66 GTO LY6 Swap with VVT

 01-28-2012, 09:21 AM
#162
Staging Lane

Join Date: Dec 2007
Posts: 85
Likes: 0
Received 0 Likes
on
0 Posts

My advice to you on the body restoration is to do as much as you can. Finding a good shop that isn't going to cut corners is going to cost you big coin. I am sure you find some guys that will tell you they will do it all for $5,000, but you need to expect twice that or more depending on the metal work needed.
Body work is really no harder than learning to install an LS motor into an old car. It requires research to learn the tips and tricks, but there are plenty of us on here that know them and can guide you through all the steps. The most complicated part is probably welding sheetmetal, but if you follow the tips of others and practice one afternoon, you will have it down.
I have restored a 66 gto just like yours for a good friend of mine. I had to cut out a lot of metal work that he had another guy do but we got the car straight and it looks amazing.
01-28-2012, 10:15 AM
#163
TECH Apprentice
Thread Starter

Join Date: Jul 2011
Posts: 393
Likes: 0
Received 0 Likes
on
0 Posts
Yeah I have had some quotes for the metalwork and it was way more then I could ever spend. Now granted this was from a restoration shop that has a big per hour rate.
I actually went and visited with the owner of the resto shop that gave me the quote yesterday and we got to talking about how I can learn this stuff. Basically I'm going to come in every so often and start media blasting parts, spraying epoxy primer in the booth on the small parts, performing any filler work if they are pitted etc. I'm hoping to eventually get to learn to do some welding etc, we will see where this goes. I like learning new things and I'm excited that he is giving me the chance to work at his shop to learn something. I've always felt hands on learning is the best way.
I actually went and visited with the owner of the resto shop that gave me the quote yesterday and we got to talking about how I can learn this stuff. Basically I'm going to come in every so often and start media blasting parts, spraying epoxy primer in the booth on the small parts, performing any filler work if they are pitted etc. I'm hoping to eventually get to learn to do some welding etc, we will see where this goes. I like learning new things and I'm excited that he is giving me the chance to work at his shop to learn something. I've always felt hands on learning is the best way.
01-28-2012, 10:16 AM
#164
Staging Lane
Join Date: Dec 2007
Posts: 85
Likes: 0
Received 0 Likes
on
0 Posts
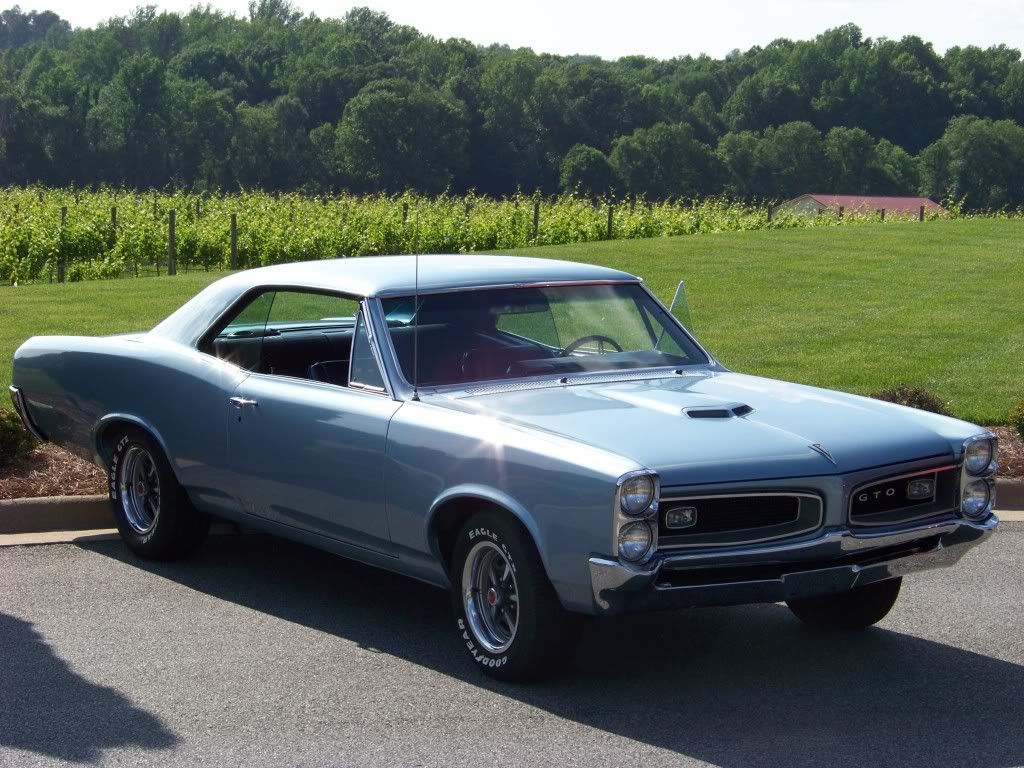
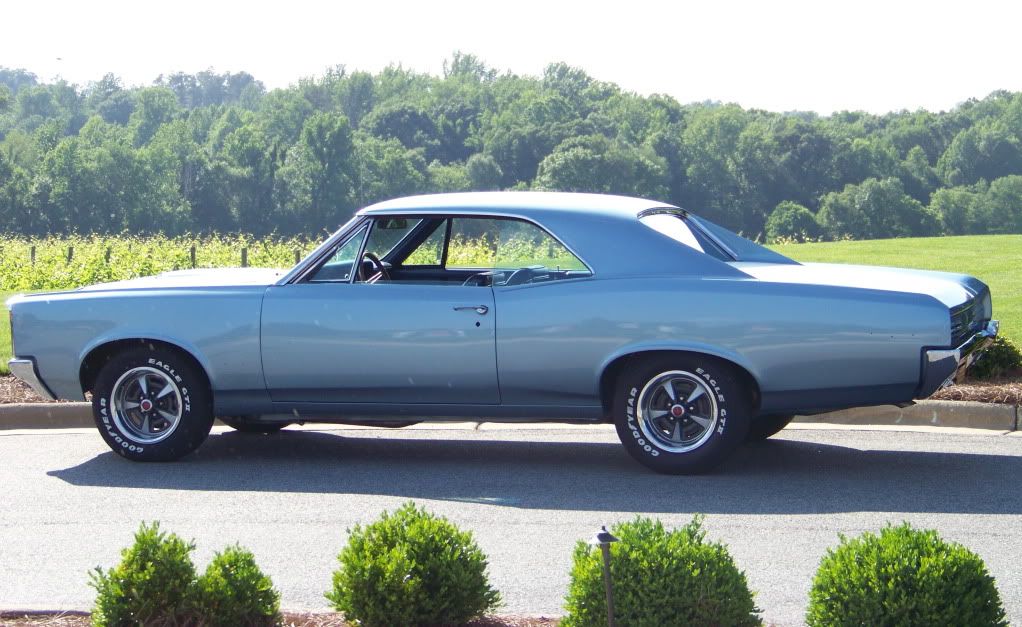
Here are a couple of pictures of how how the gto turned out. Metal work included lower rear quarters, patches on quarters in front of wheels, rear tail panel, patches on lower door corners, patches on lower fender, fixed some patching in the rear window channel. The other guy patched his floors in the trunk and inside the car and I was able to leave that. Also, him and his girlfriend must have got passionate on the hood a few times back in the day because we had to spend quite a time building that up and blocking it down since I couldn't get the metal warp out.
01-28-2012, 10:31 AM
#165
TECH Apprentice
Thread Starter
Join Date: Jul 2011
Posts: 393
Likes: 0
Received 0 Likes
on
0 Posts
That looks like it turned out really nice! I was thinking I wanted to do the same as what you are showing here and not run the stainless around the wheel wells or on the rockers. Did he leave it like that or were they added later?
Mine needs similar work to both sides of the rear wheels, as well as the lower fender patches. I wish dynacorn would come out with the full sail panel included rear quarters for these cars already.
Mine needs similar work to both sides of the rear wheels, as well as the lower fender patches. I wish dynacorn would come out with the full sail panel included rear quarters for these cars already.
01-28-2012, 10:39 AM
#166
Staging Lane
Join Date: Dec 2007
Posts: 85
Likes: 0
Received 0 Likes
on
0 Posts
He eventually installed all the brightwork since he was going for original show car. If you leave the trim off, you will have to fill the holes in the rockers quarters and fenders. At the time we did his, the 80% quarters were either not out yet, or they were junk. I don't know the quality now for the gto. I know the chevelles are pretty good.
01-30-2012, 11:05 AM
#167

I like the looks of the minimal bright work and I thought about leaving the bright work off mine but with wide tires I think the chrome helps protect the rocker panels and quarters from stones. So I decided to put it back on. Pained me to cut holes in the quarters for the chrome retention clips. Also thought about just the wheel well chrome. I have seen that done and that looks good too.
01-30-2012, 11:11 AM
#168
I actually went and visited with the owner of the resto shop that gave me the quote yesterday and we got to talking about how I can learn this stuff. Basically I'm going to come in every so often and start media blasting parts, spraying epoxy primer in the booth on the small parts, performing any filler work if they are pitted etc. I'm hoping to eventually get to learn to do some welding etc, we will see where this goes. I like learning new things and I'm excited that he is giving me the chance to work at his shop to learn something. I've always felt hands on learning is the best way.
01-30-2012, 05:52 PM
#169
TECH Apprentice
Thread Starter
Join Date: Jul 2011
Posts: 393
Likes: 0
Received 0 Likes
on
0 Posts
I like the looks of the minimal bright work and I thought about leaving the bright work off mine but with wide tires I think the chrome helps protect the rocker panels and quarters from stones. So I decided to put it back on. Pained me to cut holes in the quarters for the chrome retention clips. Also thought about just the wheel well chrome. I have seen that done and that looks good too.
Yeah I spent 8 hours there today and I'm going back for more tomorrow
 Did some blasting today on various small parts, scuffed up E-coat on a 70 Challenger that is on the rotisserie, did some more sanding, even got to mix up some filler to fill some spots on the undercarriage, and then I did more sanding... You can sand forever, it never ends. I was surprised to have the owner point out the "stretch" marks in the sheet metal on various places on the car. Turns out these are important to leave alone and not fill for the "concours correct" crowd. Hoping tomorrow I can get in the booth and spray some epoxy primer on some parts.
03-12-2012, 12:45 PM
Did some blasting today on various small parts, scuffed up E-coat on a 70 Challenger that is on the rotisserie, did some more sanding, even got to mix up some filler to fill some spots on the undercarriage, and then I did more sanding... You can sand forever, it never ends. I was surprised to have the owner point out the "stretch" marks in the sheet metal on various places on the car. Turns out these are important to leave alone and not fill for the "concours correct" crowd. Hoping tomorrow I can get in the booth and spray some epoxy primer on some parts.
03-12-2012, 12:45 PM
#170
LS1Tech Co-Founder
iTrader: (34)
BeCool universal crossflow radiator 26"x19"x3" just had to raise up 3/4"
Spal 16" puller electric fan
Spal 16" puller electric fan
How is your fan/radiator combo doing, Is that enough fan for your setup?
03-12-2012, 07:48 PM
#171
TECH Apprentice
Thread Starter
Join Date: Jul 2011
Posts: 393
Likes: 0
Received 0 Likes
on
0 Posts
Last year I was only able to put a few hundred miles on the car before I had to park it for the winter so the true test is yet to come. But so far the radiator and fan has worked great. Holds temps between 190* and 200* The fan turns on at 200* and even if I'm idling it will lower the temp in no time.
 03-12-2012, 10:08 PM
#173
TECH Apprentice
Thread Starter
Join Date: Jul 2011
Posts: 393
Likes: 0
Received 0 Likes
on
0 Posts
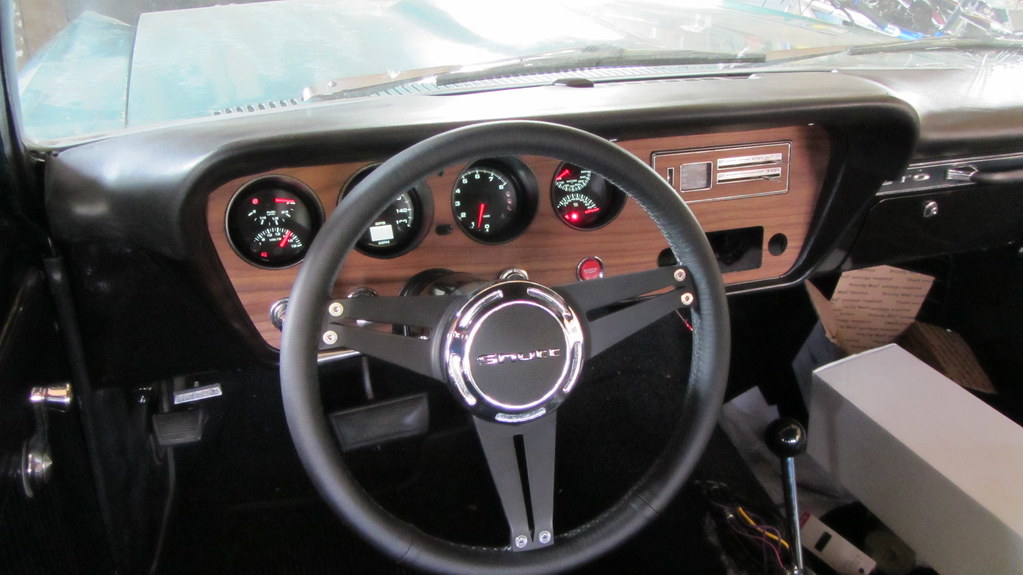
Ha, soon hopefully by this weekend. I've been sidetracked lately. I went through my dash harness this past weekend and deleted all the unused wires, cleaned up some splices, and reworked my ignition switch so I can have a push button start where the cigarette lighter was.
I've got a flaming river collapsible steering column coming in this week and I need to make a decision on a new steering wheel.
Here is the dash currently

I've got a flaming river collapsible steering column coming in this week and I need to make a decision on a new steering wheel.
Here is the dash currently
03-15-2012, 06:12 PM
#174
TECH Apprentice
Thread Starter
Join Date: Jul 2011
Posts: 393
Likes: 0
Received 0 Likes
on
0 Posts
Today I set out to do something about the ECM, TCM, and fuse panel all sitting on the passenger side floor. I knew I wanted to put the 3 items in the glove box but GTO's don't have a nice glove box. Its some sort of fiber material and it never would support the weight of the computers.
I simply started out taking some measurements of the glove box area and laying them out on some thin aluminum sheet. After that I made cuts to allow me to fold the pieces into the general shape of the glovebox. Used some bolts to fasten it all together and that was it. I mounted the E38 ECM to the backside between the heater core and the glove box and the T42 TCM got mounted inside. I used some squishy rubber material in an attempt to isolate the computers from vibration. Not sure if this was necessary or not. I had to cut a 4" hole in the back of the box to allow the fuse panel to be slid inside as well. I still have to mount the fuse panel but for now I'm very happy with how it all turned out.
Here are some pics.
 03-15-2012, 09:26 PM
#176
TECH Apprentice
Thread Starter
Join Date: Jul 2011
Posts: 393
Likes: 0
Received 0 Likes
on
0 Posts
Thanks! That's the one that came with my PSI harness. I've given up on doing the other fuseblock and complete rewire for this year. I decided to clean some wiring up and will leave it for now. When the body goes in for work in a couple of years I will worry about the wiring at that time.
03-17-2012, 08:15 AM
#177
Thanks! That's the one that came with my PSI harness. I've given up on doing the other fuseblock and complete rewire for this year. I decided to clean some wiring up and will leave it for now. When the body goes in for work in a couple of years I will worry about the wiring at that time.
03-17-2012, 09:06 AM
#178
TECH Apprentice
Thread Starter
Join Date: Jul 2011
Posts: 393
Likes: 0
Received 0 Likes
on
0 Posts
Yeah I'm still waiting on my Flaming River steering column, I thought it would have been here this week. I hate waiting for parts. Did you ever find a decent crimper?
04-01-2012, 03:39 PM
#180
TECH Apprentice
Thread Starter
Join Date: Jul 2011
Posts: 393
Likes: 0
Received 0 Likes
on
0 Posts
Finally done messing around with the gauges, dash, and steering column. That project took way too long. Can't wait to get the car back on the road soon. I'm just waiting on a u-joint to connect the new column to the gear box. I hope I have it this week. The new column has tilt which I believe is going to be a really nice feature to have. It sure was nice after having the car stored all winter to turn the key and push the start button and the thing fired right up!