

lsa blower swap?
 01-01-2016, 10:55 AM
#181
Teching In
 01-02-2016, 08:54 AM
#183

Take an old long belt and cut it so its a strap. Route it and mark where the overlap ends. Repeat with the tensioner at full compression. AVG the two measurements and compare to the chart. Bias towards a slightly shorter belt than the calculated number
The correction would change based on the number of pulleys and which direction the belt landed on it. Since this is a universal application, its better to just measure it
01-02-2016, 06:36 PM
#184
Teching In
No
Take an old long belt and cut it so its a strap. Route it and mark where the overlap ends. Repeat with the tensioner at full compression. AVG the two measurements and compare to the chart. Bias towards a slightly shorter belt than the calculated number
The correction would change based on the number of pulleys and which direction the belt landed on it. Since this is a universal application, its better to just measure it
 01-19-2016, 07:11 AM
#187

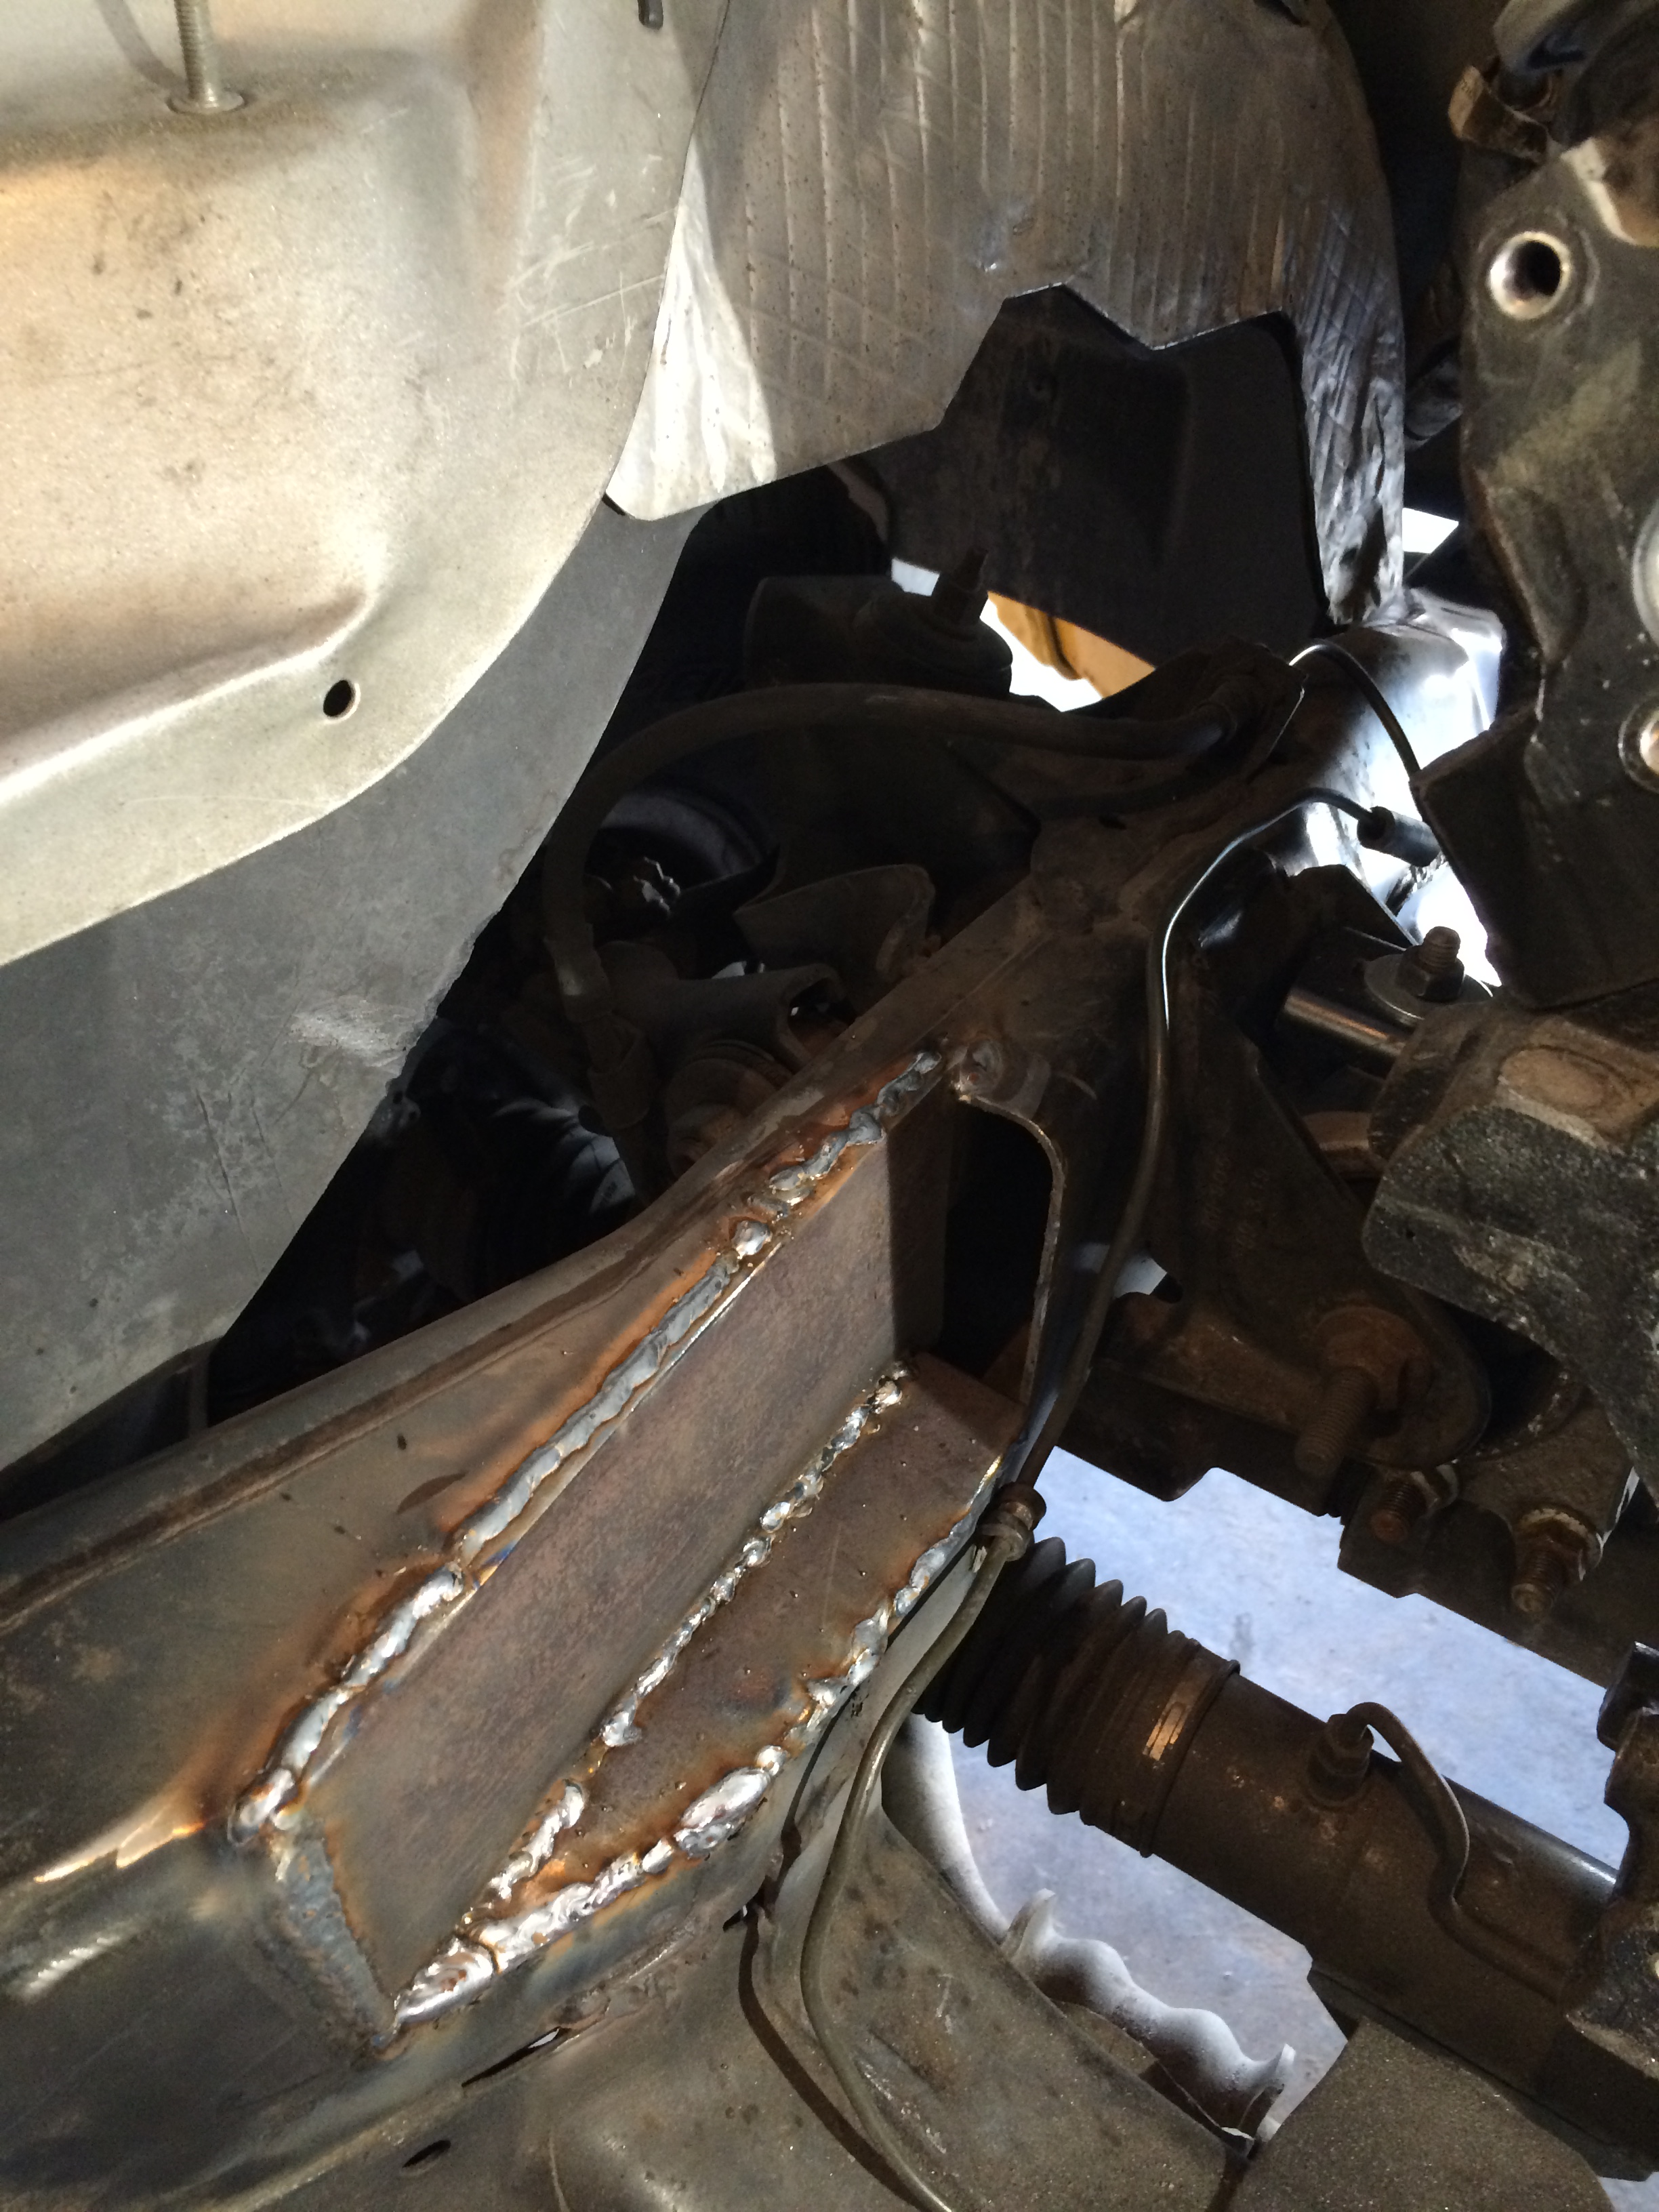
I wanted to post up some pictures of the arrangement I came up with.
I started with 2010+ camaro accessories, water pump and balancer. I wanted to use LSA pullies, so here is how it came together.
I made this bracket out of 1/2 6061 aluminum, which uses the top bosses of the water pump.
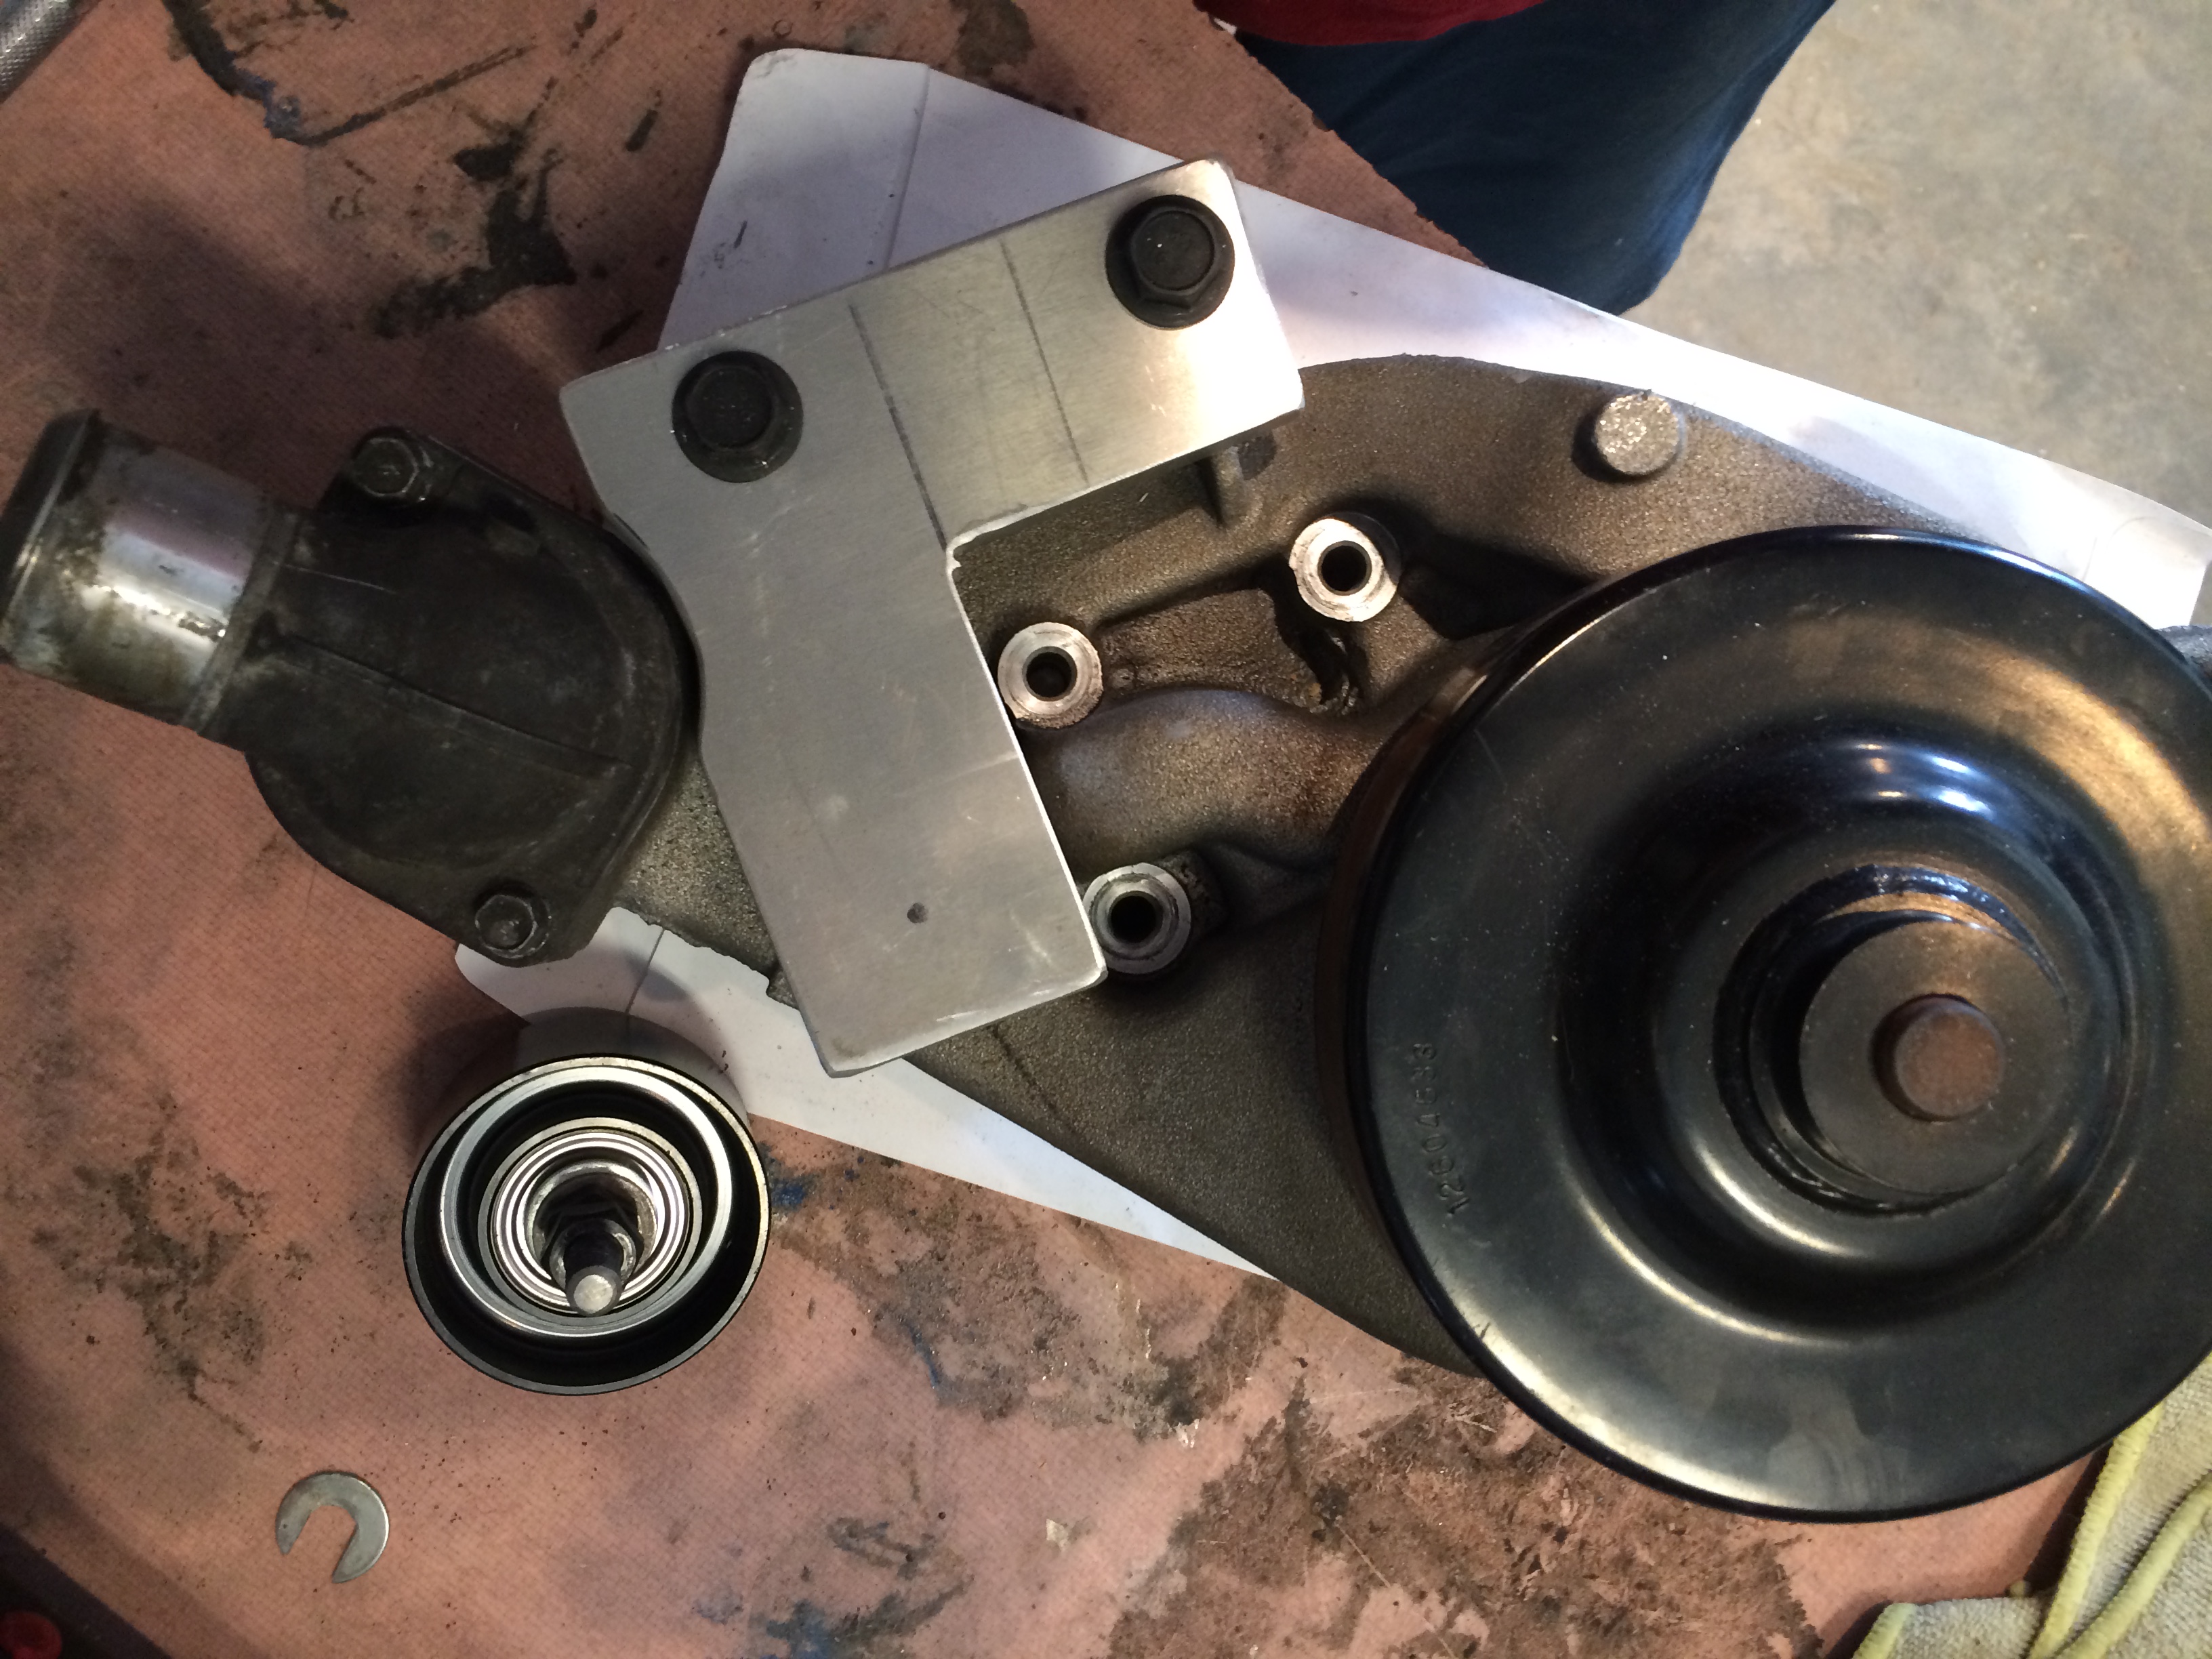
I mounted it to the water pump, and spaced the pullies correctly.
I did have to grind these bosses down flat. Originally, I was going to use shims, but I couldn't get the thickness exact.
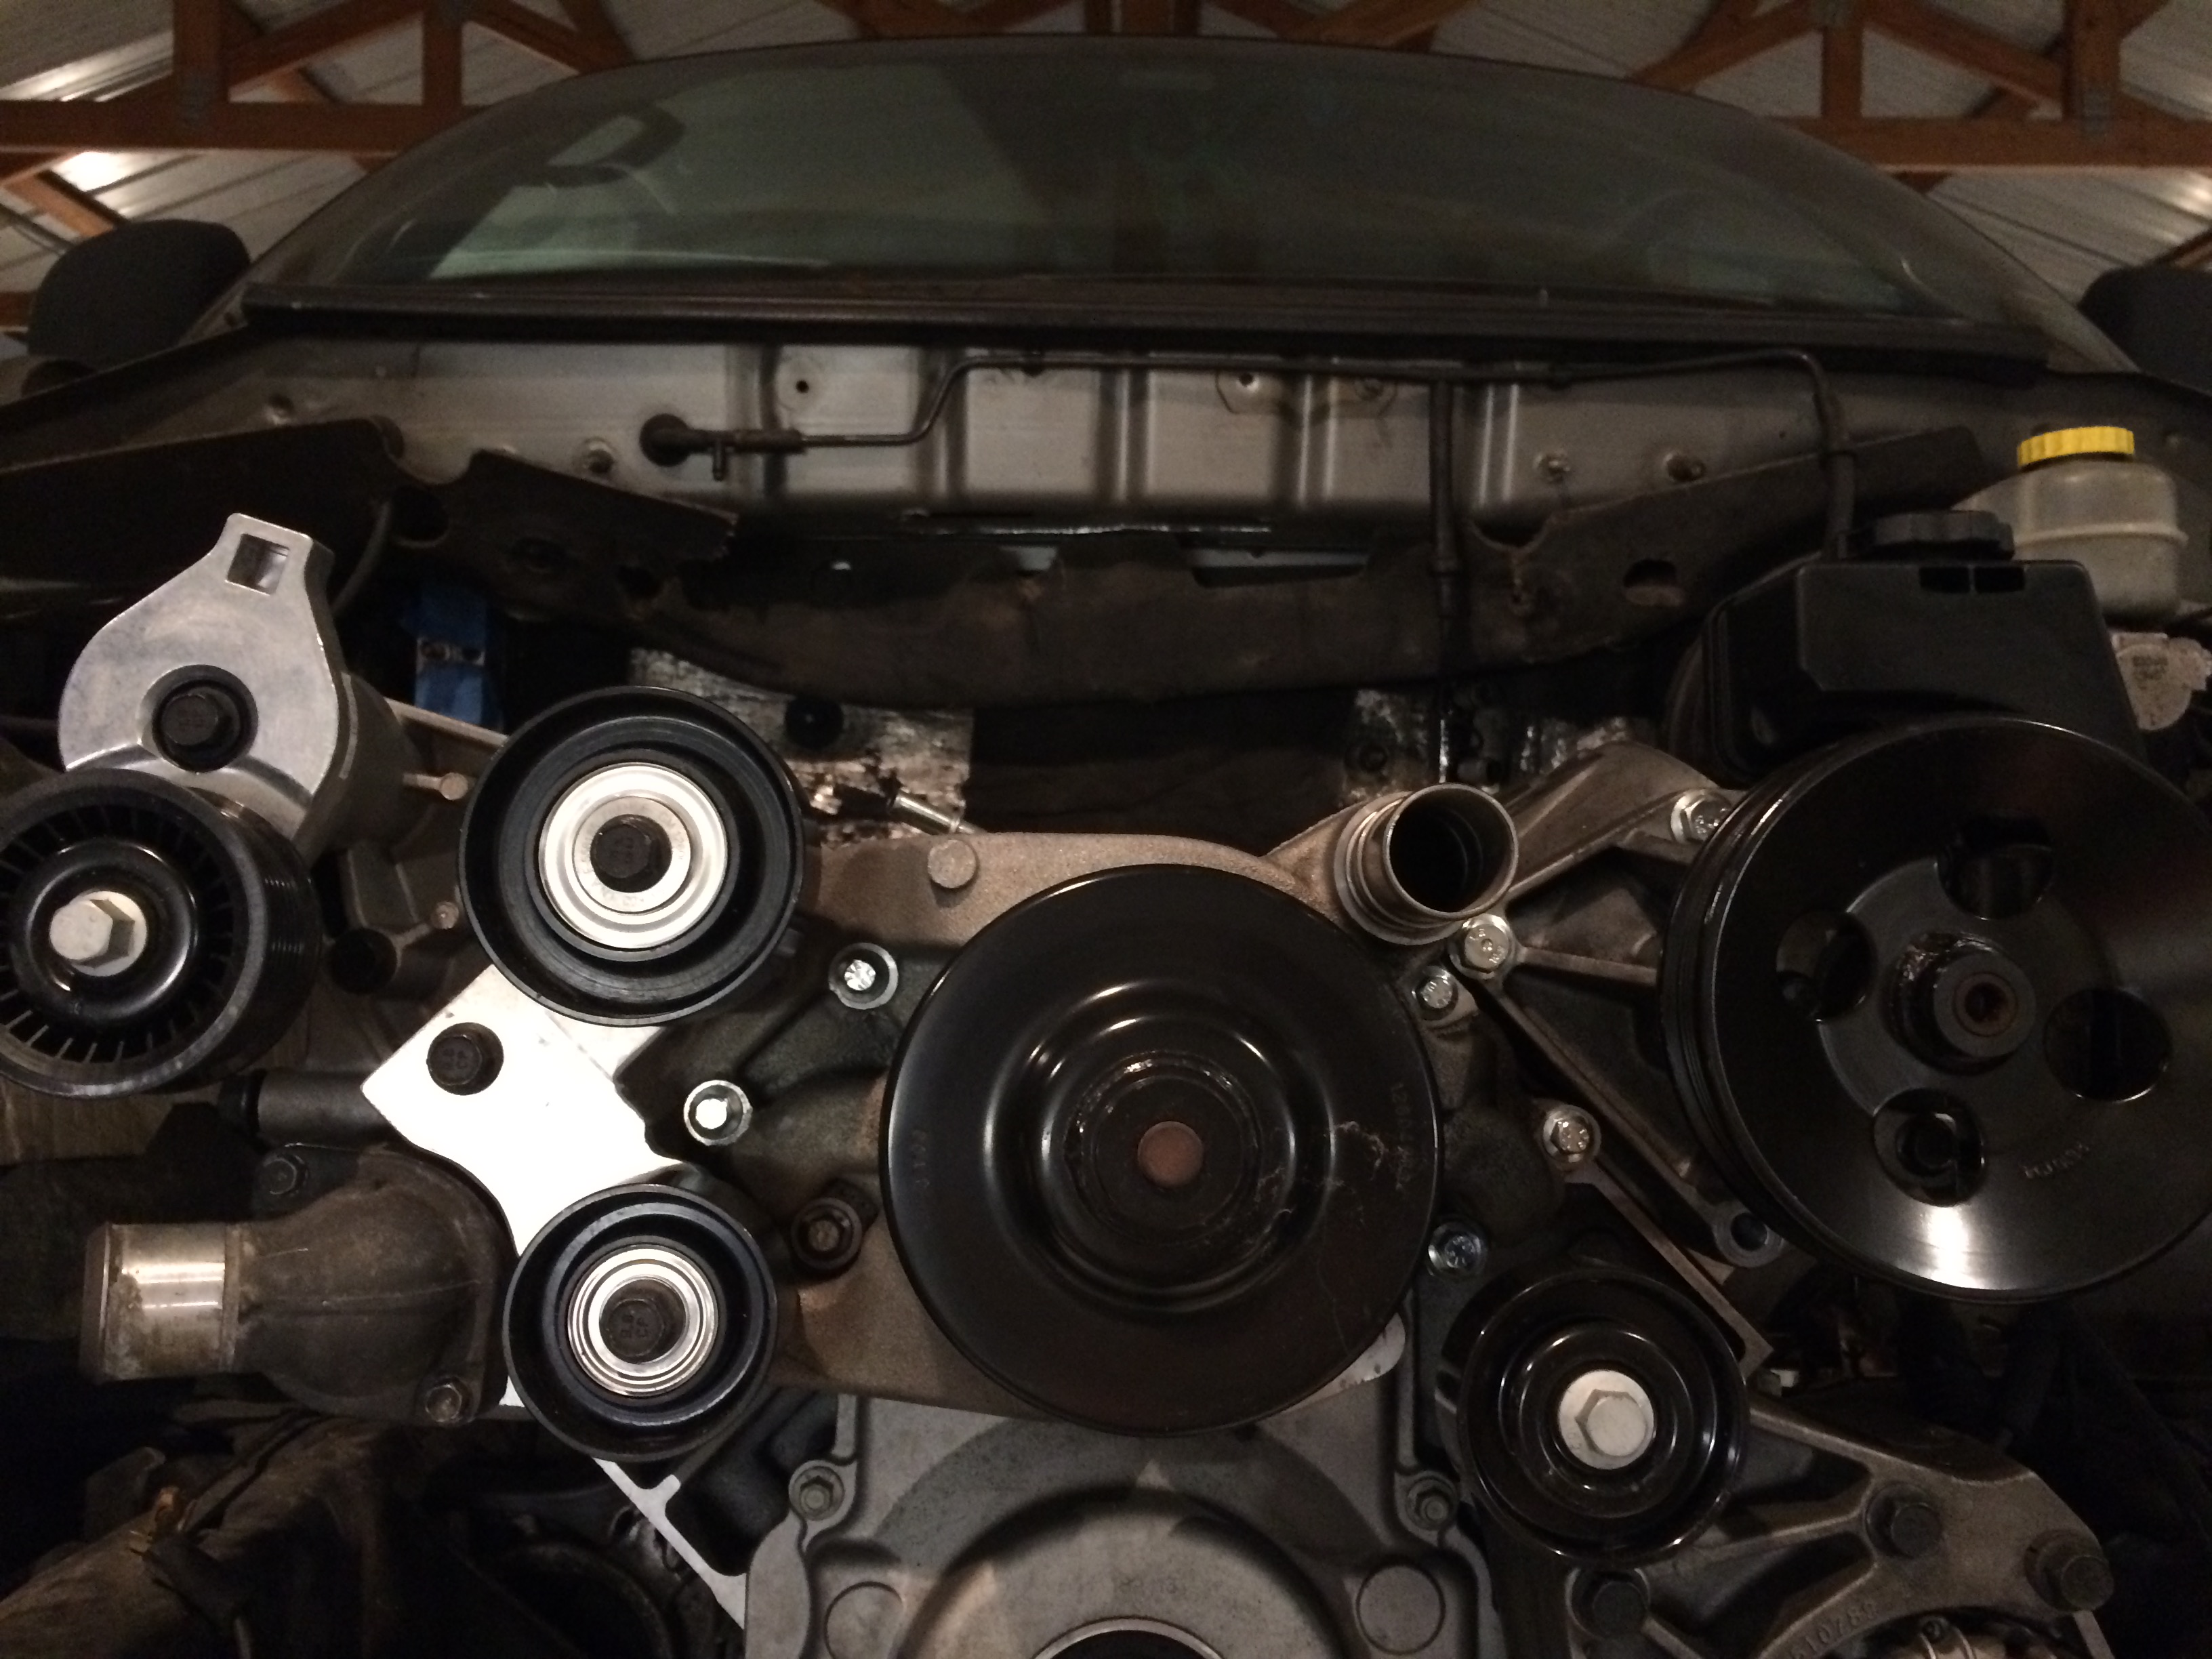
Giving me this belt arrangement
And the Zl1 lid clears the cowl. Perfect.
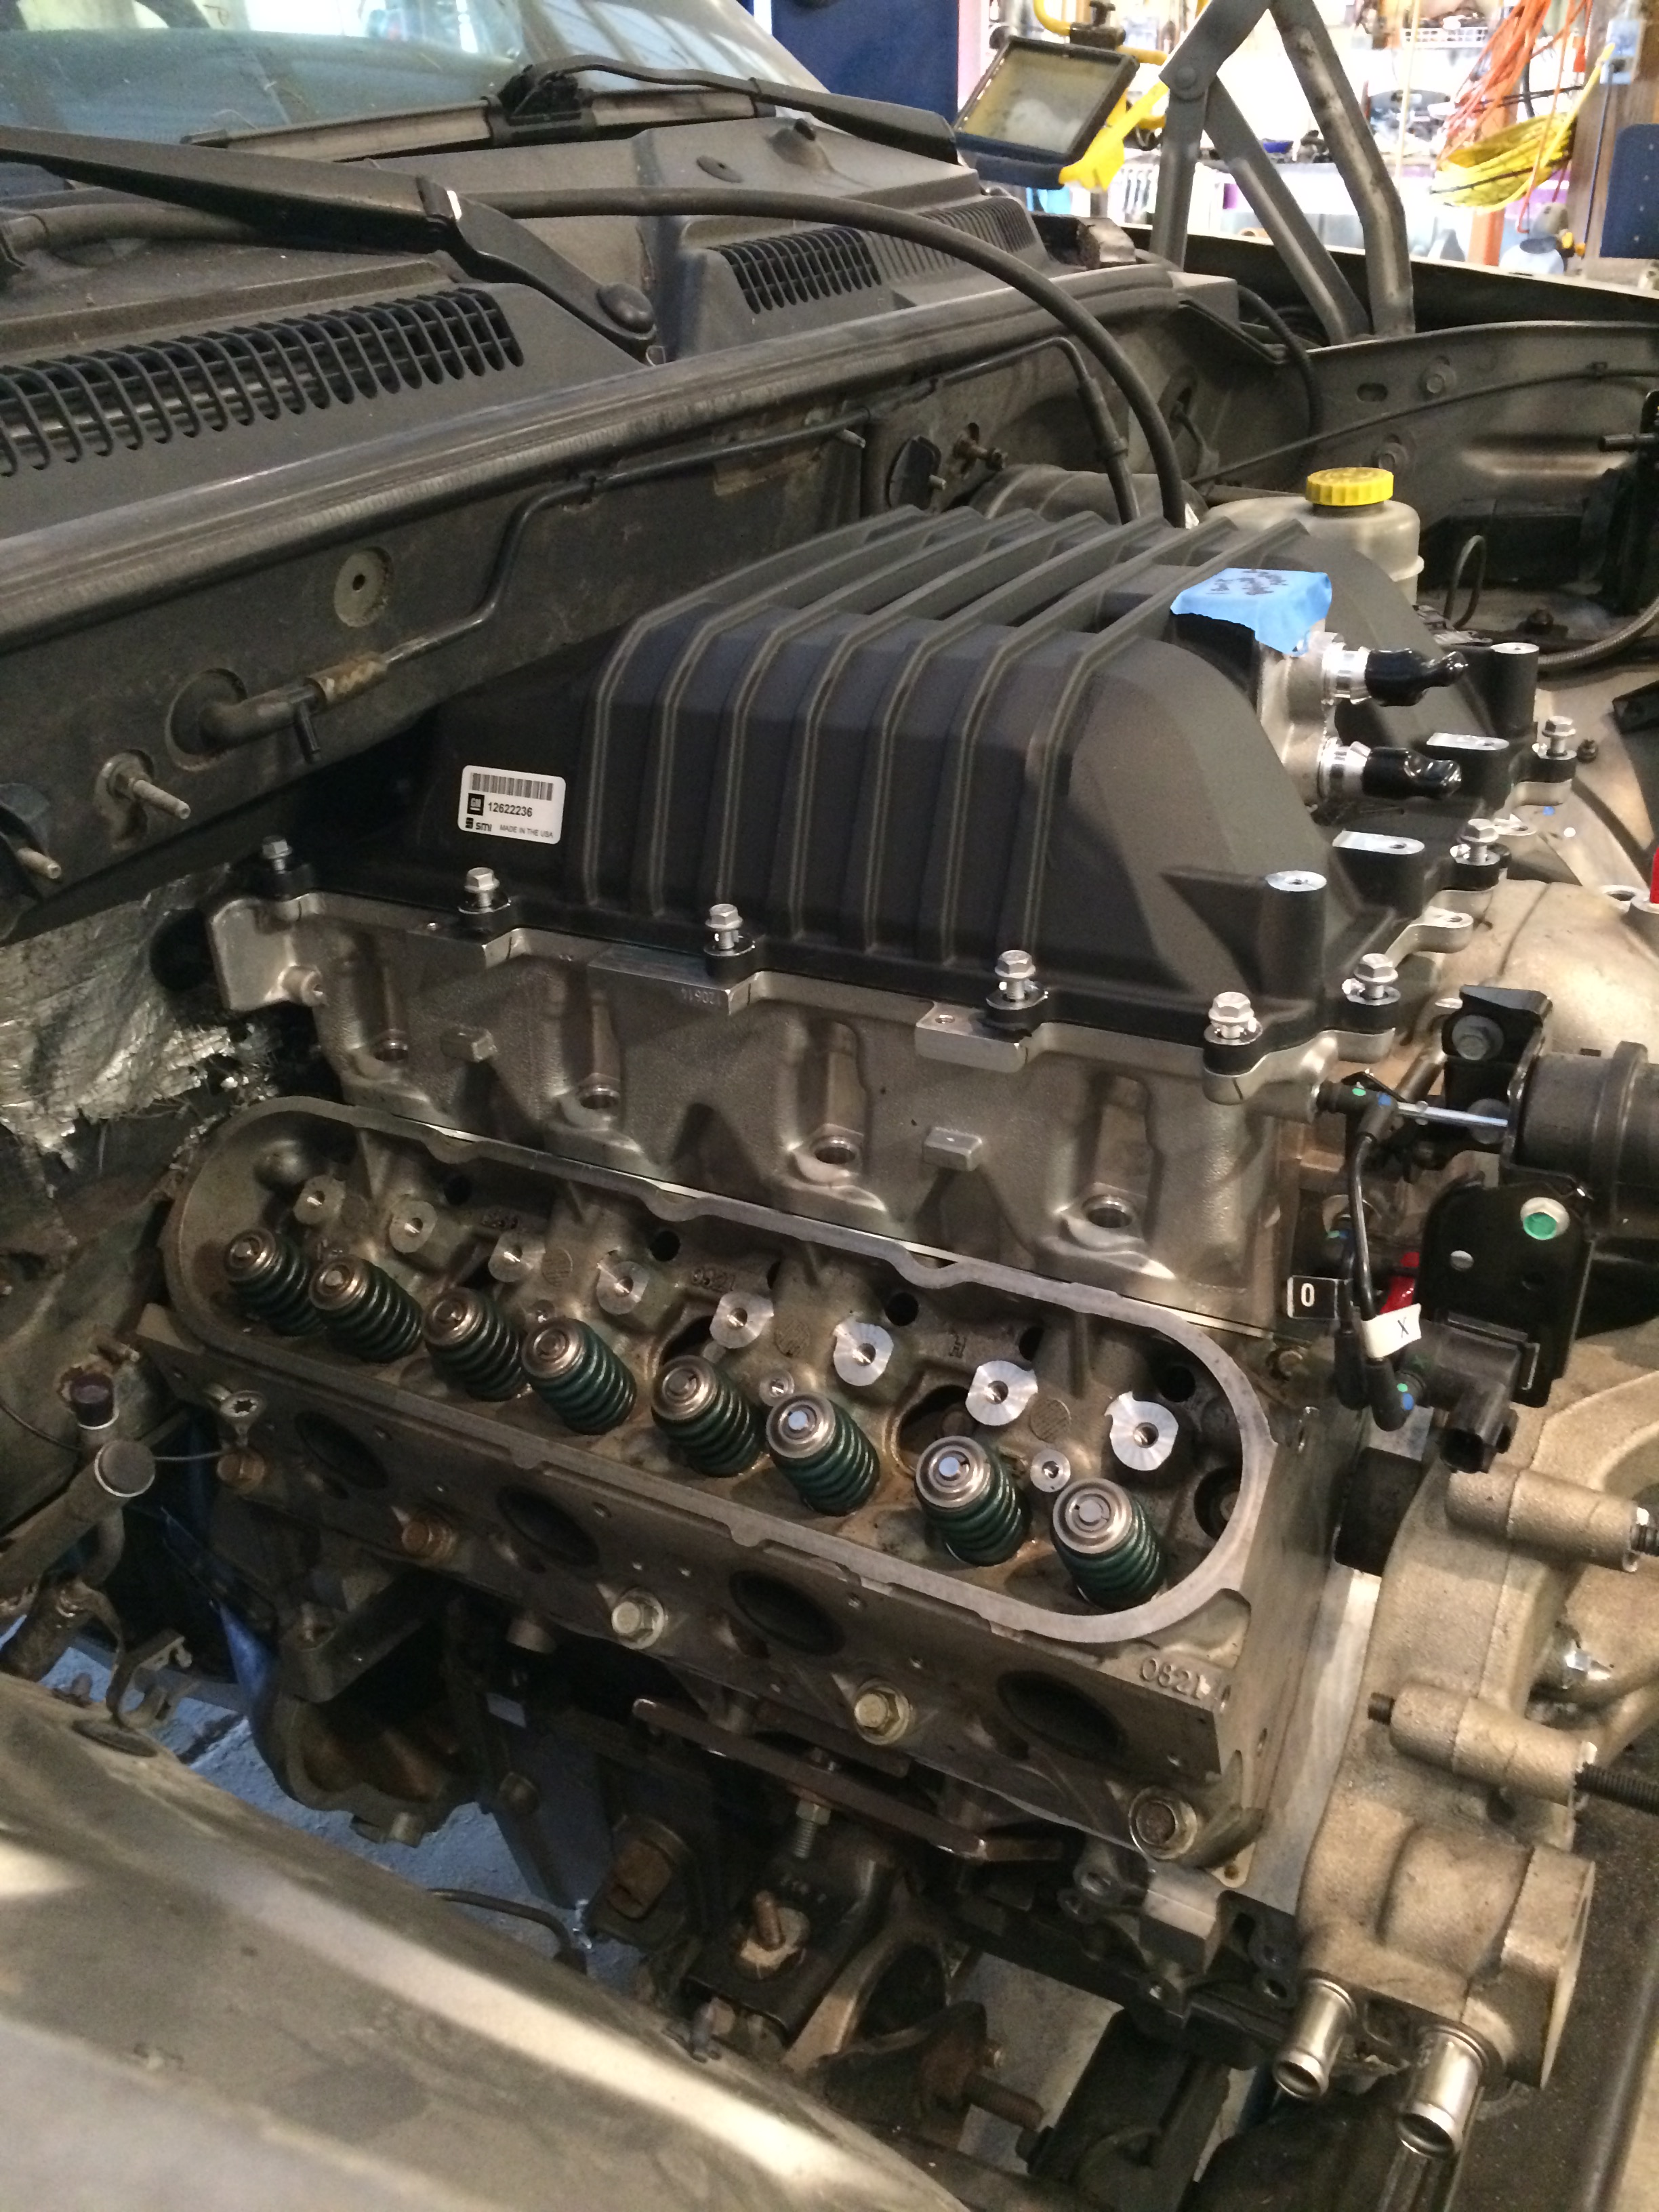
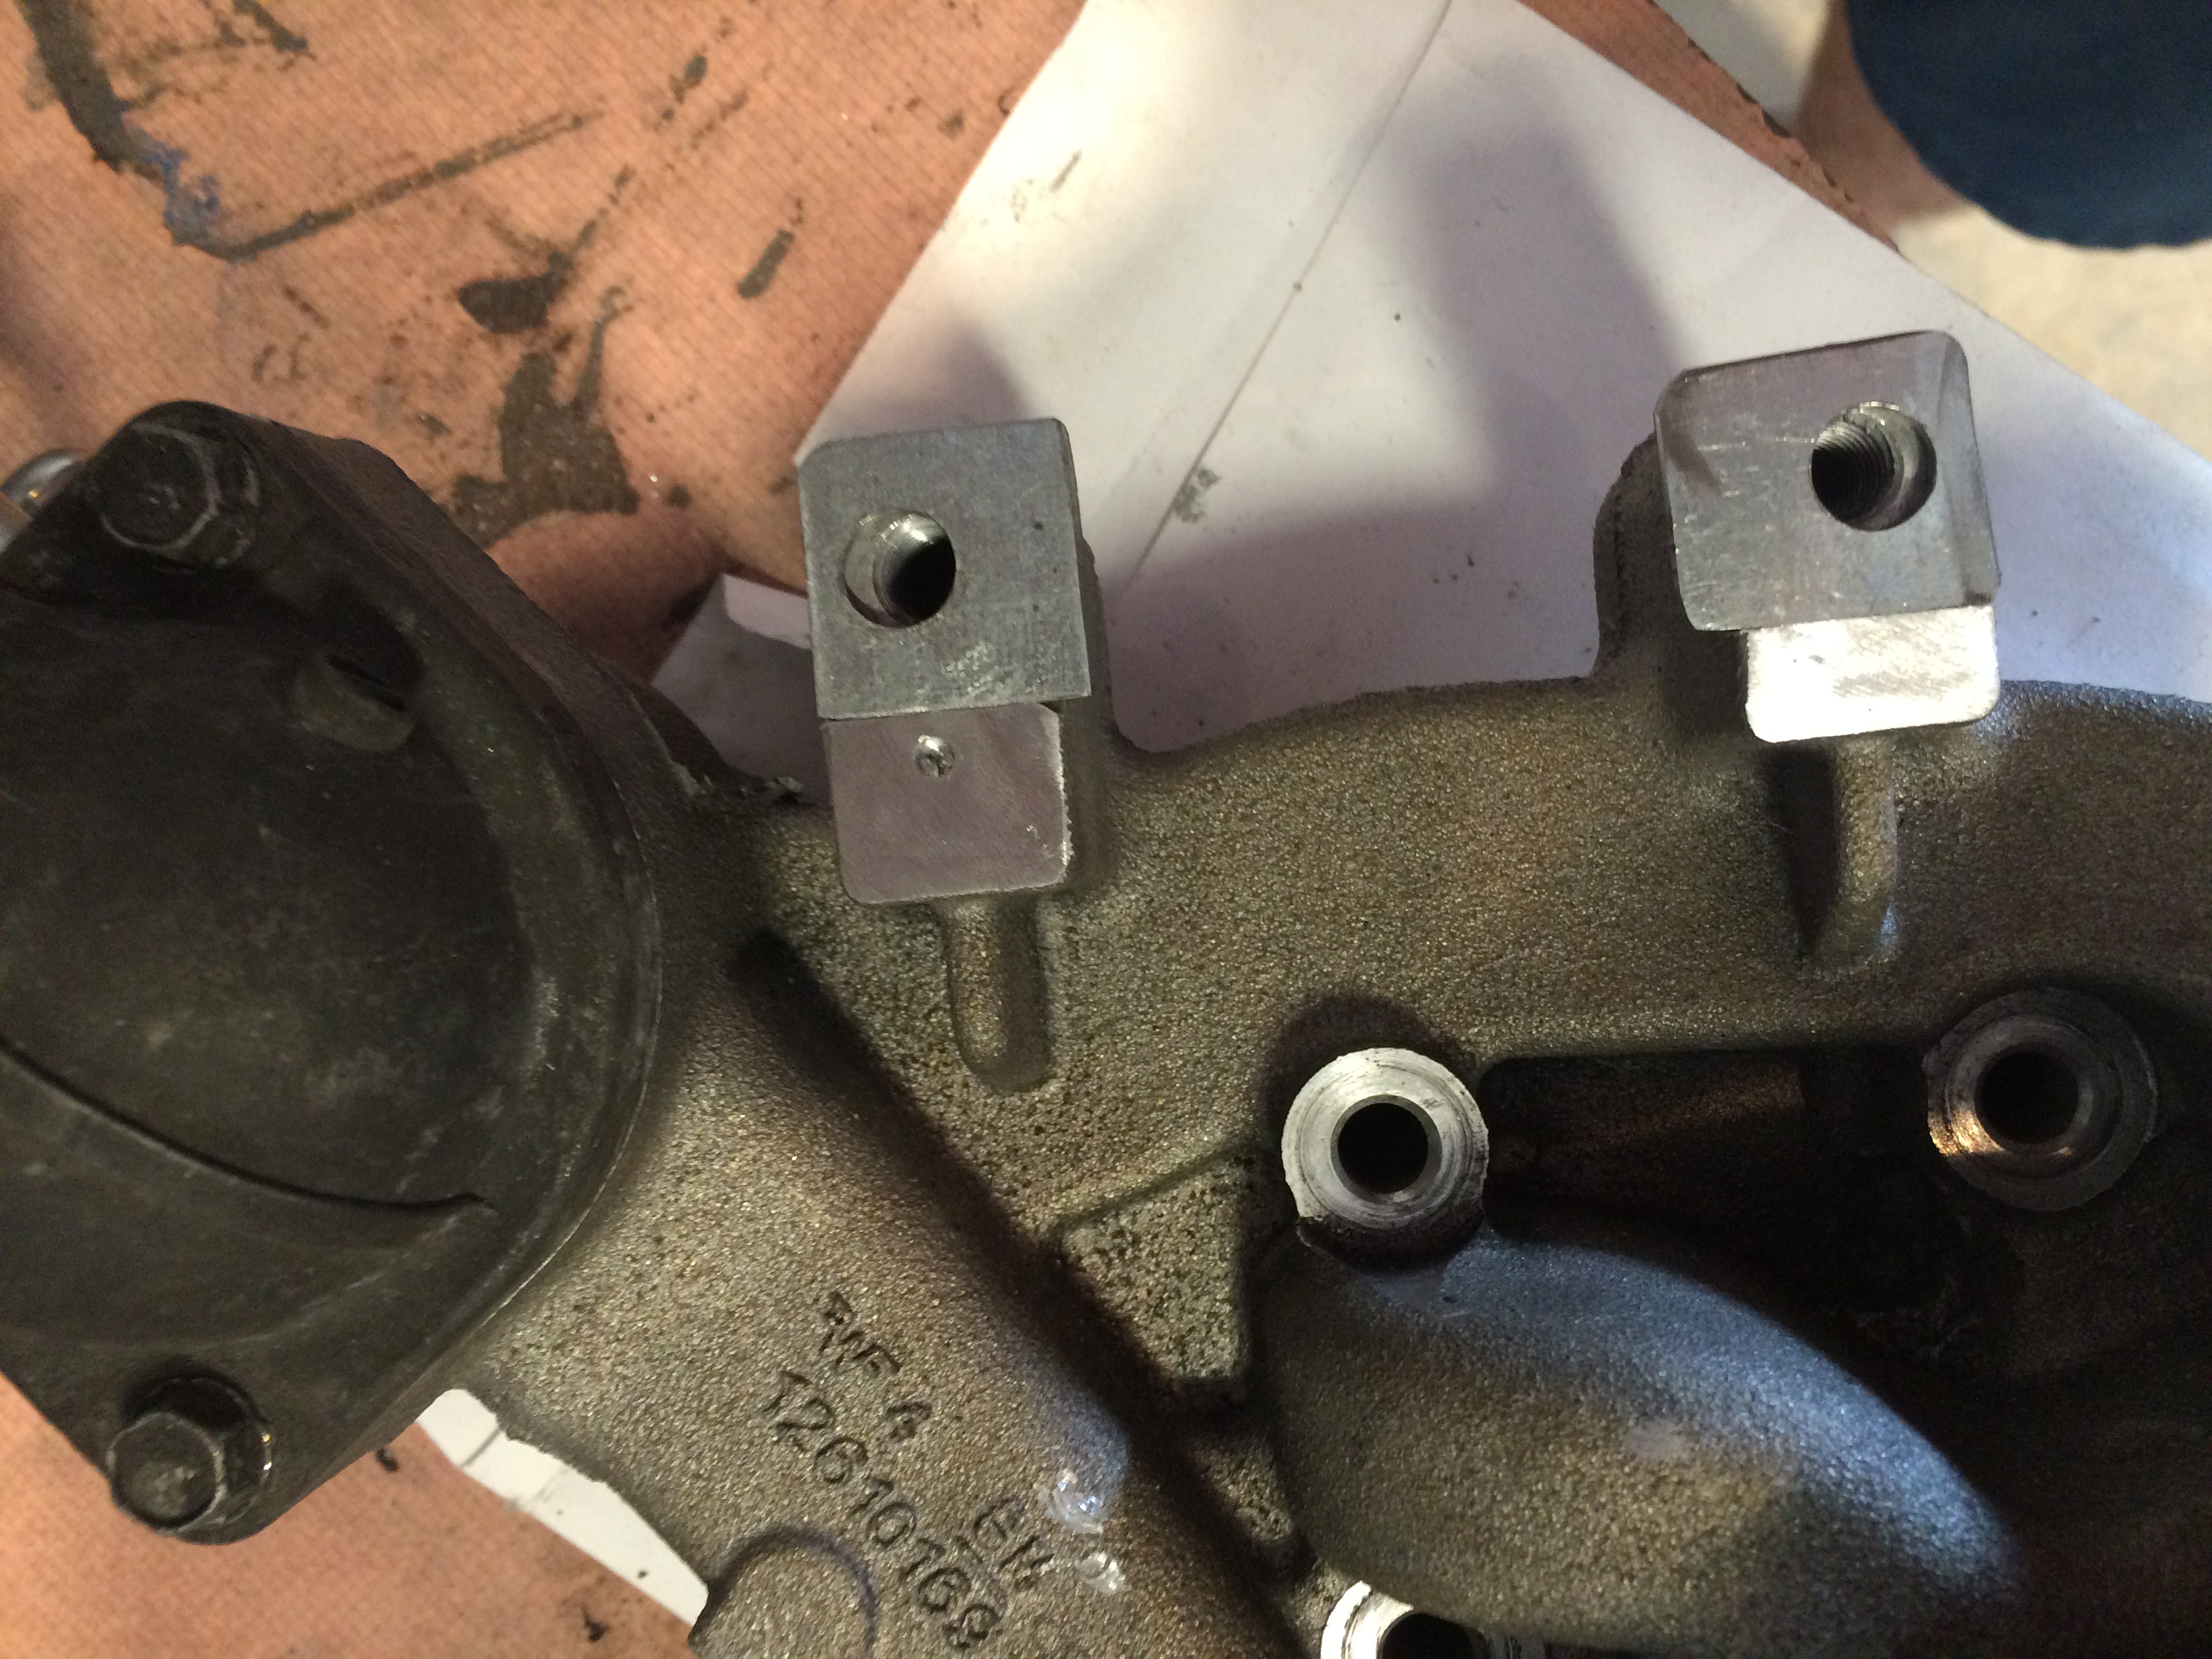
I did have to cut an access hole to get to the rear bolts of the cover, so I made a plate for it.
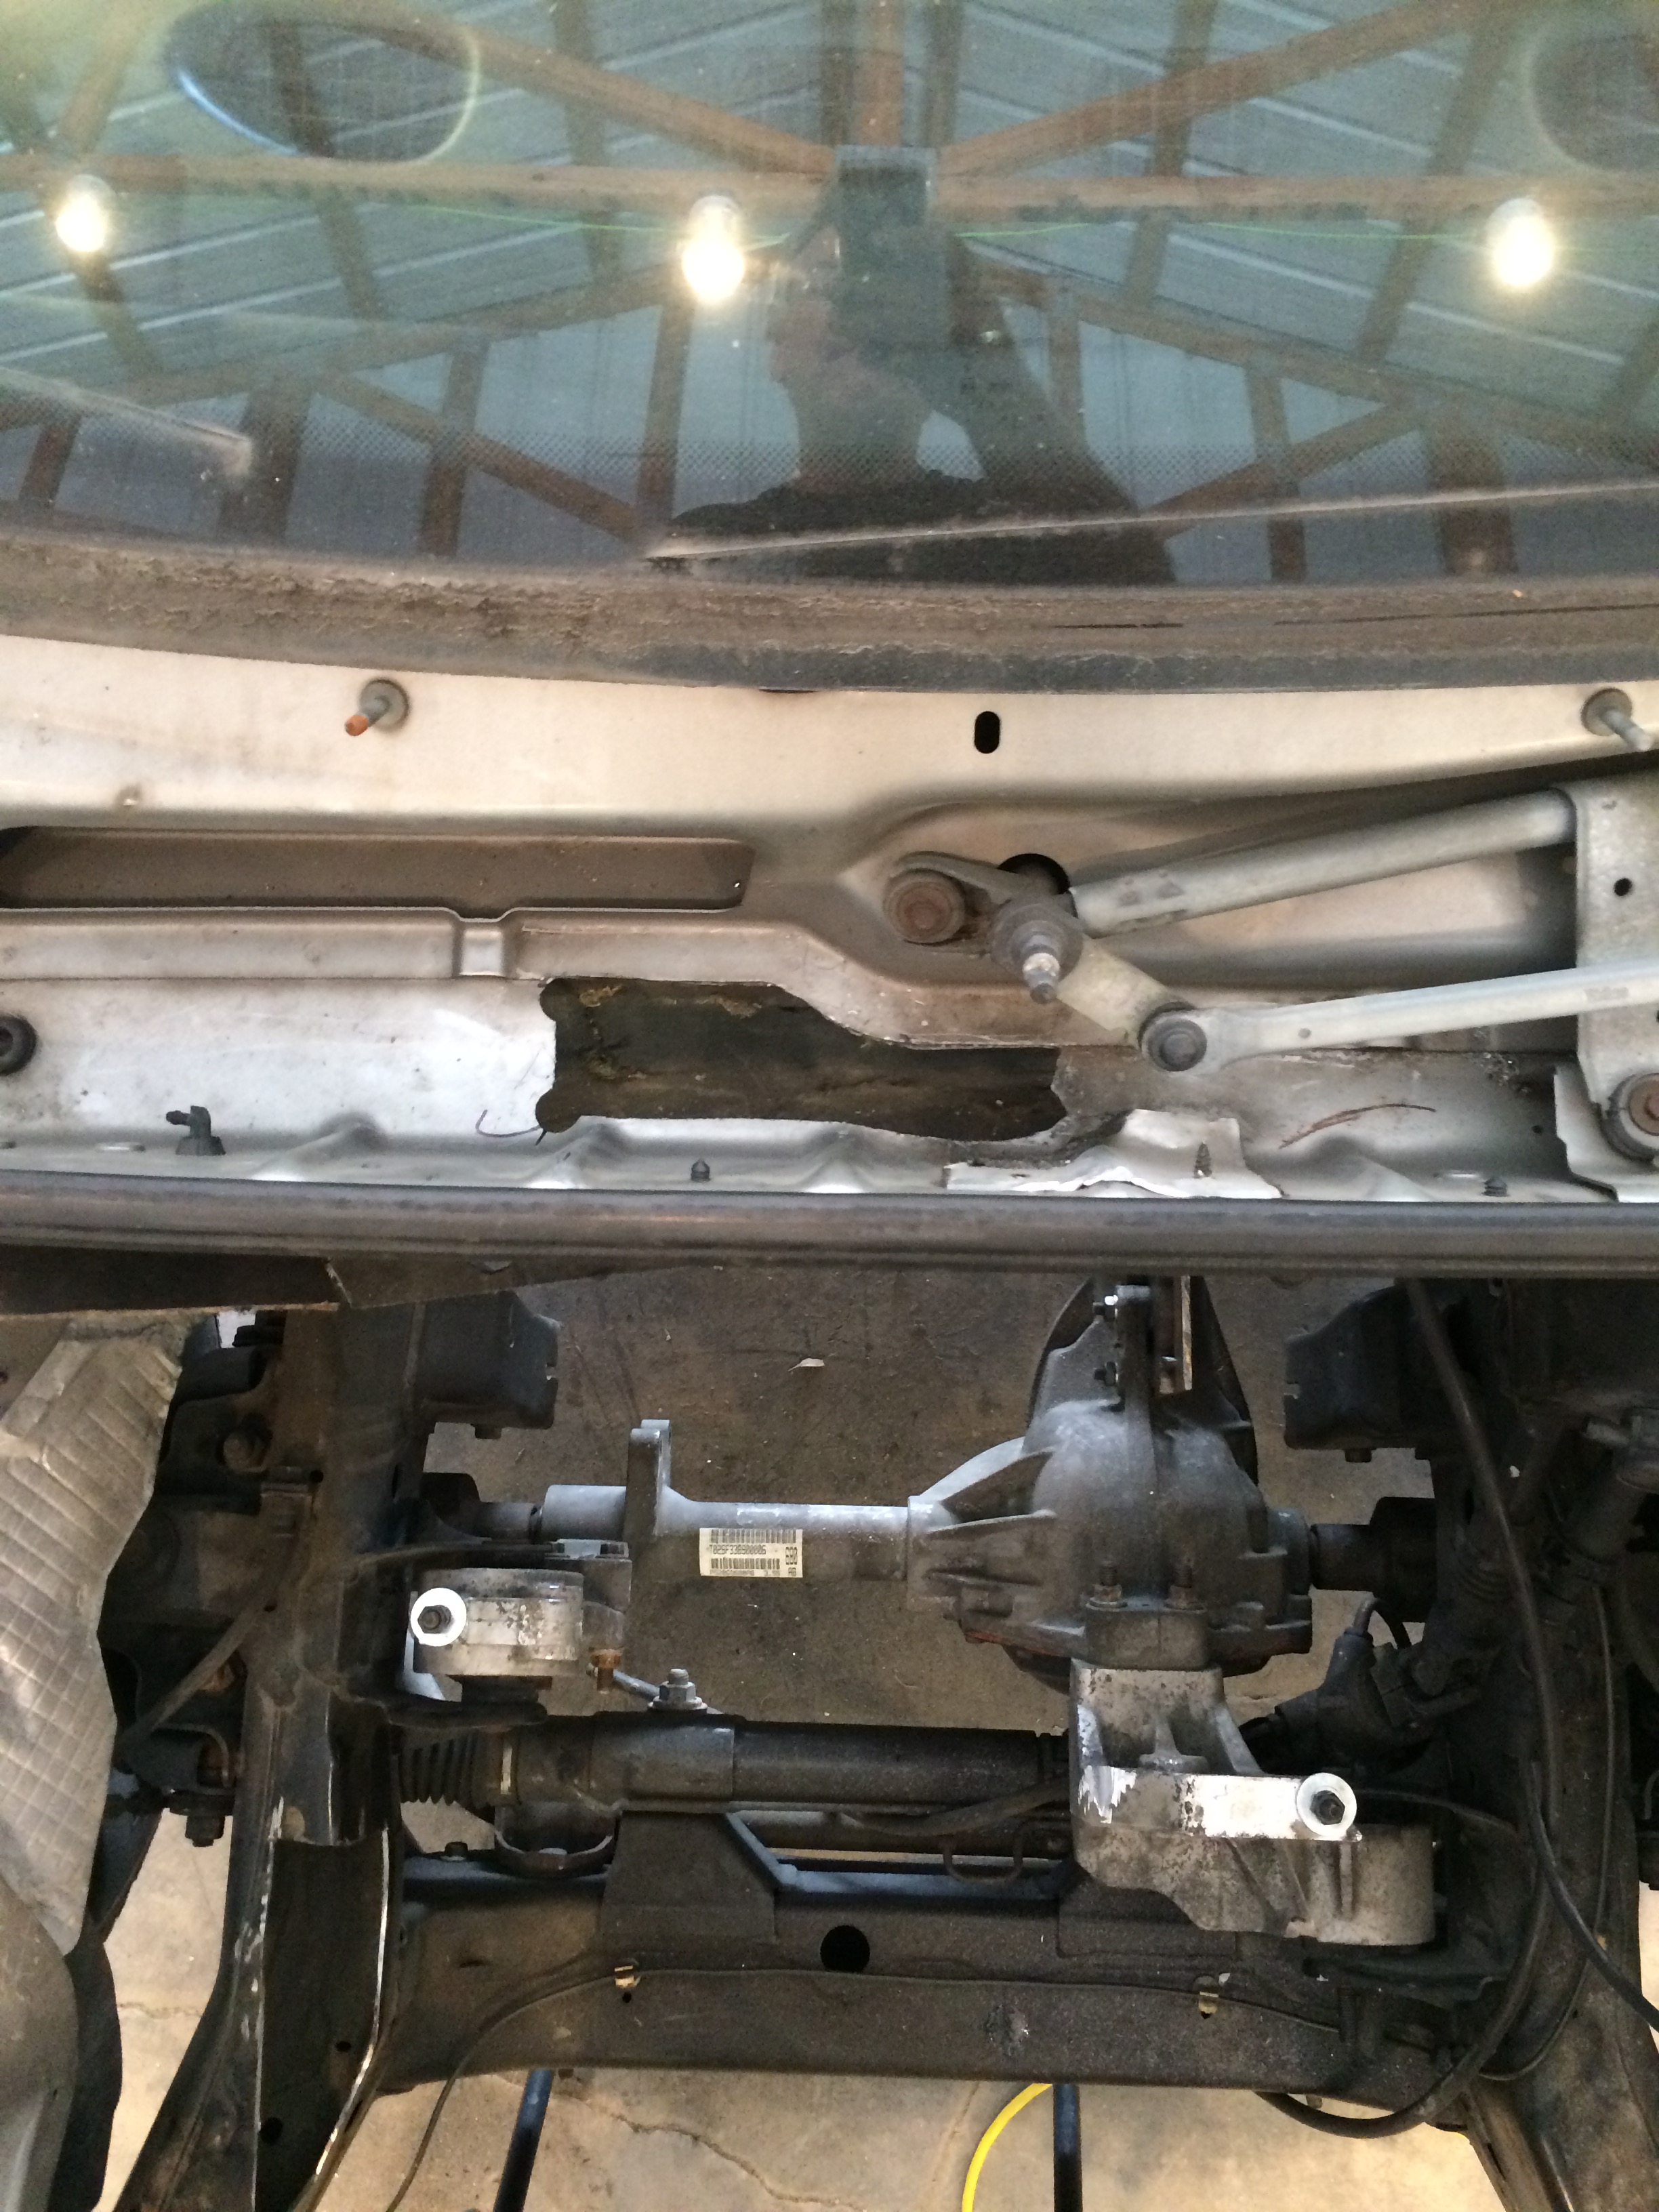
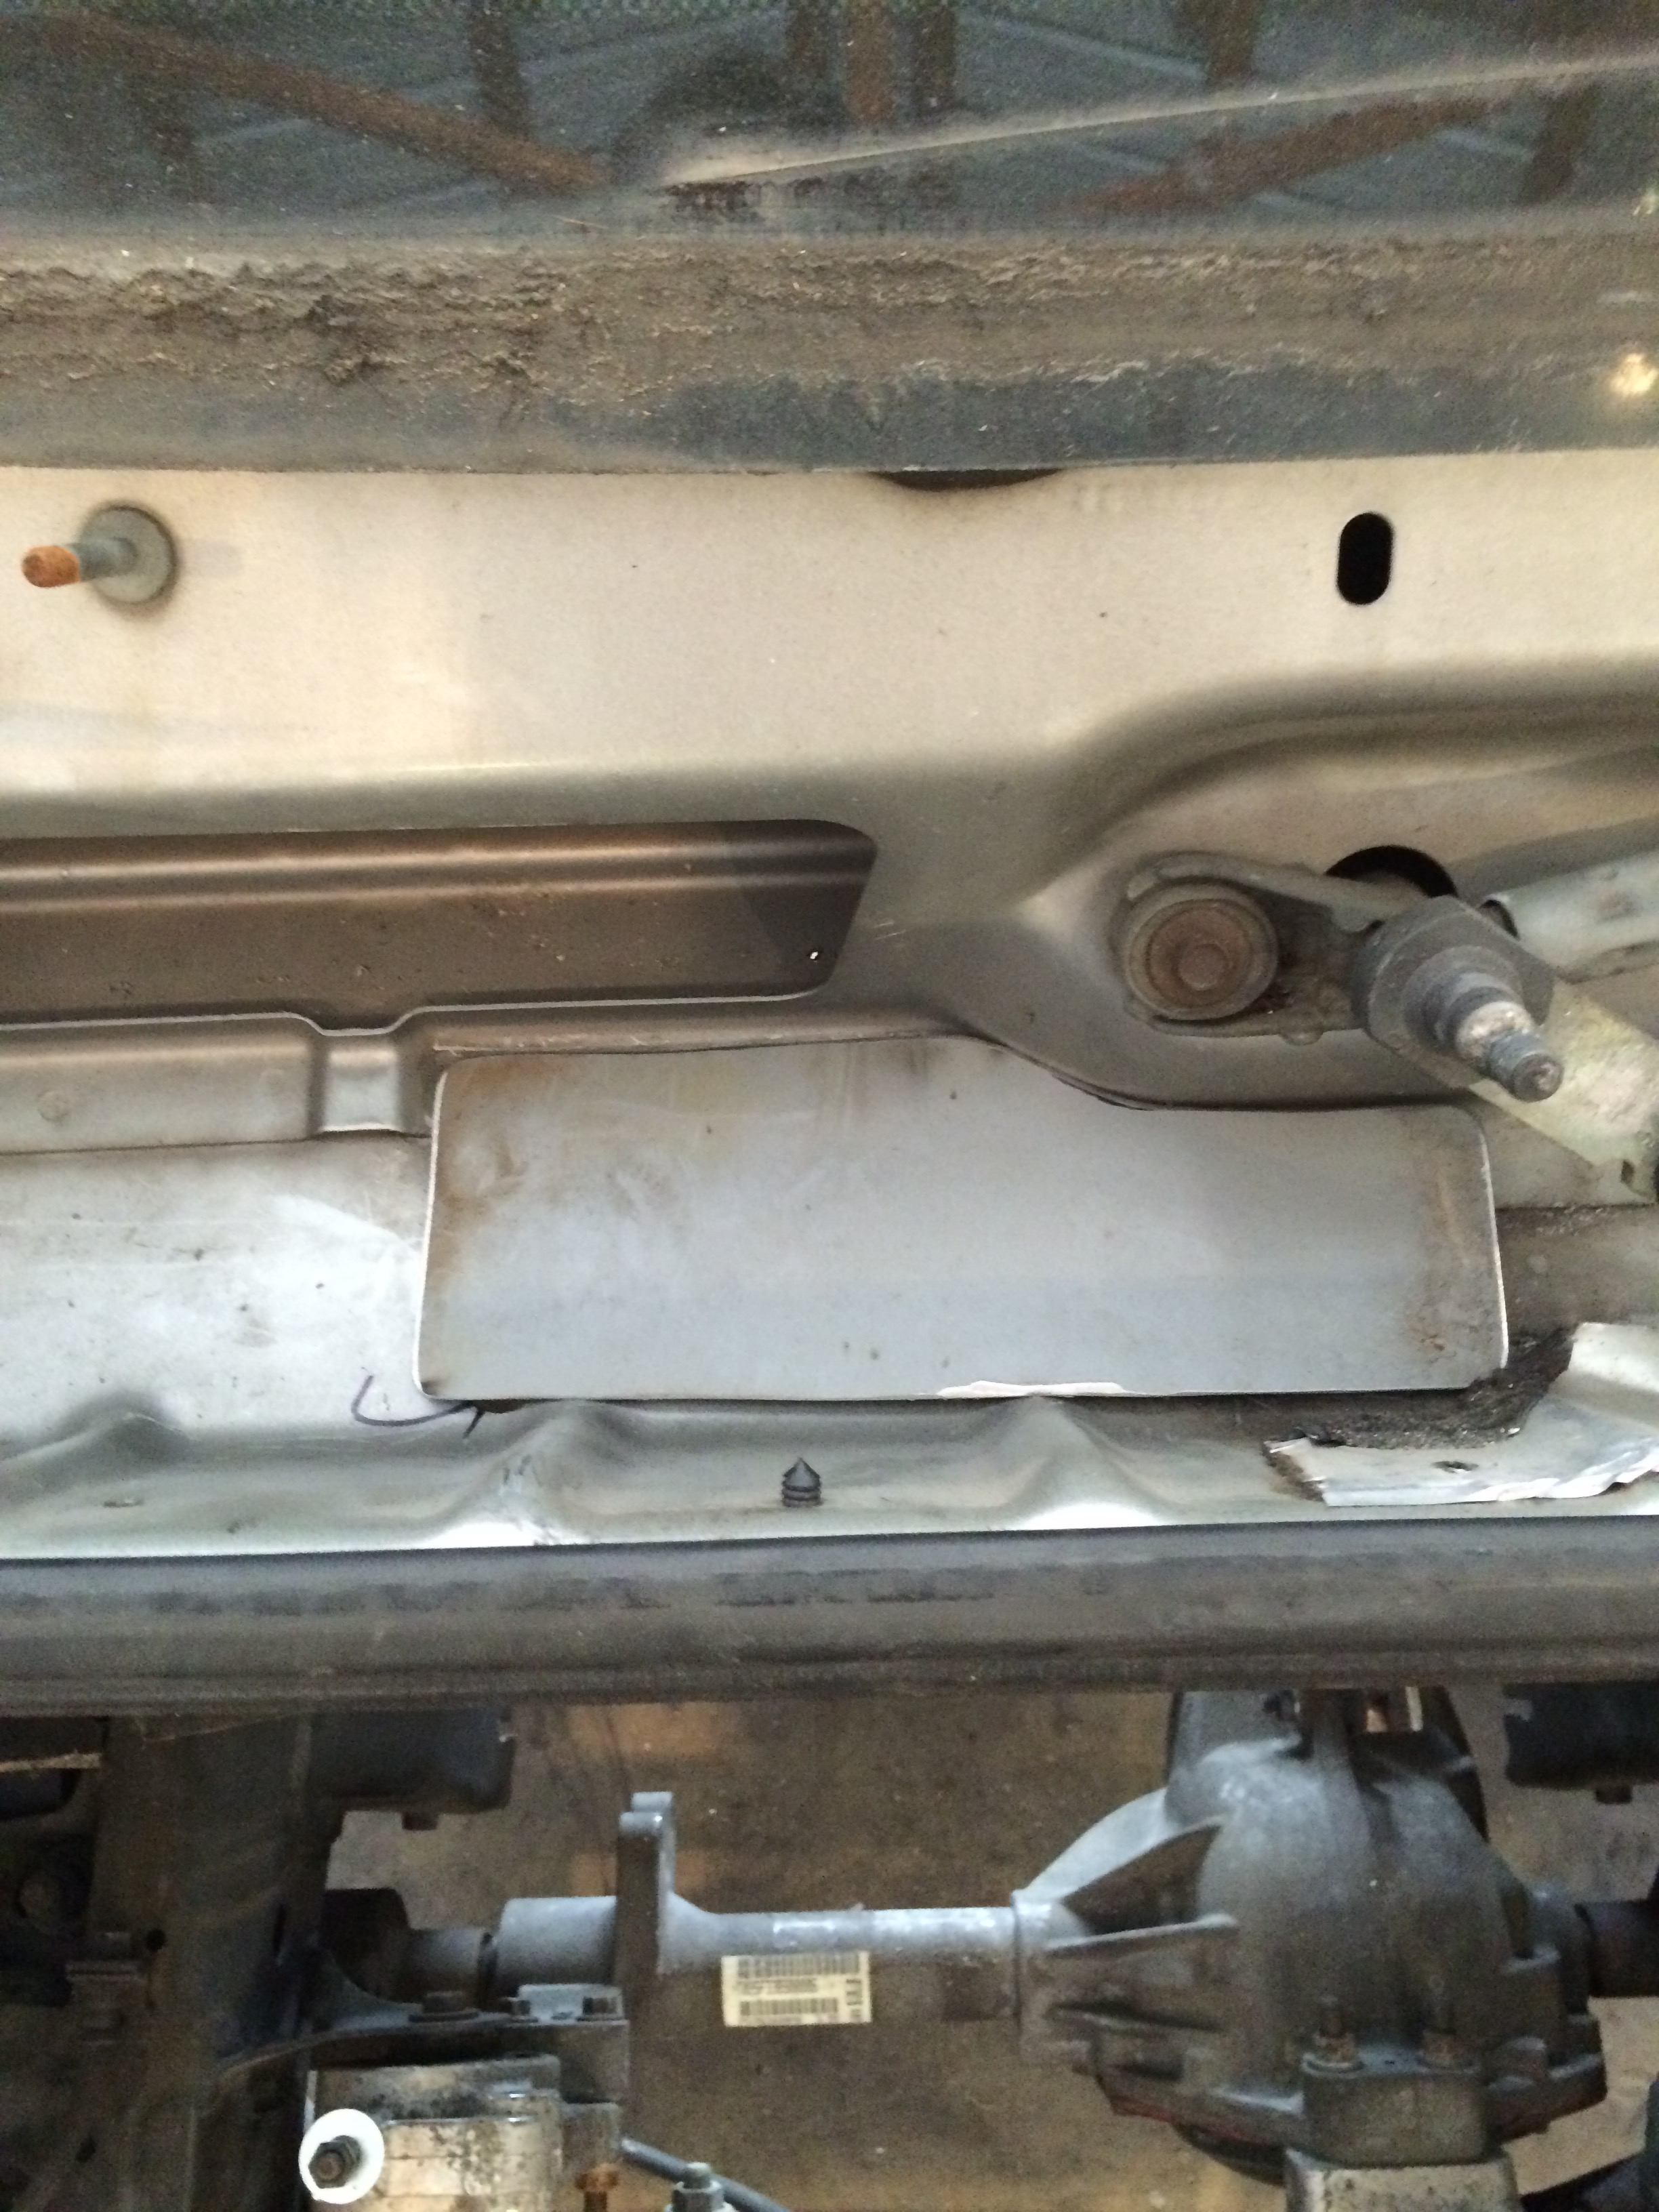
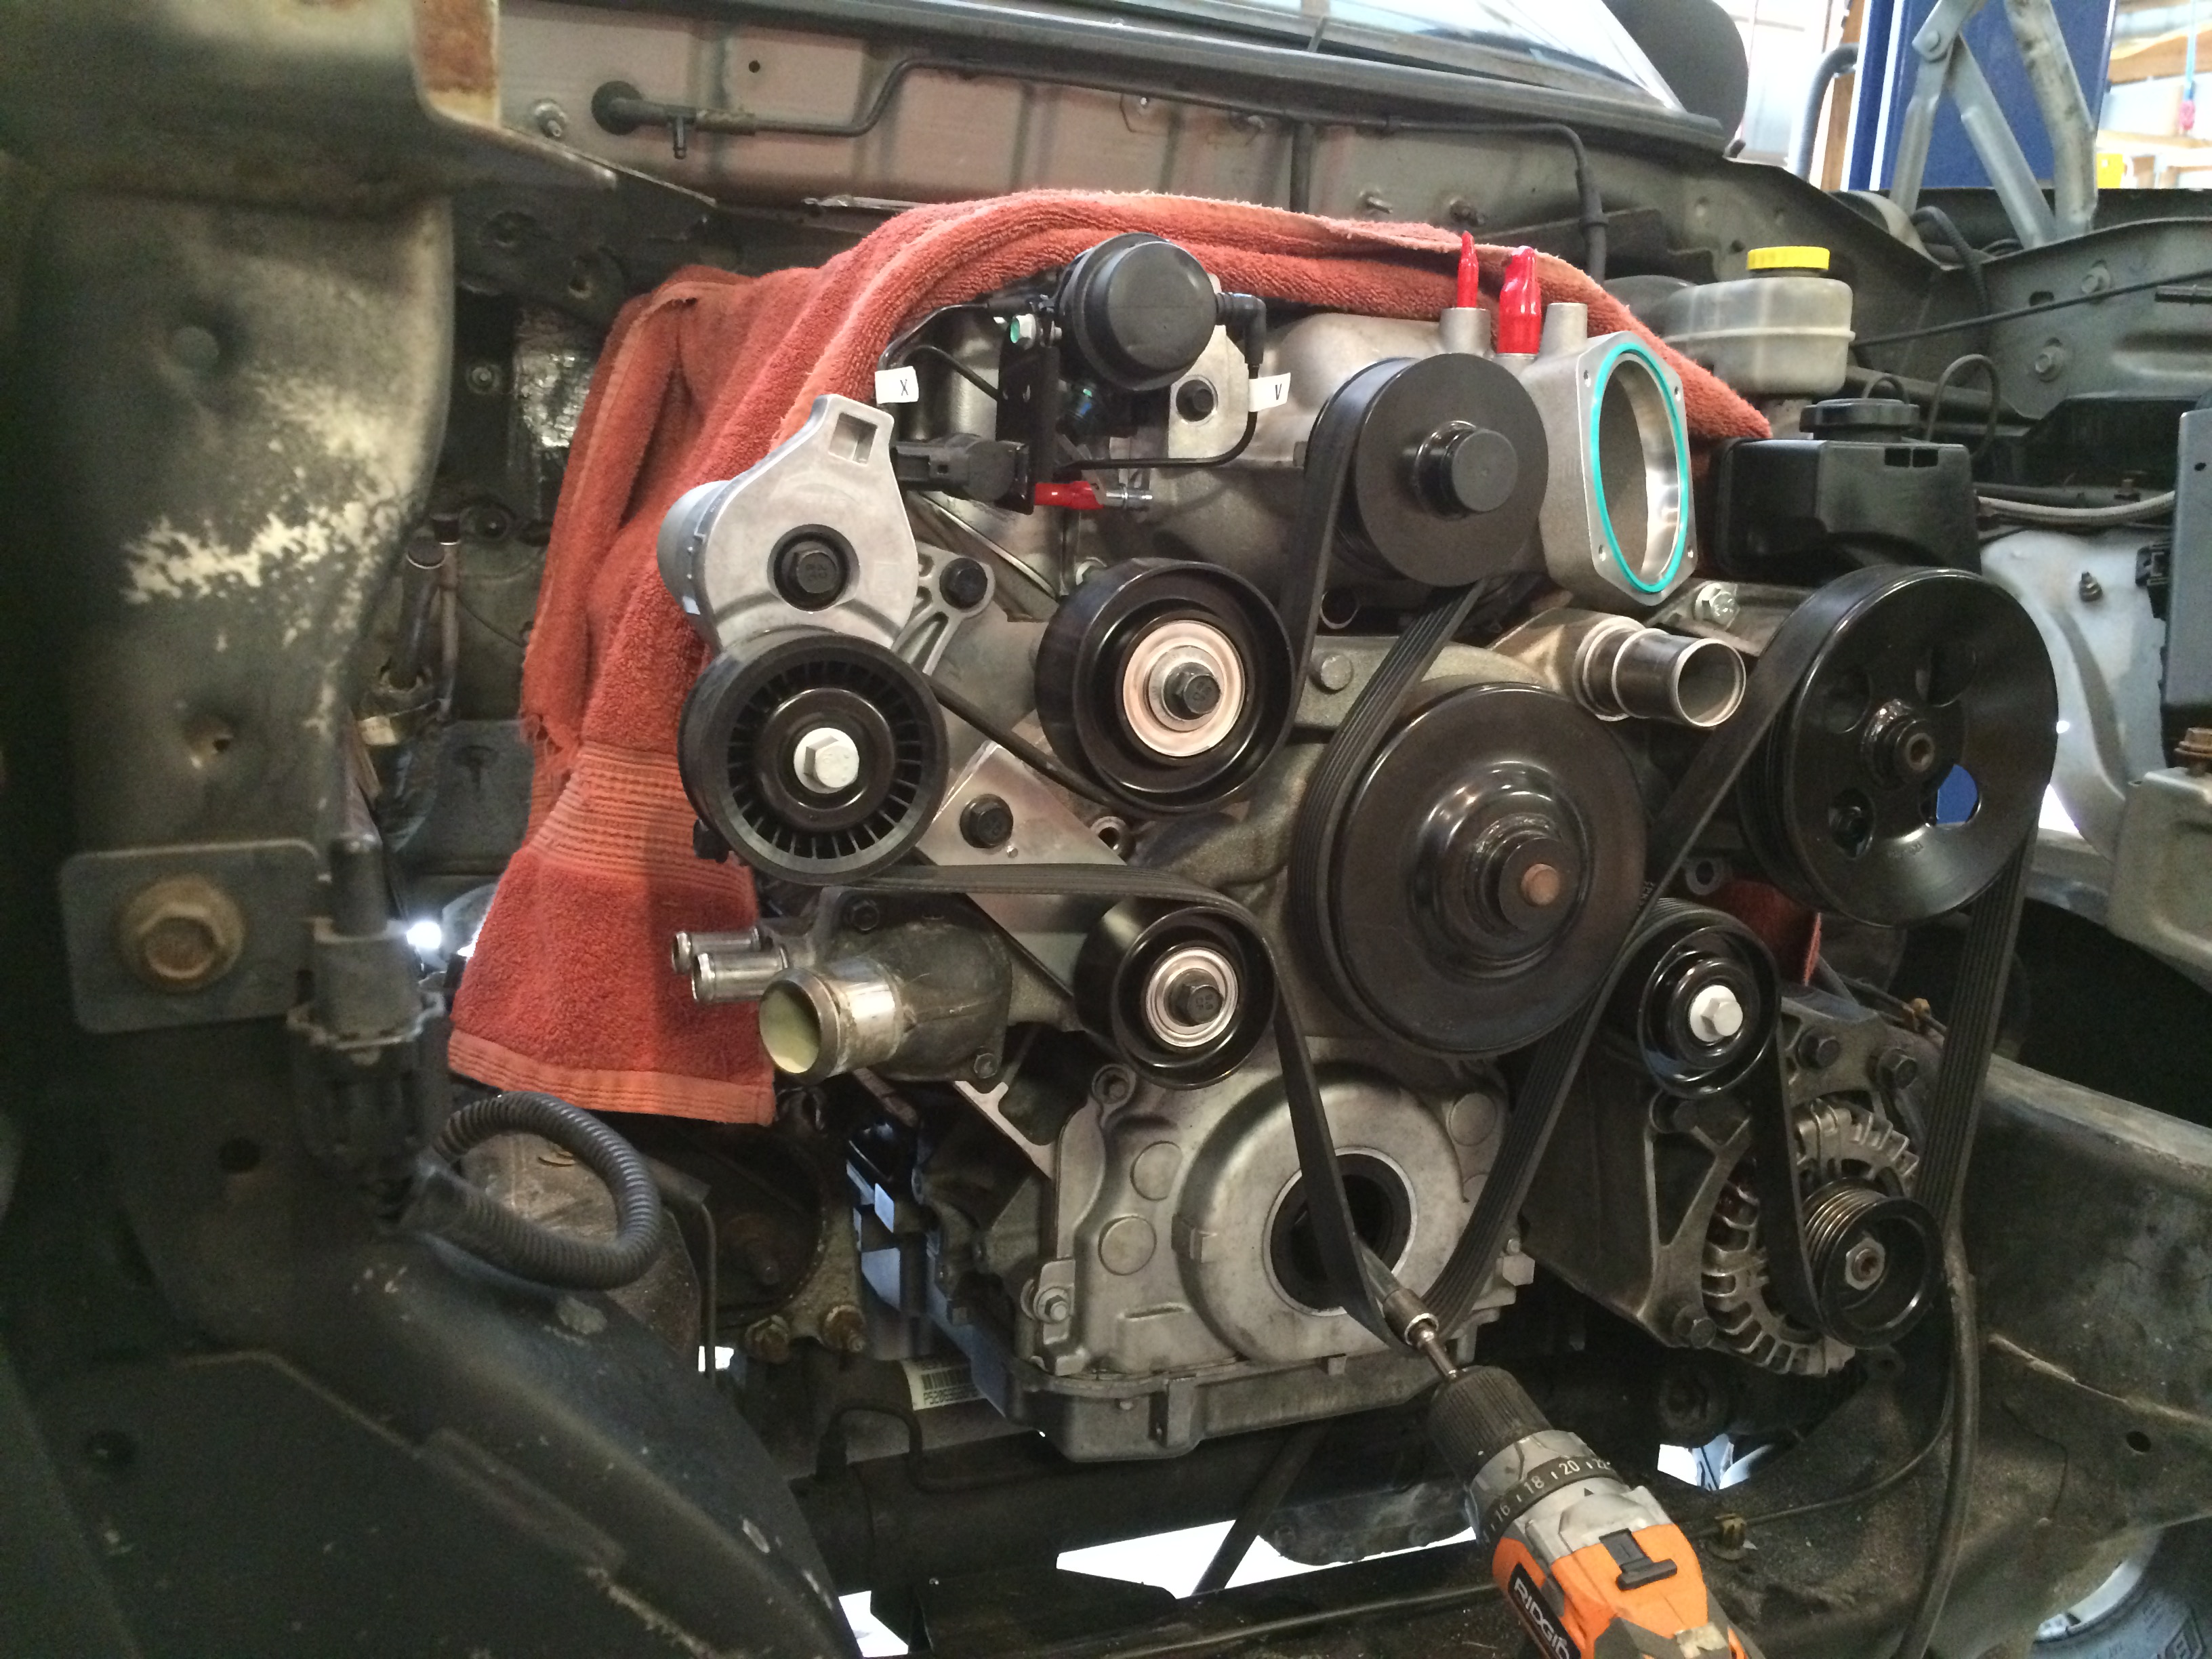
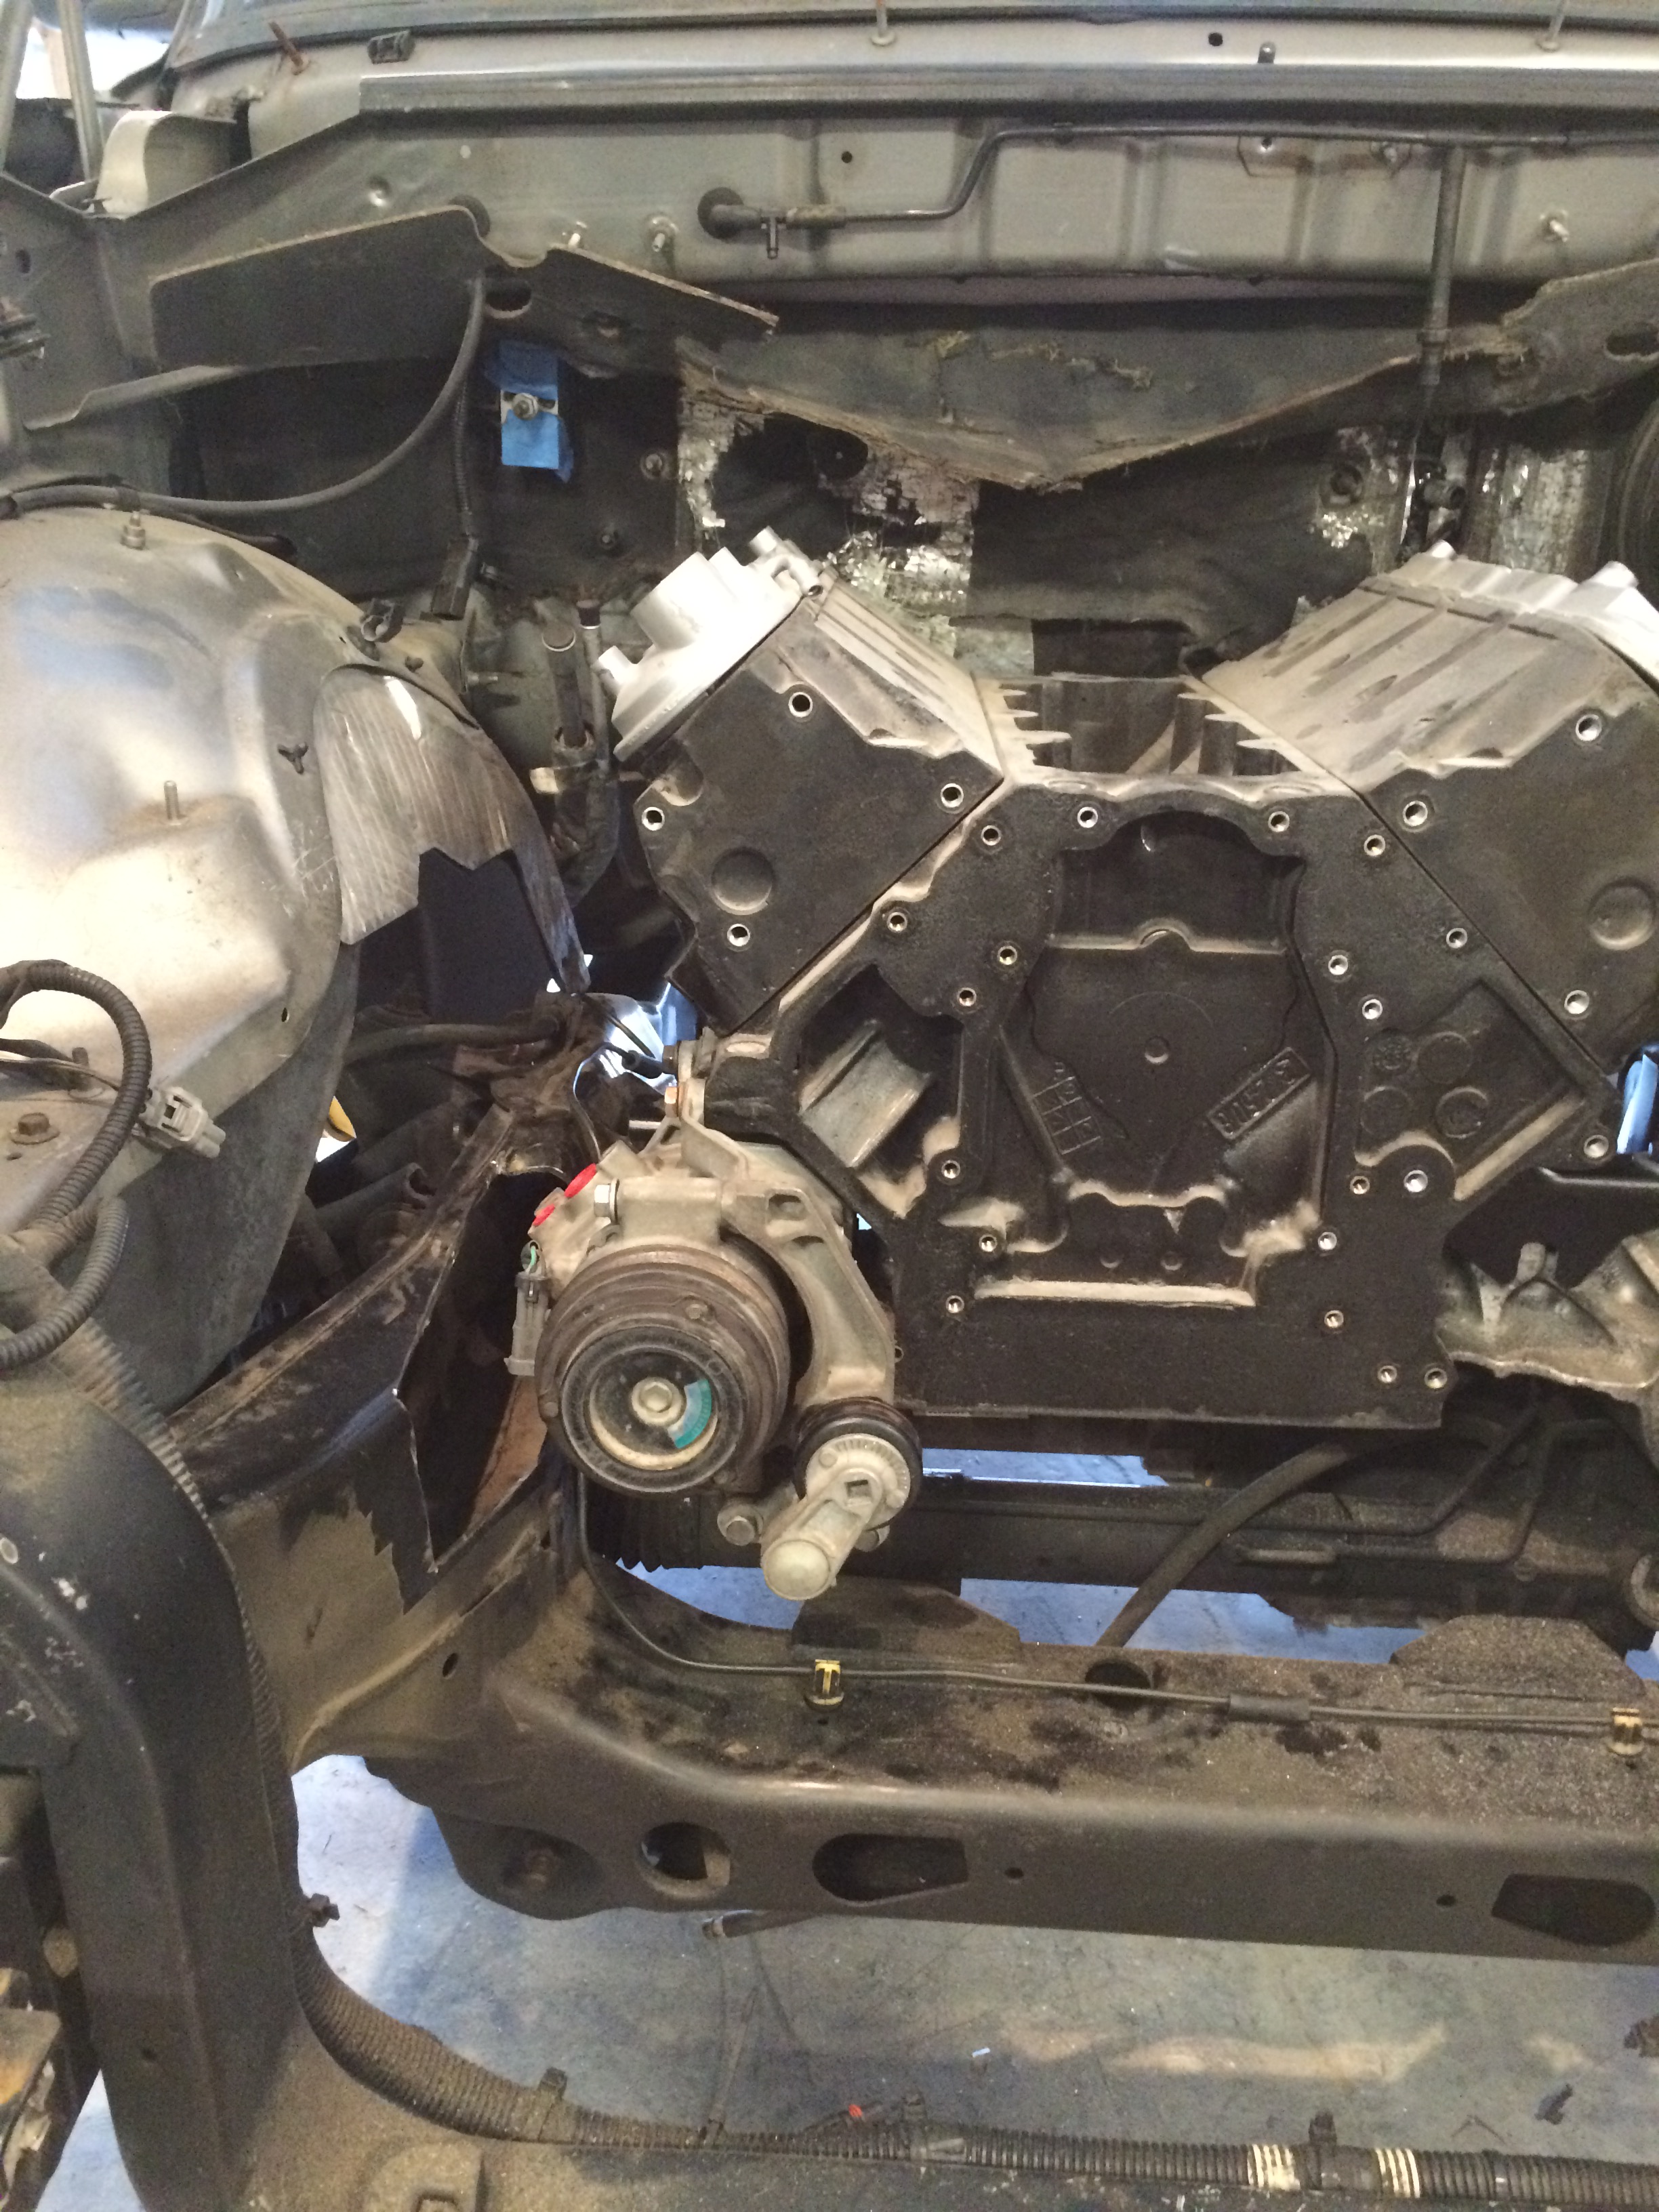
And I had to notch the frame to fit the low-mount AC
I started with 2010+ camaro accessories, water pump and balancer. I wanted to use LSA pullies, so here is how it came together.
I made this bracket out of 1/2 6061 aluminum, which uses the top bosses of the water pump.

I mounted it to the water pump, and spaced the pullies correctly.

I did have to grind these bosses down flat. Originally, I was going to use shims, but I couldn't get the thickness exact.

Giving me this belt arrangement

And the Zl1 lid clears the cowl. Perfect.

I did have to cut an access hole to get to the rear bolts of the cover, so I made a plate for it.


And I had to notch the frame to fit the low-mount AC

 01-20-2016, 09:10 PM
#188
Teching In

Join Date: Aug 2015
Location: ga
Posts: 9
Likes: 0
Received 0 Likes
on
0 Posts
I'm interested in starting this swap on my goat basically because its an uncommon swap.... I have an ls1 starting out with... im having a hard time getting a direct on what parts i'd need to get... so could someone please give me a rundown on whats needed for the ls1..... thanks in advance
01-21-2016, 02:27 AM
#189
Well to start off you'd need the cathedral to square port adapters. Then you'd need to figure out a way to run the pulleys there's one person I only know that offers them to work with ls1 accessories but im not sure if he is a member on here pm me if you want his info.
01-21-2016, 09:10 PM
#190
Teching In
Join Date: Aug 2015
Location: ga
Posts: 9
Likes: 0
Received 0 Likes
on
0 Posts
i seen the adapters on ebay for fairly cheap .... if i can work it out ill start gathering... and yes please send me his info
 03-05-2016, 07:07 AM
#192
I used a kit from SLP, I think? Someone gave it to me. They are pretty pricey at about $75.
If I had to do it without the kit, I would probably just do it by hand. Get a good 1/4 inch drill bit, and some pins, and just free-hand it. I don't think the guide added much support.
 03-05-2016, 07:57 AM
#193
Launching!

Join Date: Feb 2003
Location: 08003
Posts: 205
Likes: 0
Received 0 Likes
on
0 Posts

Got a kit from eBay. I personally wouldn't risk drilling my crank without the fixture. It comes with two pins but IMO only one is needed. I plan on selling mine with the extra pin when I'm done.
03-06-2016, 12:16 PM
#194

I would think having 2 pins vs. 1 would help in keeping it in balance. Maybe not. lol.
03-06-2016, 03:34 PM
#195
03-13-2016, 08:14 PM
#197
03-30-2016, 08:36 AM
#198
On The Tree
iTrader: (7)

Join Date: Aug 2007
Location: Jackson, Ms
Posts: 103
Likes: 0
Received 0 Likes
on
0 Posts

Let me pick yalls brain. I have read through this thread and many others for the last 3 months. I have a lsa on my 08 sierra. I ended up using a modified lsa fead. Has anyone modified the truck compressor bracket to work on the corvette spacing?
05-17-2016, 12:50 PM
#200
Teching In

Join Date: May 2016
Location: Houston Texas
Posts: 1
Likes: 0
Received 0 Likes
on
0 Posts
i have a 2002 Camaro z28 and a 2012 ctsv. I wanted to do this swap myself for the Camaro. I have read through this entire thread and have not found a definitive answer on "lsa swap not ls9". is there a kit I can use for just the pullies? can lsa pulley setup work on these cars ? I also want to do this on a 347ci which was originally ls1. I have seen the adapter plate for cathedral to square port but have a hard time figuring out how the blower would bolt on to the adapters? thanbks everyone and anyone for any input