

55/58 Chevy Truck 5.3 4L60e Build.
 10-17-2020, 09:49 AM
#81
On The Tree
Thread Starter

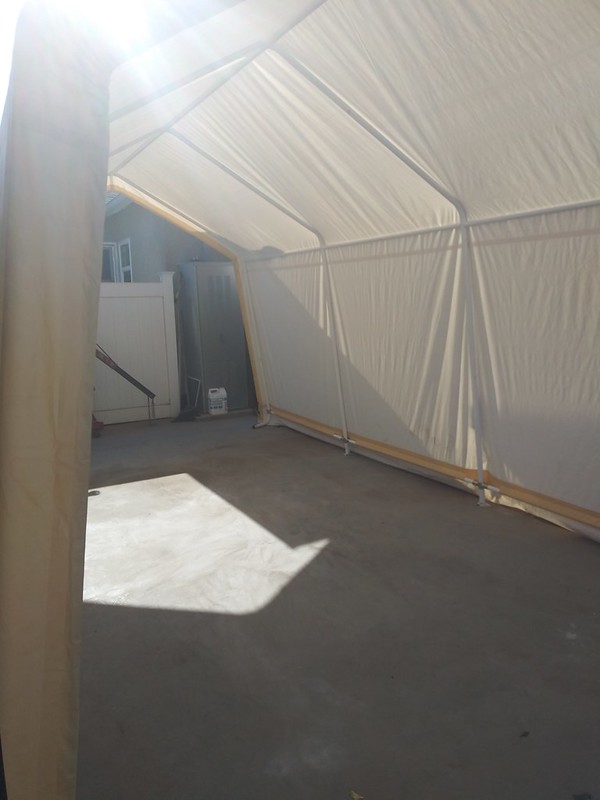
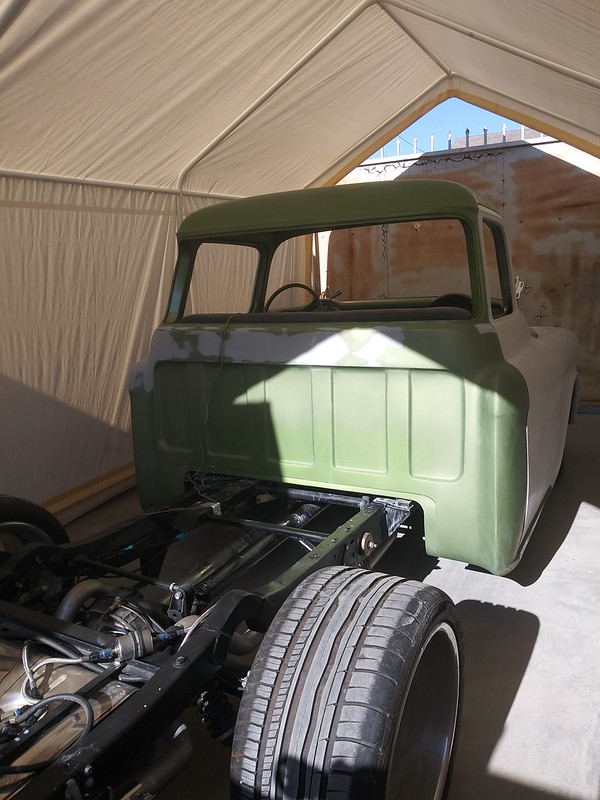
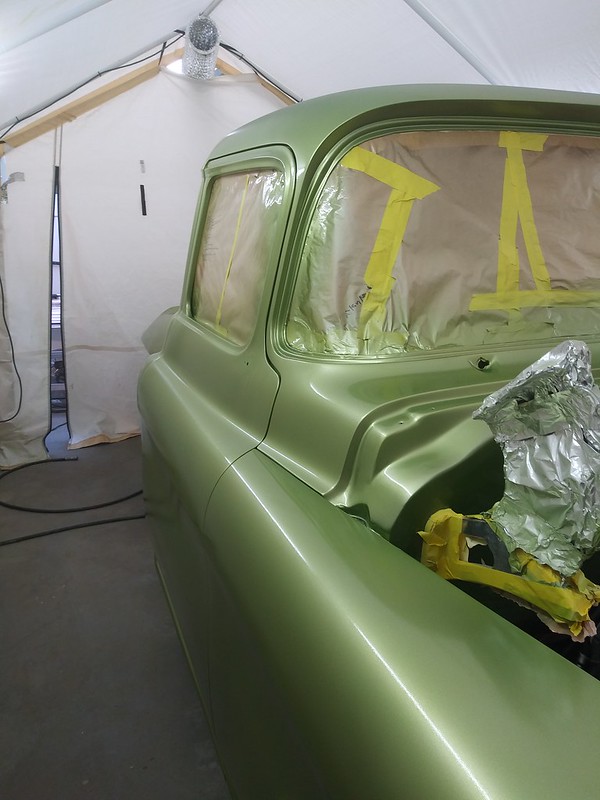
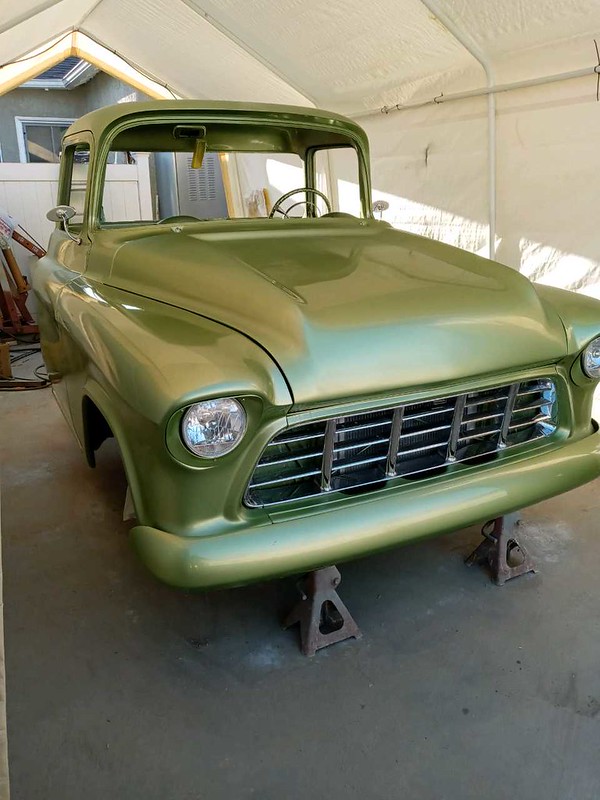
I had a major set back on the project. I had it to the point of test driving it around the neighborhood and everything was going fine and I was about to start the prep for the bed and notice when I removed some tape from the doors the clear came off with it. So I started putting tape all over the truck and snatching the tape off and it was just the doors that it was happening on. Then I remembered I used some Universal Clear that was recommended but I guess it did not like my basecoat. I could not find the clear I usually used locally. So I sanded the doors and scuffed the rest of the truck (the good areas) and repainted the whole thing to ensure I don't have any more issues.
Here is my makeshift paint booth
Repainted


Got things back together


Here is my makeshift paint booth
Repainted
Got things back together
 10-17-2020, 09:52 AM
#82
On The Tree
Thread Starter
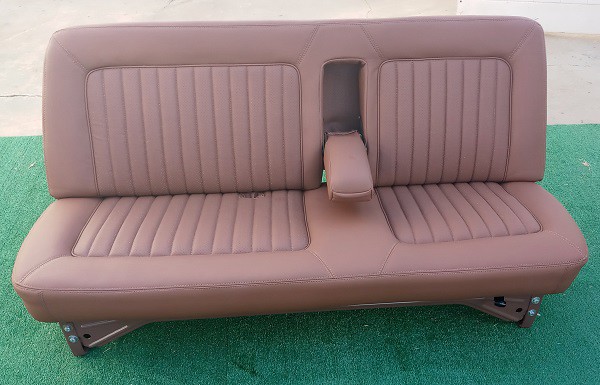
Got the seat back today.
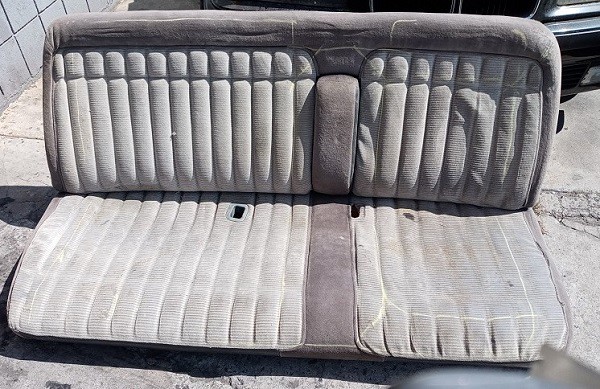
Here is a before pic and you can see the marks made on the seat of the changes I wanted made. I also had the seat back cut down about an inch so that is not stick up when you look through the big back window (its a pet peeve of mine).

Close up

Well I got the headliner installed. I did it a little differently because I did not want that black gasket that goes around it.

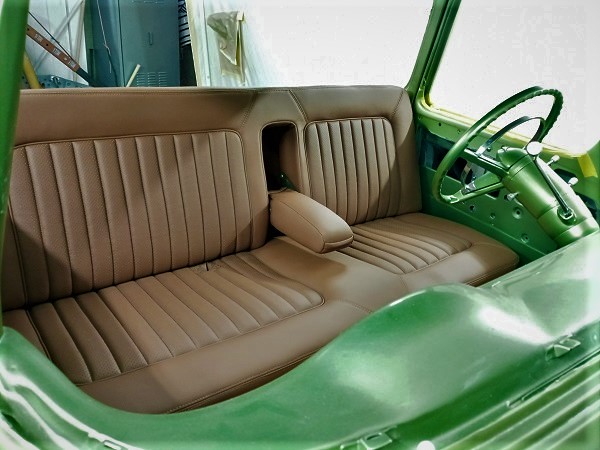
Here is a pic of the seat installed as you can see I had the seat back cut down about an inch so that is not sticking up when you look through the big back window. Like I said that is a pet peeve of mine.


Here is a before pic and you can see the marks made on the seat of the changes I wanted made. I also had the seat back cut down about an inch so that is not stick up when you look through the big back window (its a pet peeve of mine).
Close up
Well I got the headliner installed. I did it a little differently because I did not want that black gasket that goes around it.
Here is a pic of the seat installed as you can see I had the seat back cut down about an inch so that is not sticking up when you look through the big back window. Like I said that is a pet peeve of mine.
10-17-2020, 02:56 PM
#84
On The Tree
Thread Starter
10-17-2020, 04:06 PM
#85
TECH Senior Member

One thing about do-overs- We don't like 'em, but at least we CAN do 'em!
The following users liked this post:
Motown 454 (10-19-2020)
10-18-2020, 02:44 PM
#87

Wow. That�s looks great. I really like the seat.
10-28-2020, 03:51 PM
#88
On The Tree
Thread Starter
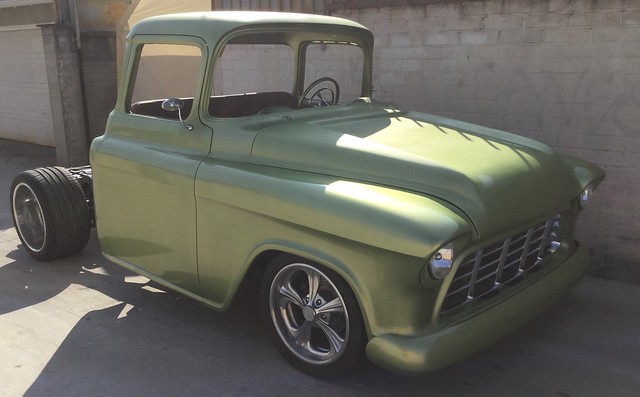
I had to move the truck the garage to start work on the bed so I drove it around the block first and took some more pics.


Here are some pics of the work I've done to the bed. I completely welded the bed and added a inner panel to smooth everything out.
I installed tubs and did a little metal fab to make a smooth transition to the angle strips.

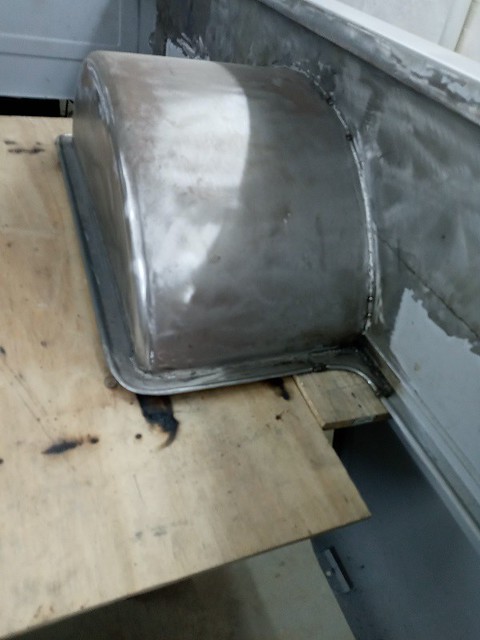


I also smooth the tailgate and installed a 57 Chevy third brake light.
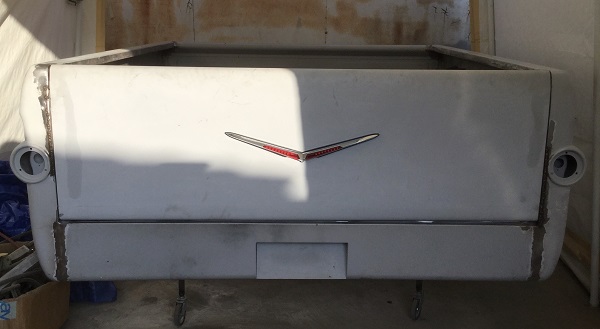
Now to grind more welds and start block sanding.
Here are some pics of the work I've done to the bed. I completely welded the bed and added a inner panel to smooth everything out.
I installed tubs and did a little metal fab to make a smooth transition to the angle strips.
I also smooth the tailgate and installed a 57 Chevy third brake light.
Now to grind more welds and start block sanding.
10-30-2020, 09:08 AM
#89
Looks great. Where didscha get the fancy lock for the bed? Any pics of it opened?
thanks,
Jim
thanks,
Jim
10-31-2020, 01:47 PM
#90
On The Tree
Thread Starter
They are for boat cabinets. I got them on eBay a while ago. Sorry I already took the tailgate off to get it ready for body work so I can’t take a pic with the gate opened
Last edited by BAM55; 10-31-2020 at 03:11 PM.
11-01-2020, 07:09 AM
#91
11-23-2020, 11:28 AM
#92
On The Tree
Thread Starter
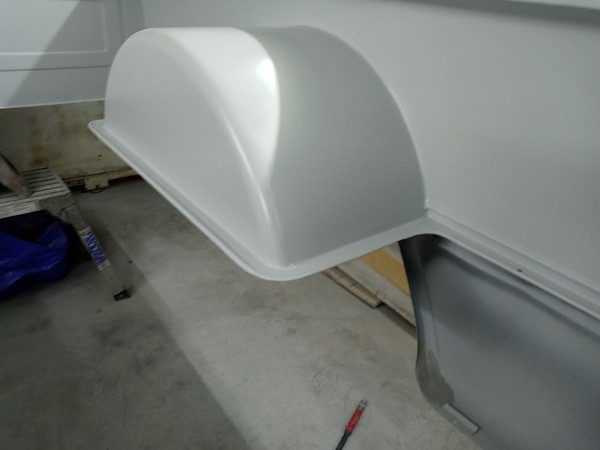
Well I been covered in dust lately but the blocking sessions is going great. This is what it looks like after the first blocking session and second coat of primer. I think I only have one more blocking of the complete bed in and out if I use a sealer, the panels will dictate that.


11-25-2020, 09:06 AM
#93
Looks good. What do you wear for PPE while doing body work and painting? You must do a awful lot of it (before, experienced) to make your stuff look so good.
11-25-2020, 12:02 PM
#94
On The Tree
Thread Starter
11-25-2020, 02:22 PM
#95
I've found the key to success on this stuff is prep. If your metal work is top shelf your filling and blocking goes better and faster. If you aren't worn out from blocking filler you tend to take your time and still have energy which results in a better finish. Once a solid foundation is laid the paint and clear are - for lack of better words - the easy part. Laying down paint is far easier and faster than getting to the point where panels are ready to spray.
If you look at Bam's previous images you'll see his metal work is on point so his fill and block work isn't taking forever. This is because he doesn't need to do radical stuff like create a panel with mud or fill the Grand Canyon. All Bam is doing is simply give the already pretty girl a highlight or two, proper lighting and a nice dress to enhance all the right parts. Excellent work sir!
If you look at Bam's previous images you'll see his metal work is on point so his fill and block work isn't taking forever. This is because he doesn't need to do radical stuff like create a panel with mud or fill the Grand Canyon. All Bam is doing is simply give the already pretty girl a highlight or two, proper lighting and a nice dress to enhance all the right parts.
Excellent work sir!
11-30-2020, 12:16 PM
#96
On The Tree
Thread Starter
I decided to make my own bed wood because I don’t care for how busy the fleetside kits are with all those boards. I like the simplicity of how it looks with wider boards, so I talked to a couple of buddies of mine who done this years ago and they told me they had no issues going with wider board and their beds floors looks as good now as it did when they done it.
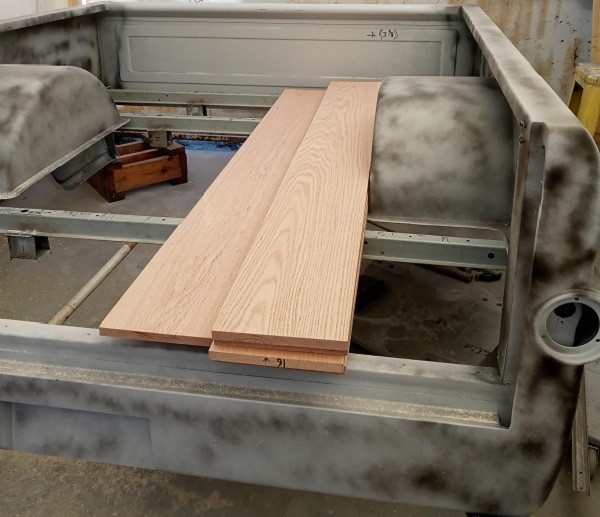
Use a router with a rabbet bit to create the notch for the strips.

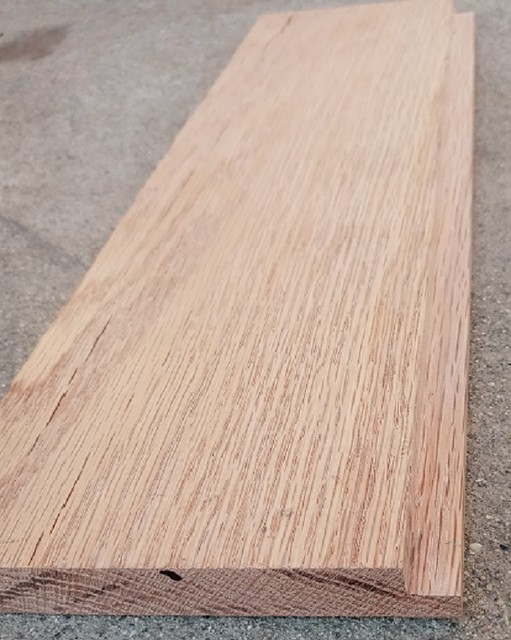
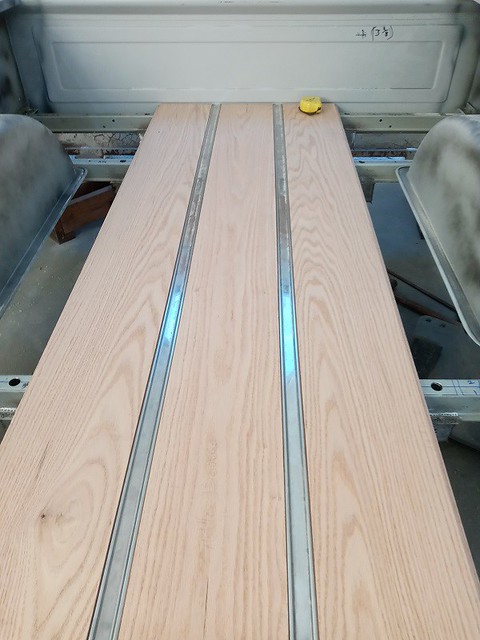


I haave not decided on a stain as of yet, but I’m leaning towards automotive clear to protect it.
Use a router with a rabbet bit to create the notch for the strips.
I haave not decided on a stain as of yet, but I’m leaning towards automotive clear to protect it.
12-01-2020, 02:11 PM
#97
Looking killer Bam. Since I�m old and my memory is getting worse, has anyone asked you yet what do you coat the inside(backside) of your panels/fender with? If not. That�s my question. Damn I hate speed check
12-02-2020, 12:41 PM
#98
On The Tree
Thread Starter
I used epoxy primer and top coated it with raptor bed liner. Its a DIY bed liner kit that is very user friendly.
12-03-2020, 09:09 AM
#99
Ok. I figured you�d prolly did the epoxy and some sort of bed lining. Thanks
12-11-2020, 02:17 PM
#100
Wow, the bed floor looks great BAM!
I've always thought the wood bed floor on trucks like these was a little too busy but never thought much about why. After buying the 50 truck for my wife I've spent a lot of time looking at (or re-looking at) other trucks for inspiration but that is one topic that eluded me. Thanks again for the inspiration.
I've always thought the wood bed floor on trucks like these was a little too busy but never thought much about why. After buying the 50 truck for my wife I've spent a lot of time looking at (or re-looking at) other trucks for inspiration but that is one topic that eluded me. Thanks again for the inspiration.