

55/58 Chevy Truck 5.3 4L60e Build.
 12-12-2018, 06:49 PM
#1
On The Tree
Thread Starter

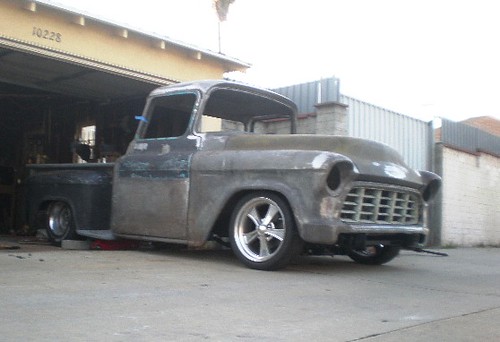
Its taking longer than I thought, but things got out of hand with rust repair, bodywork, and mods. So let me take you through the years.
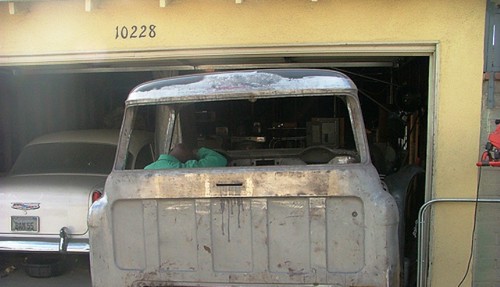
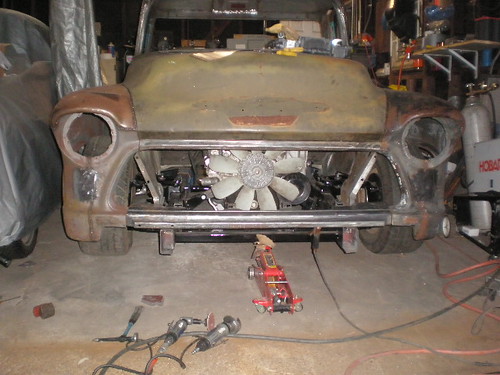
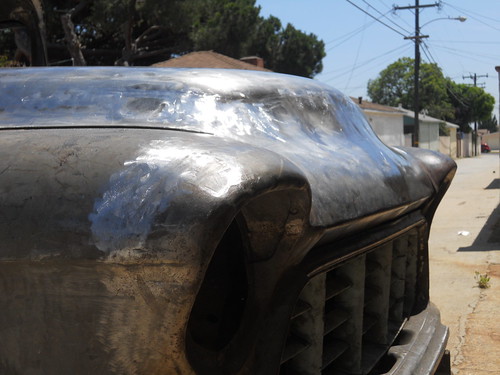
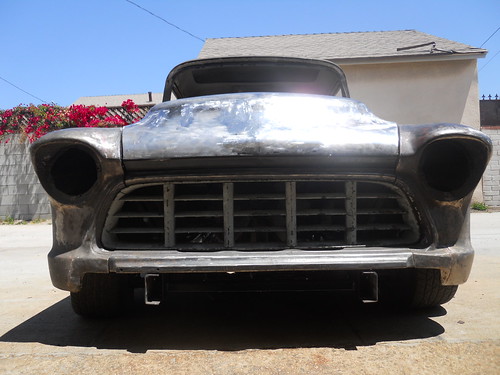
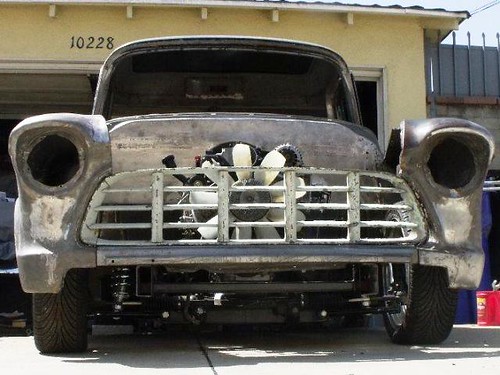
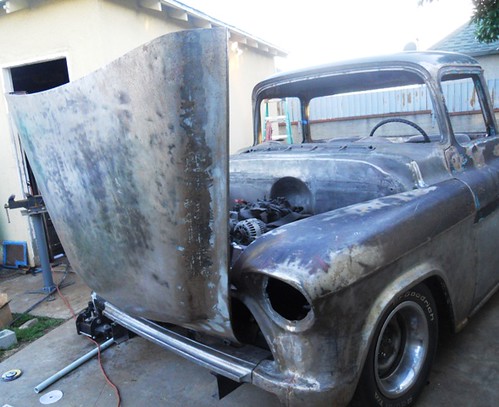
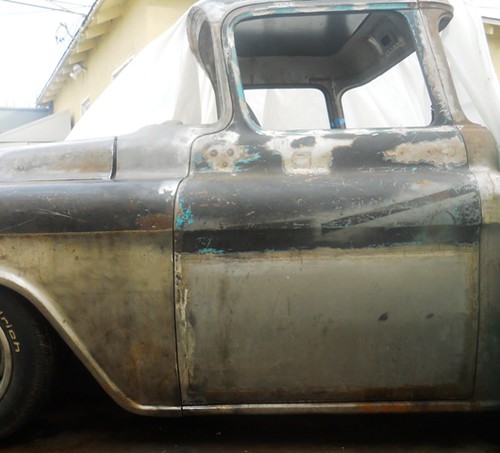
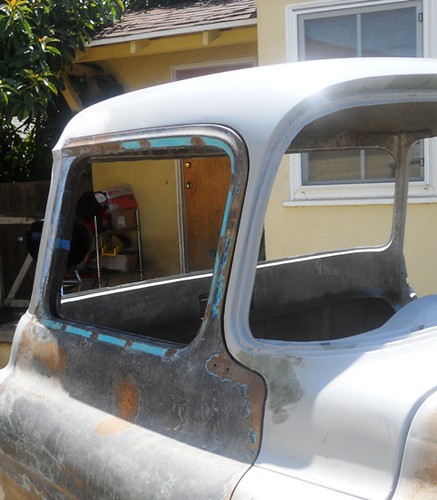
Heres what I started with 1958 Chevy Big Window I only bought it for the cab.

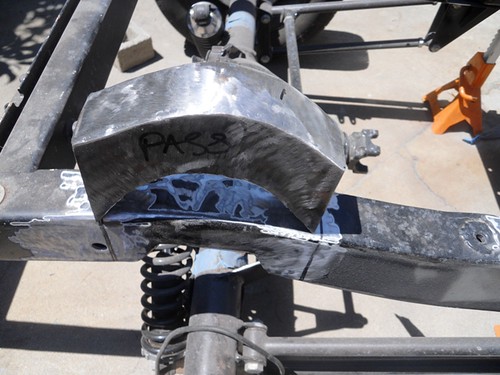
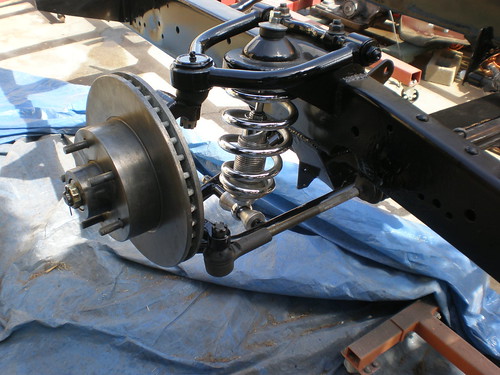
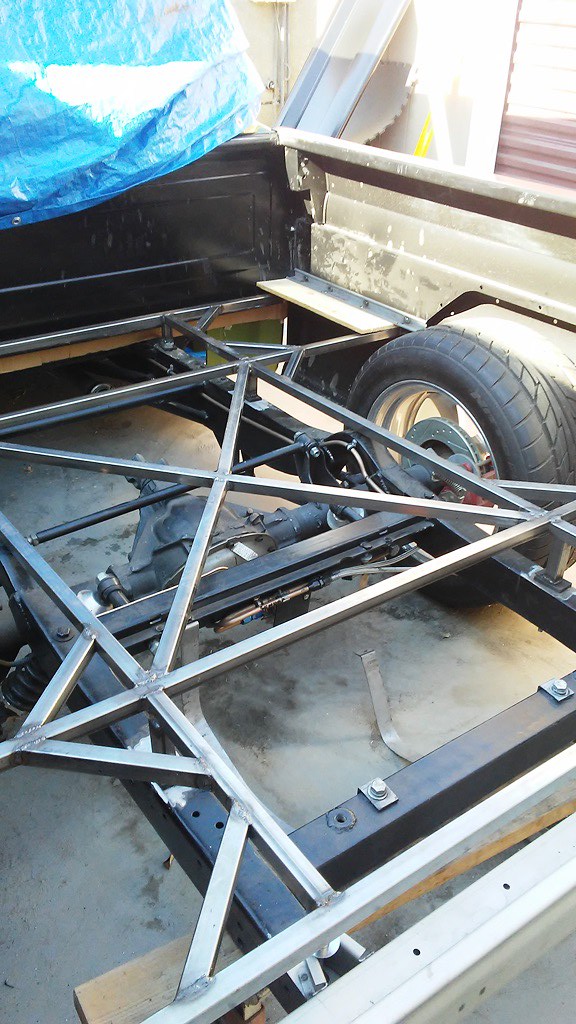
I’ll start with the frame. I install a Mustang II, 4 link and c-notched the rear of the frame.
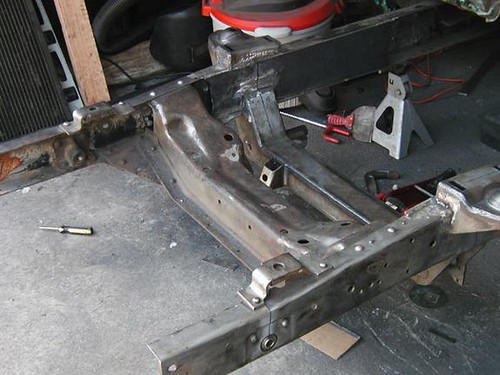
I made a frame rotisserie out of two engine stands to get the frame ready for paint.
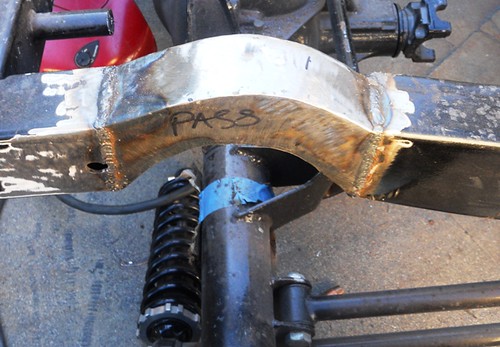
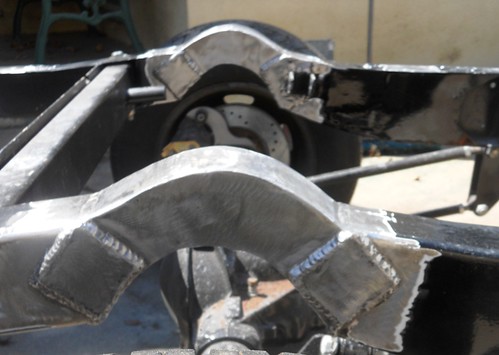
I had to redo the c-notch for more clearance for a lower stance.
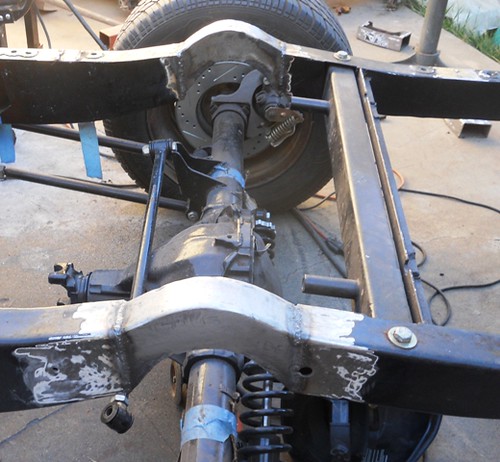
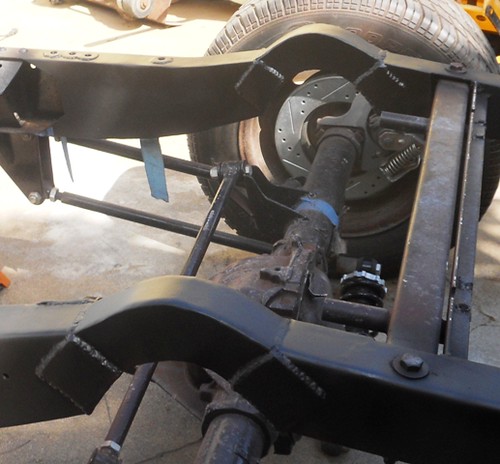
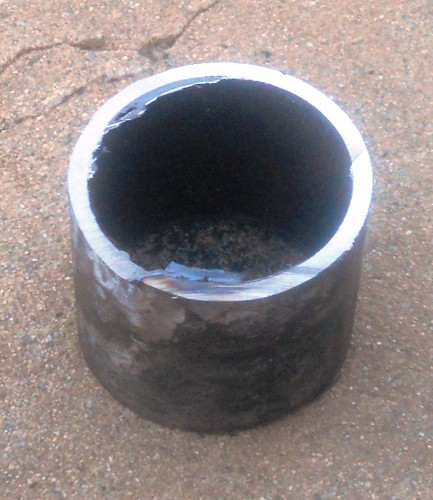
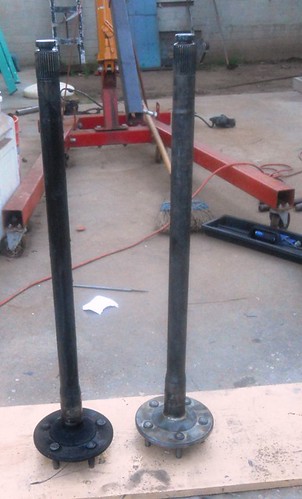
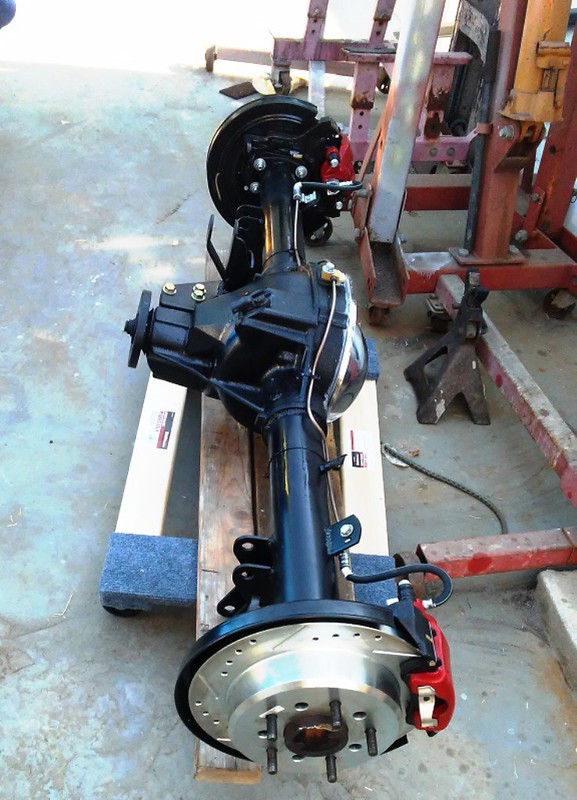
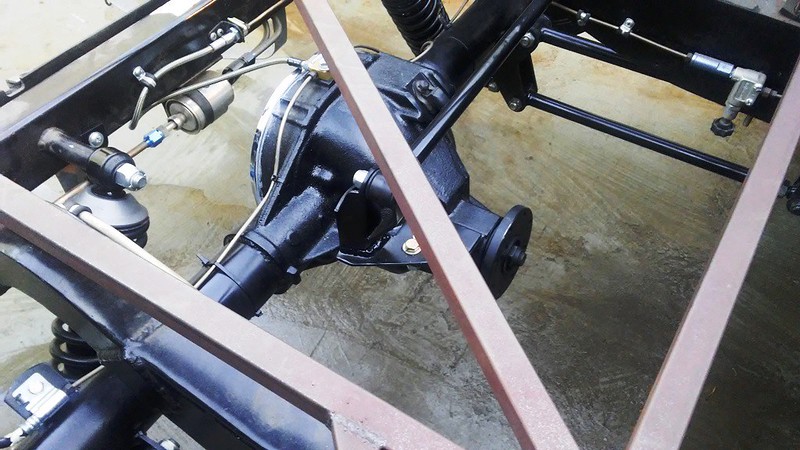
I changed the rear end to a Ford 8.8 Limited Slip 3:73 Gears. I had to narrow driver axle shaft, which will center the pinion in the frame and also give me more than enough room
I need for my wheels and tires. To do this mod you will need to 2 passenger side axles and remove 2 7/8 of the axle drive shaft to make it the same length as the passenger side.

Cleaned, all welding with 4-link brackets welded on and ready for installation.
4-Link installed.
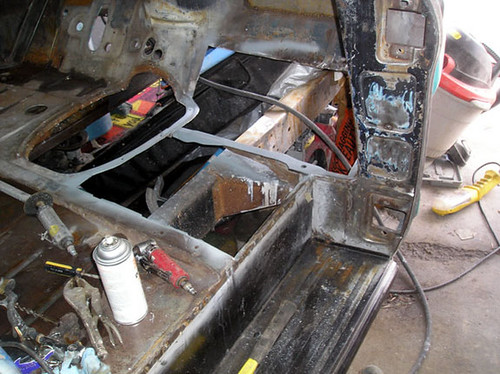
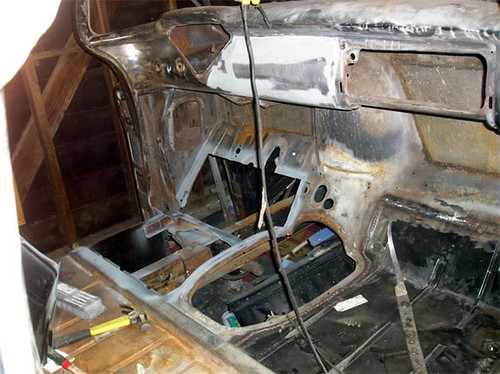
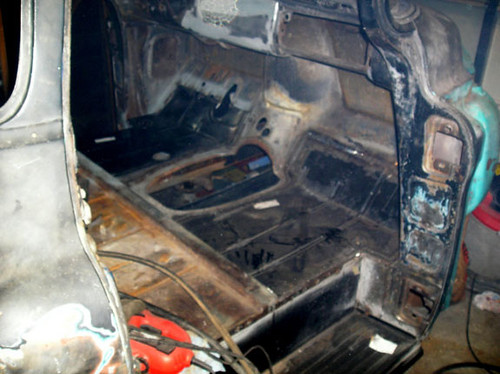
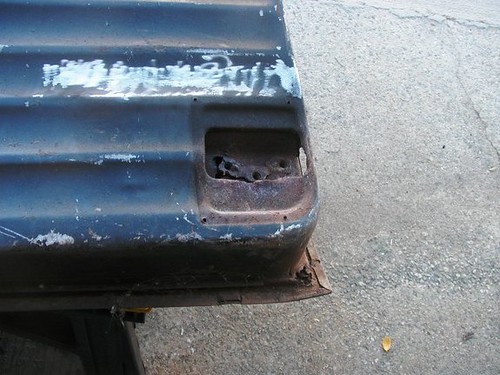
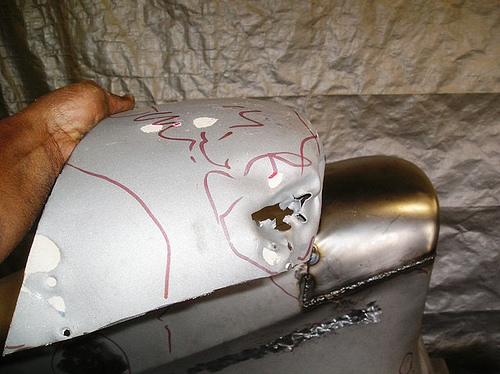
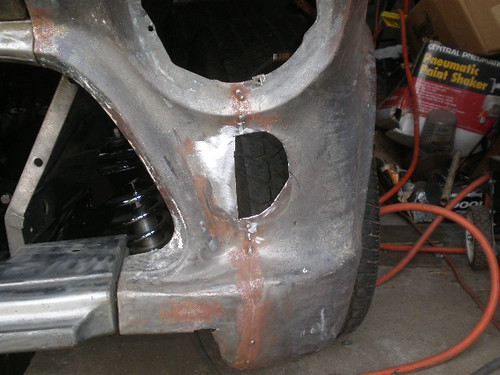
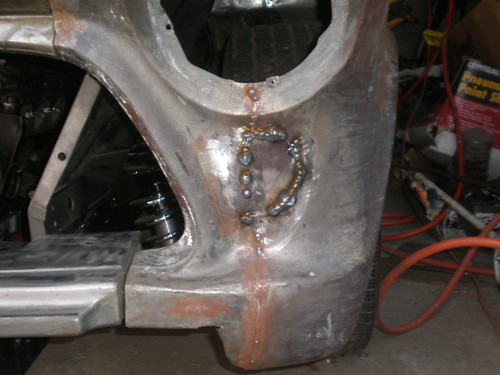
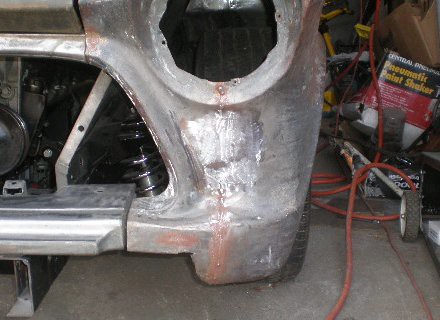
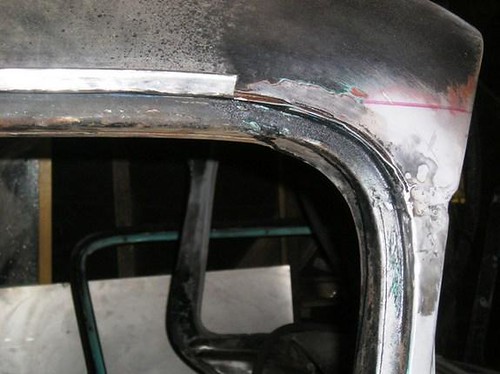
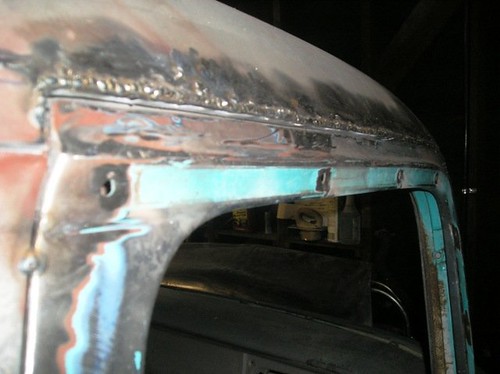
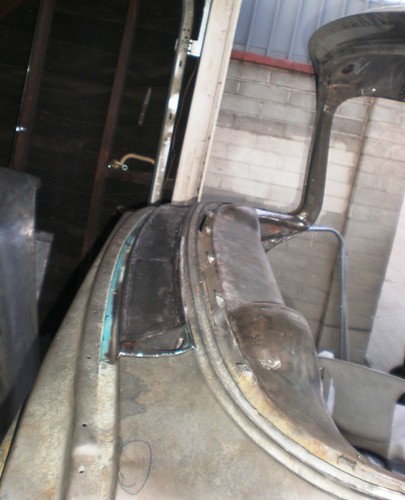
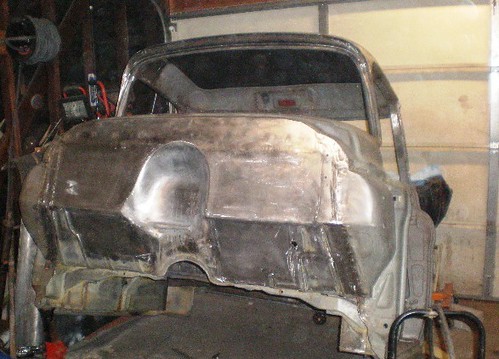
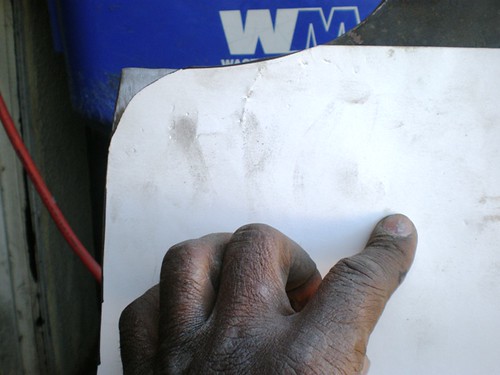
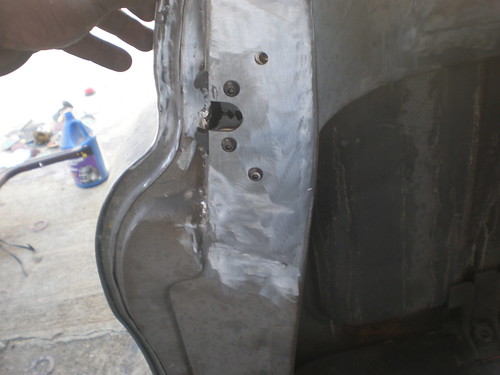
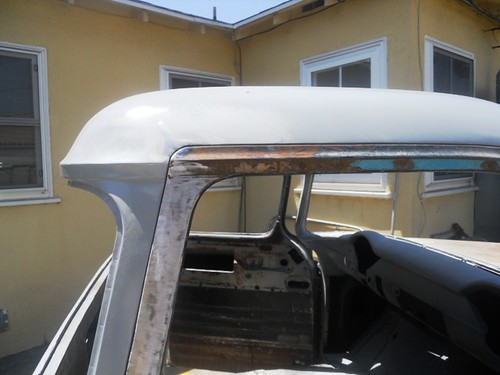
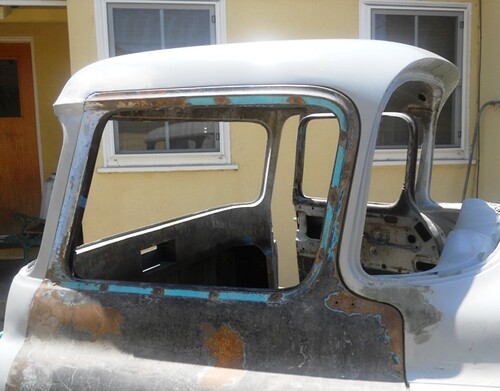
There was extensive rust damage on this cab but I wanted a big window cab and I had to have it.lol I should have waited because I ended up building a cab.lol
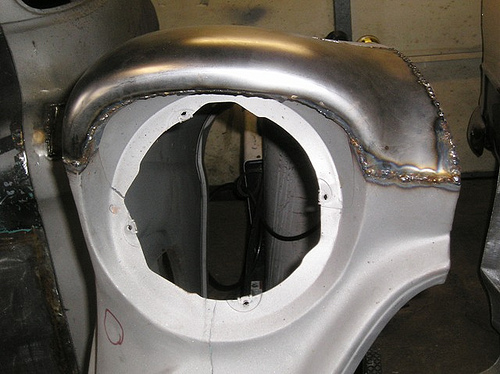
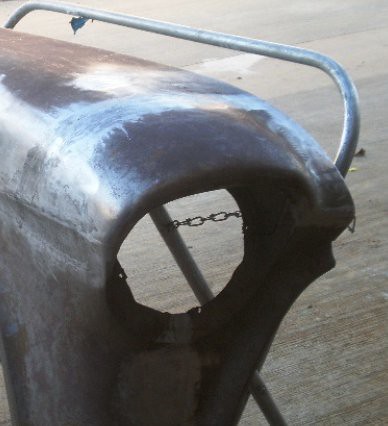
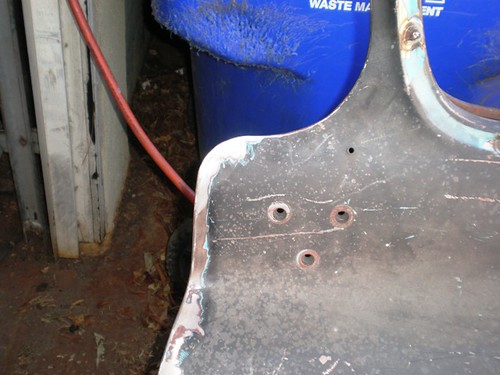
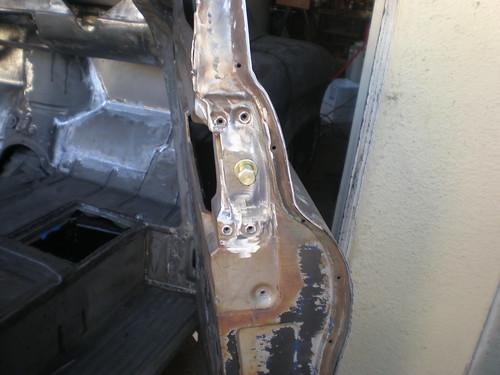
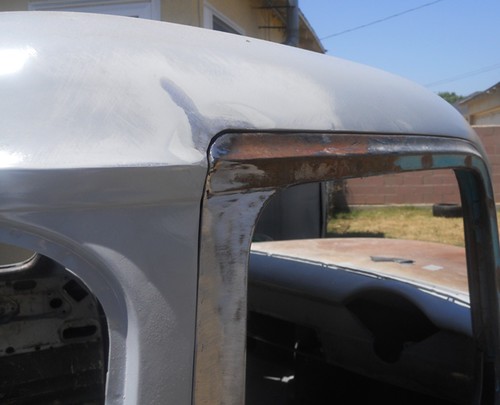
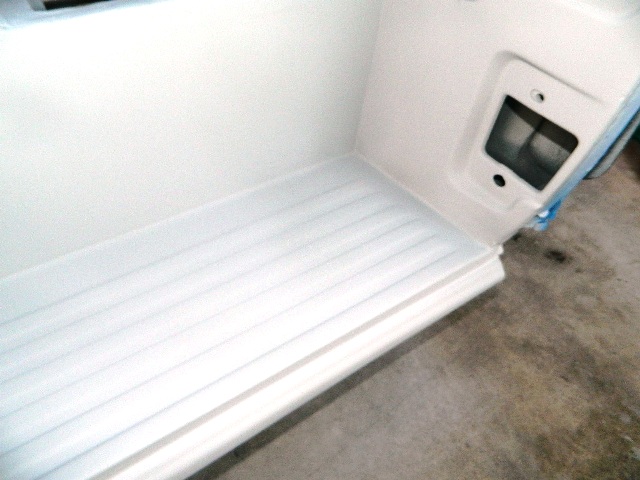
I had to replace both cab corners, the steps and rockers, floors, and the roof. Cab corners replaced


Steps replaced

Heres what I started with 1958 Chevy Big Window I only bought it for the cab.
I’ll start with the frame. I install a Mustang II, 4 link and c-notched the rear of the frame.
I made a frame rotisserie out of two engine stands to get the frame ready for paint.
I had to redo the c-notch for more clearance for a lower stance.
I changed the rear end to a Ford 8.8 Limited Slip 3:73 Gears. I had to narrow driver axle shaft, which will center the pinion in the frame and also give me more than enough room
I need for my wheels and tires. To do this mod you will need to 2 passenger side axles and remove 2 7/8 of the axle drive shaft to make it the same length as the passenger side.
Cleaned, all welding with 4-link brackets welded on and ready for installation.
4-Link installed.
There was extensive rust damage on this cab but I wanted a big window cab and I had to have it.lol I should have waited because I ended up building a cab.lol
I had to replace both cab corners, the steps and rockers, floors, and the roof. Cab corners replaced
Steps replaced
Last edited by BAM55; 12-13-2018 at 06:26 PM.


 12-13-2018, 02:48 PM
#3
On The Tree
Thread Starter
Now for the custom touches
55 Chevy car dash
Shaved parking lights
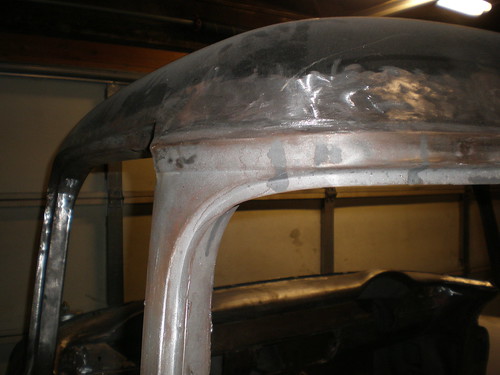
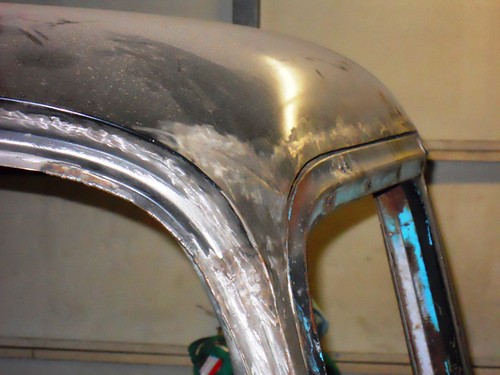
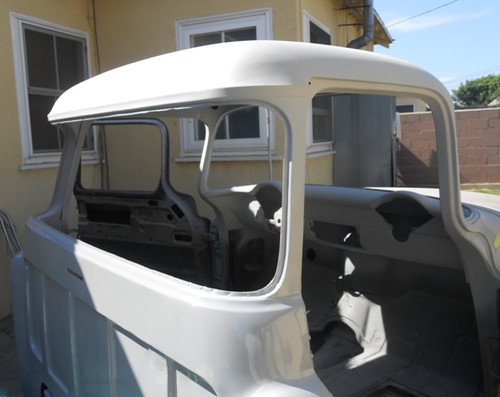
Shaved drip rails
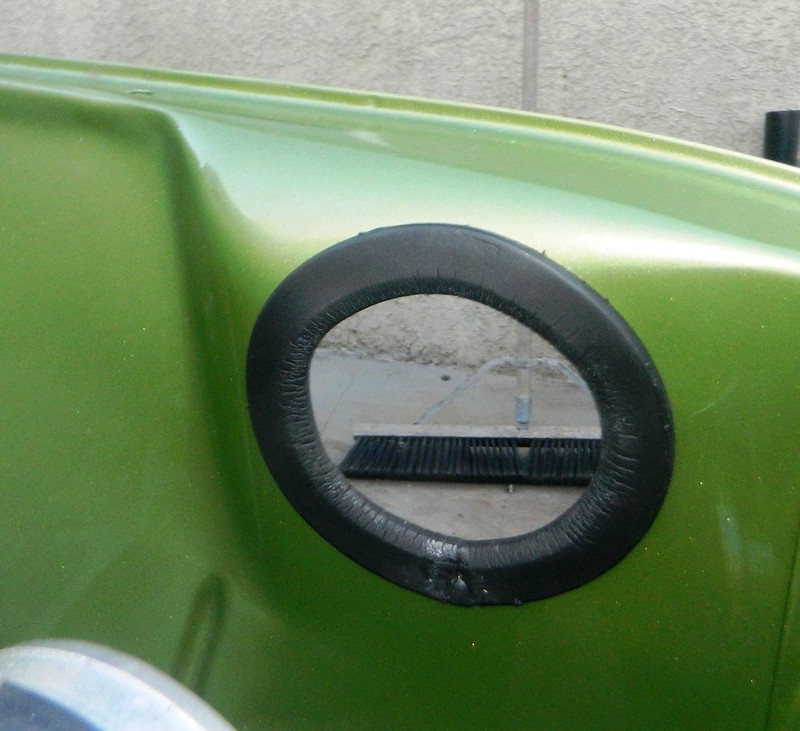
Smooth the vent cover
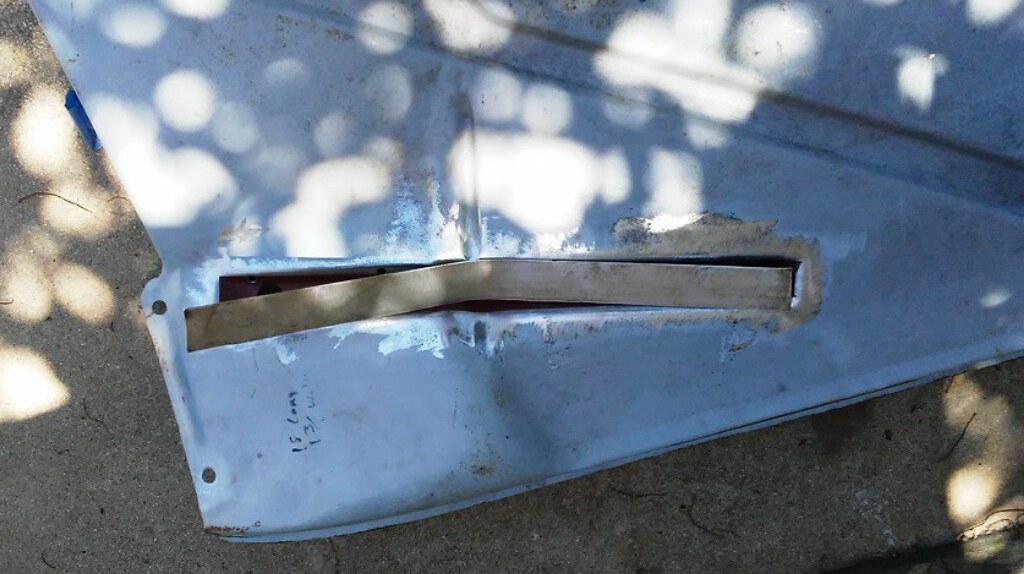
Shaved gas filler

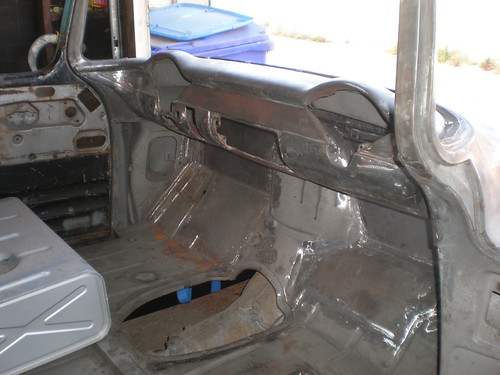
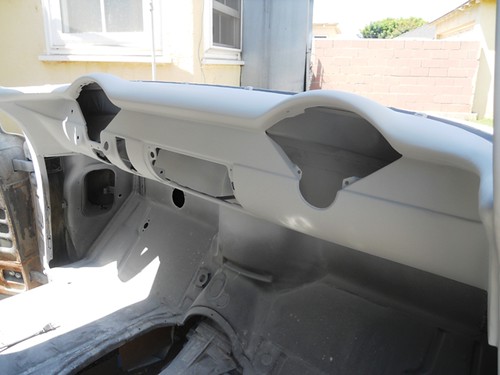
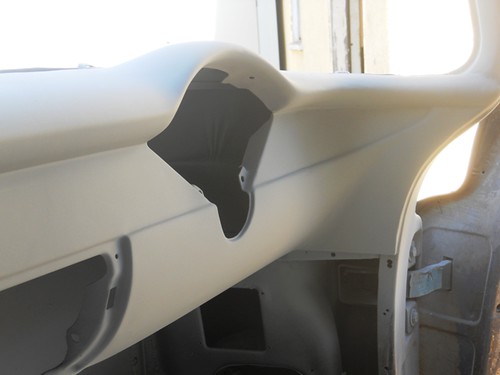
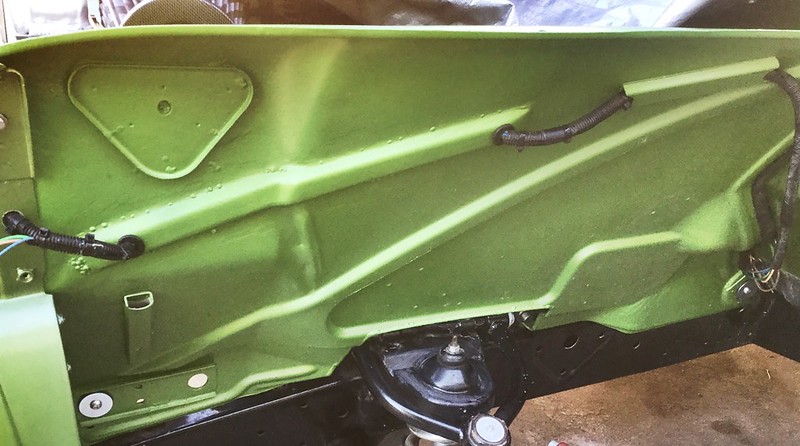
Shaved firewall

3rd brake light

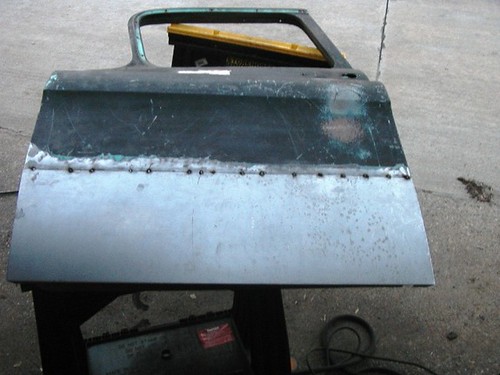
Rounded door corners

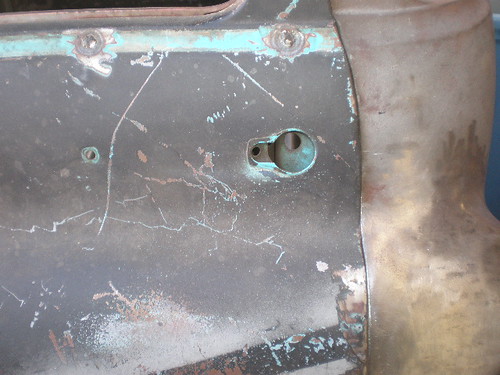
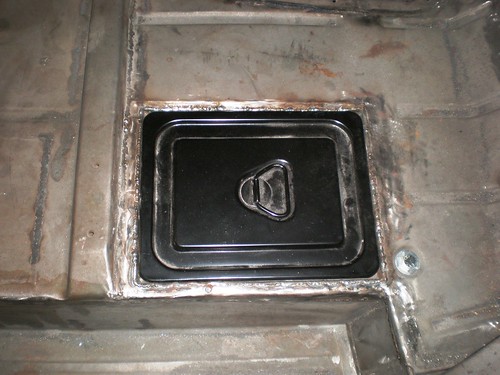
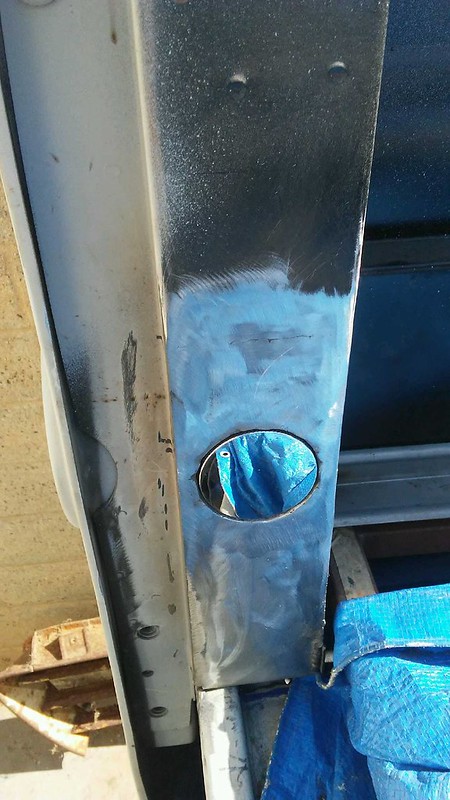
Shaved door hands and bearclaws latches installed in reverse because I want the solenoid in the cab corner instead of at the bottom of the door.
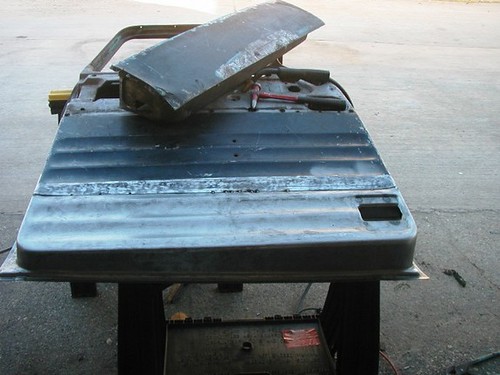
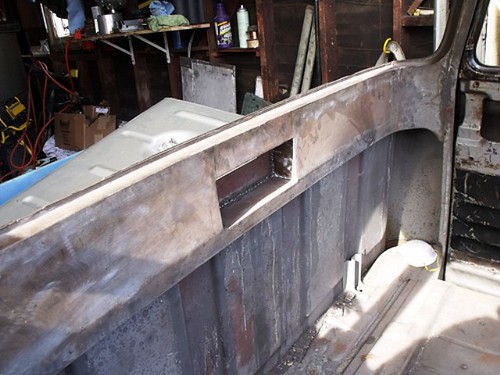
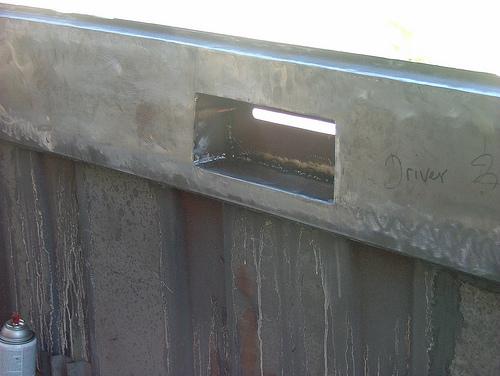
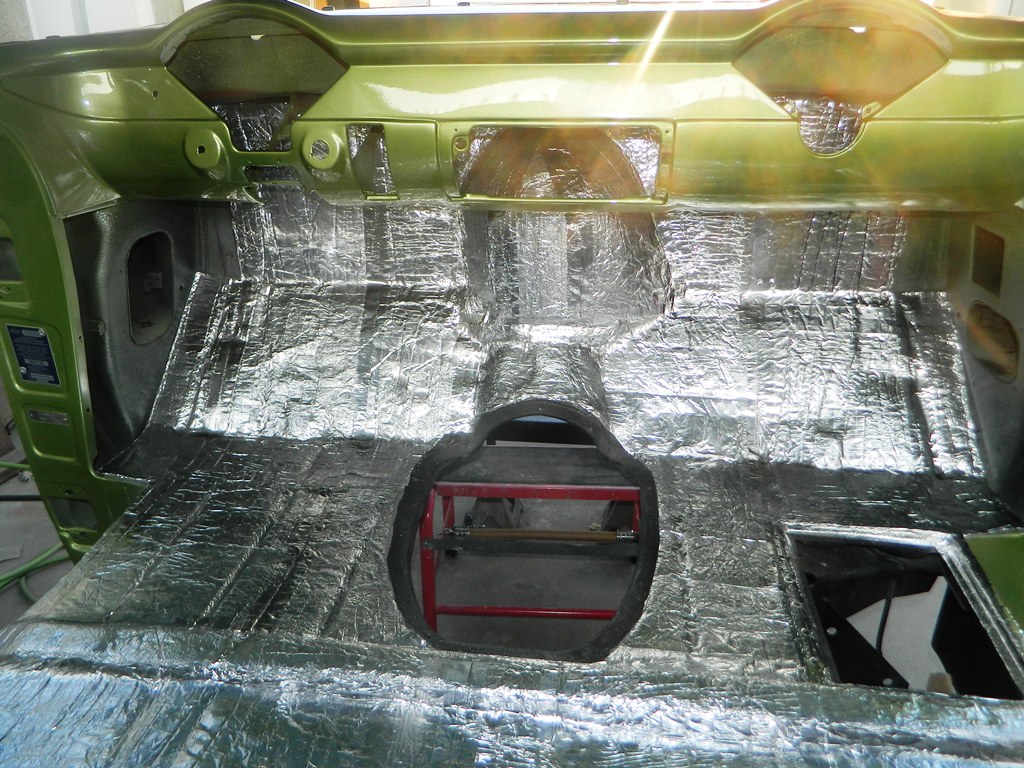
47-55 1st Series Chevy Truck Battery access door.
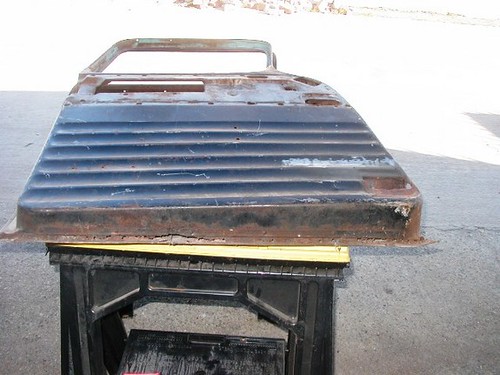
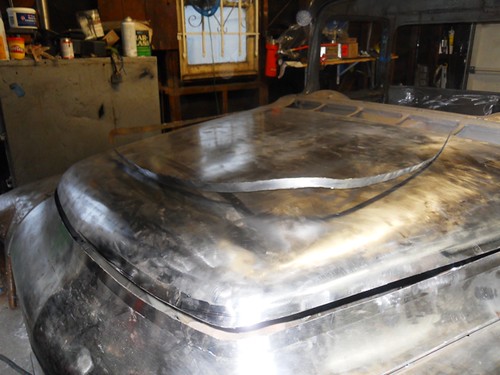
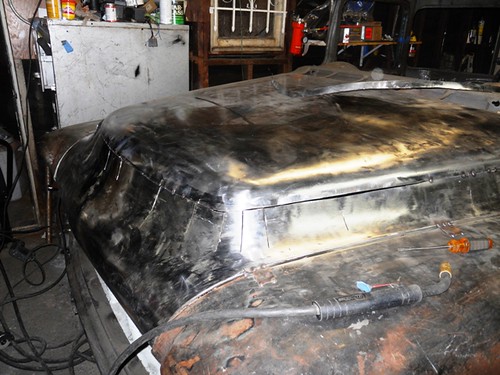
Pancaked the hood.

55 Chevy car dash
Shaved parking lights
Shaved drip rails
Smooth the vent cover
Shaved gas filler
Shaved firewall
3rd brake light
Rounded door corners
Shaved door hands and bearclaws latches installed in reverse because I want the solenoid in the cab corner instead of at the bottom of the door.
47-55 1st Series Chevy Truck Battery access door.
Pancaked the hood.
12-13-2018, 02:51 PM
#4
On The Tree
Thread Starter
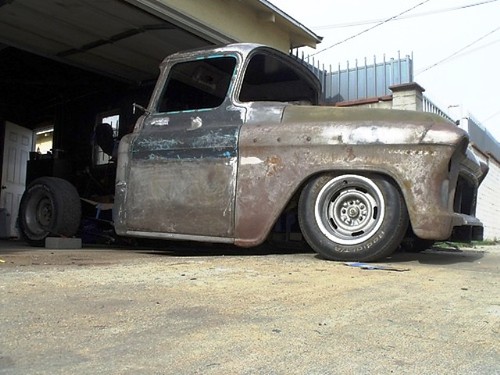
A couple of mock up pics.
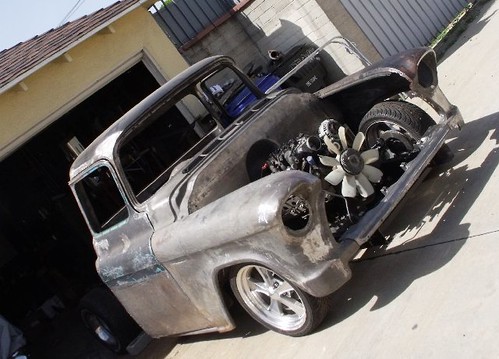
Installed the No Limit Flip Hood Kit
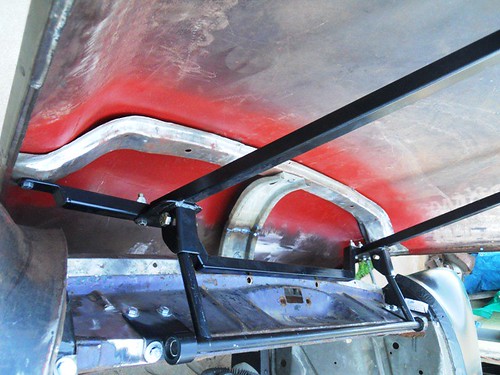
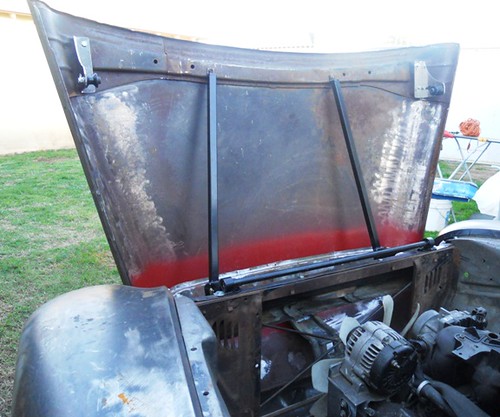
I had to add some round tubing to the front the door to get it right. I think it will look decent once I grind down the welds and make it flow on the edge. Man the door fitment on these things leaves much to be desired.
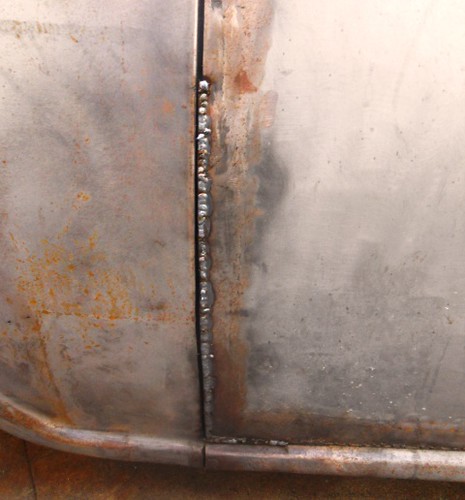
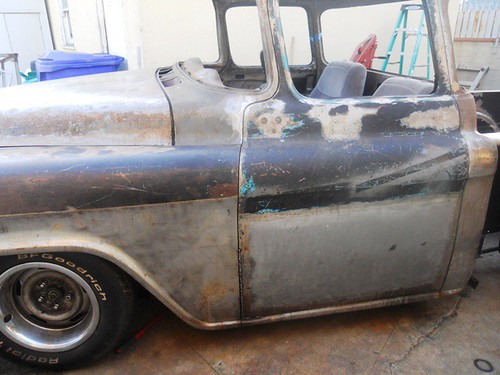
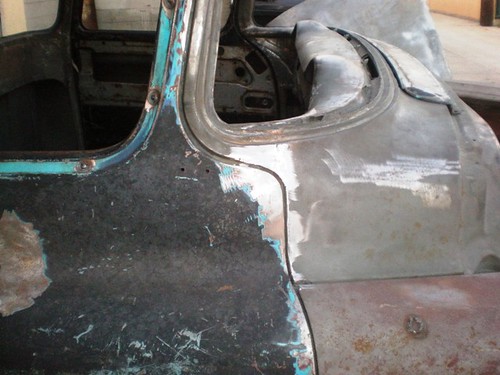
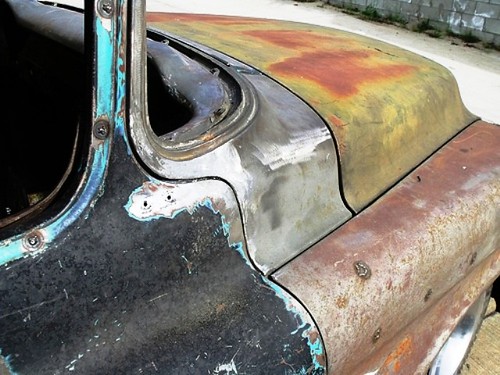
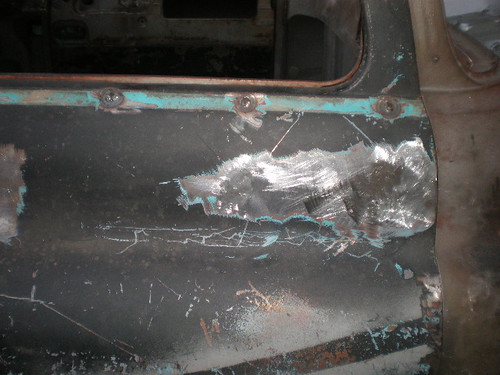
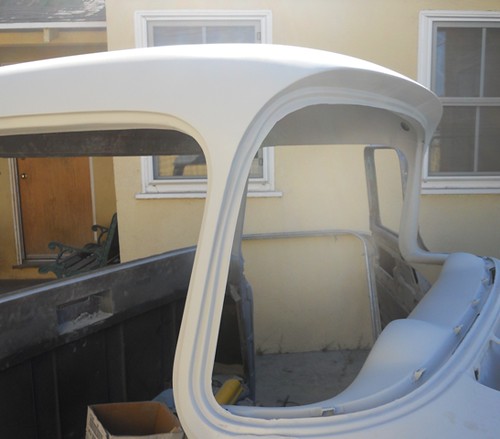
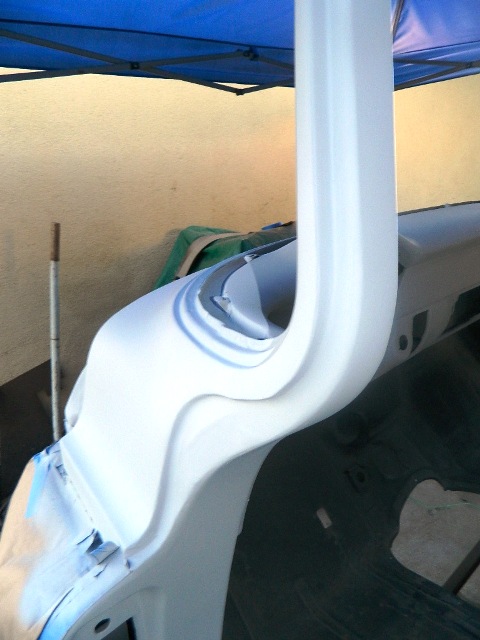
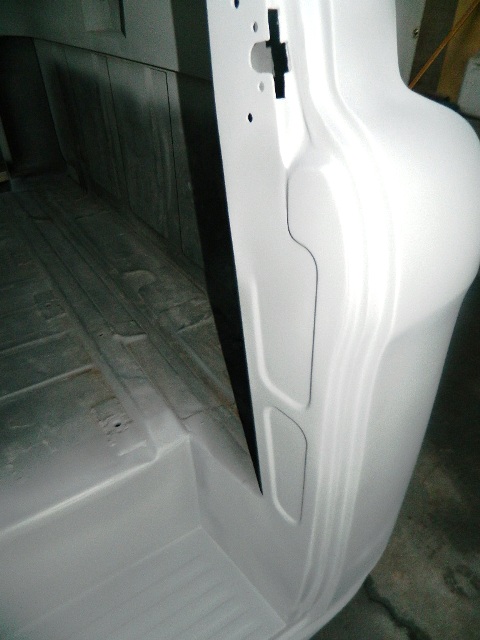
I thought since I rounded the doors in the front and shaved the drip rails I mightiest well go all the way and round the rear of the doors.
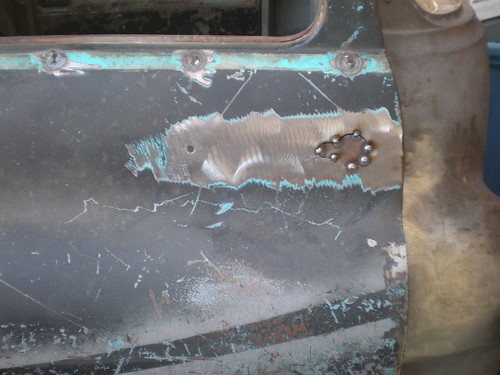
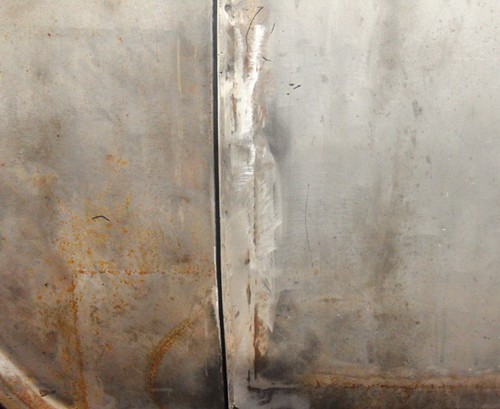
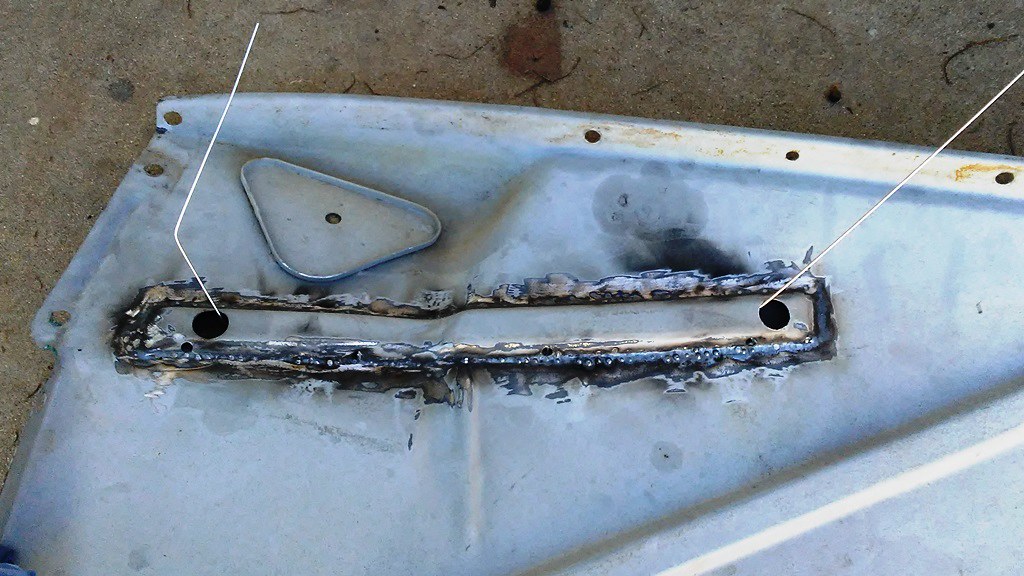
I welded up the seam in this area. I then used Duraglass over the welds to smooth everything out.
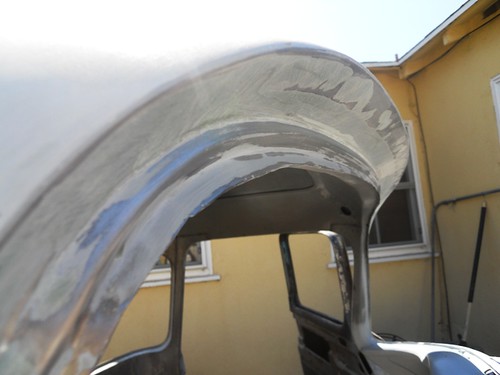
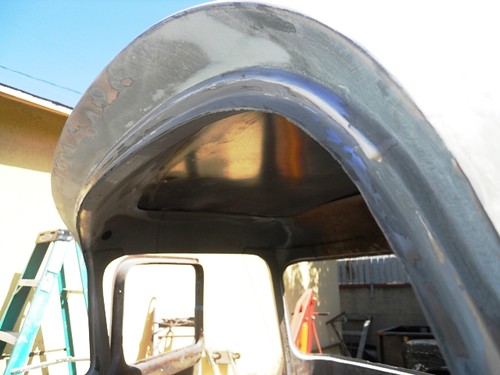
A little primer and I like it much better than that unfinished look that came from the factory.
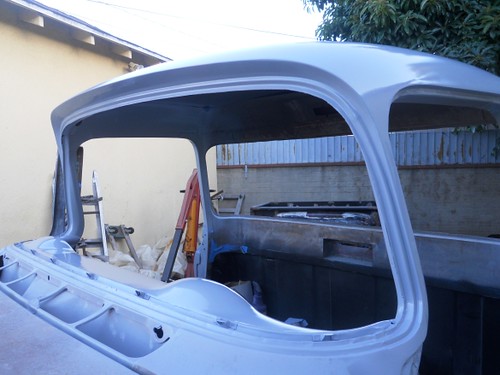
Its getting there I guess I'll keep chipping away at it inch by inch.

Installed the No Limit Flip Hood Kit
I had to add some round tubing to the front the door to get it right. I think it will look decent once I grind down the welds and make it flow on the edge. Man the door fitment on these things leaves much to be desired.
I thought since I rounded the doors in the front and shaved the drip rails I mightiest well go all the way and round the rear of the doors.
I welded up the seam in this area. I then used Duraglass over the welds to smooth everything out.
A little primer and I like it much better than that unfinished look that came from the factory.
Its getting there I guess I'll keep chipping away at it inch by inch.
12-13-2018, 02:53 PM
#5
On The Tree
Thread Starter

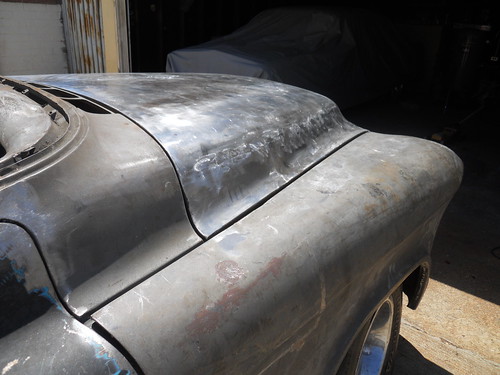
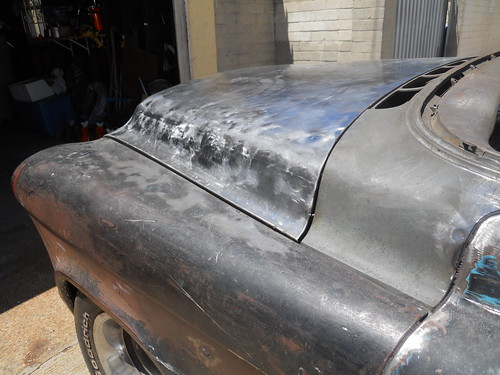
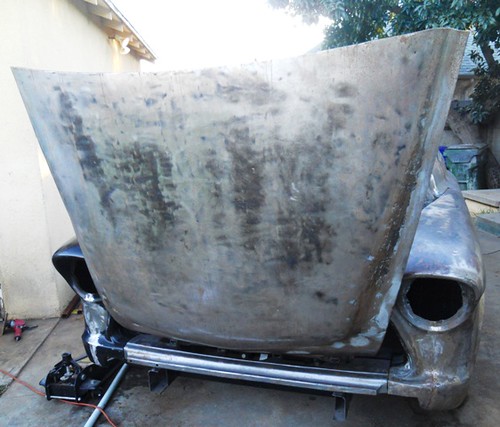
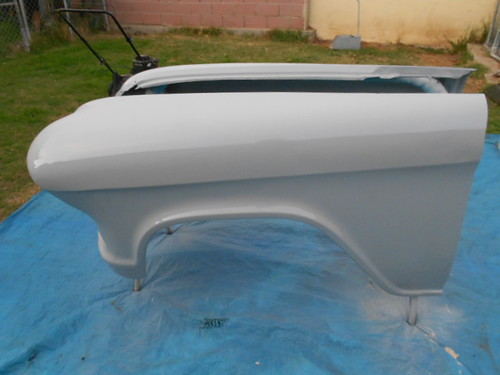
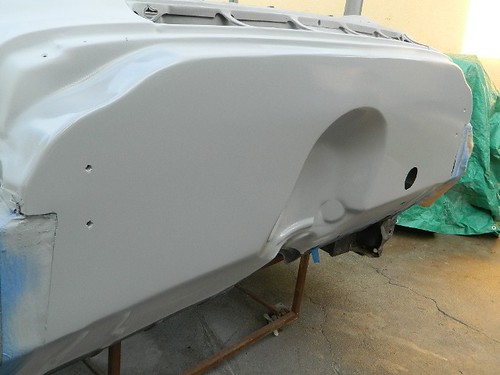
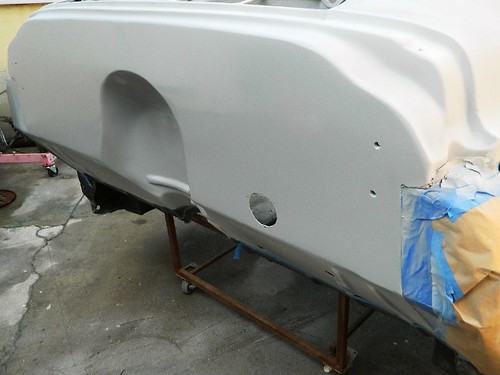
Fenders in primer, still needs to be blocked but they are coming along.
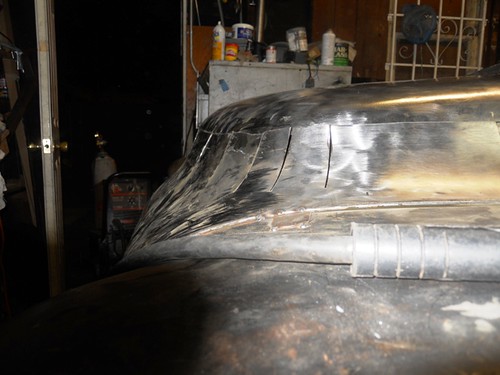
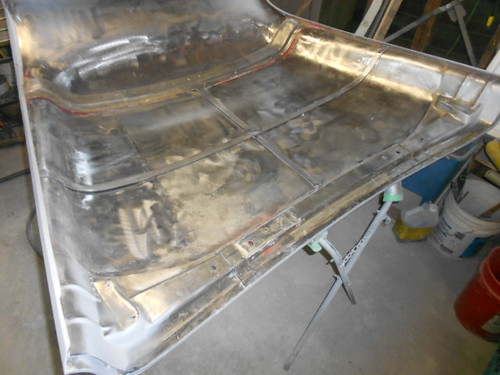
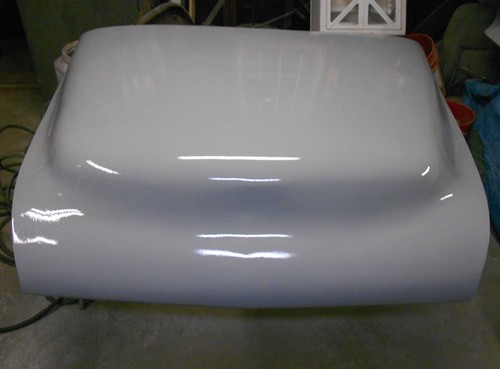
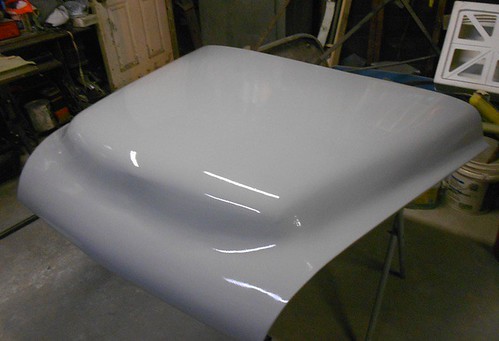
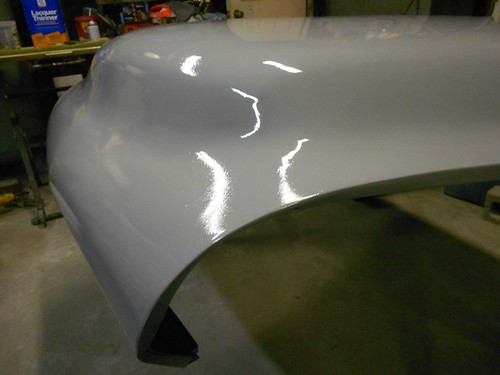
I got the sectioned hood in primer. It was a lot of hammer and dolly work but here it is.
Oh yeah I had to make a brace for the sectioned hood. I made it out of 1 inch wide and 1/4 thick flat stock. Making it flow with the radius of the side of the hood took some thought but it came out decent.


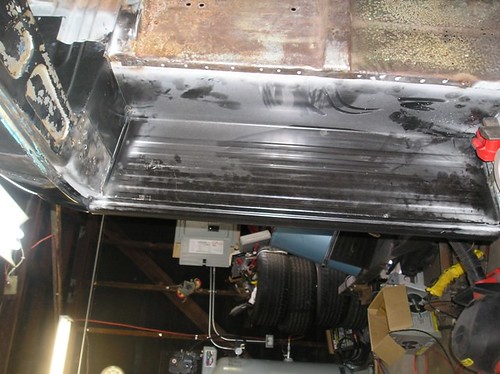
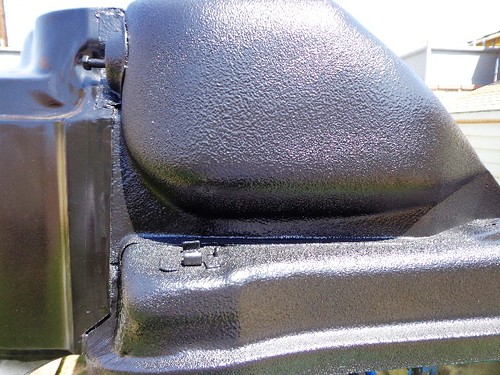
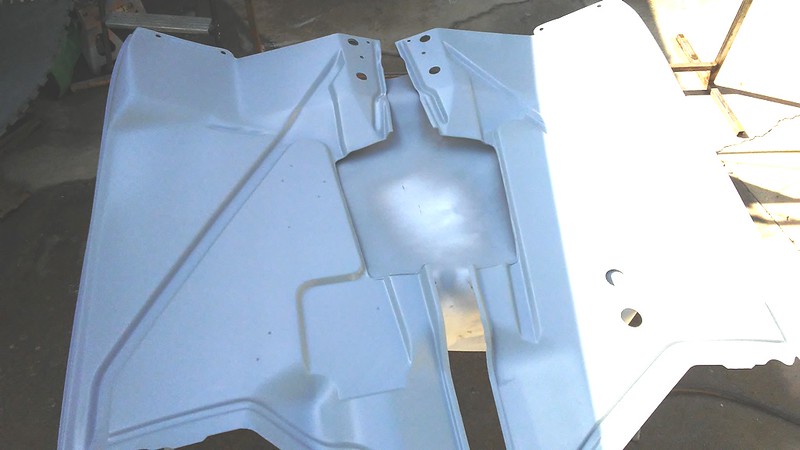
Undercoated the bottom of the cab with a bedliner kit. I will also be spraying it on the interior floor.

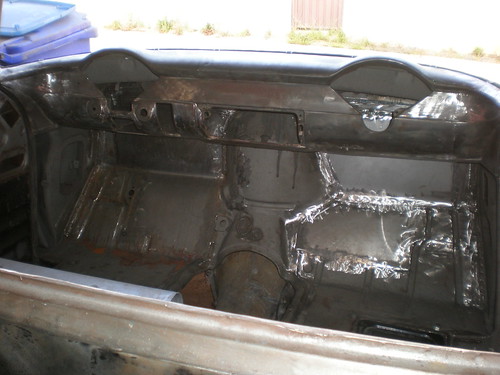
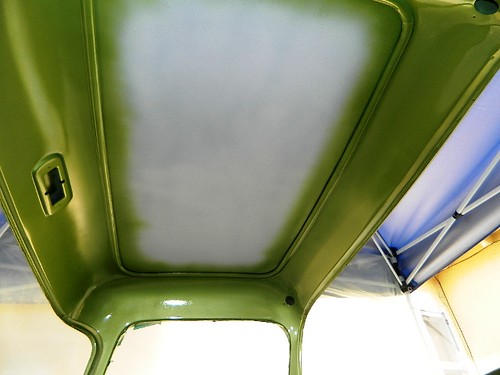
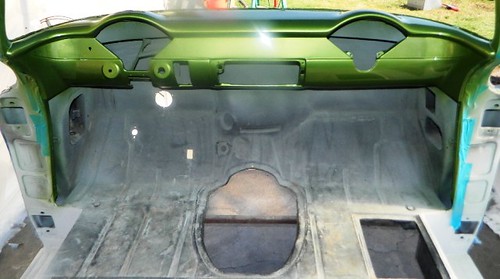
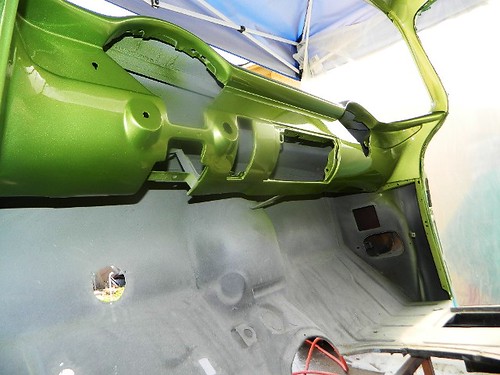
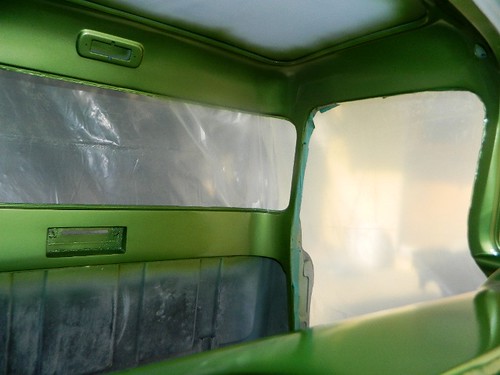
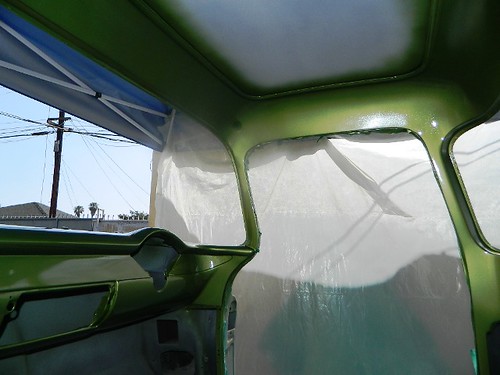
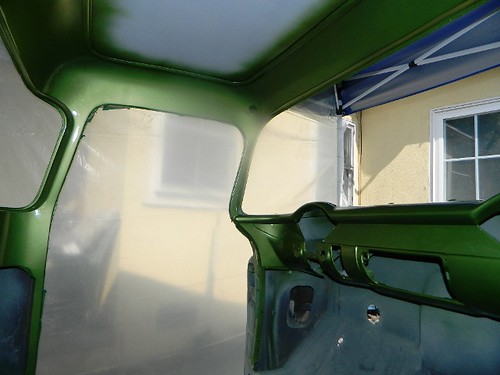
I welded up all the interior seams and grind them smooth to give it that smooth and finished look that was lacking from the factory. I got it in primer and now it needs to be blocked sanded. I'm happy with the look so far. It was a lot of work but I've been told many times that the devil is in the details.
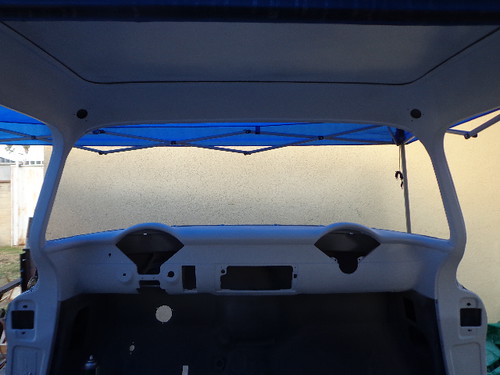

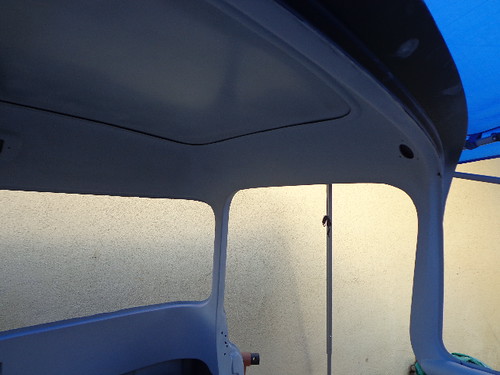
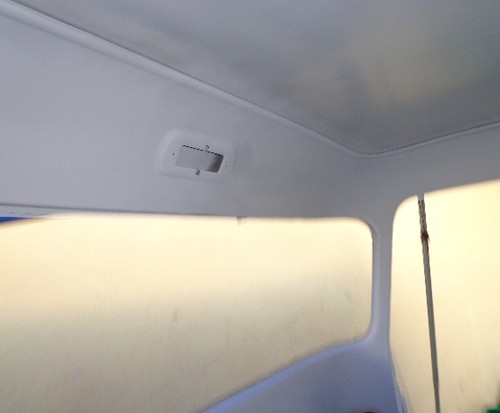
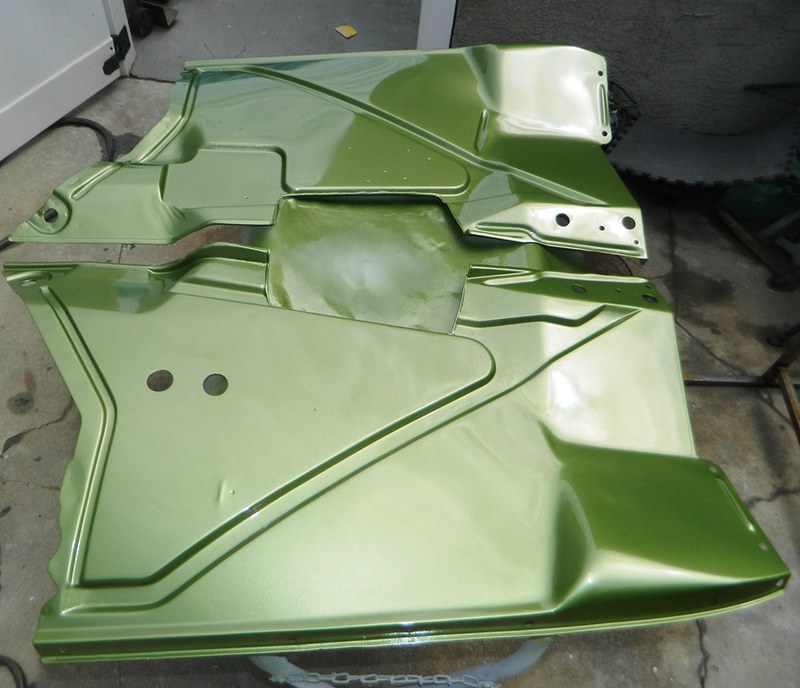
More smoothing seams.


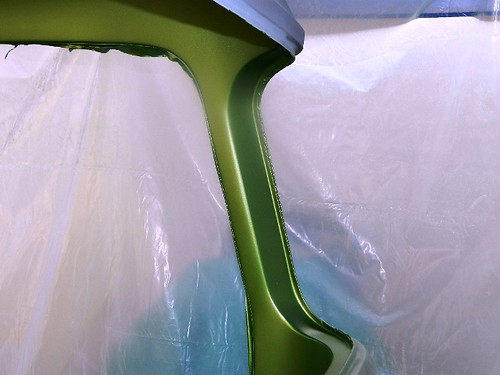
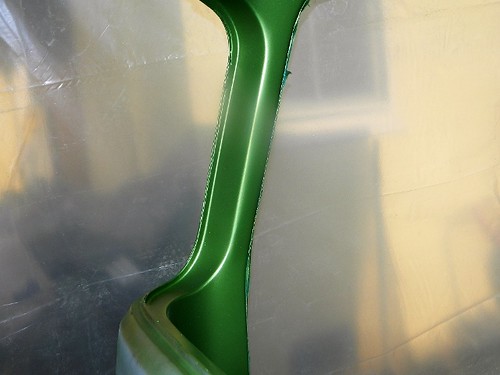
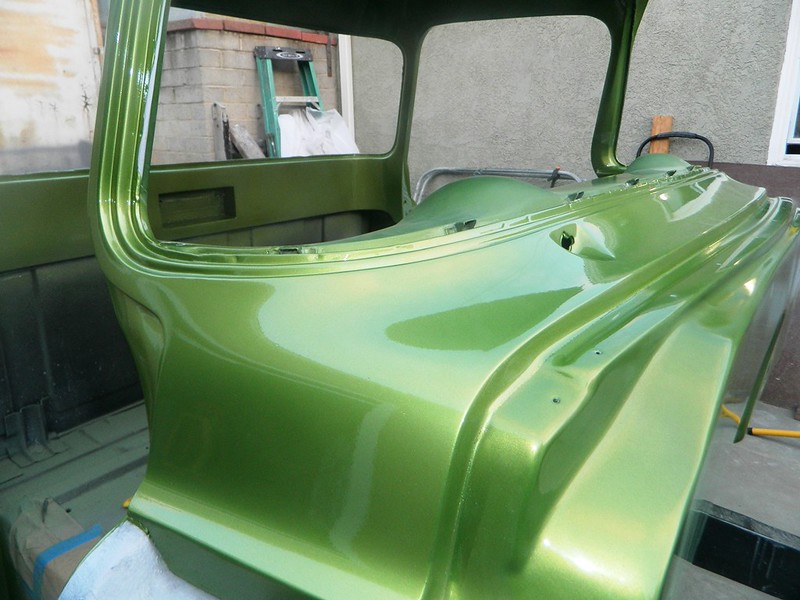
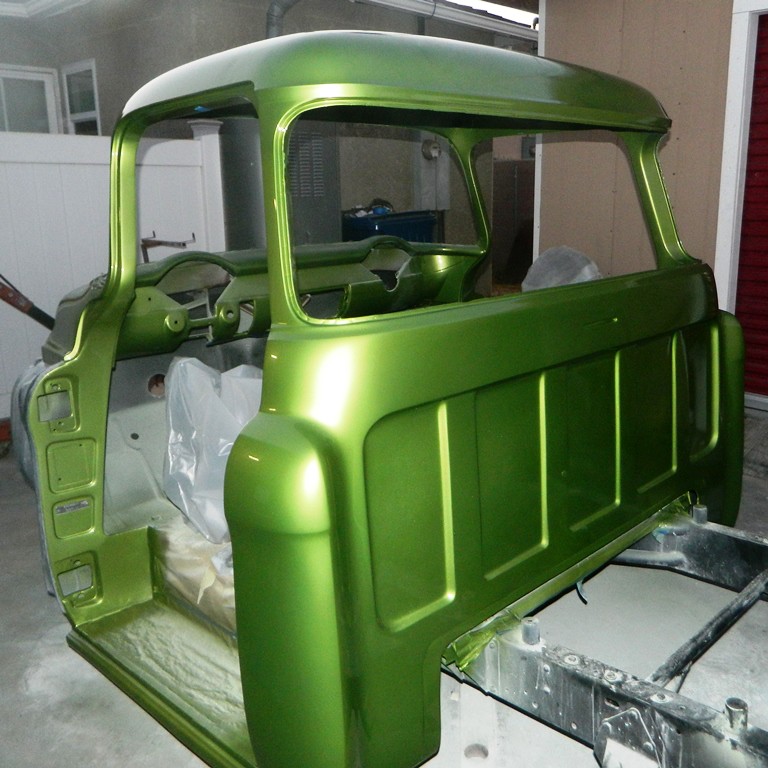
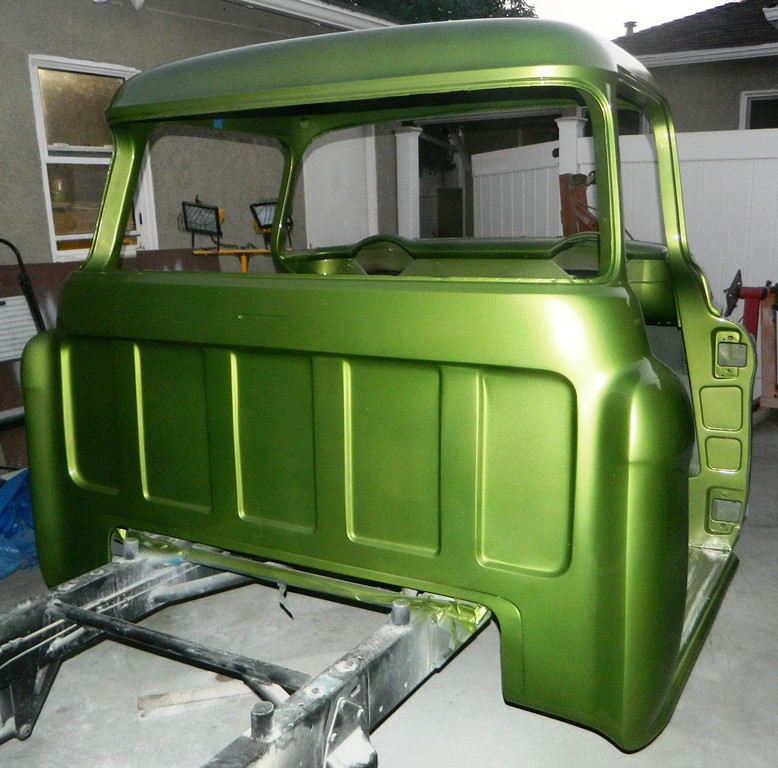
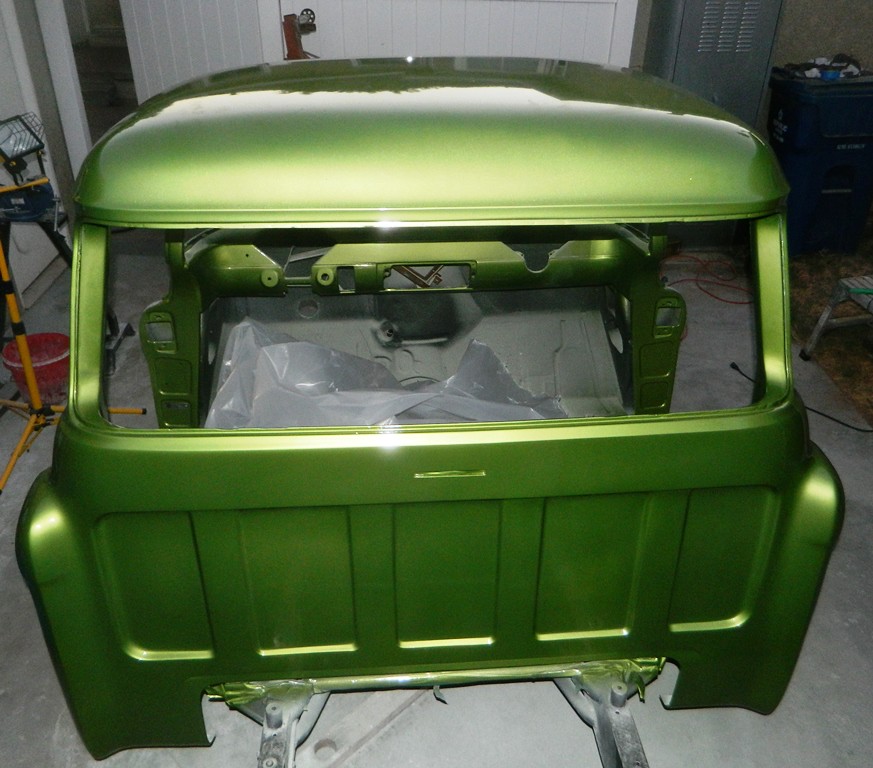
Well I finally got some color on the truck, well the interior. I could not wait to see want the color would look like so I just thought I'd shoot the interior just to see if I really liked it.
Last edited by BAM55; 12-13-2018 at 06:29 PM.
12-13-2018, 03:01 PM
#6
On The Tree
Thread Starter
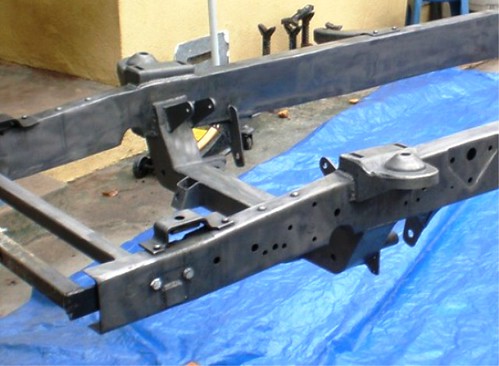
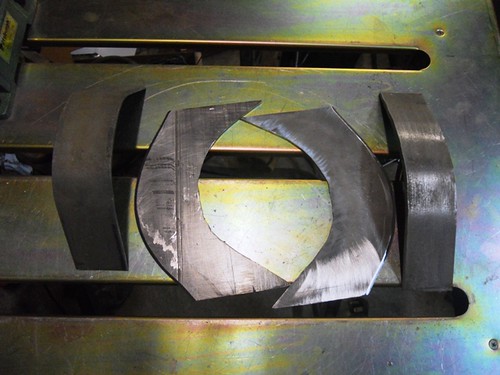
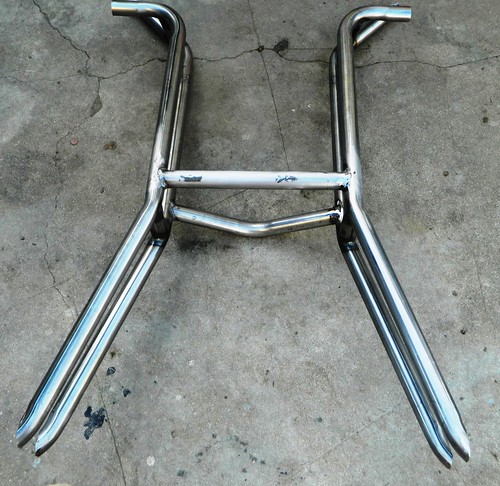
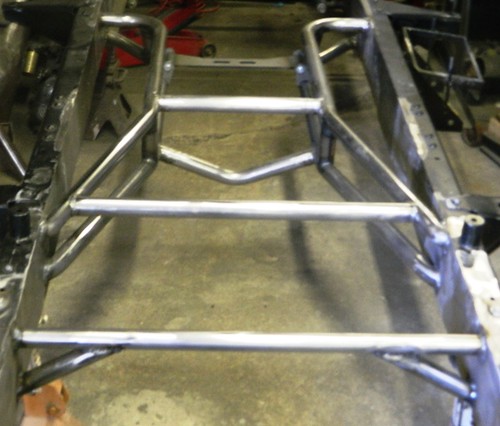
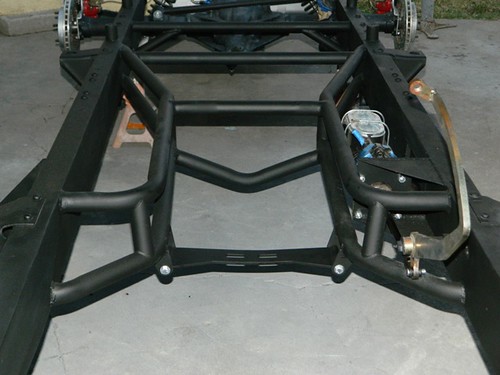
I could not help myself.lol I always wanted the progressive automotive x member/transmission mount but put it off due to cost. But it keep calling me so I broke down and bought it. Well anyway here it is.
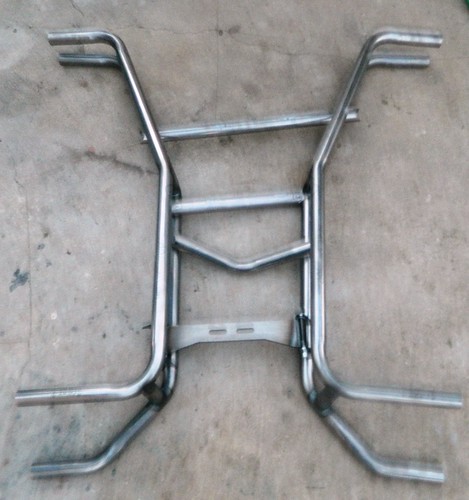
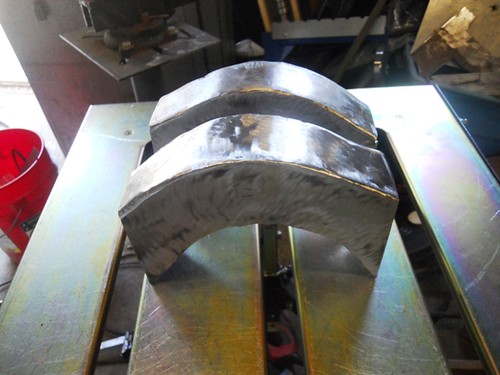
Welded together and cut down for installation
Installed. Removing the factory crossmembers were a lot of work but I like this better.
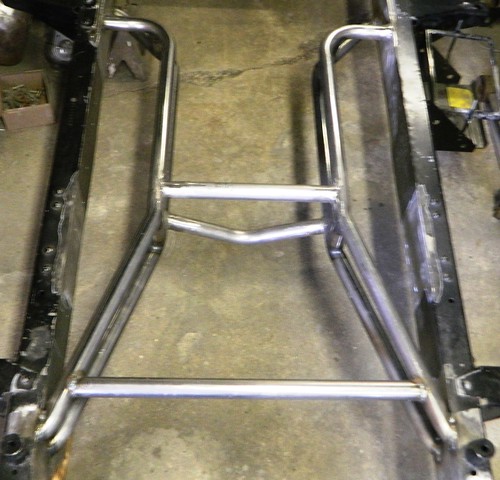
The Transmission mount is just sitting there in this pic, it will not be welded in until engine and trans mockup.
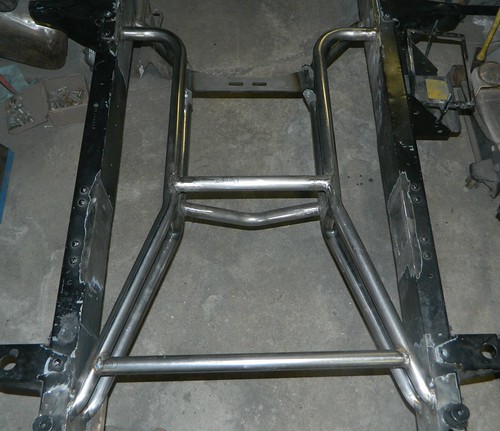
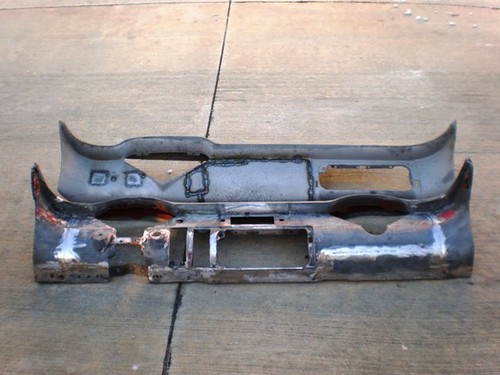
I also decided to fab up a tubular cross member to replace the factory one.

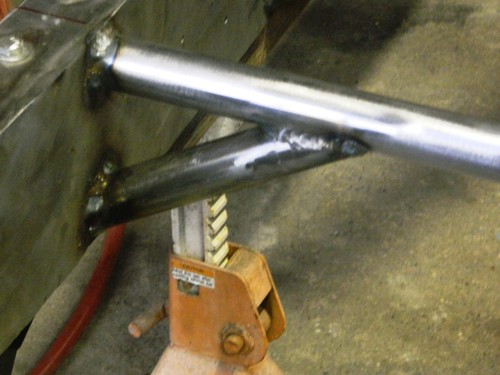
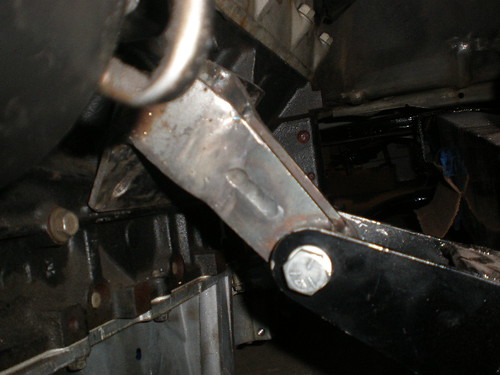
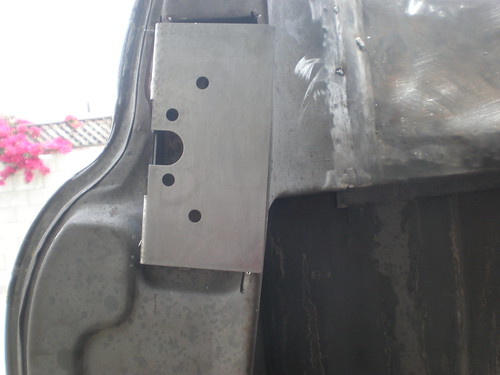
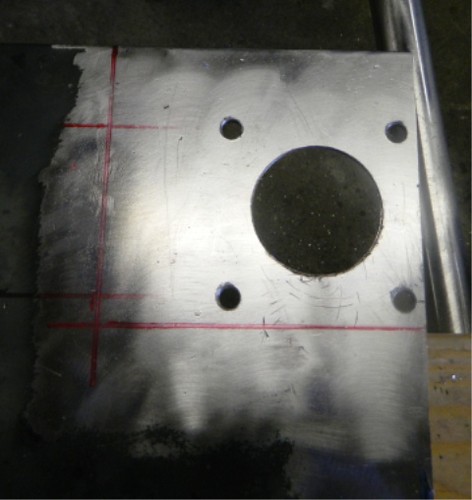
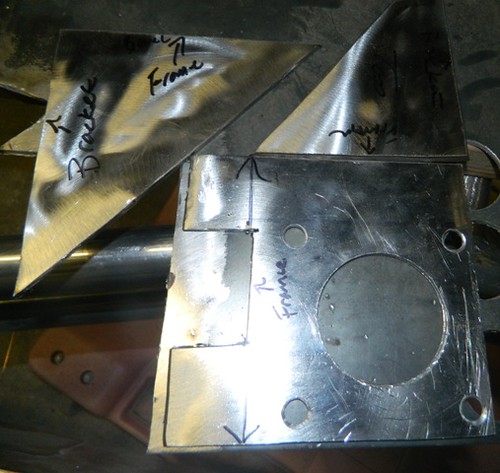
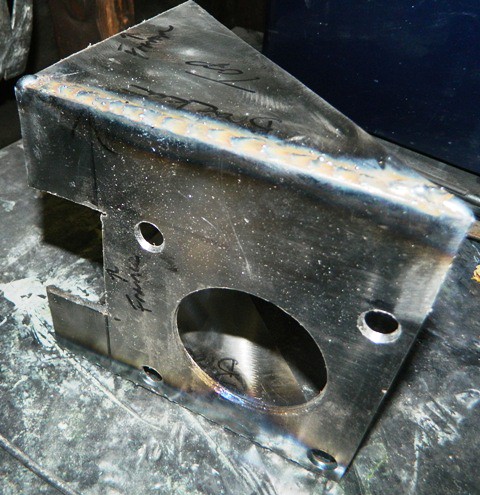
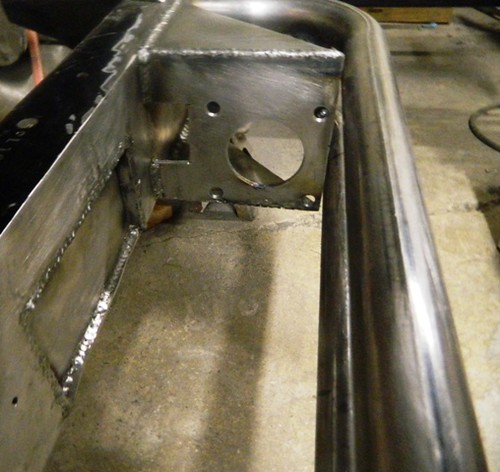
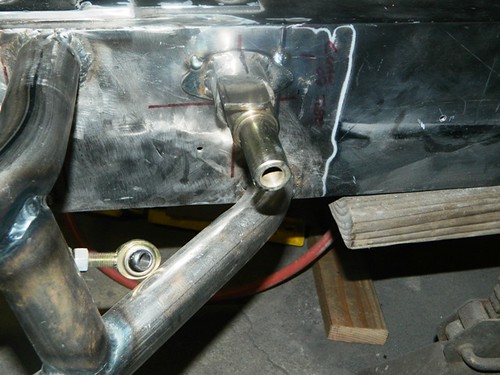
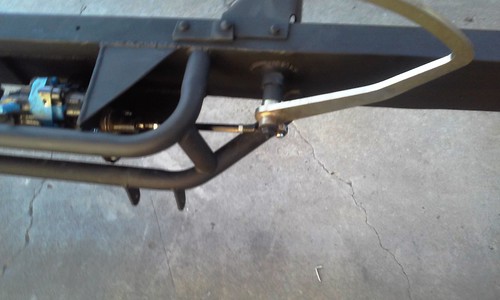
The set back of installing the x member means I can no longer use the factory brake assembly. So here is my brake bracket I fabricated. As you can see I also had to notch the
frame to have clearance for the Hydroboost unit.
Welded together and cut down for installation
Installed. Removing the factory crossmembers were a lot of work but I like this better.
The Transmission mount is just sitting there in this pic, it will not be welded in until engine and trans mockup.
I also decided to fab up a tubular cross member to replace the factory one.
The set back of installing the x member means I can no longer use the factory brake assembly. So here is my brake bracket I fabricated. As you can see I also had to notch the
frame to have clearance for the Hydroboost unit.
Last edited by BAM55; 12-13-2018 at 03:11 PM.
12-13-2018, 03:12 PM
#7
On The Tree
Thread Starter
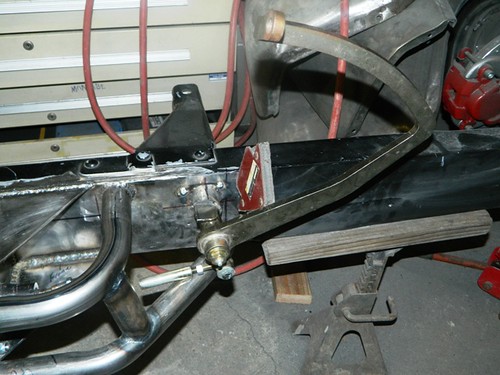
I modified the panel assembly, all that is required is a push rod extension but I think I better wait until the cab is back on to mock it up so that I know the brake is in the right spot.
Here is the piece I fabricated for the pedal assembly.
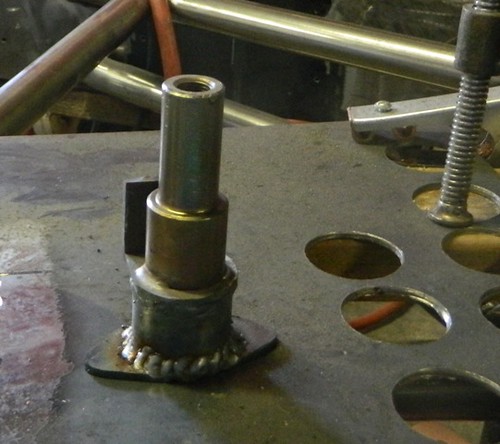
After a lot of measuring here it is tacked in place. I'm going to leave it tacked until the cab is back on the frame, because I may have to move it a little bit.
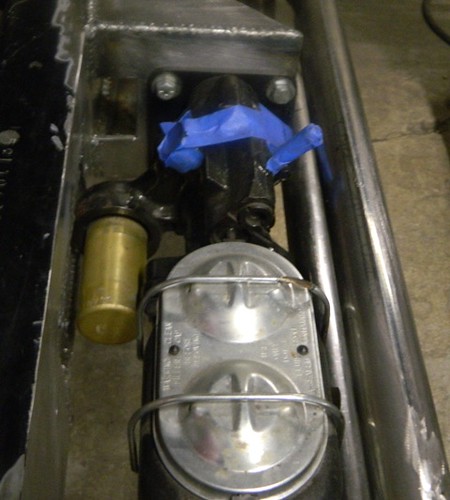
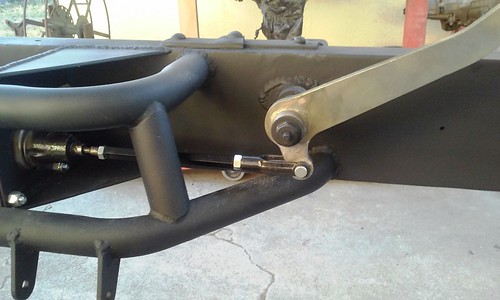
Here is the pedal installed. Yes the push rod connection clears the bottom tube by about 1/2 inch. As you can see I need to make or purchase a longer push rod extension.
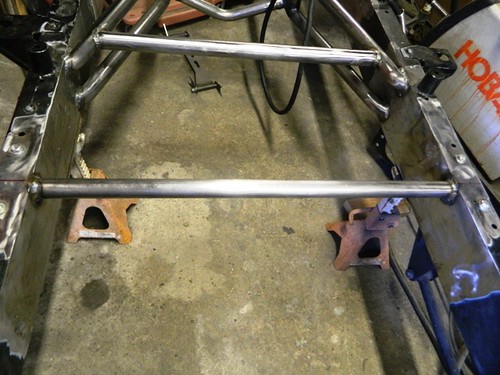
Well I got the frame repainted.
Here is the push rod connection to the brake pedal I had to fab up the mount for the brake pedal.
Here is the piece I fabricated for the pedal assembly.
After a lot of measuring here it is tacked in place. I'm going to leave it tacked until the cab is back on the frame, because I may have to move it a little bit.
Here is the pedal installed. Yes the push rod connection clears the bottom tube by about 1/2 inch. As you can see I need to make or purchase a longer push rod extension.
Well I got the frame repainted.
Here is the push rod connection to the brake pedal I had to fab up the mount for the brake pedal.
Trending Topics
12-13-2018, 03:14 PM
#8
On The Tree
Thread Starter
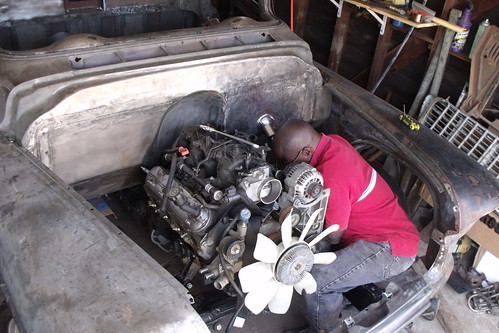
LS engine.
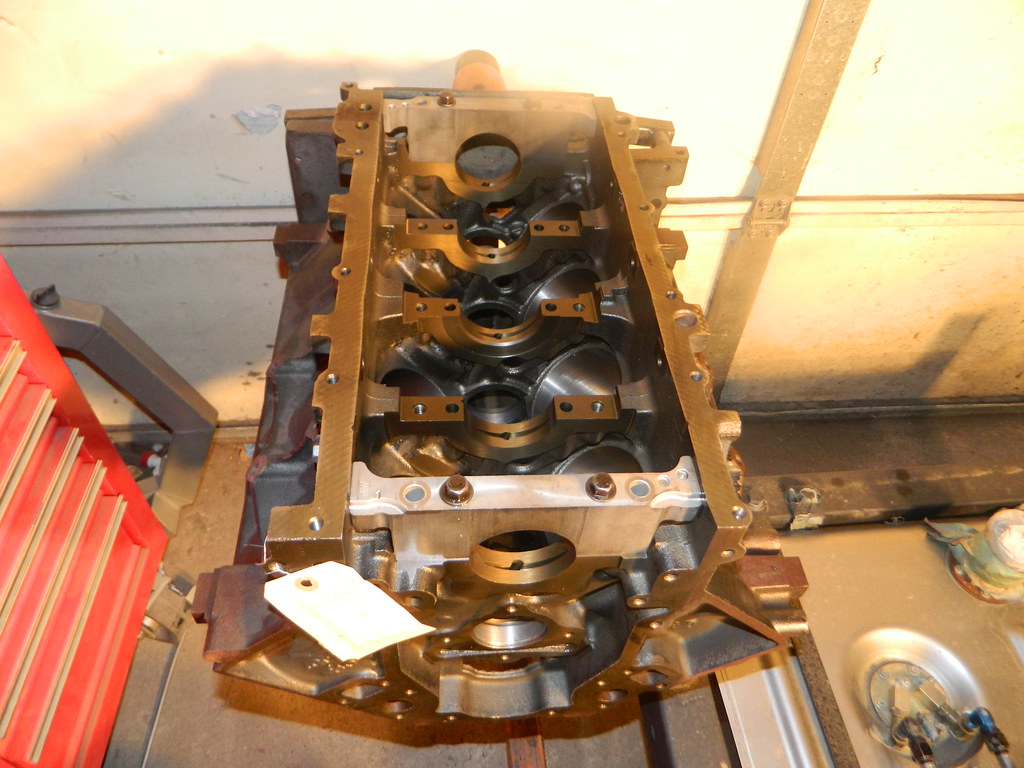
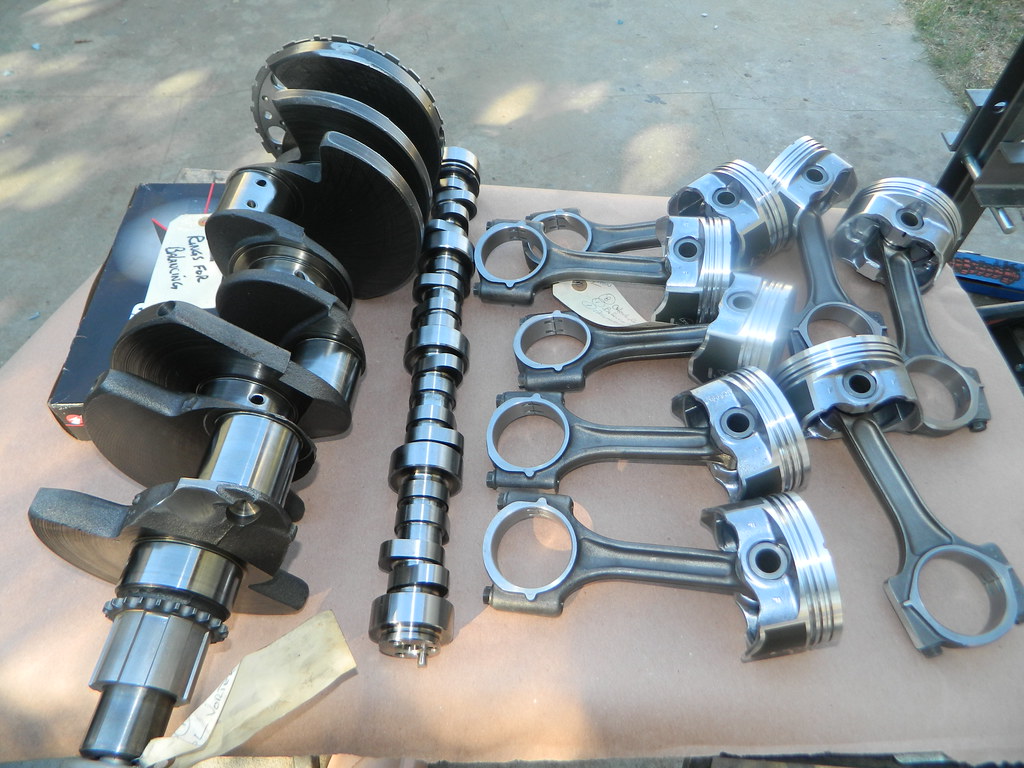
It was sitting so long that I just want to rebuild it. I bored it to a 5.7 and added 5.7 flattop pistons, and TSP 228r cam, and ARP rod bolts,
other than that the rotating assembly is stocked.
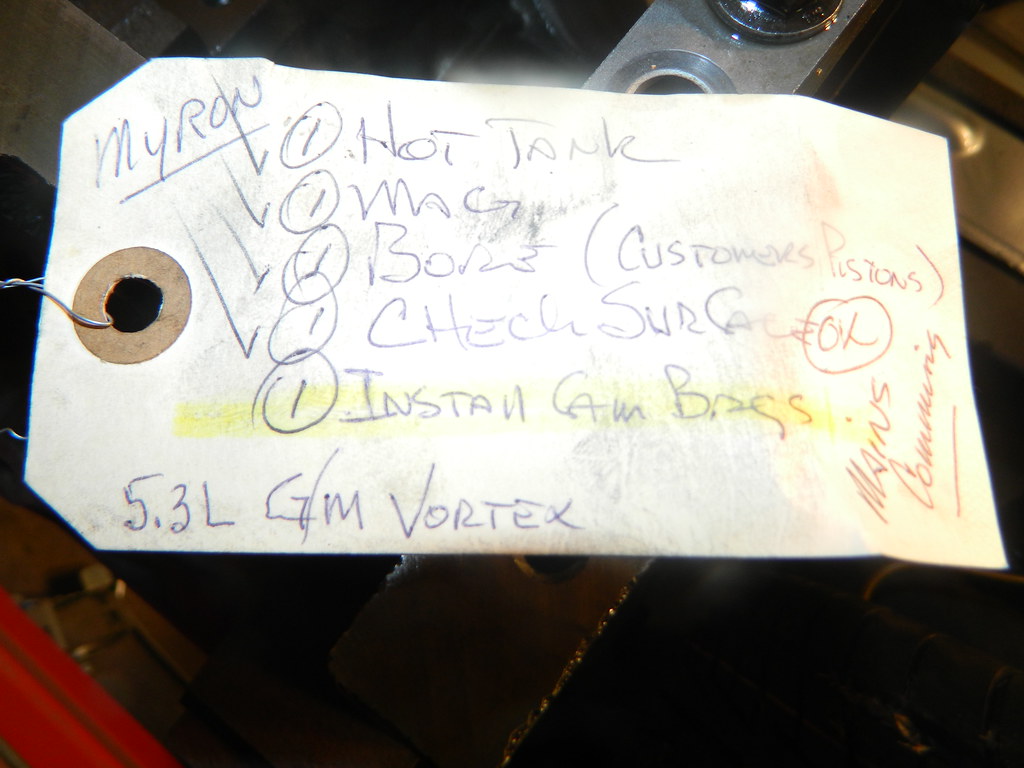
Bare block when it came back from the machine shop
Rotating Assembly right before I installed it.
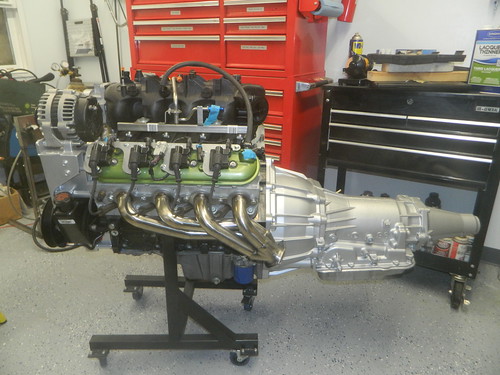
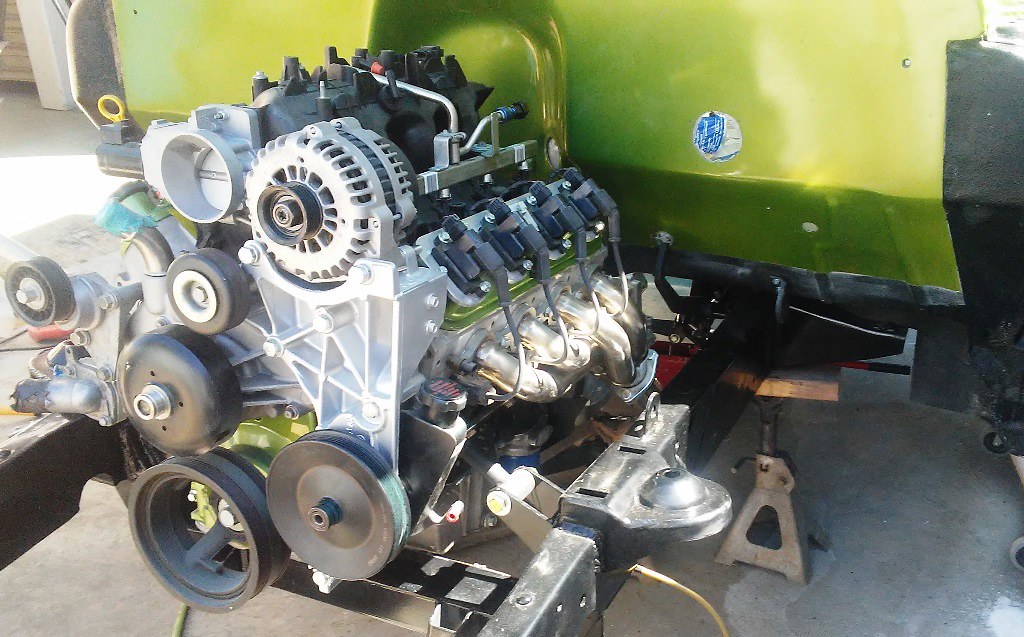
Engine back together. Oh I also brought some used 243 heads of ebay and had them rebuilt also.
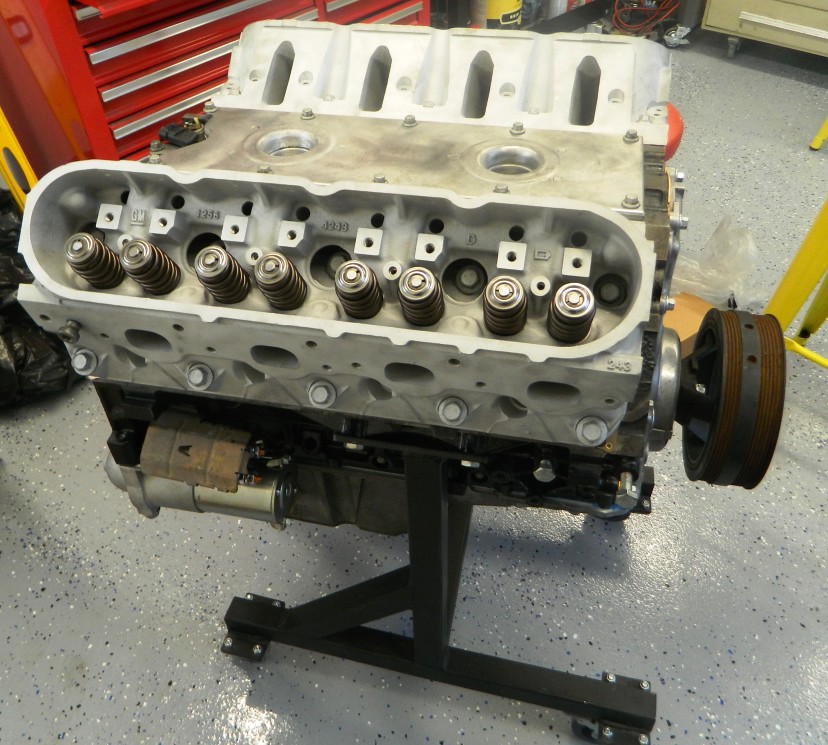
Other things I did was paint the valve the same color as the trucks and found some aftermarket coil brackets that I like way better than the OEM ones and headers.
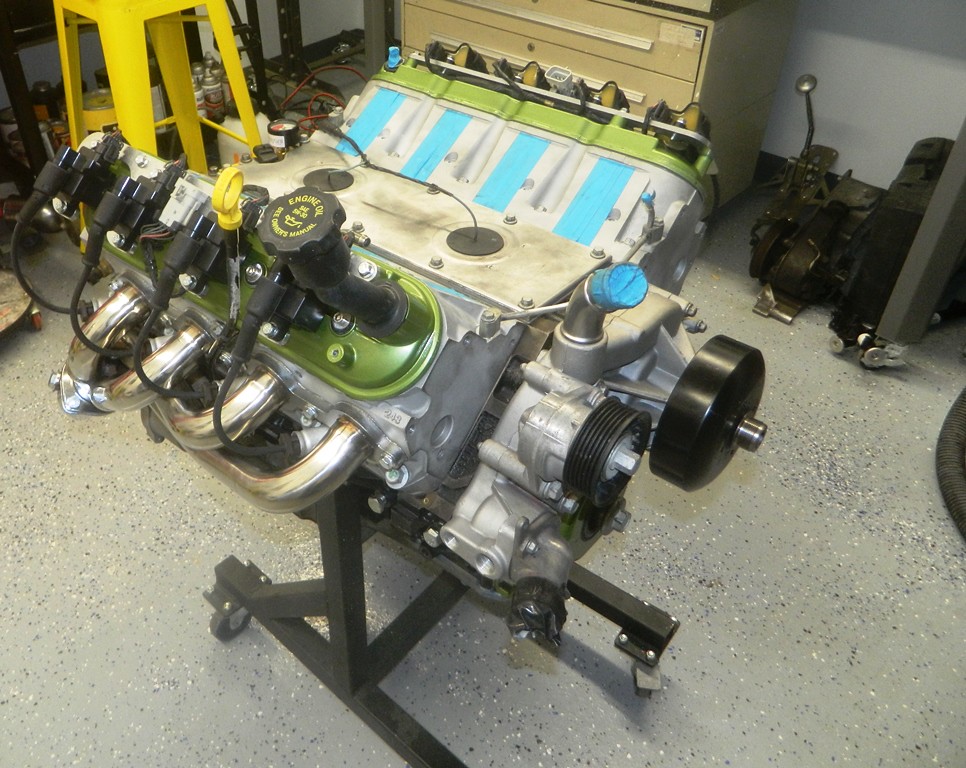
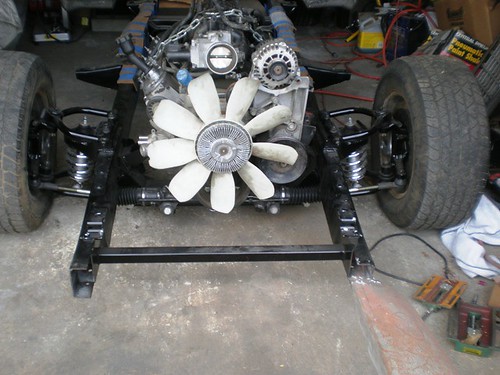
Ready to fire it up for the first time. I only let it run a little while due to no radiator. My setup is a engine dolly I made, along with a front that is removable.
It just slides into the legs of the dolly. For gas I used Lawn Mower gas tank that I modified for a return line, PSI wiring harness and basic tune (still have to have it tuned for the cam), external fuel pump, corvette filter regulator, and drive by wire.

Here is a link to a short video of it running. I only let it run for a short time due to no radiator. It sounds pretty good.
Here's a link to it running for the first time
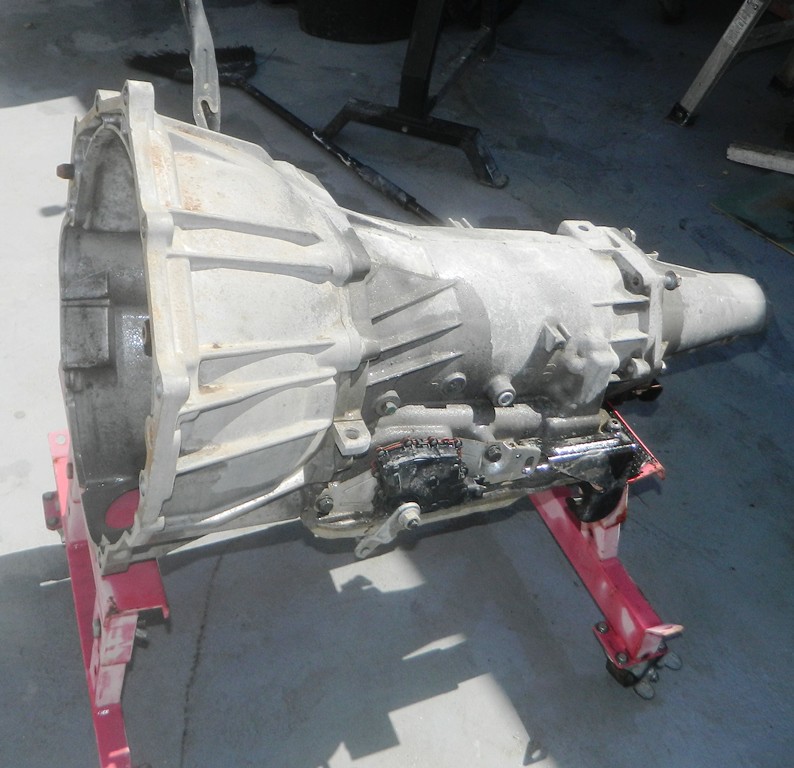
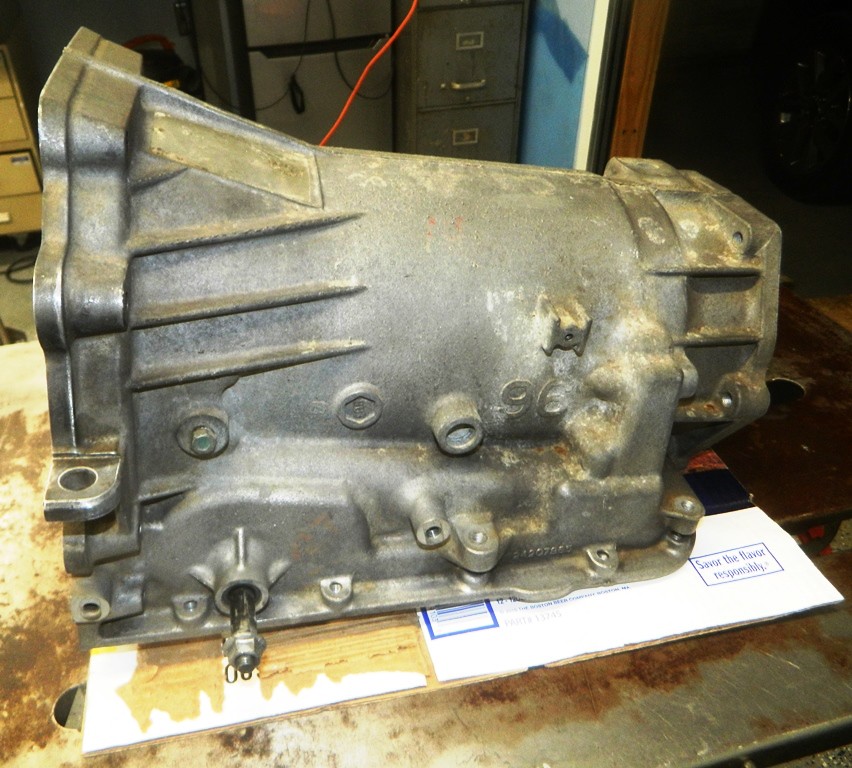
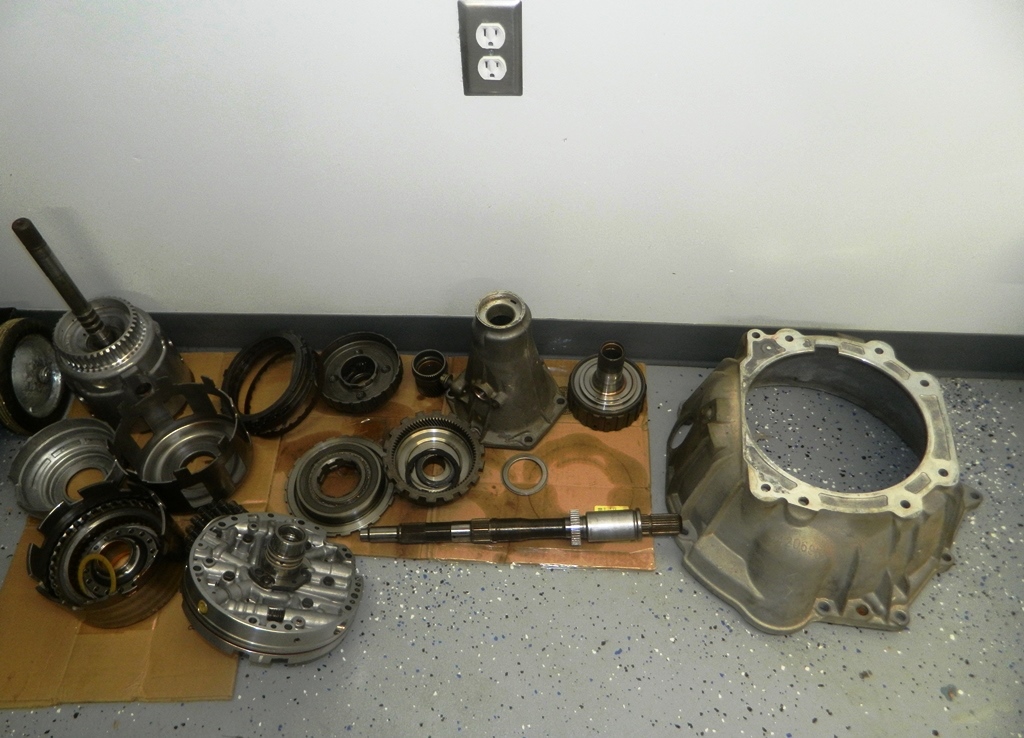
Here are some pics of the trans tear down and cleaned up.
It was sitting so long that I just want to rebuild it. I bored it to a 5.7 and added 5.7 flattop pistons, and TSP 228r cam, and ARP rod bolts,
other than that the rotating assembly is stocked.
Bare block when it came back from the machine shop
Rotating Assembly right before I installed it.
Engine back together. Oh I also brought some used 243 heads of ebay and had them rebuilt also.
Other things I did was paint the valve the same color as the trucks and found some aftermarket coil brackets that I like way better than the OEM ones and headers.
Ready to fire it up for the first time. I only let it run a little while due to no radiator. My setup is a engine dolly I made, along with a front that is removable.
It just slides into the legs of the dolly. For gas I used Lawn Mower gas tank that I modified for a return line, PSI wiring harness and basic tune (still have to have it tuned for the cam), external fuel pump, corvette filter regulator, and drive by wire.
Here is a link to a short video of it running. I only let it run for a short time due to no radiator. It sounds pretty good.
Here's a link to it running for the first time
Here are some pics of the trans tear down and cleaned up.
12-13-2018, 03:18 PM
#9
On The Tree
Thread Starter
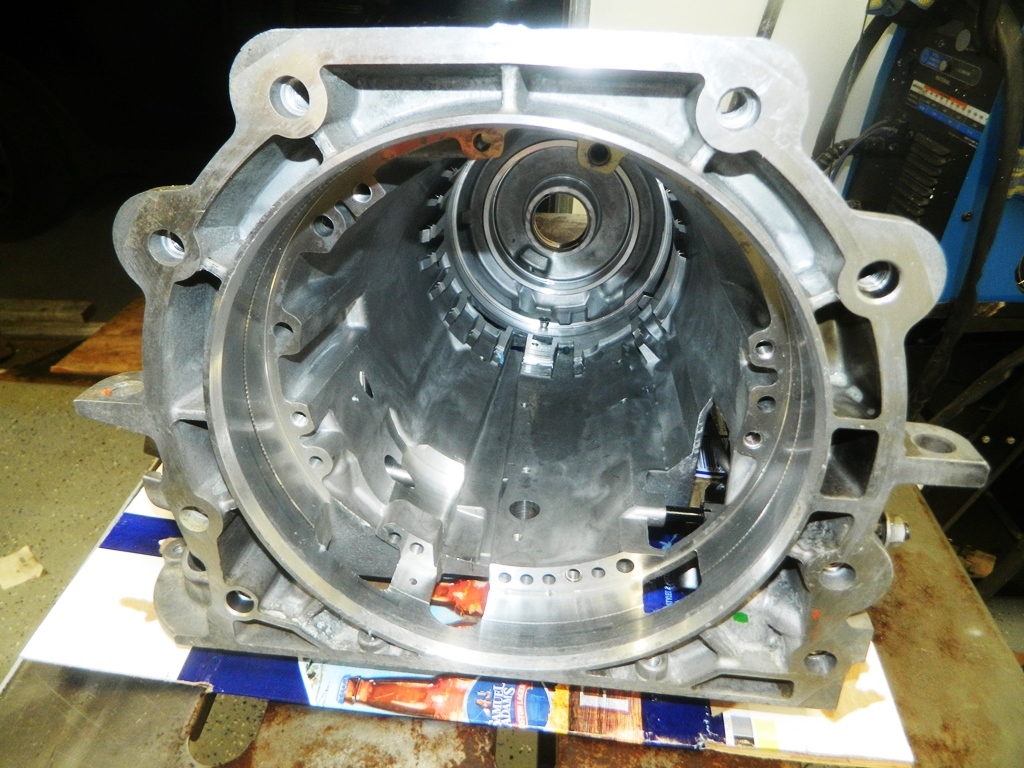
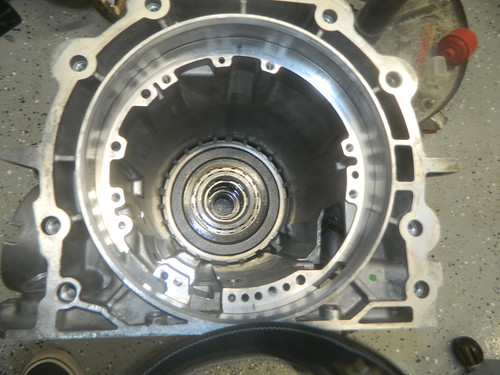
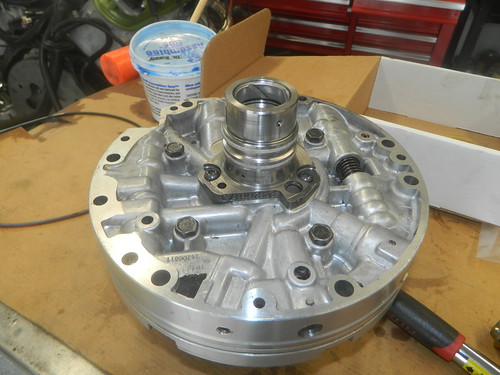
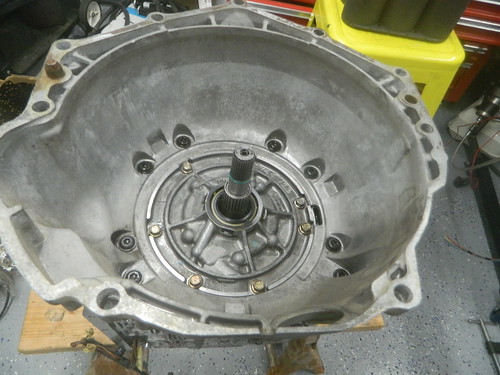
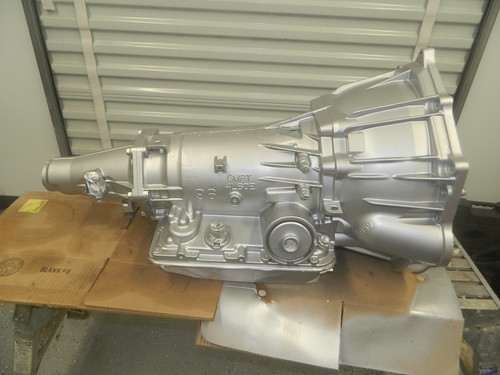
I finished the 4L60E rebuild with upgrades such as corvette servo and added more clutches than stock. Here are the pics.
Installing the components for the case.
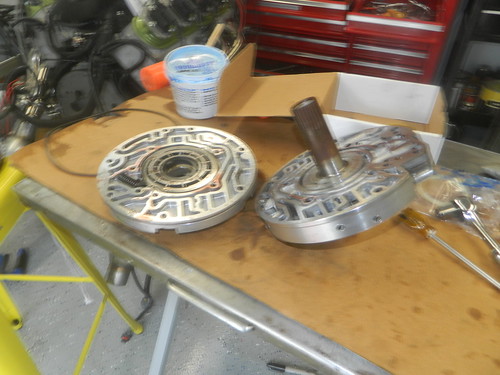
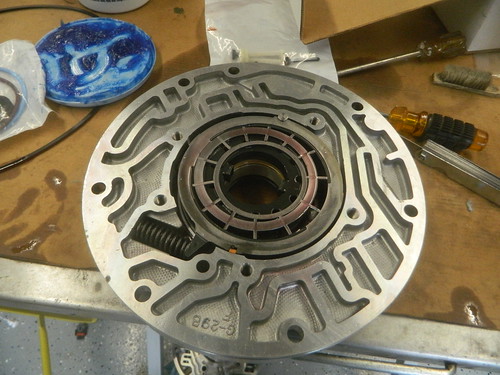
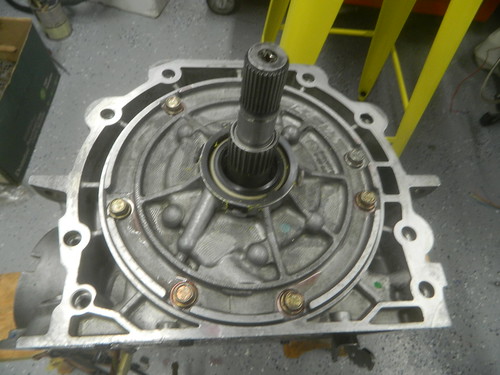
Rebuilt the pump
Assembling the drum with new steel and frictions
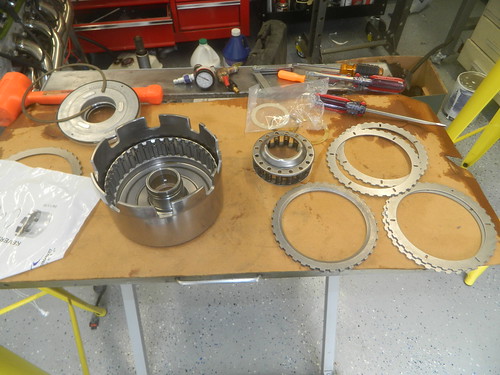
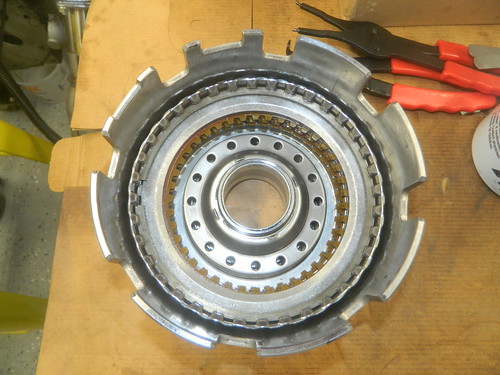
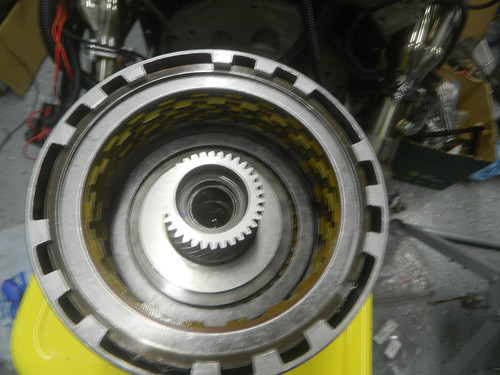
Assembly of the input drum with new steel and frictions
Components ready to go in the case
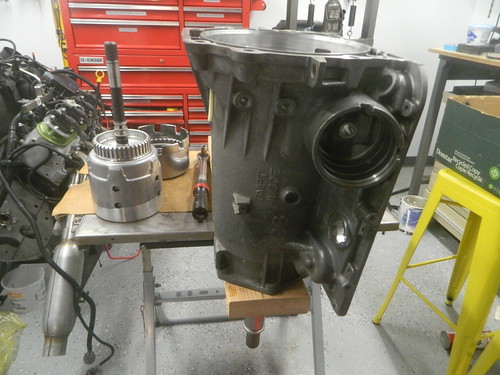
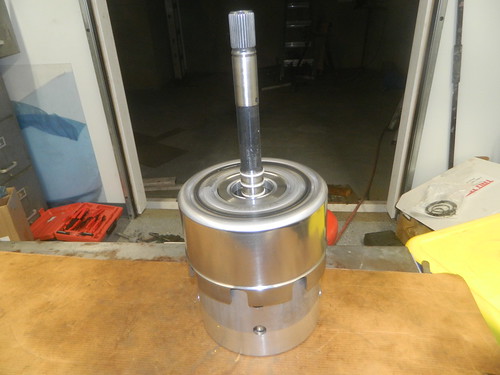
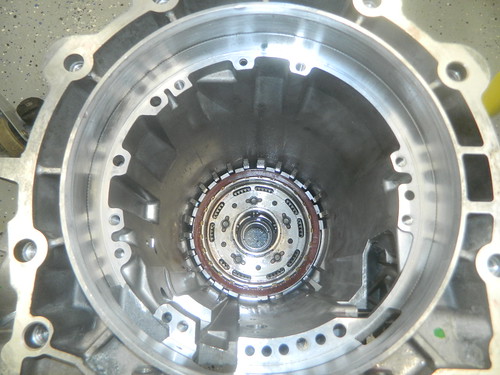
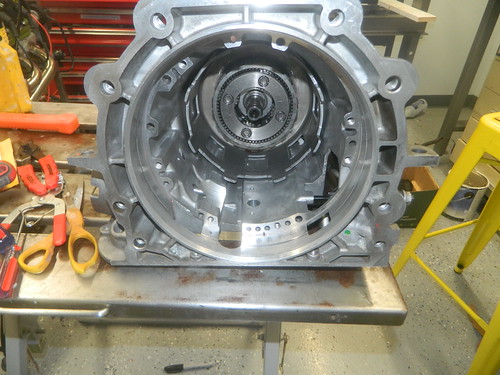
Drum and input drum installed.
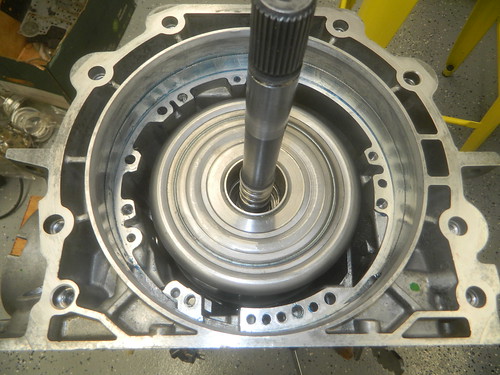
Pump installed.
Bell Housing installed
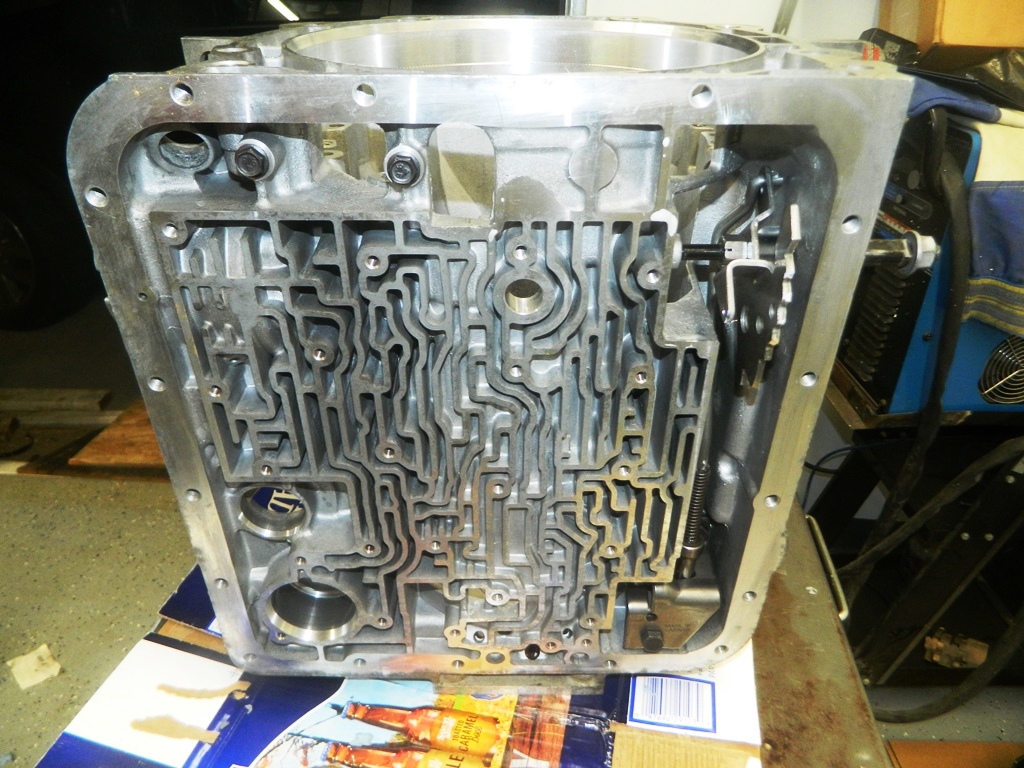
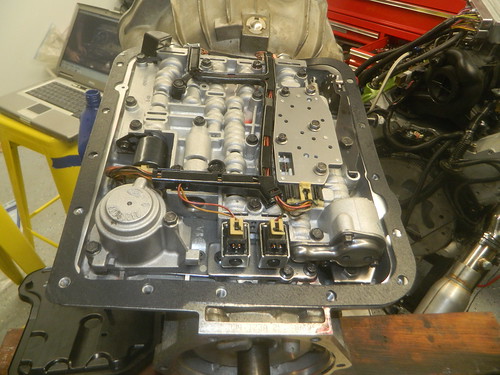
Valve body and all electronics installed
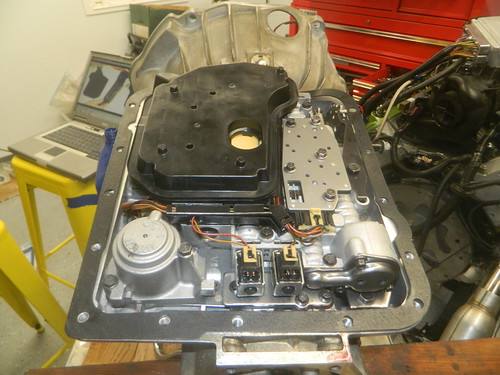
Prep for primer and paint
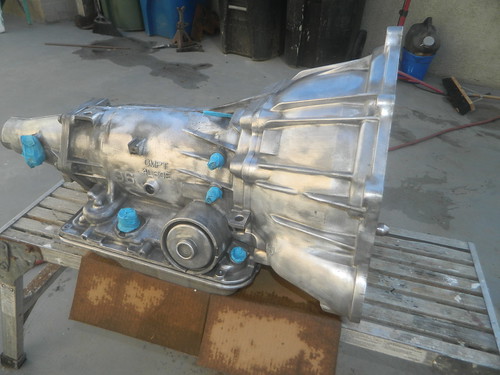
Painted and done
I air tested everything along the way.
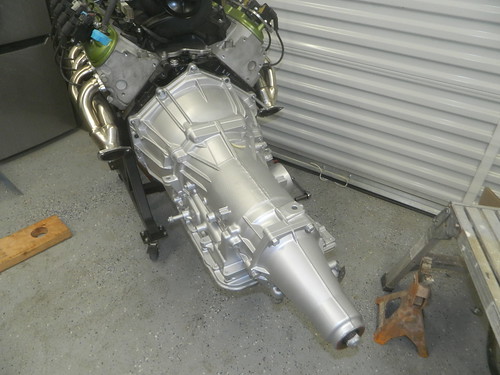
Got the engine, trans, and torque converter mated up, next is to get it between the frame rails.
Installing the components for the case.
Rebuilt the pump
Assembling the drum with new steel and frictions
Assembly of the input drum with new steel and frictions
Components ready to go in the case
Drum and input drum installed.
Pump installed.
Bell Housing installed
Valve body and all electronics installed
Prep for primer and paint
Painted and done
I air tested everything along the way.
Got the engine, trans, and torque converter mated up, next is to get it between the frame rails.
12-13-2018, 03:23 PM
#10
On The Tree
Thread Starter
I got a little painting done after the many, many, hours of block sanding.
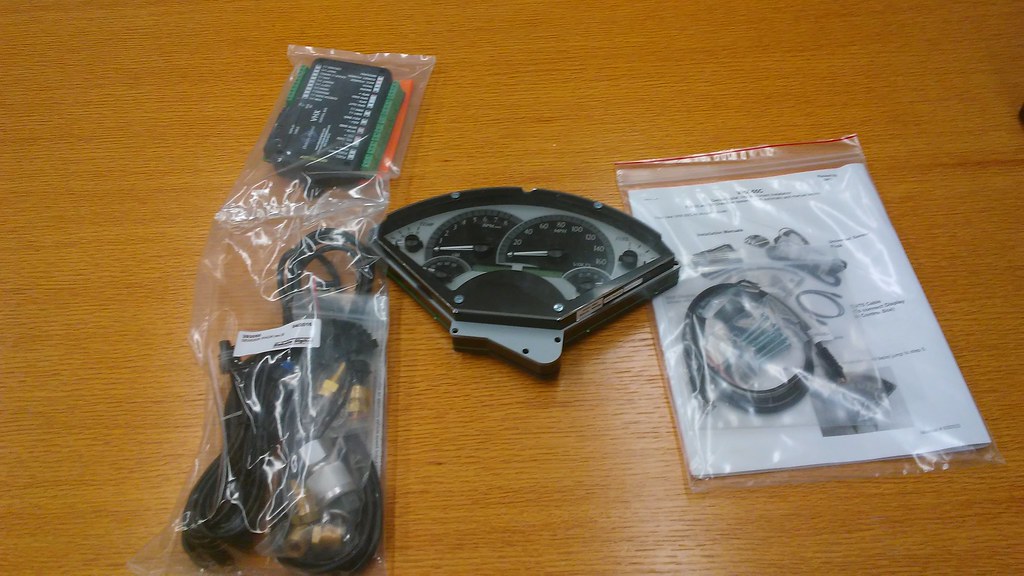
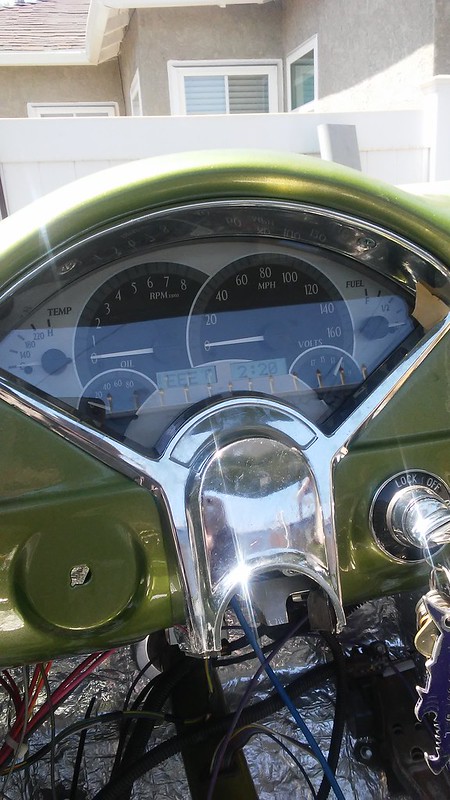
I also got some goody's for the truck. I went with the Dakota Digital VHX 55-56 Belair gauges.
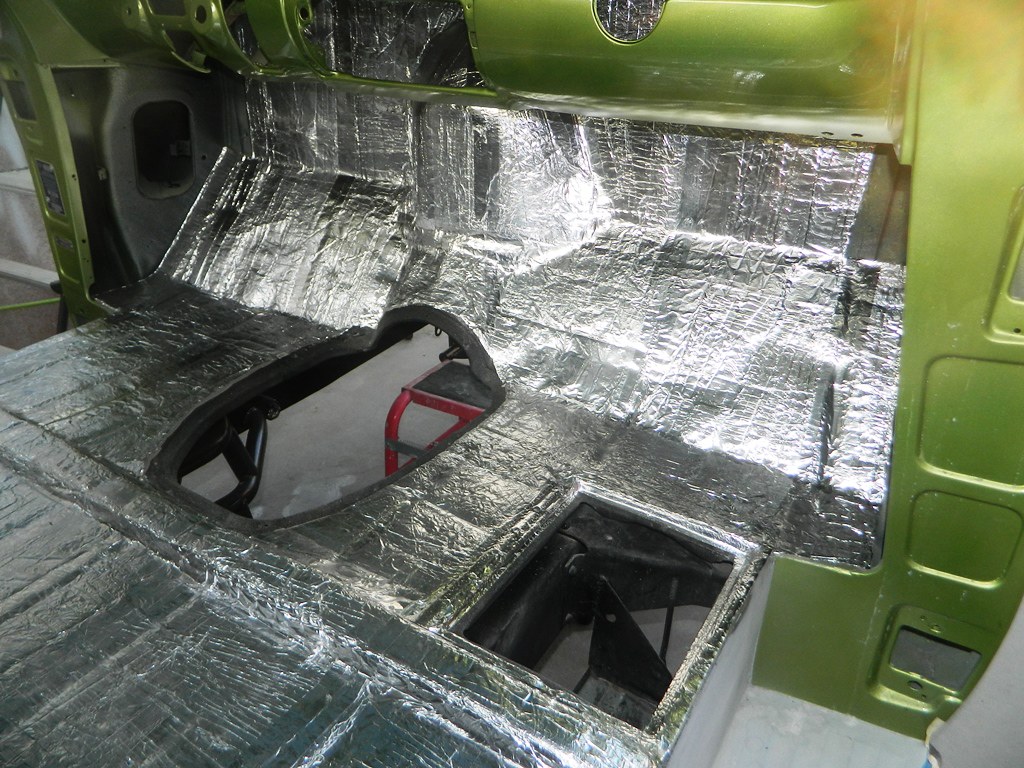
I sound deaden the cab.
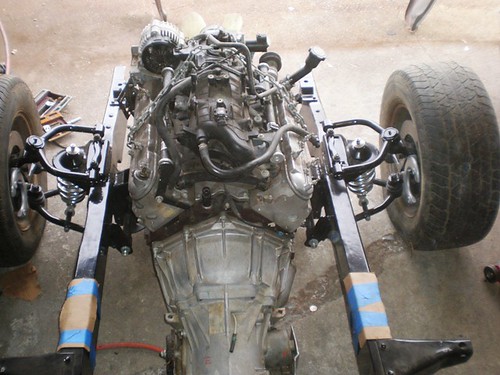
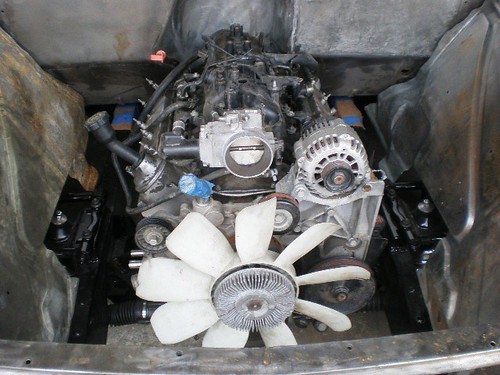
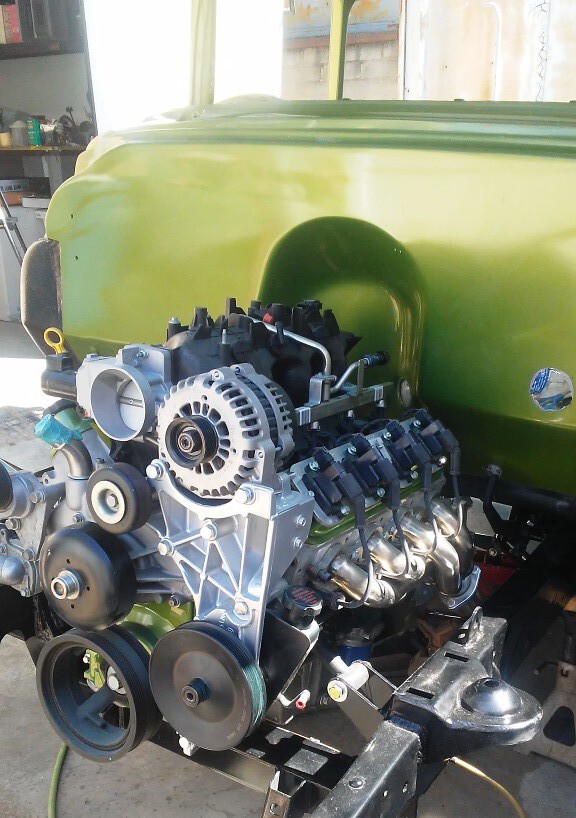
I also got the engine and trans between the frame rails for the last time.
I also got some goody's for the truck. I went with the Dakota Digital VHX 55-56 Belair gauges.
I sound deaden the cab.
I also got the engine and trans between the frame rails for the last time.
12-13-2018, 03:25 PM
#11
TECH Senior Member

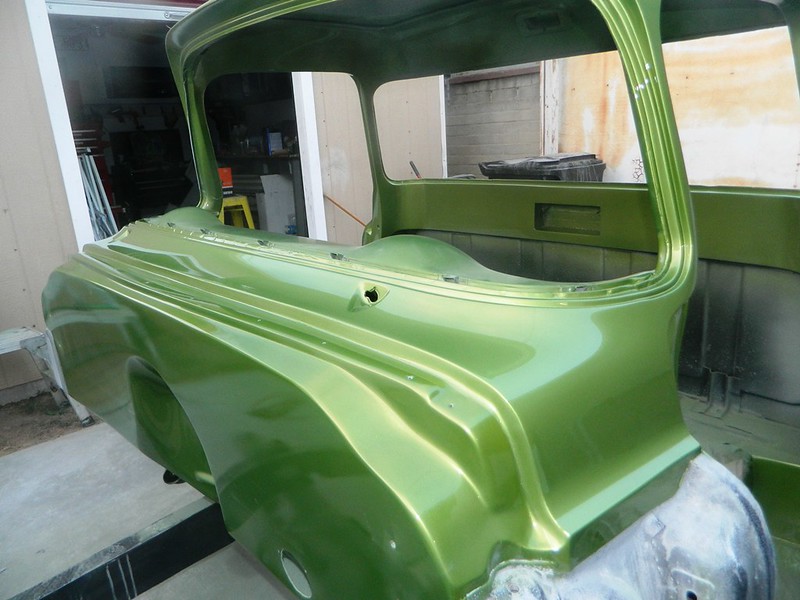
Man, I'm not usually much into greens, but that color POPS! Can't wait to see the finished ride!
The following users liked this post:
1955GMC (10-23-2019)
12-13-2018, 03:29 PM
#12
On The Tree
Thread Starter
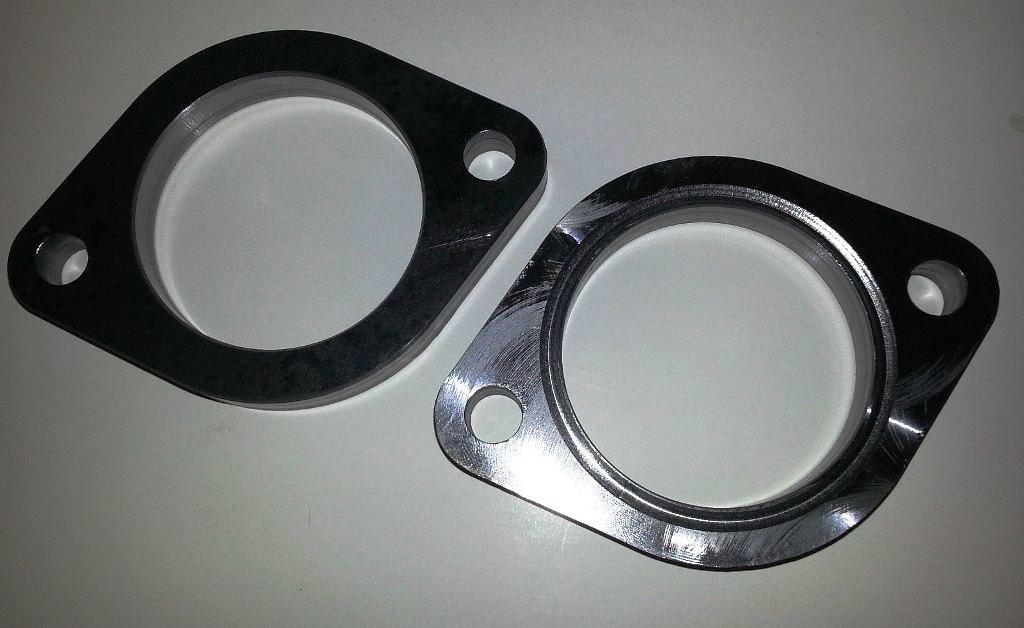
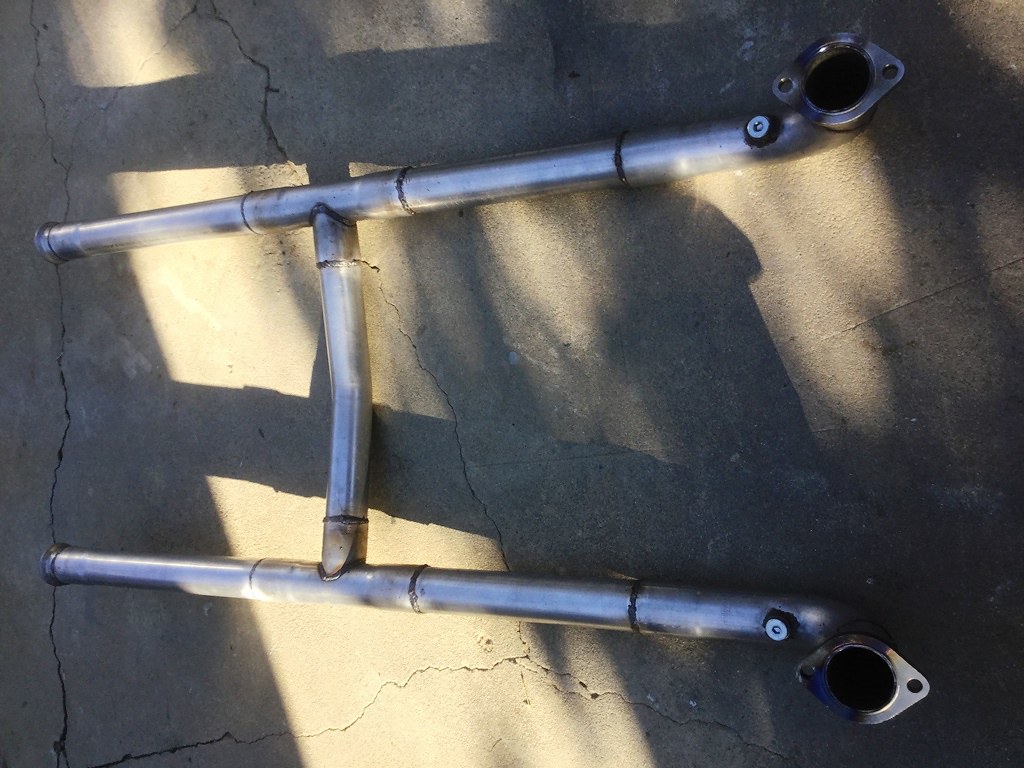
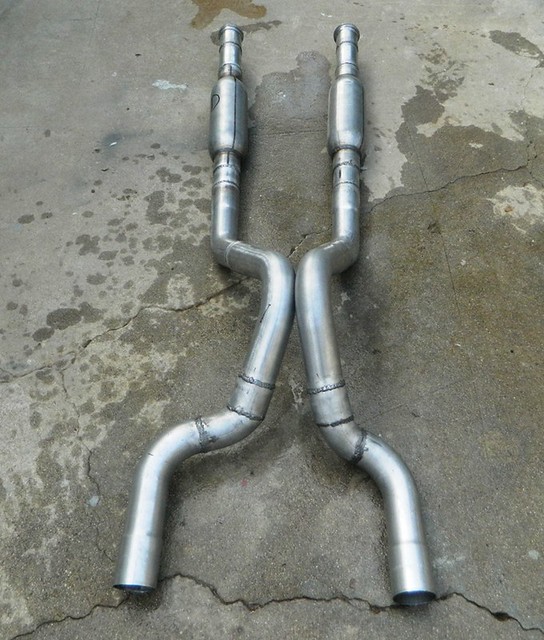
I started working on the exhaust. I got it about half way done. I stopped at where I will be connection the second half of the exhaust with marman v-band flanges.
Any way these are the components I used.
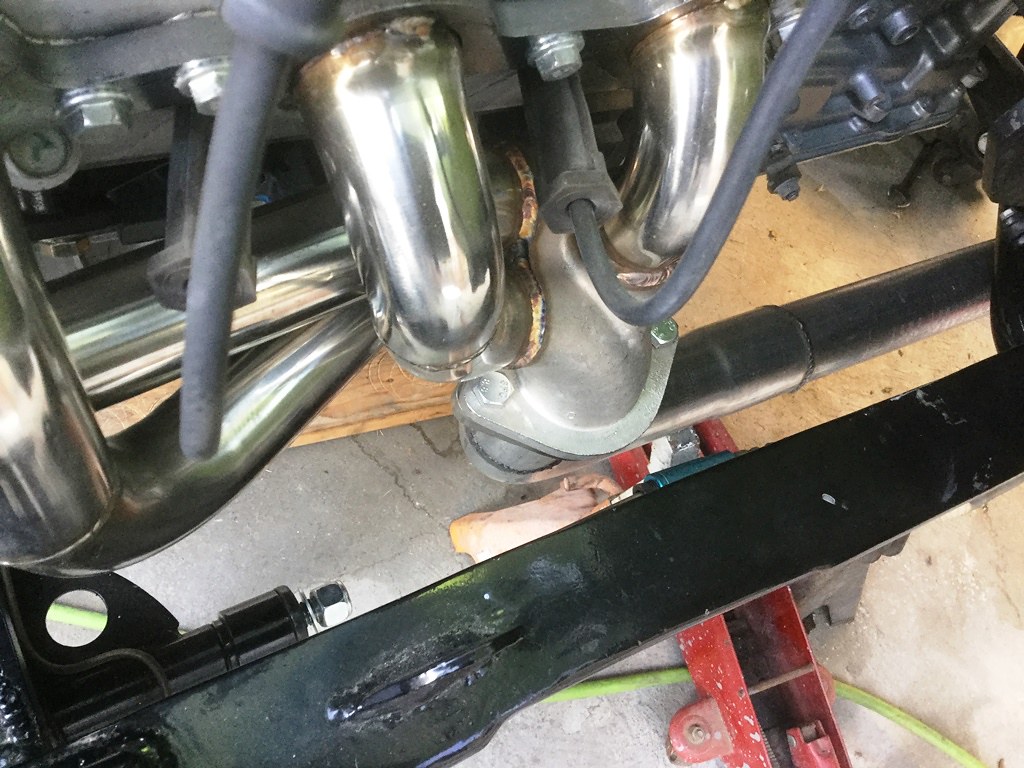
2010 Camaro Shorty Headers
2010 Camaro Flanges
Jegs universal 2 � exhaust kit
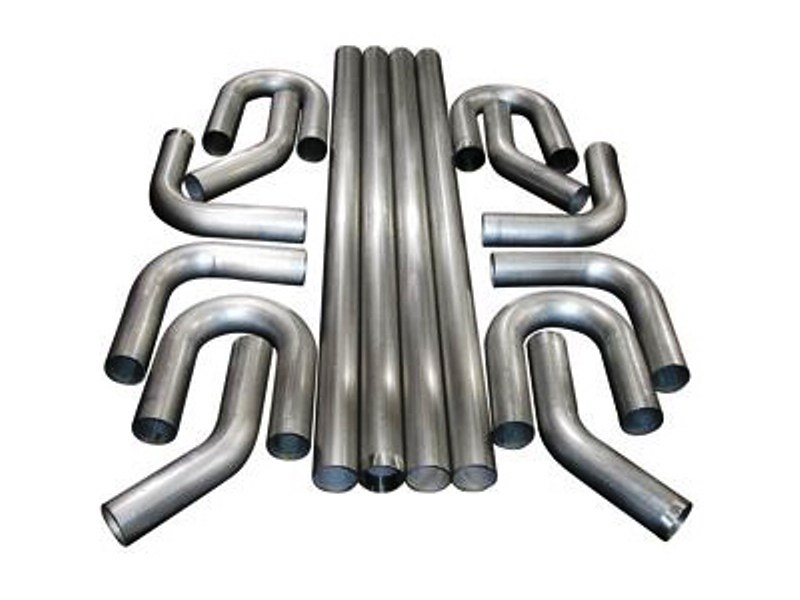
Jegs 2 � H-pipe kit
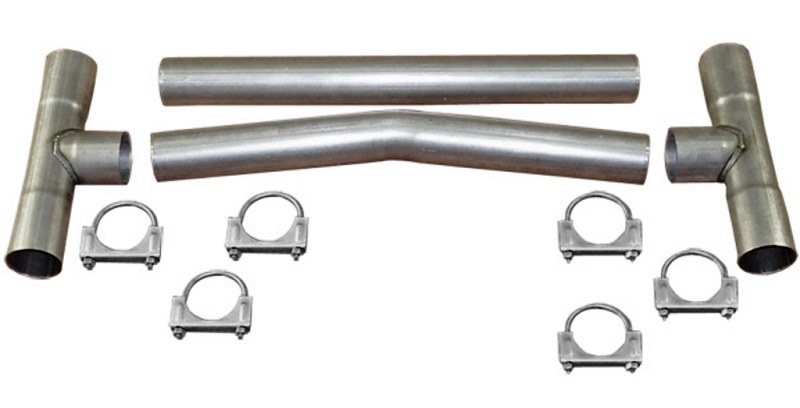

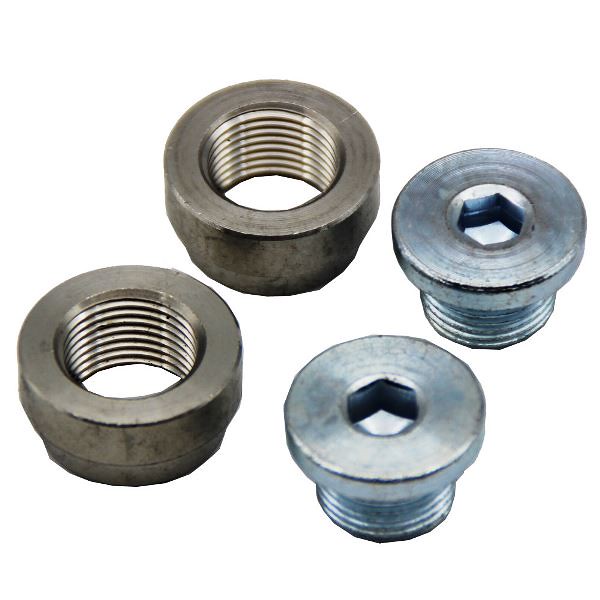
Oxygen Sensors Bungs
Marman V-band flanges will tie the front and rear sections together

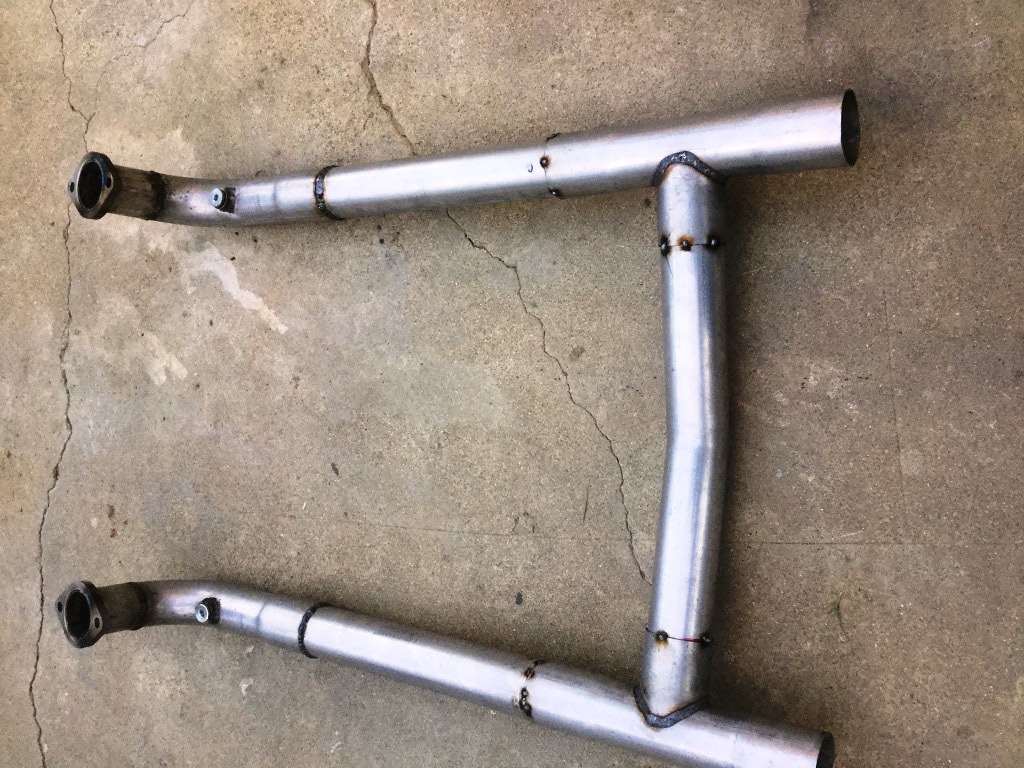
Here are some pics on the install so far.
Tack together for a test fit to the h-pipe
Any way these are the components I used.
2010 Camaro Shorty Headers
2010 Camaro Flanges
Jegs universal 2 � exhaust kit
Jegs 2 � H-pipe kit
Oxygen Sensors Bungs
Marman V-band flanges will tie the front and rear sections together
Here are some pics on the install so far.
Tack together for a test fit to the h-pipe
12-13-2018, 03:32 PM
#13
On The Tree
Thread Starter
Completely welded and Marman v-band flanges installed. The is the front section
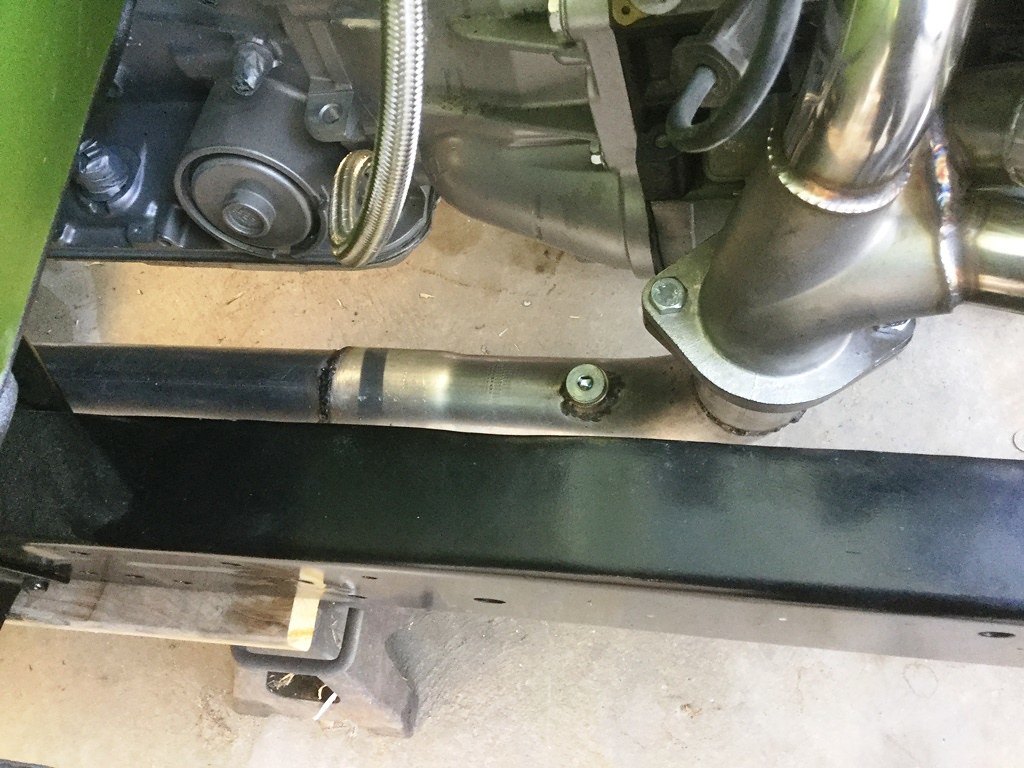
Installed in the truck.
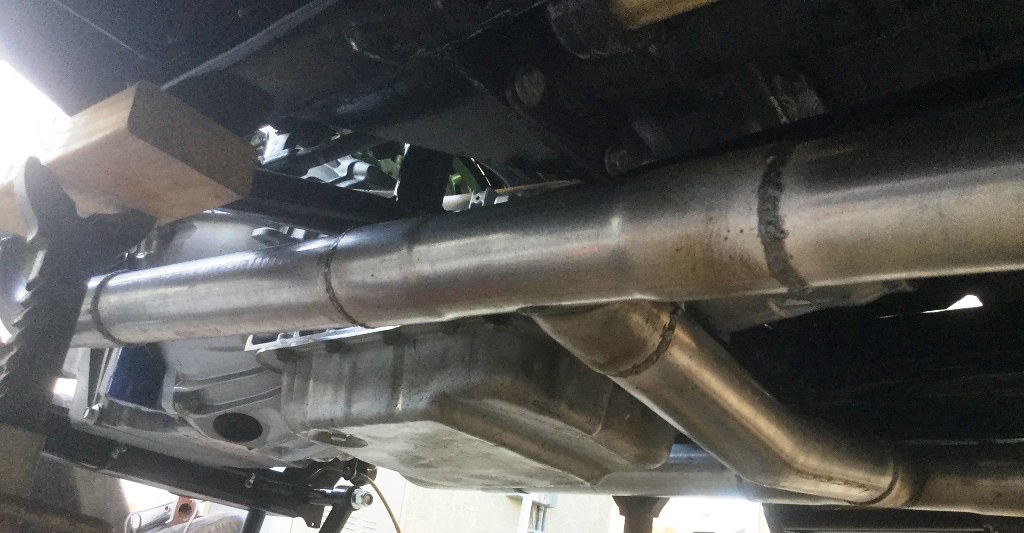
Completed the rear section of the exhaust. The mufflers are Dynomax race bullets.
Mocked up
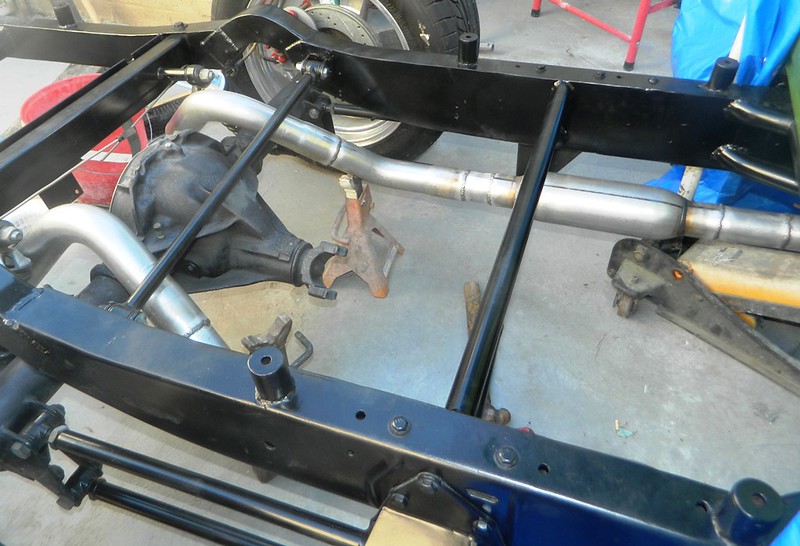
Installed in the truck.
Completed the rear section of the exhaust. The mufflers are Dynomax race bullets.
Mocked up
Last edited by BAM55; 12-13-2018 at 03:42 PM.
12-13-2018, 03:36 PM
#14
On The Tree
Thread Starter
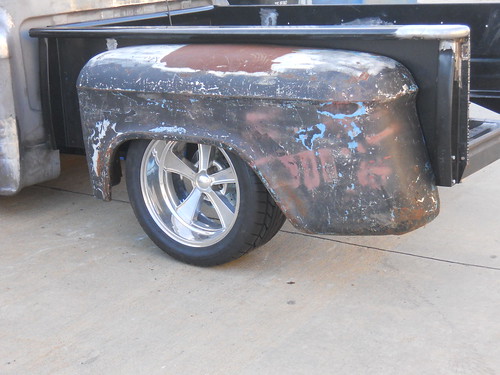
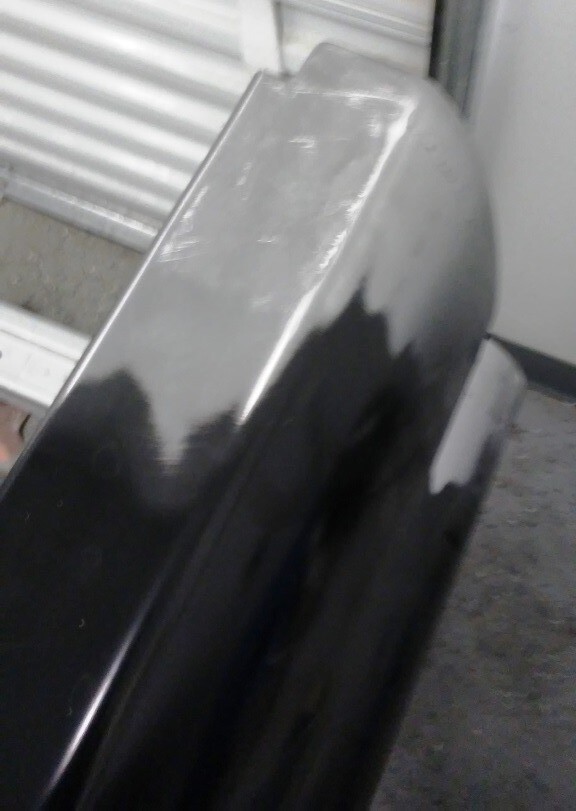
I just can’t leave well enough alone. I had to go out and by the new fleetside bedsides.lol
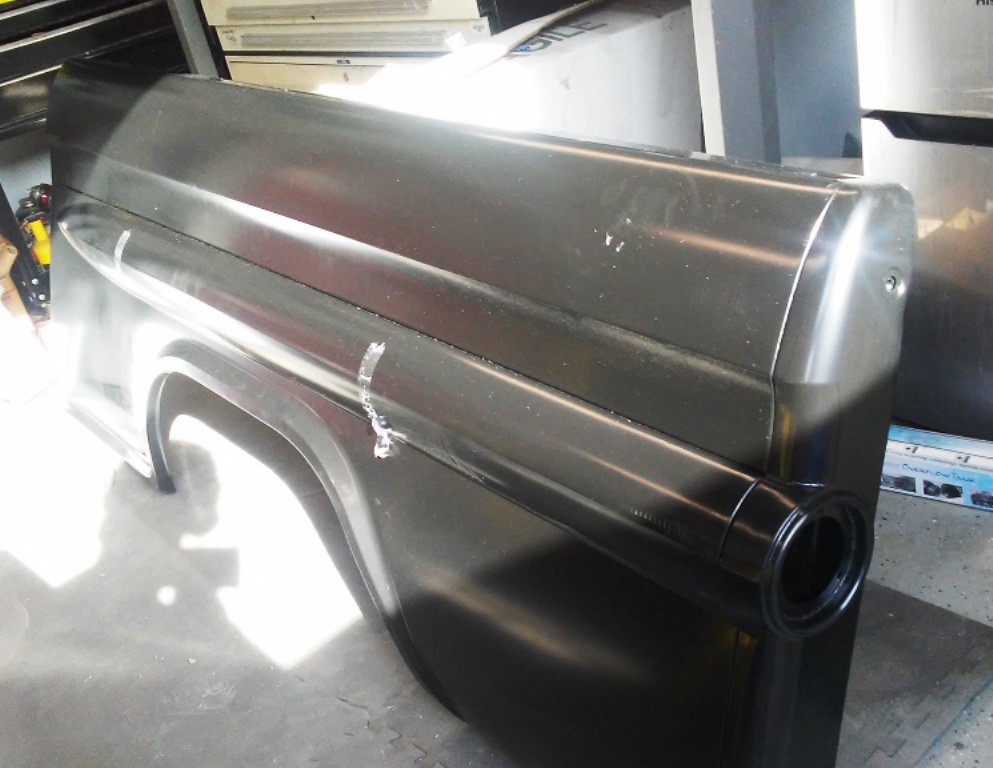
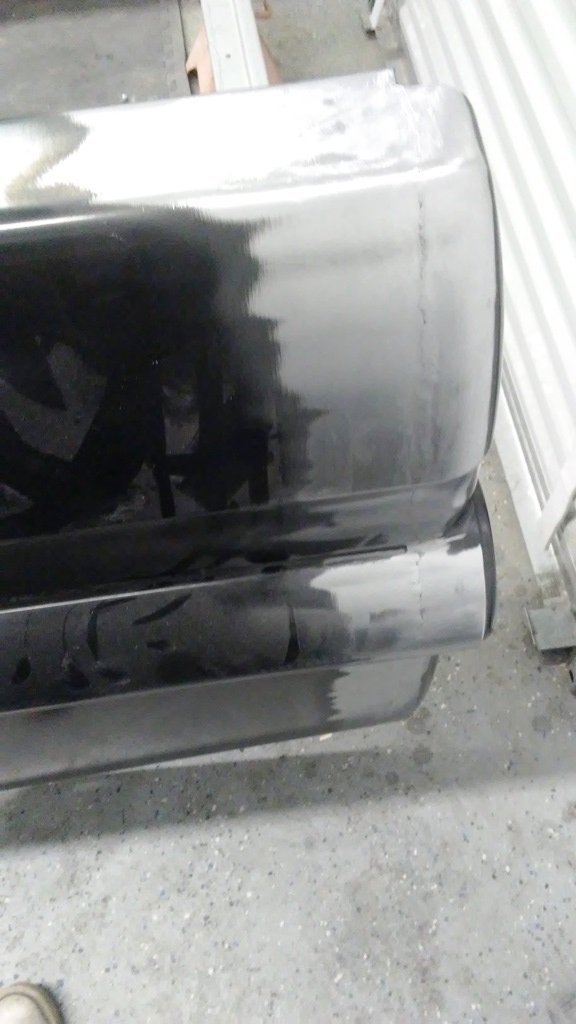
First order of business was to smooth the seams and stake pockets.
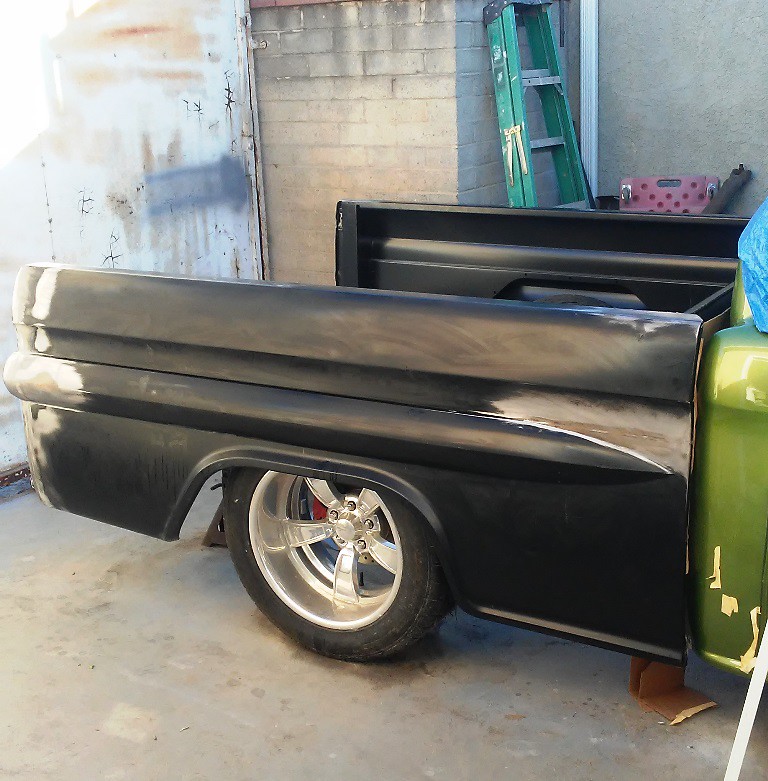
Here is a pic of the fleetside bed mocked up.

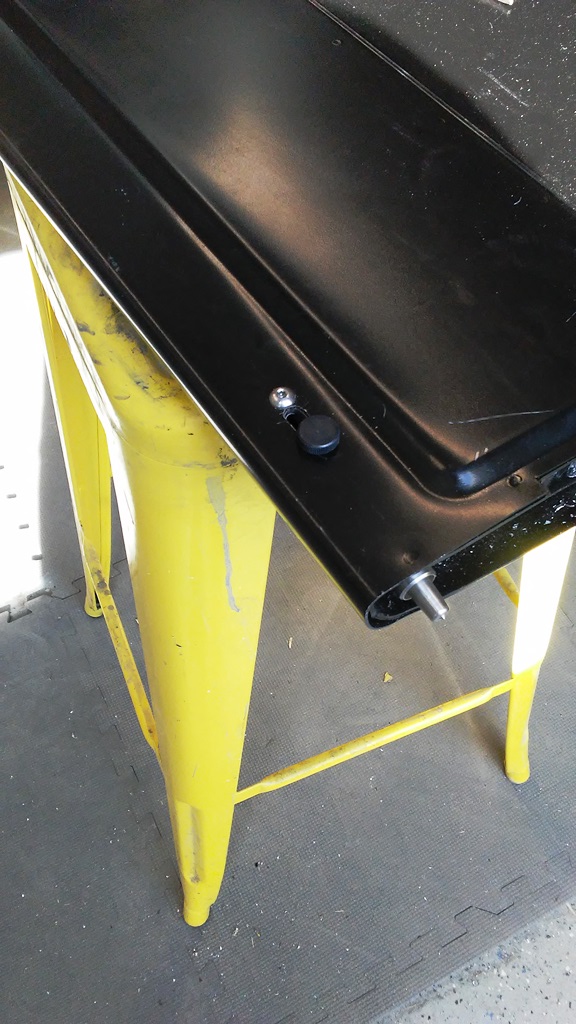
I also installed the hidden tailgate latches I had from the step side.
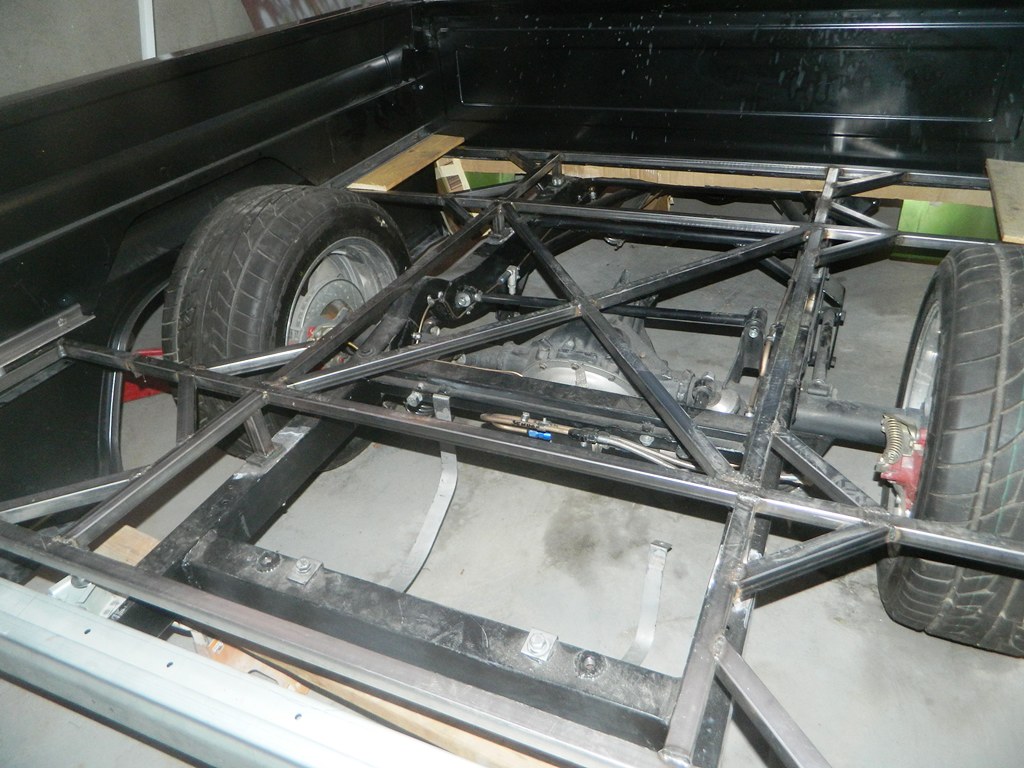
This now how I’m raising the bed floor.
First order of business was to smooth the seams and stake pockets.
Here is a pic of the fleetside bed mocked up.
I also installed the hidden tailgate latches I had from the step side.
This now how I’m raising the bed floor.
Last edited by BAM55; 12-13-2018 at 03:43 PM.
12-13-2018, 03:45 PM
#15
On The Tree
Thread Starter
Due to my narrowed rearend I had to widen the new wheel tubs for the fleetside bed. I had some sheet metal laying around that I cut into long 2 inch wide stripes.

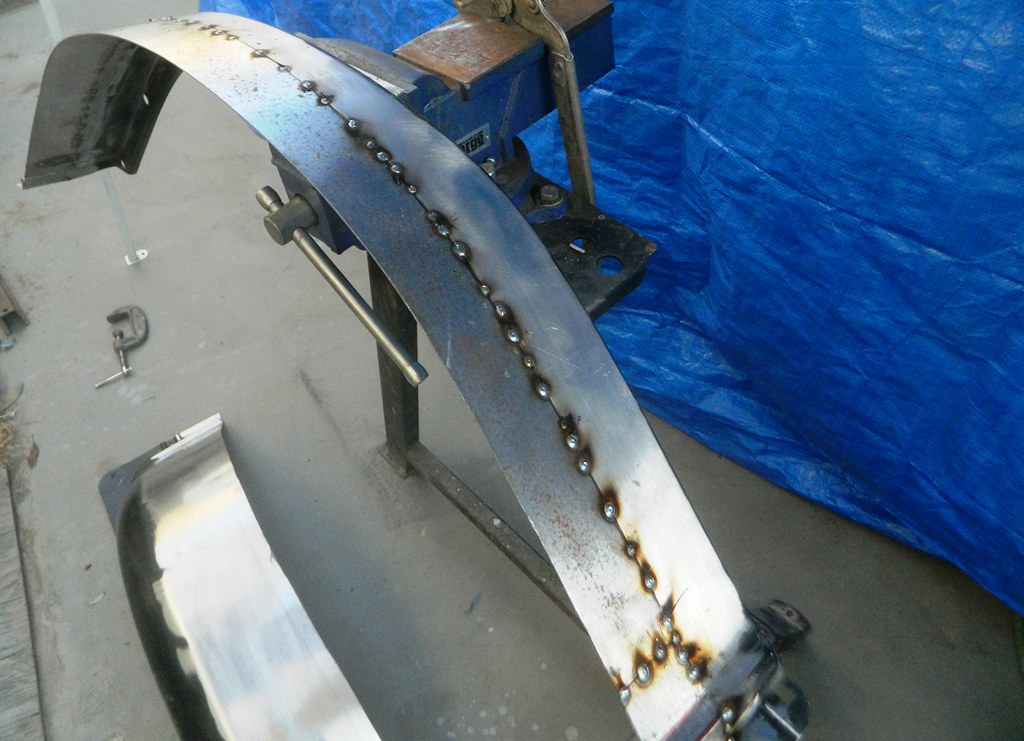
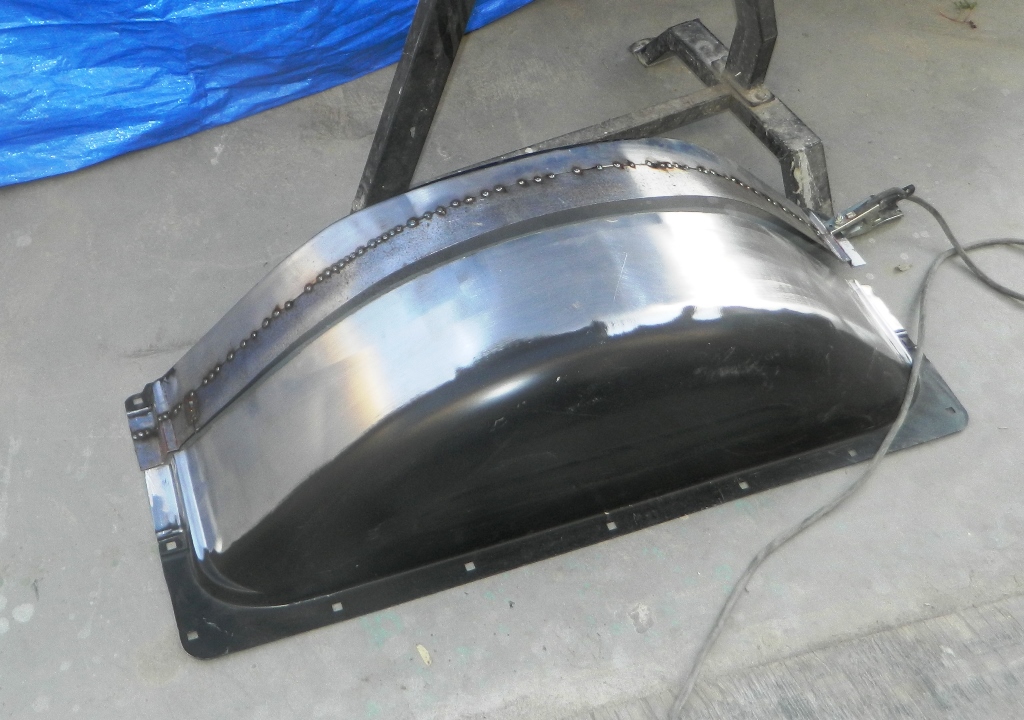
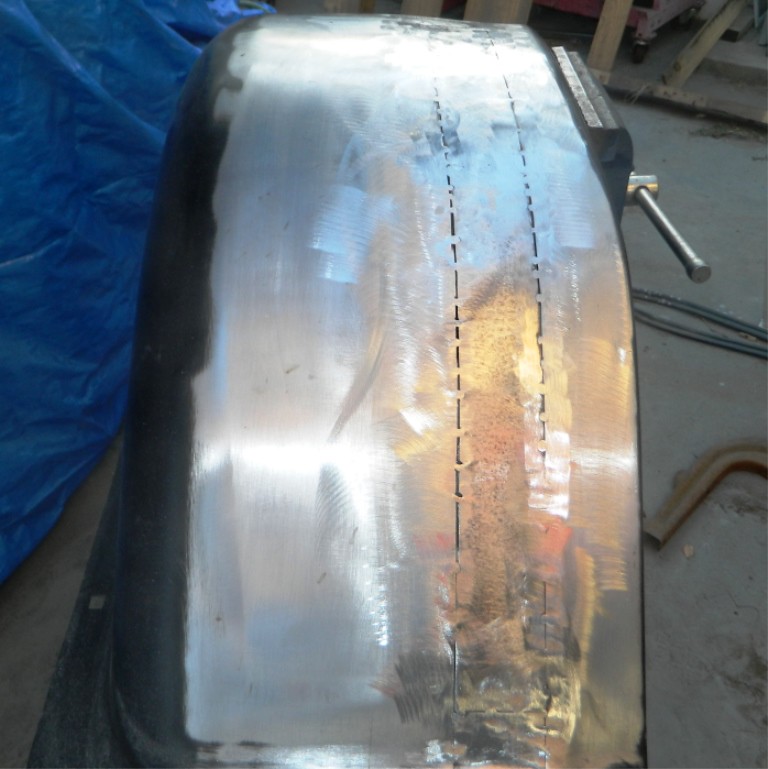
Very simple mod but someone may be interested in how I widened them so I posted it. I will post another pic of them as soon as I finish the welding and metal finishing.
The truck is moving along slowly, but its moving along.
A mod I did to the inner fenders.
I welded up one of the valleys in the inner fender to use a s a wire loom for the electrical wire going to the front of the truck.
Here is the other side that will hold the wires.
Filler, primer, block sanded, and painted
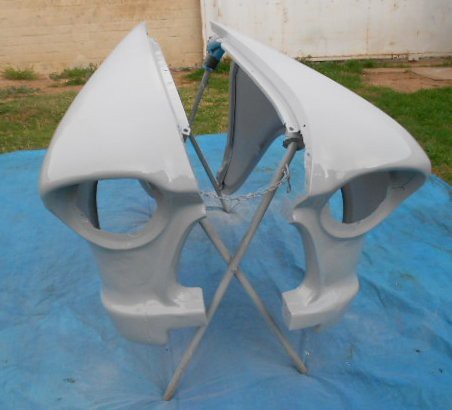
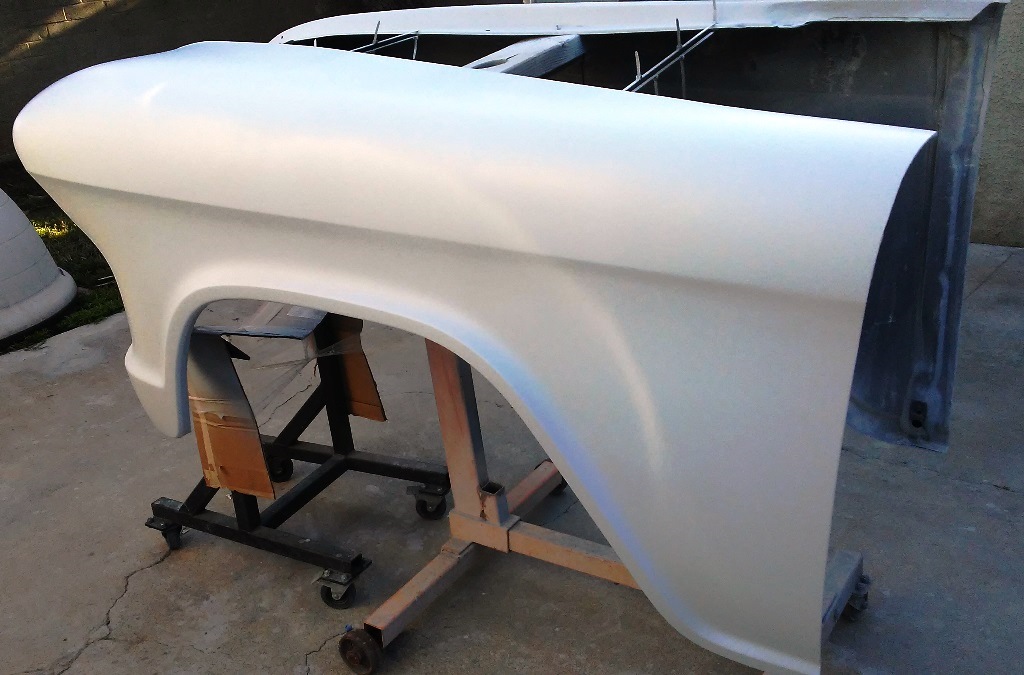
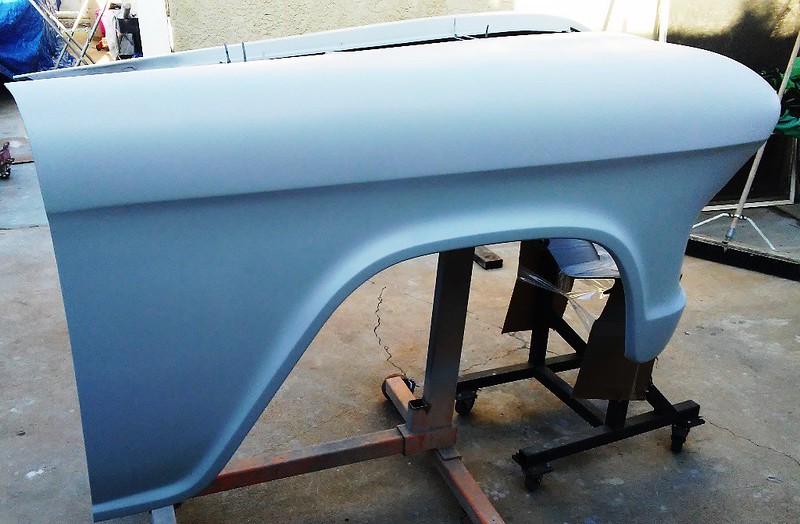
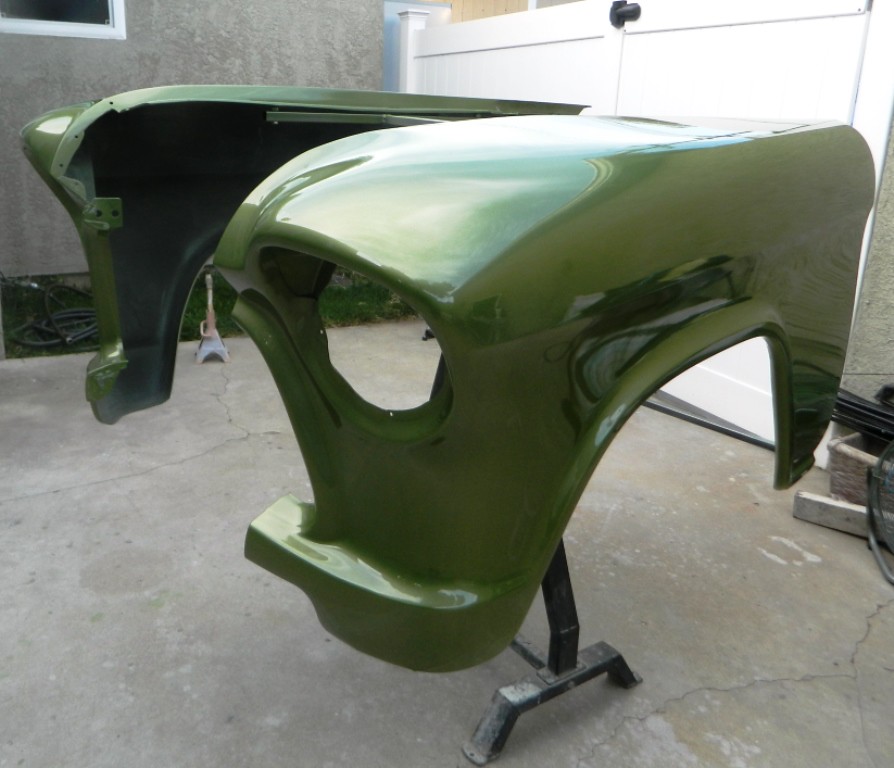
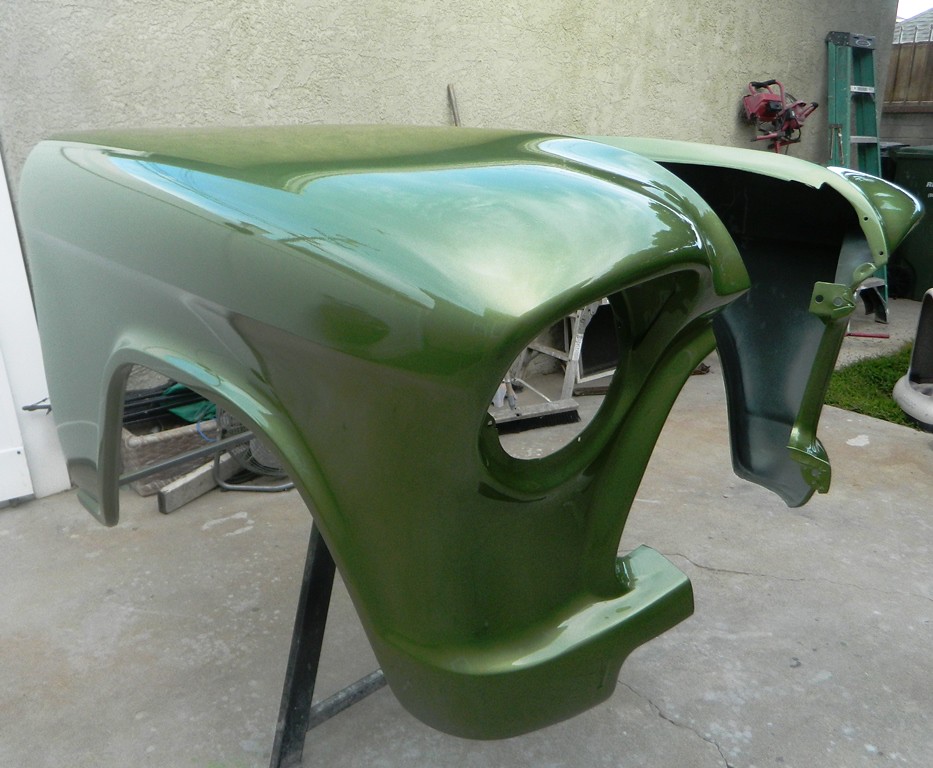
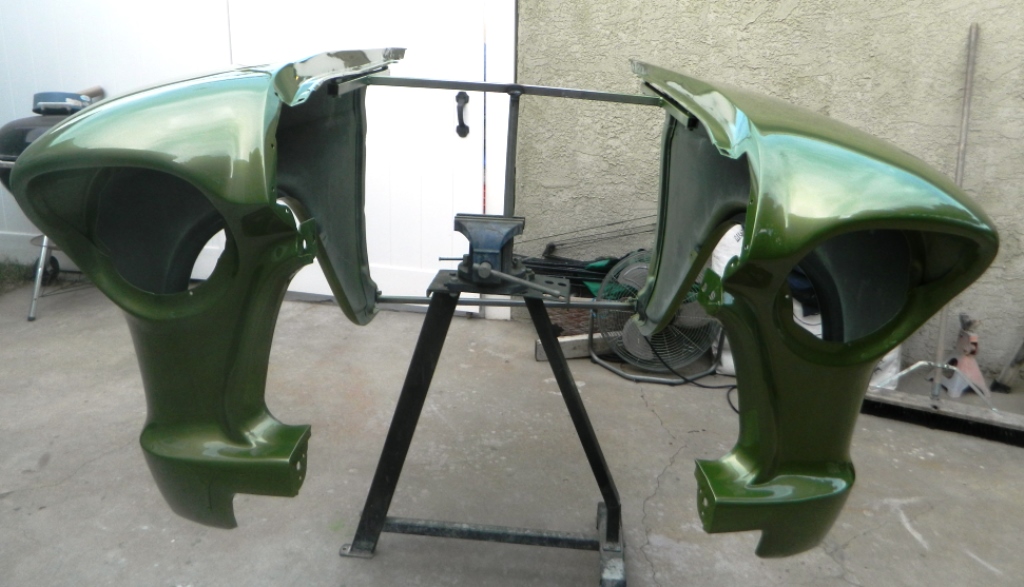
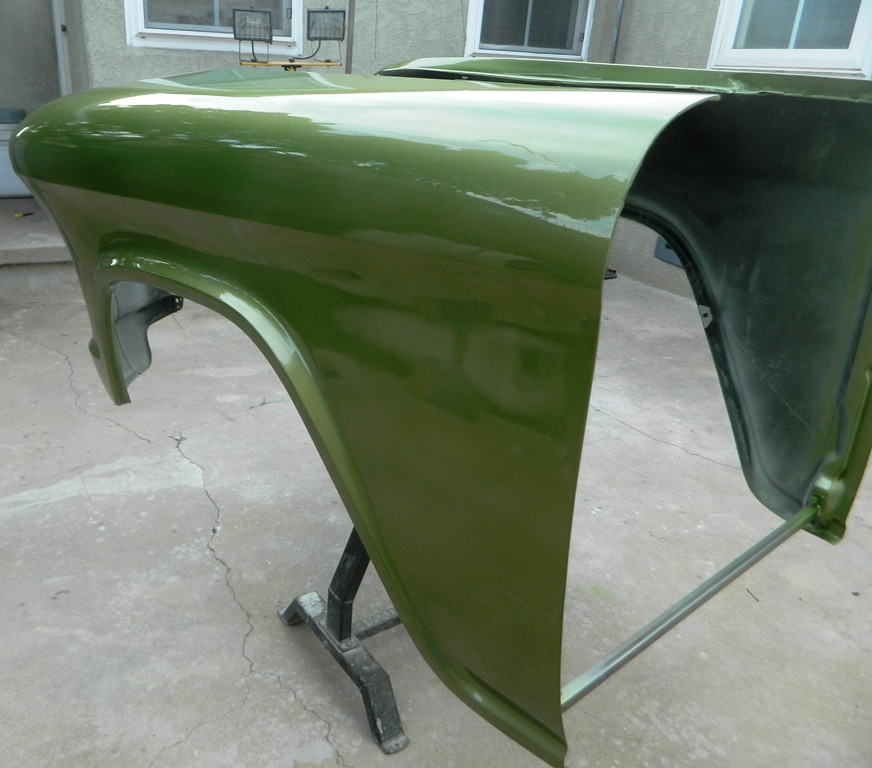
Front Fenders
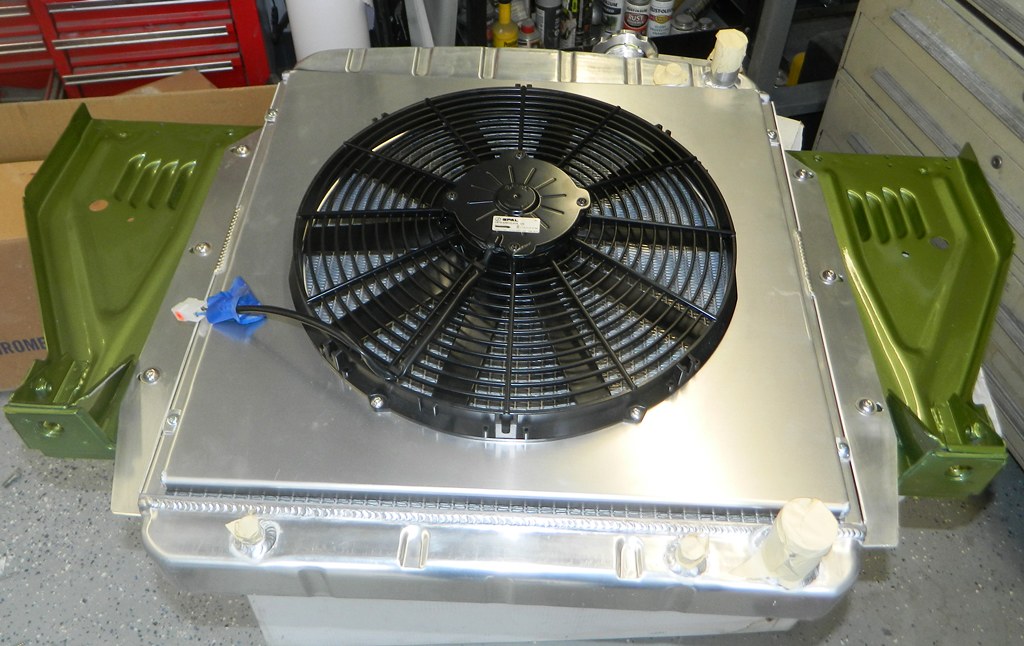
New Radiator
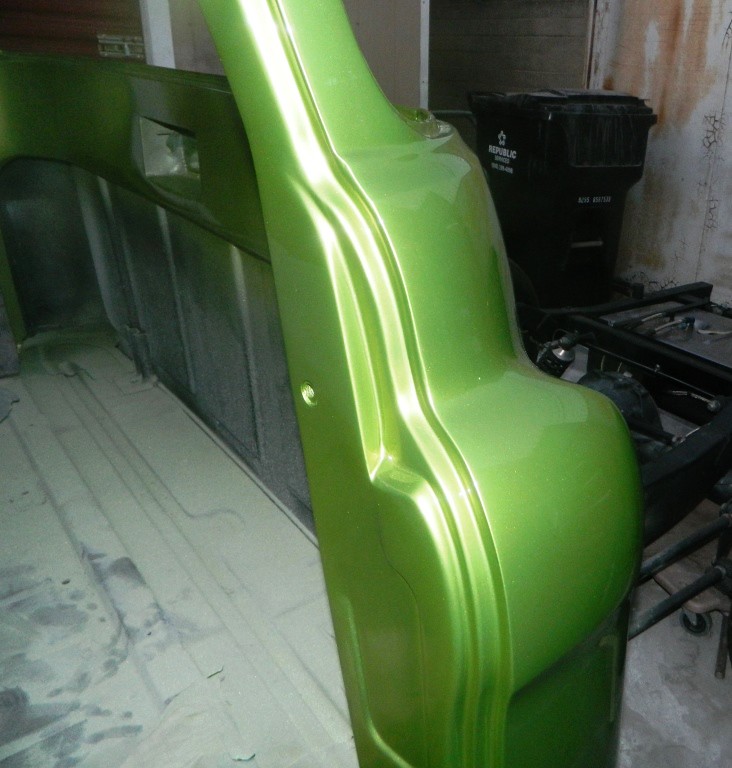
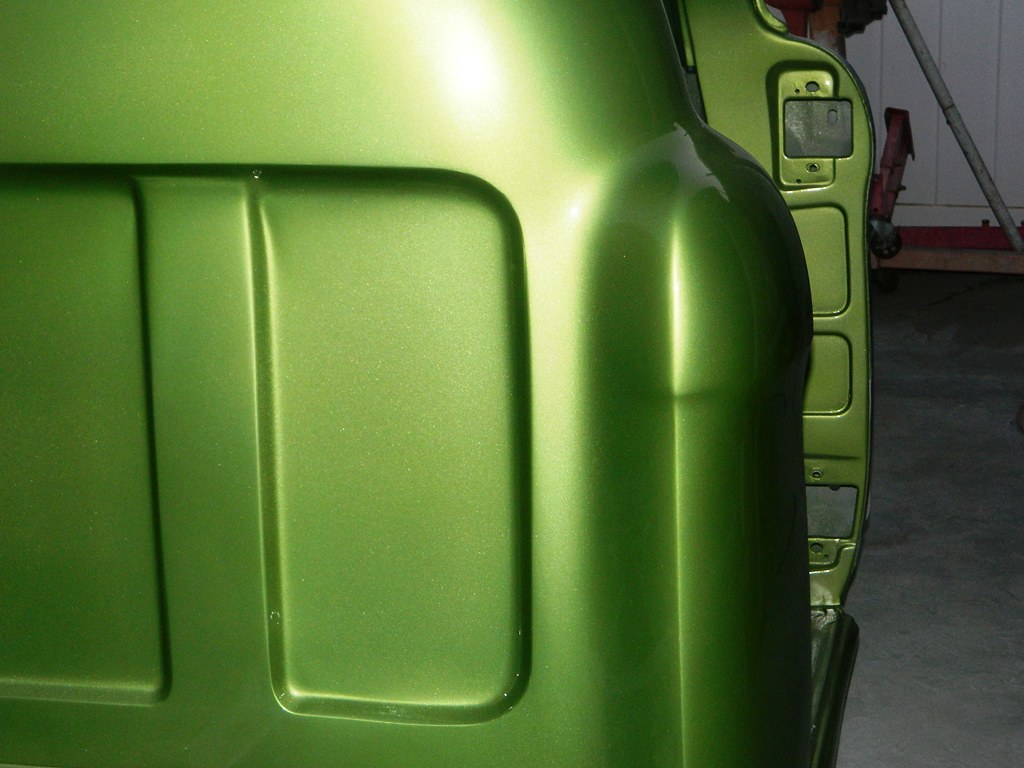
Raptor liner tinted with body color and clear.
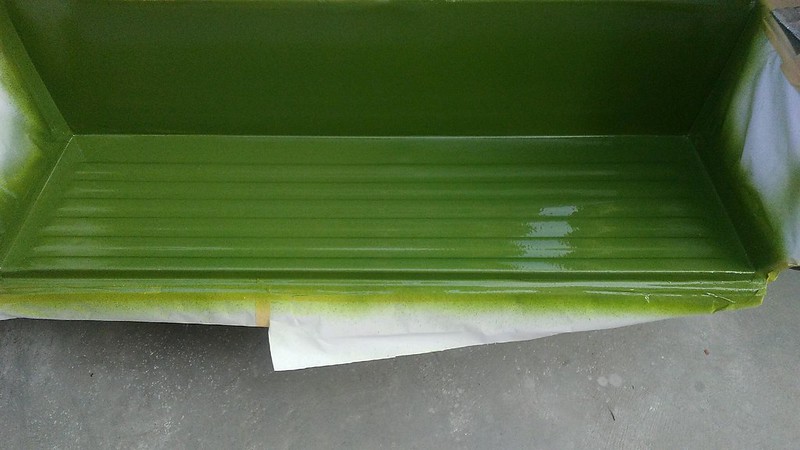
Raptor liner tinted with body no clear.
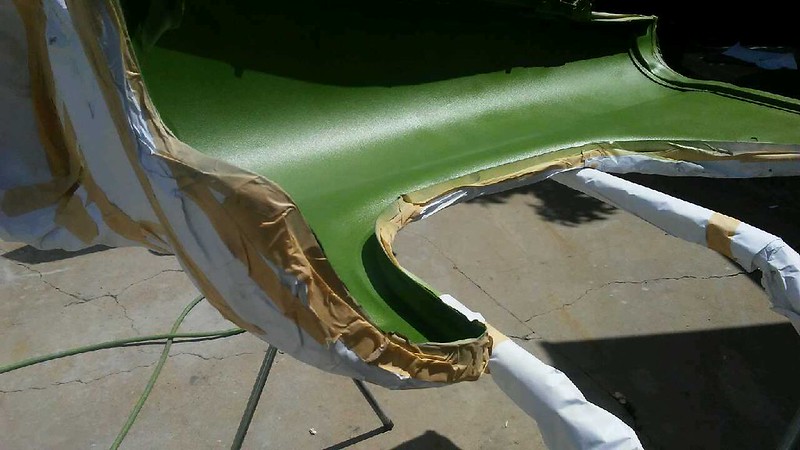
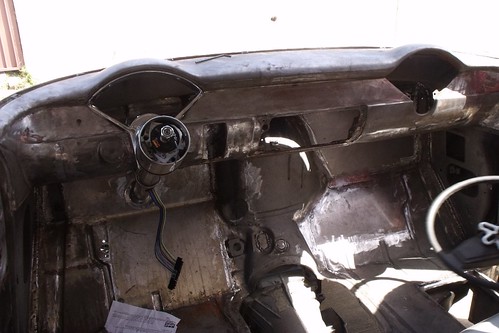
Well once again I could not leave well enough alone. If you guys remember I never liked how the column stuck out of the firewall when I installed the 55 dash.
The aftermarket mount just looked to busy and I wanted something smooth looking. So I decided to do this.
I made this piece out of sheetmetal and exhaust pipe I had laying around.
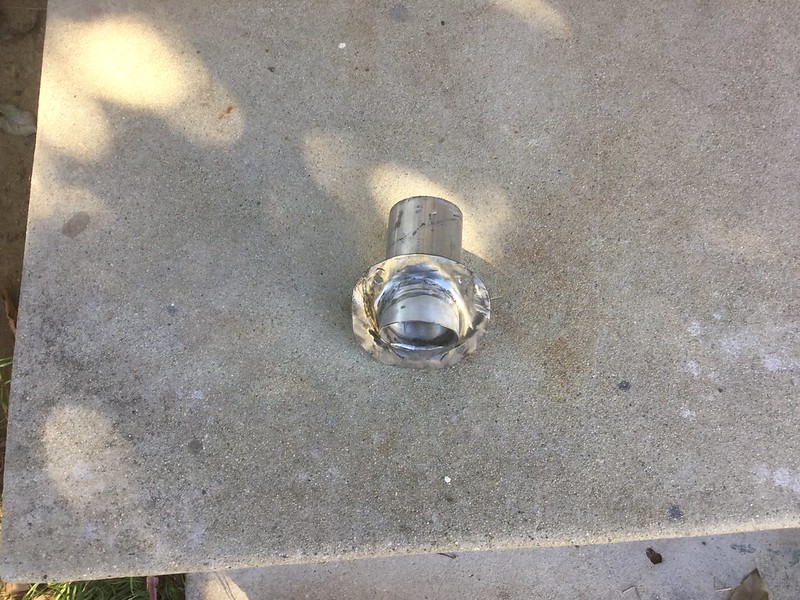
Mocked up to see if I liked it better before I commented to it.
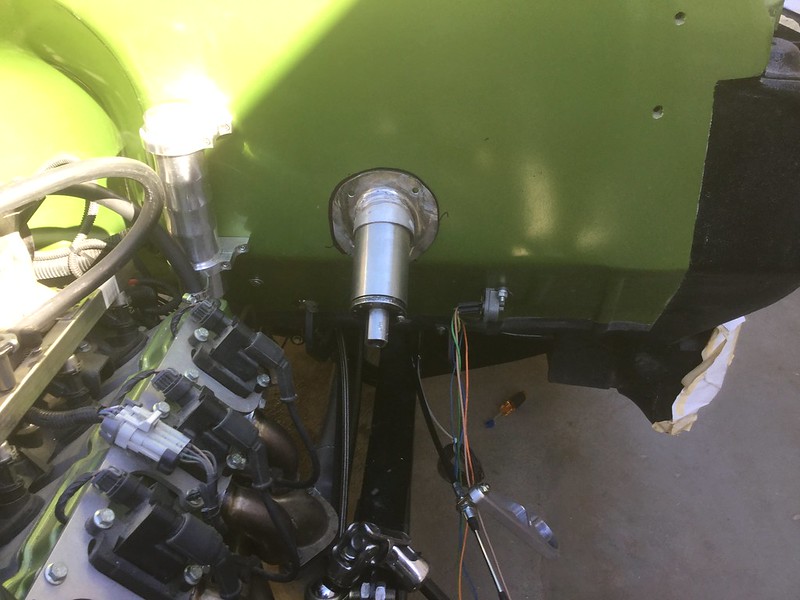
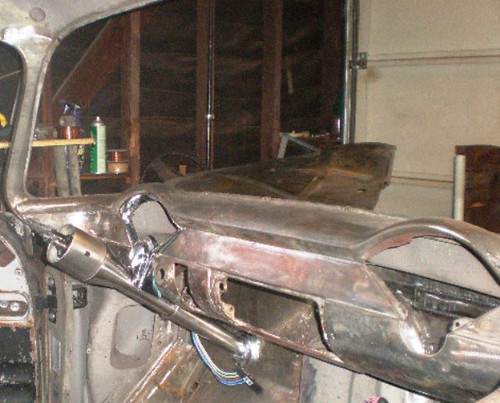
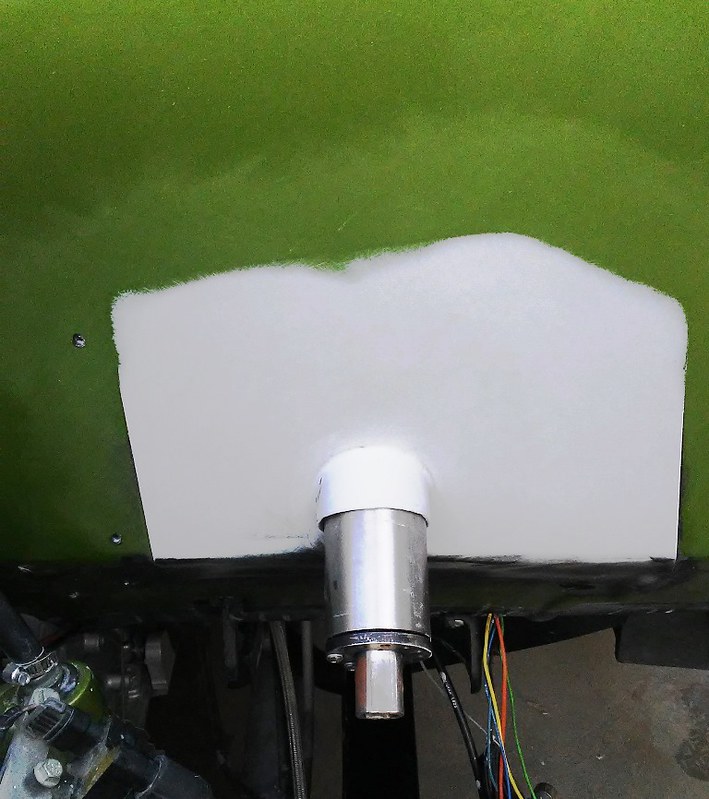
Welded in and mocked up and yes I like it much better.

Grinded all the welds, filler, primer and almost done blocking. I will blend the paint in that area and you will never notice the difference.
With the column mod finished, I installed the steering column and I have to say I like it much better than the ididit swivel ball I had in place before.
Less busy and a smoother look in my opinion.
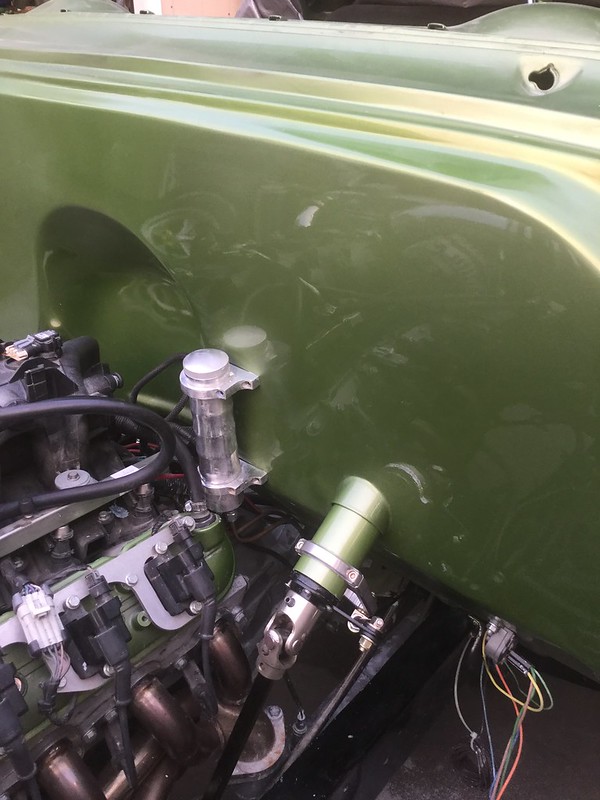
I did not want the filler in the bed so this is what I came up with. Its a pop up motorcycle filler that I located in the fleetside stake pocket, the one the tailgate
is attached to. I had to figure out the plumbing it was some work but I like it.

Working on the tune since the cam swap. The engine was turning off when I gave it some gas so I had to start tweaking ECU settings. Here are a couple of videos of me trying to get it right.
First tune
Second tune
These are the new gauges installed.
Well I got the inner fenders installed. The truck is starting to look like a truck.lol
Very simple mod but someone may be interested in how I widened them so I posted it. I will post another pic of them as soon as I finish the welding and metal finishing.
The truck is moving along slowly, but its moving along.
A mod I did to the inner fenders.
I welded up one of the valleys in the inner fender to use a s a wire loom for the electrical wire going to the front of the truck.
Here is the other side that will hold the wires.
Filler, primer, block sanded, and painted
Front Fenders
New Radiator
Raptor liner tinted with body color and clear.
Raptor liner tinted with body no clear.
Well once again I could not leave well enough alone. If you guys remember I never liked how the column stuck out of the firewall when I installed the 55 dash.
The aftermarket mount just looked to busy and I wanted something smooth looking. So I decided to do this.
I made this piece out of sheetmetal and exhaust pipe I had laying around.
Mocked up to see if I liked it better before I commented to it.
Welded in and mocked up and yes I like it much better.
Grinded all the welds, filler, primer and almost done blocking. I will blend the paint in that area and you will never notice the difference.
With the column mod finished, I installed the steering column and I have to say I like it much better than the ididit swivel ball I had in place before.
Less busy and a smoother look in my opinion.
I did not want the filler in the bed so this is what I came up with. Its a pop up motorcycle filler that I located in the fleetside stake pocket, the one the tailgate
is attached to. I had to figure out the plumbing it was some work but I like it.
Working on the tune since the cam swap. The engine was turning off when I gave it some gas so I had to start tweaking ECU settings. Here are a couple of videos of me trying to get it right.
First tune
Second tune
These are the new gauges installed.
Well I got the inner fenders installed. The truck is starting to look like a truck.lol
Last edited by BAM55; 12-13-2018 at 06:04 PM.
12-13-2018, 03:49 PM
#16
On The Tree
Thread Starter
The wiring loom idea worked like a charm.
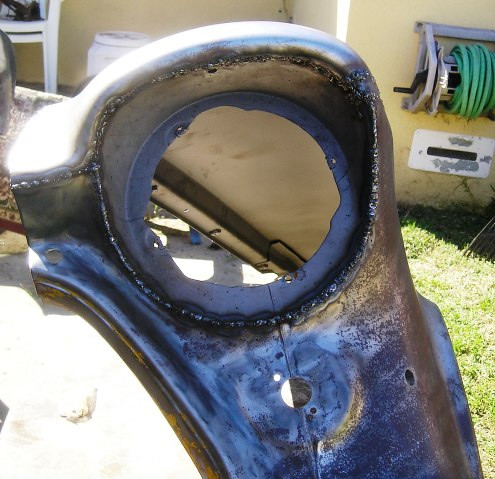
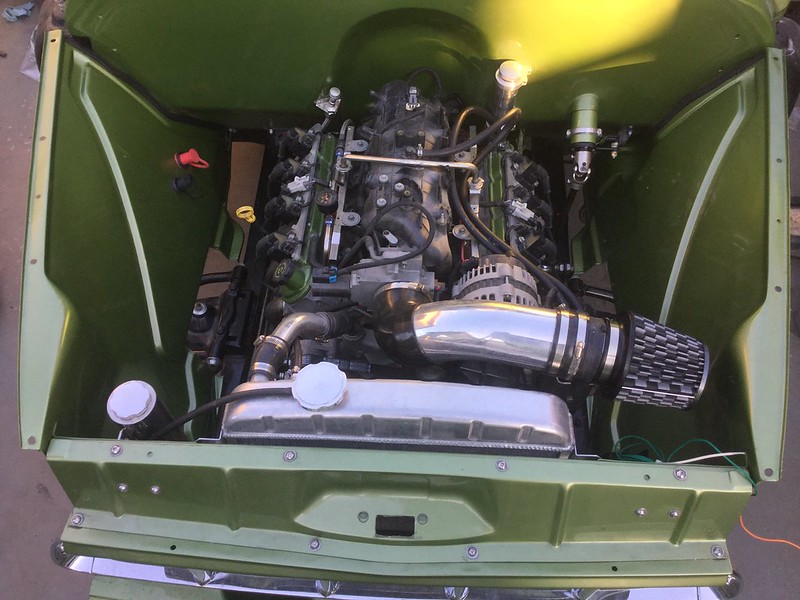
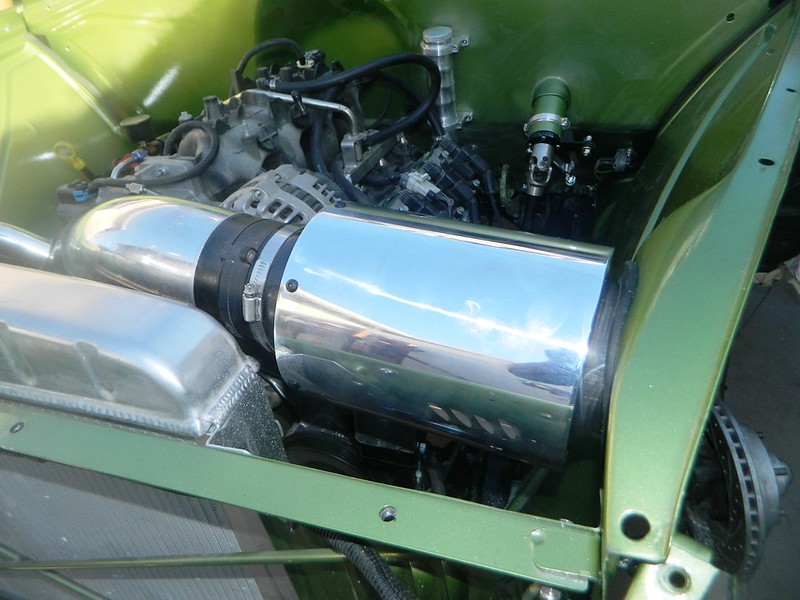
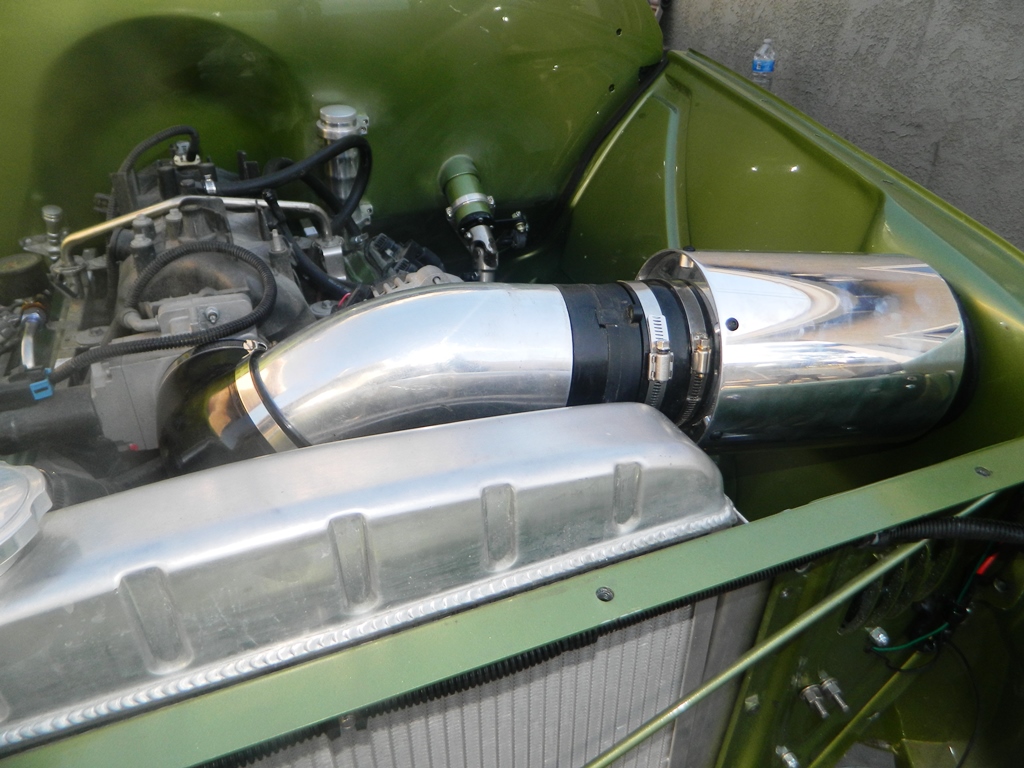
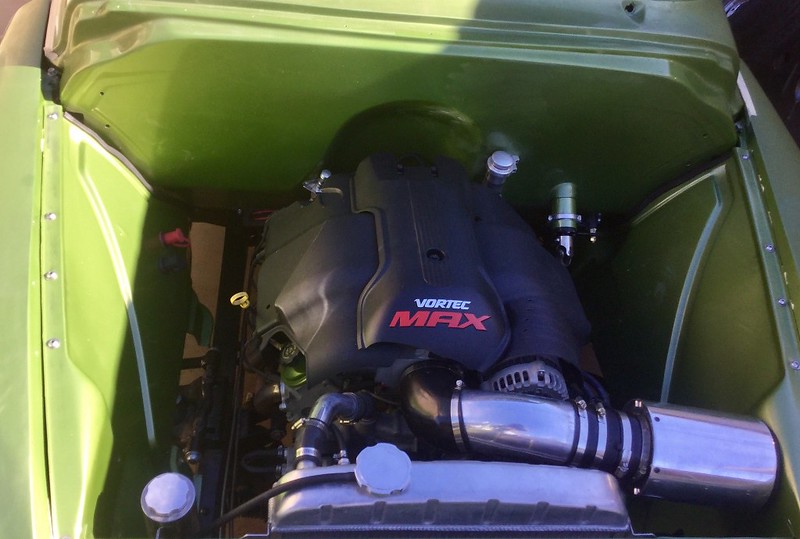
I've been trying to think of a way to build a air box to have the coolest air possible and found a air box that is exactly what I was thinking of building.
It took a simple mod but I i did not have to make a box, which saved me a lot of time.
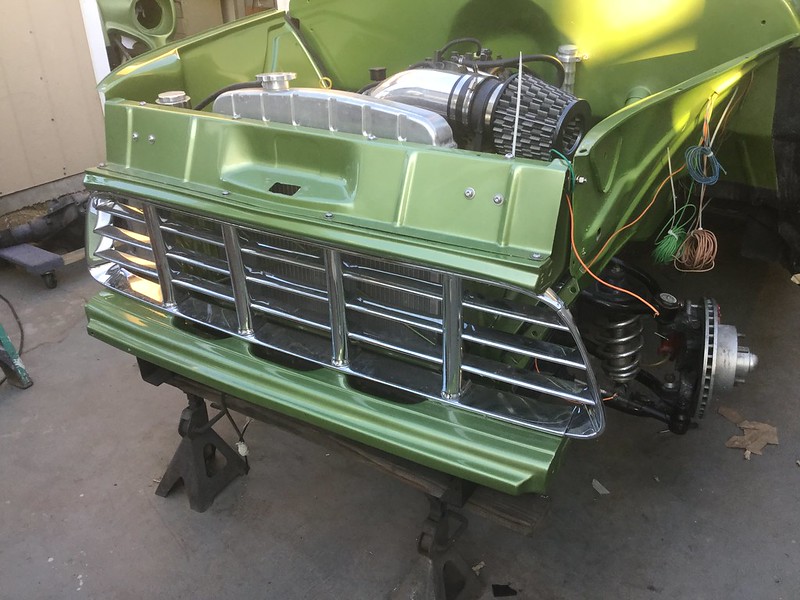
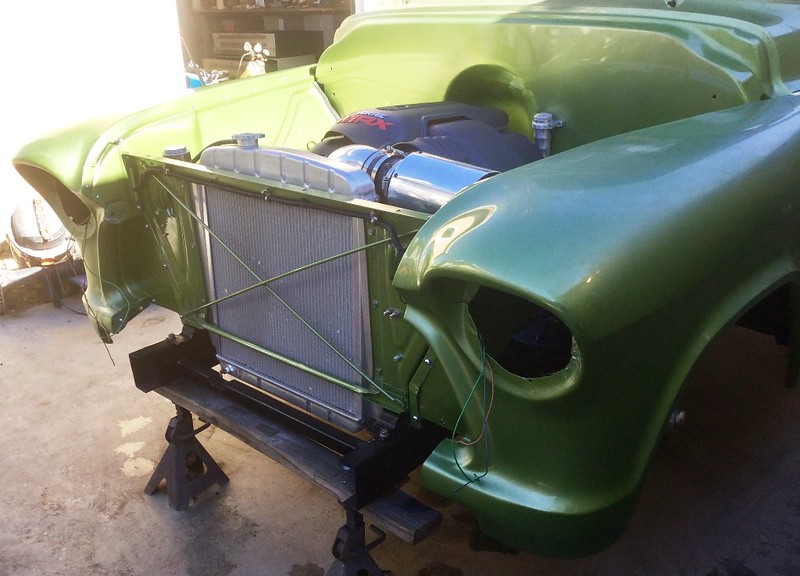
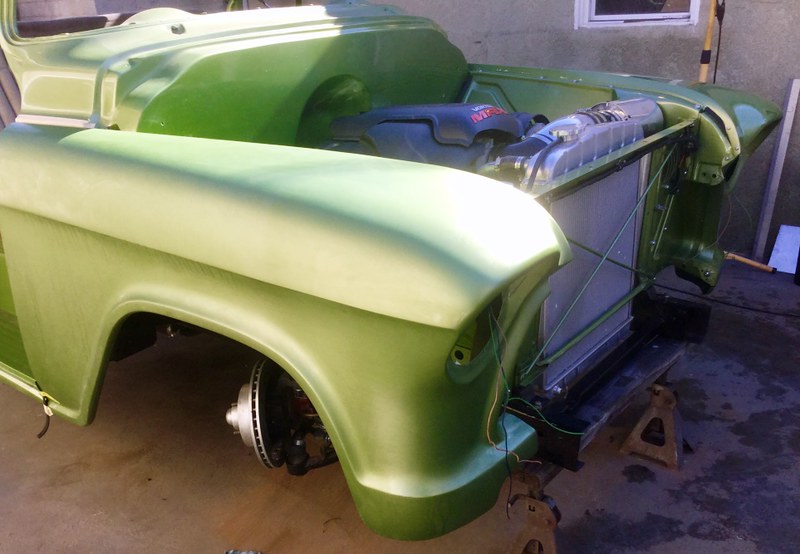
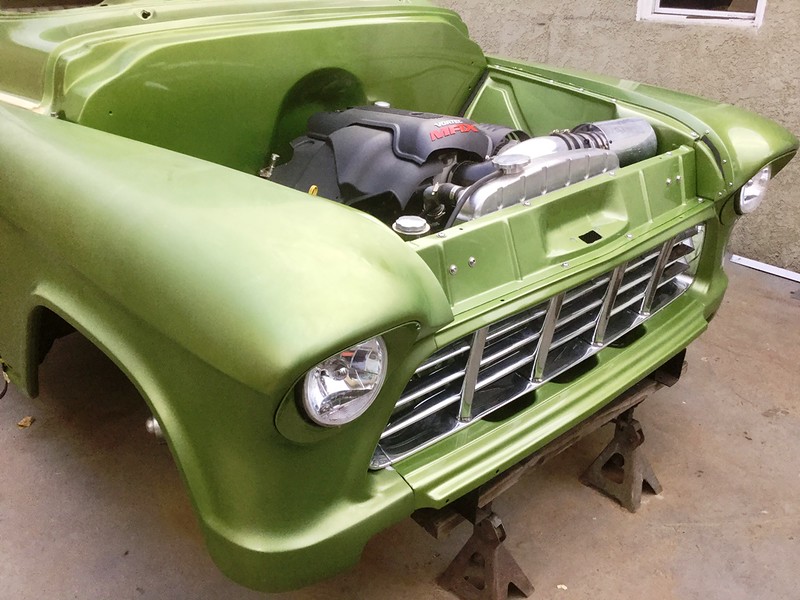
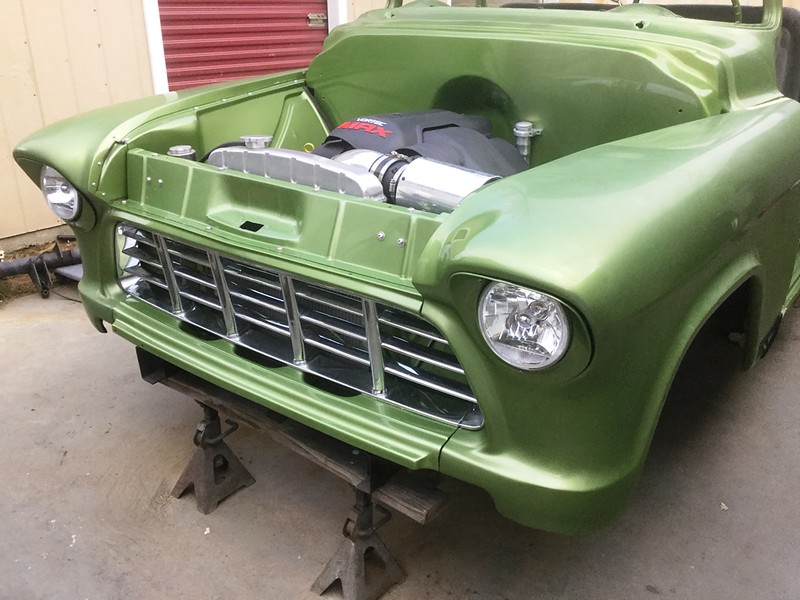
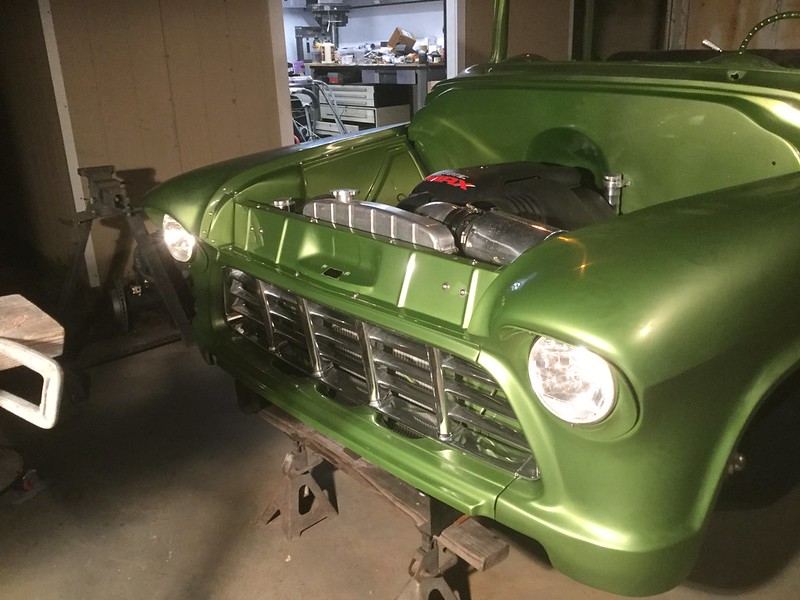
Well I’m finally getting this thing to look like a something. I got the complete dog house install, along with the headlights and turn signals, a
nd an engine cover (I think it’s temporary until I have time to fab something). I also started wet sanding the fenders.
The wifey said the truck was way too loud.lol She will be in it with me and I want her comfortable so I had to compromise. I installed new mufflers. The were cheap but got good reviews.
So for the price I tried them. They are Jones Exhaust Max Air Flows.
Heres what the truck sounds like now
Let there be lights
Last edited by BAM55; 12-13-2018 at 06:24 PM.
12-13-2018, 03:55 PM
#17
On The Tree
Thread Starter
Man everybody who sees it says that.lol I usually pick very conservative colors for projects but with this truck build I felt I needed a color that popped. I looked at all the oranges, and stuff like that and it was just way too common. I wanted something different
Last edited by BAM55; 12-13-2018 at 05:57 PM.
12-13-2018, 05:39 PM
#20
TECH Senior Member
I hear a SLIGHT lope (maybe just from being cold). Did you change the cam? Exhaust sounds good, BTW.