

LS1/700r4 into 02 Jeep TJ


 11-18-2007, 08:50 PM
#103

I haven't seen an update on this lately. How's it progressing?
How are you going to like driving a RMVB as a DD? What shifter are you going with?
I got those ROR motor mounts but need the longer arms for my chassis.
Looks like I'm going to need a pillow block for my front drive shaft as the 4 speed atlas is a little to long.
How are you going to like driving a RMVB as a DD? What shifter are you going with?
I got those ROR motor mounts but need the longer arms for my chassis.
Looks like I'm going to need a pillow block for my front drive shaft as the 4 speed atlas is a little to long.
11-19-2007, 07:28 PM
#104
On The Tree
Thread Starter
iTrader: (1)

Join Date: Jun 2007
Location: The 'Couve
Posts: 183
Likes: 0
Received 0 Likes
on
0 Posts
I have a few more update pics, and Pete shold be sending me more in the next couple of days. I'll get em up hopefully tomorrow.
It's a FMVB, not a reverse. I think it'll be fine to DD it. I drive my G35, an auto, in the manual mode most of the time, so Im used to having to change gears with no clutch. Wish the wife and I had got a munual in the G, but we were planning on living in Seattle when we bought it...sticks suck in that traffic!!
If you need the other arms, hit up ray and I'm sure he'll exchange them.
What ratio did you go with? I went with the 2.7, 3.8 & 10.4 or whatever the deep one is. I wanted the ability to front dig in 3.8, since that's the range I'll most likely use when wheeling.
Got any pics of your progress/rig/parts?
Got any pics of your progress/rig/parts?
11-22-2007, 01:40 AM
#105
Teching In

Join Date: Mar 2006
Location: Chicago
Posts: 20
Likes: 0
Received 0 Likes
on
0 Posts

Interesting build,
How wide arre the axles wms/wms?
How wide is the front section of the frame?
How many degrees do the front tires turn?
Do you have any pics of the entire frame with the body removed?
How wide arre the axles wms/wms?
How wide is the front section of the frame?
How many degrees do the front tires turn?
Do you have any pics of the entire frame with the body removed?
11-22-2007, 01:25 PM
#106
On The Tree
Thread Starter
iTrader: (1)
Join Date: Jun 2007
Location: The 'Couve
Posts: 183
Likes: 0
Received 0 Likes
on
0 Posts
Thanks
They are Chevy full width, I believe right around 69-70"
The front was narrowed 3" and raised 2.5" (I think I'm remmbering right...I'll go back and look again.)
The steering isnt hooked up yet, but they should turn the full amount that a stock chevy would turn. Just have to set the steering stops where we want em.
Dont have any of those yet. Once the cage has all the tubes put in it, and it's time to paint, then we'll tear it apart and I can get some pics.


 11-27-2007, 08:59 PM
#109
On The Tree
Thread Starter
iTrader: (1)
Join Date: Jun 2007
Location: The 'Couve
Posts: 183
Likes: 0
Received 0 Likes
on
0 Posts
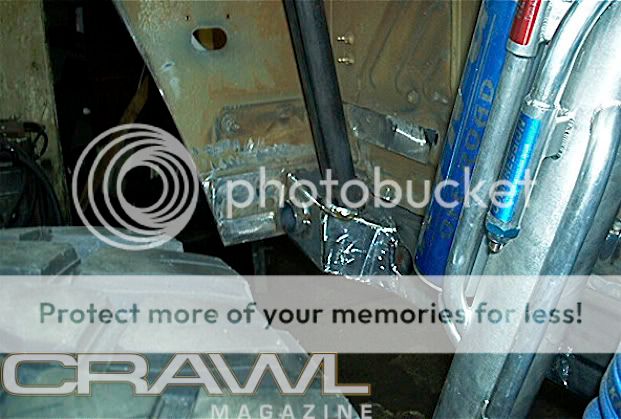
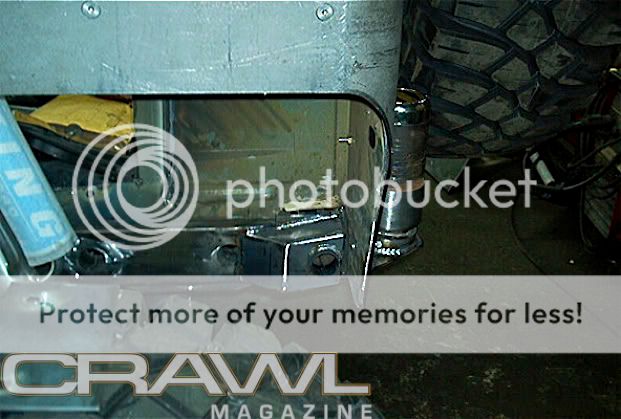
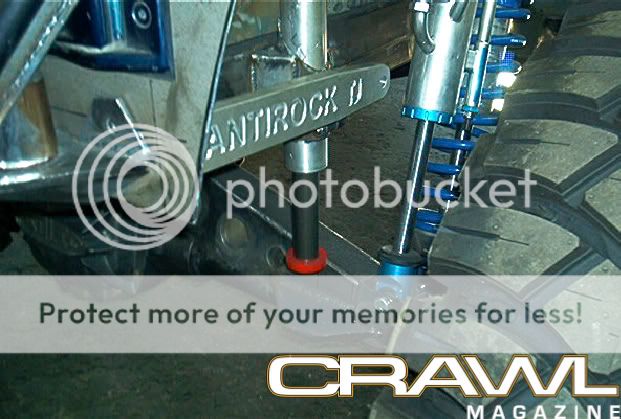
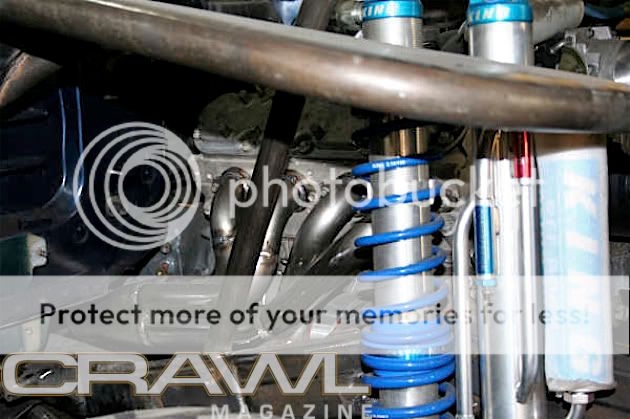
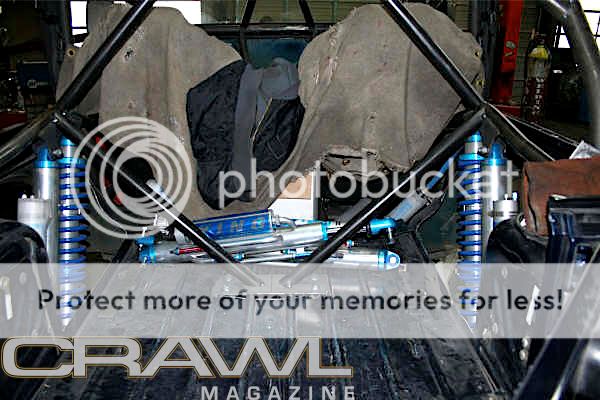
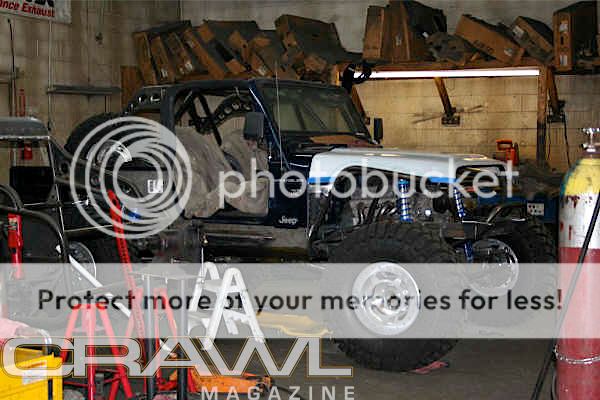
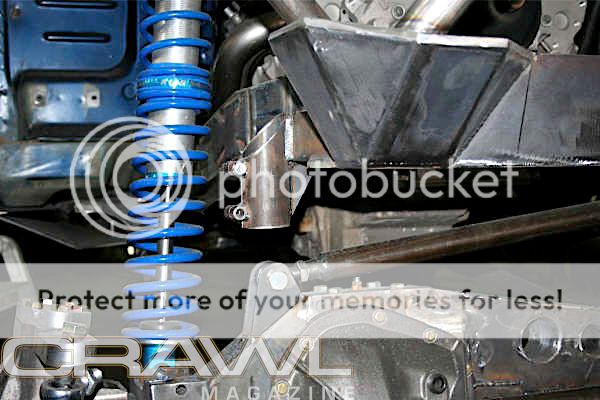
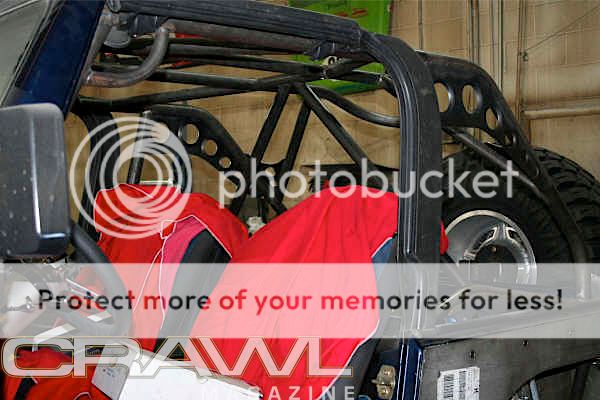
Here's the latest with the Currie Anti-Rock and Rock Equipment air bumps.
Got em in there nice and tight. Just need to get the Anti-Rock mounted up on the housing.
Im going to talk to Pete about making it a possible limiting strap/anti-rock mount.
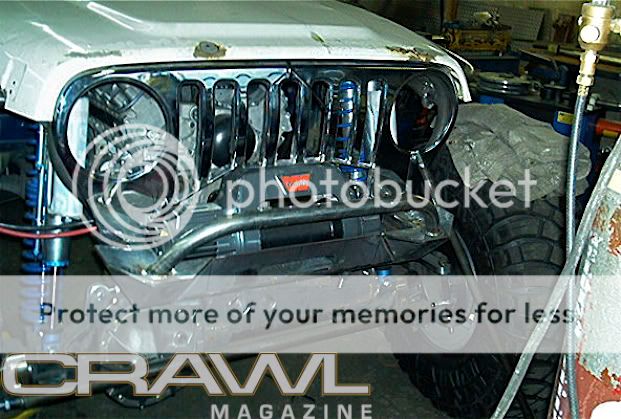
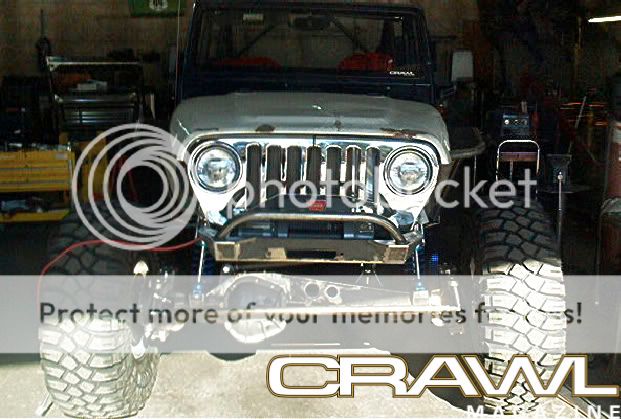
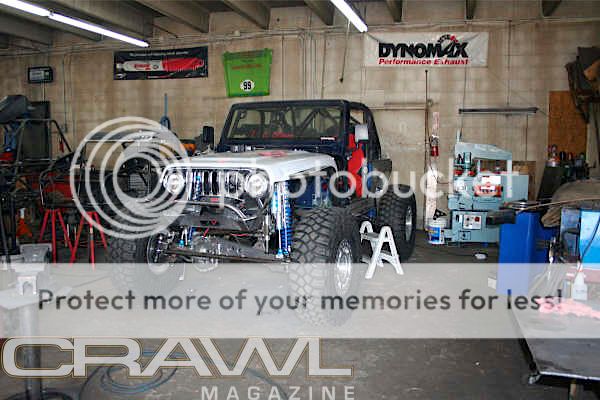
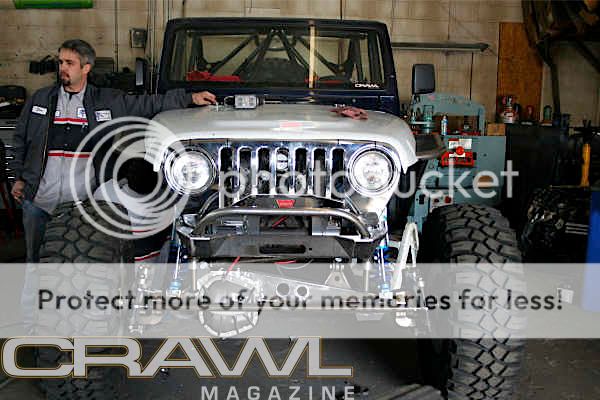
Front bumper cleaned up. Looks really nice with the grinding on the top edges. 8)
Here's the grill, lights mounted, and Griffin rad/trans cooler mocked up in place behind the grill. Dont wory, the grill will stay chrome!!
KIDDING!

Got em in there nice and tight. Just need to get the Anti-Rock mounted up on the housing.
Im going to talk to Pete about making it a possible limiting strap/anti-rock mount.
Front bumper cleaned up. Looks really nice with the grinding on the top edges. 8)
Here's the grill, lights mounted, and Griffin rad/trans cooler mocked up in place behind the grill. Dont wory, the grill will stay chrome!!
KIDDING!
12-13-2007, 11:14 AM
#111
On The Tree
Thread Starter
iTrader: (1)
Join Date: Jun 2007
Location: The 'Couve
Posts: 183
Likes: 0
Received 0 Likes
on
0 Posts
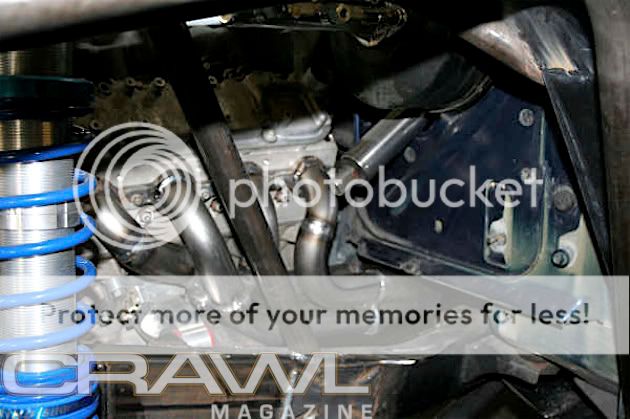
You and me both!! The guys have been hammered with lots "paying" jobs, so it's been a bit slow for updates. I talked to Pete a couple days ago and they were working on building the headers.
They've also got it flexed a bit a few times to check clearance, but Pete wasnt there to get any pics. Hopefully I'll get some updated shots sometime this weekend or early next week.
They've also got it flexed a bit a few times to check clearance, but Pete wasnt there to get any pics. Hopefully I'll get some updated shots sometime this weekend or early next week.
 12-27-2007, 06:45 PM
#113
On The Tree
Thread Starter
iTrader: (1)
Join Date: Jun 2007
Location: The 'Couve
Posts: 183
Likes: 0
Received 0 Likes
on
0 Posts
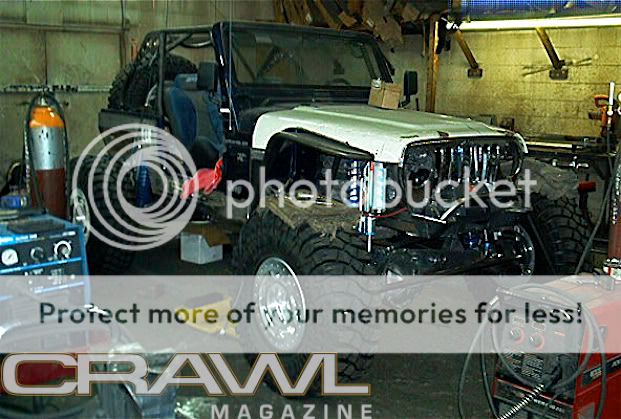
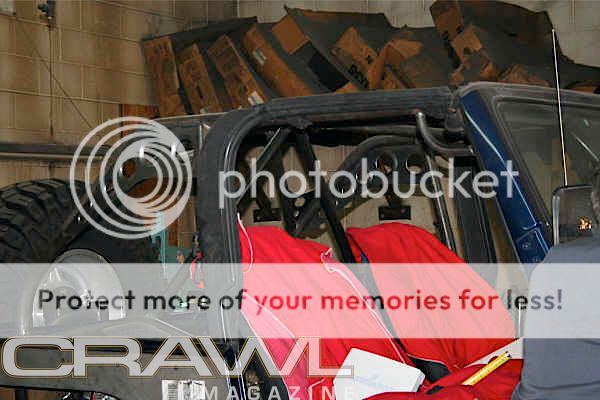
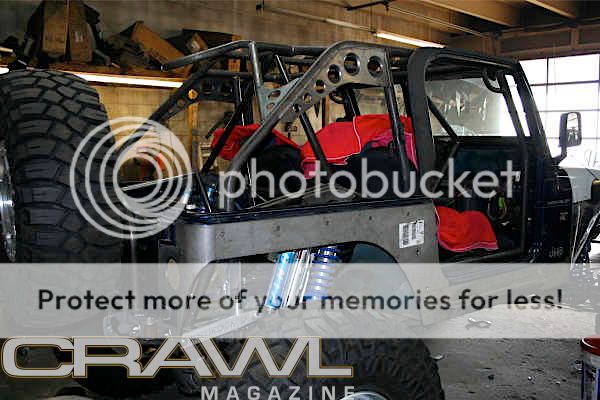
Got some pics from Pete today.
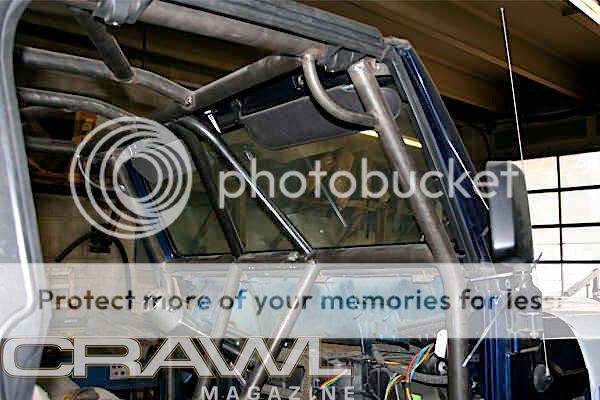
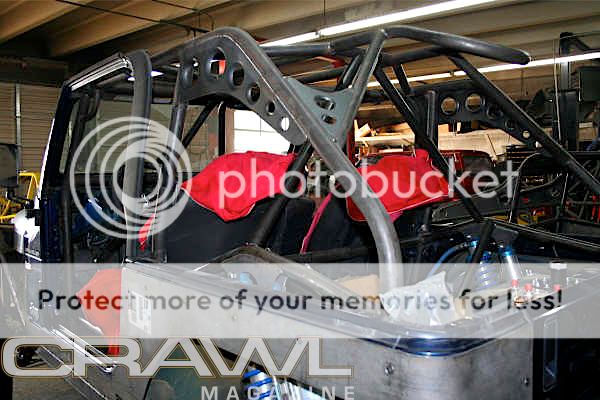
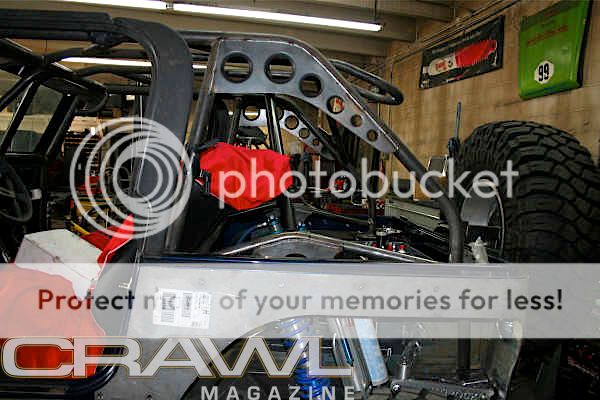
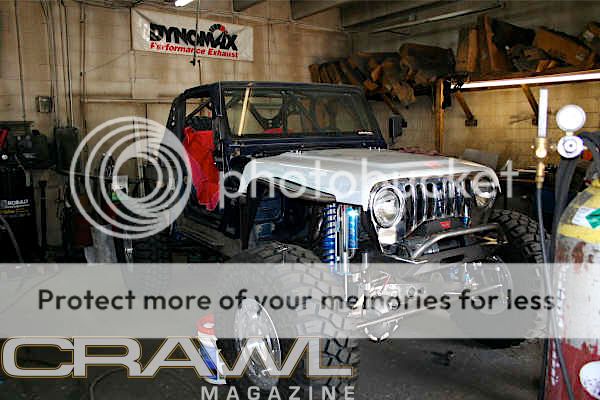
Got a cage mock up going. I like the direction it's going as it allows me good access to the rear of the jeep from the drivers seat. One of the purposes for this build it to have my camera gear within reach of the drivers seat, but not sitting in a camera bag in the passenger seat. This design would allow me to gain access to pelican cases I want to have tied down behind the seats, and it serves of course as triangulation for side impacts, also supports the shock bar running from back to front.
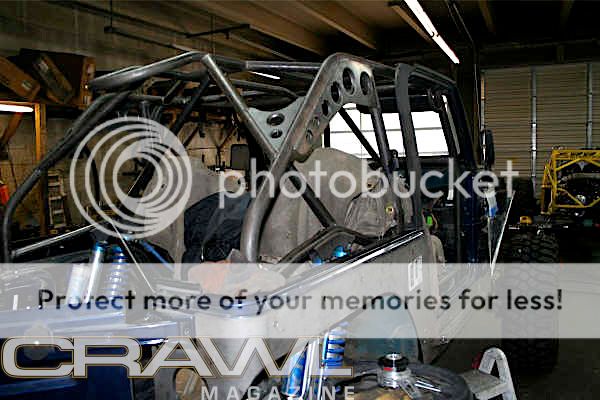
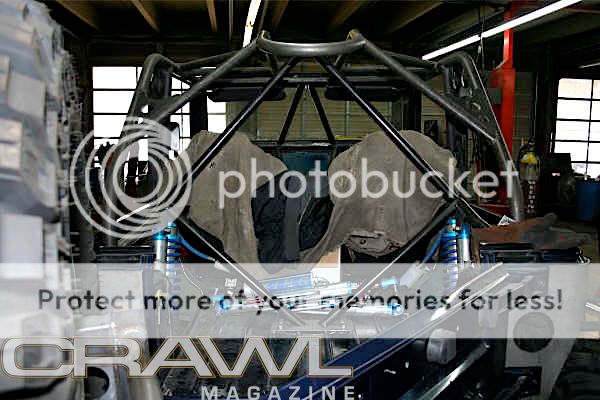
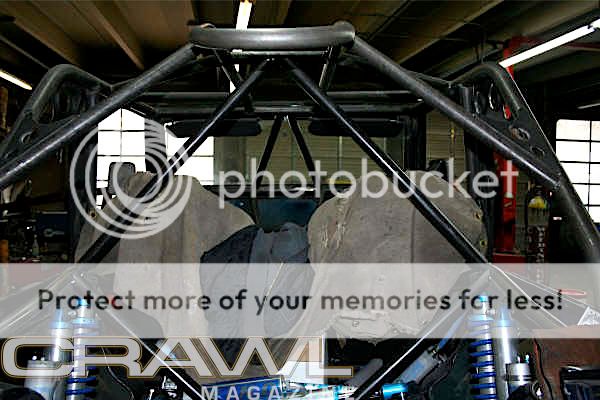
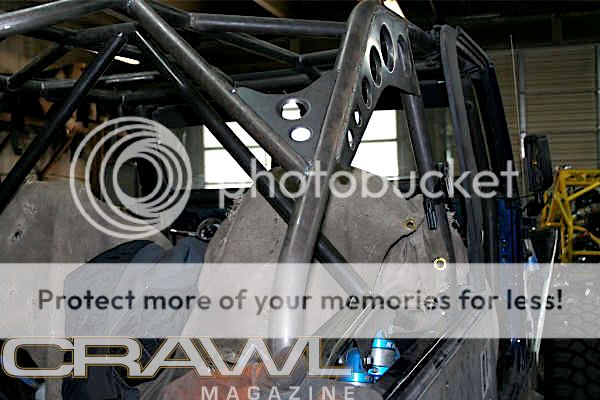

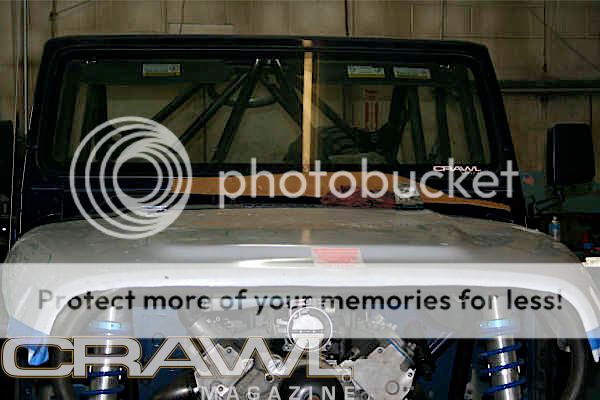
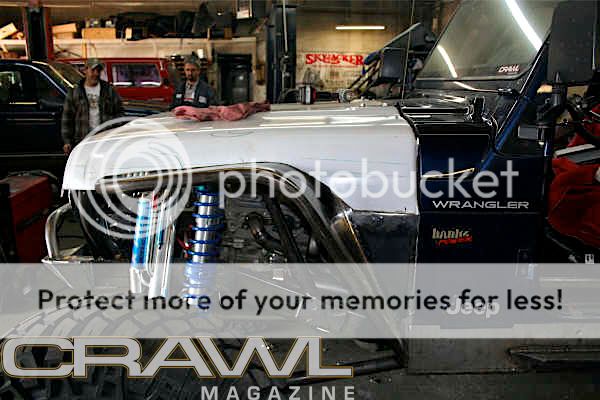
Bars added to the front, from the dash cross bar to the top cross bar.

Trent Fab lexan hood cut nice and tight around the front fenders.

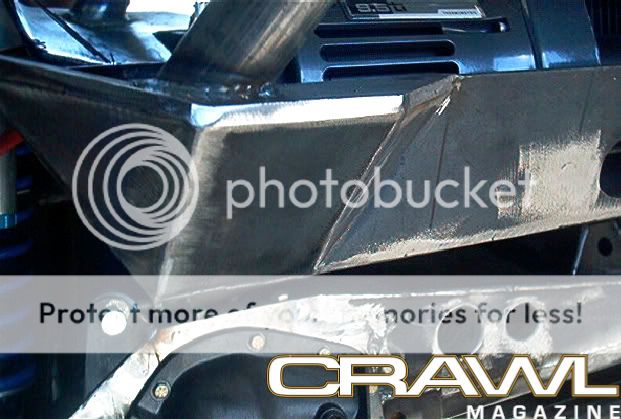
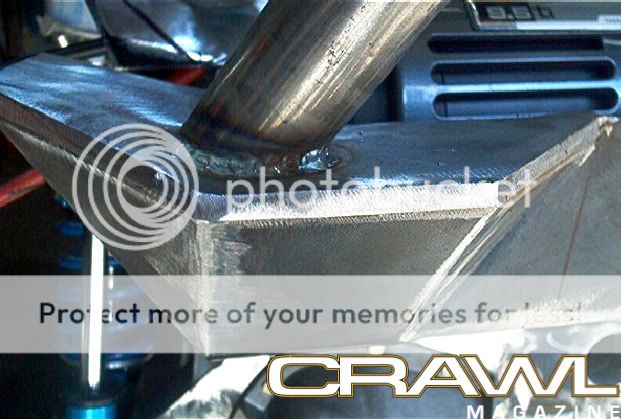
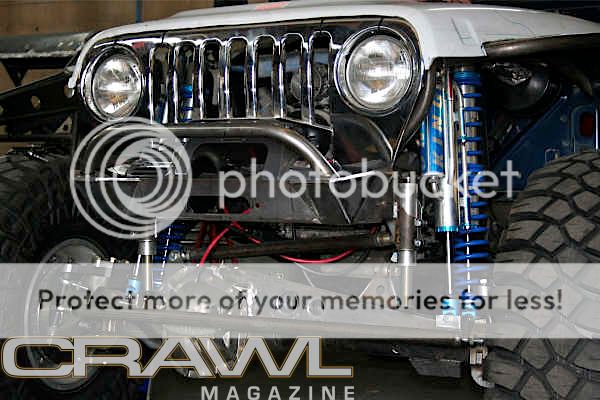
And the front bump can mounts
Got a cage mock up going. I like the direction it's going as it allows me good access to the rear of the jeep from the drivers seat. One of the purposes for this build it to have my camera gear within reach of the drivers seat, but not sitting in a camera bag in the passenger seat. This design would allow me to gain access to pelican cases I want to have tied down behind the seats, and it serves of course as triangulation for side impacts, also supports the shock bar running from back to front.
Bars added to the front, from the dash cross bar to the top cross bar.
Trent Fab lexan hood cut nice and tight around the front fenders.
And the front bump can mounts
12-28-2007, 05:06 PM
#114
On The Tree
Thread Starter
iTrader: (1)
Join Date: Jun 2007
Location: The 'Couve
Posts: 183
Likes: 0
Received 0 Likes
on
0 Posts
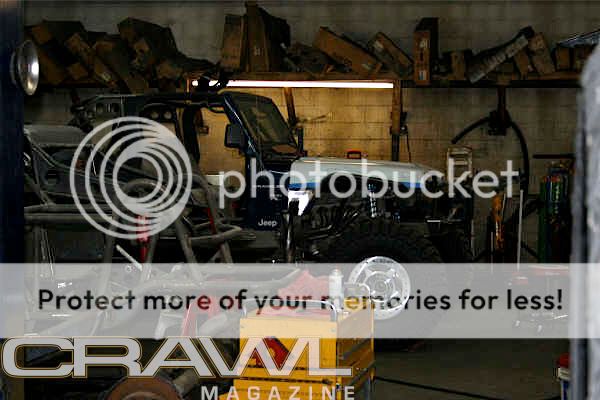
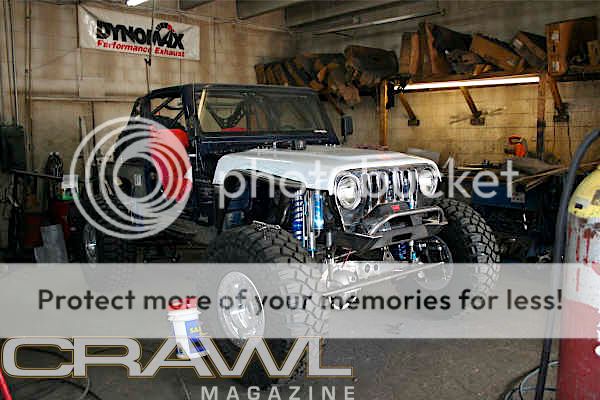
Few more pics for today.
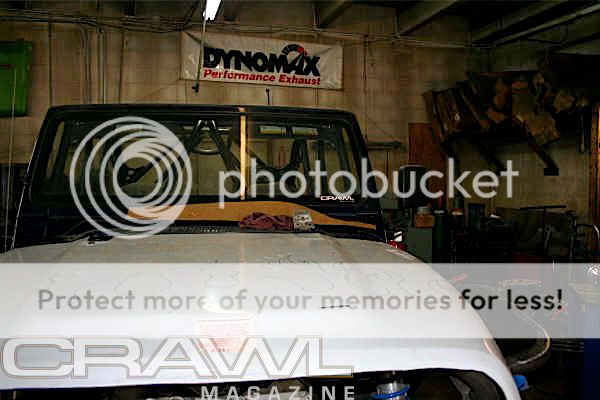
Here we go...more of the cage additions.
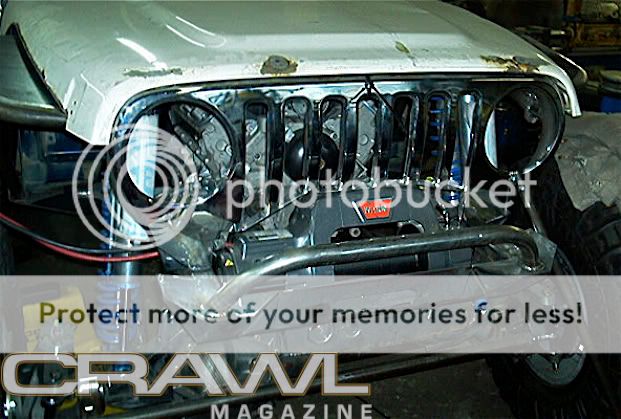
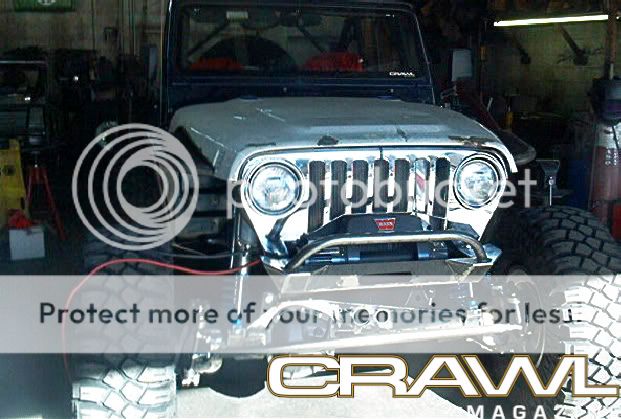
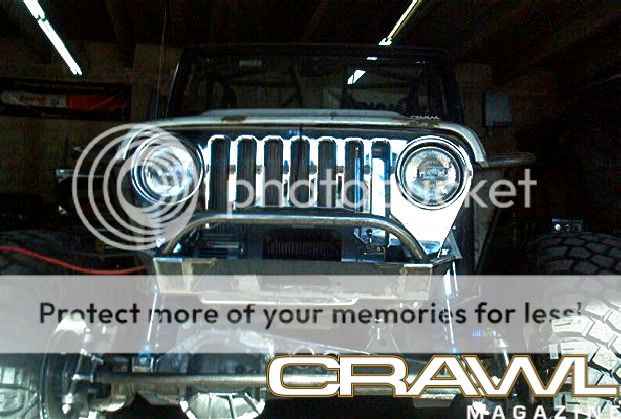
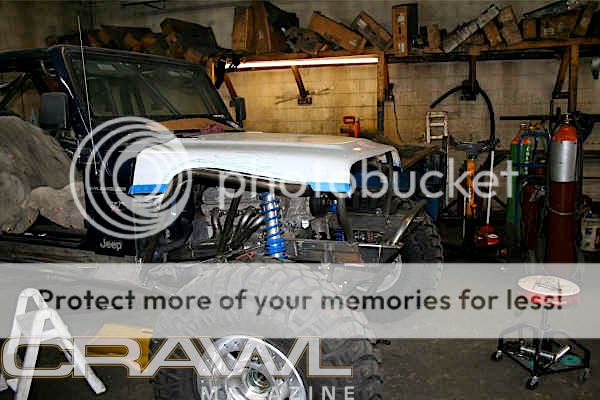
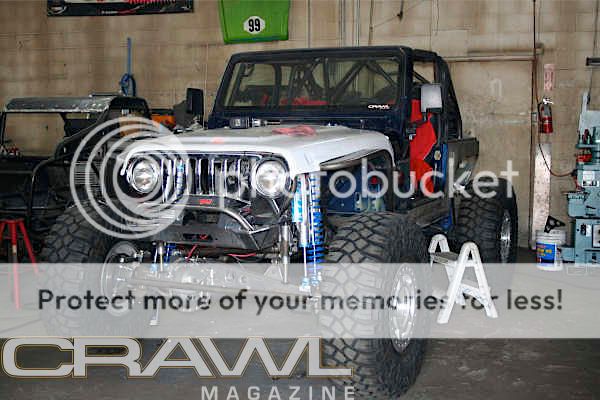
Shots of the front end nearly complete. Grill on, lights, Trent Fab hood & bumps.


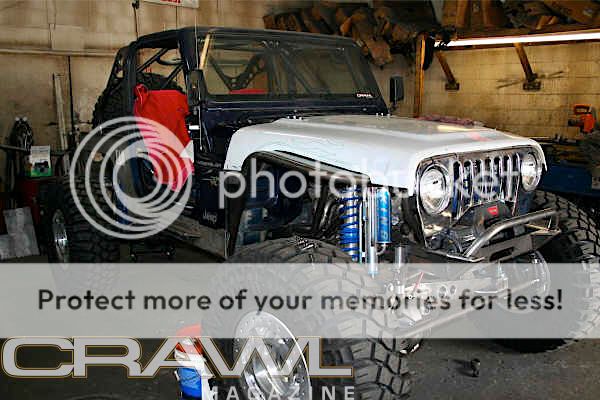
Here we go...more of the cage additions.
Shots of the front end nearly complete. Grill on, lights, Trent Fab hood & bumps.
12-29-2007, 08:54 PM
#116
On The Tree
Thread Starter
iTrader: (1)
Join Date: Jun 2007
Location: The 'Couve
Posts: 183
Likes: 0
Received 0 Likes
on
0 Posts
Shoot, I honestly have no idea. I'll have to go through receipts when it's all said and done to get an idea of the stupid amount of money in this thing.

 01-19-2008, 02:23 AM
#118
On The Tree
Thread Starter
iTrader: (1)
Join Date: Jun 2007
Location: The 'Couve
Posts: 183
Likes: 0
Received 0 Likes
on
0 Posts
Been a while since an update...
These are some shots with some 47" LTB's on it!!! Monster truck!


And one of Pete's buggy that the 47" LTBs were on!

These are some shots with some 47" LTB's on it!!! Monster truck!
And one of Pete's buggy that the 47" LTBs were on!
01-19-2008, 02:24 AM
#119
On The Tree
Thread Starter
iTrader: (1)
Join Date: Jun 2007
Location: The 'Couve
Posts: 183
Likes: 0
Received 0 Likes
on
0 Posts
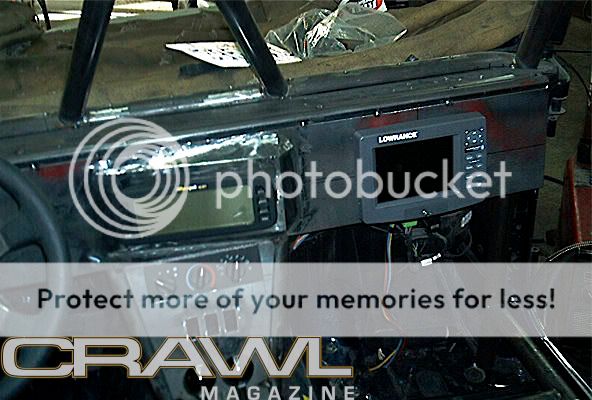
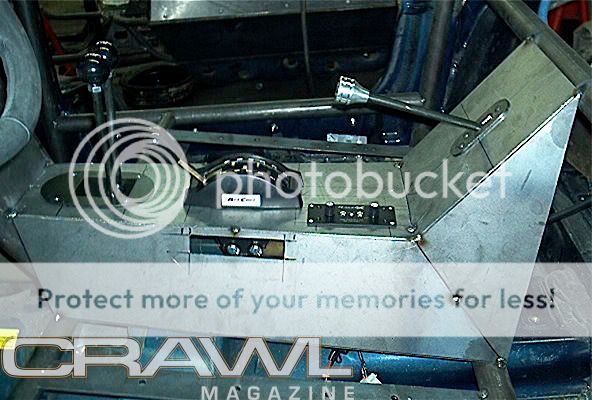
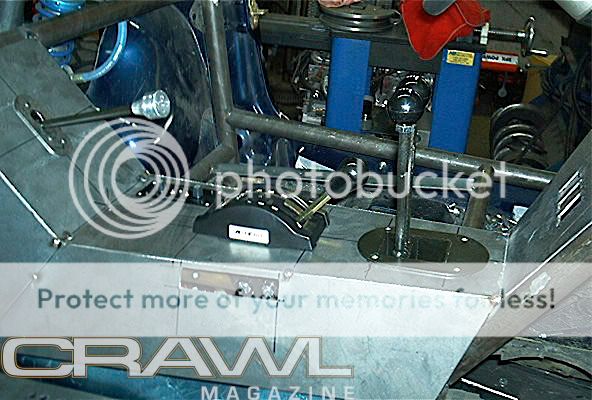
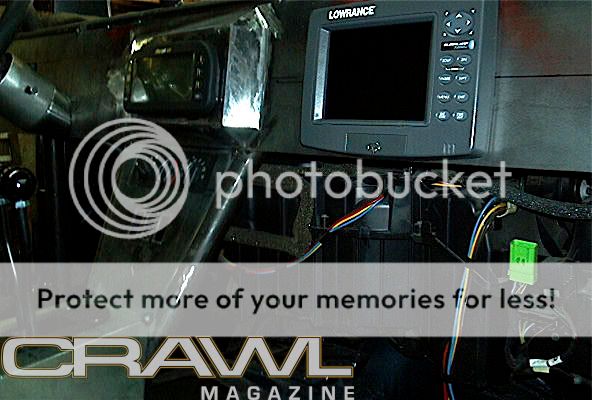
Here's the start of the dash/center console build...
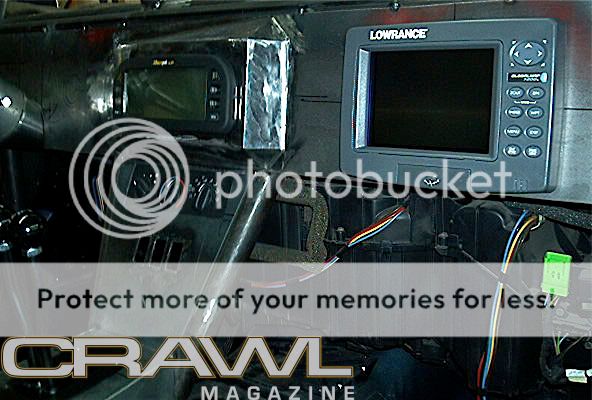
Looking in from the back seats. Racepak digi dash above the heat & A/C controls. The GPS is just set up in the dash to see about where it's going to go. It'll more than likely be raised up a bit off the dash like the Racepak.
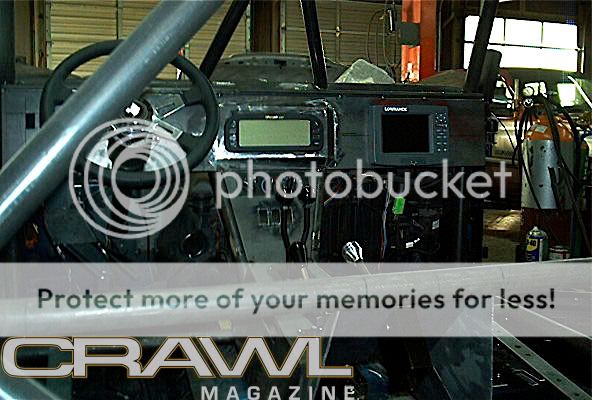
We're talking about getting some bezels done out of aluminum to go around the Racepak and Lowrance. Also having a piece machined to cover up the heater-A/C controls and then get some machined ***** as well.
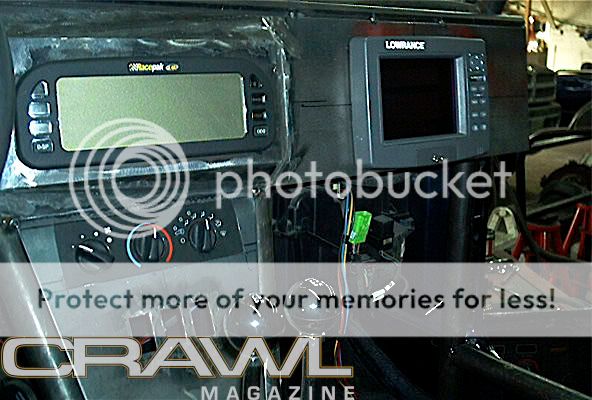
Atlas twin sticks (I still need to get the nice ***** for them), Art Carr shifter, intercom controls and you can see the end of the Atlas LOW LOW lever.
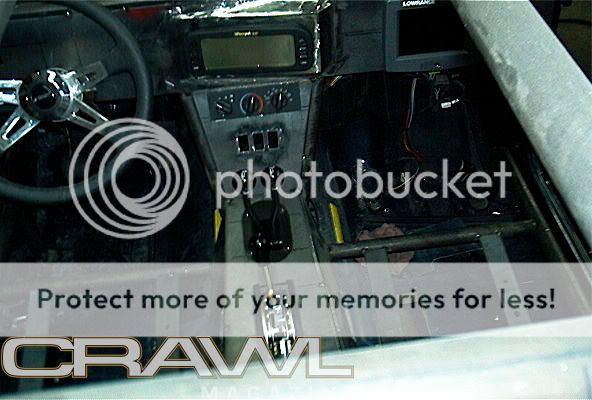
Holes cut out for the ARB controls, below the heater controls.
Looking in from the back seats. Racepak digi dash above the heat & A/C controls. The GPS is just set up in the dash to see about where it's going to go. It'll more than likely be raised up a bit off the dash like the Racepak.
We're talking about getting some bezels done out of aluminum to go around the Racepak and Lowrance. Also having a piece machined to cover up the heater-A/C controls and then get some machined ***** as well.
Atlas twin sticks (I still need to get the nice ***** for them), Art Carr shifter, intercom controls and you can see the end of the Atlas LOW LOW lever.
Holes cut out for the ARB controls, below the heater controls.
01-19-2008, 02:26 AM
#120
On The Tree
Thread Starter
iTrader: (1)
Join Date: Jun 2007
Location: The 'Couve
Posts: 183
Likes: 0
Received 0 Likes
on
0 Posts
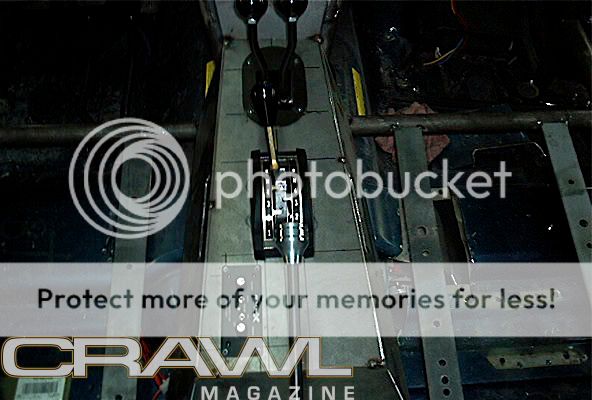
Trans tunnel.
Rectangular holes are for shifter adjustments.
Looking at placing the volume control for the AMP just on the left (drivers side) of the trans shifter.
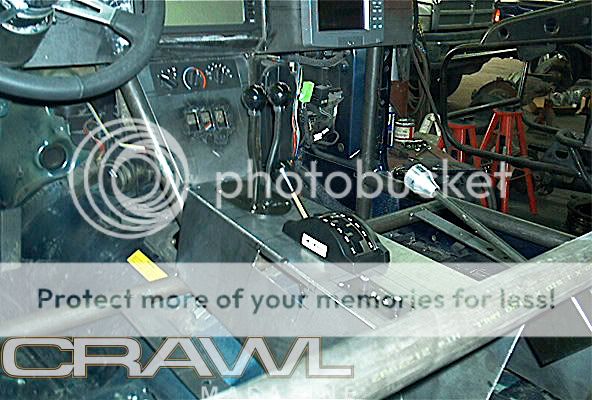
To finish off the dash, removable tins will be used to hide everything under the dash.
Rectangular holes are for shifter adjustments.
Looking at placing the volume control for the AMP just on the left (drivers side) of the trans shifter.
To finish off the dash, removable tins will be used to hide everything under the dash.