SOM LAG Project: 394ci, 25.3, Twin PT7675 Gen 2's, PG, E85, 7-second Street Car
 12-27-2013, 04:46 PM
#1
SOM LAG Project:
Build 1.0: Purchased car with D1SC Procharger.
Build 1.1: Swapped D1SC head unit for F1A.
Build 2.0: 417 Motorsports Twin Turbo Kit with T3 Flanges. Engine Upgrade from LS1 to 6.0 Block.
Build 2.1: 417 Motorsports Twin Turbo Kit with T4 Flanges.
Build 3.0: One Guy's Garage Twin Turbo Kit. Engine Upgrade from 6.0 Block to LSX Block.
Build 3.1: Rossler Powerglide. Transmission upgrade from 4L80 to Powerglide.
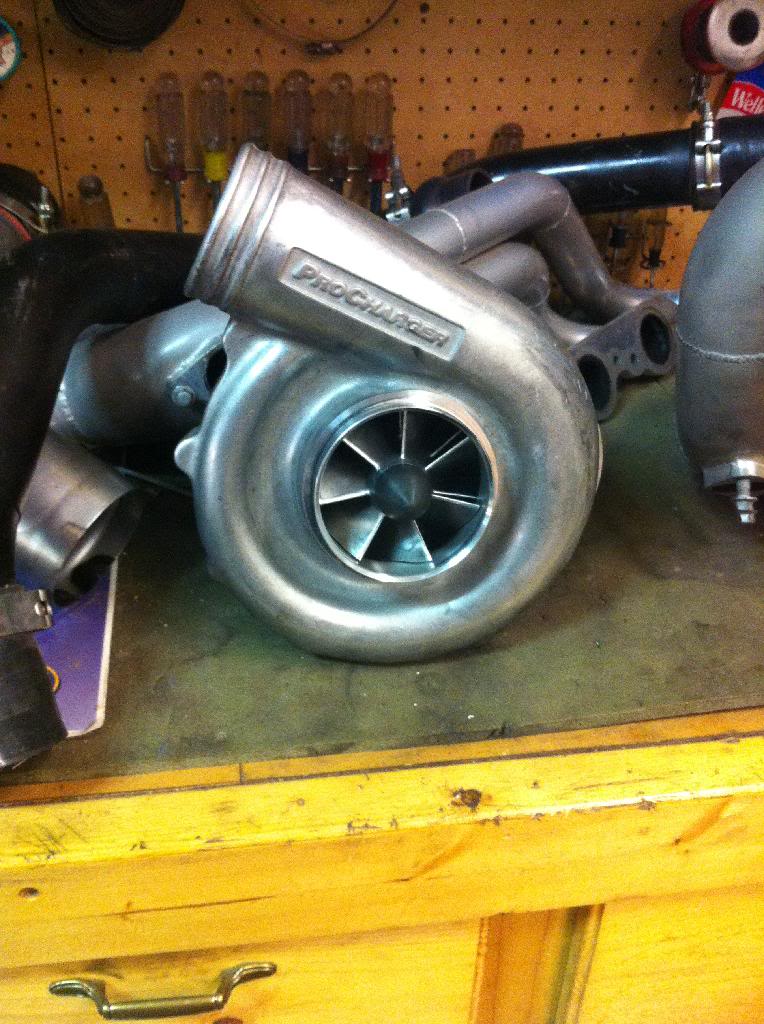
Build 3.2: Turbo upgrade from Precision PT6766's to Precision Gen 2 PT7675CEA BB Turbos.
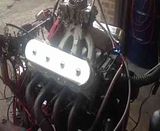
Build 3.3: 394ci with Winberg Crankshaft (3.75" stroke) and Diamond 2K Pistons (4.09" bore) with Brodix BR1-13 Cylinder Heads.
Build 3.4: Rossler Turboglide. Transmission upgrade from Powerglide to Turboglide. Change from 3.50 to 3.89 rear gear.
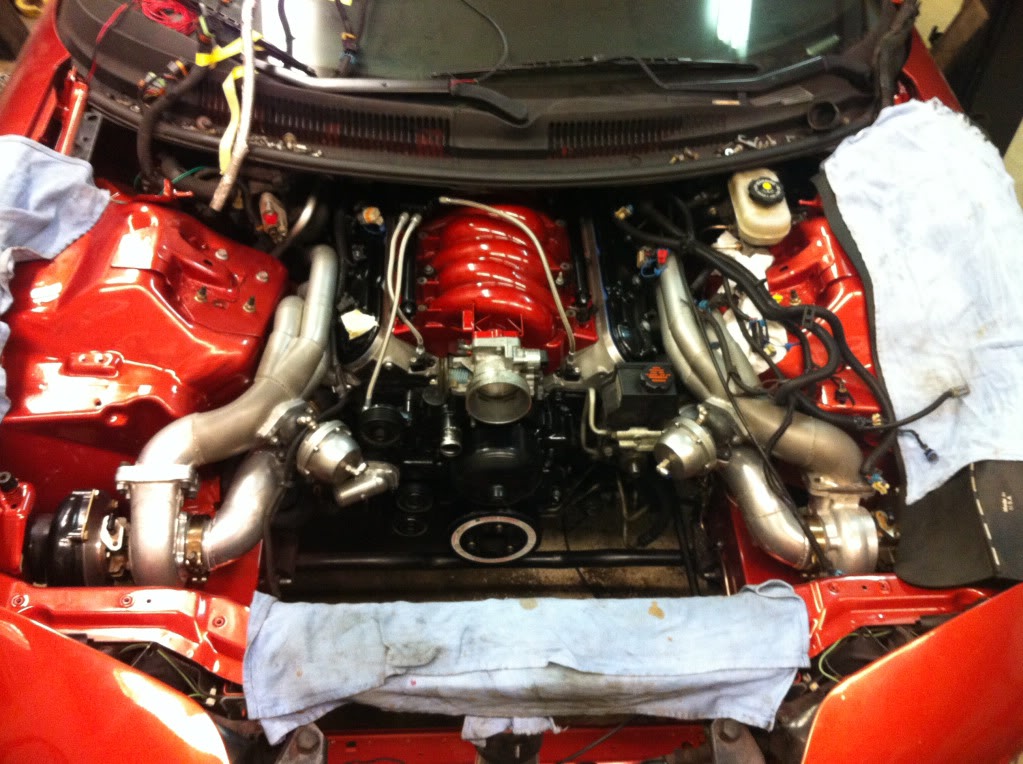
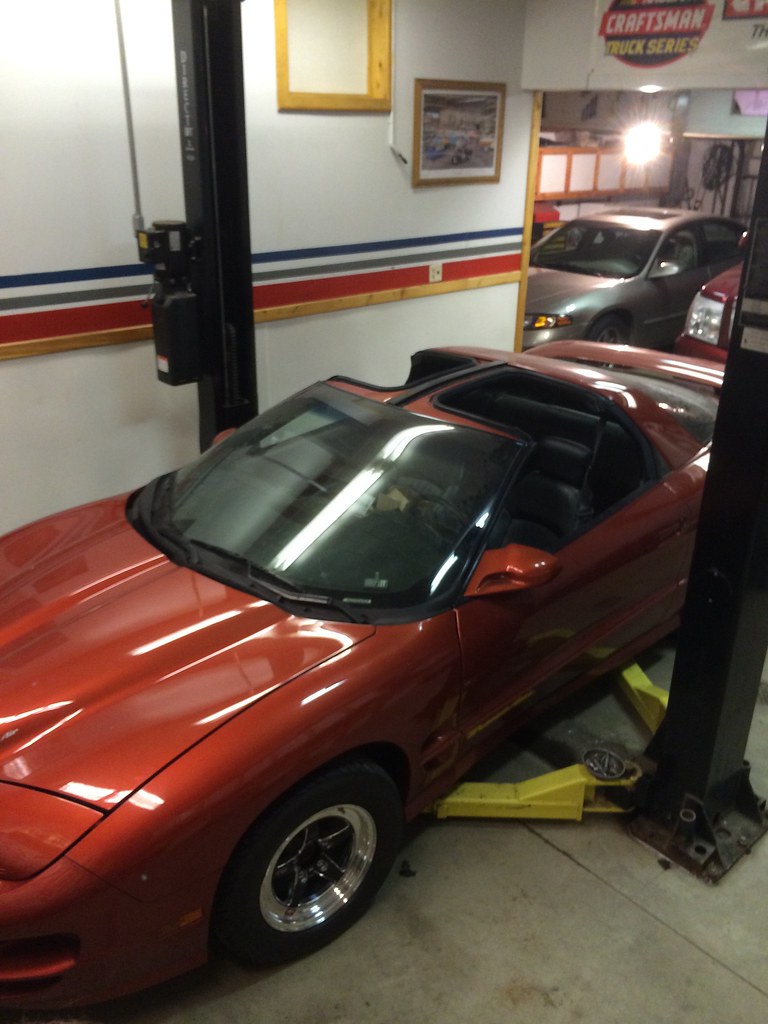
Teaser Underhood Shot (From Build 2.1):
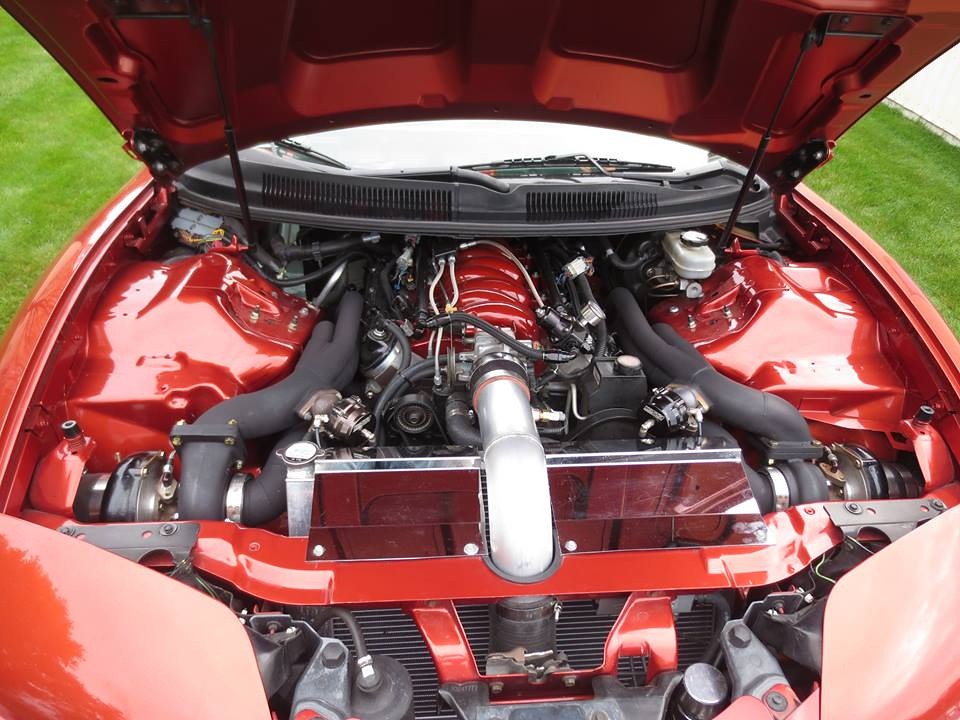
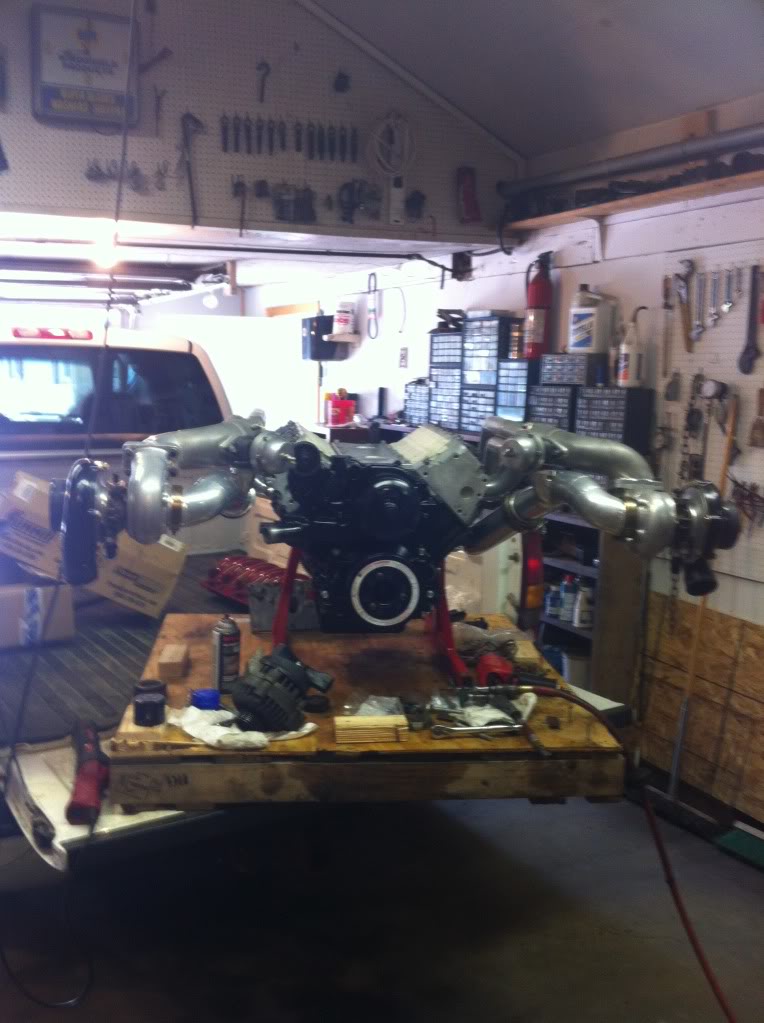
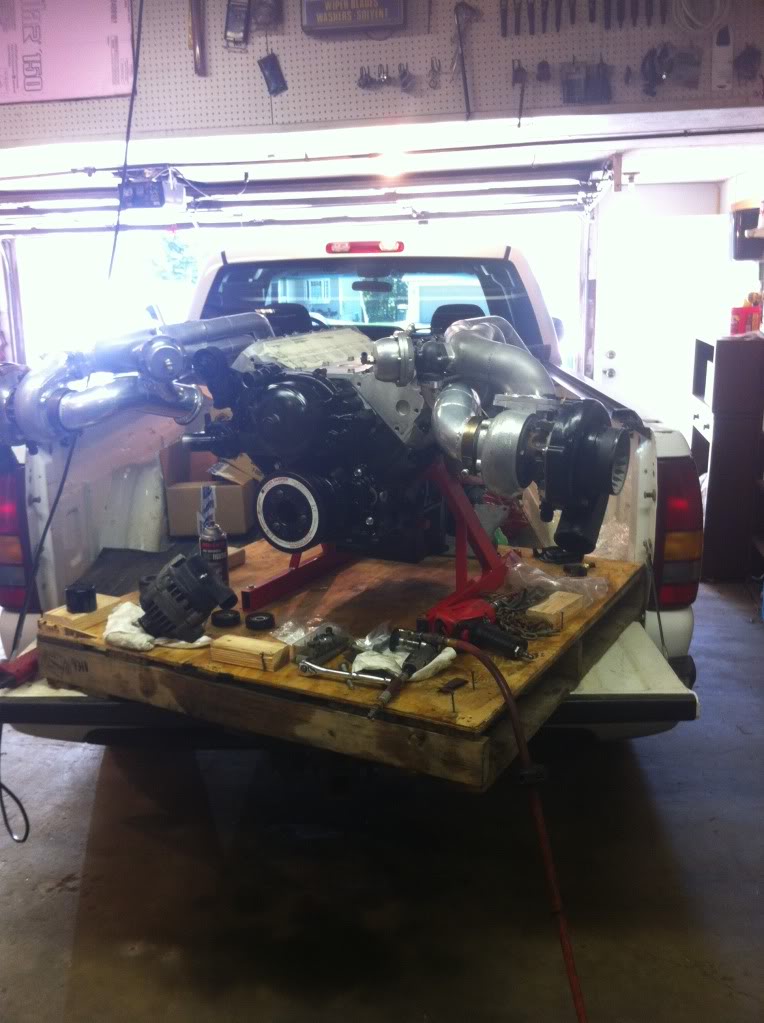
Underhood Shot (From Build 3.0)

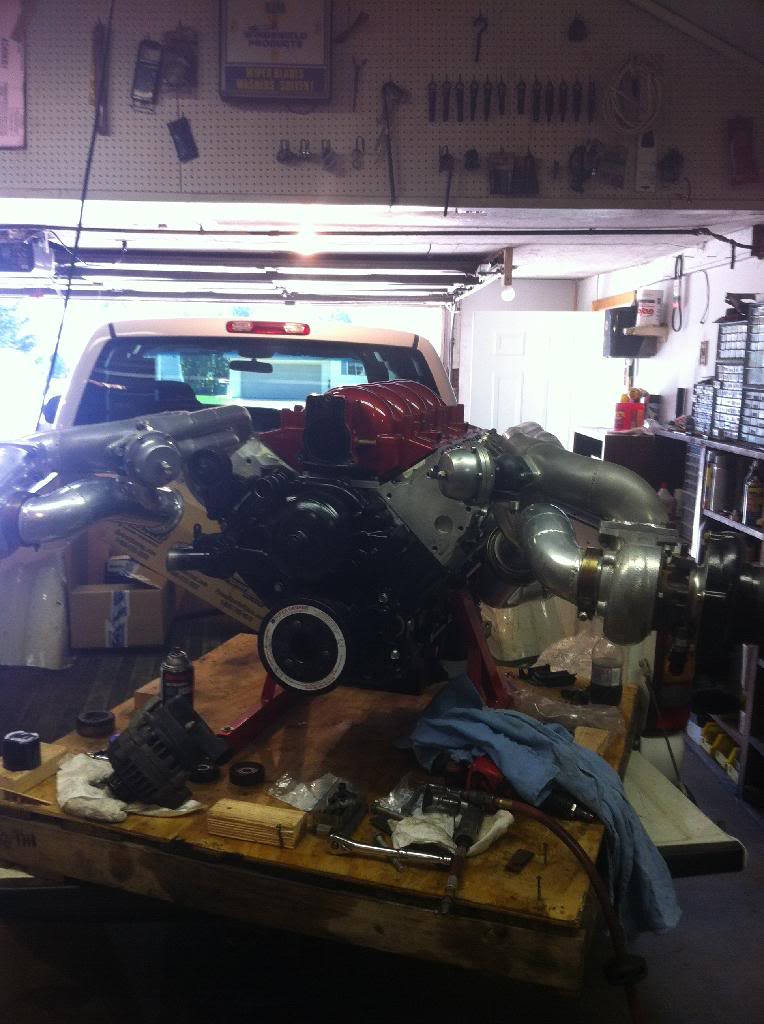
Underhood Shot (From Build 3.3)

General Information:
Vehicle: 2001 Pontiac Trans Am WS6
Owner: Only ERO's (Josh Shones), Rochester, Minnesota
Youtube Channel: Only ERO's, https://www.youtube.com/channel/UCp7..._as=subscriber
Engine
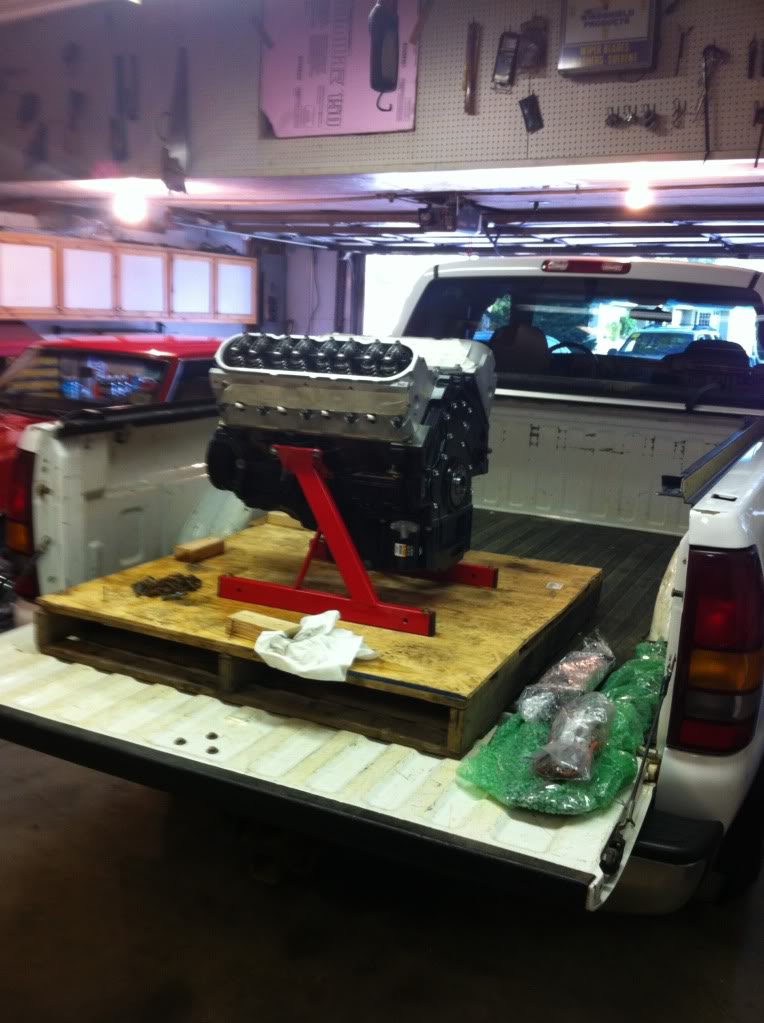
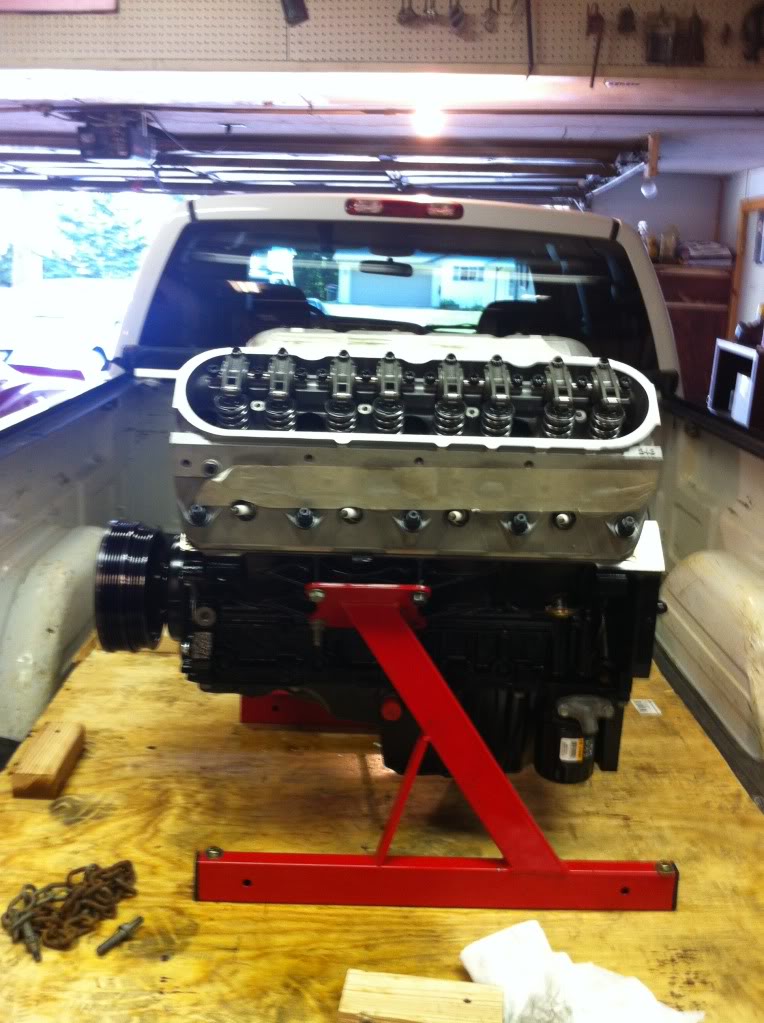
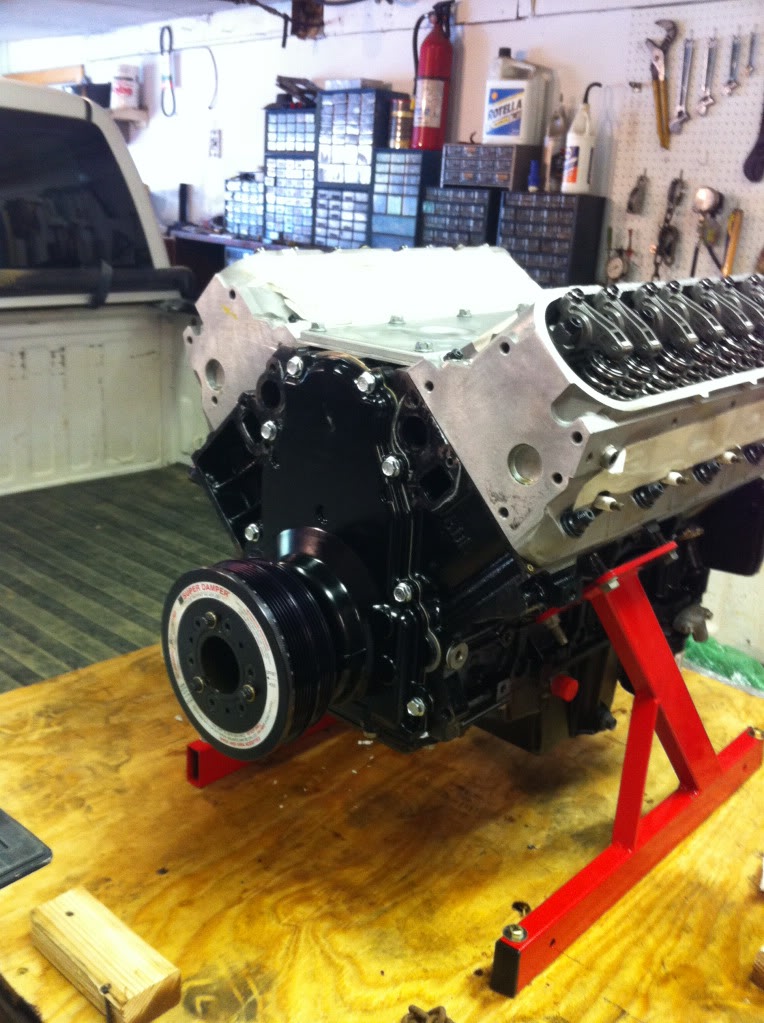
Block: GM Performance LSX Bowtie Block Standard Deck #19260093, 394ci (4.09 x 3.75), ARP main studs, Melling high-volume oil pump #10355
Oil Pan: Moroso 21150 Aluminum Street/Strip Oil Pan, with Moroso 23763 remote oil filter mount.
Compression ratio: 9.8:1
Heads: Brodix BP BR1-13 CNC ported Cathedral, 249cc intake runner, 70cc chamber, 6-bolt, HIPed. ARP 625 head studs plus BTR 4-bolt to 6-bolt conversion, Cometics MLX 6-bolt 4.150 .053" head gaskets.
Cam: LJMS Custom Cam, 243�/255�, .632/.632, 117+5
Intake Valves: Ferrea Stainless 12 degree Intake Valves, 2.10" Diameter, #F6242
Exhaust Valves: Ferrea Inconel 24 degree Exhaust Valves, 1.60" Diameter, #F1892P
Springs: BTR SK701, .685" Lift Spring Kit, with titanium retainers. Locator - .505" ID .045" Thick.
Pushrods: BTR, .080" Wall, 3/8" Diameter, 7.525" length.
Lifters: Johnson 2126LSR slow leak down Race-style lifters with Axle Oiling for LS Engines
Rocker arms: Stock with BTR LS1 shaft rocker kit.
Pistons: Diamond LS 2K Custom LS Pistons (1938004) w/H13 .225 Wrist Pins. 4.090” forged, lateral piston gas ports
Rings: Total Seal CS AP Advanced Profiling Ring Set, 4.090”.
Crankshaft: Winberg LS Billet CCW Crankshaft. 3.750" stroke, 2.100" pin size, 2.560" Main size, 2004 Bobweight
Rods: Oliver #C6125LS1-STSW8 Speedway Series Connecting Rods. 6.125 Length, 2.100 Rod Journal, I Beam Design, 7/16 WSB bolts.
Intake manifold: 417 Motorsports Billet low profile intake with sheetmetal lid.
Throttle body: Holley Billet 95mm LS Throttle Body w/low RPM Taper
Balancer: ATI Super Damper, Fbody Balancer w/ 8mm HTD 25 tooth pulley, #918852.
Cooling System: Griffin 56241 Radiator (relocated to rear), Davies Craig EWP150 EWP, 417 Motorsports Anodized Billet Engine Water Manifold, Kurt Urban LS Vapor Vent System.
Fuel System:
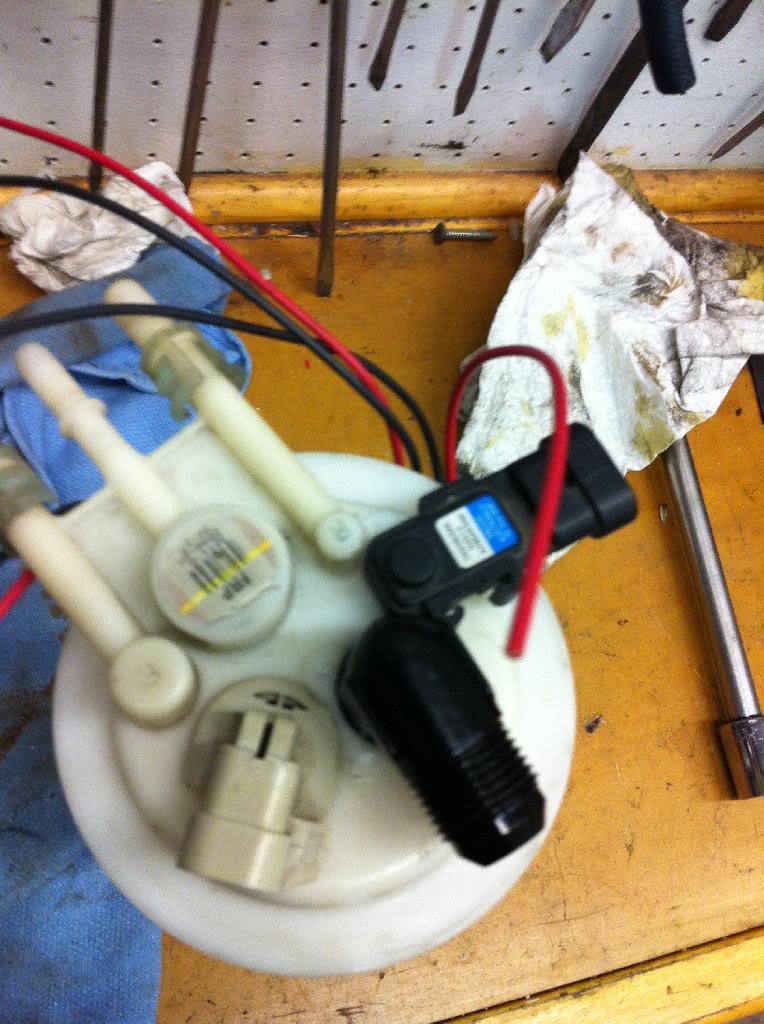
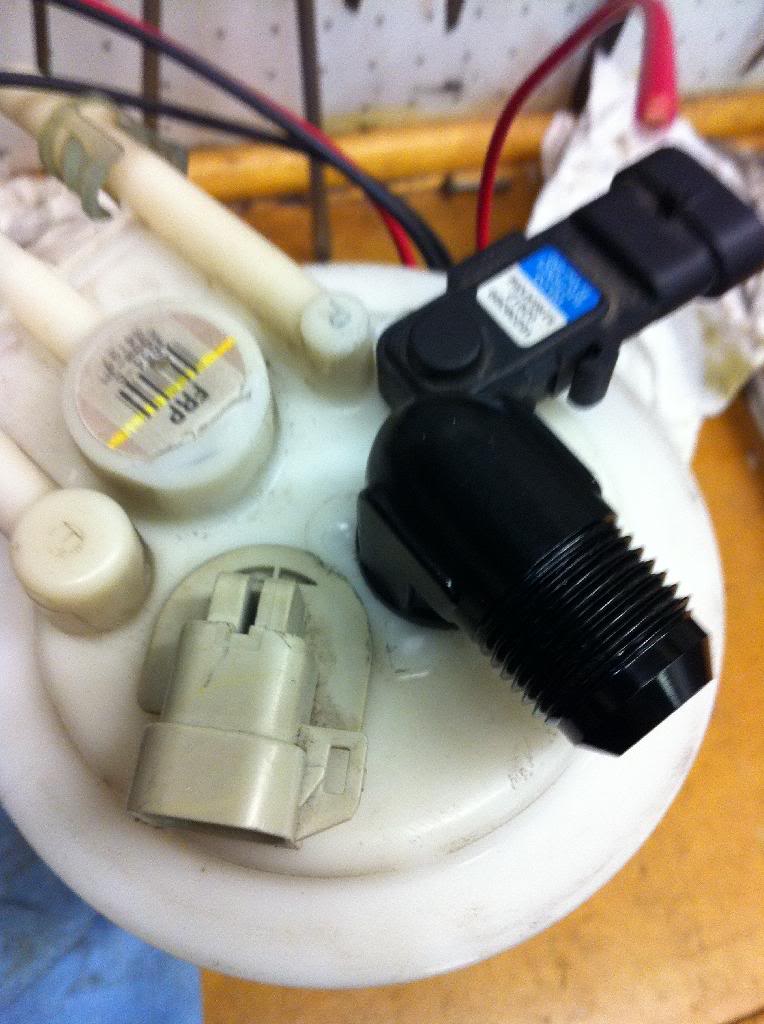
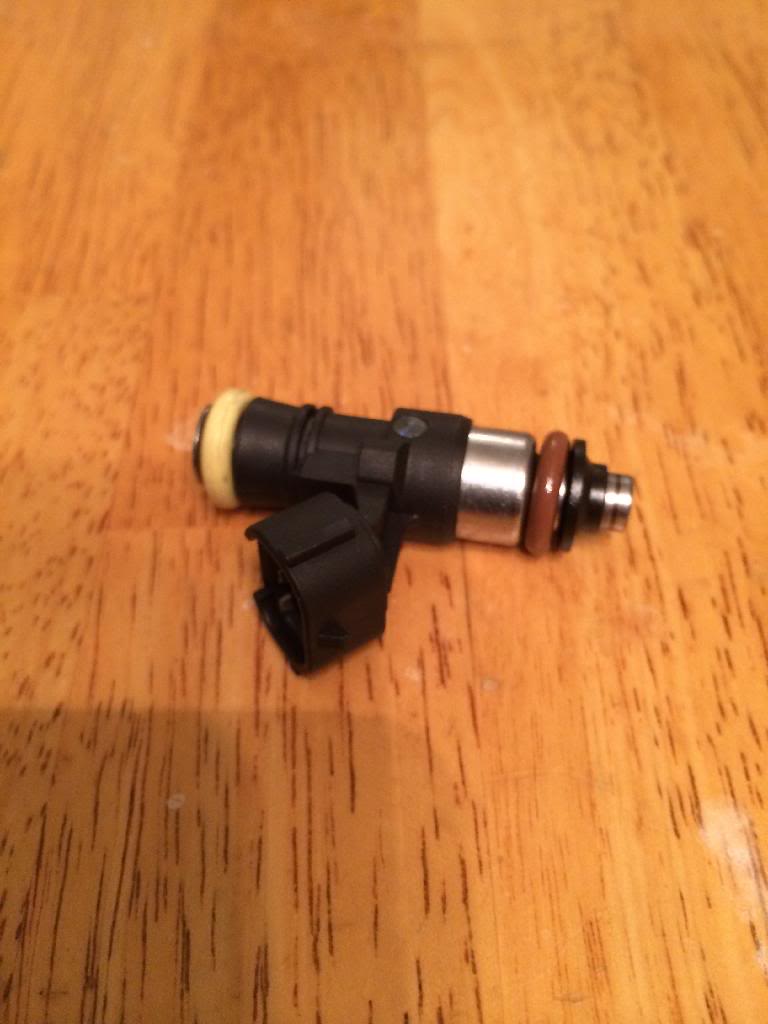
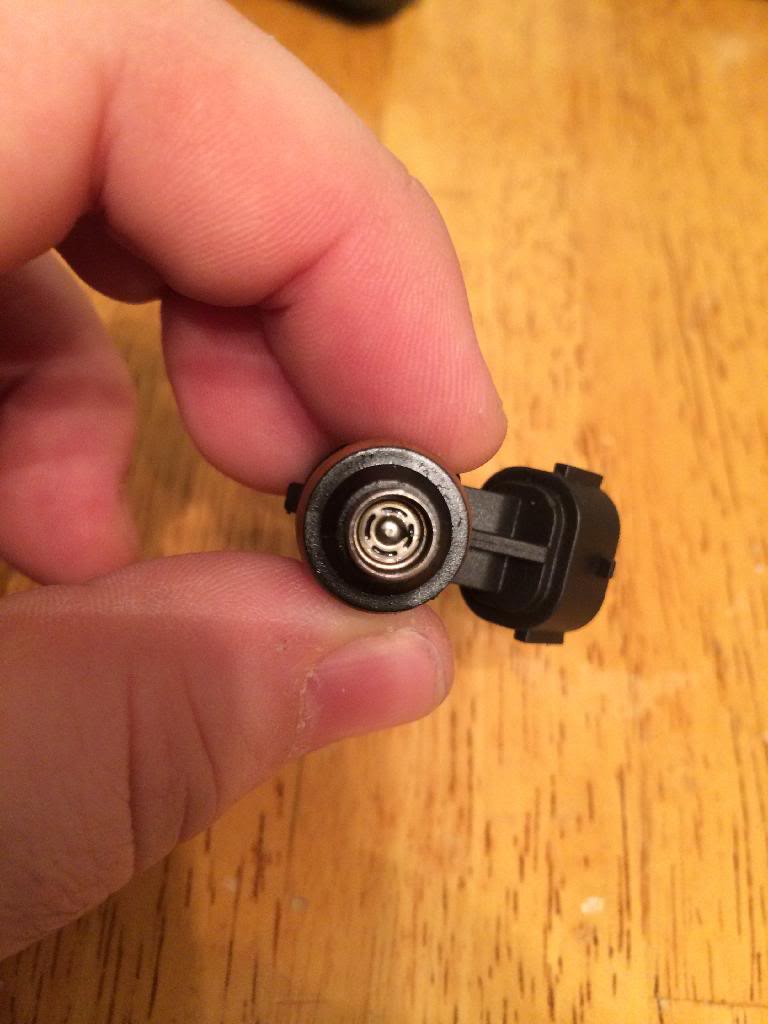
Fuel injectors: Siemens Deka FI114212 Low Impedance 220lb Injectors (Long Style) with EV1 Connector.
Fuel Regulator: Aeromotive #13132 Extreme Flow EFI Regulator.
Fuel rails: 417 Motorsports Fuel Rails
Fuel pump: Waterman Mini Bertha Fuel Pump, #251100. AEICNC LS passenger side block-mounted fuel pump cable drive assembly for <13GPM fuel pumps. AEICNC Rear-mounted cable drive fuel pump adaptor/coupler/chassis mount, for any 3 or 4-bolt hilborn-style mounting flange.
Fuel Tank: Nasty Performance F-body sumped race tank.
Electrical:
Ignition: IGN1A Coils, Magnecor custom KV85 Wires, NGK 5238 R5671-9 Spark Plugs, MSD Dynaforce Starter, Mechman 250A Elite alternator.
Engine management: Holley Dominator EFI
Wiring Board: Leash Electronics Street/Strip Wiring Board
Power Adder:
Turbo Kit: Custom twin kit by One Guy's Garage. Truck manifolds with 2.5" V-bands.
Turbochargers: Precision Gen 2 PT7675CEA BB Turbos, Ported H compressor cover with 4.0” inlet and 3.0 outlet, and Stainless steel .96 A/R V-band Turbine.
Wastegate: Twin Precision PW46 wastegates, 9psi spring
Blow Off Valve: Twin Chinese 50mm blow-off valve
Intercooler: Stacked Garrett 24" x 12.1" x 3" Air-Air Intercooler Cores, fabricated by Bickford Fabrications.
Exhaust system: One Guy's Garage custom dual 3.5" stainless downpipes/bumper exit.
Rear Drivetrain:
Transmission: Rossler Turboglide XHD with a 1.57 low gear, EZ Spool valve, Converter Dump Valve, 1-2 Accumulator, and short tailshaft to match the Powerglide length.
Transmission Cooler: Derale 13870 Hyper-Cool Extreme Remote
Shifter: M&M Shifter
Converter: Greg Slack Converter. Circle-D LS Billet flexplate.
Driveshaft: PST 1350 3.75” Carbon Fiber Shaft w/Strange Billet Chromoly 2-piece Slip Yoke. U-joint upgrade: Spicer 1350.
Rear-axle: MWC Fabricated 9” w/3.89 gear, Stock width, 35-spline axles, and spool. Spare third member w/3.50 gear.
Chassis:
Cage: 25.3 SFI-spec Cage constructed by JT Raceshop.
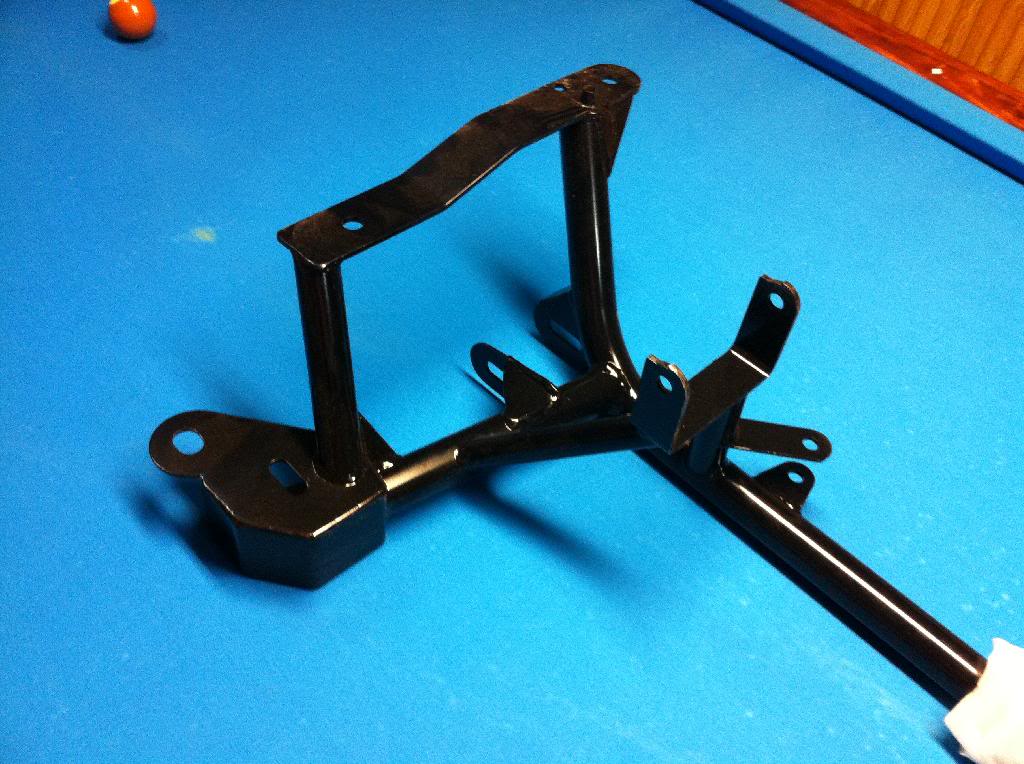
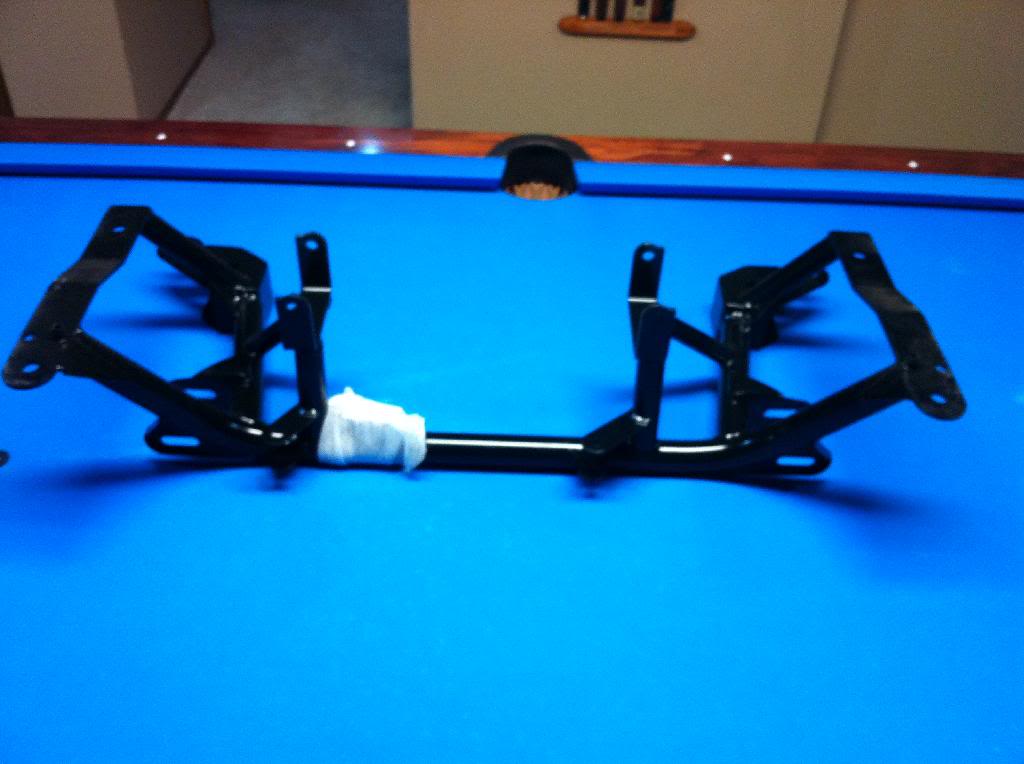
Front suspension: Midwest Chassis mild steel K-member, mild steel upper and lower A-arms Solid Engine Mounts, Crash Bars, and Tubular Style Travel Limiters. Menscer Double Adjustable Coilovers, One Guy's Garage Front Bumper Support.
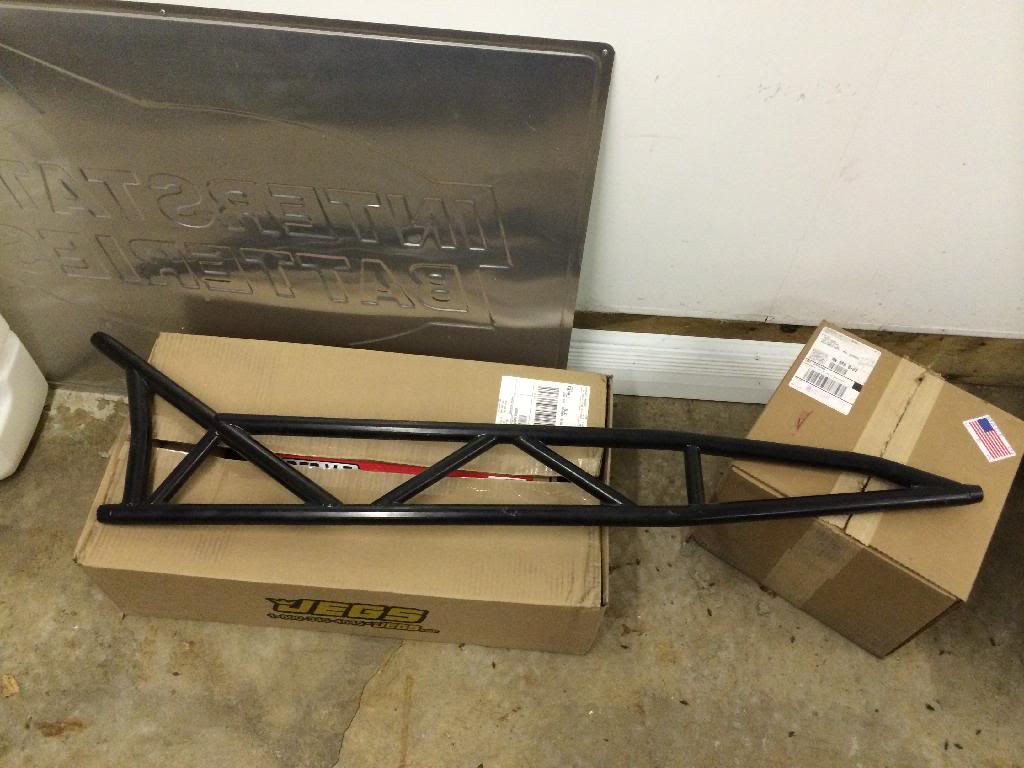
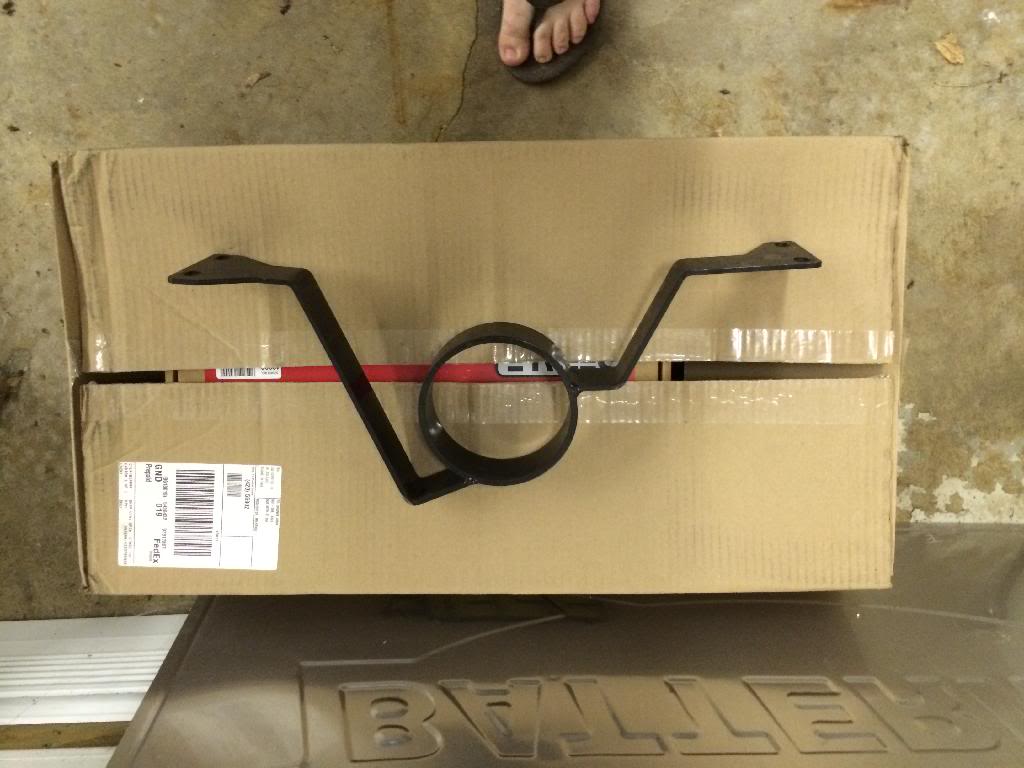
Rear suspension: Midwest Chassis (MWC) short torque arm for 3.5" catback w/ relocation crossmember, MWC lower control arms, MWC Panhard Bar, MWC Anti-Roll bar with 3' long / 1" diameter round alloy steel 4340 bar, Menscer Double Adjustable Coilovers, Founder's Performance Panhard Rod Relocation Kit, MWC Rear Bumper Support with Parachute Mount.
Safety: Stroud Safety 410-01 Parachute Assembly, Motion Raceworks LS Engine Diaper.
Body: Joe Van Overbeek 4" Ram Air Lift off Carbon Fiber Hood, Kostick Carbon Fiber Hardtop Roof Panel, Kostick Carbon Fiber Wing
Interior: Glasstek 2-piece Fiberglass Dash, DMH Fabrication Carbon Fiber door panels.
Miscellaneous: Rock Solid Motorsports Tubular Front End
Tires and Wheels:
Brakes: Strange pro drag brakes, front, and rear
Wheels: Weld RT-S, black, 15x10 (7.5” BS), 15x4 (1.5” BS)
Front tires: Hoosier Pro Street, 26 x 7.5R15, #19050
Rear tires: Mickey Thompson 275/60-15 ET Street Radial Pro
Miscellaneous:
Headlights: Blackbird Lighting Solutions Premium Kit, 5000K color temperature.
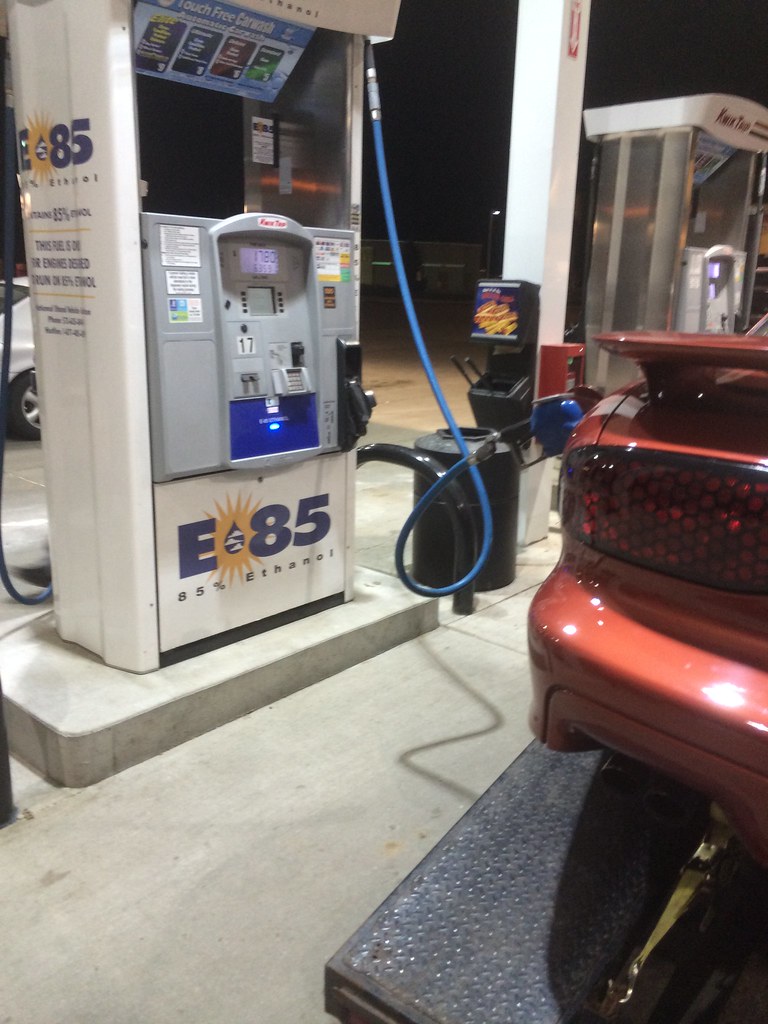
Fuel: E85 Straight from the Pump
Weight: 3440lbs raceweight.
HP Results: 1656 rwhp with no dyno correction factor. 1726 rwhp with STD J607 corrected.
1/4 Mile: 7.64 @ 181.54
Best 60': 1.174
1/8th Mile: 4.776 @ 153.17
Quickest Street Rolls: 3.61s 60-130mph, 2.71s 100-150mph.
Current as of 8/3/21
Build 1.0: Purchased car with D1SC Procharger.
Build 1.1: Swapped D1SC head unit for F1A.
Build 2.0: 417 Motorsports Twin Turbo Kit with T3 Flanges. Engine Upgrade from LS1 to 6.0 Block.
Build 2.1: 417 Motorsports Twin Turbo Kit with T4 Flanges.
Build 3.0: One Guy's Garage Twin Turbo Kit. Engine Upgrade from 6.0 Block to LSX Block.
Build 3.1: Rossler Powerglide. Transmission upgrade from 4L80 to Powerglide.
Build 3.2: Turbo upgrade from Precision PT6766's to Precision Gen 2 PT7675CEA BB Turbos.
Build 3.3: 394ci with Winberg Crankshaft (3.75" stroke) and Diamond 2K Pistons (4.09" bore) with Brodix BR1-13 Cylinder Heads.
Build 3.4: Rossler Turboglide. Transmission upgrade from Powerglide to Turboglide. Change from 3.50 to 3.89 rear gear.
Teaser Underhood Shot (From Build 2.1):
Underhood Shot (From Build 3.0)
Underhood Shot (From Build 3.3)
General Information:
Vehicle: 2001 Pontiac Trans Am WS6
Owner: Only ERO's (Josh Shones), Rochester, Minnesota
Youtube Channel: Only ERO's, https://www.youtube.com/channel/UCp7..._as=subscriber
Engine
Block: GM Performance LSX Bowtie Block Standard Deck #19260093, 394ci (4.09 x 3.75), ARP main studs, Melling high-volume oil pump #10355
Oil Pan: Moroso 21150 Aluminum Street/Strip Oil Pan, with Moroso 23763 remote oil filter mount.
Compression ratio: 9.8:1
Heads: Brodix BP BR1-13 CNC ported Cathedral, 249cc intake runner, 70cc chamber, 6-bolt, HIPed. ARP 625 head studs plus BTR 4-bolt to 6-bolt conversion, Cometics MLX 6-bolt 4.150 .053" head gaskets.
Cam: LJMS Custom Cam, 243�/255�, .632/.632, 117+5
Intake Valves: Ferrea Stainless 12 degree Intake Valves, 2.10" Diameter, #F6242
Exhaust Valves: Ferrea Inconel 24 degree Exhaust Valves, 1.60" Diameter, #F1892P
Springs: BTR SK701, .685" Lift Spring Kit, with titanium retainers. Locator - .505" ID .045" Thick.
Pushrods: BTR, .080" Wall, 3/8" Diameter, 7.525" length.
Lifters: Johnson 2126LSR slow leak down Race-style lifters with Axle Oiling for LS Engines
Rocker arms: Stock with BTR LS1 shaft rocker kit.
Pistons: Diamond LS 2K Custom LS Pistons (1938004) w/H13 .225 Wrist Pins. 4.090” forged, lateral piston gas ports
Rings: Total Seal CS AP Advanced Profiling Ring Set, 4.090”.
Crankshaft: Winberg LS Billet CCW Crankshaft. 3.750" stroke, 2.100" pin size, 2.560" Main size, 2004 Bobweight
Rods: Oliver #C6125LS1-STSW8 Speedway Series Connecting Rods. 6.125 Length, 2.100 Rod Journal, I Beam Design, 7/16 WSB bolts.
Intake manifold: 417 Motorsports Billet low profile intake with sheetmetal lid.
Throttle body: Holley Billet 95mm LS Throttle Body w/low RPM Taper
Balancer: ATI Super Damper, Fbody Balancer w/ 8mm HTD 25 tooth pulley, #918852.
Cooling System: Griffin 56241 Radiator (relocated to rear), Davies Craig EWP150 EWP, 417 Motorsports Anodized Billet Engine Water Manifold, Kurt Urban LS Vapor Vent System.
Fuel System:
Fuel injectors: Siemens Deka FI114212 Low Impedance 220lb Injectors (Long Style) with EV1 Connector.
Fuel Regulator: Aeromotive #13132 Extreme Flow EFI Regulator.
Fuel rails: 417 Motorsports Fuel Rails
Fuel pump: Waterman Mini Bertha Fuel Pump, #251100. AEICNC LS passenger side block-mounted fuel pump cable drive assembly for <13GPM fuel pumps. AEICNC Rear-mounted cable drive fuel pump adaptor/coupler/chassis mount, for any 3 or 4-bolt hilborn-style mounting flange.
Fuel Tank: Nasty Performance F-body sumped race tank.
Electrical:
Ignition: IGN1A Coils, Magnecor custom KV85 Wires, NGK 5238 R5671-9 Spark Plugs, MSD Dynaforce Starter, Mechman 250A Elite alternator.
Engine management: Holley Dominator EFI
Wiring Board: Leash Electronics Street/Strip Wiring Board
Power Adder:
Turbo Kit: Custom twin kit by One Guy's Garage. Truck manifolds with 2.5" V-bands.
Turbochargers: Precision Gen 2 PT7675CEA BB Turbos, Ported H compressor cover with 4.0” inlet and 3.0 outlet, and Stainless steel .96 A/R V-band Turbine.
Wastegate: Twin Precision PW46 wastegates, 9psi spring
Blow Off Valve: Twin Chinese 50mm blow-off valve
Intercooler: Stacked Garrett 24" x 12.1" x 3" Air-Air Intercooler Cores, fabricated by Bickford Fabrications.
Exhaust system: One Guy's Garage custom dual 3.5" stainless downpipes/bumper exit.
Rear Drivetrain:
Transmission: Rossler Turboglide XHD with a 1.57 low gear, EZ Spool valve, Converter Dump Valve, 1-2 Accumulator, and short tailshaft to match the Powerglide length.
Transmission Cooler: Derale 13870 Hyper-Cool Extreme Remote
Shifter: M&M Shifter
Converter: Greg Slack Converter. Circle-D LS Billet flexplate.
Driveshaft: PST 1350 3.75” Carbon Fiber Shaft w/Strange Billet Chromoly 2-piece Slip Yoke. U-joint upgrade: Spicer 1350.
Rear-axle: MWC Fabricated 9” w/3.89 gear, Stock width, 35-spline axles, and spool. Spare third member w/3.50 gear.
Chassis:
Cage: 25.3 SFI-spec Cage constructed by JT Raceshop.
Front suspension: Midwest Chassis mild steel K-member, mild steel upper and lower A-arms Solid Engine Mounts, Crash Bars, and Tubular Style Travel Limiters. Menscer Double Adjustable Coilovers, One Guy's Garage Front Bumper Support.
Rear suspension: Midwest Chassis (MWC) short torque arm for 3.5" catback w/ relocation crossmember, MWC lower control arms, MWC Panhard Bar, MWC Anti-Roll bar with 3' long / 1" diameter round alloy steel 4340 bar, Menscer Double Adjustable Coilovers, Founder's Performance Panhard Rod Relocation Kit, MWC Rear Bumper Support with Parachute Mount.
Safety: Stroud Safety 410-01 Parachute Assembly, Motion Raceworks LS Engine Diaper.
Body: Joe Van Overbeek 4" Ram Air Lift off Carbon Fiber Hood, Kostick Carbon Fiber Hardtop Roof Panel, Kostick Carbon Fiber Wing
Interior: Glasstek 2-piece Fiberglass Dash, DMH Fabrication Carbon Fiber door panels.
Miscellaneous: Rock Solid Motorsports Tubular Front End
Tires and Wheels:
Brakes: Strange pro drag brakes, front, and rear
Wheels: Weld RT-S, black, 15x10 (7.5” BS), 15x4 (1.5” BS)
Front tires: Hoosier Pro Street, 26 x 7.5R15, #19050
Rear tires: Mickey Thompson 275/60-15 ET Street Radial Pro
Miscellaneous:
Headlights: Blackbird Lighting Solutions Premium Kit, 5000K color temperature.
Fuel: E85 Straight from the Pump
Weight: 3440lbs raceweight.
HP Results: 1656 rwhp with no dyno correction factor. 1726 rwhp with STD J607 corrected.
1/4 Mile: 7.64 @ 181.54
Best 60': 1.174
1/8th Mile: 4.776 @ 153.17
Quickest Street Rolls: 3.61s 60-130mph, 2.71s 100-150mph.
Current as of 8/3/21
Last edited by Only ERO's; 08-03-2021 at 01:39 PM.

The following users liked this post:
trodo302 (02-07-2022)
12-27-2013, 04:46 PM
#2
Hopefully between the title and the first shot, this is enough to draw some interest in my build.
All builds typically start because something broke. In this case, the F1A and 10lbs of boost didn’t attack the stock shortblock. I was out on the backroads in October 2012 and was leaving a little “advertising”. Needless to say, the clutch a little warm (AKA really hot) and wouldn’t engage in most gears. The clutch was shot. I was able to finally get the car in 2nd gear and drove it to the shop. It was a long 7 miles at about 25mph. This is where this build got out of hand.
Advertising (end of the clutch):
At this point, I probably should have started the build thread, but I ended up doing it towards the end of the build. Or let me rephrase this, at the end of this phase of the build. I’m sure it will never end. I have been catching hell from a bunch of people to get a build thread going, so here we go.
I will emphasize that this was one of the largest pain in the *** projects I have ever taken on. Be forewarned, I will not hold back any hard feelings I have experienced towards the build, or vendors that I bought stuff from. Hopefully that will be thoroughly documented in the build thread. I will speak the truth and let you know exactly what I thought of them! You can learn from my mistakes!
Background on me: I am an Electrical Engineer that provides construction services to an extremely difficult industrial client. I know and understand how important good communication is and I also take pride in being organized and detail oriented. This was the beginning of my frustration through this project. It has been over a year of nothing but pitfalls, stress, disappointment, but hopefully an end in site.
Sit back and enjoy reading through my project. I am going to throw up information on the car to help with a bunch of the questions then jump into more specifics on the car and build. I have sat down to type some of the build, and I get lost each time when getting into. There is too much to try to document on these. I highly recommend starting these when you start the project. The pictures and write-up will be in no particular order.
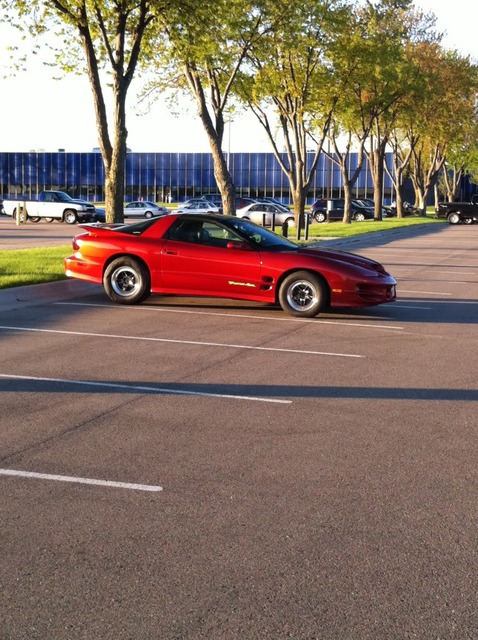
The car is a 2001 Sunset Orange Metallic Trans Am WS6, six speed car. I bought the car in 2008 with a D1SC Procharger kit on the car. Eventually, I swapped to an F1A head unit. The car made 566rwhp / 525rwtq on a Dynojet with the D1SC. I never made it back to the dyno with the F1A. I had purchased a MWC Fab 9” and other rear suspension supporting modifications.
2001 SOM WS6 (back in 2008)

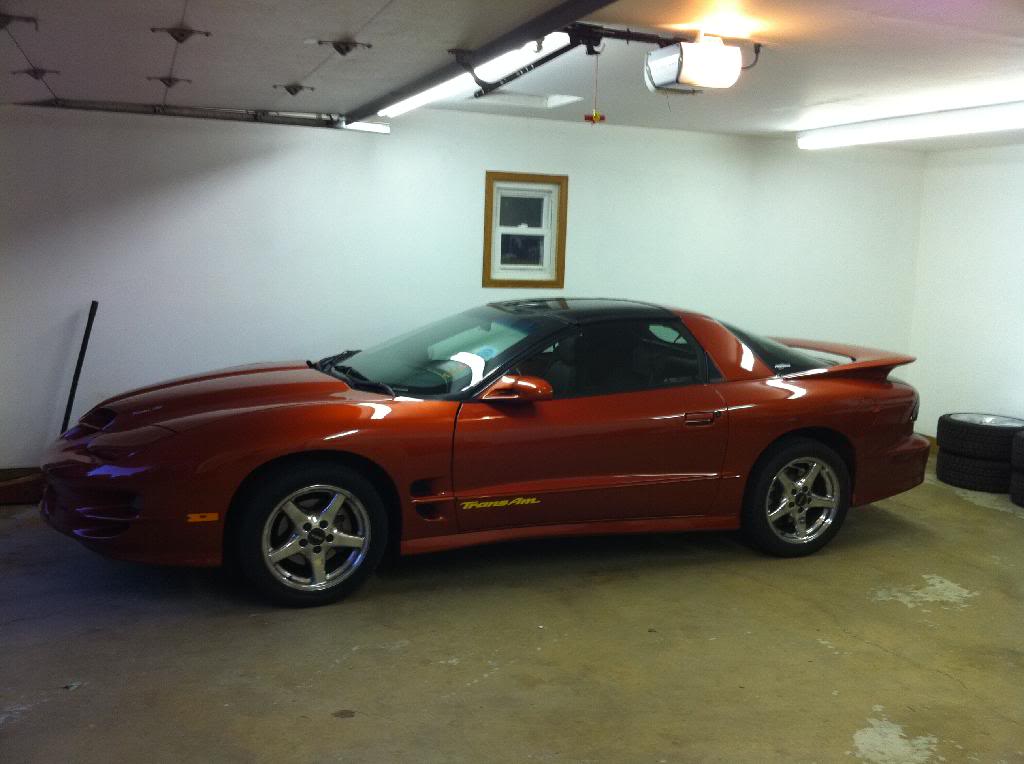
2001 SOM WS6 (back in 2012)
Midwest Chassis Fab 9" Installation (back in 2010)
Right after I took the clutch out of my car, I rode in a buddy’s recently completed (or a 1st phase) Turbo car (LS1Tech Username: Slow94formula) in the fall of 2012 and instantly got the bug for additional power. I was amazed how the power was brought in with a turbo car. I also liked the fact of being able to control the power levels with an electronic boost controller. I quickly decided to ditch the Procharger setup and switch to a turbo setup (sorry No Juice). From there, I decided to start spending money. I purchased a used 417 Motorsports twin turbo kit previously made famous by LS1Tech Username: Fitz98TA. The kit was recently updated with Precision PT6766CEA turbos.
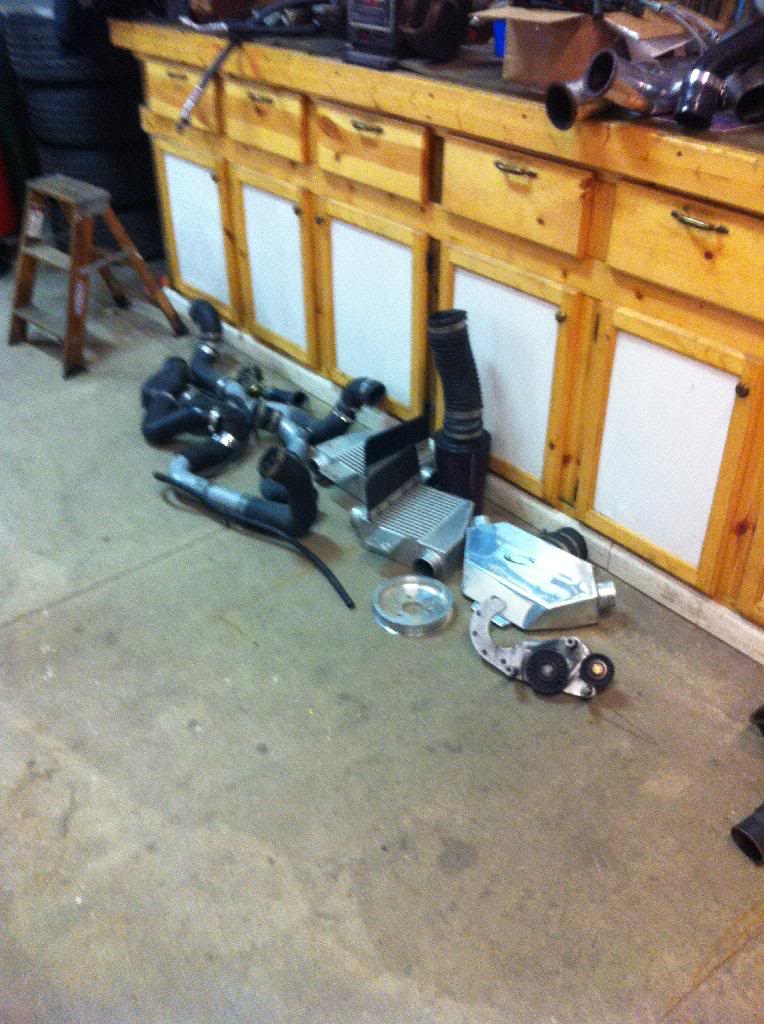
Twin Turbo Kit, in pieces, but a cool picture (Build 2.0)
My parents were going to Branson, MO for vacation, so I stuffed their pockets full of cash and asked them to stop in KC and pick up the TT kit. I bought the kit from Skinnies and my Dad thought the LTD was pretty damn cool. Look up threads on this car if you haven't seen them.
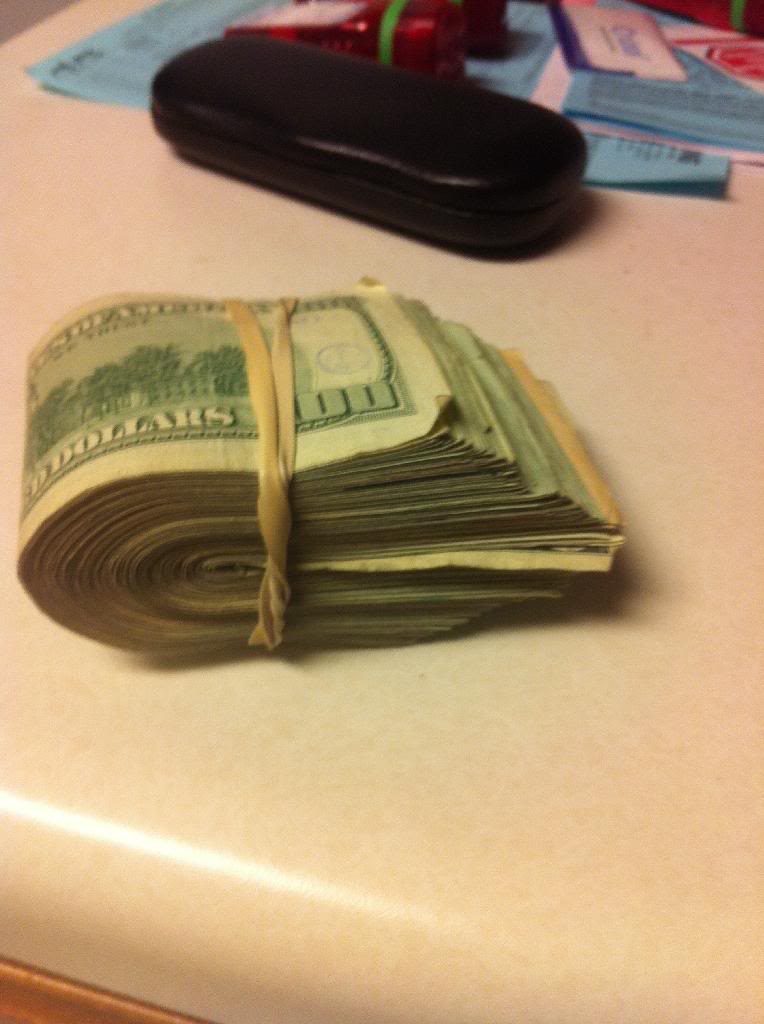
Be prepared to spend this kind of stuff, if you start a build like this:
I must say that I am pretty fortunate to borrow my Dad’s garage for this build (especially seeing the length the build took due to all the delays). It is the ultimate Shadetree Mechanic shop. It is a heated 4.5 stall garage, that has pretty much any tool known to man, a hoist, a separate stall for his 1968 RS/SS Big Block Camaro, air fully plumbed throughout the entire garage, heat, etc. It is a perfect location to have a build, minus his frustration of losing not only one stall to the car, but another stall for all the parts either going on or coming off. The 68 Camaro was moved to my storage location and the build took over his garage.
First we removed the Procharger kit and sold to help fund the new project. From there, we started mocking the turbo kit on the LS1 to see what sort of mess we were getting ourselves into. We already knew we were going to have to relocate the battery, the fuse panels, modify the brake lines, etc. We found a few other things, but continued on. We pulled the stock LS1 and T56 and sold those.
Procharger Kit on Car
Procharger Kit in Pieces on Ground, Ready to be boxed
Procharger F1A Head Unit
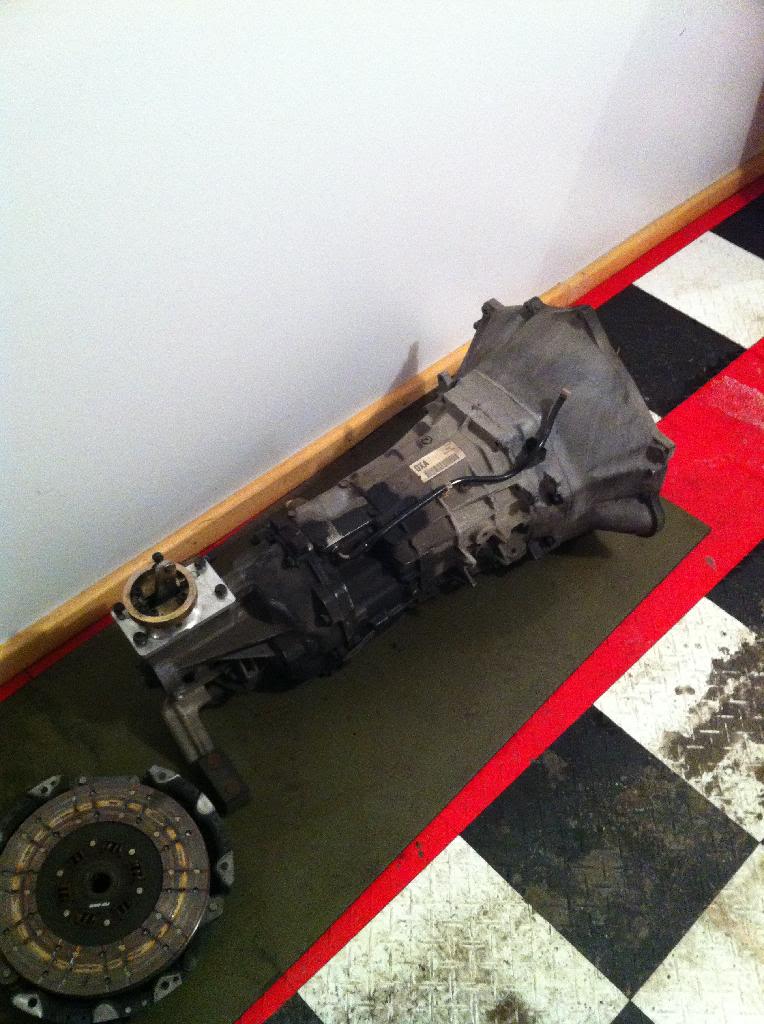
T56 Transmission Removed
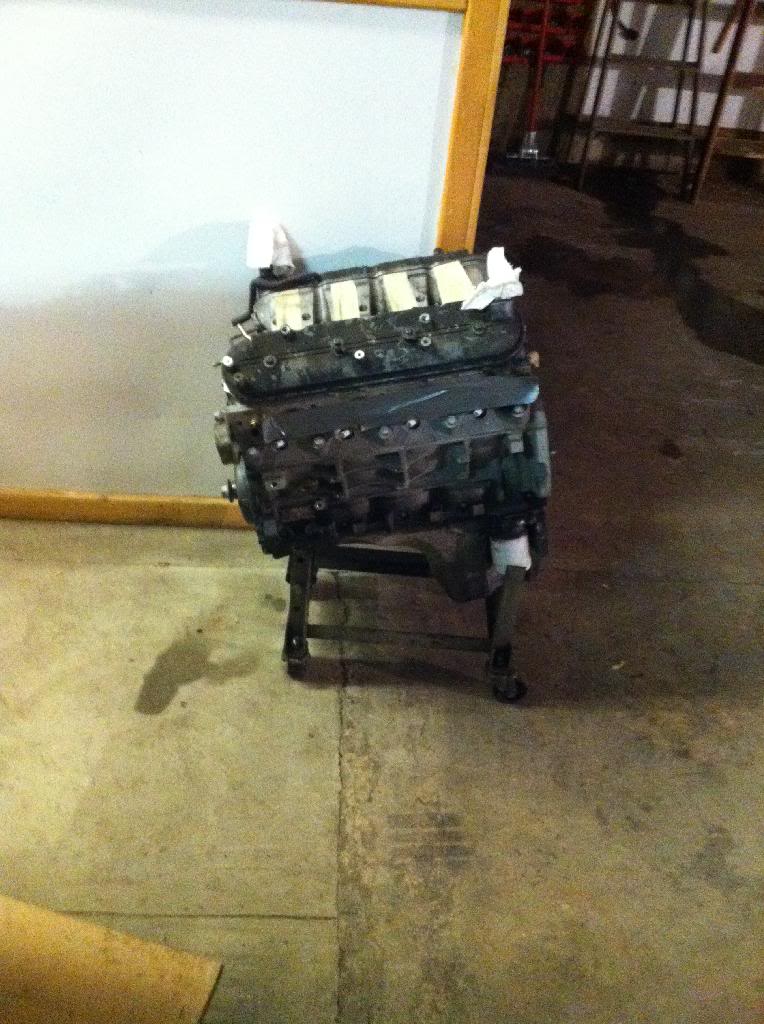
Stock LS1 Removed
Equivalent of a LS1 and T56
My goal for the car was to have a car that would maintain street manners, relieve stress by laying a bunch of rubber, but be able to take it on a long cruise. Hopefully we will even be able to retain Air Conditioning with this kit, it has been done before. I plan to take it to the racetrack and see how many passes I can squeeze in before being reminded that I don’t have a cage or bar. The original plan was to have the car torn apart, and put back together by Spring of 2013. Wow, was I wrong on this.
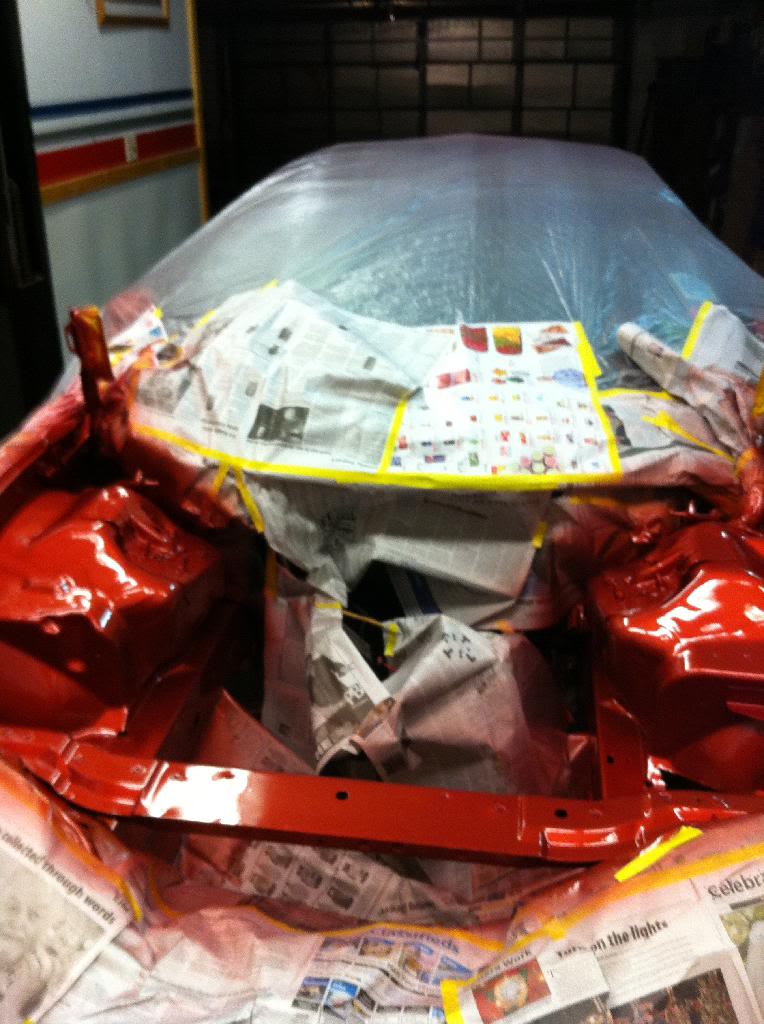
While we had the engine and transmission out, we did the wire mods and painted the engine bay. I would highly recommend painting the engine bay whenever involved with a project like this. It is well worth it. The engine bays are really dull and they come out nice with new paint, especially after a couple of coats of clear. I was able to get in touch with a local body man, and have him spray the engine bay. Thank you to Slow94formula's Dad and thanks to Slow94formula for sanding and taping!
Miscellaneous Engine Bay Pictures after Paint
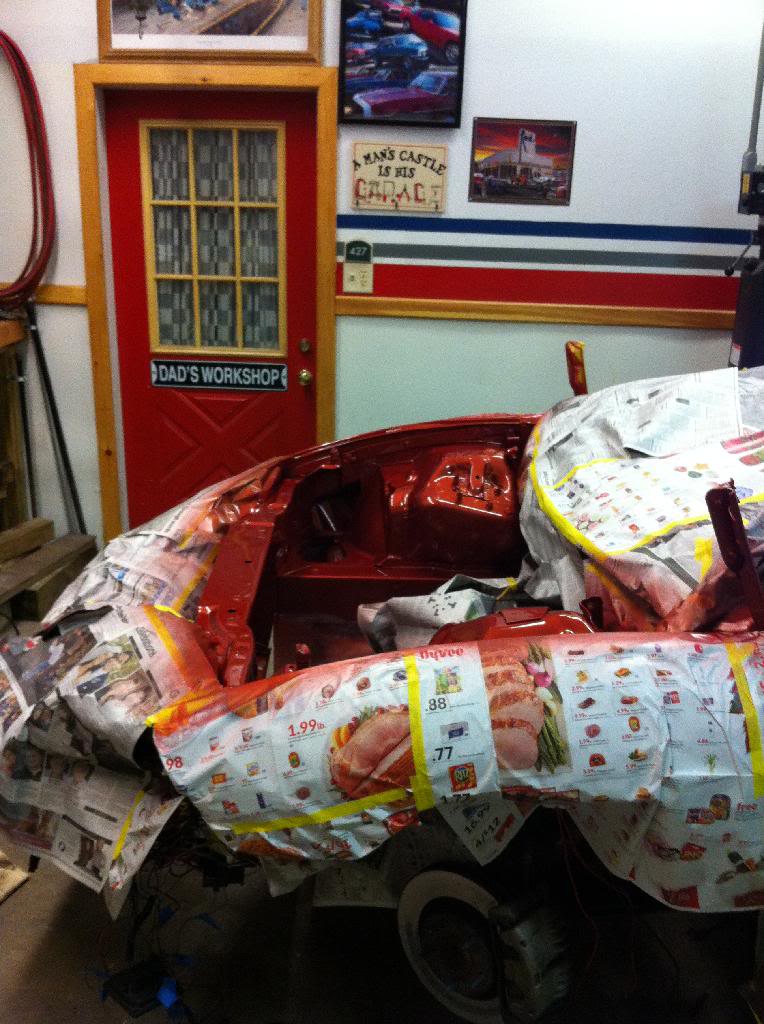
Thanks again Dad for a spot in Dad's Workshop!

All builds typically start because something broke. In this case, the F1A and 10lbs of boost didn’t attack the stock shortblock. I was out on the backroads in October 2012 and was leaving a little “advertising”. Needless to say, the clutch a little warm (AKA really hot) and wouldn’t engage in most gears. The clutch was shot. I was able to finally get the car in 2nd gear and drove it to the shop. It was a long 7 miles at about 25mph. This is where this build got out of hand.
Advertising (end of the clutch):
At this point, I probably should have started the build thread, but I ended up doing it towards the end of the build. Or let me rephrase this, at the end of this phase of the build. I’m sure it will never end. I have been catching hell from a bunch of people to get a build thread going, so here we go.
I will emphasize that this was one of the largest pain in the *** projects I have ever taken on. Be forewarned, I will not hold back any hard feelings I have experienced towards the build, or vendors that I bought stuff from. Hopefully that will be thoroughly documented in the build thread. I will speak the truth and let you know exactly what I thought of them! You can learn from my mistakes!
Background on me: I am an Electrical Engineer that provides construction services to an extremely difficult industrial client. I know and understand how important good communication is and I also take pride in being organized and detail oriented. This was the beginning of my frustration through this project. It has been over a year of nothing but pitfalls, stress, disappointment, but hopefully an end in site.
Sit back and enjoy reading through my project. I am going to throw up information on the car to help with a bunch of the questions then jump into more specifics on the car and build. I have sat down to type some of the build, and I get lost each time when getting into. There is too much to try to document on these. I highly recommend starting these when you start the project. The pictures and write-up will be in no particular order.
The car is a 2001 Sunset Orange Metallic Trans Am WS6, six speed car. I bought the car in 2008 with a D1SC Procharger kit on the car. Eventually, I swapped to an F1A head unit. The car made 566rwhp / 525rwtq on a Dynojet with the D1SC. I never made it back to the dyno with the F1A. I had purchased a MWC Fab 9” and other rear suspension supporting modifications.
2001 SOM WS6 (back in 2008)


2001 SOM WS6 (back in 2012)

Midwest Chassis Fab 9" Installation (back in 2010)

Right after I took the clutch out of my car, I rode in a buddy’s recently completed (or a 1st phase) Turbo car (LS1Tech Username: Slow94formula) in the fall of 2012 and instantly got the bug for additional power. I was amazed how the power was brought in with a turbo car. I also liked the fact of being able to control the power levels with an electronic boost controller. I quickly decided to ditch the Procharger setup and switch to a turbo setup (sorry No Juice). From there, I decided to start spending money. I purchased a used 417 Motorsports twin turbo kit previously made famous by LS1Tech Username: Fitz98TA. The kit was recently updated with Precision PT6766CEA turbos.
Twin Turbo Kit, in pieces, but a cool picture (Build 2.0)

My parents were going to Branson, MO for vacation, so I stuffed their pockets full of cash and asked them to stop in KC and pick up the TT kit. I bought the kit from Skinnies and my Dad thought the LTD was pretty damn cool. Look up threads on this car if you haven't seen them.
Be prepared to spend this kind of stuff, if you start a build like this:

I must say that I am pretty fortunate to borrow my Dad’s garage for this build (especially seeing the length the build took due to all the delays). It is the ultimate Shadetree Mechanic shop. It is a heated 4.5 stall garage, that has pretty much any tool known to man, a hoist, a separate stall for his 1968 RS/SS Big Block Camaro, air fully plumbed throughout the entire garage, heat, etc. It is a perfect location to have a build, minus his frustration of losing not only one stall to the car, but another stall for all the parts either going on or coming off. The 68 Camaro was moved to my storage location and the build took over his garage.
First we removed the Procharger kit and sold to help fund the new project. From there, we started mocking the turbo kit on the LS1 to see what sort of mess we were getting ourselves into. We already knew we were going to have to relocate the battery, the fuse panels, modify the brake lines, etc. We found a few other things, but continued on. We pulled the stock LS1 and T56 and sold those.
Procharger Kit on Car

Procharger Kit in Pieces on Ground, Ready to be boxed

Procharger F1A Head Unit

T56 Transmission Removed

Stock LS1 Removed

Equivalent of a LS1 and T56

My goal for the car was to have a car that would maintain street manners, relieve stress by laying a bunch of rubber, but be able to take it on a long cruise. Hopefully we will even be able to retain Air Conditioning with this kit, it has been done before. I plan to take it to the racetrack and see how many passes I can squeeze in before being reminded that I don’t have a cage or bar. The original plan was to have the car torn apart, and put back together by Spring of 2013. Wow, was I wrong on this.
While we had the engine and transmission out, we did the wire mods and painted the engine bay. I would highly recommend painting the engine bay whenever involved with a project like this. It is well worth it. The engine bays are really dull and they come out nice with new paint, especially after a couple of coats of clear. I was able to get in touch with a local body man, and have him spray the engine bay. Thank you to Slow94formula's Dad and thanks to Slow94formula for sanding and taping!
Miscellaneous Engine Bay Pictures after Paint


Thanks again Dad for a spot in Dad's Workshop!

Last edited by Only ERO's; 11-11-2017 at 06:19 PM.
12-27-2013, 04:47 PM
#3
The plan was to change over from a T56 to a 4L80e. My car had a long torque arm and T56 crossmember. I contacted Midwest Chassis to order parts to switch to a 4L80 crossmember and short torque arm. We pulled the third member and had the gears swapped from 3.70 to 3.25 in the MWC Fab 9�. I was torn between a 3.50 gear and the 3.25. Ultimately, I wanted to keep the RPMs as low as possible on the street, especially with running E85. I know, I know, I doubt I will be able to keep my foot out of it. One other thing I ordered from MWC, was a mild steel K-member. This was by far the best purchase in terms of simplifying the install. It is unbelievable how much additional room there is without that stock K-member. I was also able to cut weight off the car, although, it is going to be difficult to notice in this full weight street car. Switching from a T56 to a 4L80 requires a shorter driveshaft. I considered having my 3.5" aluminum driveshaft shortened but eventually decided to buy a PST 3" chromoly driveshaft.
Midwest Chassis Mild Steel K-member
Removed MWC T56 Crossmember

Removed MWC Long Torque Arm
Removed MWC Driveshaft Loop
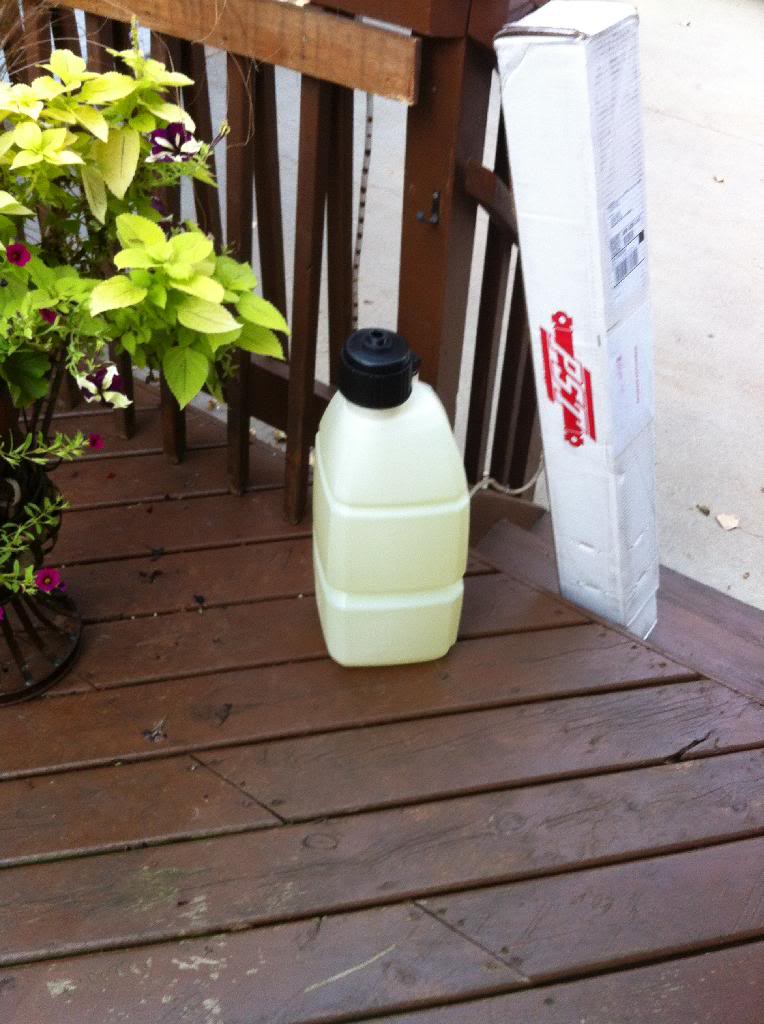
Removed PST 3.5" Aluminum Driveshaft
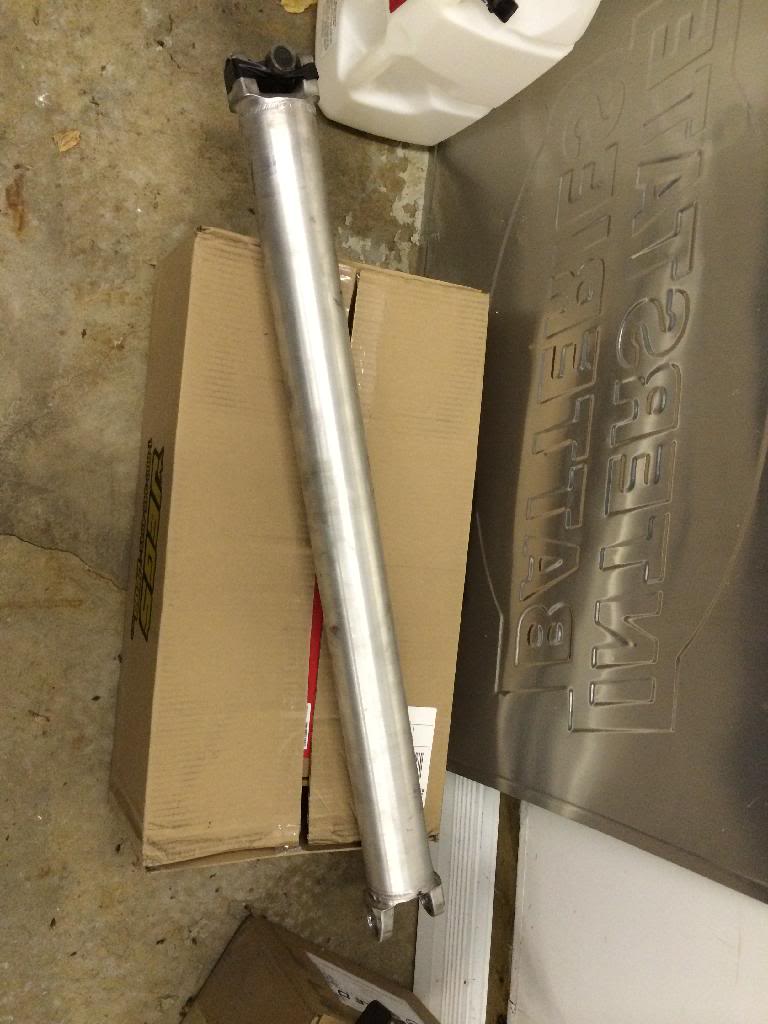
New PST Driveshaft next to 5 gallons of Pump E85
Midwest Chassis Mild Steel K-member


Removed MWC T56 Crossmember

Removed MWC Long Torque Arm

Removed MWC Driveshaft Loop

Removed PST 3.5" Aluminum Driveshaft

New PST Driveshaft next to 5 gallons of Pump E85

Last edited by Only ERO's; 12-27-2013 at 05:43 PM.
12-27-2013, 04:47 PM
#4
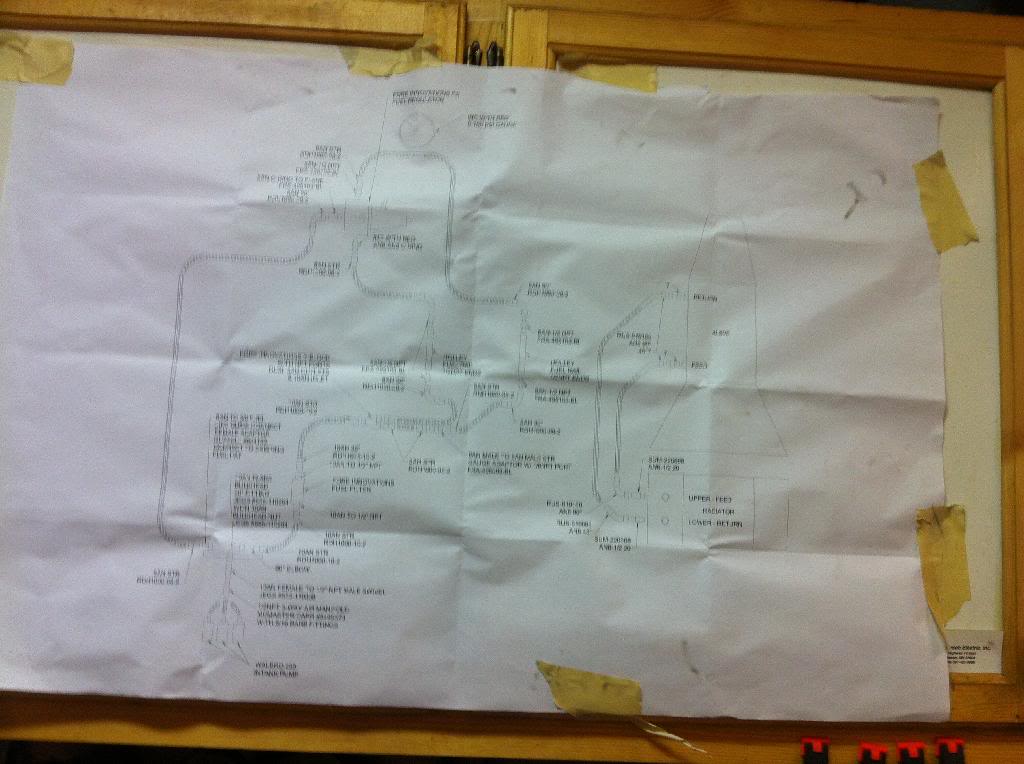
The one thing I wasn�t going to cut any corners on was fuel. I didn�t want this to be the limiting factor on my build. Most of my fuel plans were based on the Mightymouse DIY triple pumps. There is a lot of good information in there. I started by contacting Sho-me-speed and had them put together a Triple in tank Walbro 255 fuel kit with wiring harness and hobbs switch. I was torn between the (2) 400�s or the (3) 255�s. I knew either way I would be cutting the fuel basket and eventually went with the 255�s. The fuel basket is completely gone and About the only thing remaining is the float. I am running a 10AN line from the pumps to the Y-block where it will be split into 8AN lines and ran to each fuel rail. 8AN lines will also be ran out of each fuel rail to the regulator with an 8AN line back to the tank. I am using Fore Innovations F2i Fuel Pressure Regulator and their Inline Modular fuel filter. I have Holley Hi-flow fuel rails and FIC 2000 injectors. I don't plan on letting the car get low on fuel. I understand my car doesn't have a baffled tank and I don't have a fuel basket. I used a 10AN bulkhead to connect the supply hose to the fuel basket. I bought an 8AN Russell quick fitting to connect the return hose to the existing top hat. Pumps #2 and #3 come on with the Hobbs switch.
I suggest drawing a diagram for ordering fittings. This photo is before updating with changes during the build. I will try to get this updated for future reference. Each build will be different but this is a good baseline.
Photos of cut up basket, float, sender, etc.
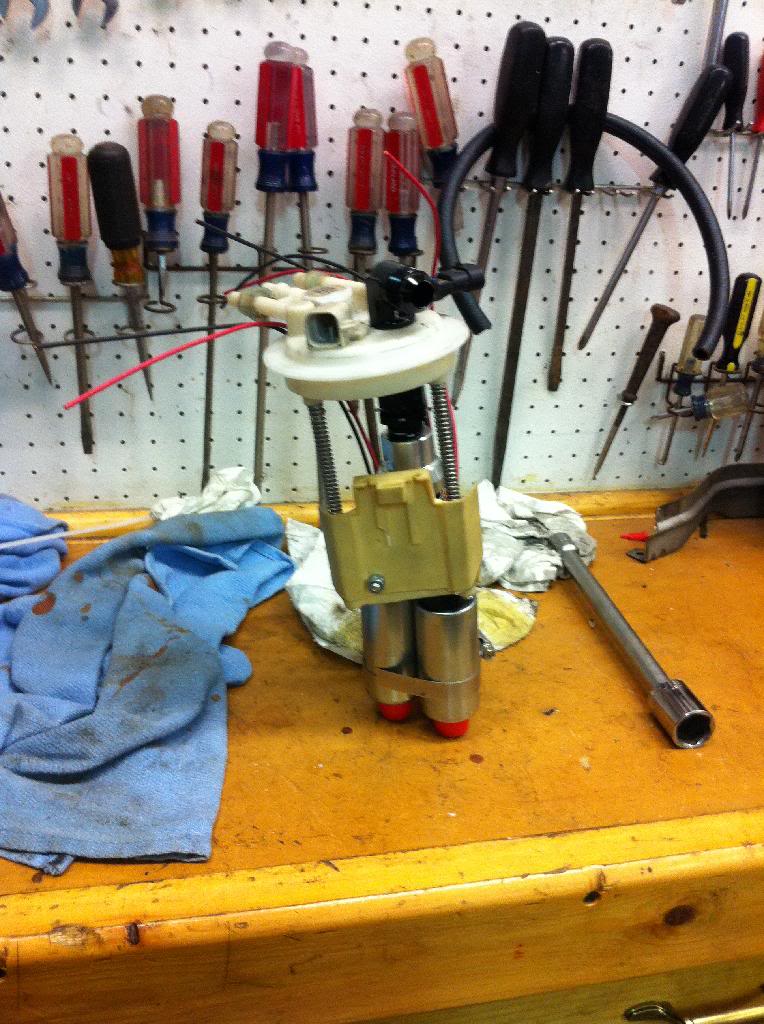

10AN bulkhead for supply hose
FIC2000 Injector
FIC2000 Nozzle
I suggest drawing a diagram for ordering fittings. This photo is before updating with changes during the build. I will try to get this updated for future reference. Each build will be different but this is a good baseline.

Photos of cut up basket, float, sender, etc.


10AN bulkhead for supply hose

FIC2000 Injector

FIC2000 Nozzle

Last edited by Only ERO's; 12-27-2013 at 07:13 PM.
12-27-2013, 04:47 PM
#5
I got in touch with AES and had them build me a 390ci engine. I wanted to keep this very streetable with minimum maintenance. We decided on 10:1 compression based on running E85, although AES frowns upon Pump E85. From there, we went with a set of ported 243 cylinder heads and full forged rotating assembly. We included all the necessary ARP bolts/studs/mains based on the amount of boost I was planning. We went with the typical LS9 head gaskets. I had AES weld 10AN bungs in the oil pan for the oil return lines from the turbos, one on each side of the pan. I used the typical connection near the oil filter for the feeds to each of the turbos. The cam was specified by AES. The valvetrain was specified to match the rest of the engine and nothing big to keep maintenance to a minimum. We had a few lengthy discussions on rocker arms and I ultimately decided to spend some extra money and go with the Crower rockers. I didn't trust the factory rockers, and I have heard nightmares with the Yella Terras. I also had bought a ATI Super Damper, specified at 25% underdrive with A/C. The original plan for the turbo returns was in the timing chain cover. An underdrive pulley was required based on this location but eventually we went with the side of the oil pan. I had AES fire the engine as part of the break in process. My plan is to run Valvoline VR1 20W50 oil.
Engine Startup Video at AES
Engine on Stand
Crower Rocker Arms
ATI Super Damper
10AN Bungs for Oil Returns
Mocking up Turbo Kit on Stand

Install Turbo Kit on Engine in Car

I purchased a used Kurt Urban Water Vapor System. Purchased a #4AN x 1/8” NPT straight adaptor. Tapped the top of the water pump for the adaptor. Bought a #4AN straight to straight 22” braided line to connect the water pump fitting to the Kurt Urban distribution block. We built a custom bracket for the mounting of the distribution block. One thing to beware of: keep an eye where the throttle bracket goes. You can't put the adaptor in the center of the water pump. I didn't make this mistake, but was warned about it before drilling and tapping the water pump.
Additional underhood pictures will be posted later in the thread.
Engine Startup Video at AES
Engine on Stand


Crower Rocker Arms

ATI Super Damper

10AN Bungs for Oil Returns


Mocking up Turbo Kit on Stand


Install Turbo Kit on Engine in Car


I purchased a used Kurt Urban Water Vapor System. Purchased a #4AN x 1/8” NPT straight adaptor. Tapped the top of the water pump for the adaptor. Bought a #4AN straight to straight 22” braided line to connect the water pump fitting to the Kurt Urban distribution block. We built a custom bracket for the mounting of the distribution block. One thing to beware of: keep an eye where the throttle bracket goes. You can't put the adaptor in the center of the water pump. I didn't make this mistake, but was warned about it before drilling and tapping the water pump.
Additional underhood pictures will be posted later in the thread.
Last edited by Only ERO's; 12-27-2013 at 08:38 PM.
12-27-2013, 04:48 PM
#6
I also contacted Jake’s Performance about building a Stage 5 4L80 with D3 transbrake. I contacted Madman and got the Madman 4L80 dipstick. I purchased a Speartech wiring harness to convert from a T56 to a 4L80e. I contacted Circle D and ordered a 4L80 LS Pro Series Stage III 258mm 1B torque converter and LS series SFI steel flexplate. We decided on a 3500 stall speed.
I am currently planning on running a stock automatic shifter; found one with only 9000 miles and was in perfect condition. I am keeping the manual console. I installed a piece of sheetmetal to cover the hole from the T56. I really need to find a Trans Am shifter handle as the Camaro one is ***-ugly! I had bought a Grand Am handle and that was ugly too. I haven't removed the clutch pedal yet. The wiring has been removed so the clutch does not need to be pushed in to start. I have a set of Auto pedals but I don't know if I will go through the work to swap them.
Package from Circle-D
Manual console with auto shifter and ugly Grand Am handle
There just isn't enough room in the engine bay. I was originally planning to install the transmission cooler in front of the radiator. It really got tight up there with the fans, radiator, condenser, intercooler, overflow, and catch can. We eventually went a different route and remotely mounted the transmission cooler. I bought a Derale 13900 Electra-cool remote transcooler with fan and thermostat and mounted it under the hatch/trunk.
Derale Remote Mounted Transcooler
I was planning to run the same driveshaft until I found out it needed to be shorter. The 4L80 will require 3/4" - 1" shorter driveshaft than the T56. I thought about having my original driveshaft shortened but ended up just buying a new one. I don't think it was worth the hassle of shipping it back to PST and having them shorten it. I ordered a 3" Chromoly driveshaft directly through PST. I worked with Cliff on the phone and he had great customer support. Spent plenty of time answering all of my questions.
My specs from ordering driveshafts (straight from PST invoices):
T56 Driveshaft: 45 1/4" seal to center
4L80 Driveshaft: 44 1/2" seal to center
I am currently planning on running a stock automatic shifter; found one with only 9000 miles and was in perfect condition. I am keeping the manual console. I installed a piece of sheetmetal to cover the hole from the T56. I really need to find a Trans Am shifter handle as the Camaro one is ***-ugly! I had bought a Grand Am handle and that was ugly too. I haven't removed the clutch pedal yet. The wiring has been removed so the clutch does not need to be pushed in to start. I have a set of Auto pedals but I don't know if I will go through the work to swap them.
Package from Circle-D

Manual console with auto shifter and ugly Grand Am handle

There just isn't enough room in the engine bay. I was originally planning to install the transmission cooler in front of the radiator. It really got tight up there with the fans, radiator, condenser, intercooler, overflow, and catch can. We eventually went a different route and remotely mounted the transmission cooler. I bought a Derale 13900 Electra-cool remote transcooler with fan and thermostat and mounted it under the hatch/trunk.
Derale Remote Mounted Transcooler


I was planning to run the same driveshaft until I found out it needed to be shorter. The 4L80 will require 3/4" - 1" shorter driveshaft than the T56. I thought about having my original driveshaft shortened but ended up just buying a new one. I don't think it was worth the hassle of shipping it back to PST and having them shorten it. I ordered a 3" Chromoly driveshaft directly through PST. I worked with Cliff on the phone and he had great customer support. Spent plenty of time answering all of my questions.
My specs from ordering driveshafts (straight from PST invoices):
T56 Driveshaft: 45 1/4" seal to center
4L80 Driveshaft: 44 1/2" seal to center
Last edited by Only ERO's; 01-06-2014 at 09:05 AM.
12-27-2013, 04:48 PM
#7
For boost control, I decided to go with a Turbosmart Eboost2 electronic boost controller. I have an individual solenoid for each of the wastegates. I mounted the Eboost2 in the left air vent.
I wanted to replace my Auto Meter gauges that were originally in the center vents. I had a C2 series vacuum/boost, electronic fuel pressure, and wideband A/F ratio gauge. I decided to go with the Zeitronix ZT-2 gauge. My plan was to install this in the car in a location easily visible while watching the road. This gauge allows for fuel pressure, wideband A/F ratio, and vacuum/boost all in the same screen. Unfortunately, I bought one used and it was a 2009 and older model. This does not allow for fuel pressure. I need to send this in to be upgraded to allow all three parameters.
Eboost2 Mounted in Driver's Vent
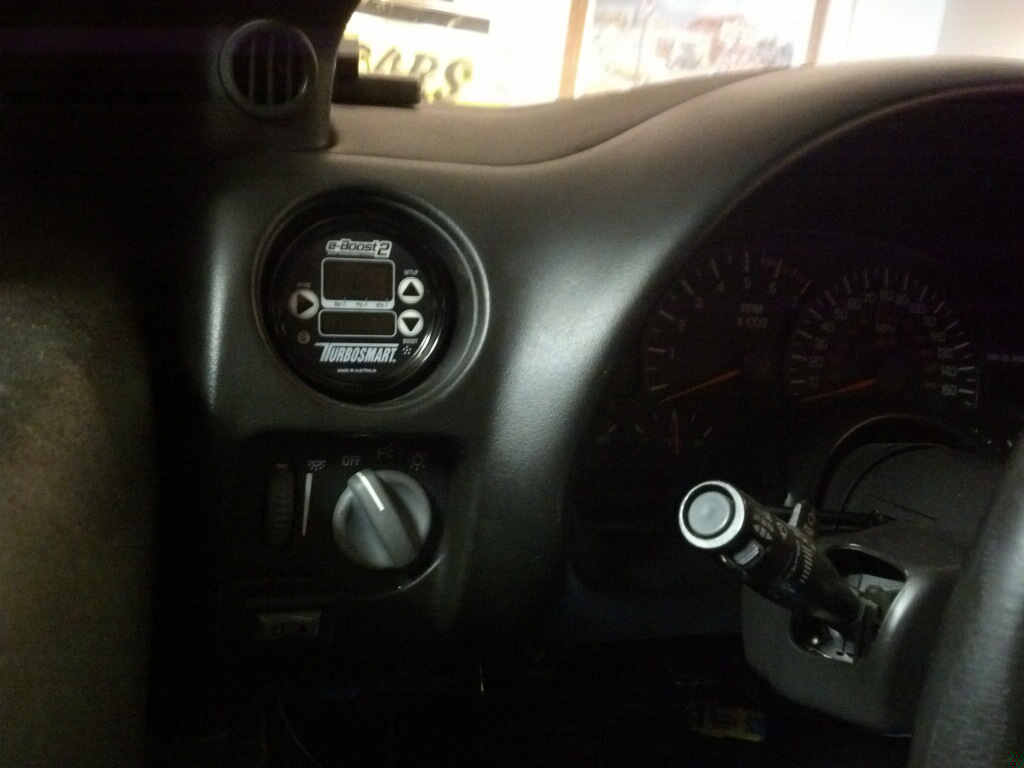
Eboost2 and Zeitronix


I bought the MSD 8733 2-step and tied that in to the transbrake switch.
I am running an Emblem Pros manual console ashtray switch plate. I have a switch to activate the line lock, the transbrake/2-step, the electronic cutout, and a miscellaneous switch.
I relocated the battery to the passenger rear cubby hole. I bought the BMR battery relocation tray to hold the battery. For disconnecting means, I chose the Flaming River Big Disconnect switch with lever kit. I wanted to try to hide the routing of the lever and decided on a location near the license plate. I don't plan to run the lever on the street and the hole would be covered by the plate. I had a custom "push off" sticker made by slow94formula as well. All of the cables routed from the battery to the switch were routed and hidden behind the carpet.
Flaming River Disconnect Switch
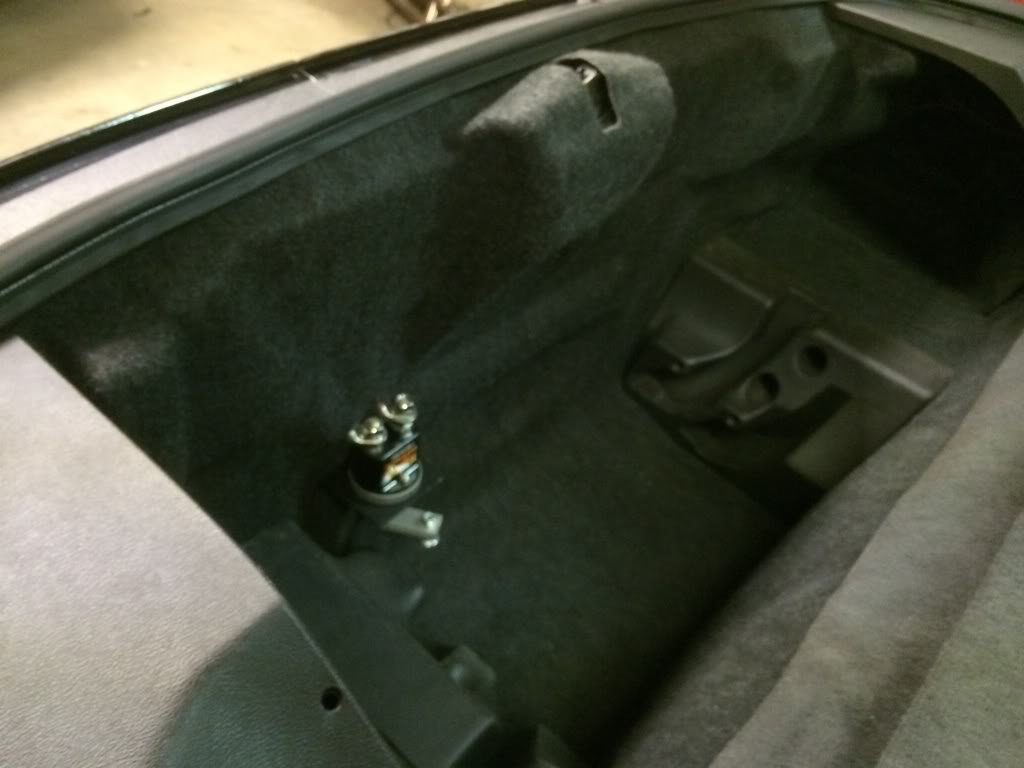
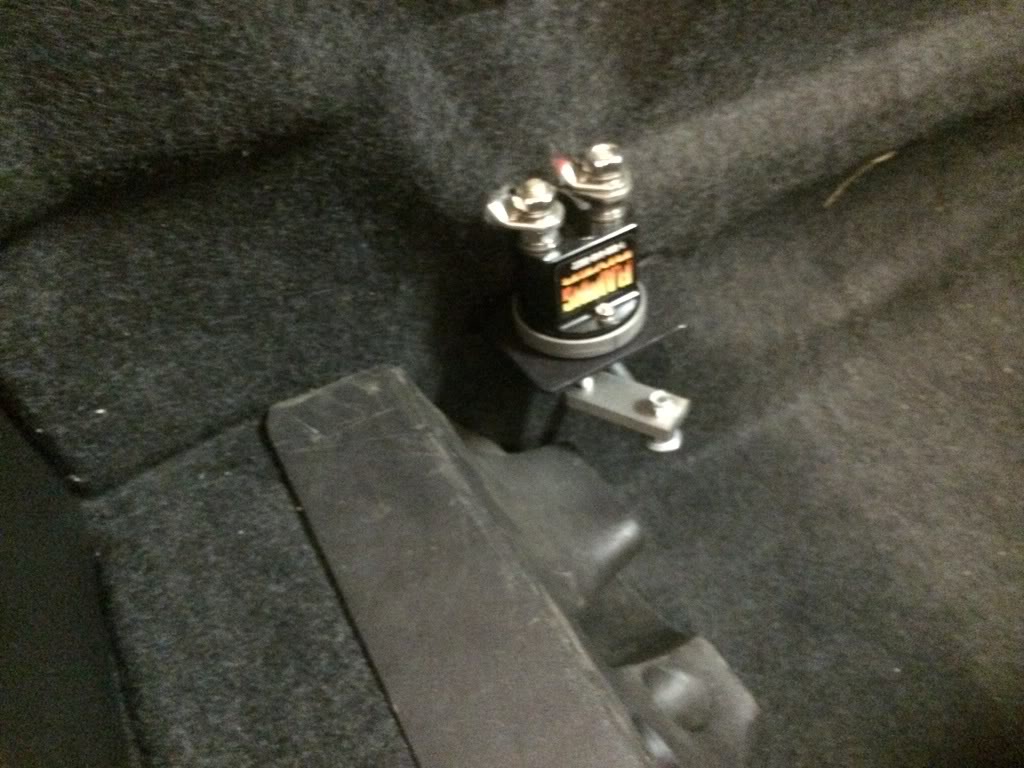
Custom "Push Off" sticker

I bought 1/0 and #2 welding cable for connections between the battery, alternator, starting, and fuse box. I routed the cable through the inside of the fender/rocker similar to the water lines in the Modular Turbo build. The cables were properly connected to kill all power to the car when disconnecting power at the switch.
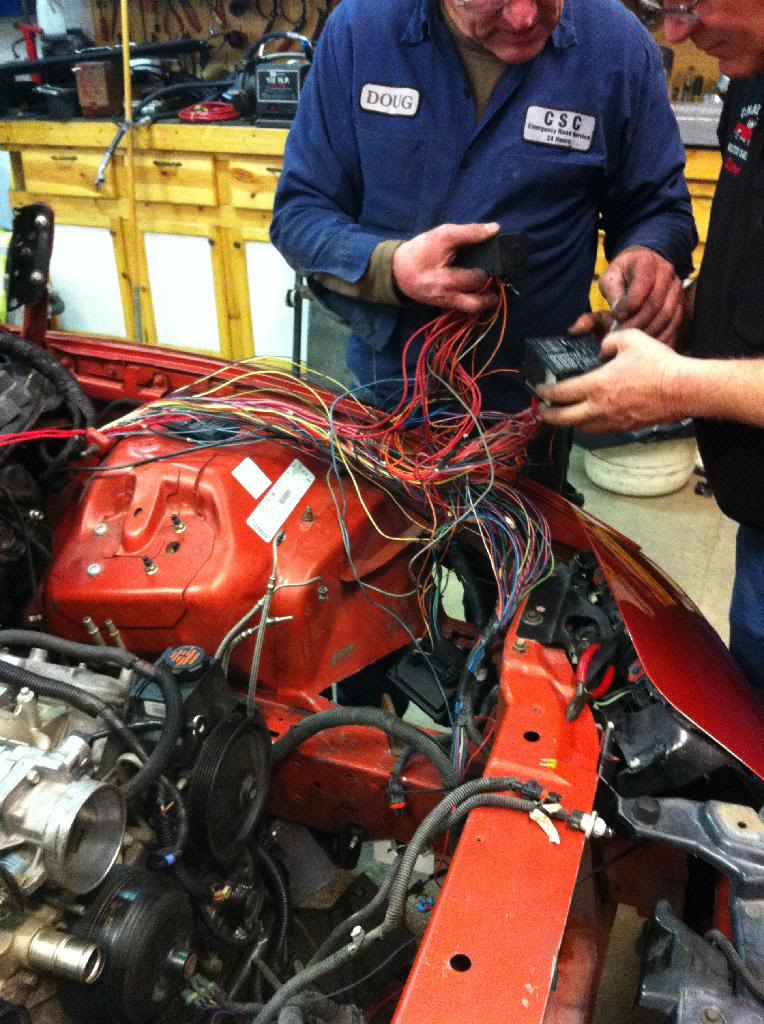
I had to relocate the fuse boxes to allow for installation of the driver's side turbo. This became interesting. We ended up combining the two fuse boxes into one and relocated under the driver's side headlight where the cruise control box and air pump were. The wires needed to be extended about 12". Good thing we eliminated what was not needed.
Relocating Fuse Boxes, Don't count fingers
The coils also needed to be relocated due to the turbo headers. I bought a coil relocation kit on Ebay and mounted them near the K-member.
Relocated Coils

I wanted to replace my Auto Meter gauges that were originally in the center vents. I had a C2 series vacuum/boost, electronic fuel pressure, and wideband A/F ratio gauge. I decided to go with the Zeitronix ZT-2 gauge. My plan was to install this in the car in a location easily visible while watching the road. This gauge allows for fuel pressure, wideband A/F ratio, and vacuum/boost all in the same screen. Unfortunately, I bought one used and it was a 2009 and older model. This does not allow for fuel pressure. I need to send this in to be upgraded to allow all three parameters.
Eboost2 Mounted in Driver's Vent

Eboost2 and Zeitronix


I bought the MSD 8733 2-step and tied that in to the transbrake switch.
I am running an Emblem Pros manual console ashtray switch plate. I have a switch to activate the line lock, the transbrake/2-step, the electronic cutout, and a miscellaneous switch.
I relocated the battery to the passenger rear cubby hole. I bought the BMR battery relocation tray to hold the battery. For disconnecting means, I chose the Flaming River Big Disconnect switch with lever kit. I wanted to try to hide the routing of the lever and decided on a location near the license plate. I don't plan to run the lever on the street and the hole would be covered by the plate. I had a custom "push off" sticker made by slow94formula as well. All of the cables routed from the battery to the switch were routed and hidden behind the carpet.
Flaming River Disconnect Switch


Custom "Push Off" sticker

I bought 1/0 and #2 welding cable for connections between the battery, alternator, starting, and fuse box. I routed the cable through the inside of the fender/rocker similar to the water lines in the Modular Turbo build. The cables were properly connected to kill all power to the car when disconnecting power at the switch.
I had to relocate the fuse boxes to allow for installation of the driver's side turbo. This became interesting. We ended up combining the two fuse boxes into one and relocated under the driver's side headlight where the cruise control box and air pump were. The wires needed to be extended about 12". Good thing we eliminated what was not needed.
Relocating Fuse Boxes, Don't count fingers

The coils also needed to be relocated due to the turbo headers. I bought a coil relocation kit on Ebay and mounted them near the K-member.
Relocated Coils

Last edited by Only ERO's; 07-25-2017 at 06:28 PM.
Trending Topics
12-27-2013, 04:48 PM
#8
My of my largest concerns was trying to keep this thing cool. I plan to drive it as much as possible. I don't want to be limited on hot days (yes, I know, I am in Minnesota). I ran across the Engineered Cooling Products radiator and thought I would give it a shot. It is the same dimensions as the factory radiator and it is still installed in the angled fashion. I also installed a 160� thermostat. For fans, I went with Derale dual puller fans, #16833. This is a shrouded kit and provides 3750cfm of airflow.
I bought a boosted catch can from Mightymouse. I ended up running into trouble finding a location to install the can. I have it mounted near the hood latch.
Mightymouse Catch Can mounted by Hood Latch
Overflow mounted by Hood Latch
I am running a Golden Eagle vacuum distribution block. I was also having issues where to install this. I have this installed in the front of the car near the hood latch as well.
The entire brake lines were updated throughout the car. We removed all the existing lines and put new in. We ran a larger line from stock and used the flexible lines. Those made the installation much easier. I previously had an SJM Manufacturing Line Lock in the car. This was relocated to the driver's side frame rail. I also added the SJM ABS delete as I plan to run a 28" rear tire and a 26" front tire. I anticipate I will need a sticky tire based on the horsepower. We installed the proportioning valve near the brake booster.
We modified the exhaust system to tie in the new 3" downpipes that came with the turbo kit. For the time being, we installed a Y-pipe and tied the existing Magnaflow catback in. The car is extremely quiet. I am sure that might end up shocking a few people when it comes alive. I also added a Badlanz HPE 3" cutout just before the rear end. This should also help the car breathe. The exhaust will most likely be modified next summer to help breathe a little more.
Badlanz Cutout
Yes, the exhaust looks pretty ratty right now. It will be updated this summer.
I also had not pulled the film off the stainless steel radiator support. I don't have an updated picture with that off.
Last edited by Only ERO's; 07-25-2017 at 06:28 PM.
12-27-2013, 04:48 PM
#9
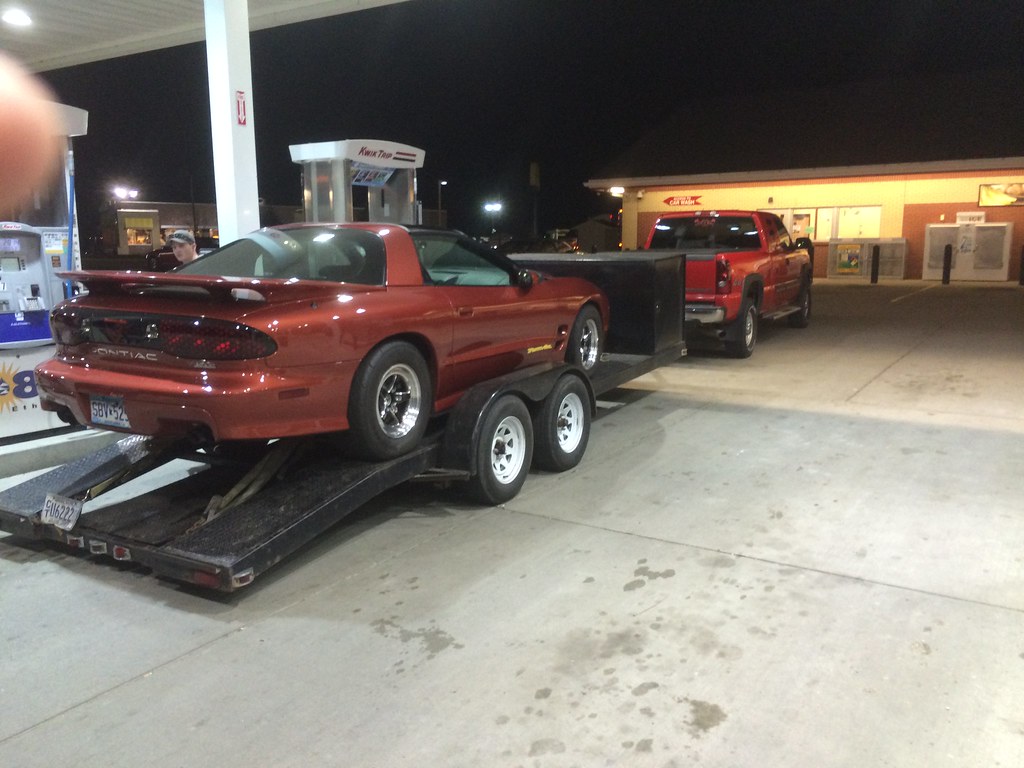
The following are a couple of pictures before taking off for the tuning session:

Loaded and Ready for Transport for Tuning
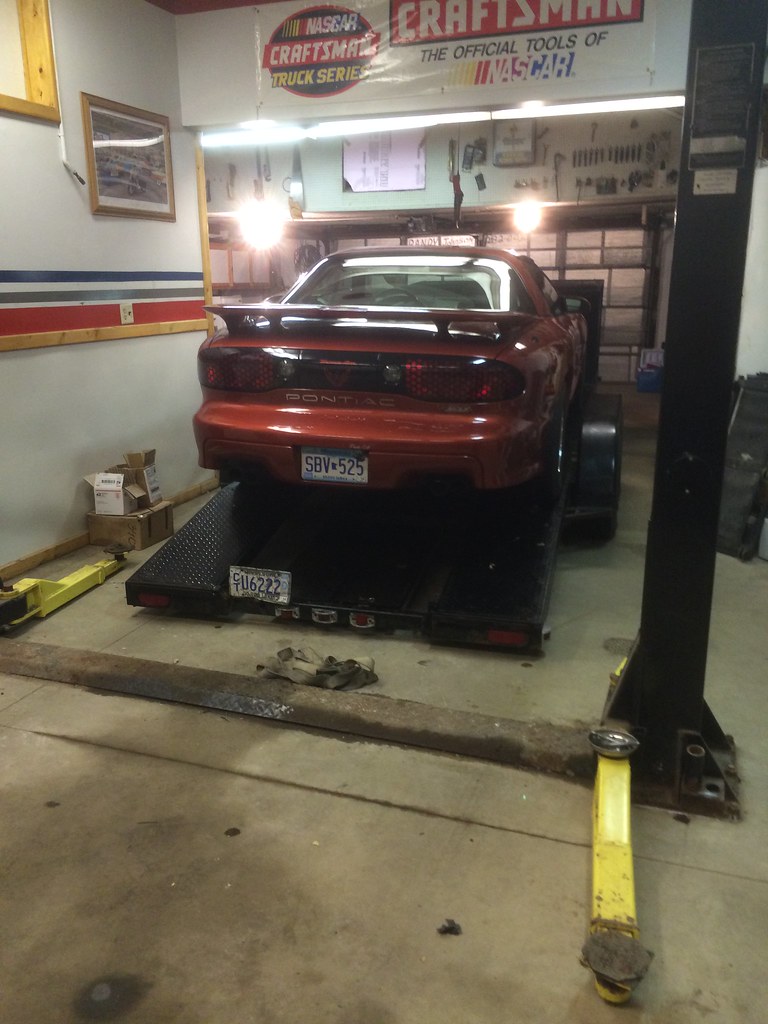
Topping off with a little Pump E85
Hitting the road at 4:30AM
I hauled the car over to Andy Wicks of Dynotune Speed and Performance for him to work his magic on the car. Andy has quite the resume when tuning high powered cars, especially on ethanol. He is well known for the Mobile Dyno that appeared on The Hot Rod Power Tour as well as many other large events across the nation.
We ran into a bunch of issues while tuning: bad MAP sensor, 1 bad injector, transmission wiring issues, electric cutout issues, pinion angle issues, and finally boost issues.
We thought we were having boost controller issues. We were struggling with my Eboost2 and even swapped to a buddy's head unit. His worked much better but we kept seeing boost fall off bad around 4500RPMs. We ended up changing to a manual boost controller and changed the wastegate plumbing. On a 19psi pull, we were seeing about 10 pounds of boost fall off.
We finally thought, lets try removing the air filter and elbows and see what happens. The boost levels didn't drop like they had previously. We decided to make one final hit and wrapped up with the following numbers:
8lbs: 550hp / 610tq
12lbs: 685hp / 758tq
19lbs: 880hp / 946tq
I would liked to have modified a few settings and tried a few more pulls but we ran out of time. I'm sure there will be another time. I need to get some data from Andy to analyze.
Final Dyno Pull on 19psi
Back to its resting place for the rest of the winter

Santa's Sleigh?
Random Pictures from Dynotune Speed and Performance, Andy just moved into this building the same week I dropped the car off.
They are pretty serious about this ethanol ethanol stuff in South Dakota
I have a few things to look at based on the dyno numbers. The car is losing power around 5300-5500RPMs and up. I am guessing this is due to the T3 turbines and/or backpressure. Hopefully I can get it all squared away this Spring. I am ready to take it out and have some fun with it.
I took the clutch out of the car on October 6, 2012. The car was tuned and completed and home on December 21, 2013. It was too long of a year. The car only took about two months to put together but the rest of waiting/delays. I have a few minors things to fix this winter to be ready for Spring. I can't wait!
Loaded and Ready for Transport for Tuning
Topping off with a little Pump E85
Hitting the road at 4:30AM
I hauled the car over to Andy Wicks of Dynotune Speed and Performance for him to work his magic on the car. Andy has quite the resume when tuning high powered cars, especially on ethanol. He is well known for the Mobile Dyno that appeared on The Hot Rod Power Tour as well as many other large events across the nation.
We ran into a bunch of issues while tuning: bad MAP sensor, 1 bad injector, transmission wiring issues, electric cutout issues, pinion angle issues, and finally boost issues.
We thought we were having boost controller issues. We were struggling with my Eboost2 and even swapped to a buddy's head unit. His worked much better but we kept seeing boost fall off bad around 4500RPMs. We ended up changing to a manual boost controller and changed the wastegate plumbing. On a 19psi pull, we were seeing about 10 pounds of boost fall off.
We finally thought, lets try removing the air filter and elbows and see what happens. The boost levels didn't drop like they had previously. We decided to make one final hit and wrapped up with the following numbers:
8lbs: 550hp / 610tq
12lbs: 685hp / 758tq
19lbs: 880hp / 946tq
I would liked to have modified a few settings and tried a few more pulls but we ran out of time. I'm sure there will be another time. I need to get some data from Andy to analyze.
Final Dyno Pull on 19psi
Back to its resting place for the rest of the winter
Santa's Sleigh?
Random Pictures from Dynotune Speed and Performance, Andy just moved into this building the same week I dropped the car off.
They are pretty serious about this ethanol ethanol stuff in South Dakota
I have a few things to look at based on the dyno numbers. The car is losing power around 5300-5500RPMs and up. I am guessing this is due to the T3 turbines and/or backpressure. Hopefully I can get it all squared away this Spring. I am ready to take it out and have some fun with it.
I took the clutch out of the car on October 6, 2012. The car was tuned and completed and home on December 21, 2013. It was too long of a year. The car only took about two months to put together but the rest of waiting/delays. I have a few minors things to fix this winter to be ready for Spring. I can't wait!
Last edited by Only ERO's; 07-25-2017 at 06:26 PM.

 12-27-2013, 11:20 PM
#14
Thank you, I am trying to get through as least the overall build. I will continue to expand on it. It is difficult putting together a thread when most of the work is complete.
We will have to see what it puts down for ET's. I am afraid to run it across the scale. It is a full weight street car. Iron block, 4L80, twin turbos, 9", A/C, and full interior. It is going to be heavy. I haven't put a cage in so I am going to try some 1/8 mile hits and hopefully don't get told to leave. Once I get it to launch alright, I am going to try to run a full pass.
Yes sir. The User2 input can be used for fuel pressure. Mine was an older model, so I will have to send in. It is $199 including shipping to get it upgraded. I already have the sensors and wired in. It only makes sense to upgrade it. I will have to shoot you a PM with the info.
12-28-2013, 12:41 AM
#15
Staging Lane
iTrader: (11)

Join Date: Dec 2010
Location: Indiana
Posts: 59
Likes: 0
Received 0 Likes
on
0 Posts

Very impressive build. What brake line kit did you use? I'd like to replace all of mine front to rear with the flexible hoses as well. Also, how much work did you have to do to the trans tunnel for the 4l80e swap?
12-28-2013, 01:37 AM
#17
I had a guy come in and run all new lines. Don't quote me on this but I think he switched it all to 1/4" from 3/16". I will try to find out what brand the line was. The guy that did it works for a towing service and updates a lot of the brake systems on their tow trucks. He came in and had the flaring tool and hammered it out in no time. The flexible line was helpful for routing between the brake booster, proportioning valve, line lock, etc all in a small area.
There is a few things that need to be done to get the 4L80 to fit. There are some ears that need to be cut off the transmission. We were able to just take a sawzall and cut those off. The trans tunnel needs to be widened towards the front of the transmission. We were able to use a hammer/maul and pound the tunnel out. Also need to make sure you have enough room for the transmission connector. I will try to remember to take a few pictures of this when I get it back on the hoist.
12-28-2013, 01:40 AM
#18
Nope. I kept the cam that AES spec'd in it. I was scrambling to get it done before winter. I am not sure if I am going to change anything for this coming year or just try to enjoy it for the time being.
I was surprised that the torque numbers I got. I was quite happy with that. It was a little bit of a late bloomer but not too bad. When it starts building boost, the torque comes in very hard.
We will see what happens as we go forward.
I was surprised that the torque numbers I got. I was quite happy with that. It was a little bit of a late bloomer but not too bad. When it starts building boost, the torque comes in very hard.
We will see what happens as we go forward.
12-28-2013, 02:11 AM
#19
TECH Apprentice
iTrader: (1)

Join Date: Mar 2012
Location: metro detroit, mi
Posts: 398
Likes: 0
Received 0 Likes
on
0 Posts
Nope. I kept the cam that AES spec'd in it. I was scrambling to get it done before winter. I am not sure if I am going to change anything for this coming year or just try to enjoy it for the time being.
I was surprised that the torque numbers I got. I was quite happy with that. It was a little bit of a late bloomer but not too bad. When it starts building boost, the torque comes in very hard.
We will see what happens as we go forward.
I was surprised that the torque numbers I got. I was quite happy with that. It was a little bit of a late bloomer but not too bad. When it starts building boost, the torque comes in very hard.
We will see what happens as we go forward.