Forced Induction Superchargers | Turbochargers | Intercoolers

2000 Z28 6.0 LY6 7875 Turbo Build

Old 07-24-2016, 04:34 PM
  #121  
TECH Addict
Thread Starter
iTrader: (1)
 
MY_2K_Z's Avatar
 
Join Date: Jan 2012
Location: Houston
Posts: 2,140
Likes: 0
Received 38 Likes on 34 Posts

Default

It's a 6.0 but ya I can't believe it either.
Old 07-24-2016, 04:38 PM
  #122  
TECH Enthusiast
 
ElQueFør's Avatar
 
Join Date: Dec 2011
Posts: 531
Likes: 0
Received 3 Likes on 3 Posts

Default

Oh, my mistake. But yeah, you basically stole that thing.
Old 07-24-2016, 07:37 PM
  #123  
TECH Addict
Thread Starter
iTrader: (1)
 
MY_2K_Z's Avatar
 
Join Date: Jan 2012
Location: Houston
Posts: 2,140
Likes: 0
Received 38 Likes on 34 Posts

Default

Made a transmission crossmember today. I couldn't see myself spending $279 on one with how simple they are so I made one. I'm pretty happy with the result.
Name:  5ECEA3ED-DE28-4A3D-8C55-4BEEC5FDA38D_zpssiq4zojc.jpg
Views: 629
Size:  145.2 KBName:  E3555BB4-229E-4BE6-8297-98F328E4AD2B_zps7dncn4ns.jpg
Views: 628
Size:  195.3 KBName:  83D85AC9-89A6-4A7C-A0E7-1F18D8D8E7FD_zpsjjanlque.jpg
Views: 660
Size:  196.8 KBName:  8AFA06AB-DD64-4339-8C76-B90642E6211A_zpsjnrlxgmg.jpg
Views: 636
Size:  212.3 KBName:  3C8A9D83-03EF-4C92-857F-1179D8D7C3D1_zpsclt2yban.jpg
Views: 606
Size:  232.2 KBName:  93B85A06-8122-4393-90FD-B7CC32F39209_zpstavewcam.jpg
Views: 628
Size:  151.2 KBName:  F202D0FF-5AA0-4BA5-A10F-DF046548B805_zpssa8owpu2.jpg
Views: 634
Size:  186.2 KBName:  A6859CA3-6250-4857-B633-A715D90DA77B_zpstvpjab2k.jpg
Views: 588
Size:  151.9 KBName:  03C206FF-A5F2-450D-AE02-7100781521AA_zpsc68twdwe.jpg
Views: 638
Size:  170.2 KB
Old 07-24-2016, 07:45 PM
  #124  
TECH Enthusiast
 
ElQueFør's Avatar
 
Join Date: Dec 2011
Posts: 531
Likes: 0
Received 3 Likes on 3 Posts

Default

Looks great! Looks like 1/4 inch plate and square tube. I'm diggin the color too.
Old 07-24-2016, 07:49 PM
  #125  
TECH Addict
Thread Starter
iTrader: (1)
 
MY_2K_Z's Avatar
 
Join Date: Jan 2012
Location: Houston
Posts: 2,140
Likes: 0
Received 38 Likes on 34 Posts

Default

Yep that's pretty much it.
Can a mod change the thread title from 4.8 to ly6 for me?
Old 07-25-2016, 07:32 PM
  #126  
TECH Enthusiast
 
ElQueFør's Avatar
 
Join Date: Dec 2011
Posts: 531
Likes: 0
Received 3 Likes on 3 Posts

Default

Any more progress?
Old 07-25-2016, 07:42 PM
  #127  
TECH Addict
Thread Starter
iTrader: (1)
 
MY_2K_Z's Avatar
 
Join Date: Jan 2012
Location: Houston
Posts: 2,140
Likes: 0
Received 38 Likes on 34 Posts

Default

Yep finished my radiator support/intercooler mount it's all tacked together but ran out of wire so I'll seam it up maybe tomorrow and post pics.
Old 07-25-2016, 07:48 PM
  #128  
TECH Enthusiast
 
ElQueFør's Avatar
 
Join Date: Dec 2011
Posts: 531
Likes: 0
Received 3 Likes on 3 Posts

Default

Cool. What size wire are you using?
Old 07-25-2016, 07:55 PM
  #129  
TECH Addict
Thread Starter
iTrader: (1)
 
MY_2K_Z's Avatar
 
Join Date: Jan 2012
Location: Houston
Posts: 2,140
Likes: 0
Received 38 Likes on 34 Posts

Default

.023 mild steel wire.
Old 07-25-2016, 10:03 PM
  #130  
Staging Lane
 
95z286.0ls's Avatar
 
Join Date: Jun 2011
Posts: 54
Likes: 0
Received 0 Likes on 0 Posts
Default build

not to ask but where is your flex tube between your exhaust to the turbo. put its a nice build
Old 07-25-2016, 10:11 PM
  #131  
TECH Addict
Thread Starter
iTrader: (1)
 
MY_2K_Z's Avatar
 
Join Date: Jan 2012
Location: Houston
Posts: 2,140
Likes: 0
Received 38 Likes on 34 Posts

Default

There isn't one. After hours and hours of research on that subject I decided to try and run without it. Many people have had no problems without a flex joint and solid mounts. I do have billet motor mounts so and the turbo will be supported as well. If it becomes an issue it's an easy/cheap fix
Old 07-26-2016, 10:11 AM
  #132  
TECH Enthusiast
 
ElQueFør's Avatar
 
Join Date: Dec 2011
Posts: 531
Likes: 0
Received 3 Likes on 3 Posts

Default

I'd guess that you'd be fine without it, seeing you have solid mounts. I also have solid mounts in my little project so maybe I could also omit that.
Old 07-27-2016, 11:31 PM
  #133  
TECH Addict
Thread Starter
iTrader: (1)
 
MY_2K_Z's Avatar
 
Join Date: Jan 2012
Location: Houston
Posts: 2,140
Likes: 0
Received 38 Likes on 34 Posts

Default

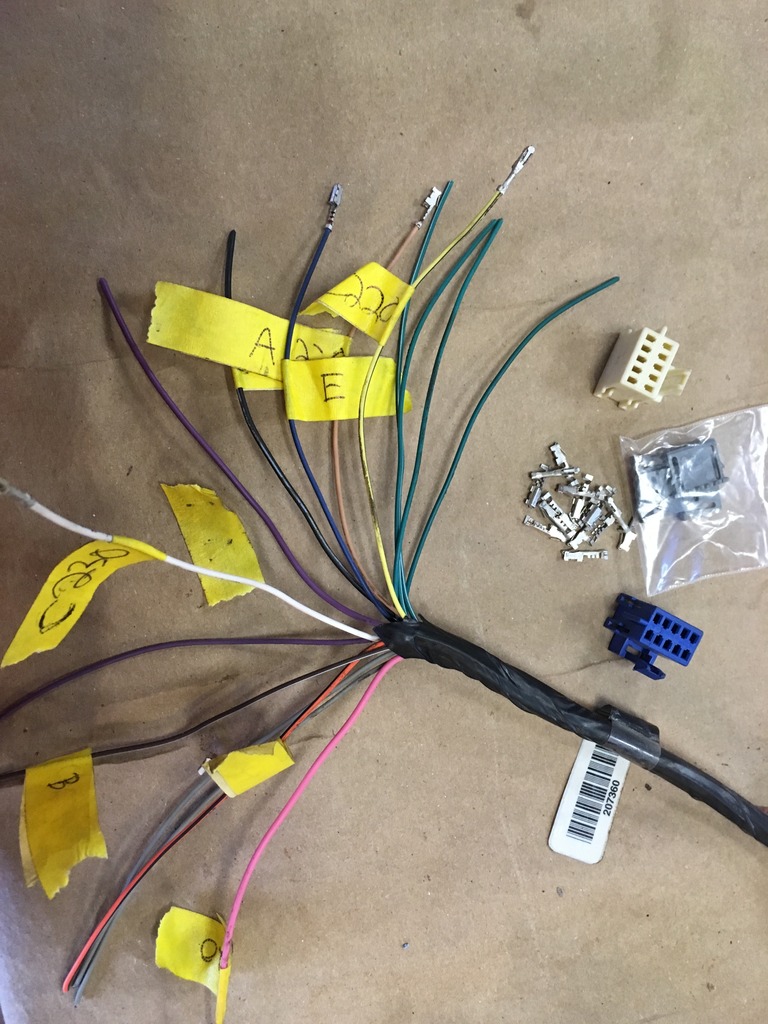
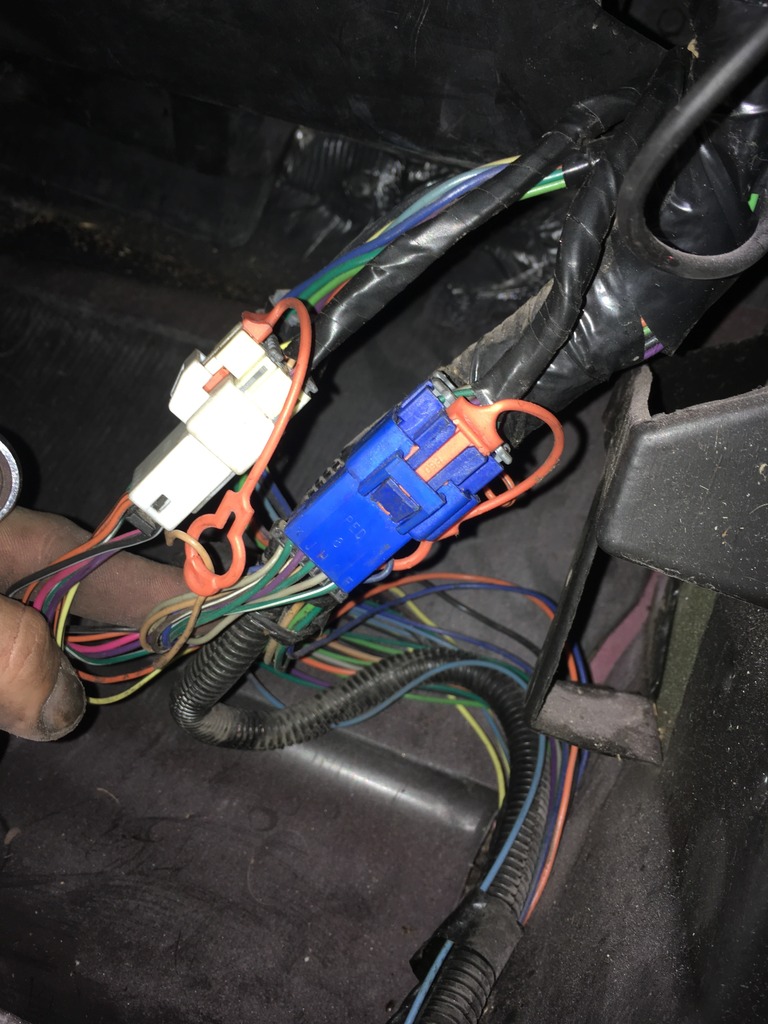
Got my harness all done today. With putting on the c220 and c230 plugs.
Name:  AF4611C4-D332-4972-A878-814C213BAA99_zpshjfisoq6.jpg
Views: 667
Size:  227.8 KBName:  68C21486-B8F2-42EB-A070-87108B80C5E0_zpsmk3n9diu.jpg
Views: 637
Size:  197.8 KB

Also started on fan shrouds. I had originally just cut down the stock one but it just didn't look very good so I cut it up even further and this time it looks great. They aren't finished but you get the idea.Name:  CA12332E-5B5E-4E84-A325-5177212FAD5E_zpsv4i3x09g.jpg
Views: 629
Size:  251.7 KBName:  E8C47F4C-6094-412B-82EA-5F7852BAFACB_zps3ubdtfjs.jpg
Views: 608
Size:  209.3 KB
Old 07-28-2016, 12:18 AM
  #134  
TECH Addict
 
DavidBoren's Avatar
 
Join Date: Jul 2013
Location: Portland, Oregon
Posts: 2,189
Received 119 Likes on 90 Posts
Default

Nice progress. I enjoy seeing this thing come together, and I can't wait to see the headlight intake.
Old 07-28-2016, 05:38 PM
  #135  
TECH Addict
Thread Starter
iTrader: (1)
 
MY_2K_Z's Avatar
 
Join Date: Jan 2012
Location: Houston
Posts: 2,140
Likes: 0
Received 38 Likes on 34 Posts

Default

Molded the fans to the shroud using 3m rigid plastic repair epoxy.
Name:  259FC9D9-115B-4026-B6DE-B1F2ED8C1E3C_zpsis1idt50.jpg
Views: 627
Size:  250.2 KBName:  69CD3AAD-6D05-48A5-887A-908614989C2E_zpsorjayqvs.jpg
Views: 631
Size:  160.1 KB
Once it's dry I'll sand it smooth and shoot it black.
Old 07-28-2016, 06:07 PM
  #136  
11 Second Club
iTrader: (43)
 
98Camarod's Avatar
 
Join Date: Aug 2006
Location: Summerville, SC
Posts: 5,364
Likes: 0
Received 2 Likes on 2 Posts

Default

Have you used the 3m stuff before?
Old 07-28-2016, 06:13 PM
  #137  
TECH Addict
Thread Starter
iTrader: (1)
 
MY_2K_Z's Avatar
 
Join Date: Jan 2012
Location: Houston
Posts: 2,140
Likes: 0
Received 38 Likes on 34 Posts

Default

Yep many times. Molding in body kits, repairing broken plastic panels and other junk. It's not cheap though. Like $60 a tube
Old 07-28-2016, 07:26 PM
  #138  
11 Second Club
iTrader: (43)
 
98Camarod's Avatar
 
Join Date: Aug 2006
Location: Summerville, SC
Posts: 5,364
Likes: 0
Received 2 Likes on 2 Posts

Default

Originally Posted by MY_2K_Z
Yep many times. Molding in body kits, repairing broken plastic panels and other junk. It's not cheap though. Like $60 a tube
That's good to know. I've looked for something similar, just never used it.
Old 07-28-2016, 07:40 PM
  #139  
TECH Addict
Thread Starter
iTrader: (1)
 
MY_2K_Z's Avatar
 
Join Date: Jan 2012
Location: Houston
Posts: 2,140
Likes: 0
Received 38 Likes on 34 Posts

Default

Find an automotive paint supply in your area and just ask for panel bond. It uses a special gun but you can make it work with just a caulk gun if your creative enough.
Old 07-30-2016, 10:49 PM
  #140  
TECH Addict
Thread Starter
iTrader: (1)
 
MY_2K_Z's Avatar
 
Join Date: Jan 2012
Location: Houston
Posts: 2,140
Likes: 0
Received 38 Likes on 34 Posts

Default

Ls9 head gaskets, head studs, timing set, timing cover, turbo oil fittings and related fittings and exhaust manifold gaskets should all be here soon to finish off the motor.
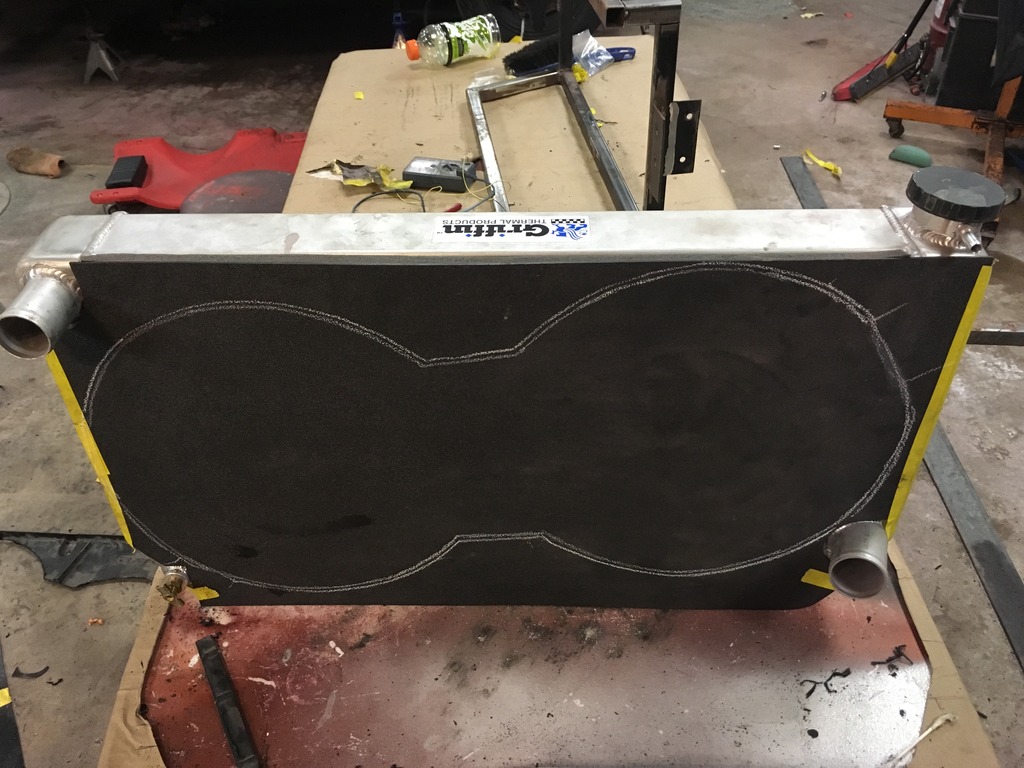
Need to get some bungs welded on my radiator for attaching the new fan setup. Also need to get a bung welded on the oil pan for the drain. Everything seems to be coming together and should be ready for a first start really soon.

On a side note... Watching denmahs latest build on his wife's truck is really depressing lol that guy knocked out the whole build in like a week and here I am taking a year and haven't even fired yet. How do you guys do it lol

Last edited by MY_2K_Z; 07-30-2016 at 11:00 PM.

Thread Tools
Search this Thread
Quick Reply: 2000 Z28 6.0 LY6 7875 Turbo Build


All times are GMT -5. The time now is 09:33 AM.