Resealing a 4th gen rack and pinion...No magic required
 04-08-2017, 02:53 PM
#1
Teching In
Thread Starter
iTrader: (1)

Join Date: Mar 2017
Posts: 32
Likes: 0
Received 0 Likes
on
0 Posts
So I blew out the input shaft seal on my 2000 Z28 quick ratio rack. Being a fairly competent mechanic I looked on this forum to see if anyone else had resealed there rack and if it was something I should attempt. Most of the post I found strongly recommended against trying. They stated that it took a myriad of special tools and skill to successfully reseal/rebuild one of these units. I was a little skeptical of the information as it appeared none of the people posting ever tried to repair one themselves, just reposting internet hearsay.
Given that a seal kit cost $22.00 and a reman rack goes for $200-$250 I decided to give it a try. If I couldn't do it then worse case I have to buy a reman and I am out $22.00.
Here we go. I got my seal kit from Orielly"s #8785. This is the proper kit for the quick ratio rack FE2 suspension. HINT: order 2 seal kits as the chance of nicking a seal is always there (I did) and there are no spares in the kit. If you don't use it you can always return for a refund.
First of all this does not require a high level of mechanical skill, just patience. If you have ever replace a wheel bearing race and hub seal you've got this covered. Second it does not require any special tools. Internal snap ring pliers, 8" crescent wrench, ball peen hammer, a couple punches, and a tub of wheel bearing grease pretty well covers it. Oh yeah almost forgot, a roll of 1/2" masking tape and some hose clamps.
Step 1. Center the steering and take a mental note or better yet a picture of where the pinch bolt on the steering shaft is. (NOTE, if rack is centered the head of the pinch bolt should be pointing up in the same direction as the pressure hose port). DO NOT remove the hard lines.
Step 2. Undo the clamps holding the rubber bellows to the rack and pull the bellow away to expose the inner tie rod swivel. The inner tie rods are torqued to about 75 lb/ft and have blue locktite on them so it take a good effort to break loose. If you pop the outer tie rod from the spindle you can unscrew the whole tie rod assembly as one unit and won't have to have the car re-aligned after it is back together.
Step 3.Remove the rack. Once you have the rack out use the crescent wrench on the input shaft to cycle it back and forth to get most of the fluid out. Mount the rack in a vice so you have access to the input shaft and remove the plastic dust cover. It is a good idea to lay out some paper towels and place the parts you take out on the towels in the order you removed them. Also take pictures as you go so you have a good reference as to how to reassemble the parts in the correct position and order. The instructions in the seal kit are very vague and slightly misleading.

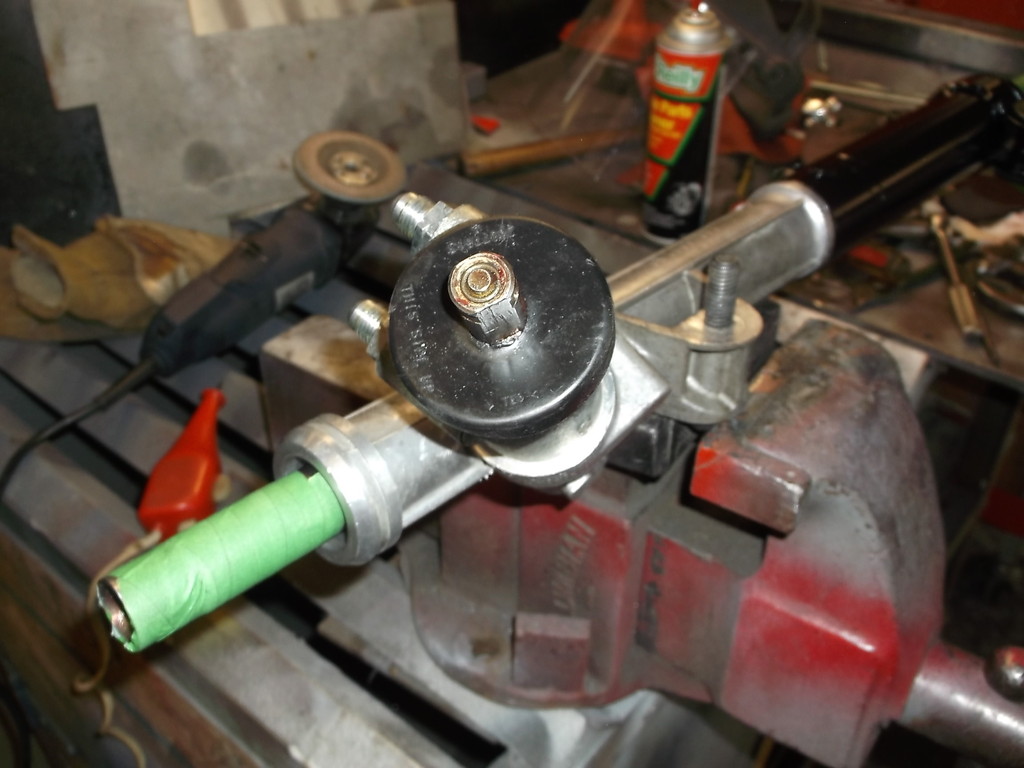
Step 4. Remove the snap ring. The instructions show a dust seal just under the snap ring. My rack did not have that. The high pressure seal has a double lip with the outer lip acting as a dust seal. The high pressure seal fits very tight in the bore and around the shaft. To remove it drill two, 3/32 holes, 180 degrees apart through top of seal. Drill the holes closer to the outer edge of the seal than the shaft. Thread 2 small sheet metal screws (#8) into the holes a couple threads. Use a screwdriver to pry up on the screws to remove the seal. Put the seal on the paper towels for later reference. Now you can see the top of the spool valve.
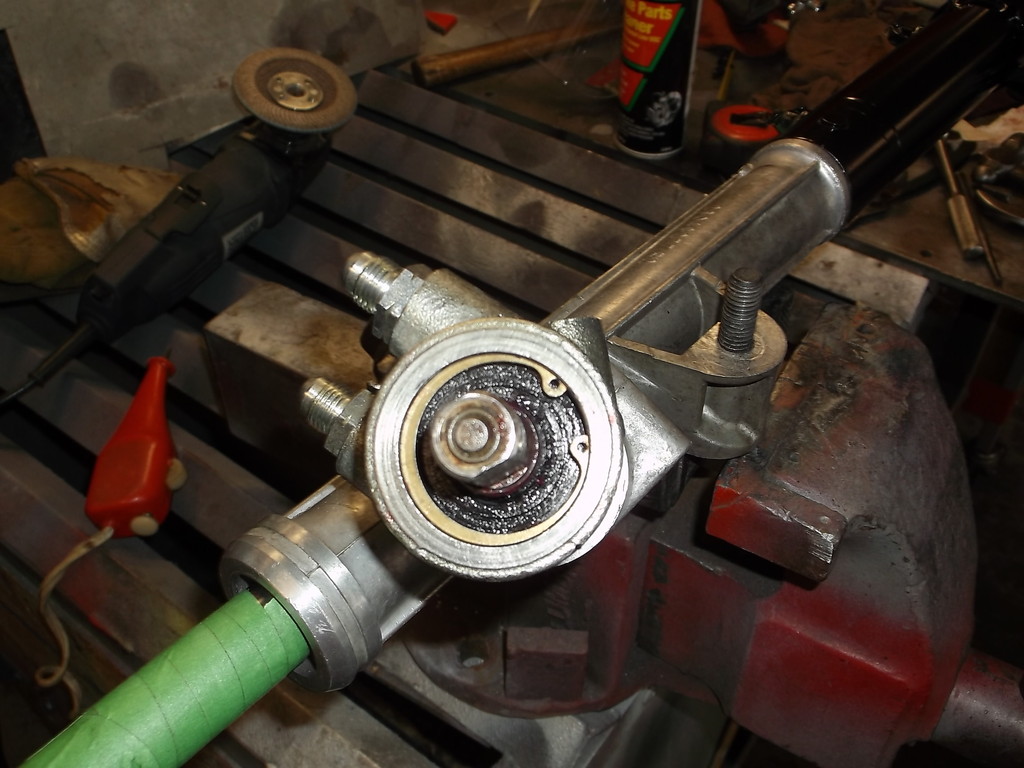
Step 5. Turn the rack over so you have access to the small, domed steel cap. This is just like a dust cap an a front wheel bearing.
Pry it off with a screwdriver. There is a 15mm locknut under the cap.Keep the cap and nut for reuse later. Hold the input end of the spool valve with the crescent wrench and remove the lock nut. Now you can slide the spool valve out. It may take a slight tap from the bottom to break it loose. Set it on the towels. Remove the small snap ring that was under the steel cap. You can tap the lower bearing out from the top side with a punch or screwdriver. It is not a real tight fit. Please note this bearing has an oil seal on the bottom side only. When reinstalling later make sure you put it back in with seal side facing out. The upper bearing can be removed as well. It has no oil seal so can be installed either way. Below the upper bearing is a nylon split bushing you can remove it with a pick. Save this for reuse as well.
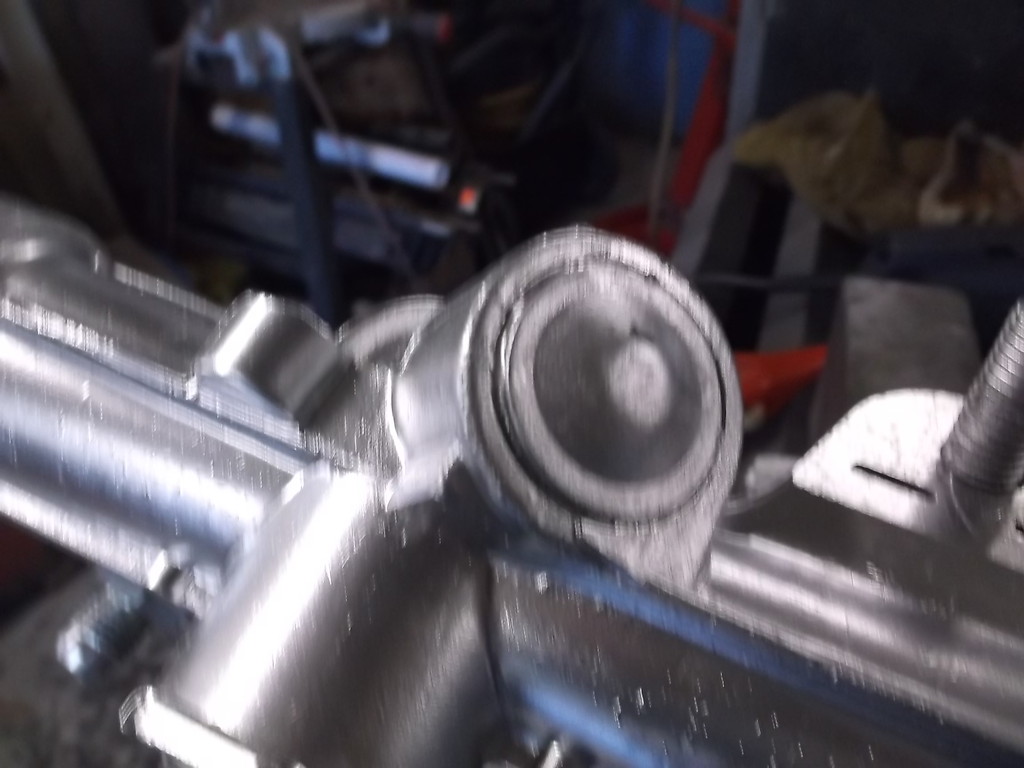
Step 6. Turn the rack so you have access to the rack preload screw and locknut. Select a location on the screw head where you can make a permanent reference mark with a chisel, center punch or file that will align with a similar mark you make on the aluminum housing.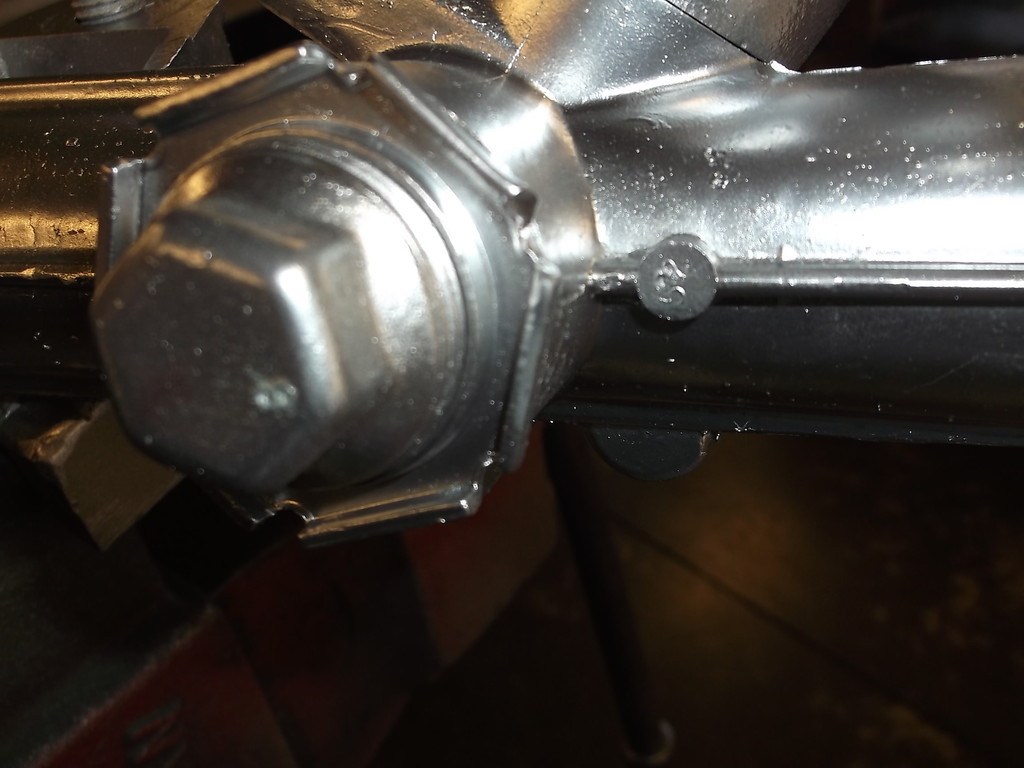
Write down the number of turns it takes to remove the screw. You will need these to reset the rack preload when reassembling. Use a punch to loosen the lock nut and unscrew the preload screw. There will be a spring and machined cup that will come out. Save all these parts for later reuse.
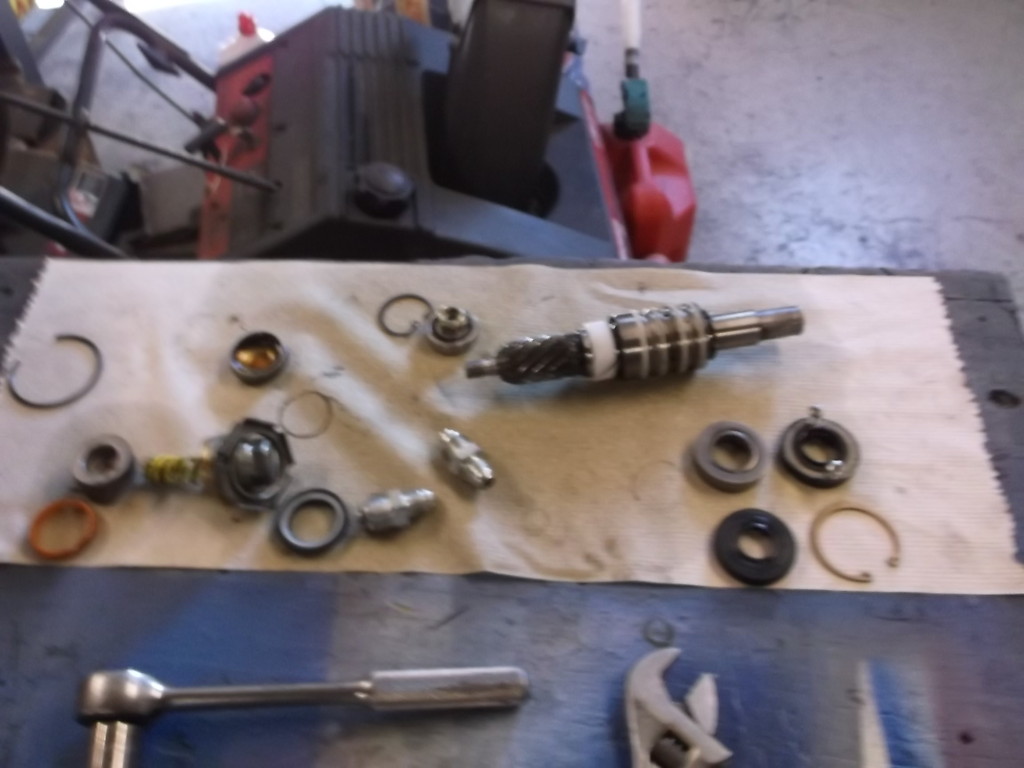
If you have done all the above you should have a pile of parts on the paper towels that look like this.
Step 7. Set the rack in the vise so you have access to the black, steel end of the rack. You will find a large aluminum sleeve/seal holder at the end. This is held in by a round wire snap ring. To remove the snap ring push the aluminum sleeve back into the rack housing as far as it will go (it will probably only move 1/8 to 3/16). There is a small hole drilled into the outer diameter of the end of the rack housing that will let you access the snap ring. With a pick or a jewler's screwdriver get in behind the snap ring and pry it out. It is a tight fit but with a little patience it will come out. Once the snap ring is out you can pull the rack shaft out of the end of the housing. As the shaft comes out take note or a picture of the location and orientation of the seals that are on the shaft. This is where the info and picture in instruction sheet is misleading.
 .
.
Finally, deep inside the rack cylinder (the black tube) there is another high pressure seal. To remove it I used a long piece of 3/8 steel rod, coming in through the aluminum side, and driving it out with a hammer. Remember it is a high pressure seal and they fit very tight in the bore, so some force is required. Now the rack housing is stripped down you can wash it out and blow it dry.
I'll start a second post for reassembly.
Hope this is helpful,
Dave
Given that a seal kit cost $22.00 and a reman rack goes for $200-$250 I decided to give it a try. If I couldn't do it then worse case I have to buy a reman and I am out $22.00.
Here we go. I got my seal kit from Orielly"s #8785. This is the proper kit for the quick ratio rack FE2 suspension. HINT: order 2 seal kits as the chance of nicking a seal is always there (I did) and there are no spares in the kit. If you don't use it you can always return for a refund.
First of all this does not require a high level of mechanical skill, just patience. If you have ever replace a wheel bearing race and hub seal you've got this covered. Second it does not require any special tools. Internal snap ring pliers, 8" crescent wrench, ball peen hammer, a couple punches, and a tub of wheel bearing grease pretty well covers it. Oh yeah almost forgot, a roll of 1/2" masking tape and some hose clamps.
Step 1. Center the steering and take a mental note or better yet a picture of where the pinch bolt on the steering shaft is. (NOTE, if rack is centered the head of the pinch bolt should be pointing up in the same direction as the pressure hose port). DO NOT remove the hard lines.
Step 2. Undo the clamps holding the rubber bellows to the rack and pull the bellow away to expose the inner tie rod swivel. The inner tie rods are torqued to about 75 lb/ft and have blue locktite on them so it take a good effort to break loose. If you pop the outer tie rod from the spindle you can unscrew the whole tie rod assembly as one unit and won't have to have the car re-aligned after it is back together.
Step 3.Remove the rack. Once you have the rack out use the crescent wrench on the input shaft to cycle it back and forth to get most of the fluid out. Mount the rack in a vice so you have access to the input shaft and remove the plastic dust cover. It is a good idea to lay out some paper towels and place the parts you take out on the towels in the order you removed them. Also take pictures as you go so you have a good reference as to how to reassemble the parts in the correct position and order. The instructions in the seal kit are very vague and slightly misleading.


Step 4. Remove the snap ring. The instructions show a dust seal just under the snap ring. My rack did not have that. The high pressure seal has a double lip with the outer lip acting as a dust seal. The high pressure seal fits very tight in the bore and around the shaft. To remove it drill two, 3/32 holes, 180 degrees apart through top of seal. Drill the holes closer to the outer edge of the seal than the shaft. Thread 2 small sheet metal screws (#8) into the holes a couple threads. Use a screwdriver to pry up on the screws to remove the seal. Put the seal on the paper towels for later reference. Now you can see the top of the spool valve.

Step 5. Turn the rack over so you have access to the small, domed steel cap. This is just like a dust cap an a front wheel bearing.

Pry it off with a screwdriver. There is a 15mm locknut under the cap.Keep the cap and nut for reuse later. Hold the input end of the spool valve with the crescent wrench and remove the lock nut. Now you can slide the spool valve out. It may take a slight tap from the bottom to break it loose. Set it on the towels. Remove the small snap ring that was under the steel cap. You can tap the lower bearing out from the top side with a punch or screwdriver. It is not a real tight fit. Please note this bearing has an oil seal on the bottom side only. When reinstalling later make sure you put it back in with seal side facing out. The upper bearing can be removed as well. It has no oil seal so can be installed either way. Below the upper bearing is a nylon split bushing you can remove it with a pick. Save this for reuse as well.
Step 6. Turn the rack so you have access to the rack preload screw and locknut. Select a location on the screw head where you can make a permanent reference mark with a chisel, center punch or file that will align with a similar mark you make on the aluminum housing.

Write down the number of turns it takes to remove the screw. You will need these to reset the rack preload when reassembling. Use a punch to loosen the lock nut and unscrew the preload screw. There will be a spring and machined cup that will come out. Save all these parts for later reuse.
If you have done all the above you should have a pile of parts on the paper towels that look like this.

Step 7. Set the rack in the vise so you have access to the black, steel end of the rack. You will find a large aluminum sleeve/seal holder at the end. This is held in by a round wire snap ring. To remove the snap ring push the aluminum sleeve back into the rack housing as far as it will go (it will probably only move 1/8 to 3/16). There is a small hole drilled into the outer diameter of the end of the rack housing that will let you access the snap ring. With a pick or a jewler's screwdriver get in behind the snap ring and pry it out. It is a tight fit but with a little patience it will come out. Once the snap ring is out you can pull the rack shaft out of the end of the housing. As the shaft comes out take note or a picture of the location and orientation of the seals that are on the shaft. This is where the info and picture in instruction sheet is misleading.
 .
.Finally, deep inside the rack cylinder (the black tube) there is another high pressure seal. To remove it I used a long piece of 3/8 steel rod, coming in through the aluminum side, and driving it out with a hammer. Remember it is a high pressure seal and they fit very tight in the bore, so some force is required. Now the rack housing is stripped down you can wash it out and blow it dry.
I'll start a second post for reassembly.
Hope this is helpful,
Dave
 05-28-2018, 10:50 PM
#4

doing the rack isn't too bad. the biggest issue I had was having something long enough to punch out that last seal. I found a used ring compressor "j-tool" on ebay and that made the pinion install so easy it wasn't funny. I recommend getting OEM boots for the inner tie rod vs aftermarket. Nothing like a torn or MELTED (in my case) boot letting dirt get to your freshly rebuilt rack.
03-29-2019, 06:09 PM
#5
On The Tree
iTrader: (4)

Join Date: Apr 2005
Location: Toledo, OH
Posts: 198
Likes: 0
Received 0 Likes
on
0 Posts

I'm having trouble understanding the last part, with how to get the rack shaft out. Any chance you can provide a picture? I have the whole thing apart minus this part.
03-29-2019, 07:05 PM
#6
Teching In
Thread Starter
iTrader: (1)
Join Date: Mar 2017
Posts: 32
Likes: 0
Received 0 Likes
on
0 Posts
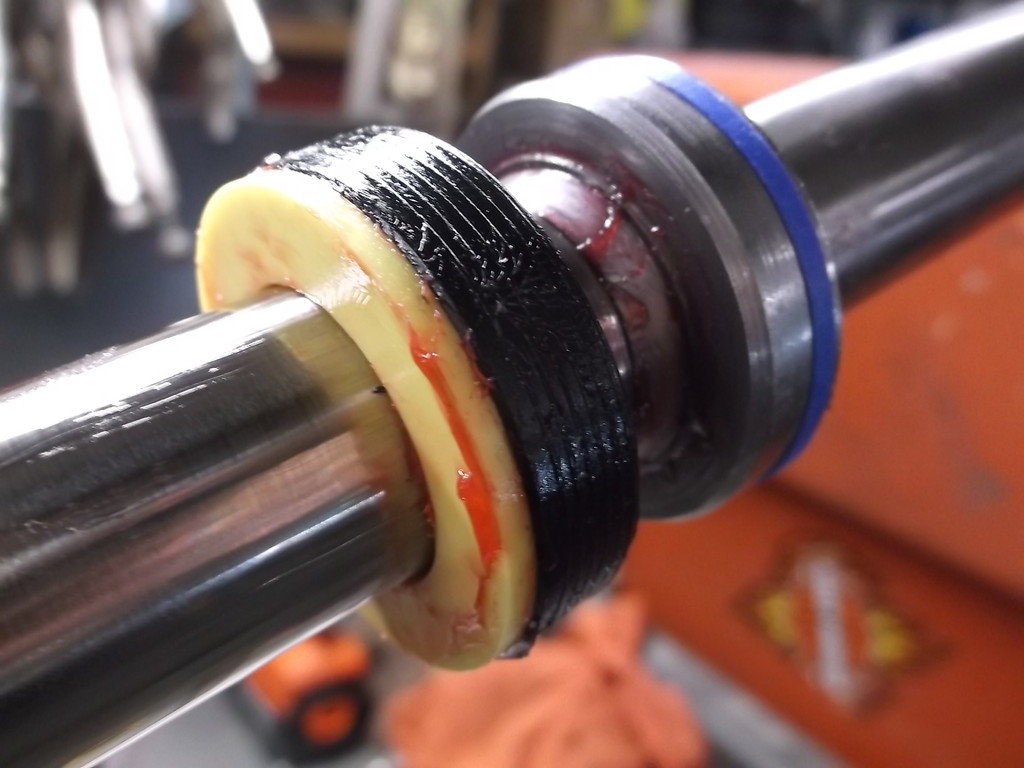
It's been 2 years since I did this article and I really can't recall any problem in getting the rack shaft out. You can see the piston and seal in the picture. They do fit tight and require a little force to remove from the tube. Sorry I can't be of more help.

