
Went to junkyard to scope out my first LSx details
 01-23-2017, 11:52 AM
#1

Hello, I am planning my first LSx swap (personal use). Basically I've read through all the sloppy mechanics stuff and checked out quite a few build threads over the past couple years, and I am ready to start collecting parts.
First step is identifications. I took some pictures and made labels to help this go smoothly. Once I know what "I need to make sure I get and how to get it" I can move on to actually finding a donor vehicle/engine.
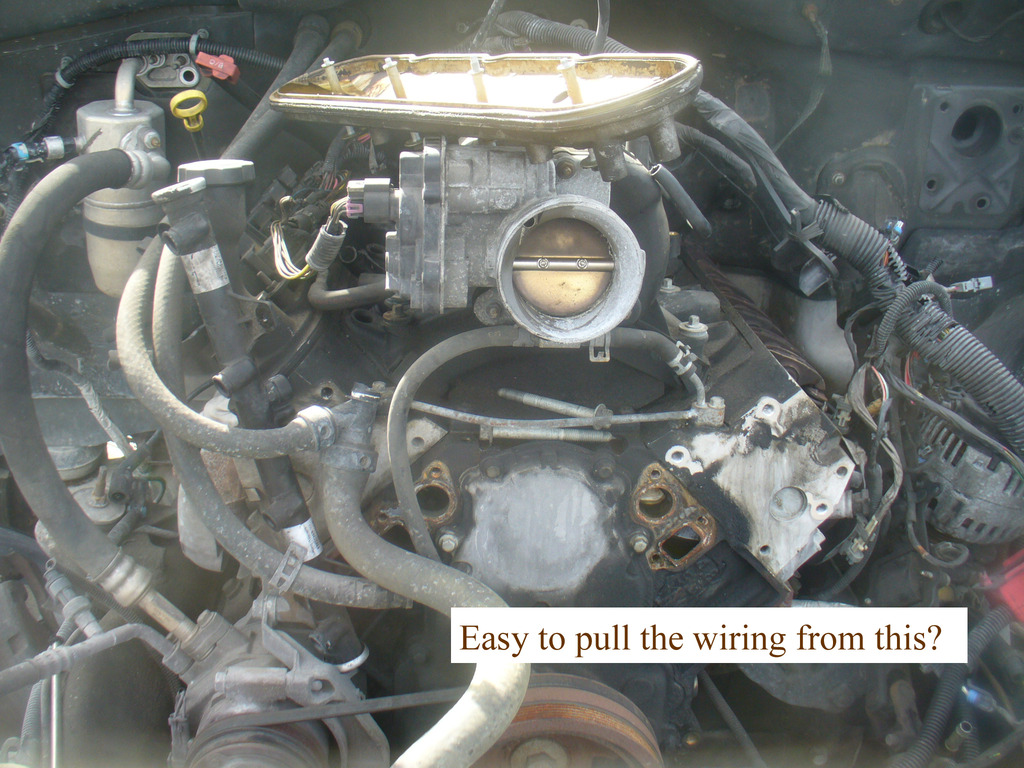
The first thing I noted was that the junkyard had a bunch of these, presumably 5.3's (Is it always a 5.3?) with the engine exposed like this, where I could easily pull the harness out. Is my guess accurate? That is, would the harness be cake to come out considering the condition of an engine like this? It looks like it, at first.
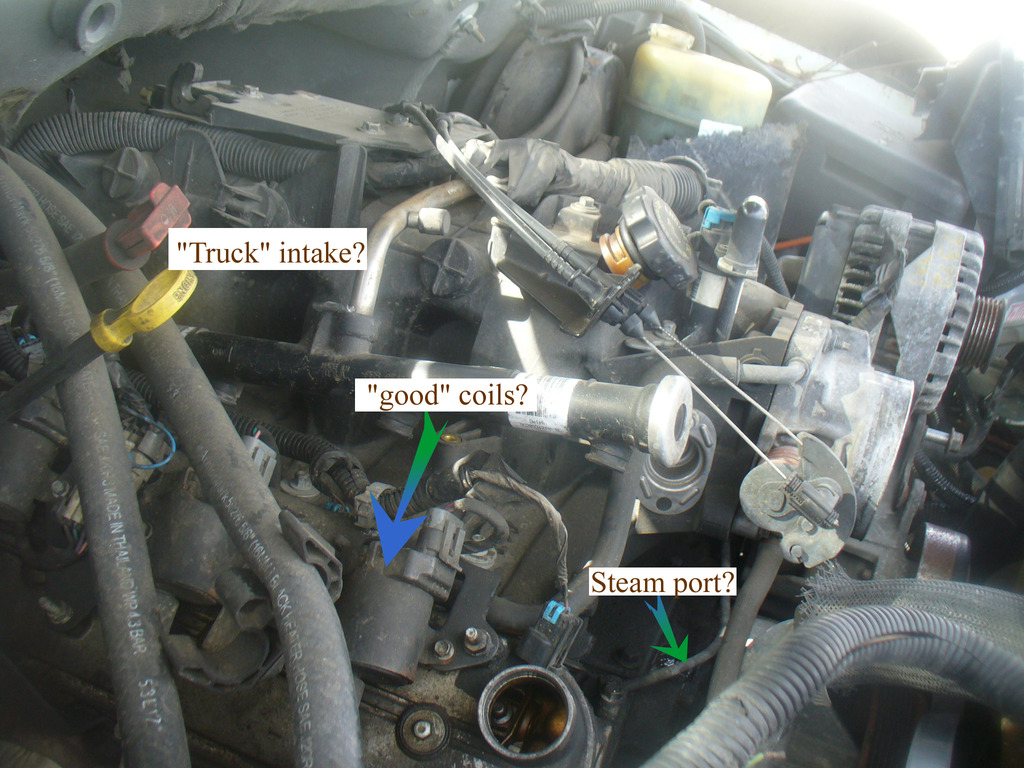
This picture is just to clarify terminology. Are the labels accurate? Are those the "good coils" everyone loves to use for boost? I am guessing not.
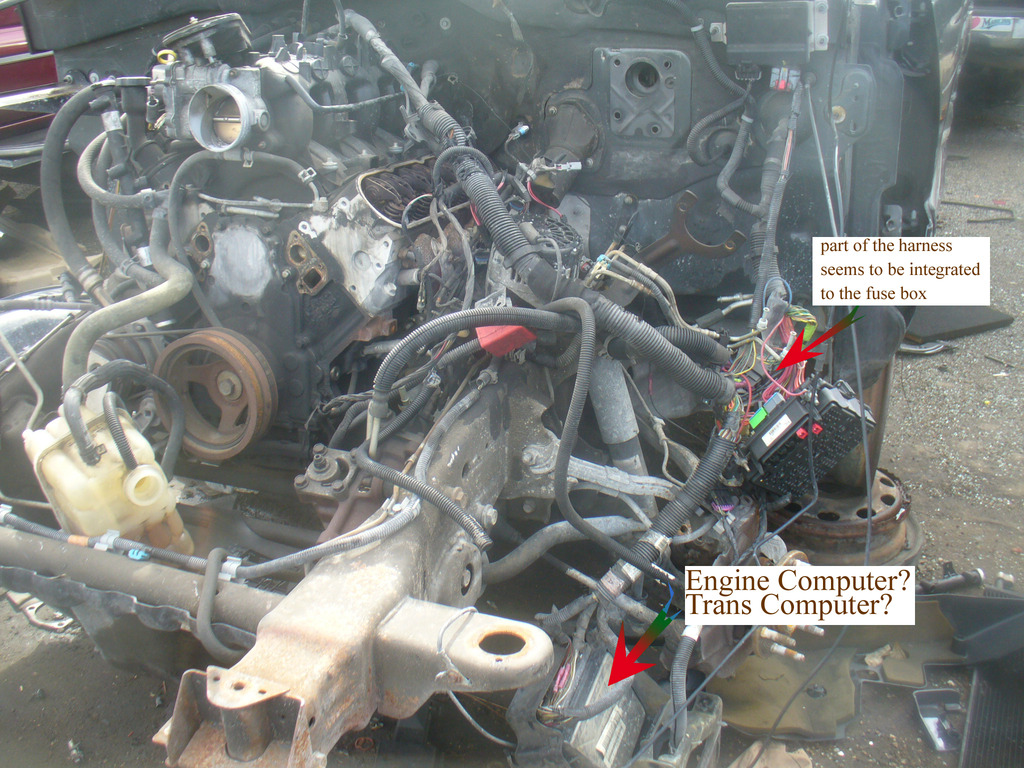
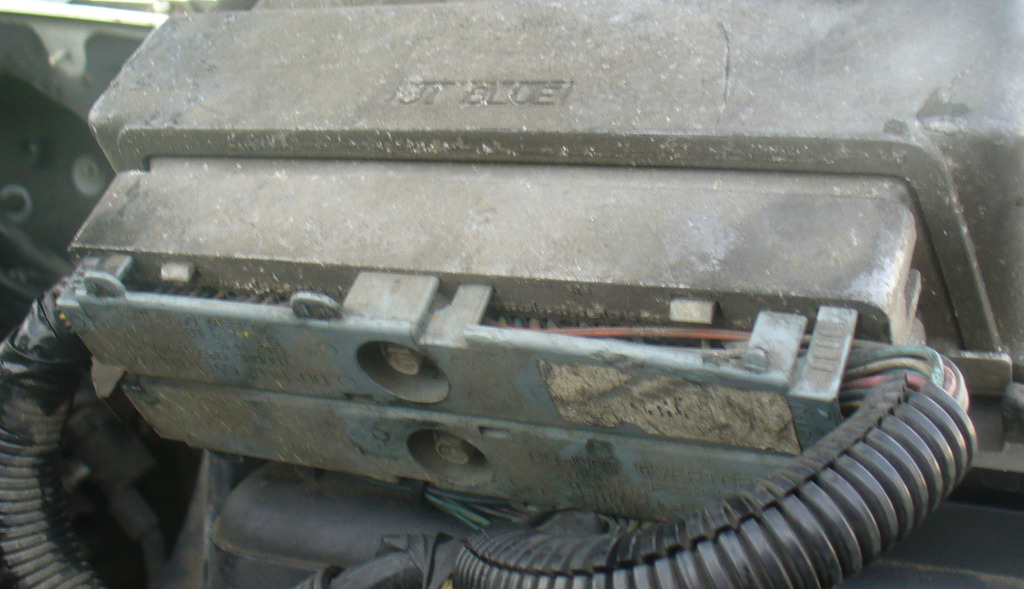
So this one is where it gets messy. I want to verify that is in fact the ECU for the engine. Also, is that the trans computer with it? And finally, it looks like the ECU harness is integrated to the fuse box. How do I deal with that? Will I need to remove the entire fuse box with the engine harness?
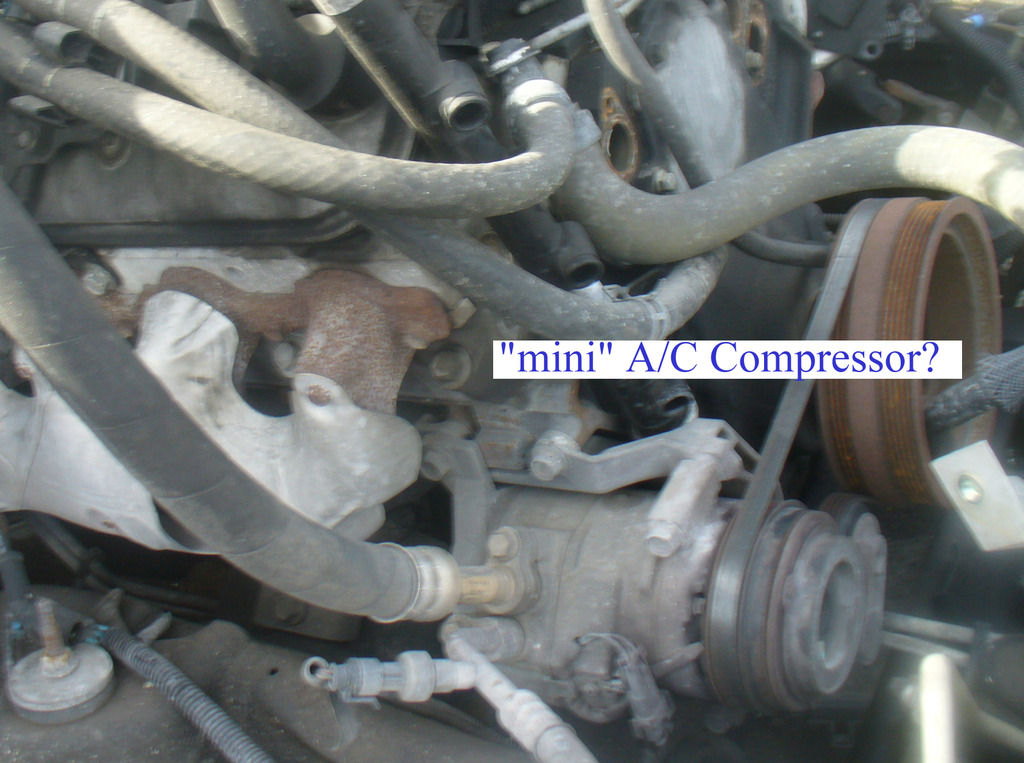
This is a picture of the A/C compressor I saw on the trucks. It is mounted low, and looks "small" to me. is this the smallest compressor they make for LSx engine? Also is this the same or similar location as the F-body uses? Or GTO? I wll not be using Truck accessories for my swap, only F-body and GTO items will work. But if the compressor is "small" I might be able to re-use the truck version and just move it. Or something. Thoughts?

This appears to be the OBD port inside the truck, as part of the factory chassis harness. Can I cut it out and re-wire it to the engine harness, or will I need to pull the chassis harness out, or how will I deal with this? I want to use HP tuner so I need this port I think.
Final thoughts: It looks like a GEN3 engine is the way to go (low cost and easy electronics, and no DoD), if I can find one from a truck with the 13mm header bolts and rear camshaft sensor I will take everything after I check under the valve cover and do a compression test, then grab a spare longblock if I can find it as well.
First step is identifications. I took some pictures and made labels to help this go smoothly. Once I know what "I need to make sure I get and how to get it" I can move on to actually finding a donor vehicle/engine.

The first thing I noted was that the junkyard had a bunch of these, presumably 5.3's (Is it always a 5.3?) with the engine exposed like this, where I could easily pull the harness out. Is my guess accurate? That is, would the harness be cake to come out considering the condition of an engine like this? It looks like it, at first.

This picture is just to clarify terminology. Are the labels accurate? Are those the "good coils" everyone loves to use for boost? I am guessing not.

So this one is where it gets messy. I want to verify that is in fact the ECU for the engine. Also, is that the trans computer with it? And finally, it looks like the ECU harness is integrated to the fuse box. How do I deal with that? Will I need to remove the entire fuse box with the engine harness?

This is a picture of the A/C compressor I saw on the trucks. It is mounted low, and looks "small" to me. is this the smallest compressor they make for LSx engine? Also is this the same or similar location as the F-body uses? Or GTO? I wll not be using Truck accessories for my swap, only F-body and GTO items will work. But if the compressor is "small" I might be able to re-use the truck version and just move it. Or something. Thoughts?

This appears to be the OBD port inside the truck, as part of the factory chassis harness. Can I cut it out and re-wire it to the engine harness, or will I need to pull the chassis harness out, or how will I deal with this? I want to use HP tuner so I need this port I think.
Final thoughts: It looks like a GEN3 engine is the way to go (low cost and easy electronics, and no DoD), if I can find one from a truck with the 13mm header bolts and rear camshaft sensor I will take everything after I check under the valve cover and do a compression test, then grab a spare longblock if I can find it as well.
 01-23-2017, 12:07 PM
#2
Restricted User

5.3s are the most common.
Hardest part about the wiring is the O2 sensors and trans connectors.
If those are round coils with heat sinks, they are the good coils.
There is not a separate transmission controller on a Gen 3, the PCM does it all.
There is a large white connector that goes in the bottom of the fuse panel. 7mm bolt holds it in. Loosen the bolt, pull the connector our of the fuse panel.
You can't use an F-body compressor in a swap, at least not easily. They are variable displacement vs fixed displacement on the truck compressors. Depending on the vehicle, they are mounted in the same spot on cars/trucks.
You can cut out the OBD port and wire it in later. There is a wire in the harness that goes to it, it will be in one of the square connectors on the harness. You'll cut off the big square connector later, and can just run the OBD wire straight to it. The OBD port only gets a single wire from the PCM. The other wires the port uses are just power and grounds.
The following users liked this post:
Homer_Simpson (12-02-2021)
01-23-2017, 12:21 PM
#3
If those are round coils with heat sinks, they are the good coils.
There is not a separate transmission controller on a Gen 3, the PCM does it all.
There is a large white connector that goes in the bottom of the fuse panel. 7mm bolt holds it in. Loosen the bolt, pull the connector our of the fuse panel.
There is a large white connector that goes in the bottom of the fuse panel. 7mm bolt holds it in. Loosen the bolt, pull the connector our of the fuse panel.
You can't use an F-body compressor in a swap, at least not easily. They are variable displacement vs fixed displacement on the truck compressors. Depending on the vehicle, they are mounted in the same spot on cars/trucks.
You can cut out the OBD port and wire it in later. There is a wire in the harness that goes to it, it will be in one of the square connectors on the harness. You'll cut off the big square connector later, and can just run the OBD wire straight to it. The OBD port only gets a single wire from the PCM. The other wires the port uses are just power and grounds.
I Had a feeling it was something like this. I hope the factory service manual has correct wire colors regarding these important wires (for some reason, many FSM do not have accurate colors, sigh)
Thanks for the support and I look forward to making progress!
01-23-2017, 12:33 PM
#4
Restricted User
Yes, I'm talking the large underhood fuse panel. 7mm socket and pull the harness out of it.
The AC isn't bad. Making your own A/C lines will be the only hard part.
Just leave 12" or so of wire on the OBD-II port and cut. That's all you'll need.
The AC isn't bad. Making your own A/C lines will be the only hard part.
Just leave 12" or so of wire on the OBD-II port and cut. That's all you'll need.
01-24-2017, 12:40 AM
#5
So I've been reading and it keeps mentioning that some ECU have blue/red connectors, and the later models have blue/green. I am looking at the picture above and the one below and it just looks blue to me. What am I missing? where is the red or green? I Must be looking at the wrong thing?
Edit; I think I figured it out. The colors are on the inside, I have to pull the plug out first to see them. Im leaving the question up there though so others can follow the thread/conversation and learn if they never saw such things.
Next observations (new question), anything wrong with these injectors: LT1swap.com says they are 50lb/hour which should support 650bhp?? Ebay has them for $80~
Moving on,
I've looked through all the wiring details and they seem reasonable. Only a couple wires I am still unsure of:
wiring pinout:
http://lt1swap.com/99-02_vortec_pcm.htm
Questions:
Pin 34, I send a ground to tell the ECU I am neutral? Will the 4l80e have this "range sensor" I am guessing so
Pin 13, cruise control engage signal. I want cruise. I am hoping for DBW but how does this single wire work? I send a ground to enable cruise? meh
Pin 33, pretty sure this is the ground from the brake pedal switch
pin 50, vehicle speed output, what is this for? To speedo?
Next, I read that
And then I read this:
http://lt1swap.com/4l60e_4l80e_harness.htm
And I can't find any info on the VSS connector, or where to get it. I am also a little confused by some of the instructions. Any further clarification would be great
My plan is to wait and see what my engine will have (dbw or cable) and then, if DBW I will grab all the DBW stuff with it and go that route. I was going to grab a harness in advance but it would be a shame to pull apart a harness for DBW, grab all the stuff, and wind up with a cable driven engine.

Edit; I think I figured it out. The colors are on the inside, I have to pull the plug out first to see them. Im leaving the question up there though so others can follow the thread/conversation and learn if they never saw such things.
Next observations (new question), anything wrong with these injectors:
12613412, 12609749 - used in 2010+ Flex Fuel engines, these are drop in high flow injectors, that fit the rails on the 4.8/5.3/6.0 non flex fuel engines. (same injector height). These are 50lb/hr injectors.
Moving on,
I've looked through all the wiring details and they seem reasonable. Only a couple wires I am still unsure of:
wiring pinout:
http://lt1swap.com/99-02_vortec_pcm.htm
Questions:
Pin 34, I send a ground to tell the ECU I am neutral? Will the 4l80e have this "range sensor" I am guessing so
Pin 13, cruise control engage signal. I want cruise. I am hoping for DBW but how does this single wire work? I send a ground to enable cruise? meh
Pin 33, pretty sure this is the ground from the brake pedal switch
pin 50, vehicle speed output, what is this for? To speedo?
Next, I read that
And then I read this:
http://lt1swap.com/4l60e_4l80e_harness.htm
And I can't find any info on the VSS connector, or where to get it. I am also a little confused by some of the instructions. Any further clarification would be great
My plan is to wait and see what my engine will have (dbw or cable) and then, if DBW I will grab all the DBW stuff with it and go that route. I was going to grab a harness in advance but it would be a shame to pull apart a harness for DBW, grab all the stuff, and wind up with a cable driven engine.
Last edited by kingtal0n; 01-24-2017 at 01:32 AM.
01-24-2017, 06:50 AM
#6
Restricted User
I've looked through all the wiring details and they seem reasonable. Only a couple wires I am still unsure of:
wiring pinout:
http://lt1swap.com/99-02_vortec_pcm.htm
Questions:
Pin 34, I send a ground to tell the ECU I am neutral? Will the 4l80e have this "range sensor" I am guessing so
Pin 13, cruise control engage signal. I want cruise. I am hoping for DBW but how does this single wire work? I send a ground to enable cruise? meh
Pin 33, pretty sure this is the ground from the brake pedal switch
pin 50, vehicle speed output, what is this for? To speedo?
Most cars/trucks have the neutral safety switch on the column or in the shifter. You could wire one in with an aftermarket shifter fairly easily and do away with the wire from the PCM.
You don't need the range sensor on the side of the trans. In a swap, its only function will be neutral safety. Its just easier to use the wire coming from the PCM than to run multiple to the switch on side of trans.
Pin 13:
All of the cruise control info for DBW was on LT1swap:
http://lt1swap.com/dbw.htm
Pin 33:
You might have to install a relay, since most older brake switches provide power and not ground. Use the switch to activate a relay that cuts the power to it.
Pin 50:
Speedo.
Next, I read that
And then I read this:
http://lt1swap.com/4l60e_4l80e_harness.htm
And I can't find any info on the VSS connector, or where to get it. I am also a little confused by some of the instructions. Any further clarification would be great
My plan is to wait and see what my engine will have (dbw or cable) and then, if DBW I will grab all the DBW stuff with it and go that route. I was going to grab a harness in advance but it would be a shame to pull apart a harness for DBW, grab all the stuff, and wind up with a cable driven engine.
As for DBW/DBC, you can use a DBW harness on a DBC engine, you'll just have to spend $15 on IAC and TPS connectors and pin them into the harness. Doing it the other way around is more difficult, as there aren't many places that sell the DBW connectors separate.
01-24-2017, 06:52 AM
#7
Restricted User
FYI, cruise control on a DBC engine isn't any more difficult than DBW. You'll just have to get the cable cruise control box out of the donor vehicle and mount it somewhere. From there, getting it to work is almost exactly like it would be with DBW.
Trending Topics
01-24-2017, 07:47 PM
#8
Thank you so very much. As usual you are an asset to this forum.
My biggest concern is the A/C. Not the lines so much- I am much more worried about the condenser situation. See, my plan is to make the core support of the car I am swapping removable for easy engine changing. The A/C condenser is not exactly small, and the lines going to it are very stiff, making that a tedious process if I kept using the OEM unit. In short, it is in the way.
I'd like to install a smaller, more remote (or at least with SOFT lines) condenser. But I have no idea what I am doing with respect to size, accommodation, and fittings.
Would something like this work:
'Universal AC Condenser 11" X 21" Parallel High Flow A/C O Ring Fitting'
Thats a unit from ebay, 11x21 seems pretty small, but the main thing is, can I make soft lines for it, that way when I want to pull the core support I can just swing it out of the way without having to de-charge the system? Or any other ideas along this nature would be MOST WELCOME


The following users liked this post:
Bigbirdtrucker (01-18-2020)
01-25-2017, 07:23 PM
#11
I don't know "what I need exactly" I just know I need it to fit my 240sx chassis and need space up front for a radiator (and possibly condenser) and of course the turbo manifolds need to snake around it all somehow. So I was thinking vette stuff first, then mock it up and see what needs to move more. But that looks like expensive city. In about a week or two I should have the motor sitting in the car so I would like to have the accessories by that time ready to figure it out.
Also it needs to fit with the LS1 or LS6 style manifold. I am looking for one of those (If anyone has one for sale). The truck unit will not fit my hood.
Update:
I understand now, the offset is the distance from the engine to the belt on the pulley. The truck has the farthest out belt offset. I have decided I will be running the Fbody offset, Fbody balancer and all Fbody accessories. I will even try the Fbody compressor, by applying a 12V to pin17 on the LS ECU (AC request pin), the LS ecu should then apply ground to pin 43 on the same ECU plug, which through a relay will provide 12V to the compressor. At least in theory, this is my original plan.
Last edited by kingtal0n; 02-14-2017 at 12:03 AM.
01-26-2017, 09:04 PM
#12
Yesterday I grabbed a harness and PCM (ecu) from the junkyard from an 02 Tahoe. I Wonder was it the 4l60 or 4l80 in that truck? (wiki says 4l60e but i will double check the harness) Anyways, the harness had blue and red connectors so it will work with throttle cable. Tonight I washed it and de-taped some of it while it was drying at my friends shop.
I am hoping to buy some F_body accessories, and use the lsbrackets.com A/C relocation bracket for an R4 compressor, and the water pump spacer, with an LS1 intake and LS6 valley cover and hopefully the truck steam port lines. And an LS6 valley cover too maybe. Think all of that will work/fit? I also found another place called LSsimple and his kits work with the truck accessories. Seems too good to be true!
Once I get the accessories, intake parts, and wiring done, I will find an engine(s). Of course I always provide pictures along the way to help the community so expect alot of them. My last build was over 3000 pictures (link is in my profile, home page). By helping me, you are helping everyone.
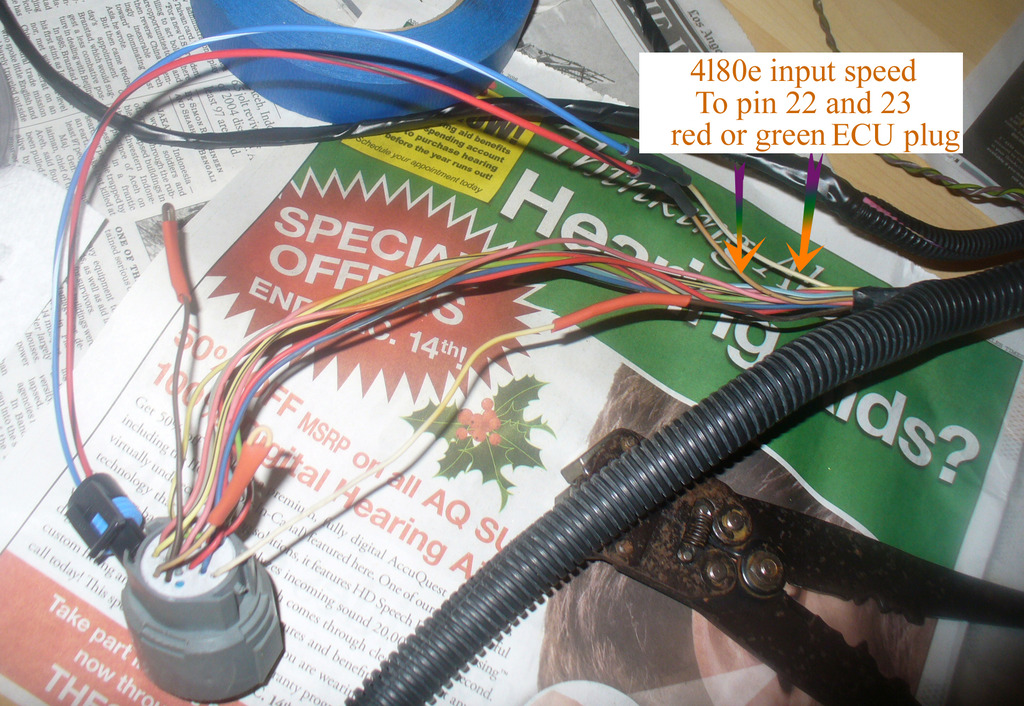
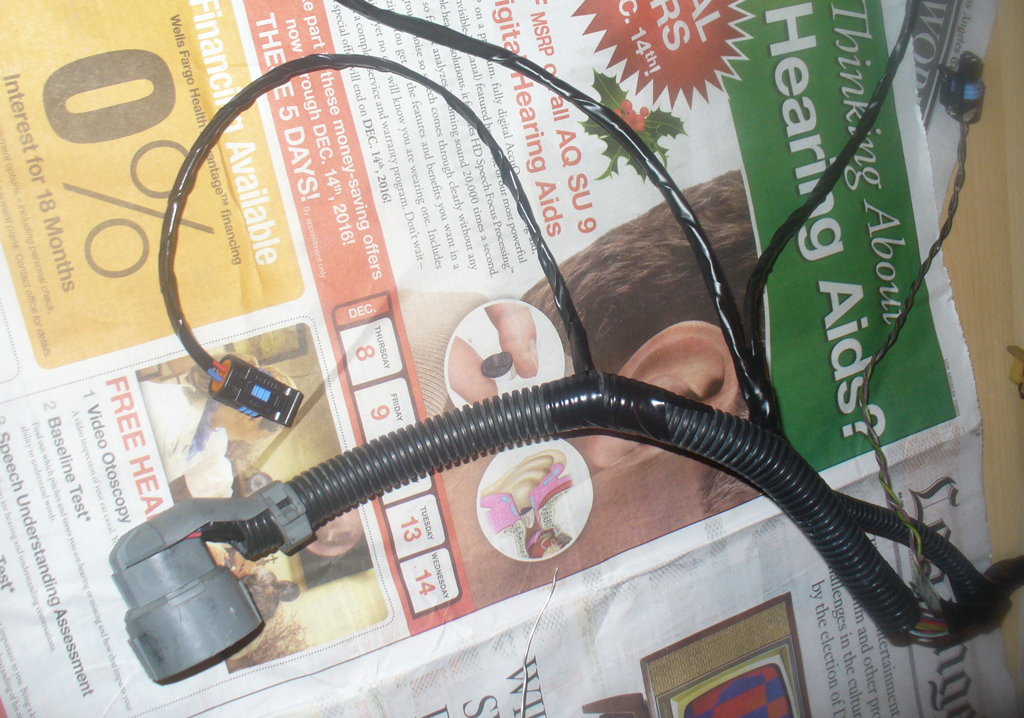
update: some transmission wiring for the 4l80e
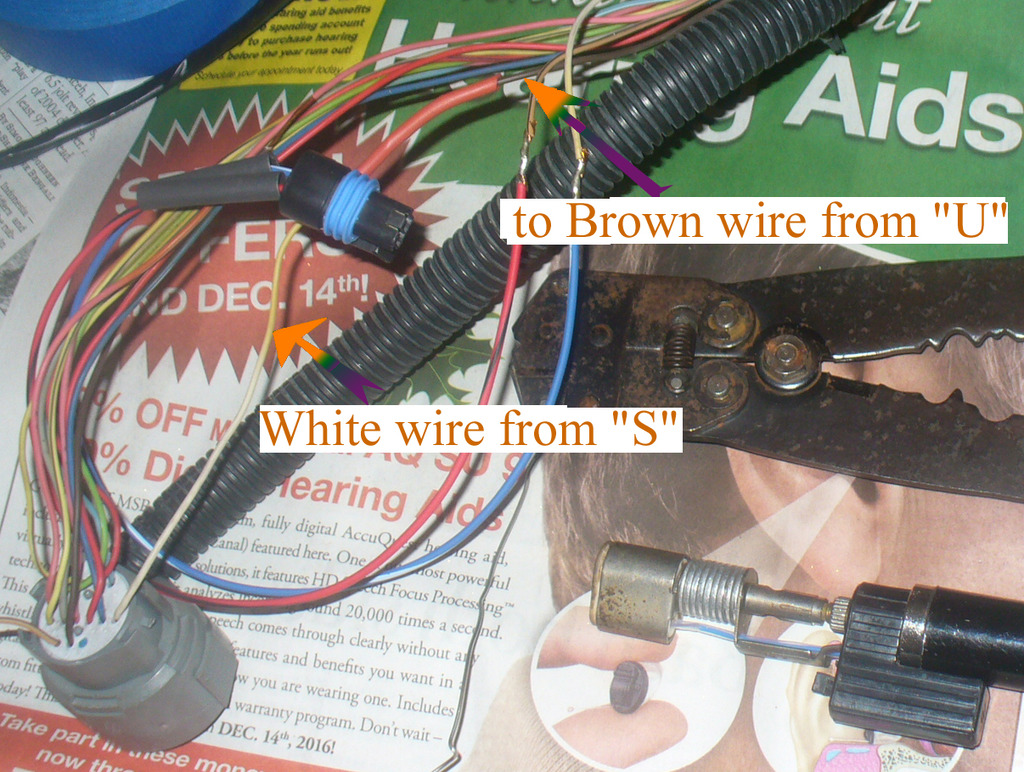
I didn't remove the wires from the plug because I didn't want to fill the holes with silicone. I'd rather just leave a little piece of wire to fill the hole.

I am hoping to buy some F_body accessories, and use the lsbrackets.com A/C relocation bracket for an R4 compressor, and the water pump spacer, with an LS1 intake and LS6 valley cover and hopefully the truck steam port lines. And an LS6 valley cover too maybe. Think all of that will work/fit? I also found another place called LSsimple and his kits work with the truck accessories. Seems too good to be true!
Once I get the accessories, intake parts, and wiring done, I will find an engine(s). Of course I always provide pictures along the way to help the community so expect alot of them. My last build was over 3000 pictures (link is in my profile, home page). By helping me, you are helping everyone.
update: some transmission wiring for the 4l80e


I didn't remove the wires from the plug because I didn't want to fill the holes with silicone. I'd rather just leave a little piece of wire to fill the hole.


Last edited by kingtal0n; 02-14-2017 at 12:19 AM.
01-27-2017, 12:07 PM
#13
So I decided to look in rockauto for some accessories (not having much luck buying used kit) and I stumbled onto this:
DORMAN 615900 {#88894339} brand new Intake manifold for 02' corvette is $288
The part number matches the LS6 intake manifold. If this is true, I can buy a brand new LS6 manifold for $288? Whats the catch? For some reason I thought the used ones are going for 400+
checked the number in summit and they are out of stock. checked in "cheapest gm parts" website and its $700+
Last edited by kingtal0n; 01-27-2017 at 12:21 PM.
01-27-2017, 12:43 PM
#15
Oh joe, I meant to thank you again. I normally only carry 8, 10, 13, 14, 17, 19 with me anywhere I go. I've never EVER would have guessed 7mm on those bolts in the fuse box. Holy ****, if I didnt remember at the last minute that 7mm you mentioned and stuck it in my pocket, ...
01-28-2017, 02:06 AM
#16
If you watch the classifieds you will see fbody alt brackets come up for like $30 and power steering for like $40. I bought mine new from dirt dingo for like $110 and couldn't be happier.
A word of advise from experience. Buy a new water pump even if yours comes with one. Mine crapped out immediately which sucked because I had to stop and tear it all back apart. Same goes for the alternator try to eliminate any possible points of failure so on first start your not chasing unneeded issues.
A word of advise from experience. Buy a new water pump even if yours comes with one. Mine crapped out immediately which sucked because I had to stop and tear it all back apart. Same goes for the alternator try to eliminate any possible points of failure so on first start your not chasing unneeded issues.
01-28-2017, 11:45 PM
#17
So I am just collecting other random stuff atm, wouldn't mind some insights
Will these DEI Titanium protect a boot work on the LSx engine coilpacks

I am using the DEI titanium wrap of course on the plumbing as well.
I was going to buy this starter, " SR8581N " But I suppose I should wait until i have the engine in the car to decide how difficult it is to change first (would be nice to put a new starter on it if its difficult to change)
Also, I am getting the 4l80E soon, but I heard there is a flexplate spacer. Will the spacer work with the OEM starter when using the OEM flexplate, or how does that whole thing work. I know I need to look it up but I figured I would ask if someone just knew off their hand.
Also I am curious if the truck shifter will fit my car, or if you think I will have to use an Fbody shifter.
Will these DEI Titanium protect a boot work on the LSx engine coilpacks
I am using the DEI titanium wrap of course on the plumbing as well.
I was going to buy this starter, " SR8581N " But I suppose I should wait until i have the engine in the car to decide how difficult it is to change first (would be nice to put a new starter on it if its difficult to change)
Also, I am getting the 4l80E soon, but I heard there is a flexplate spacer. Will the spacer work with the OEM starter when using the OEM flexplate, or how does that whole thing work. I know I need to look it up but I figured I would ask if someone just knew off their hand.
Also I am curious if the truck shifter will fit my car, or if you think I will have to use an Fbody shifter.
01-29-2017, 01:25 AM
#18
As promised I take many pictures to detail the journey (It is, after all, about the journey)
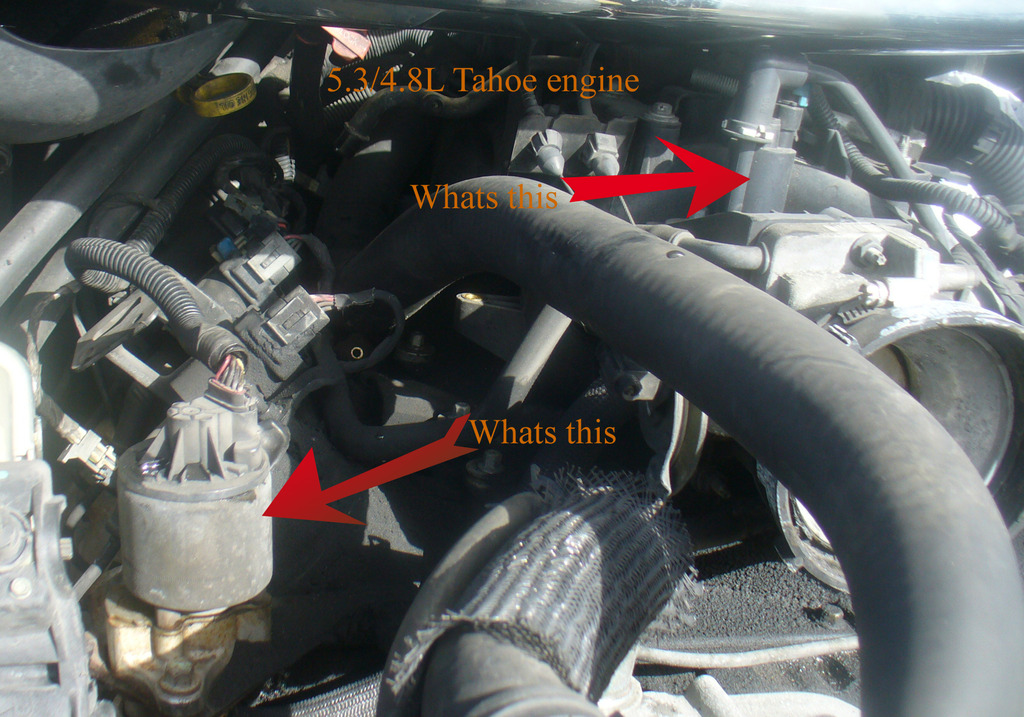
SO first I saw these two components which I am unfamiliar with. The one on the right had some kind of line connected to it that I couldn't pull off with quite a bit of force; eventually I broke it though, and cut it, and crushed it. And then crushed it some more to be sure it was gone.
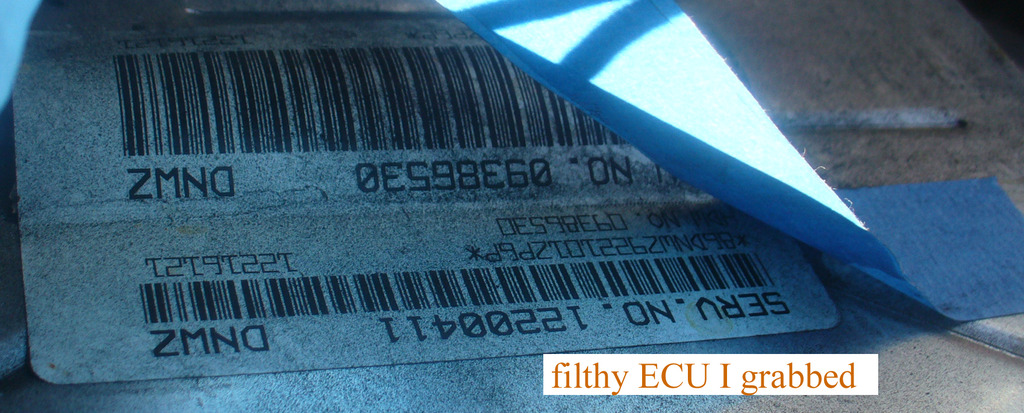
This is the filthy ECU I pulled. Research indicates it works with both DBW and DBC.
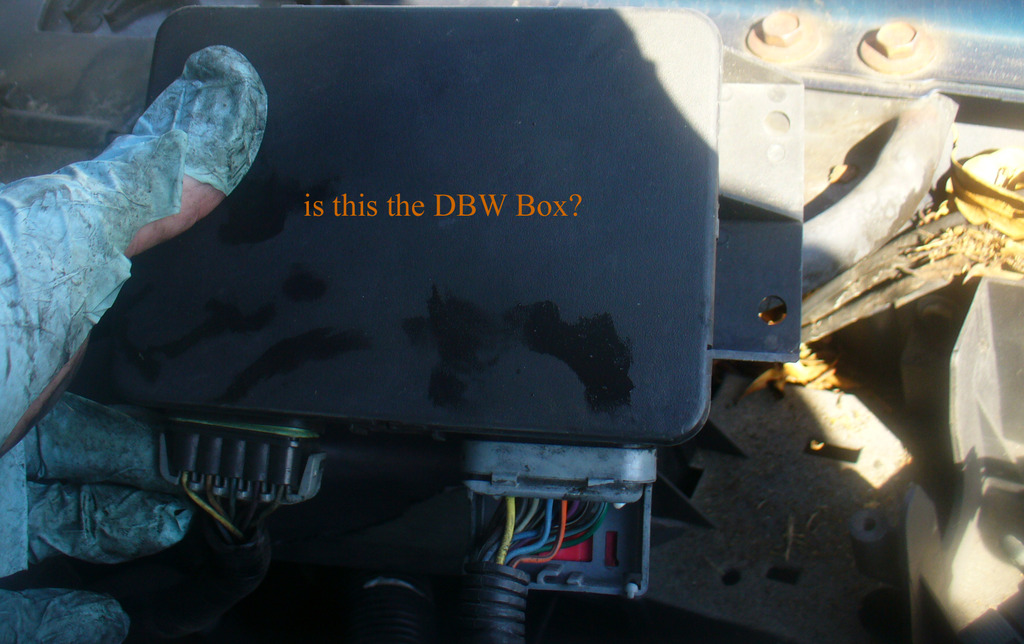
I think this was the DBW box. I didnt follow the wires I just snapped a pic and moved on.
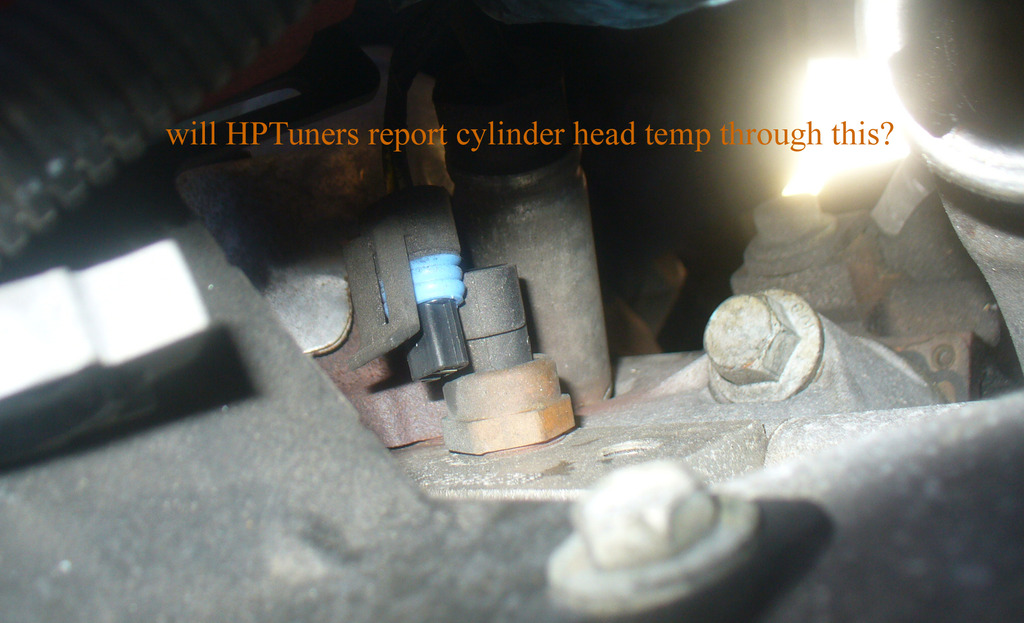
Saw this plug and figured it was a coolant cylinder head plug, wondering if HPT was going to report this as "cylinder head temp".

Thanks to Joe, I had a 7mm to pull apart the fuse box.
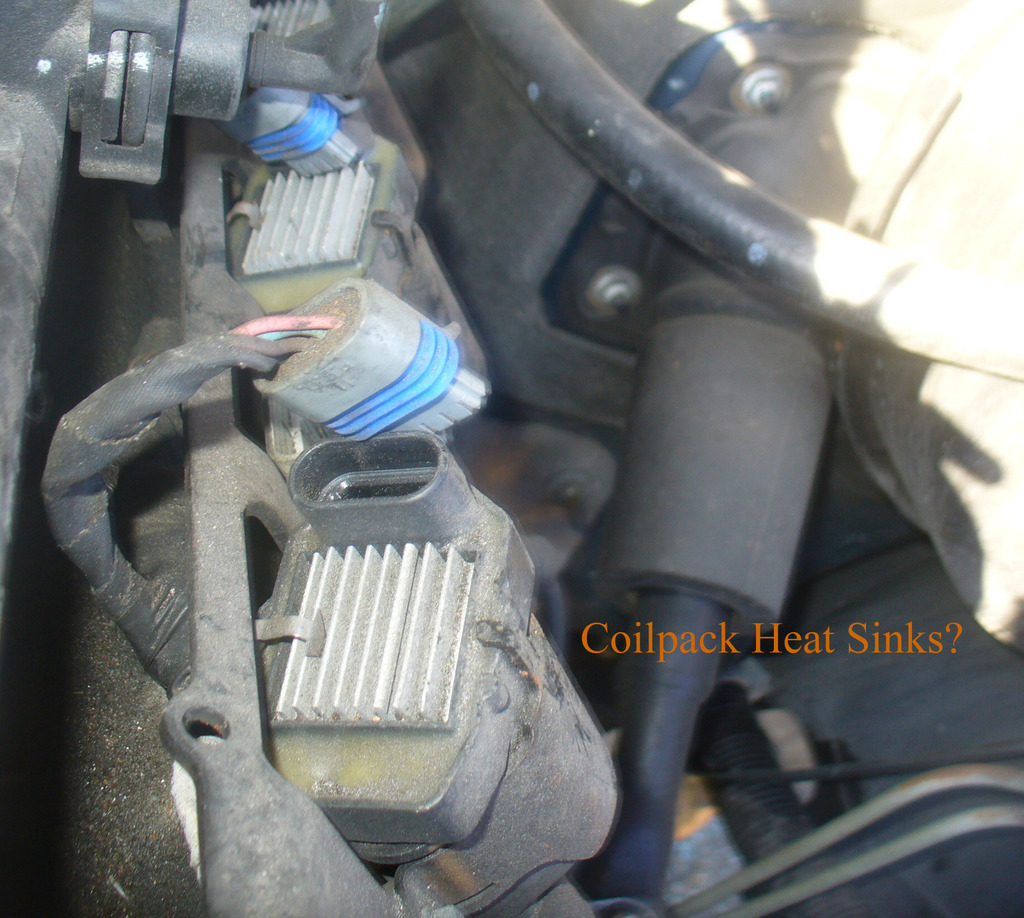
Saw those little tiny heat sinks and remembered what I was told, "the ones with the heat sinks" So these are the famous coil packs?
The harness took 1.5 hours to pull, give or take. The hardest part was the couple of O2 sensors (I almost cut the wire but... i wanted the whole dang thing, and there were these strange metal connectors hidden under/around the frame that were super annoying) and the wire above the starter, and the wires that wrapped around the oil pan.
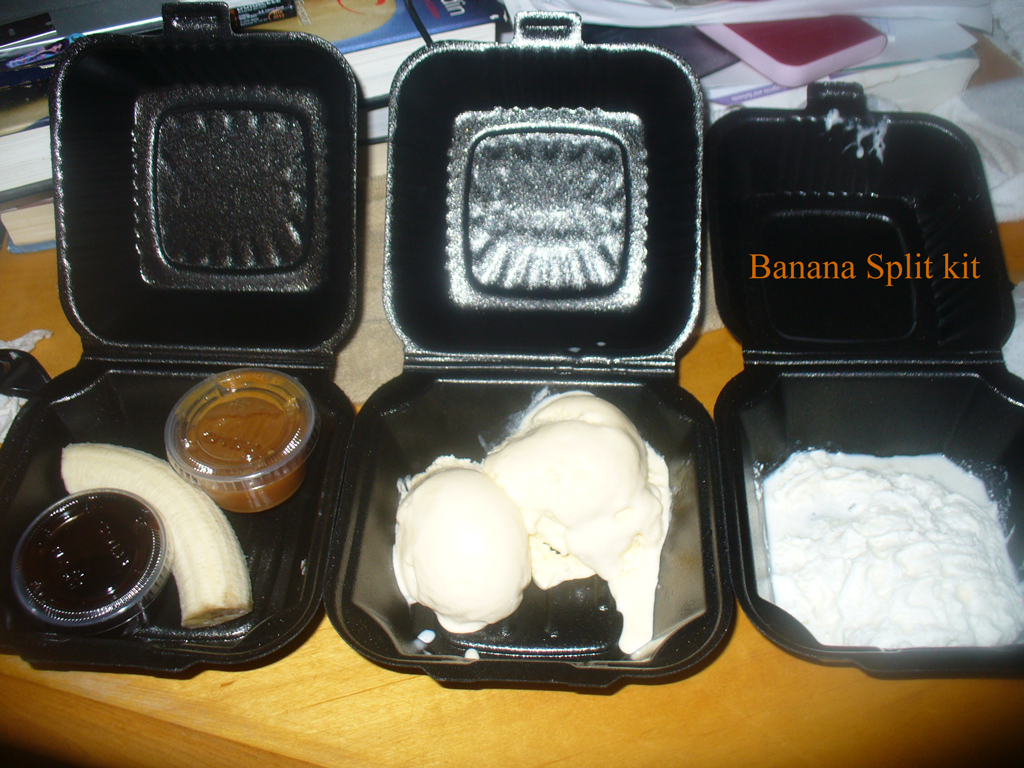
Finished off with a terrible banana split kit from Dennys.
01-29-2017, 10:11 AM
#20
thank you for the post In my shoes, for what I am planning, the difference is negligible. n/a engines scraping for 10 or 30 horsepower on an intake, nickel and dime themselves to death on air molecules. my cheap, old engine will an atmospheric control dial and some 50/50 so there won't be any dime hard breathing limits imposed by any of the engine parts, gasping on the official pressure at my sea level altitude.
In my shoes, for what I am planning, the difference is negligible. n/a engines scraping for 10 or 30 horsepower on an intake, nickel and dime themselves to death on air molecules. my cheap, old engine will an atmospheric control dial and some 50/50 so there won't be any dime hard breathing limits imposed by any of the engine parts, gasping on the official pressure at my sea level altitude. 
