
LV3 swap 1982 Toyota 4x4 Pickup
 12-11-2018, 07:10 AM
#1

Hello all, I started this swap a few months ago and have been posting at a different website, Yotatech, on a forum there. I should have started it here, as it's not very relevant on the other website. I purchased a very good example of a 1st Gen Toyota 4x4 Pickup a little more than a year ago. Those little pickups came with a 95hp L4 from the factory. Thirty six years later it was probably more like 80. I did a lot of research (not enough) and settled on the LV3. It's a tight fit and some fabrication is at hand. I'll just leave you with some pictures for now. I have to get ready for work.
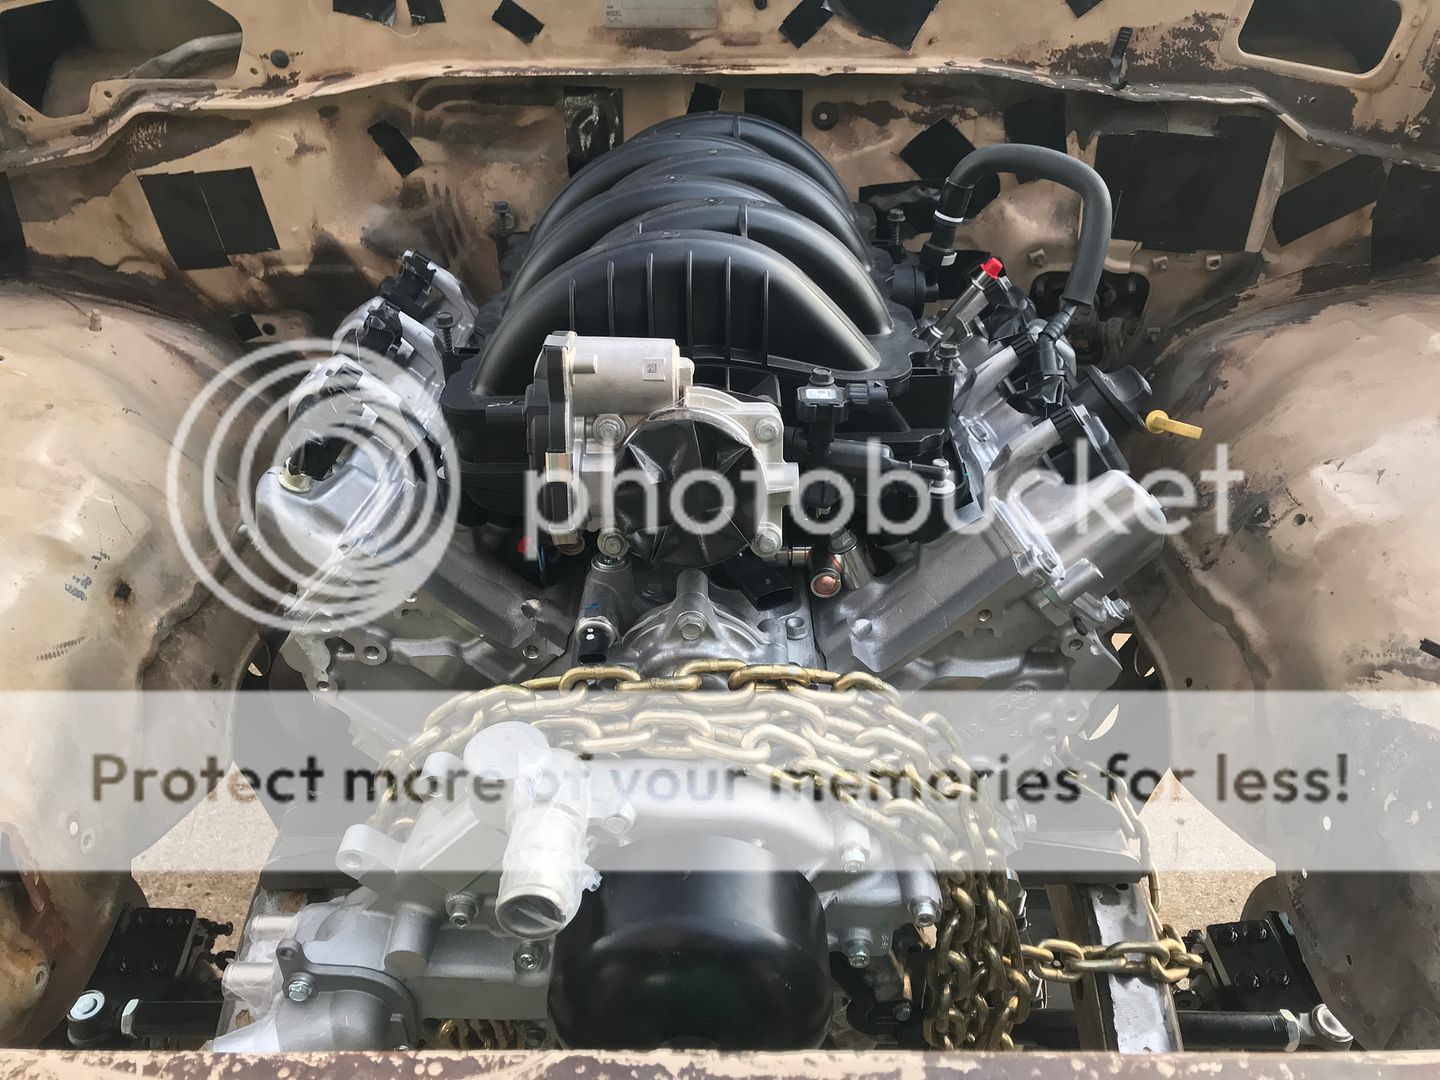
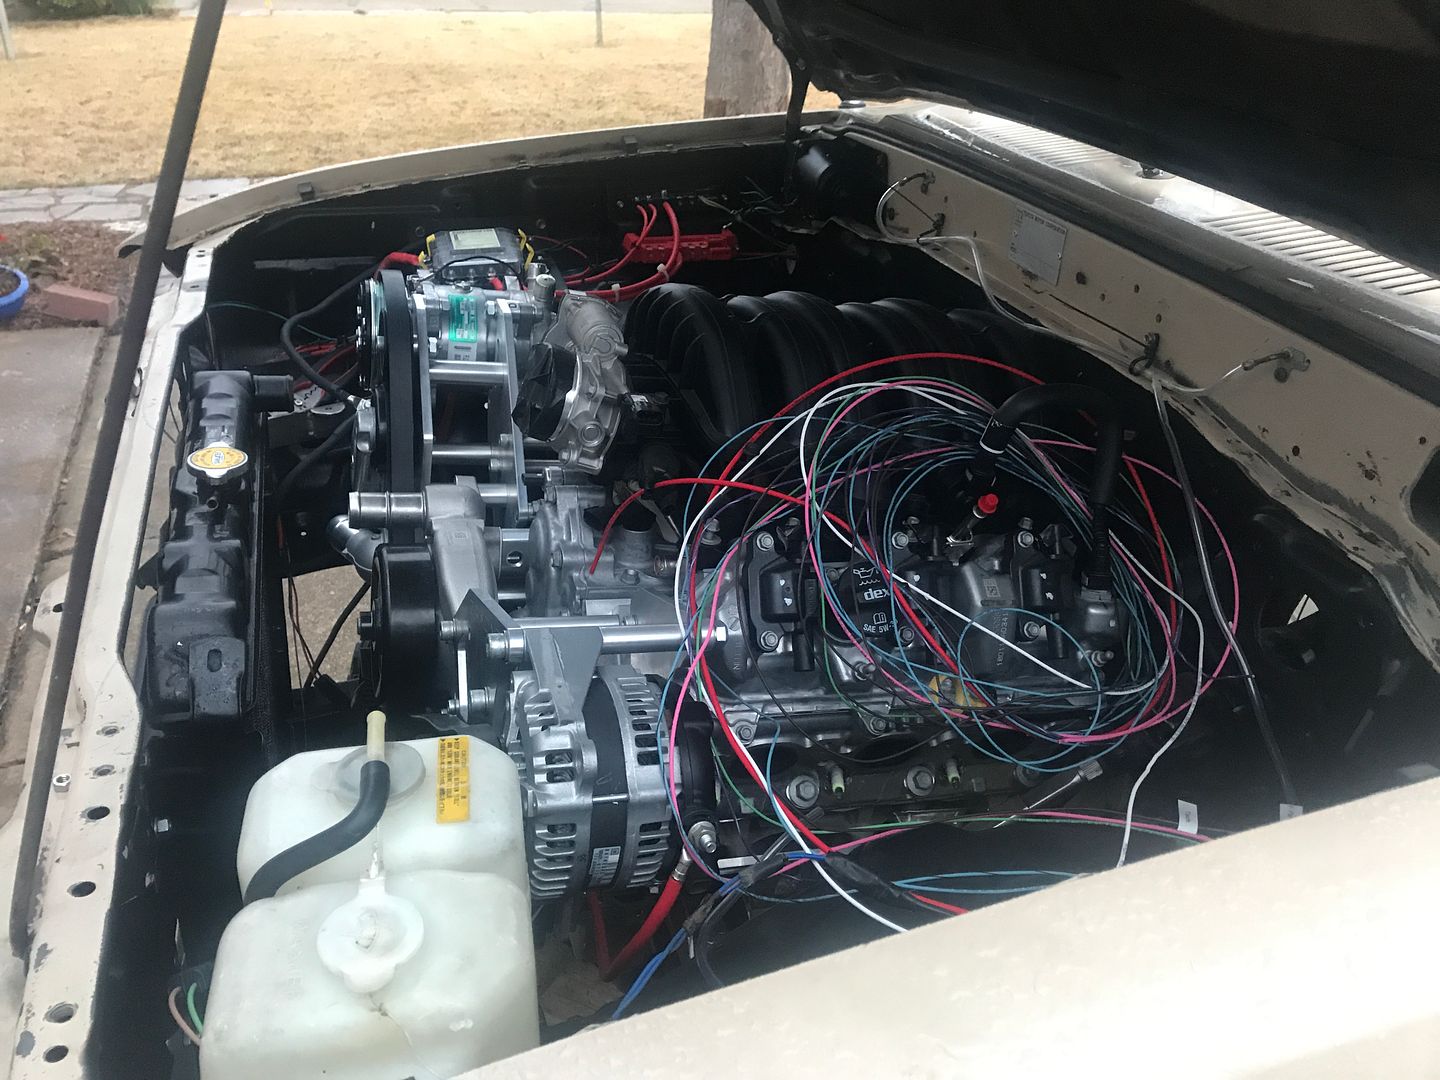
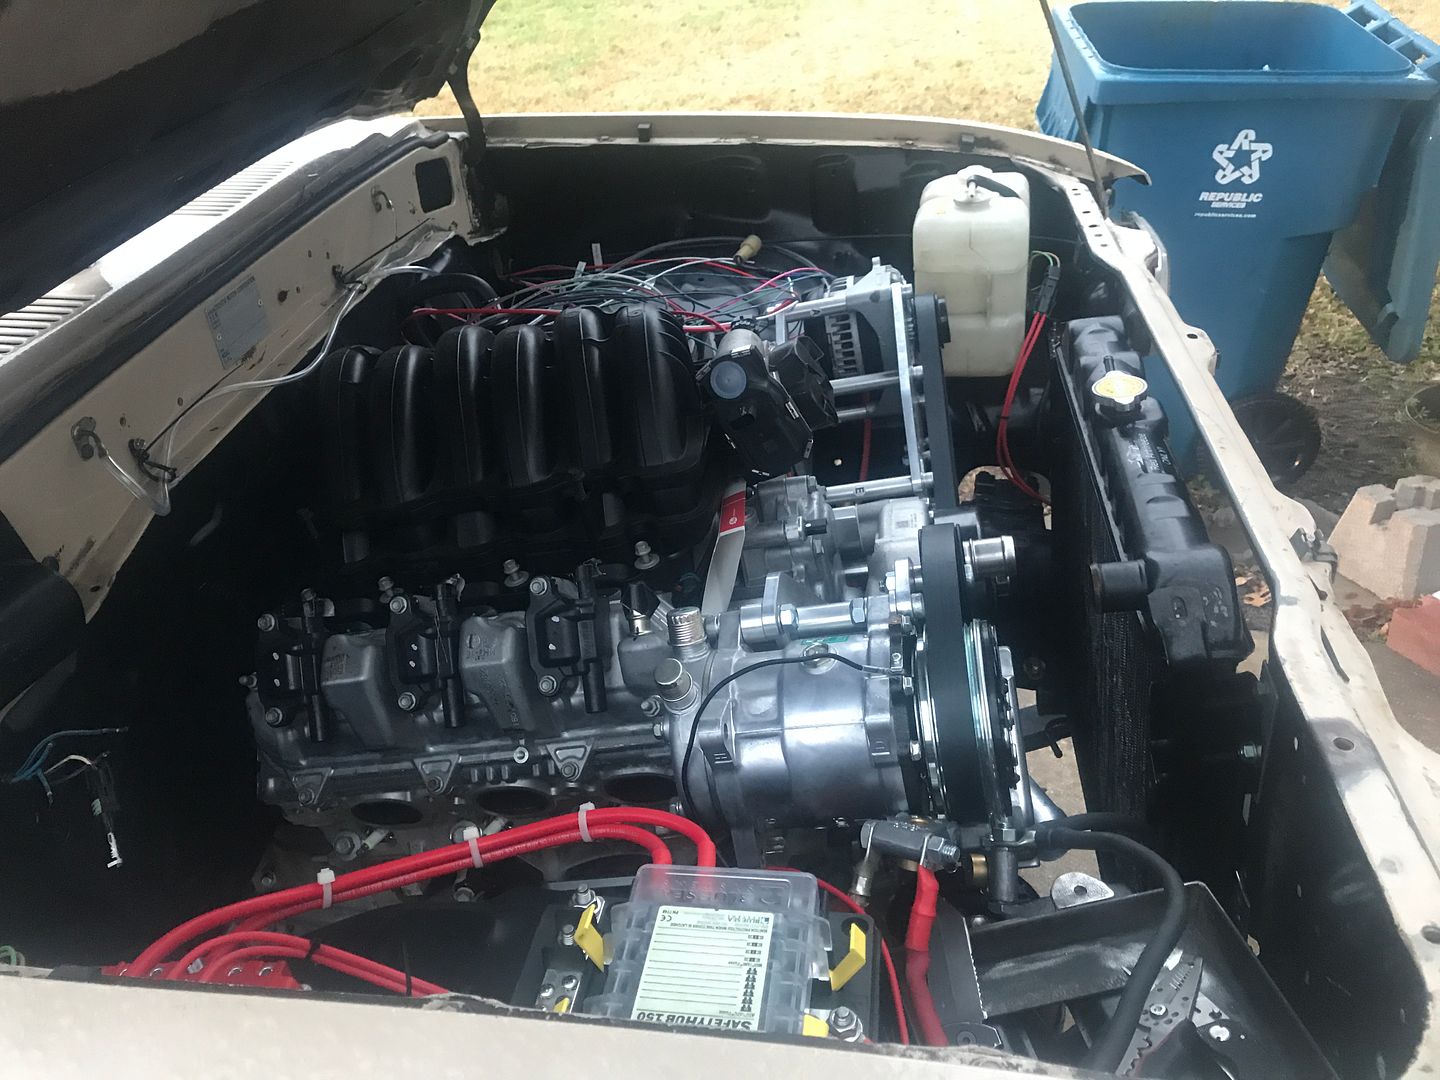
Here is what I started with: LV3 complete with 6l80 (2wd), all accessories, computer, and wiring harness
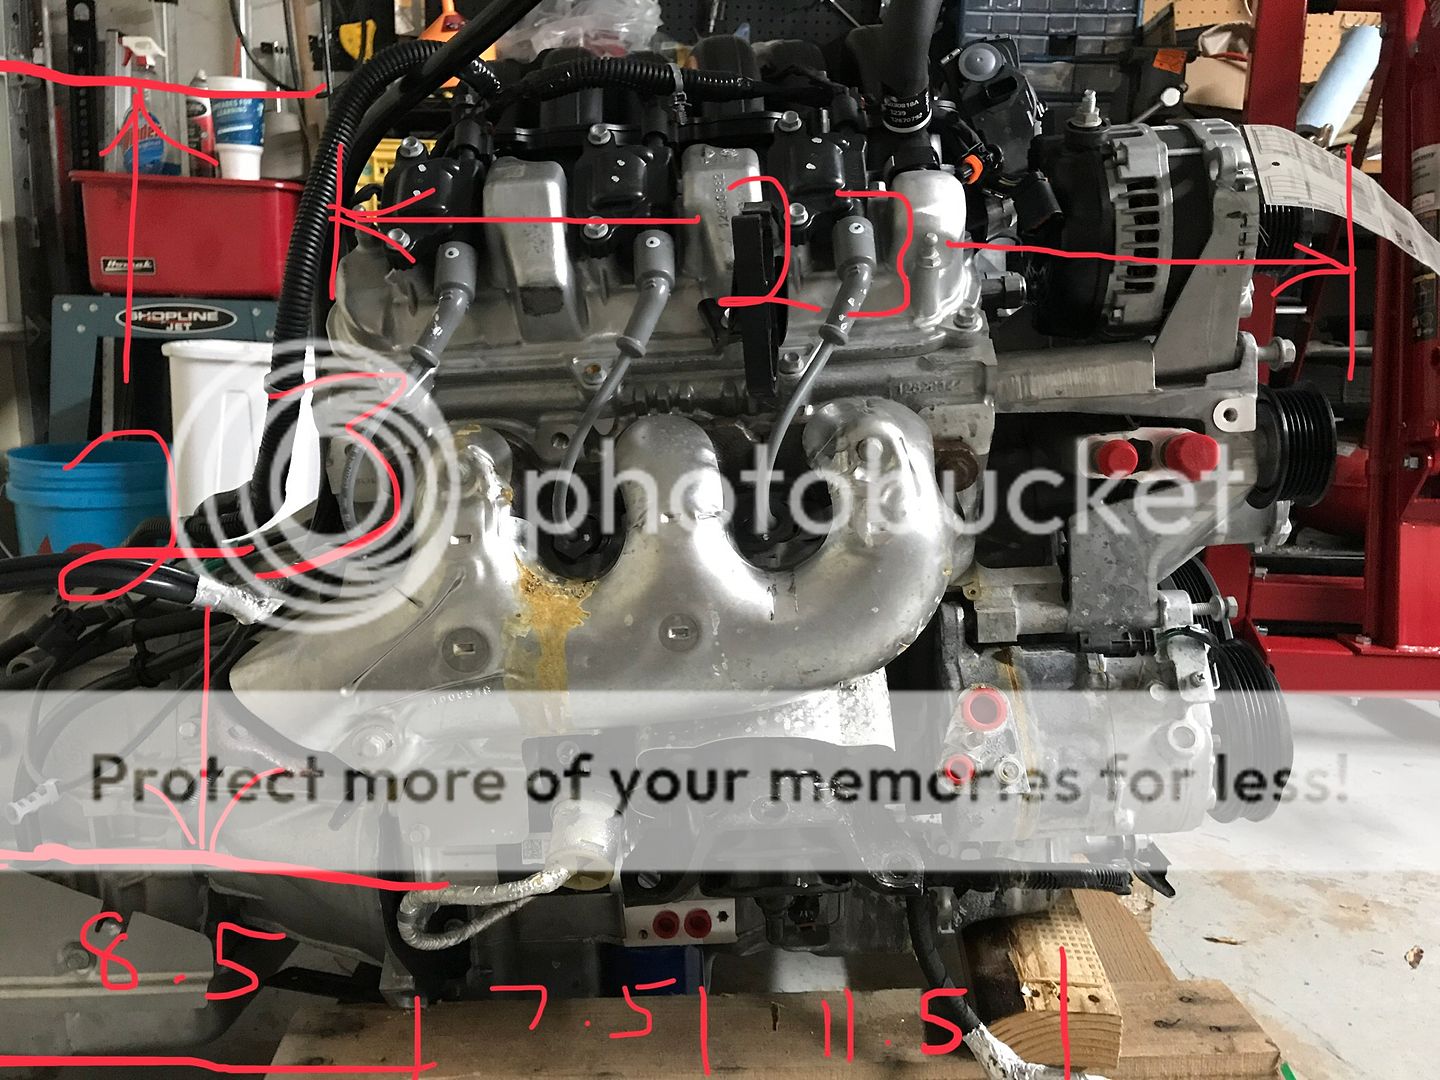
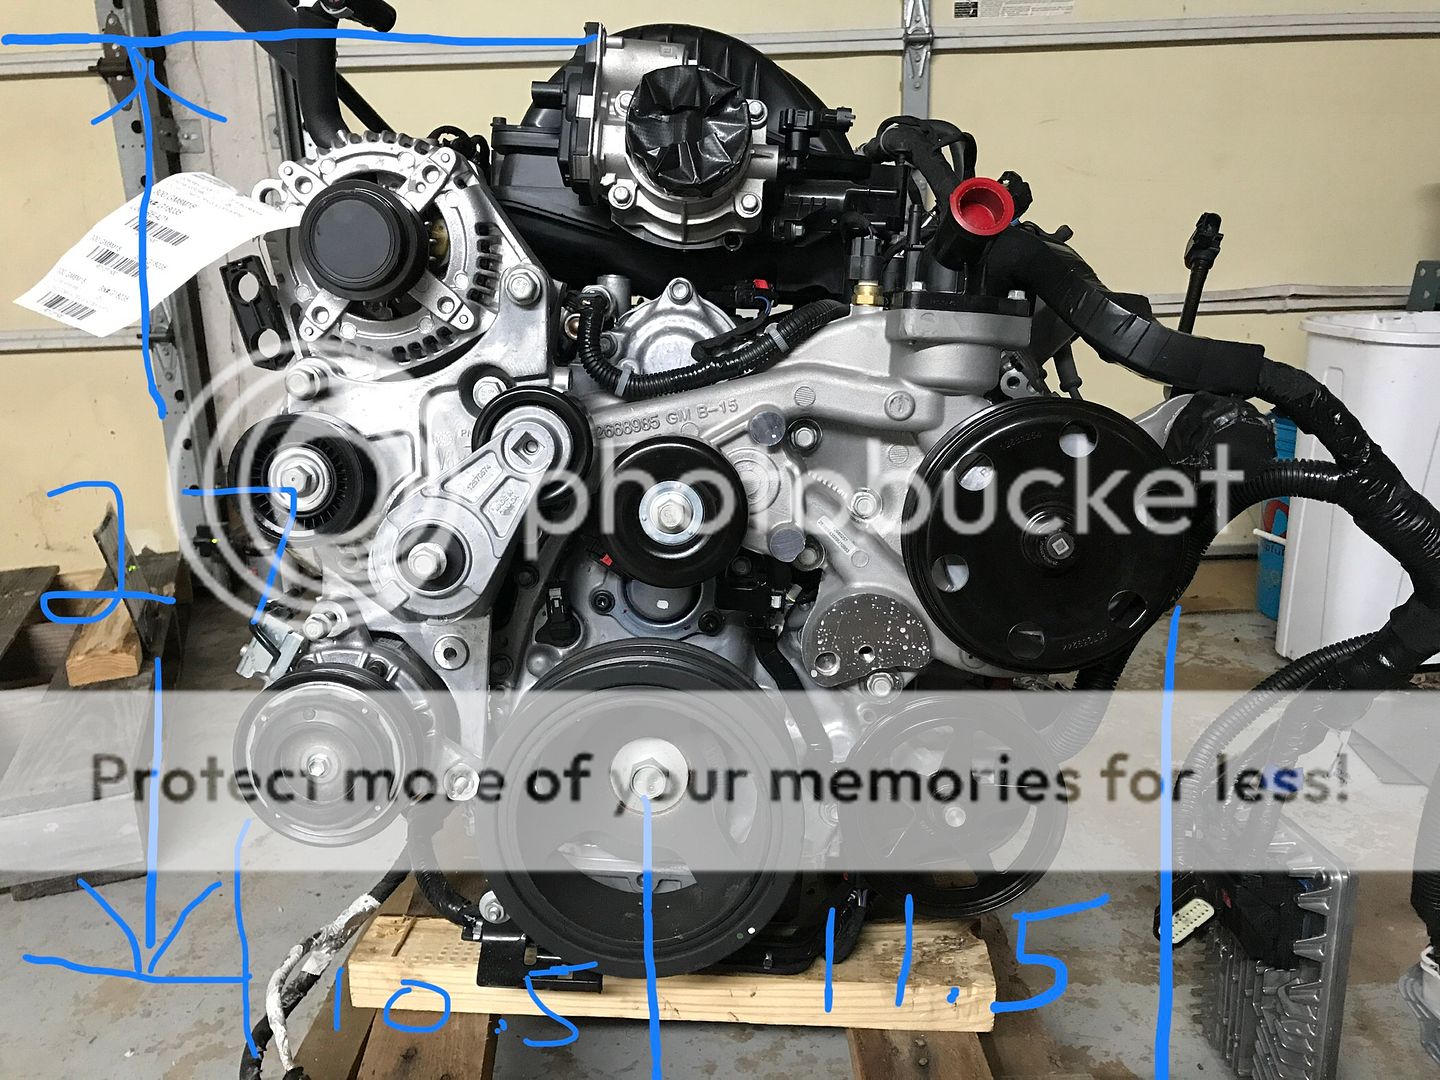
It's going into this


Here is what I started with: LV3 complete with 6l80 (2wd), all accessories, computer, and wiring harness


It's going into this


 12-11-2018, 08:32 AM
#2
ModSquad
iTrader: (6)

That is a sweet truck! LV3 looks super clean, is it new or a pullout?
 12-11-2018, 09:39 PM
#4
Thanks Scott. I looked for quite awhile before I found this one. The motor is out of wrecked 2018 Silverado. The transport truck, on the way to the dealership, crashed and totaled all of the trucks on it. It has 2 miles on it from the factory test drive, I would assume.
00pooterSS, I, in fact, did make it a 4wd. I'll do write some more posts to bring the thread up to date on my progress.
00pooterSS, I, in fact, did make it a 4wd. I'll do write some more posts to bring the thread up to date on my progress.
12-11-2018, 10:26 PM
#5
Ok, I'll try to do this in the order that I have progressed in the process so far. You know about the motor already. Just some quick background on the entire build. All of the wiring will be new, both chassis and engine harnesses. The front brake setup will be new or rebuilt. It will be converted to an IFS (independent front suspension) front brakes. The earlier 4x4's had so so brakes. The calipers, rotors, master cylinder (from an FJ80) and booster (from the '86-'87 turbo model pickup) will be used. Much improved braking and more clearance for the LV3 heads from that brake booster. I have already rebuilt the solid front axle. I won't go into detail because it's Toyota stuff. I'll try to keep updates on everything relevant to the LV3 swap. The transmission is fairly easy to convert to 4wd. I went with an Atlas 4sp transfer case. For those not in the know, the transfer case is like a manual transmission in that it transfers power from the automatic transmission into two directions. One to the front differential and one to the rear differential. The Toyota pickups have manual locking hubs on the front wheels. These lock in the wheel with the axle. You can have everything in 4wd and the front wheels will not get power until you turn the locking dial. I have stock open differentials (4.10:1), thought at some point I will but at least a locker in the rear differential. The Atlas 4sp has 3 gear shifters. One for the front diff, one for the rear diff, and one for hi and low. All three have hi and low gears. The end result is 10.34:1 reduction (just the transfer case) in gearing. To put that in to perspective, the final gear ratio is 170.83:1. At 800rpm idle (assuming 25lb/ft of torque to the real wheels) it's in the neighborhood 4270lb/ft of torque! It will crawl over just about anything. Going downhill you have the benefit of engine braking...ie complete control of the truck. Ok, now pictures.
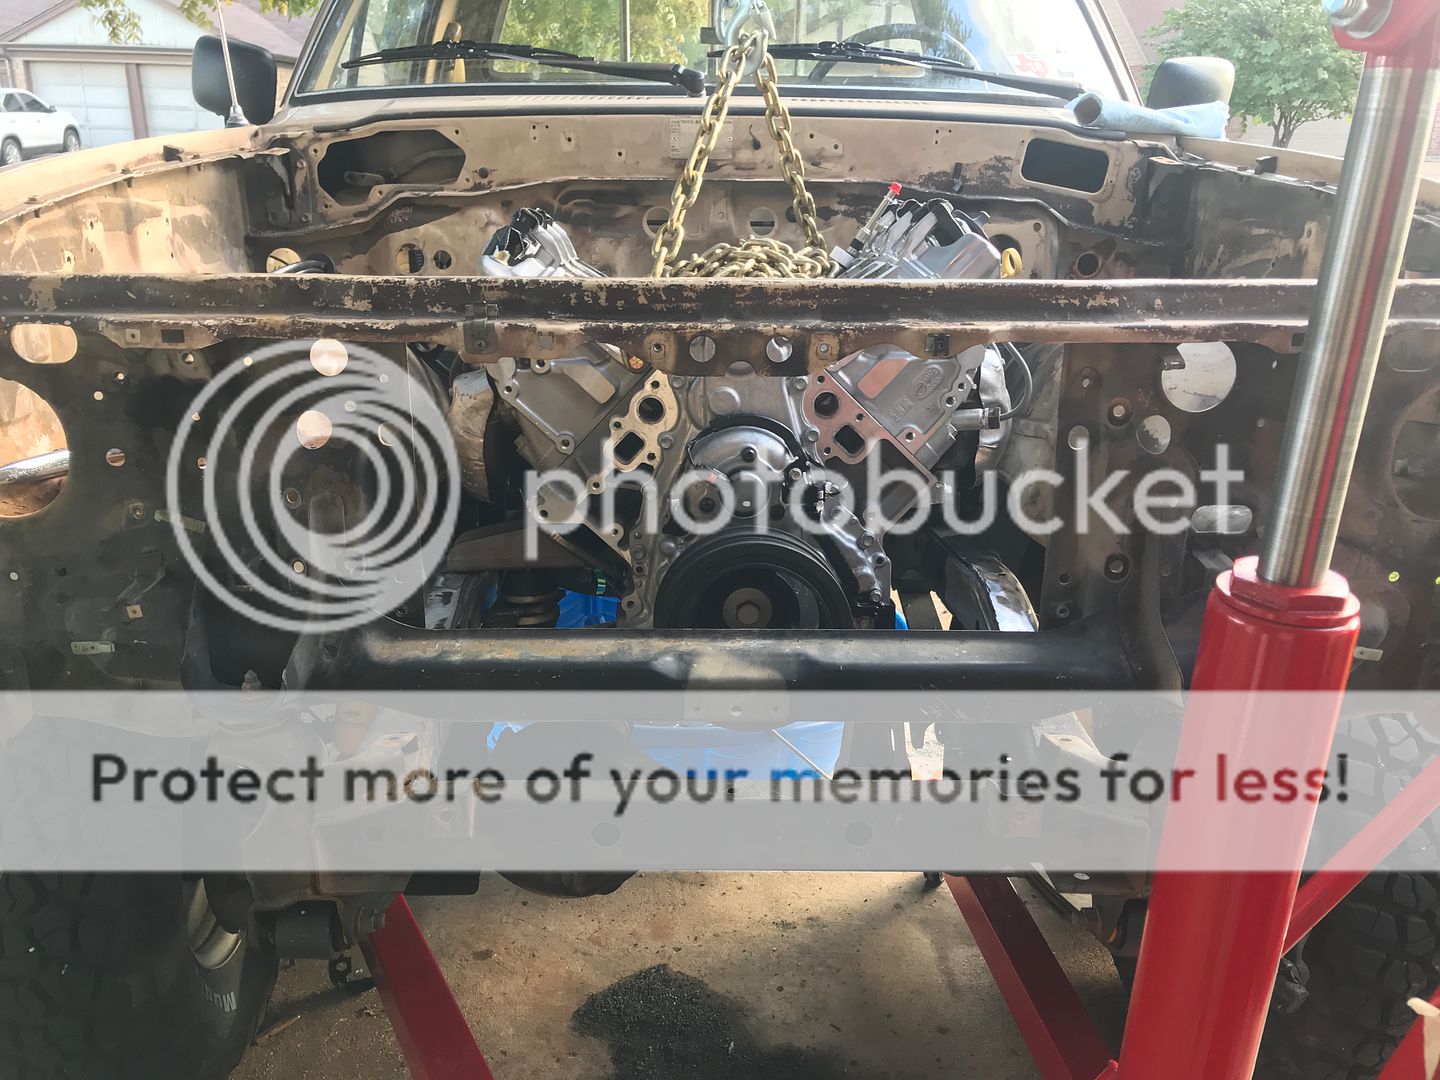
First test fit
Axle before rebuild
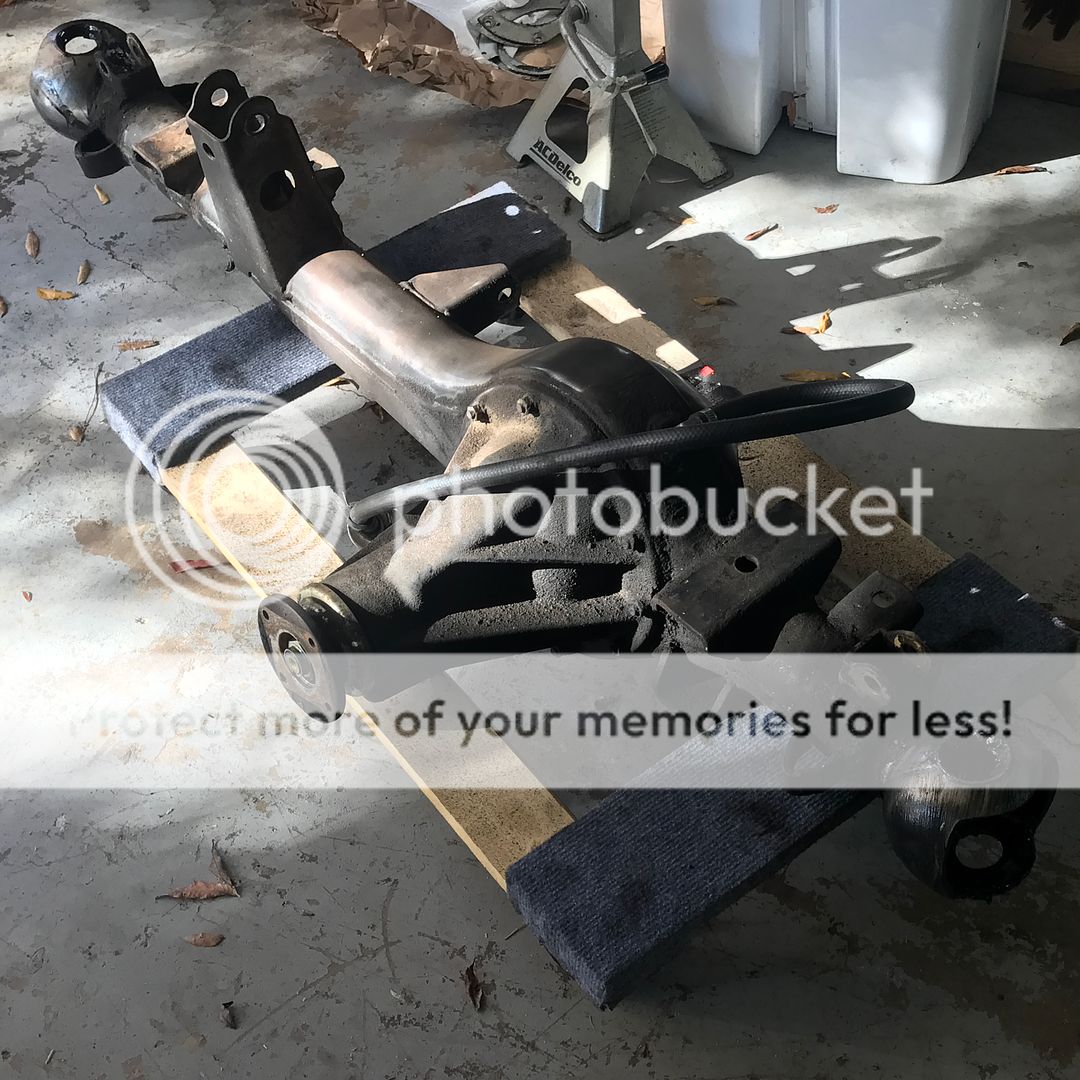
Axle after rebuild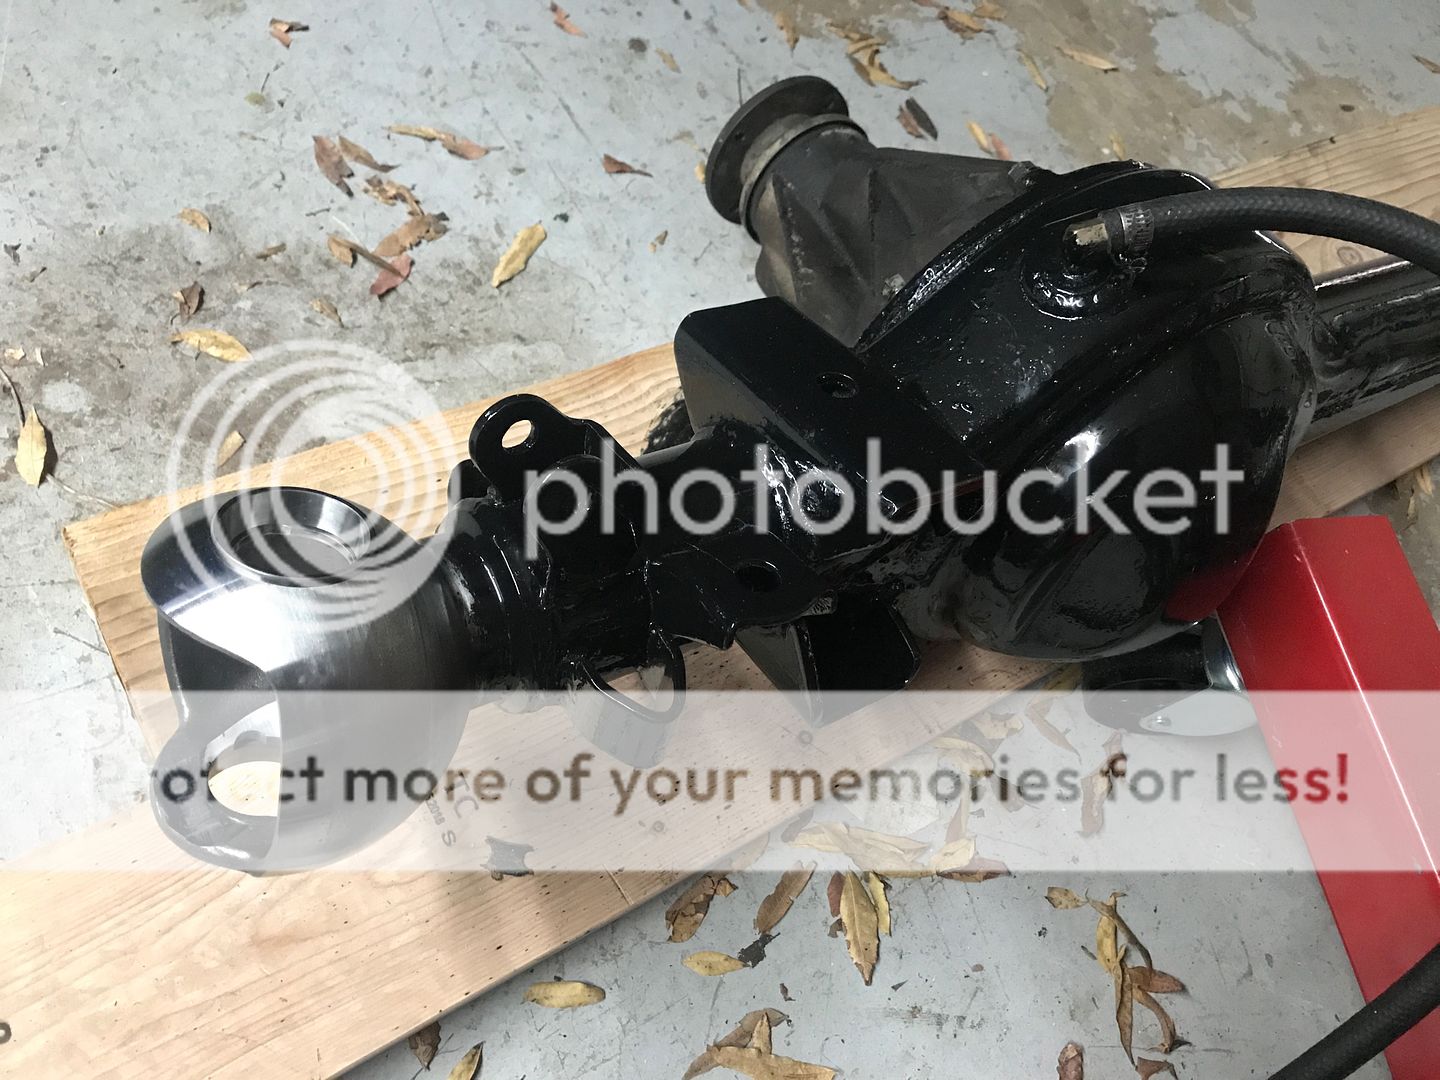
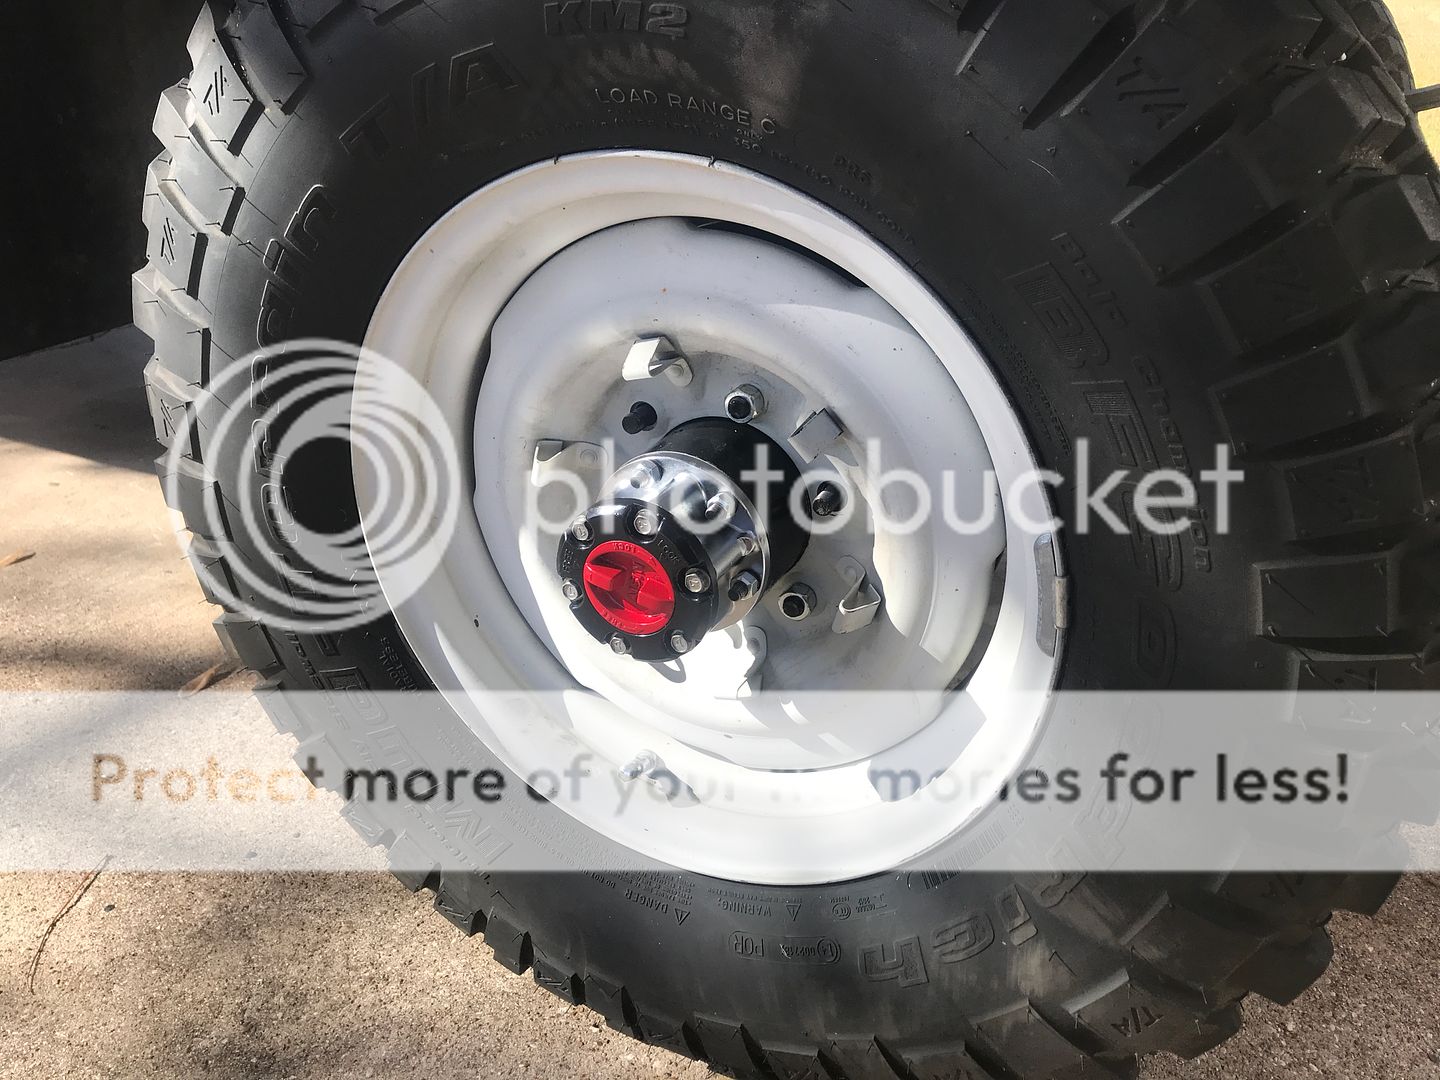
The unit with the red dial is the locking hub
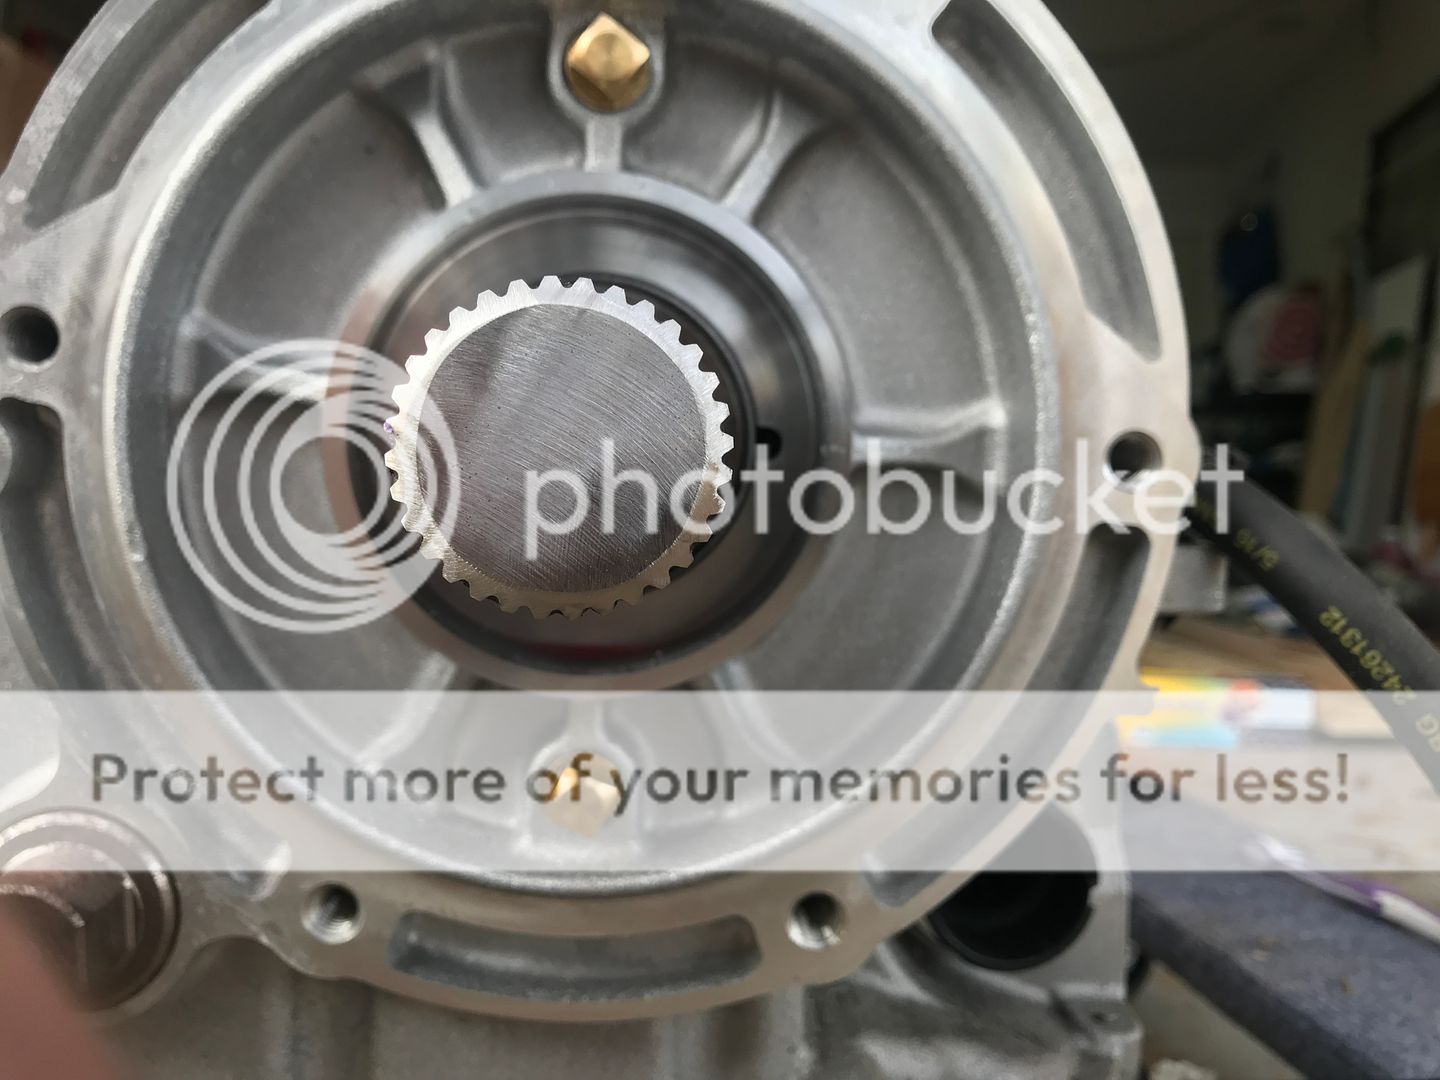
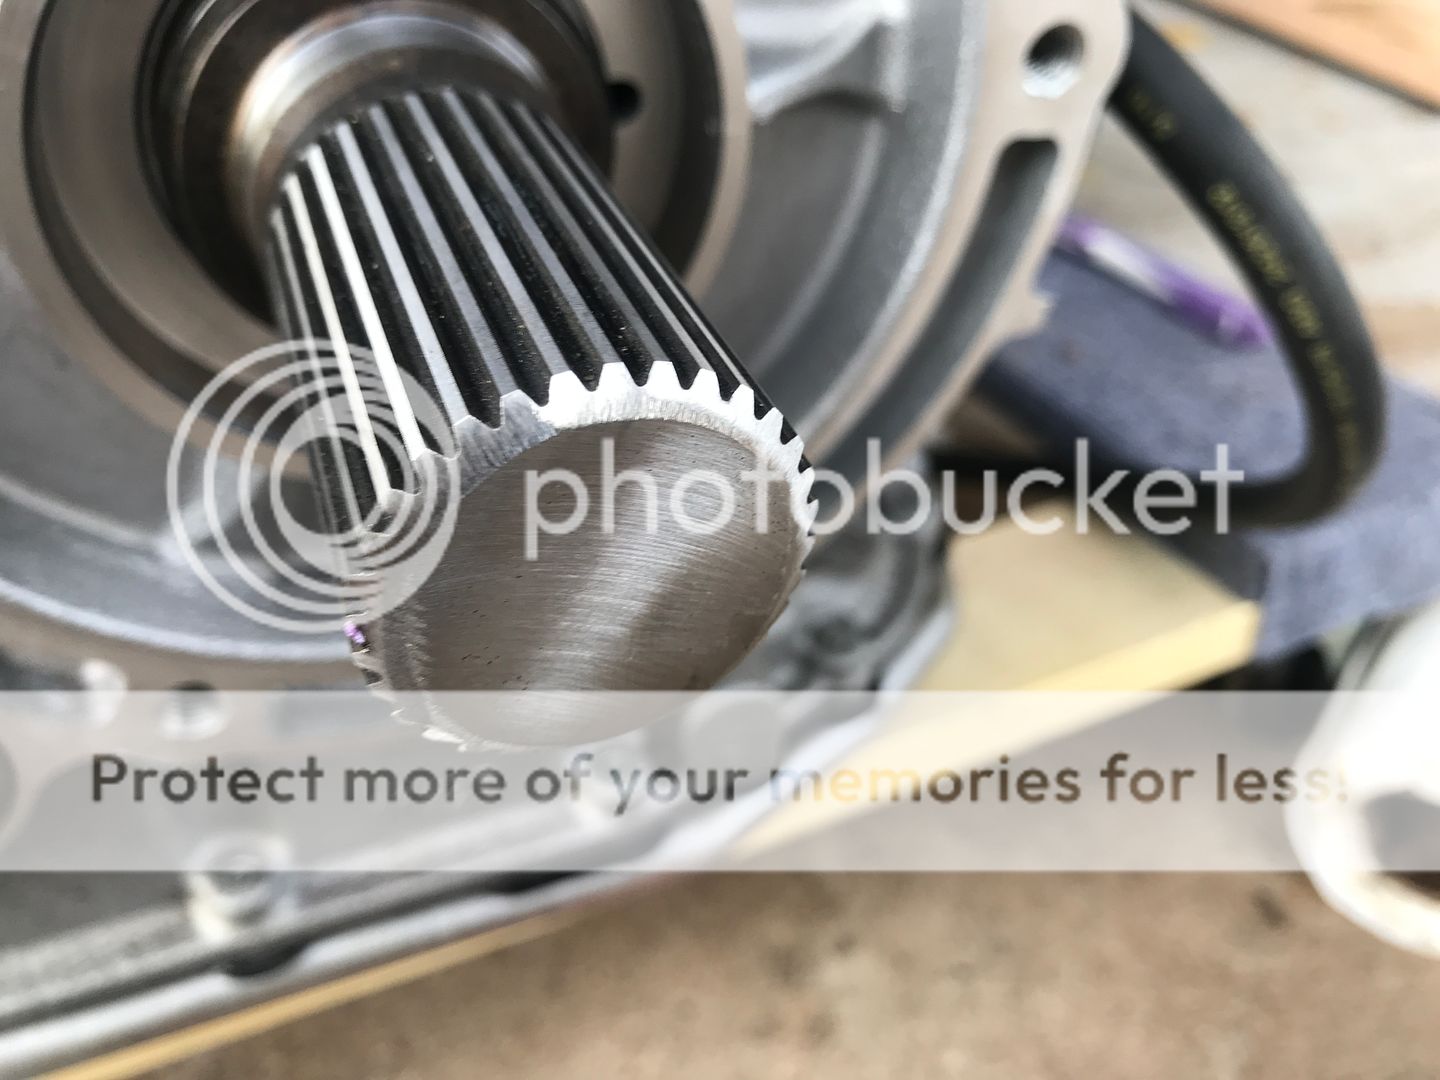
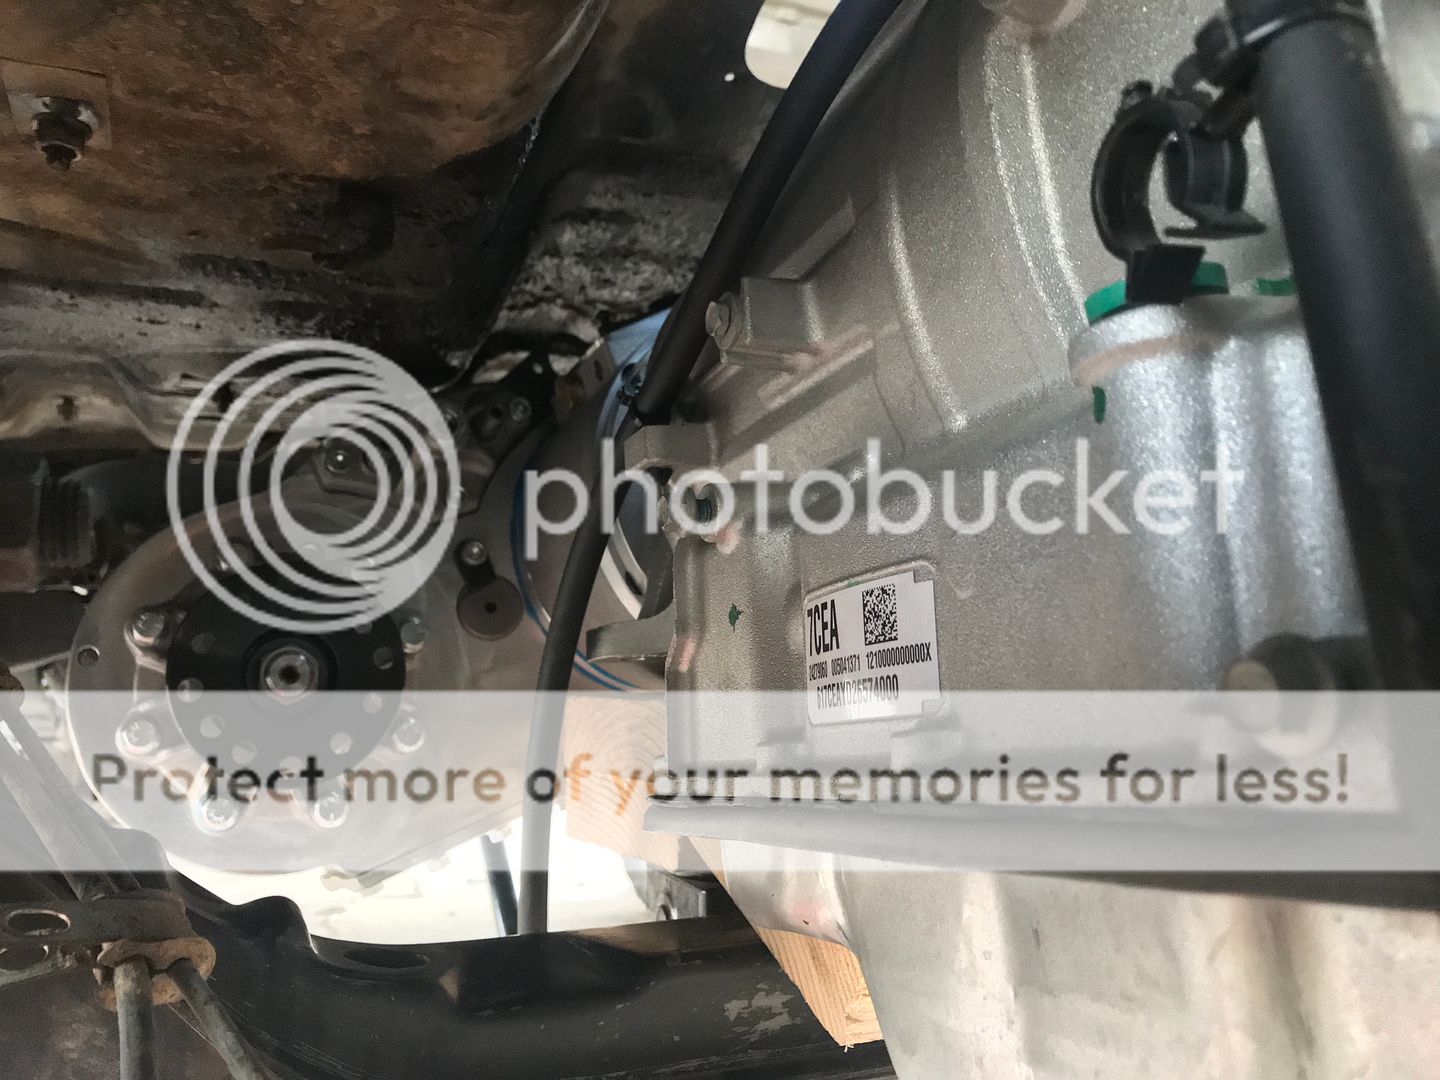
To convert the 6l80 you have to do three things. Plug those two holes (brass plugs), put a 4wd output shaft seal in place, and cut the output shaft down. I don't have the seal on there yet.
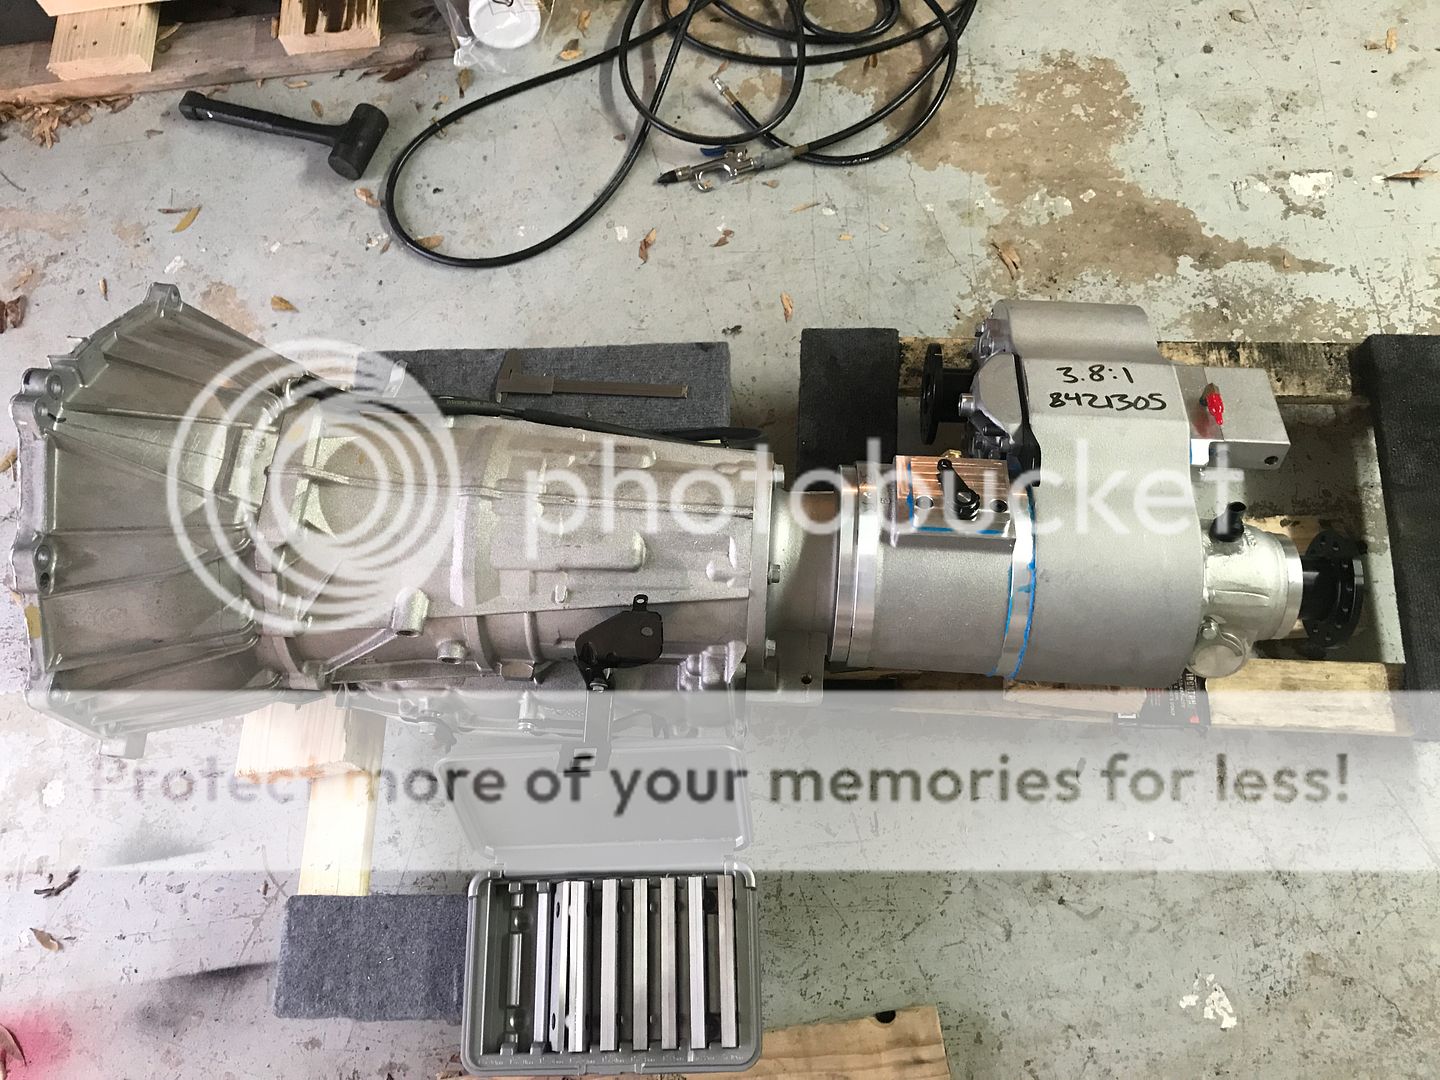
6l80 and Atlas together for test fit
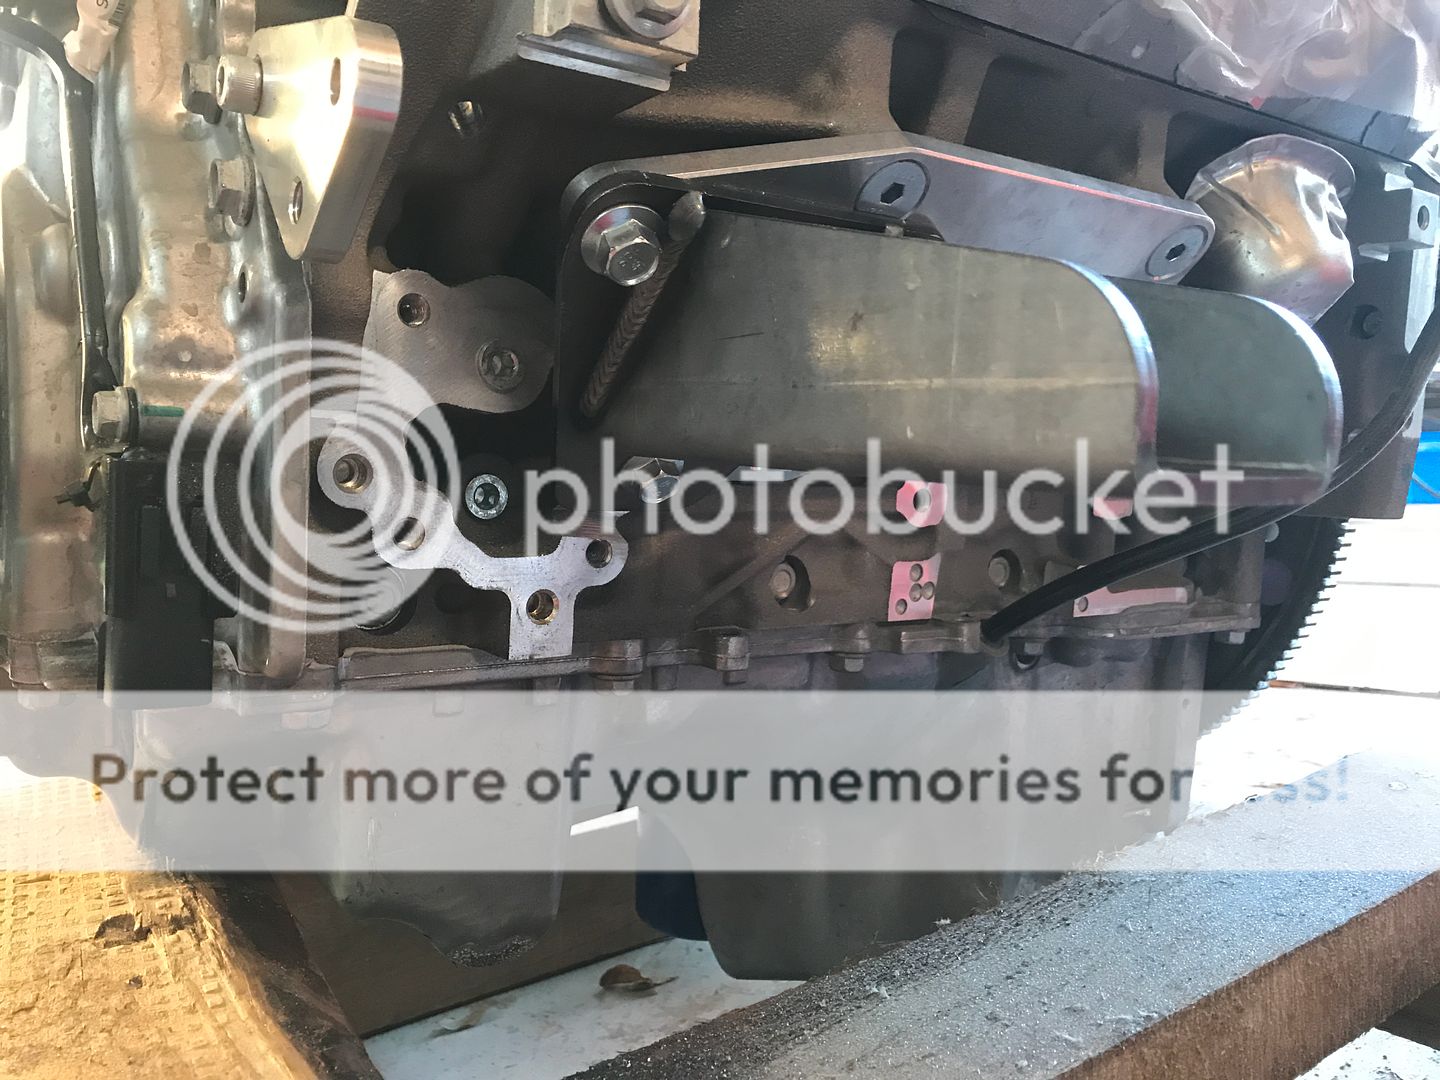
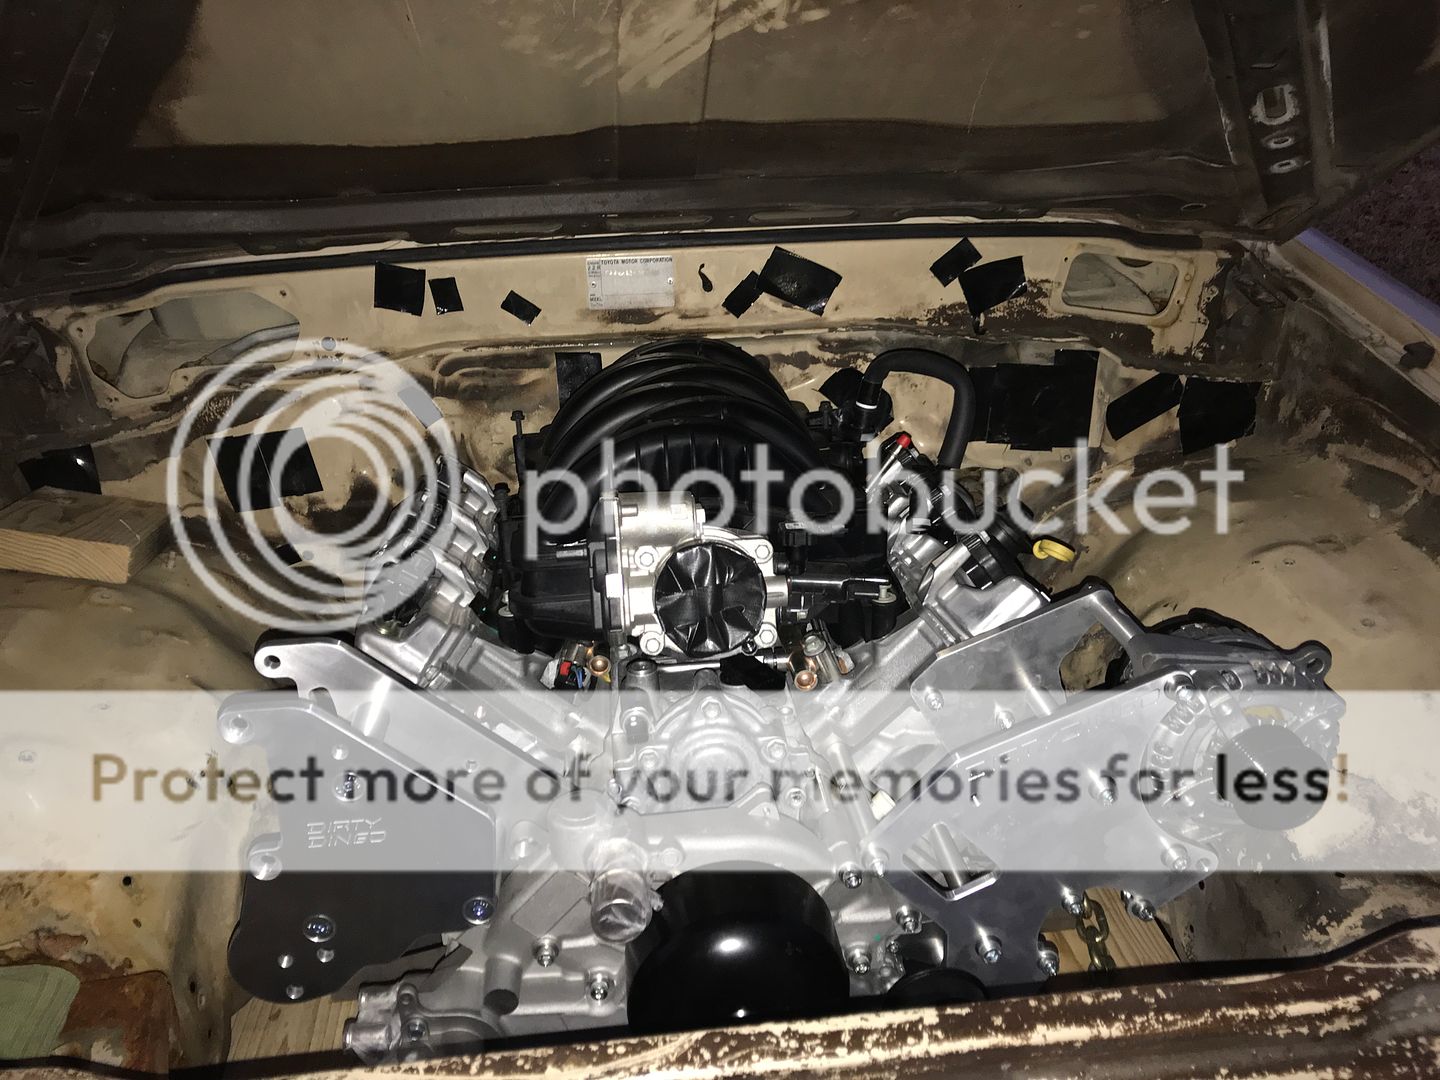
The motor mounts are ICT Billet LT1 to SBC plates with Advance Adpator's SBC universal style hot rod mounts. The vacuum pump has to go. The two oil holes have to be plugged. I had to clearance the block where the vacuum pump mounted to use the motor mount setup.

I'm going to need custom headers made. Ouch. Can anyone suggest a shop in DFW area?
The motor mounts are tacked into place now. (not shown here)

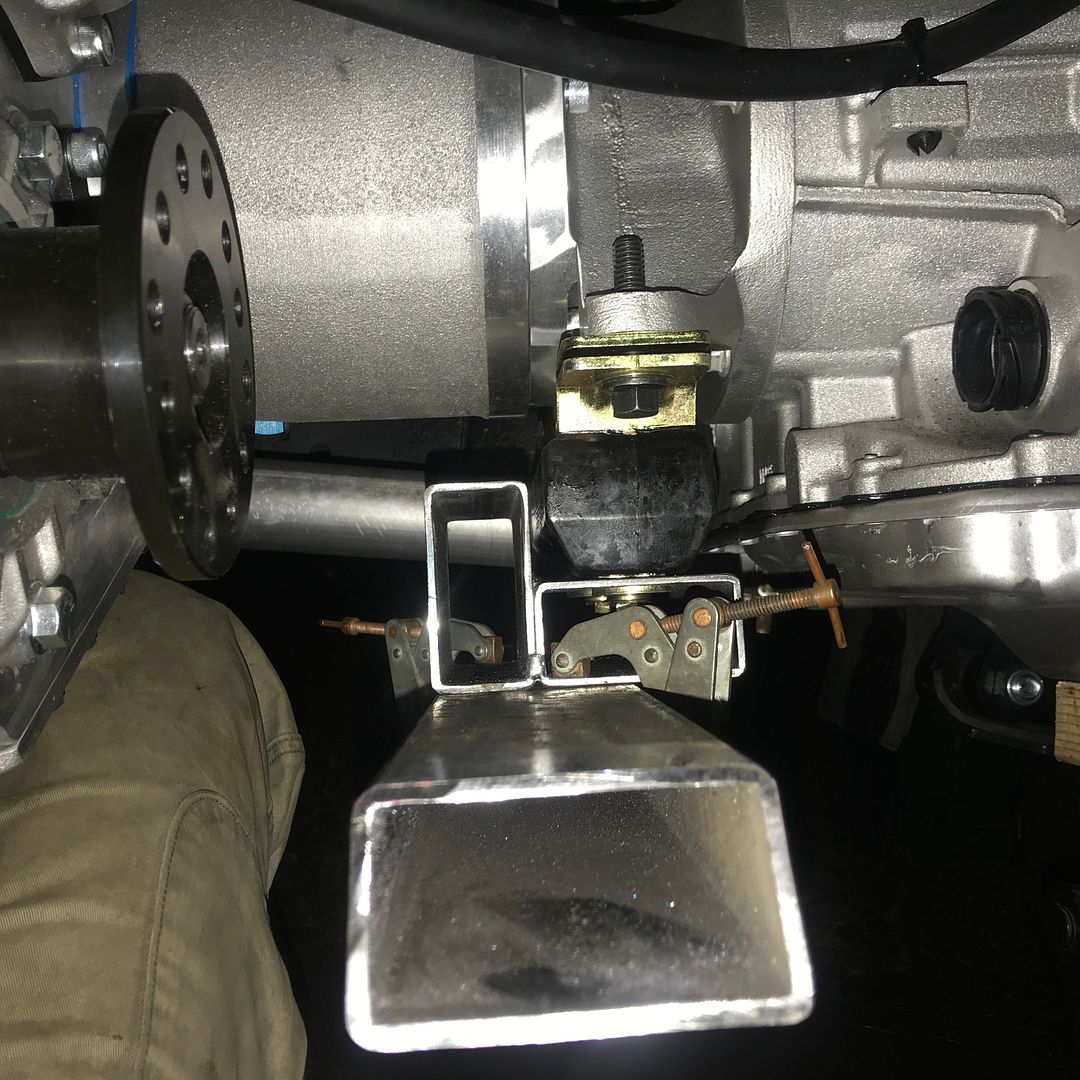
Making new crossmember/transmission mount


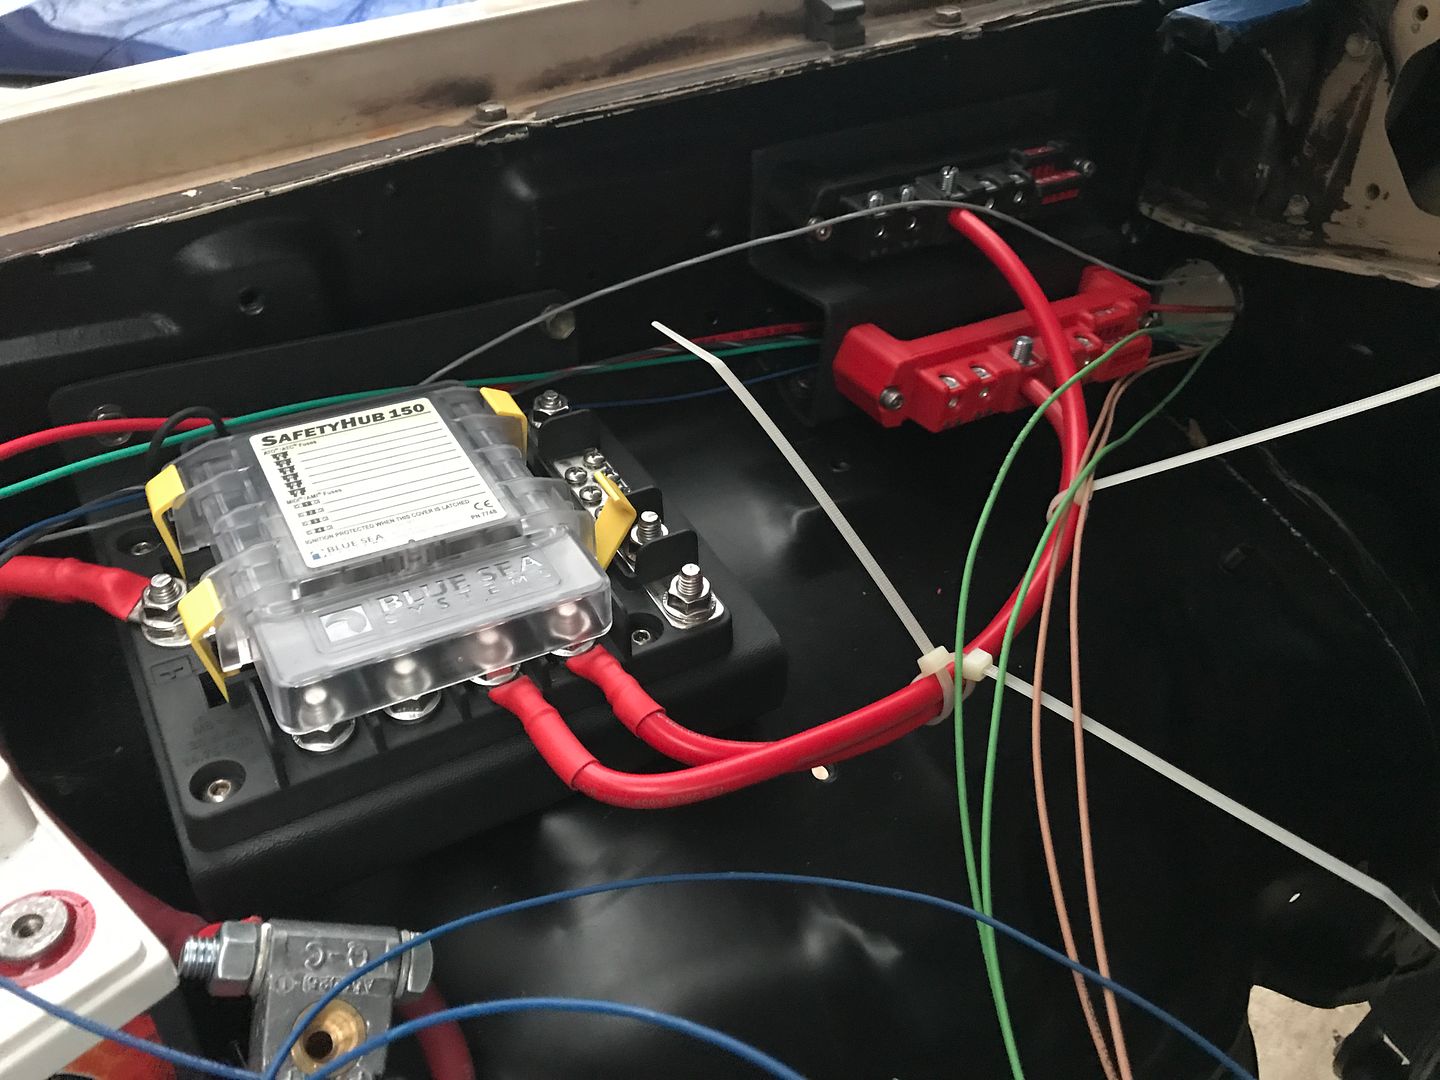
And now you are up to date. Issues I have to work through are battery relocation, reworking the wiring harness, computer sent out for programming, fuel delivery, and wiring everything up. I'm sure there will be more things to work through.Once I get the crossmember complete I'm pulling everything back out to strip down and paint the engine bay and front part of the frame. I also need to weld in the power steering pump mount. Oh yea, I'm converting it from manual steering to power steering.
First test fit

Axle before rebuild

Axle after rebuild


The unit with the red dial is the locking hub

To convert the 6l80 you have to do three things. Plug those two holes (brass plugs), put a 4wd output shaft seal in place, and cut the output shaft down. I don't have the seal on there yet.


6l80 and Atlas together for test fit

The motor mounts are ICT Billet LT1 to SBC plates with Advance Adpator's SBC universal style hot rod mounts. The vacuum pump has to go. The two oil holes have to be plugged. I had to clearance the block where the vacuum pump mounted to use the motor mount setup.


I'm going to need custom headers made. Ouch. Can anyone suggest a shop in DFW area?


The motor mounts are tacked into place now. (not shown here)

Making new crossmember/transmission mount


And now you are up to date. Issues I have to work through are battery relocation, reworking the wiring harness, computer sent out for programming, fuel delivery, and wiring everything up. I'm sure there will be more things to work through.Once I get the crossmember complete I'm pulling everything back out to strip down and paint the engine bay and front part of the frame. I also need to weld in the power steering pump mount. Oh yea, I'm converting it from manual steering to power steering.
Last edited by Bryan McCall; 12-11-2018 at 10:36 PM.
12-12-2018, 11:57 PM
#6
On The Tree

Join Date: Dec 2013
Location: North Vanacouver , BC
Posts: 182
Likes: 0
Received 11 Likes
on
7 Posts
LV3 make for really good swap candidates , efficient , light weight and more than ample power, almost 3 times the original in your case lol .Will definitely breathe some new life into the toyota.
Trending Topics
12-13-2018, 12:53 AM
#8
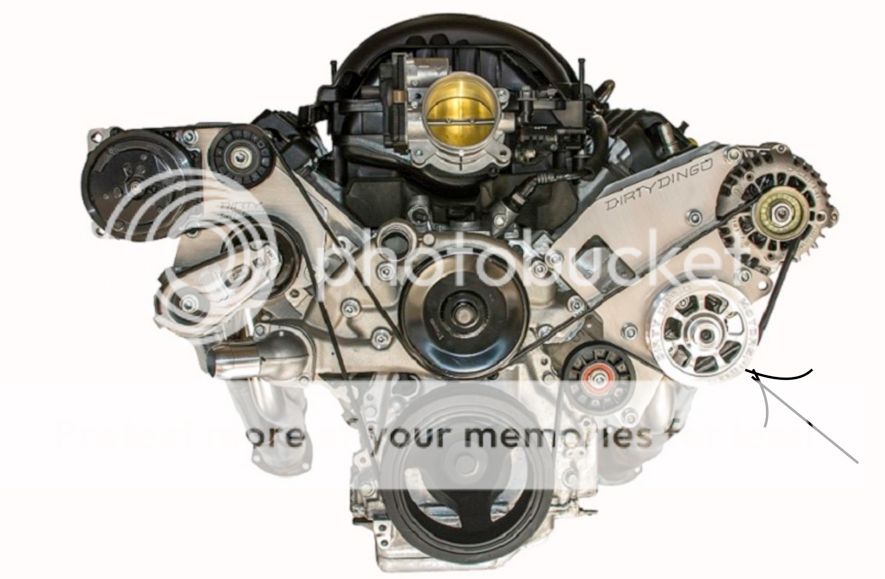
I went with the Dirty Dingo set up. It moved my AC compressor to the top passenger side, alternator to top driver's side, and added a spot for power steering pump.
To swap this engine, the vacuum pump has to go. I'll be running an electric vacuum pump.
https://leedbrakes.com/p-33752-leed-...pump-kits.html

To swap this engine, the vacuum pump has to go. I'll be running an electric vacuum pump.
https://leedbrakes.com/p-33752-leed-...pump-kits.html
02-08-2019, 12:21 AM
#10
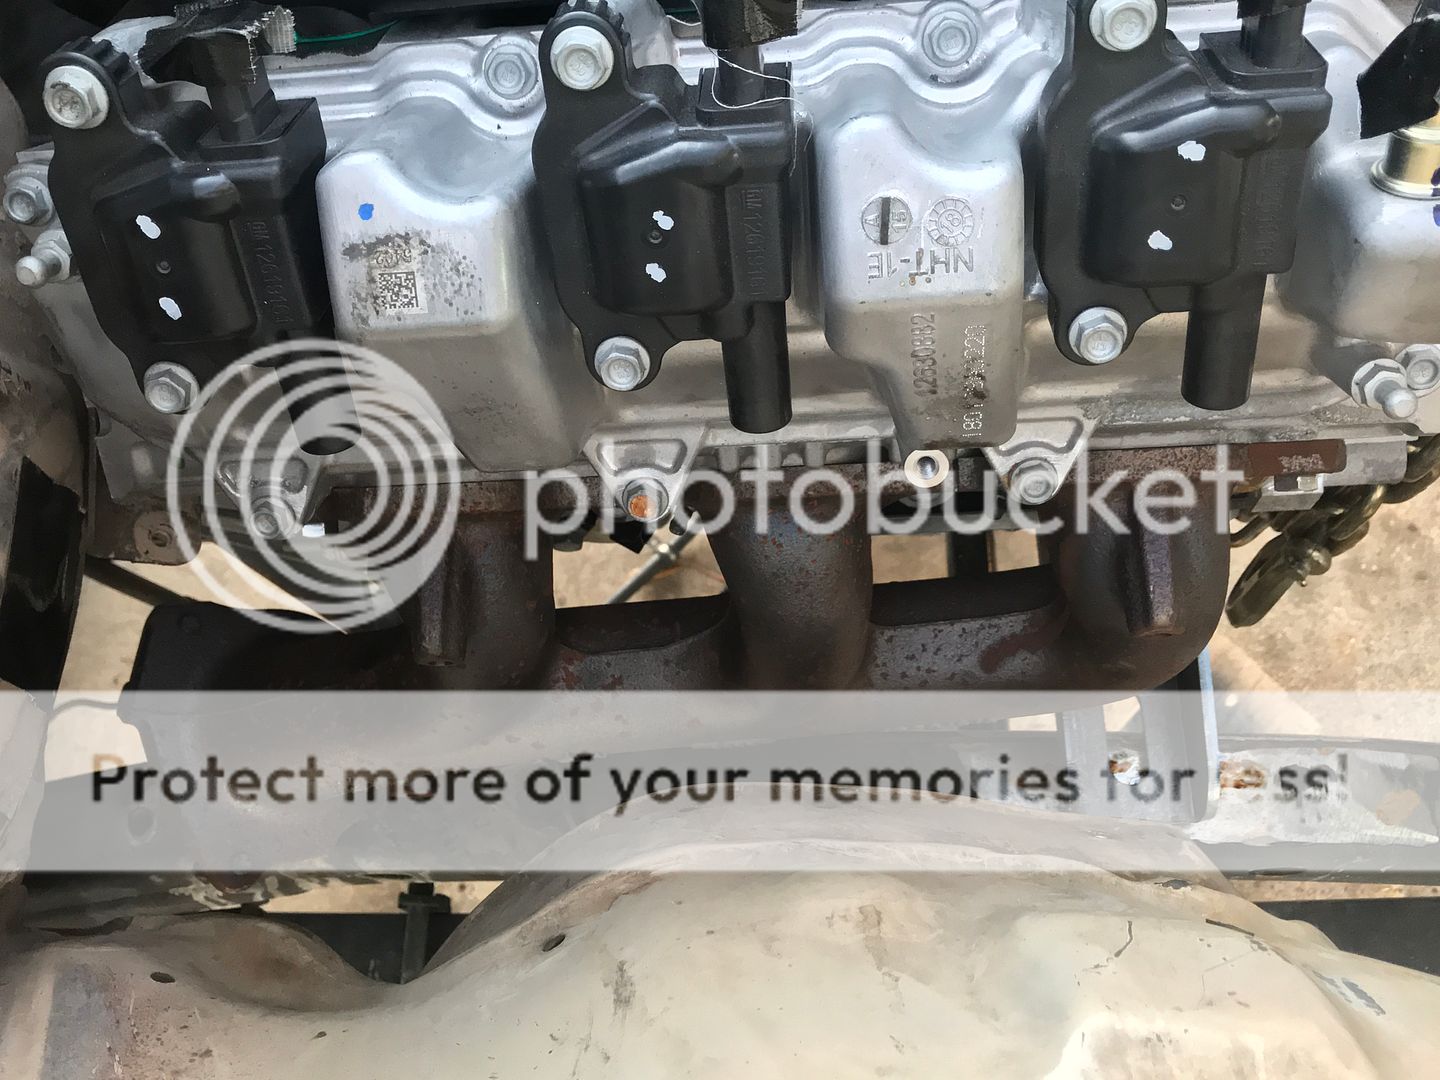
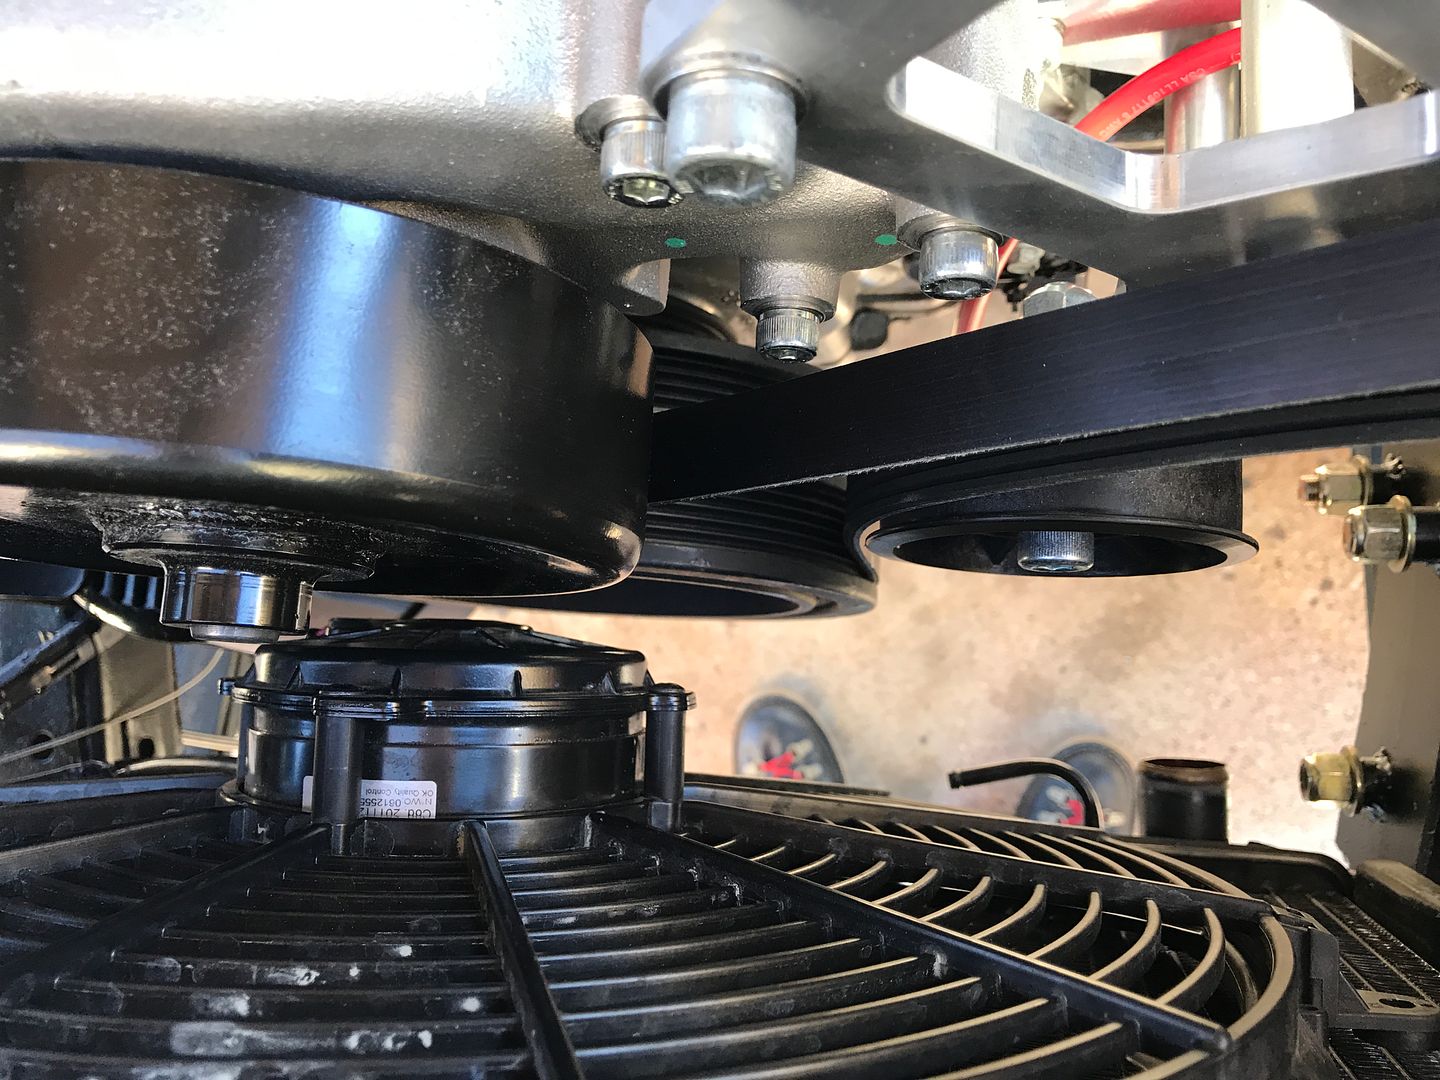
Hey Benderff, I haven't had time to do much. I started some wiring on the chassis. It turns out that is extremely slow work. All connectors are being soldered. Most of my time is sitting there thinking about where to put all of the stuff that needs to go into the engine bay and how running wires everywhere correctly and aesthetically as possible. It's not a show truck, so I'm not too worried about the latter. I got the pinout of almost every connector and the CPU. A long time friend hooked me up with the GM maintenance website. Let me know if you need and pinouts. I'd just need the VIN of the vehicle the engine came out of. I think I stumbled onto a huge money saver yesterday. A set of custom headers will set you back $1600, so, I was looking for alternatives and ran across a turbo log made from a stock exhaust manifold. The stock manifolds dump right on top of my skinny frame. I'm cutting the flanges off and will be welding a couple of 45* schedule 40 fittings that will direct the exhaust where I need it. It'll look similar to a photo below. I have my radiator and fan test fit in and have wired up my pwm fan controller from Derale. I'm cutting it very close to the water pump pulley. I think it will be ok. If not, plan B is get a thinner aluminum radiator built. Issues I still need to tackle are: reworking the wiring harness, making harness to run to the fuel pump and fuel control computer, putting a fuel pump into my gas tank, the rest of the exhaust, programming, and drive shafts from Tom Wood's. I'm sure there are a bunch of other things I'll run across.


 02-08-2019, 12:38 AM
#11
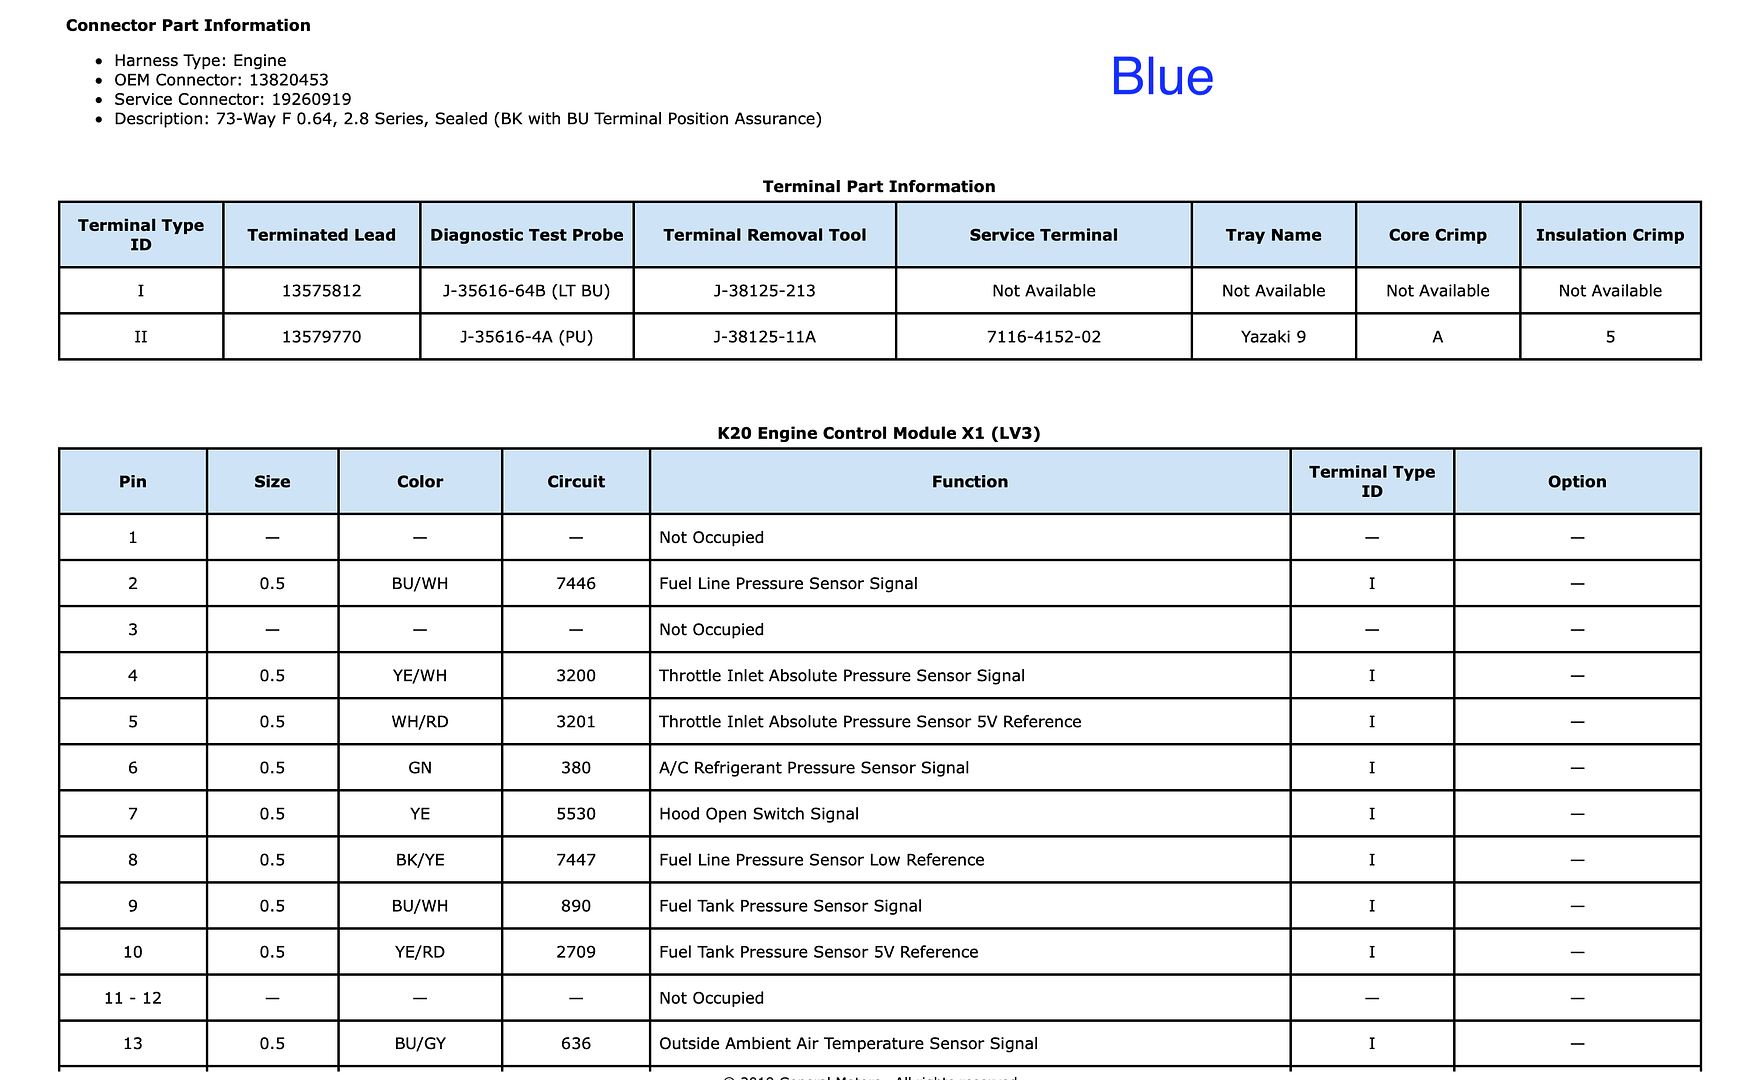
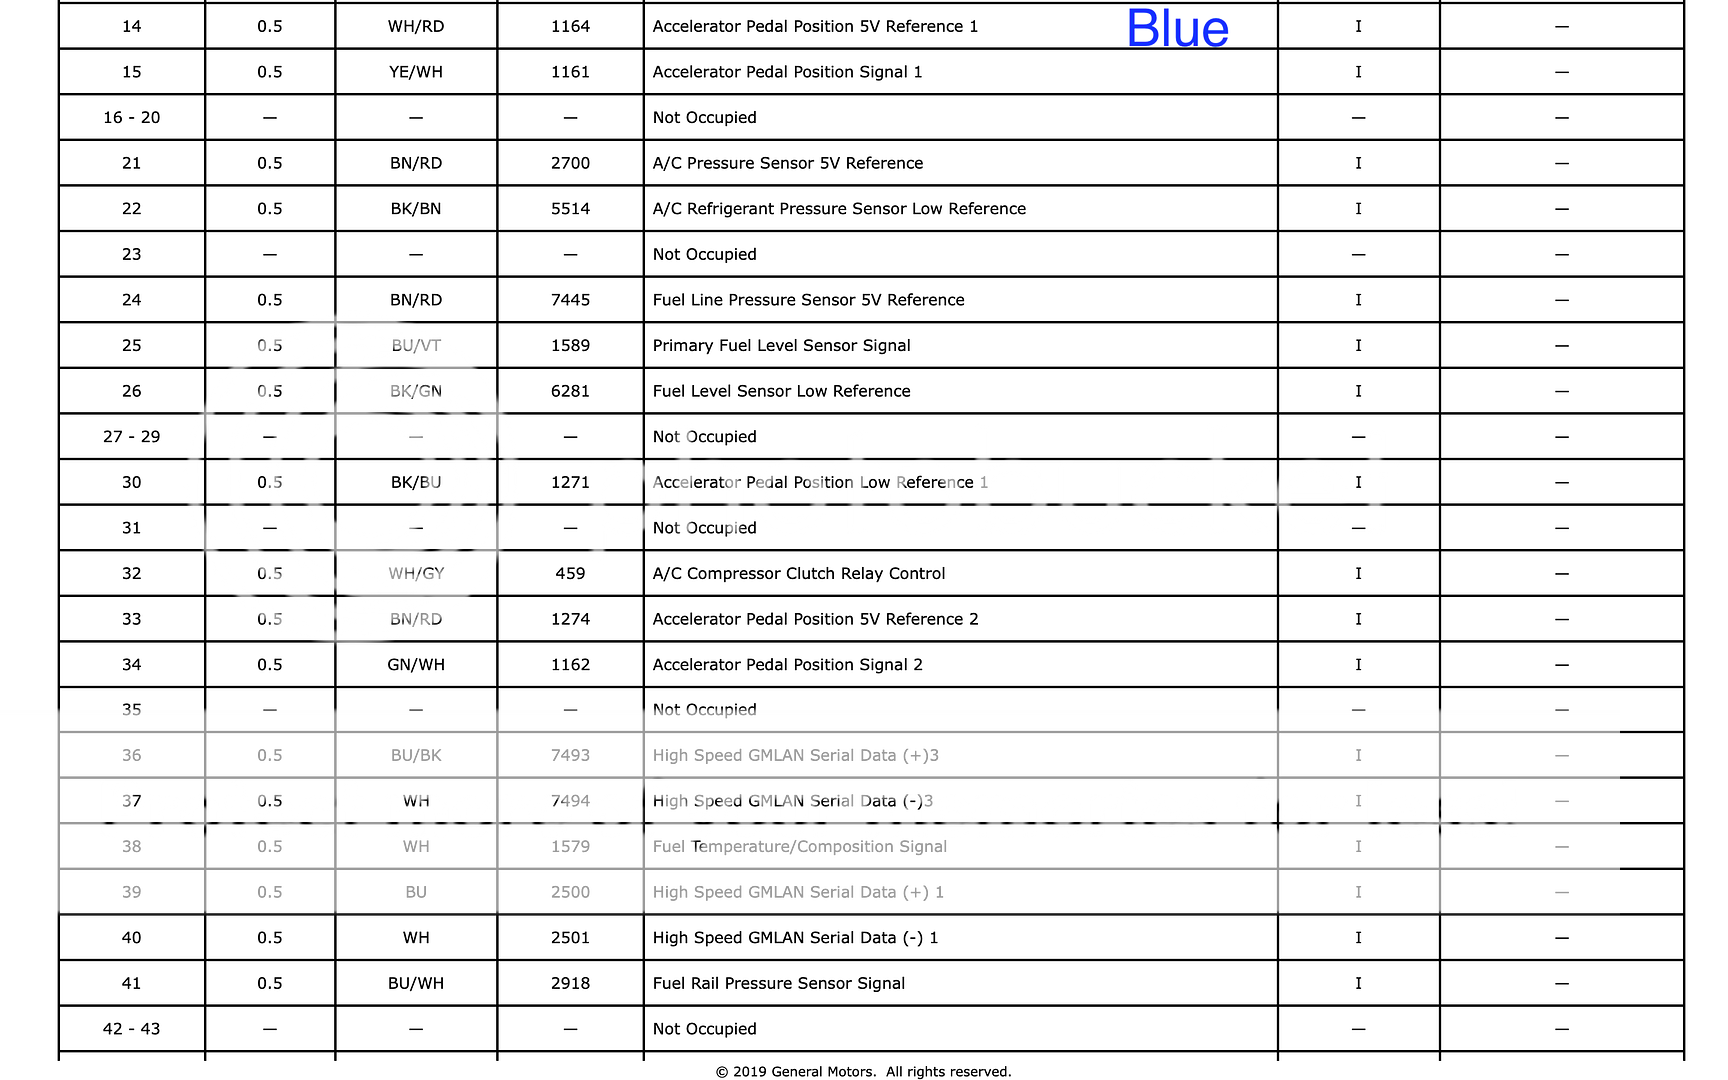
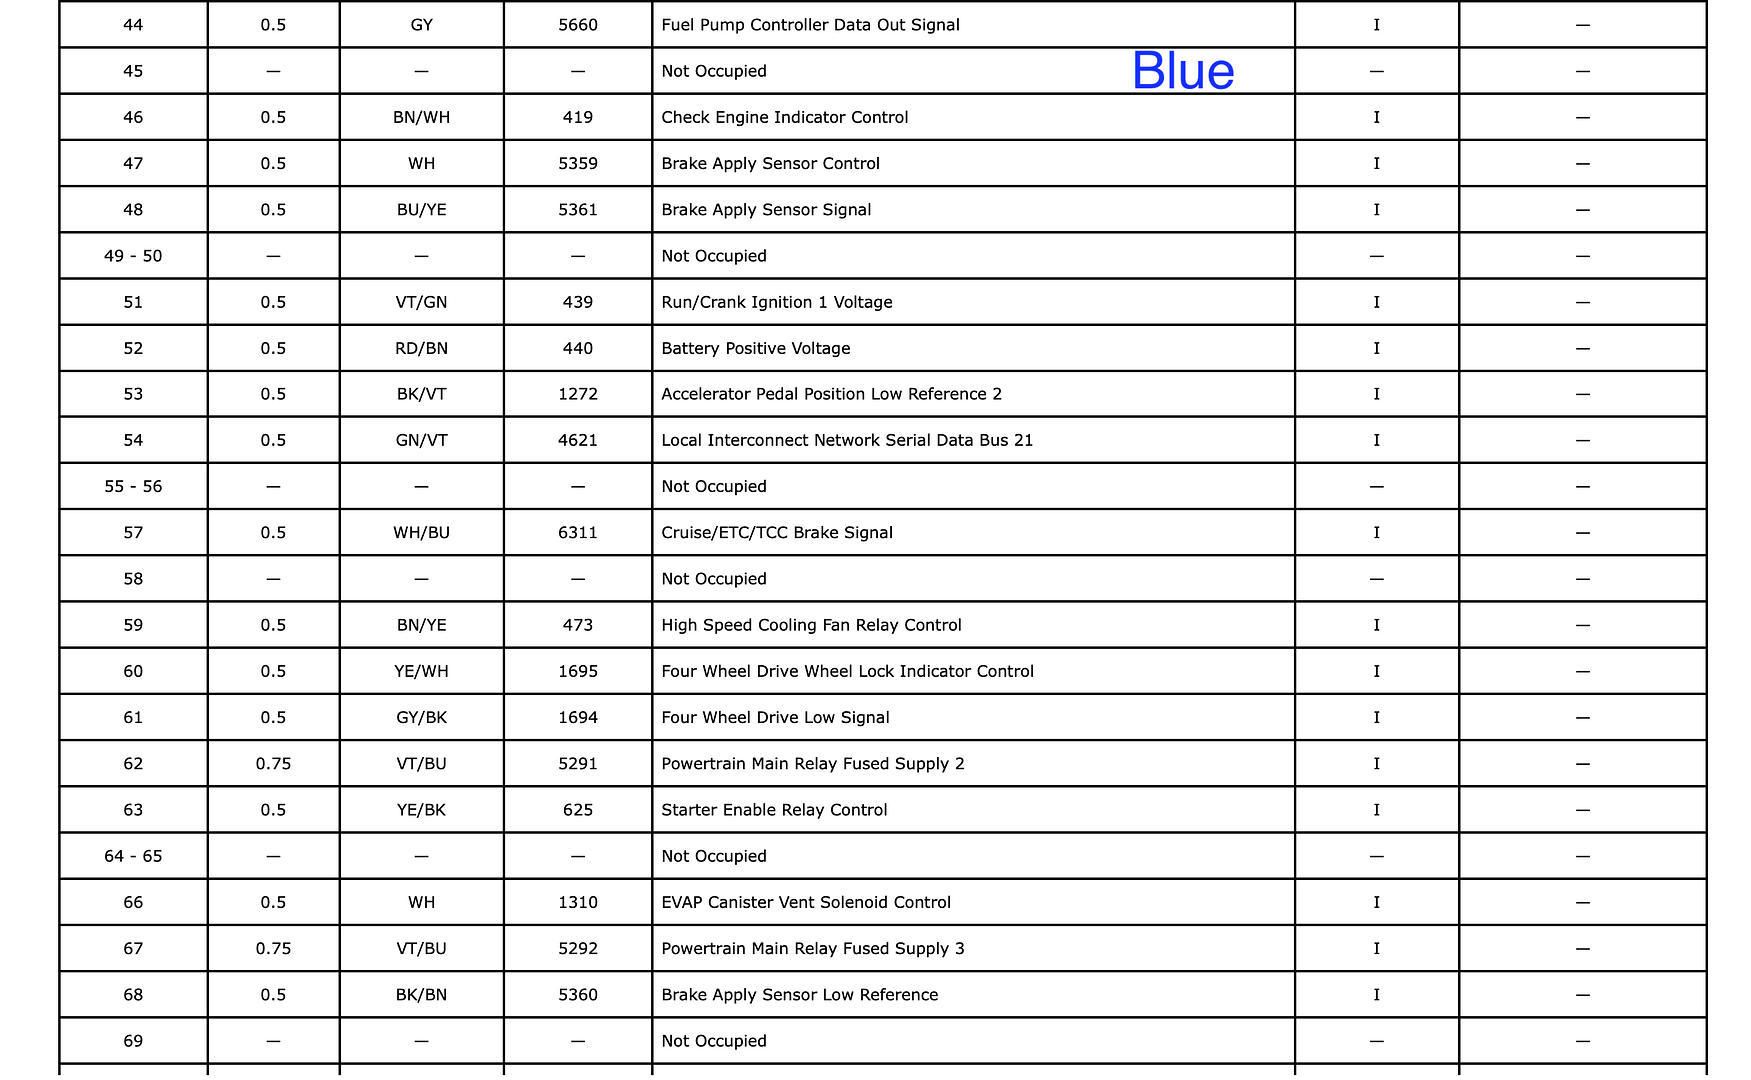
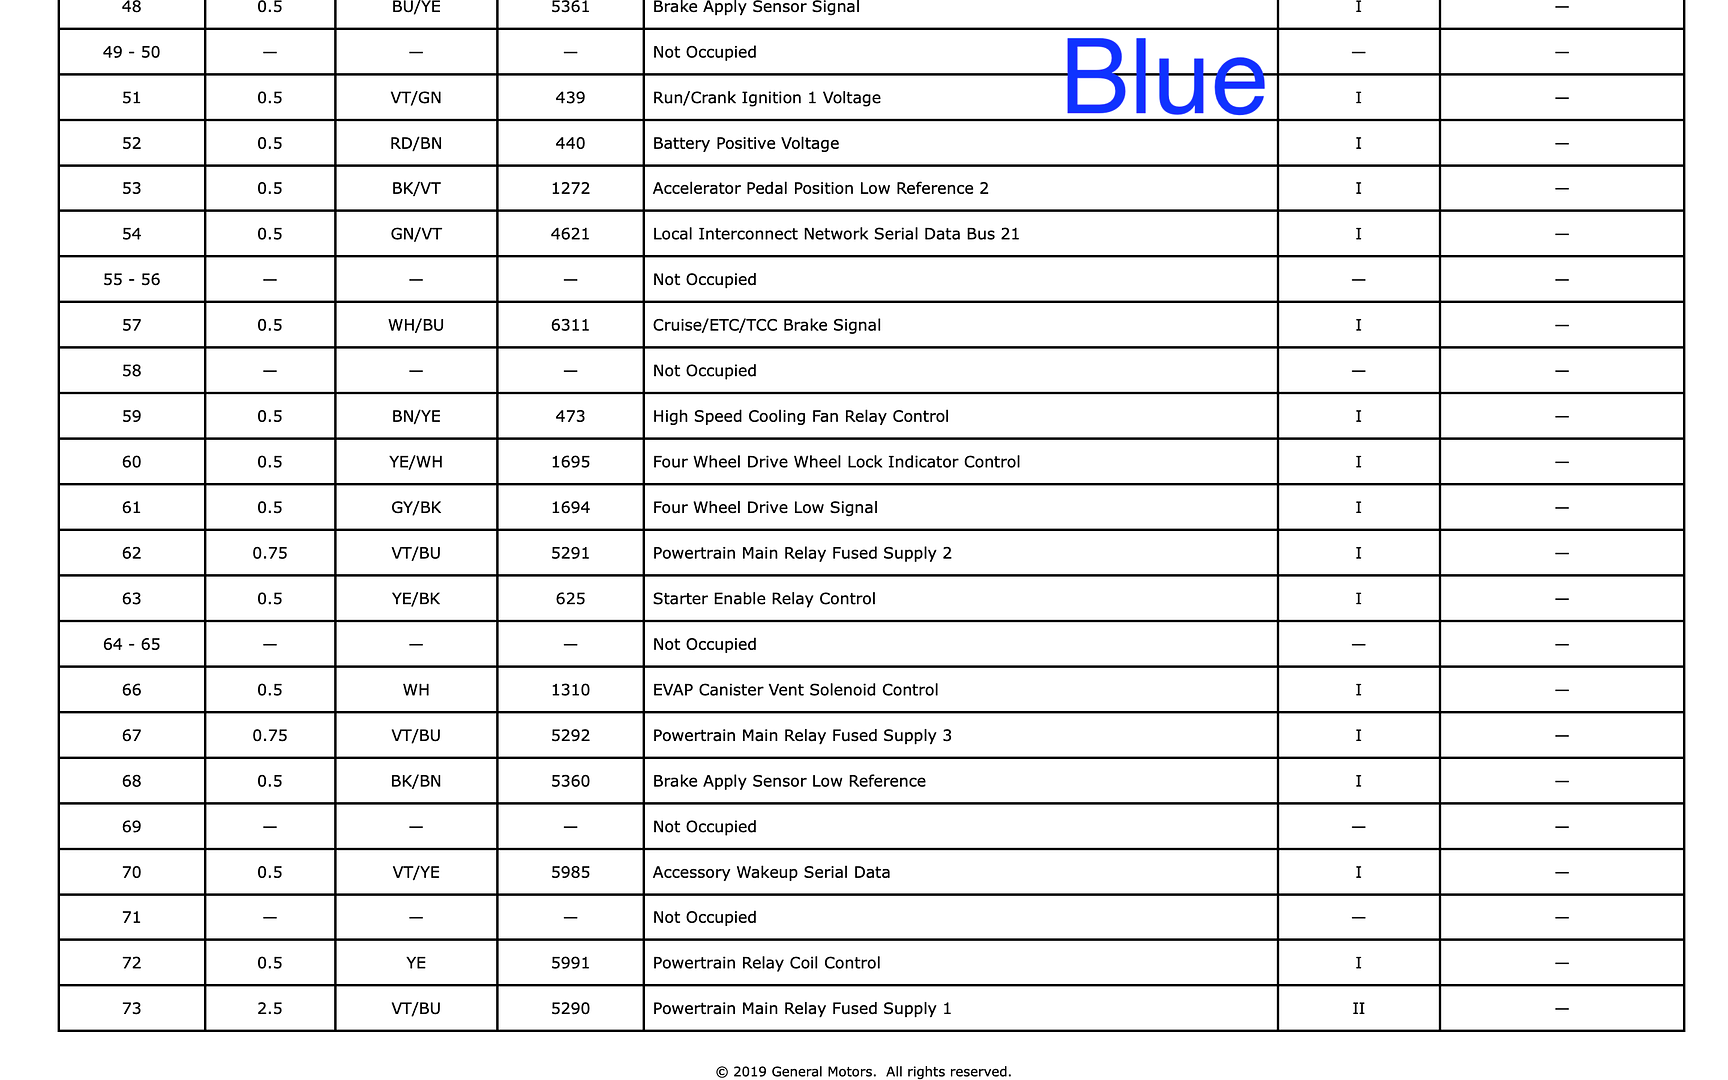
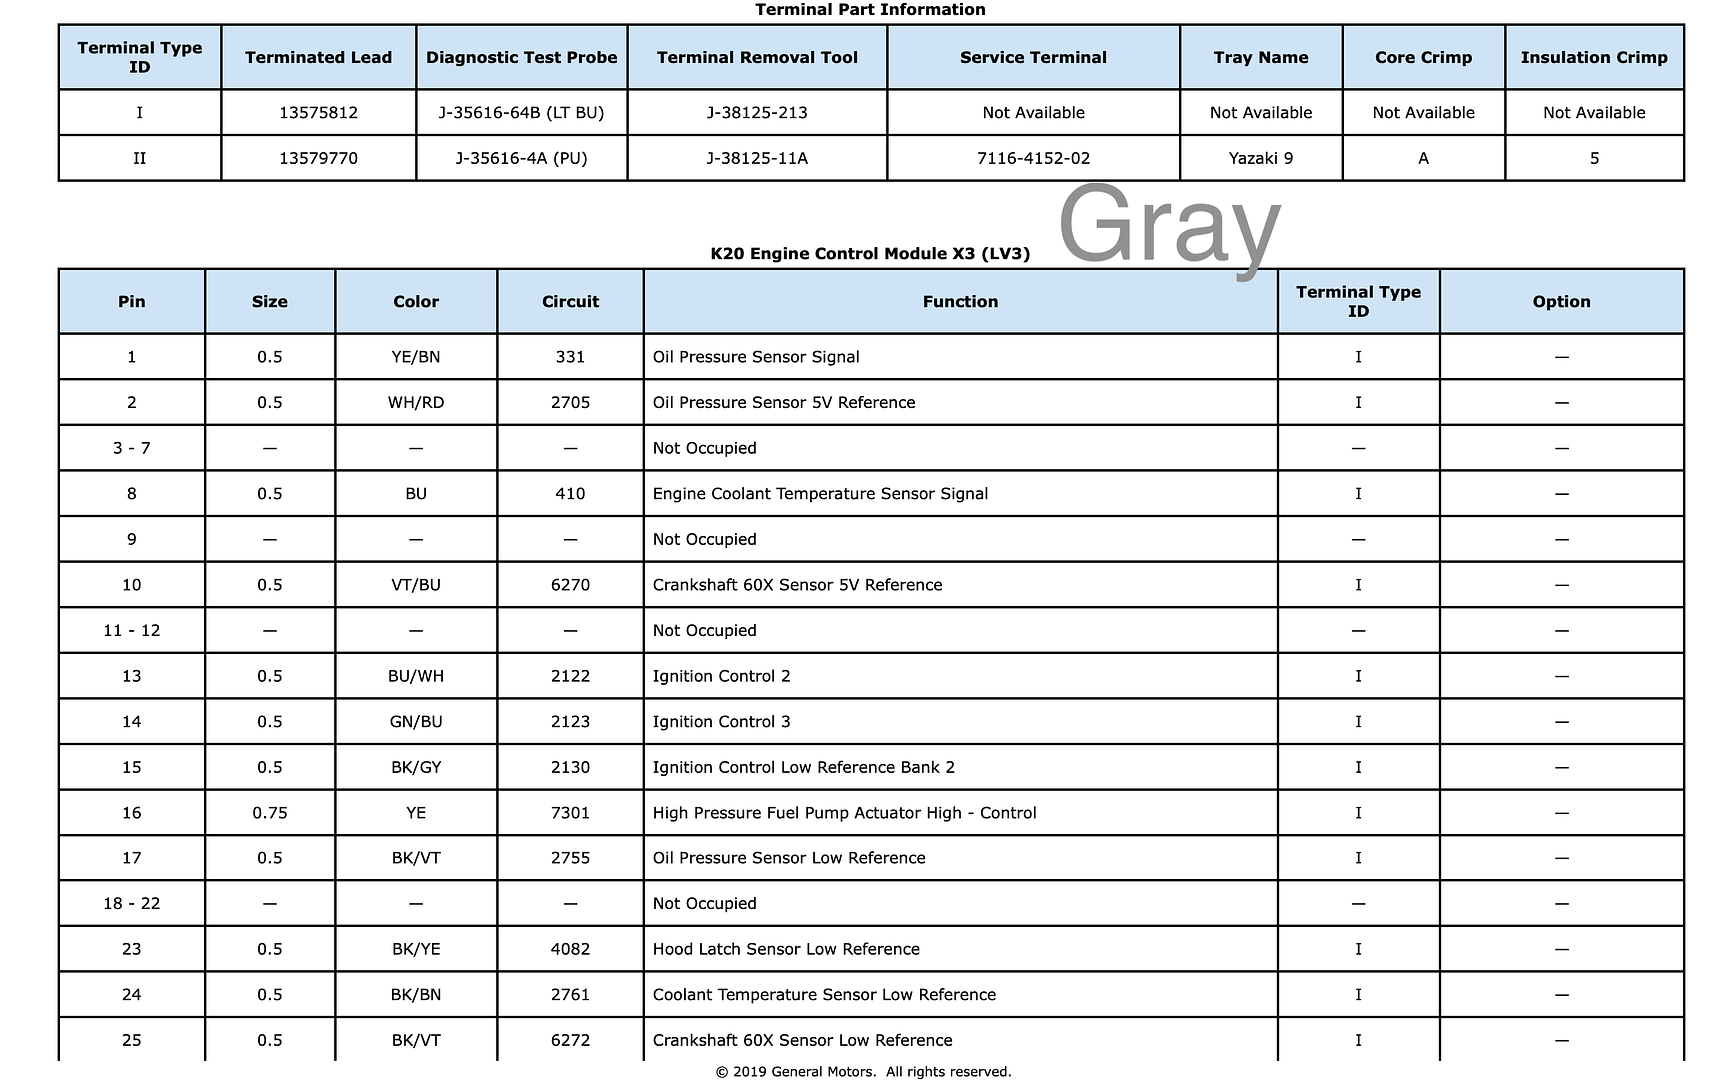
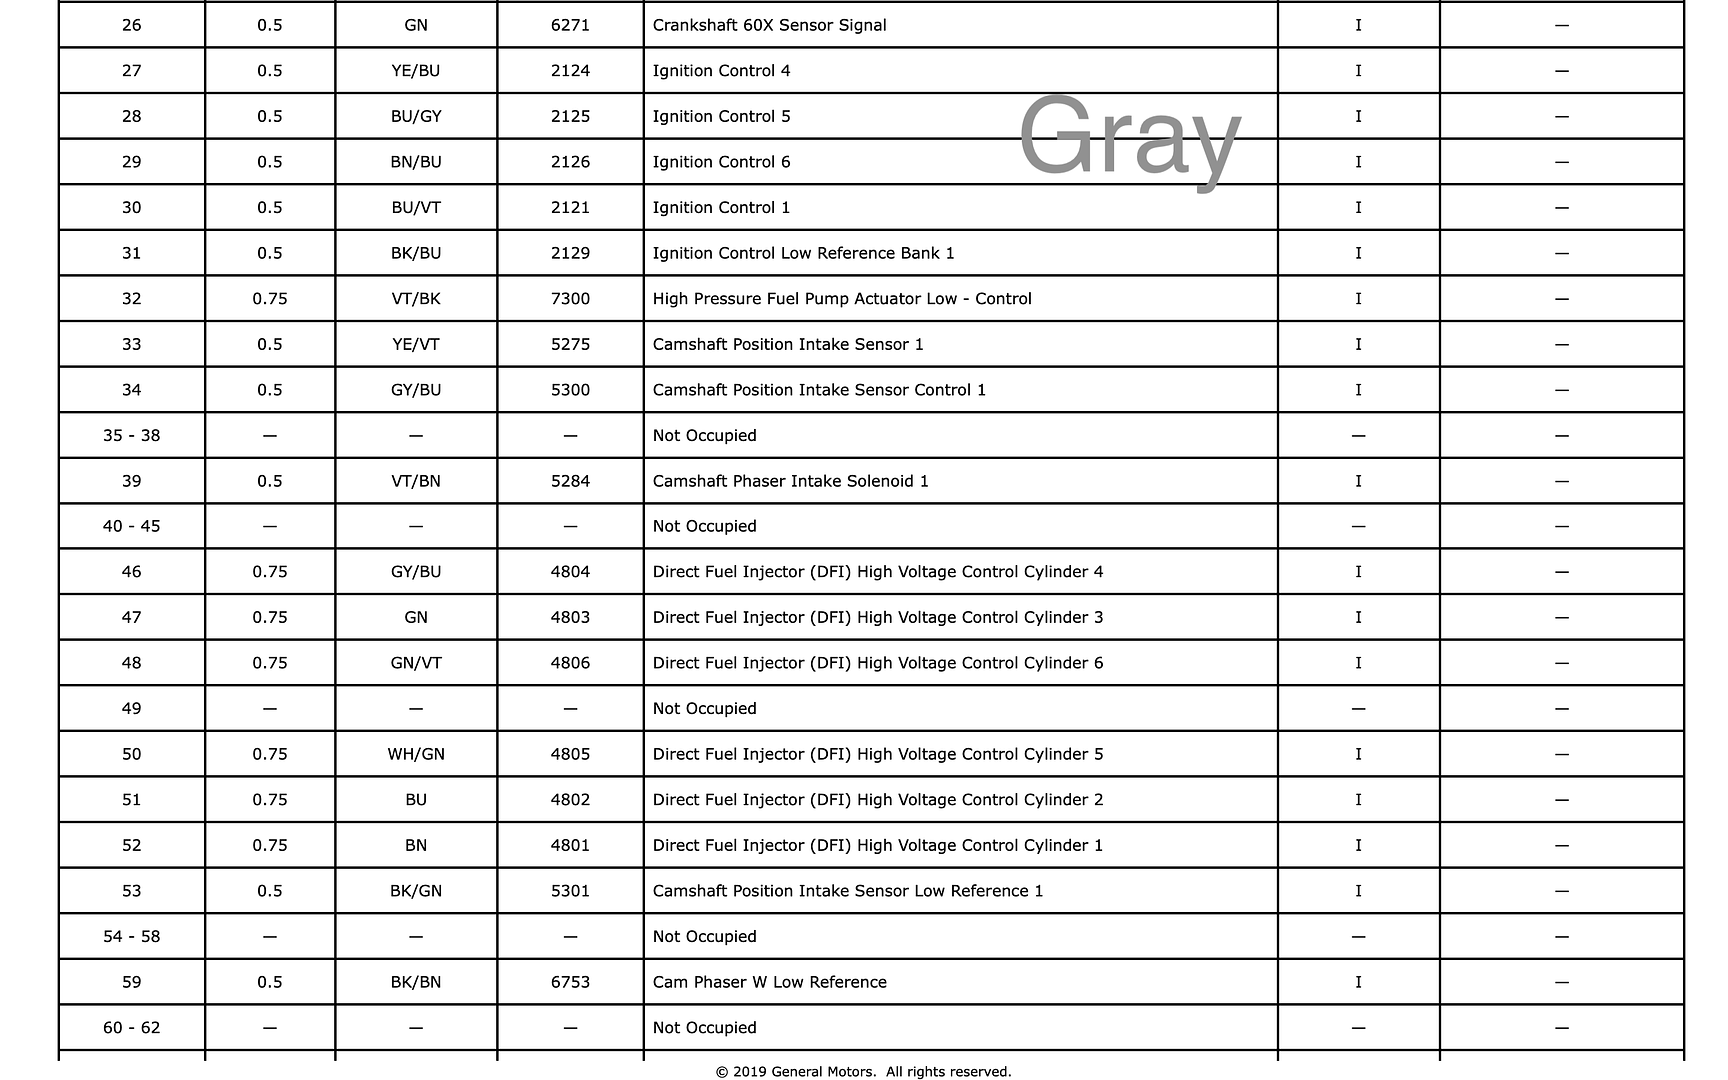
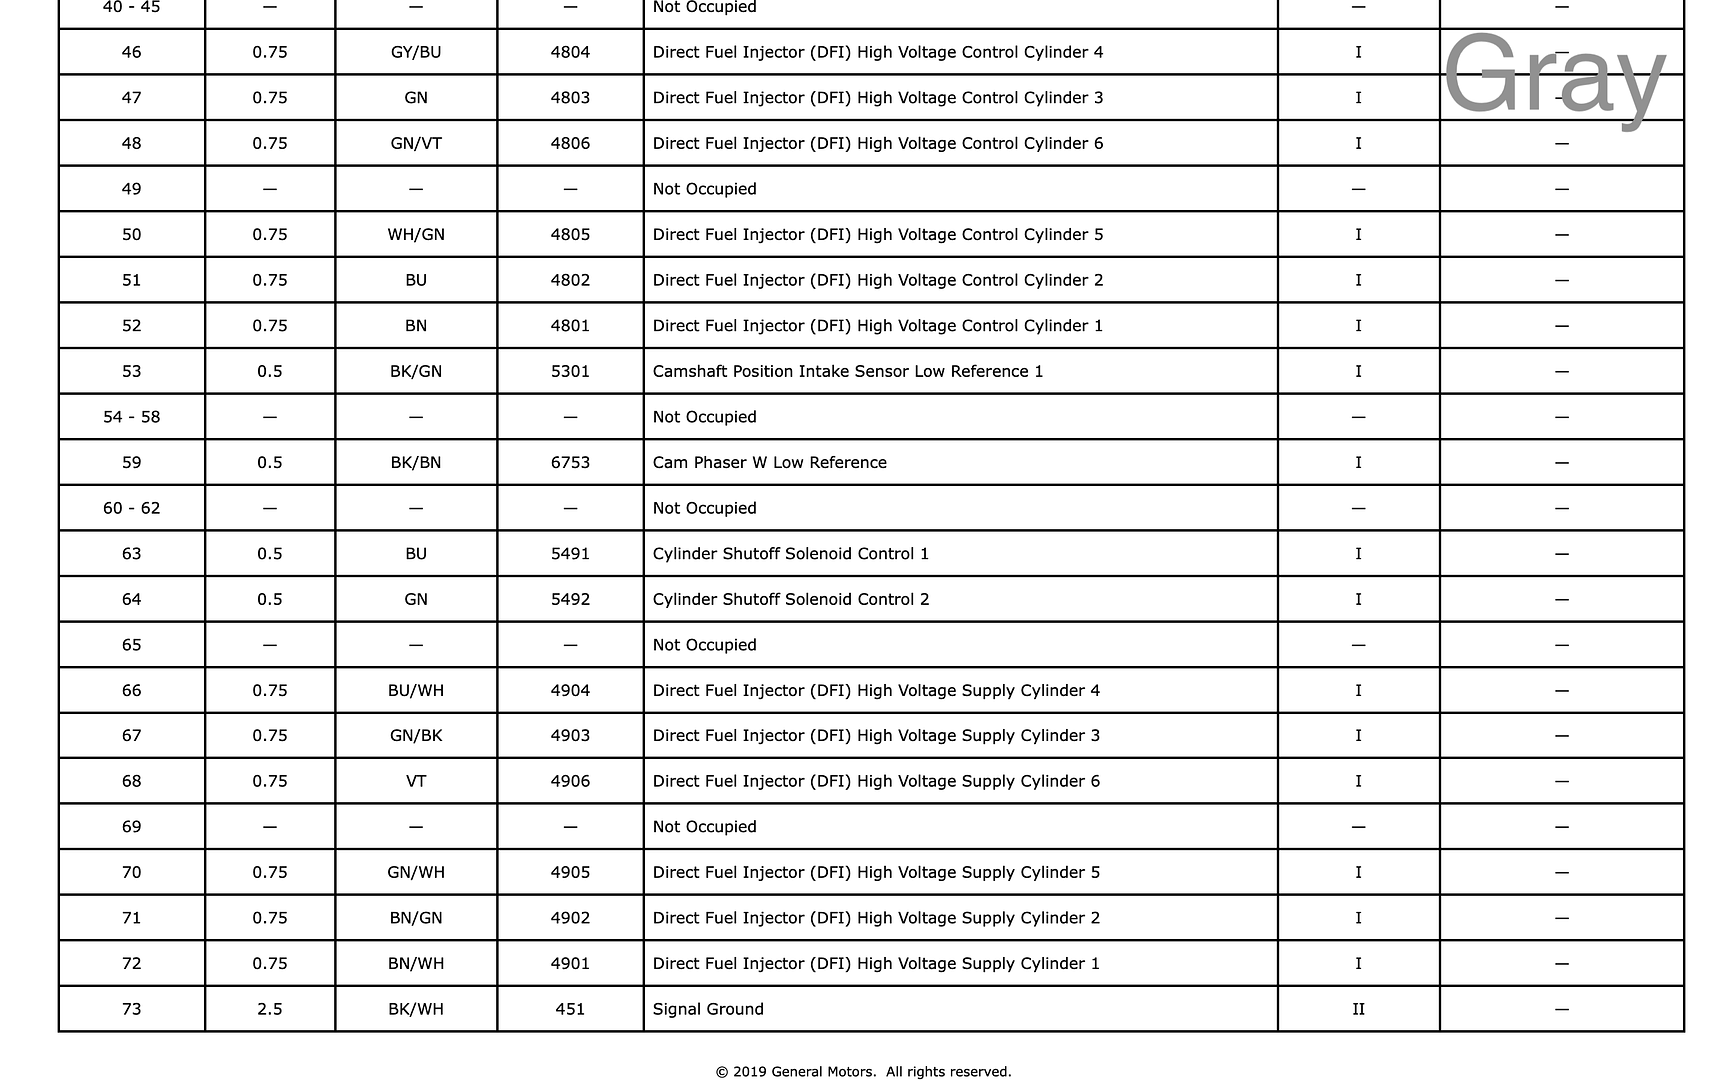
Here are the CPU pinouts for a 2018 LV3
There are two different pinouts for the black connector. I'll try to get it uploaded soon.

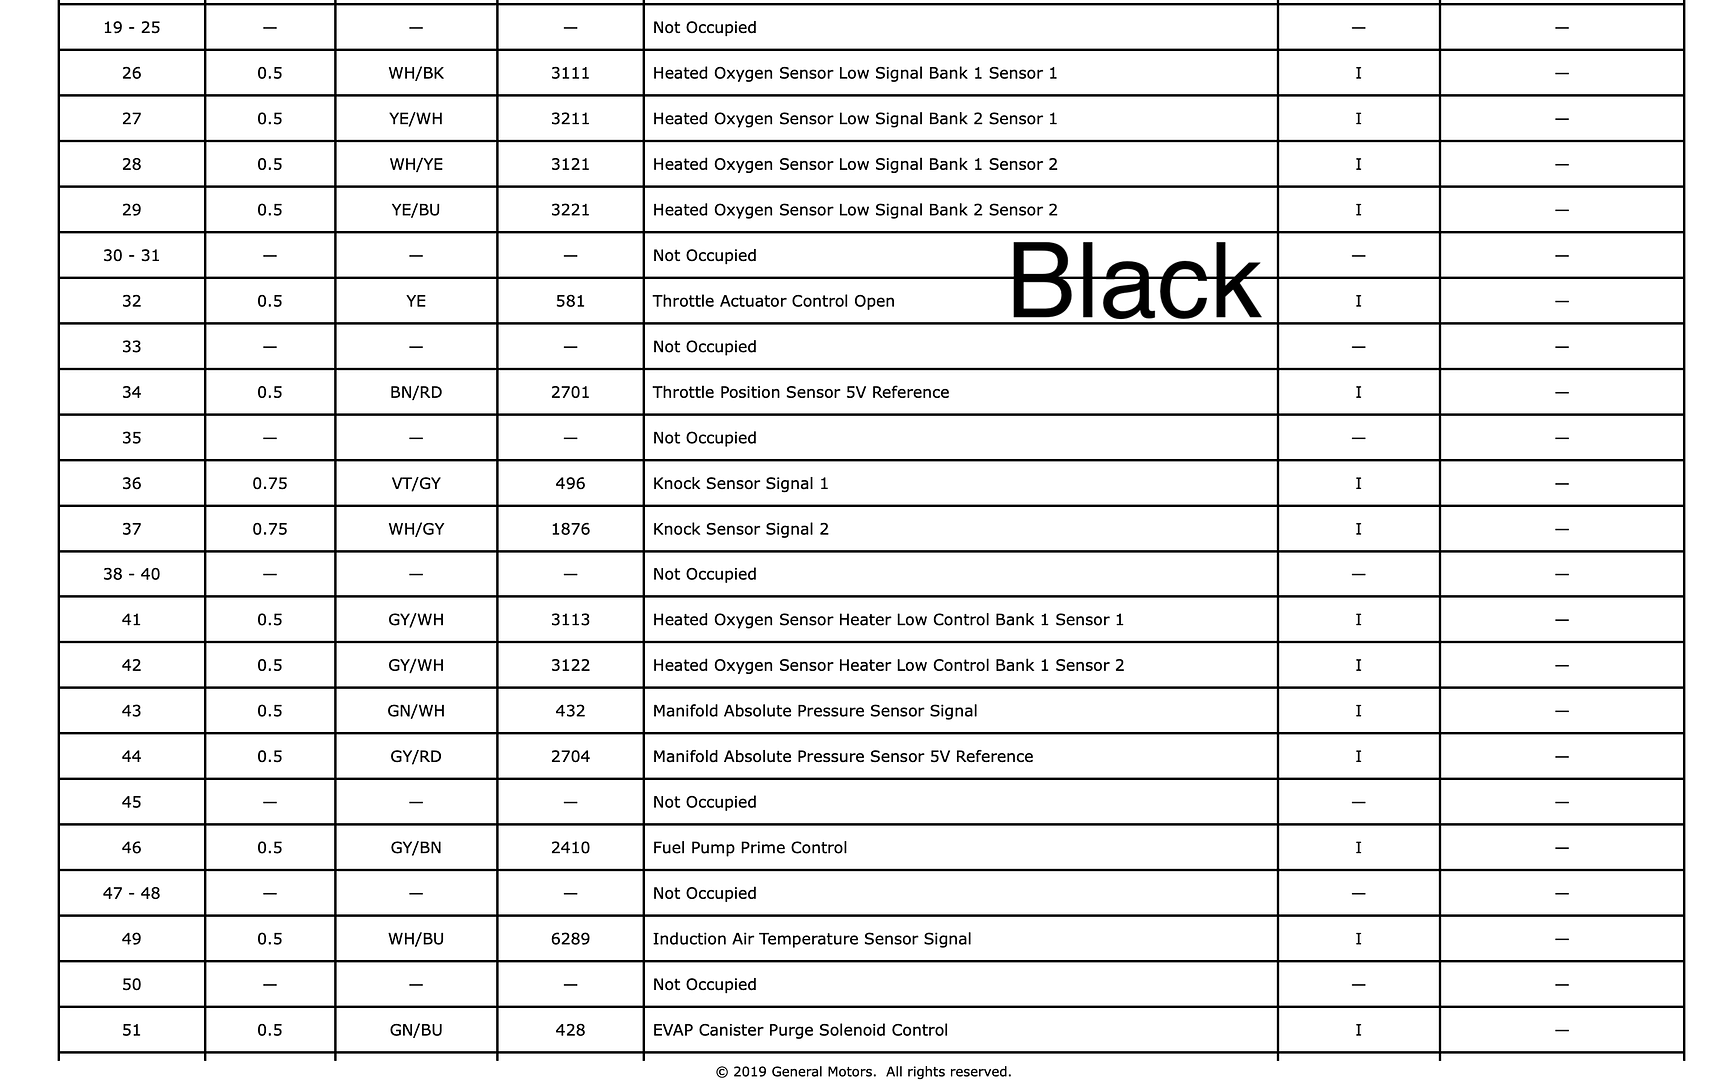
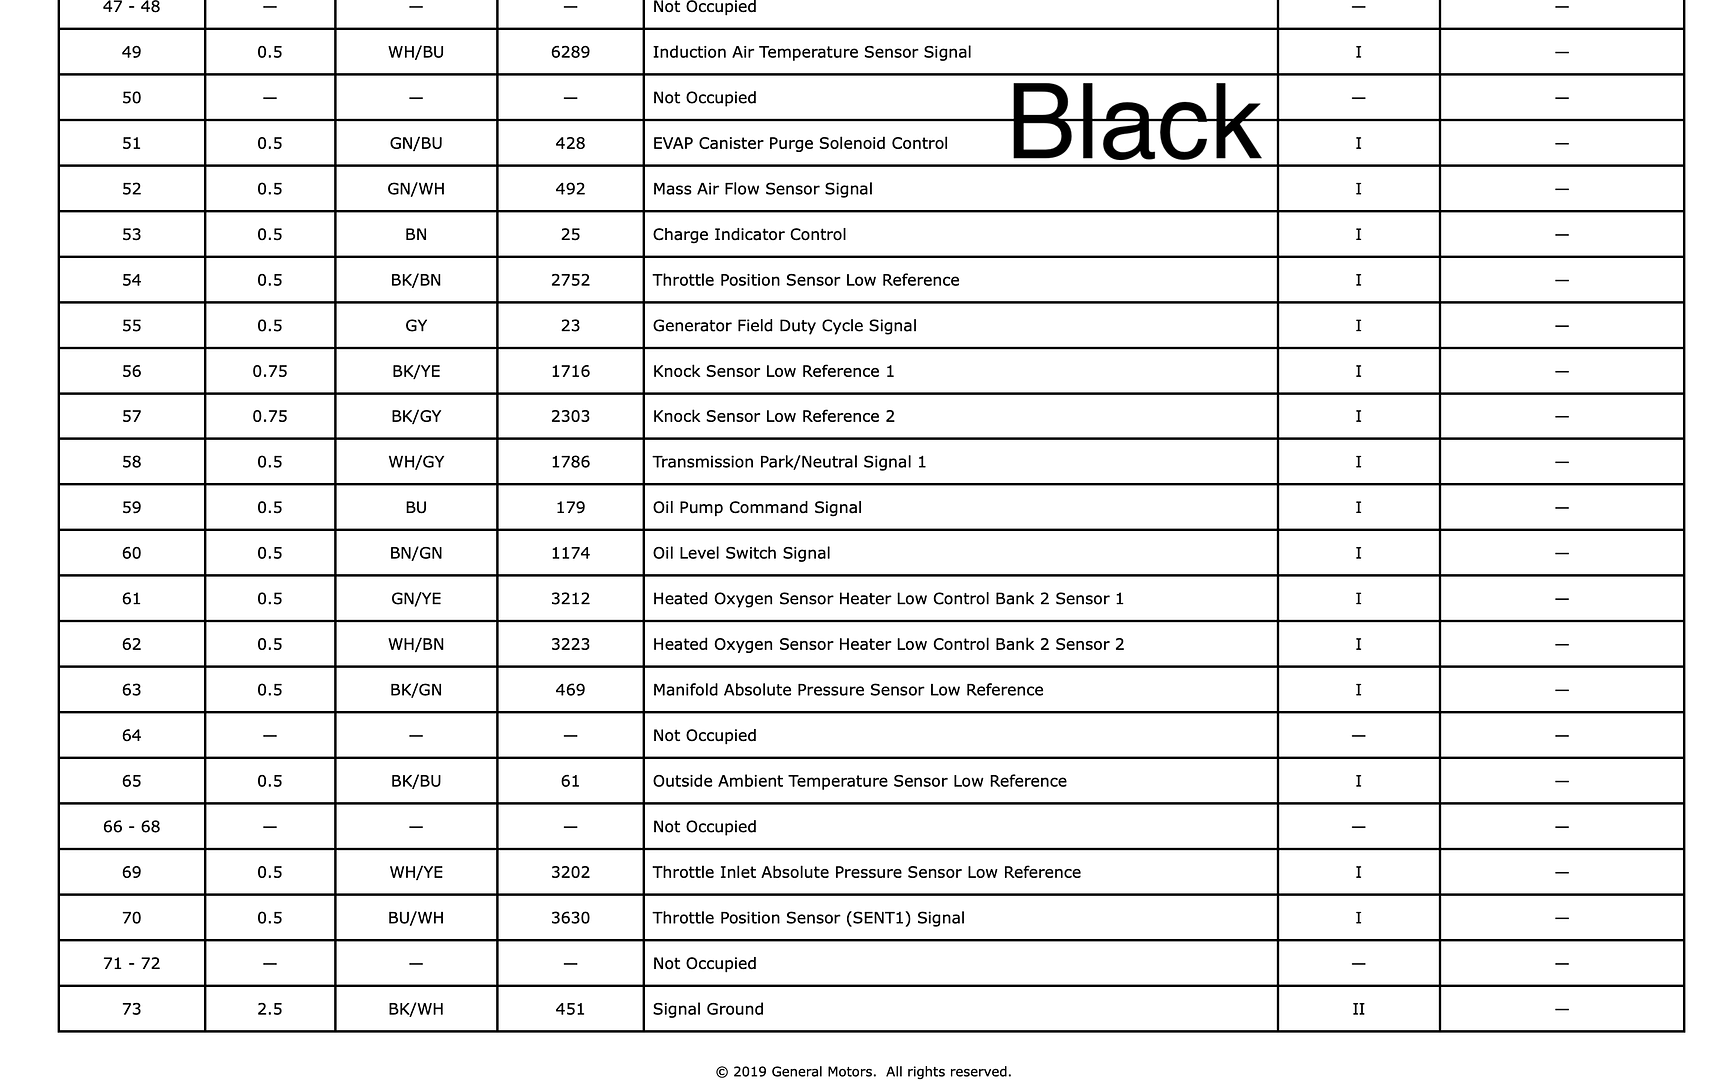
There are two different pinouts for the black connector. I'll try to get it uploaded soon.


Last edited by Bryan McCall; 02-08-2019 at 12:55 AM. Reason: broken link
02-09-2019, 03:43 PM
#12
Teching In

Join Date: Feb 2017
Location: Pacific Northwest
Posts: 5
Likes: 0
Received 0 Likes
on
0 Posts
Awesome! I like the turbo log idea! I picked up a set of JBA headers but it will be really close still. You are braver then I am with the wiring. I sent my harness and ECU to 208 Motorsports some time ago, unfortunately I think i should have held on to it since its been so long. Great seeing the progress!
 02-11-2019, 10:16 PM
#14
Benderff, are you doing a build thread on your Jeepster? I think I've reached a point of insanity with my engine harness. I'm pretty sure I'll send this one out or buy a stand alone from one of the reputable businesses. Plus, there is a lot of family stuff going on right now. Still working on the chassis wiring. I'm learning most of this electrical stuff as I get to is.
One fast Z06-thanks man. I had some good teachers and I retained some of it.
One fast Z06-thanks man. I had some good teachers and I retained some of it.
02-13-2019, 08:31 PM
#15
Teching In
Join Date: Feb 2017
Location: Pacific Northwest
Posts: 5
Likes: 0
Received 0 Likes
on
0 Posts
Bryan, I have a pretty weak build thread started on jeepforum, but there hasn't been much progress. We sold our house and are in the process of building a house and shop, plus family life, and work. Seeing your progress is a nice kick in the tight direction. Great to see the updates. I'm sure you know Howell makes a harness for the LV3. I'd like to recommend 208 Motorsports because he does solid work, but the time line and lack of communication have made things difficult.


 07-17-2019, 10:34 PM
#17
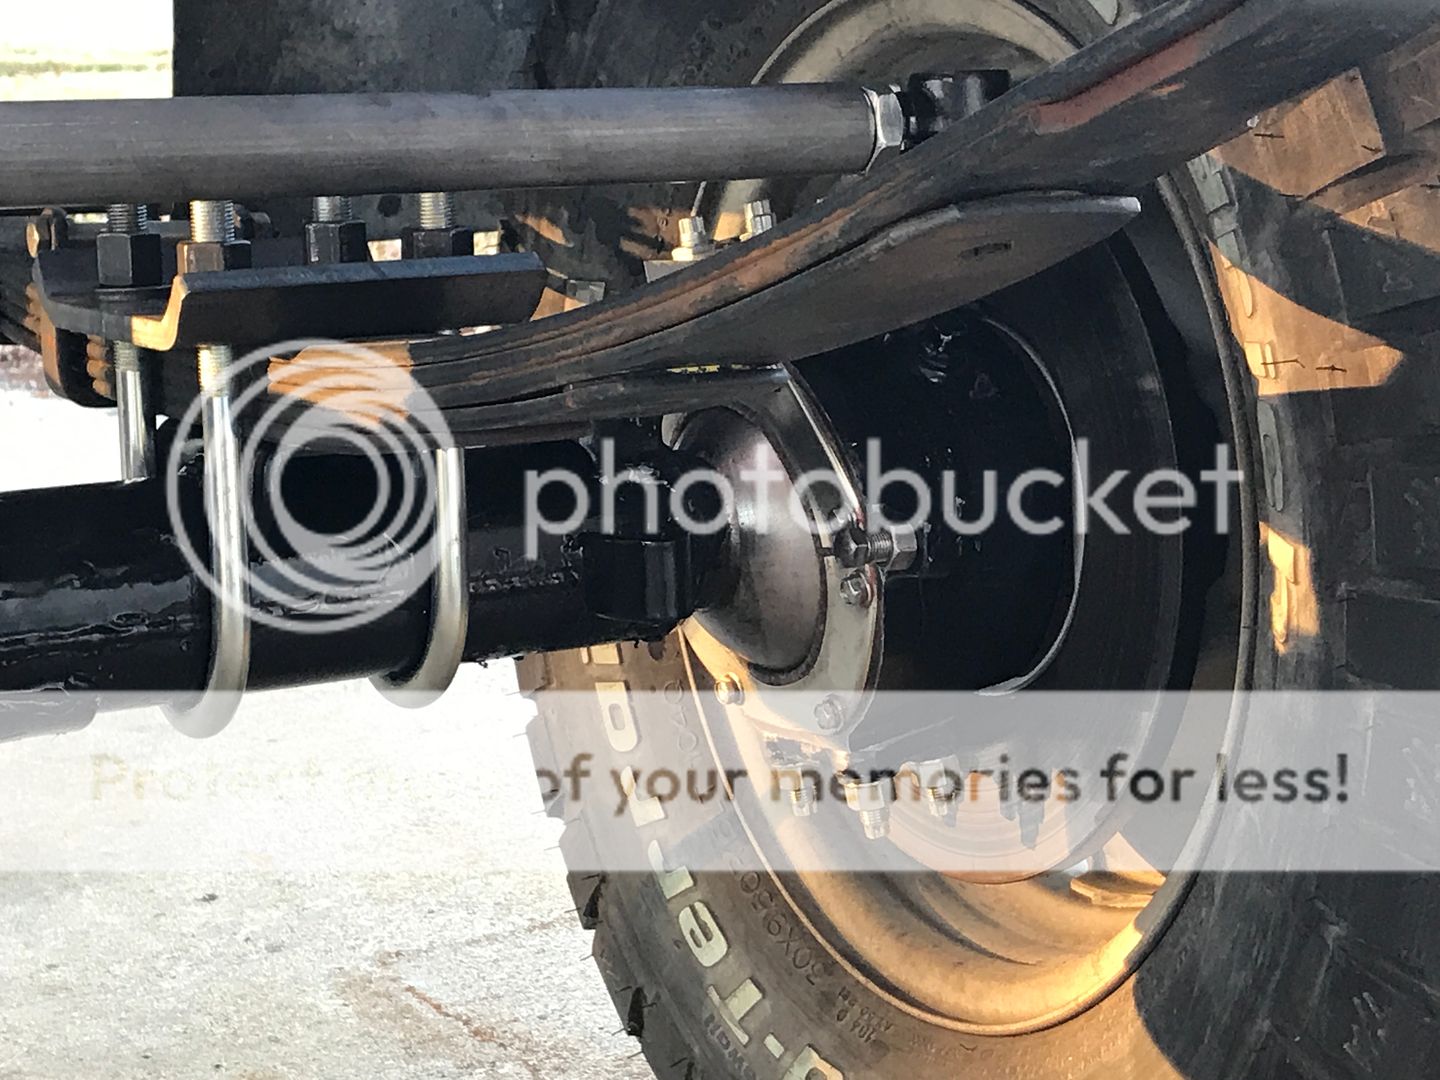
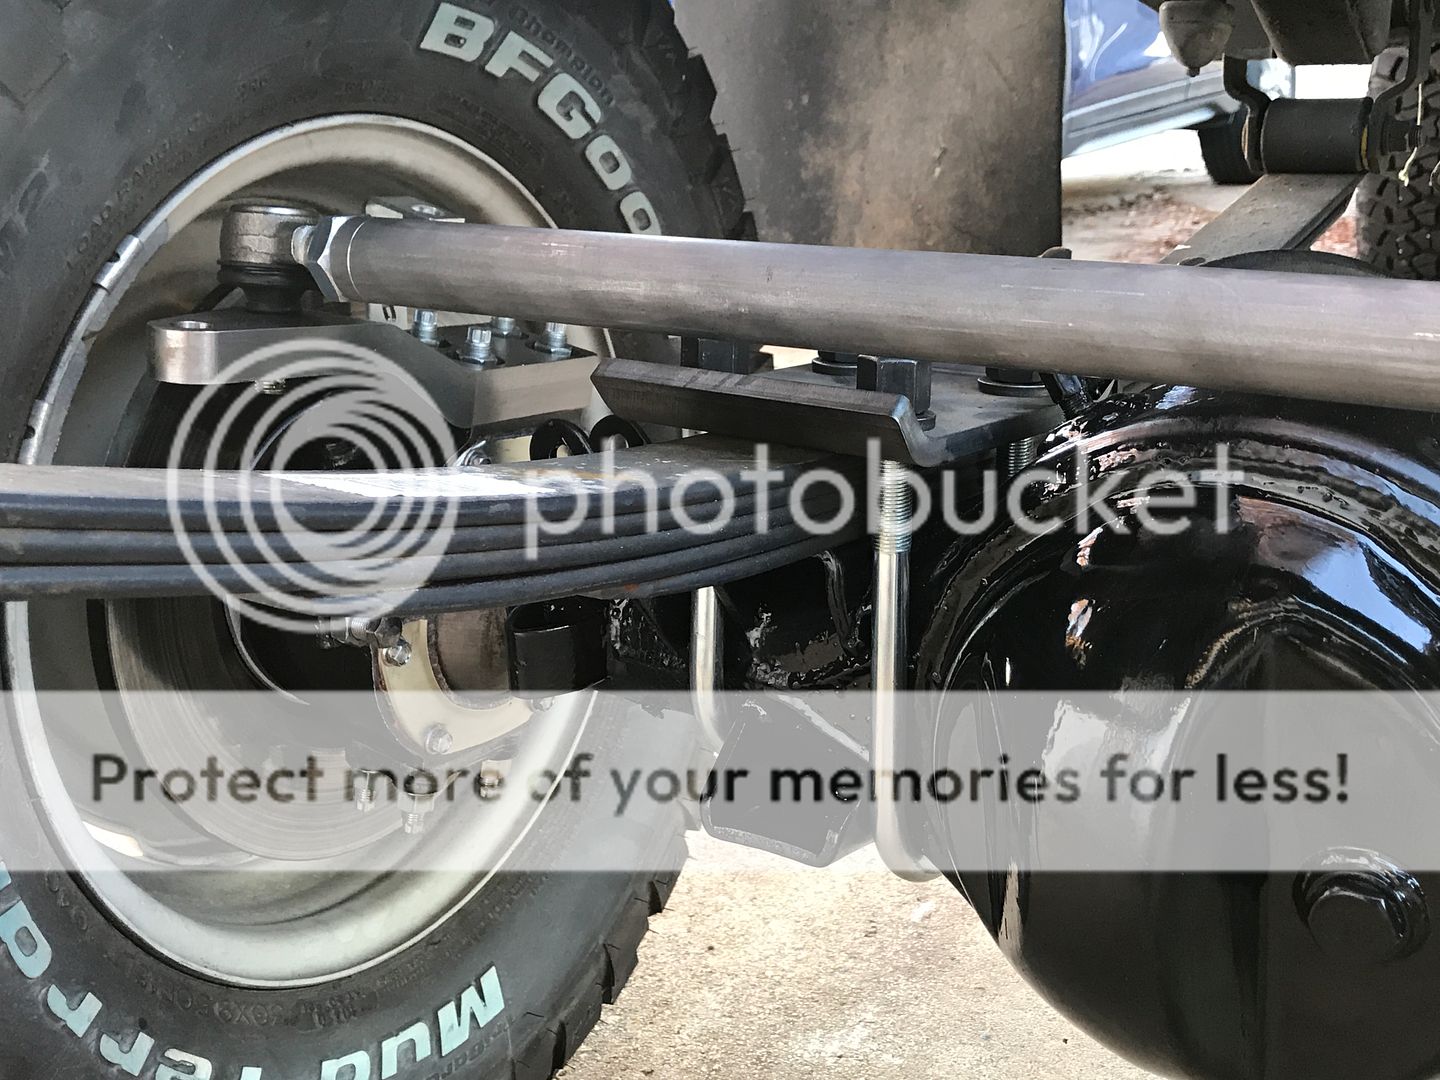
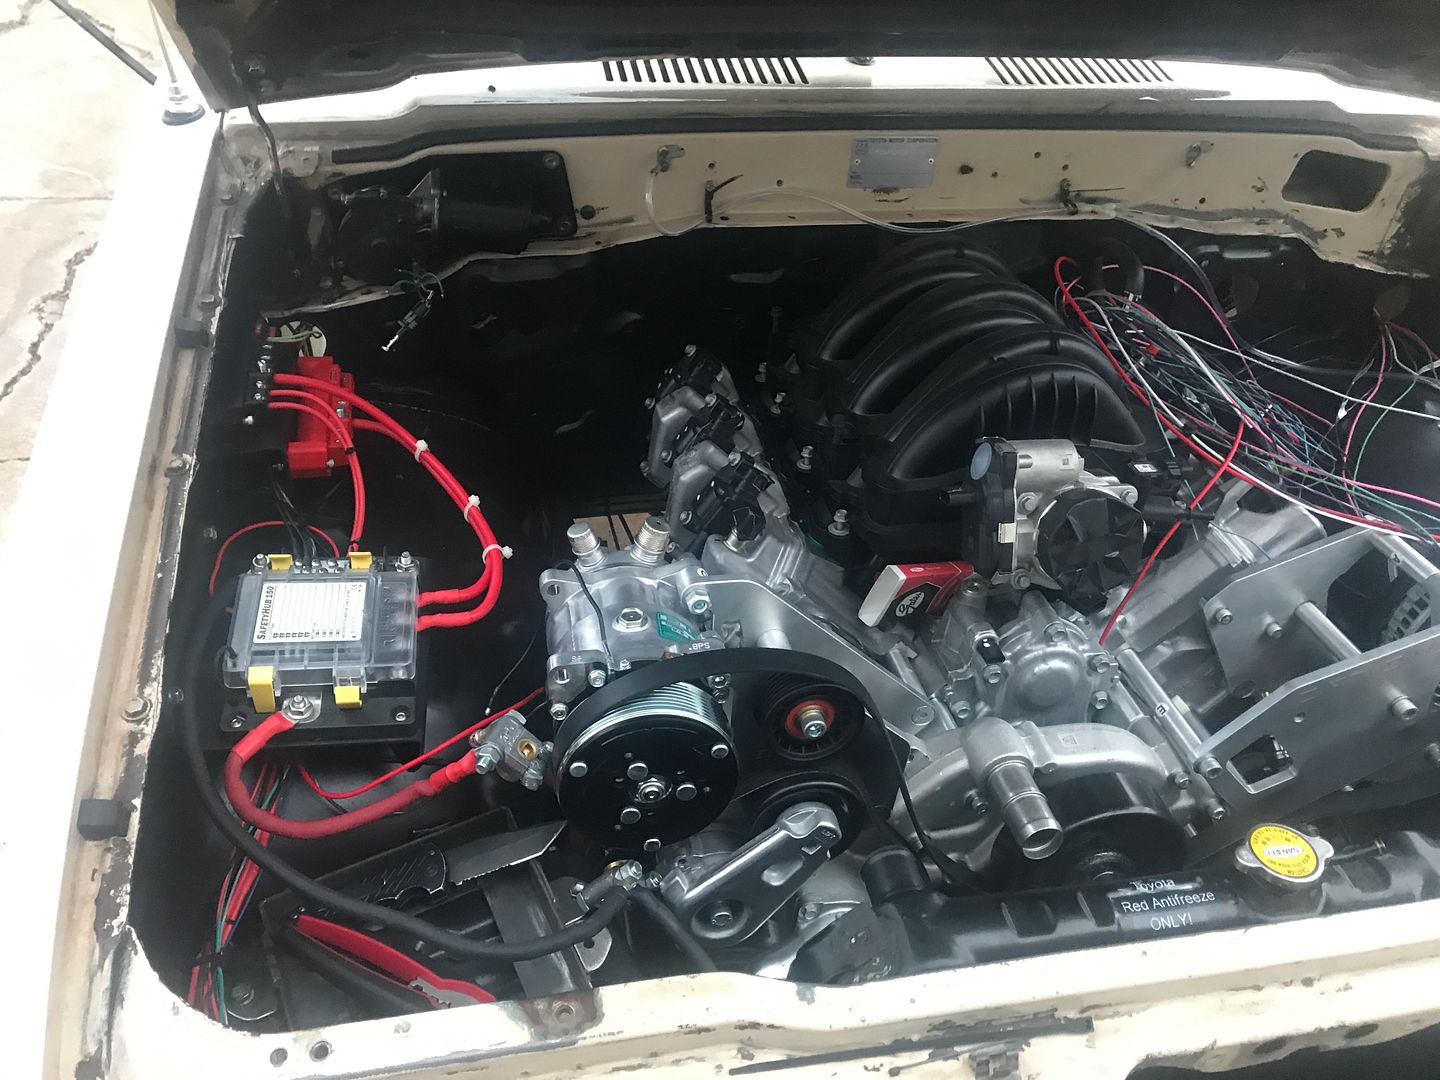
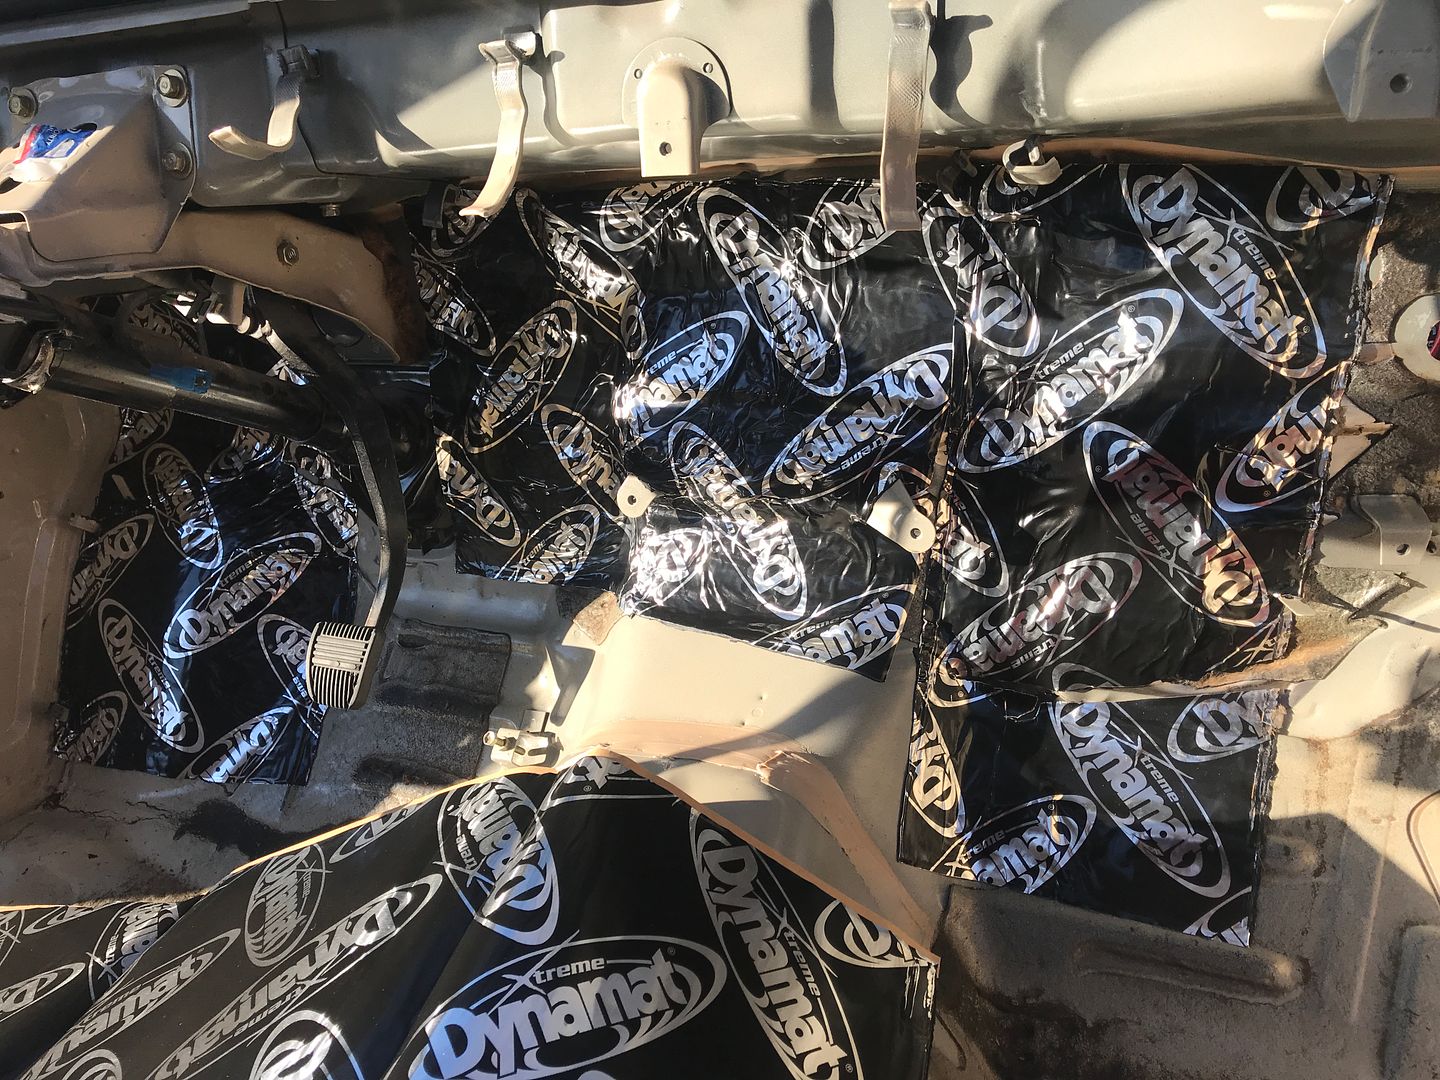
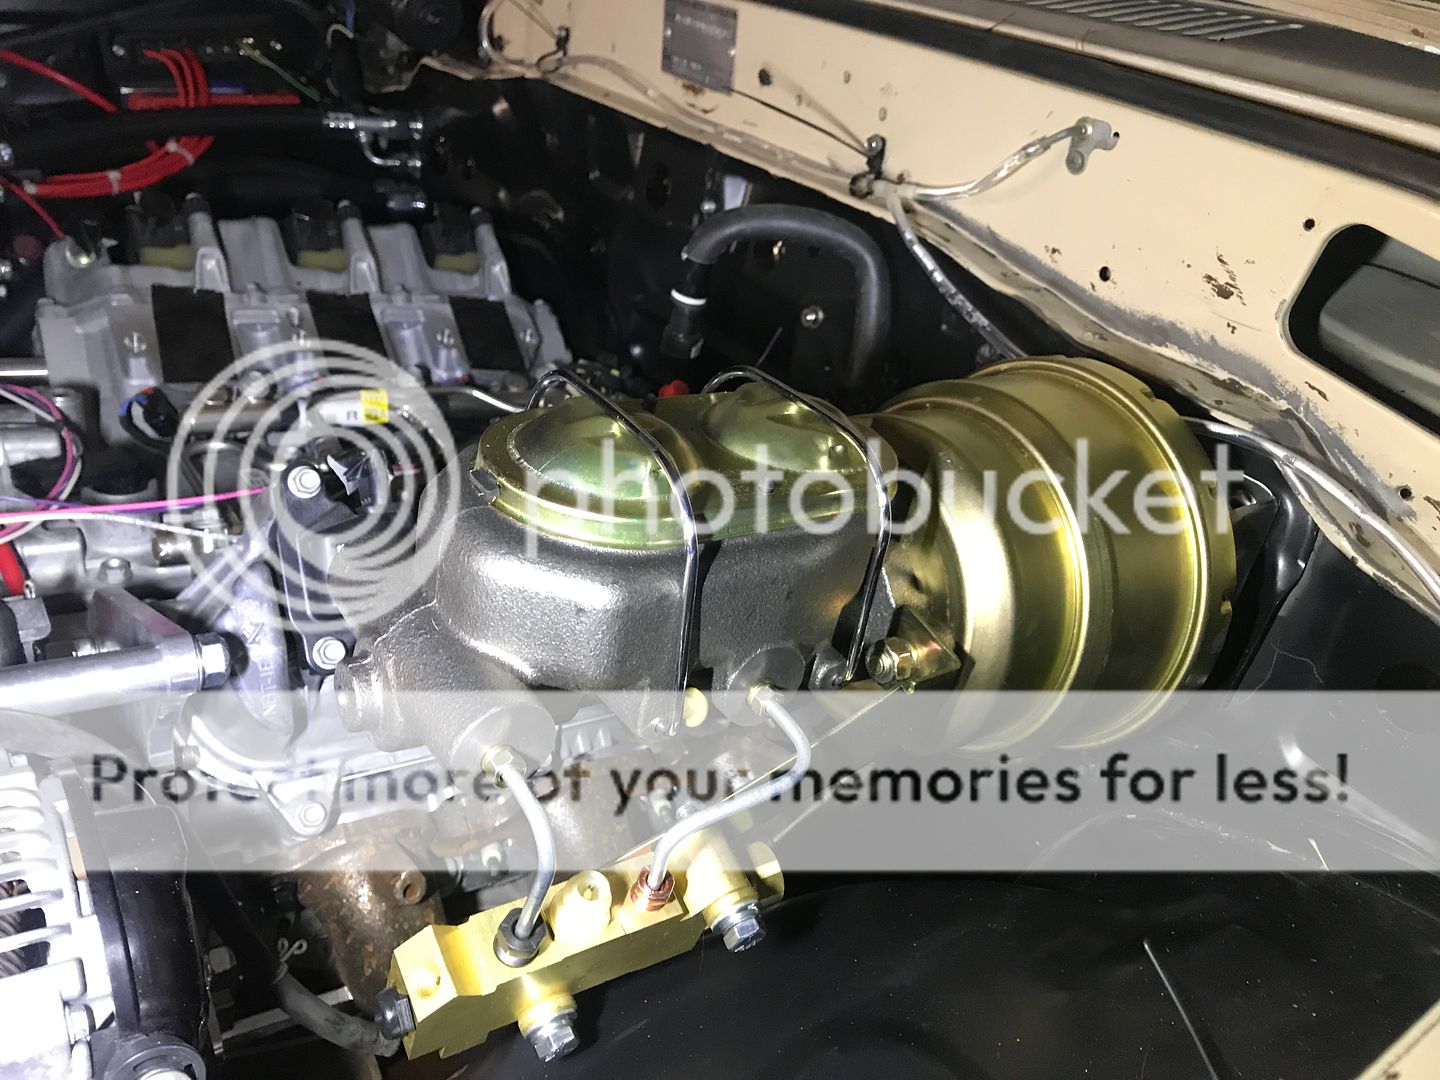
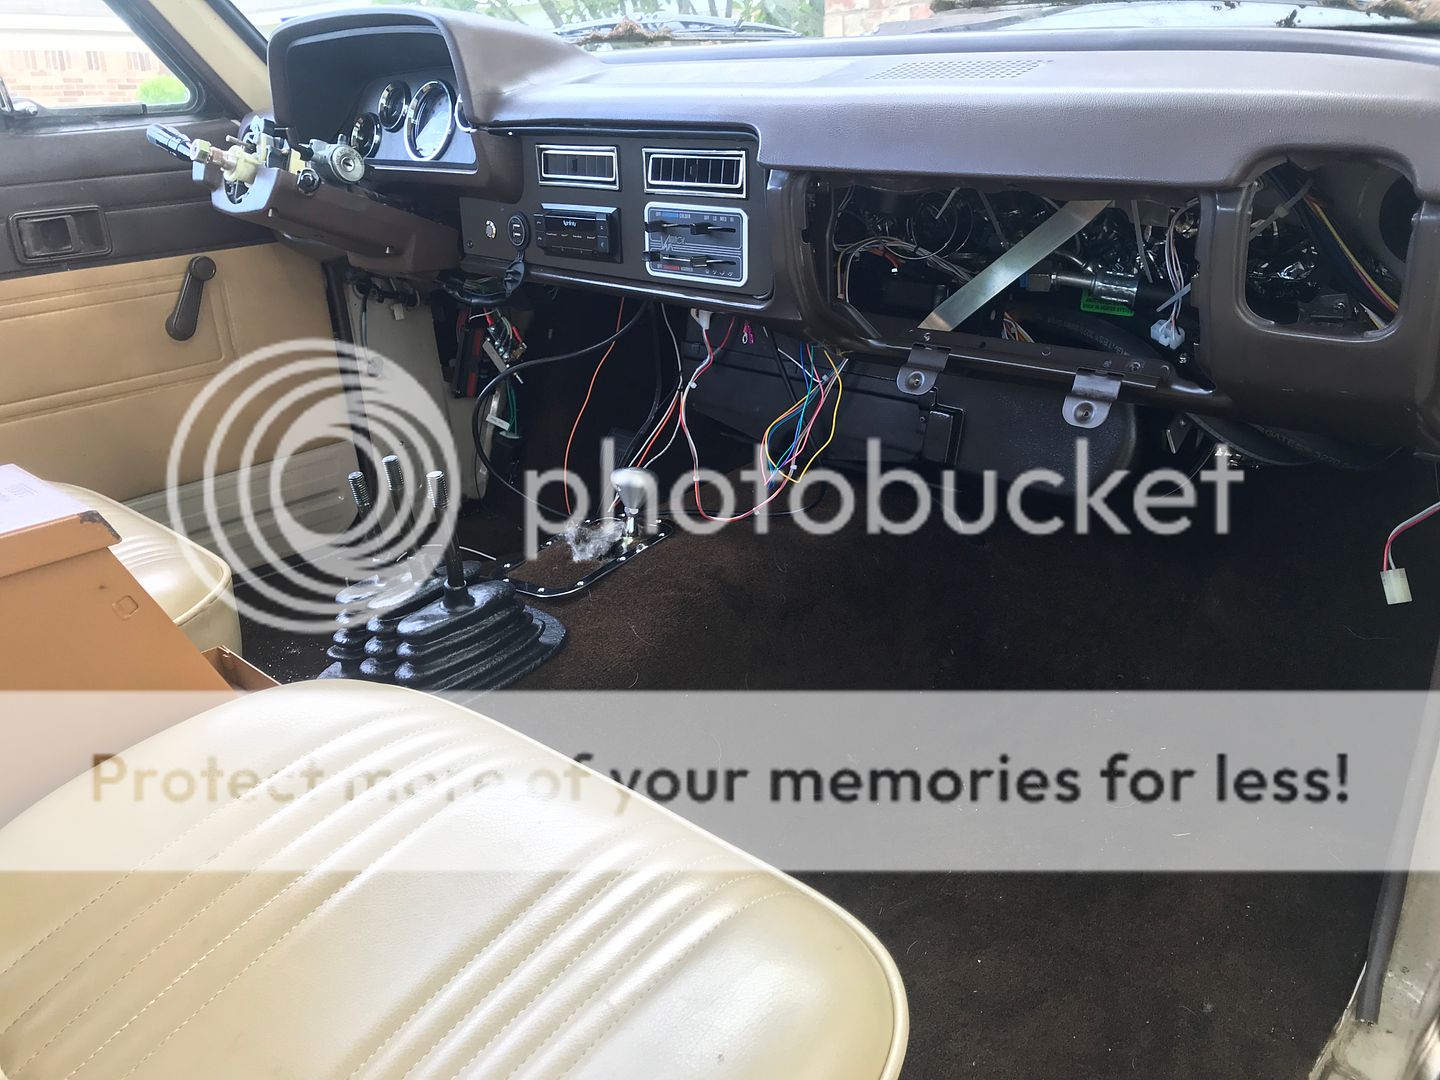
It's been a while since I've done an update. I made a console for all of the shifters, put the brake booster and master cylinder in, made and ran the brake lines, put the fuel pump in the tank, ran the fuel line, moved the axle forward to clear the axle/differential (solid front axle), put a new high pinion differential in the front axle with an Eaton TrueTrac, received and put in the stand alone harness and computer from SwapTime, put the A/C system in, installed almost the entire interior, made a gauge pod, and finished most of the wiring. I'm sure there are a few other things I can't remember at the moment. I'll just post some pictures and make some comments as I go.
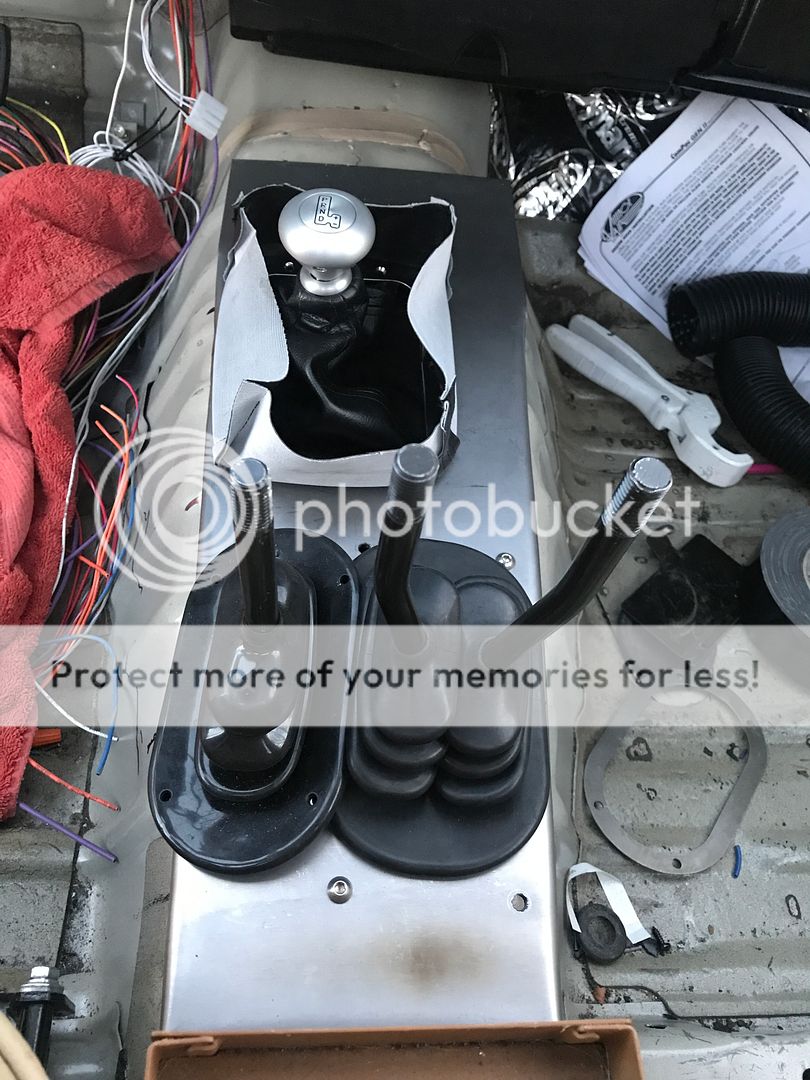
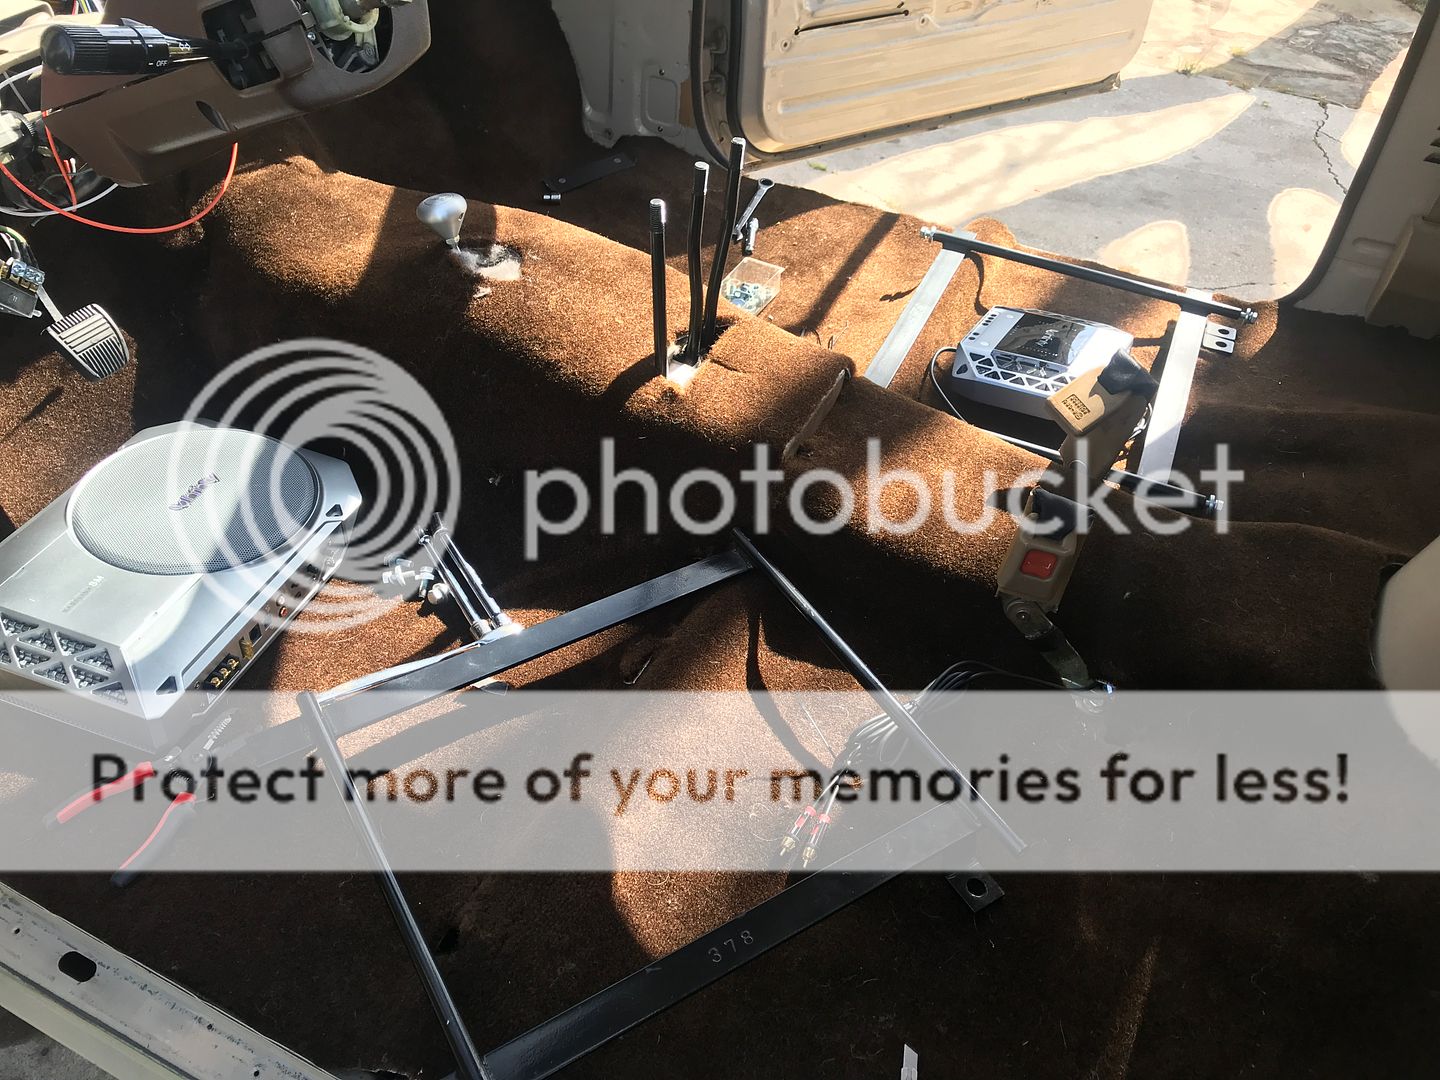
The Lokar 6L80 electronic shifter and the triple sticks for the transfer case. BTW, the Lokar electronic shifter, made specifically for the 6L80 manual shifting, has a design flaw. In order for the transmission to go into manual shift mode the gear shifter has to move one more gear past "D". The Lokar is designed to move to the right while in Drive in order to use the the shifter as a manual. It has a gate that only lets you push the stick to the right while in Drive. Once you shift one more gear down, the gate will not let you push the stick over. Mitch from SwapTime has a stand alone module that he invented to allow a manual shift, but you still have to shift the actual lever past Drive in order for the computer to recognize the manual mode. And, the module cost a lot of money just for that function. It provides many other functions that I don't need though, so I can't justify the extra cost for this. Maybe something will play out. He said he was going to call Lokar to discuss it with them but I'm not aware of the outcome.
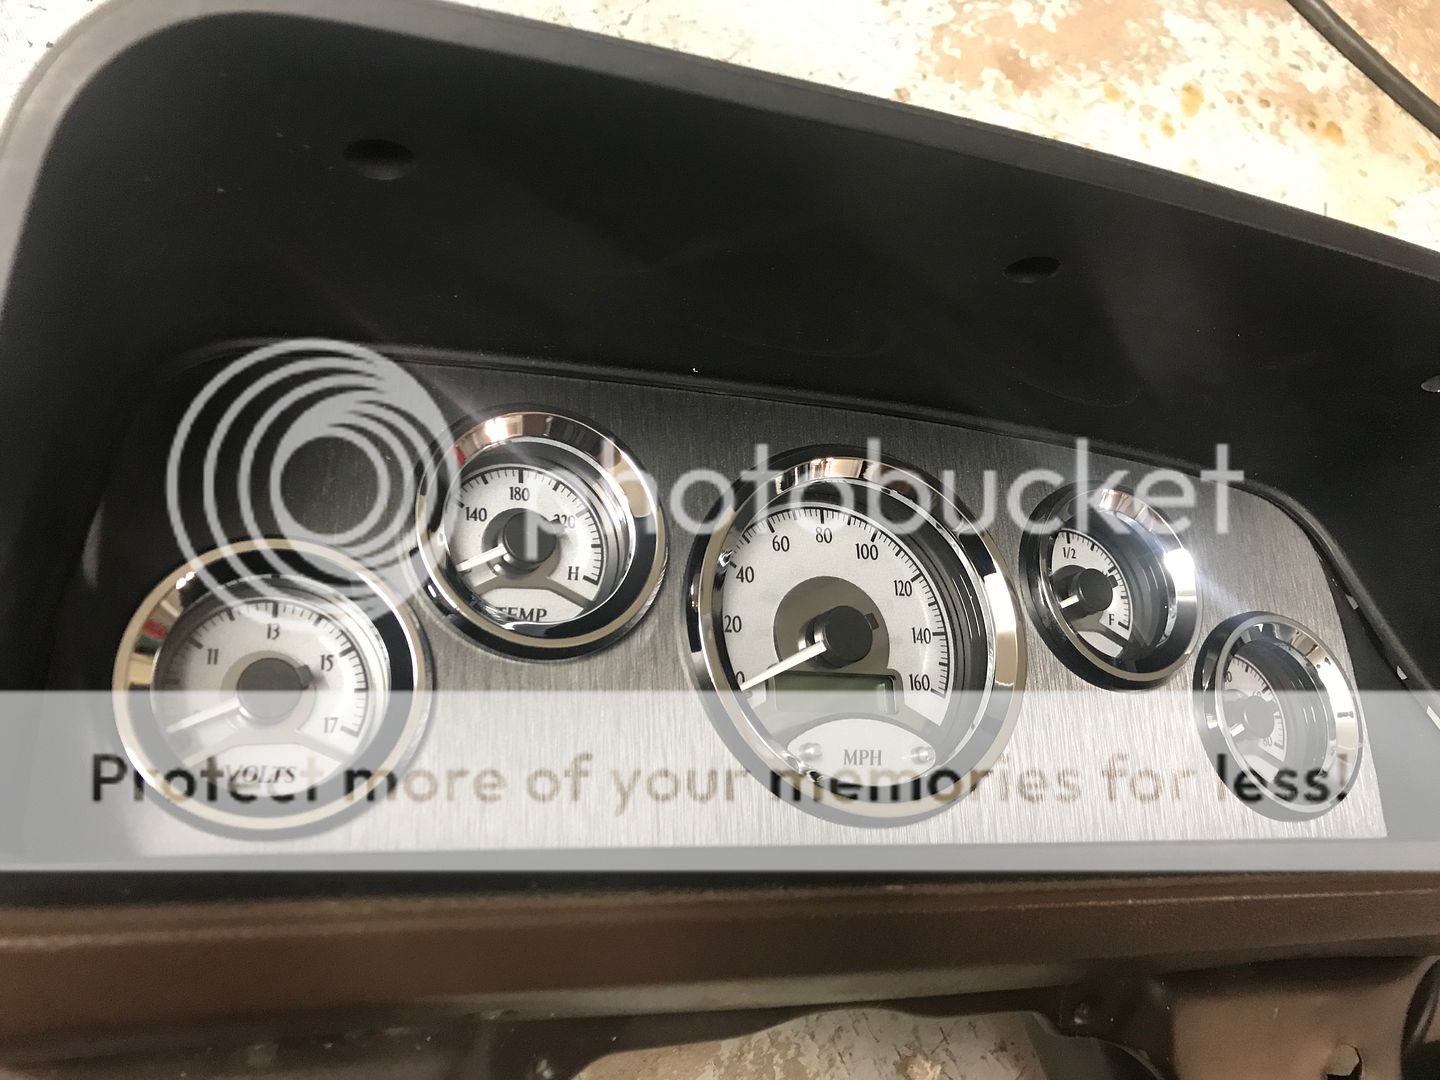
Dakota Digital VHX-1050 gauges
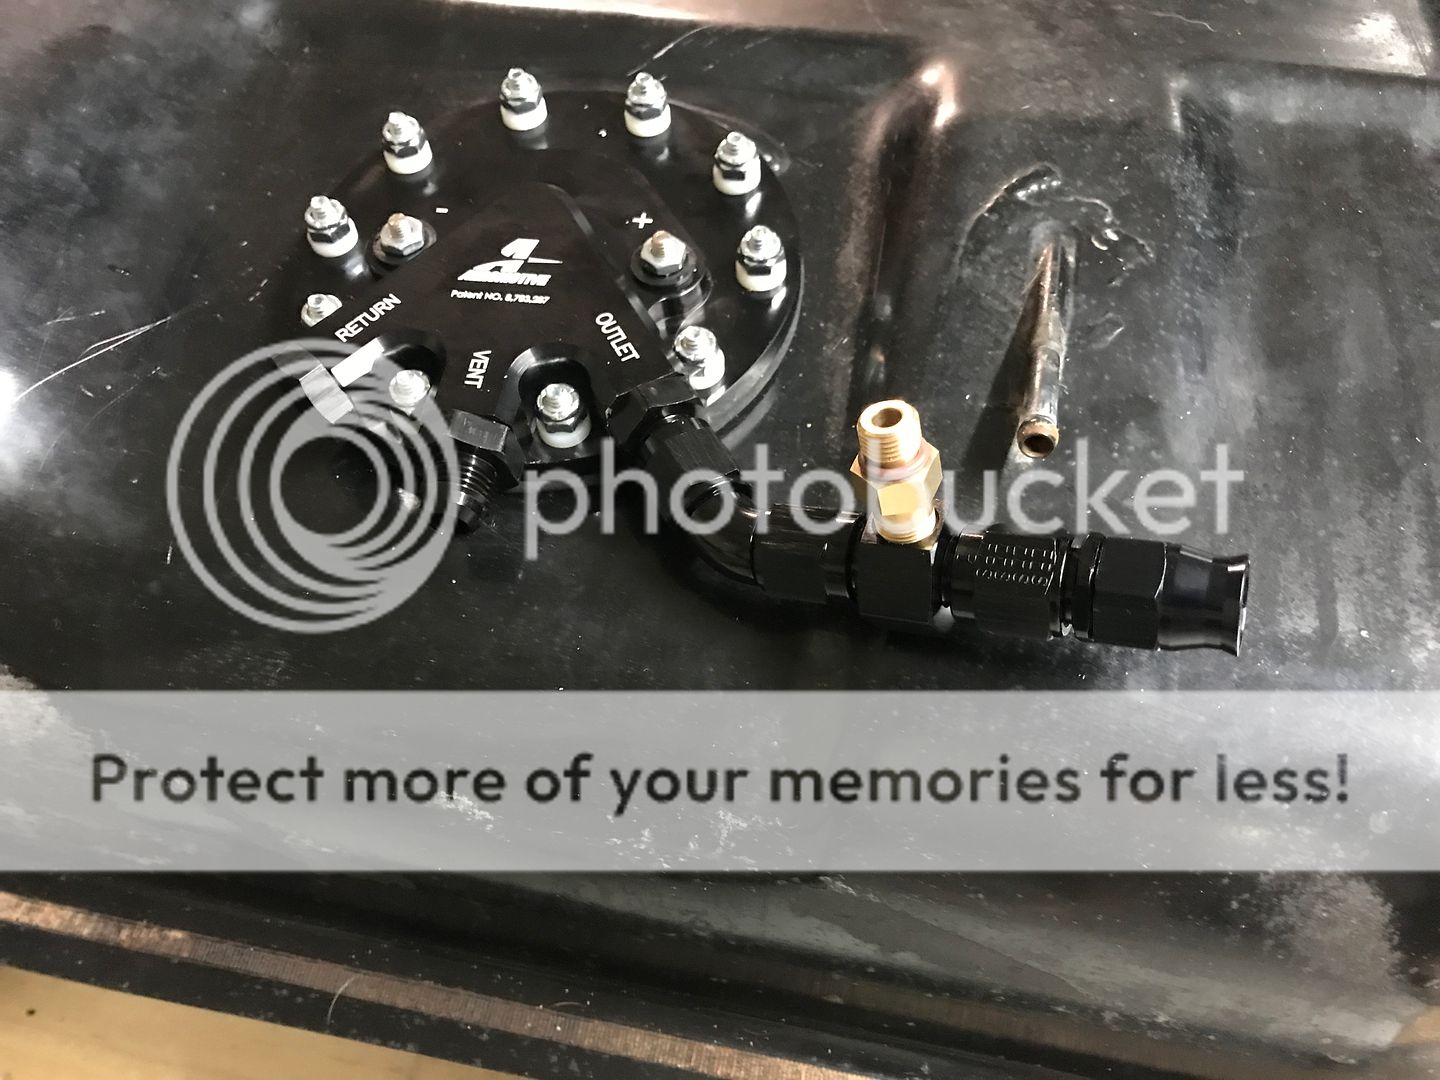
Aeromotive Phantom 340
Putting in some tunes, not much but it should sound good
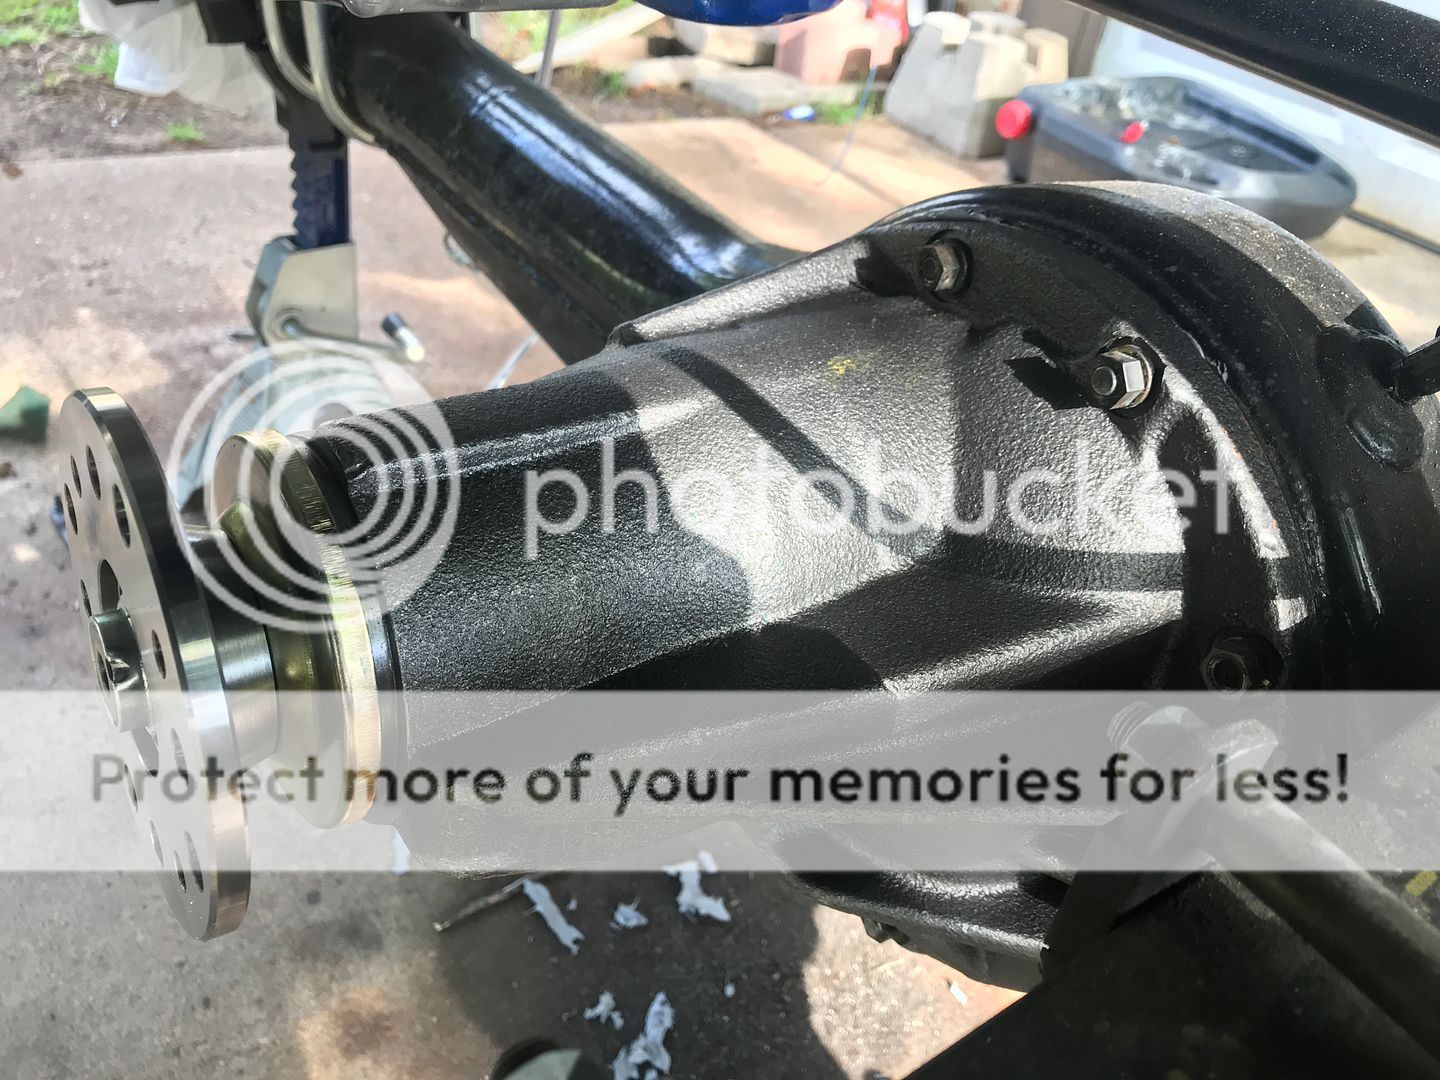
High Pinion differential to help with front propeler shaft angle
Vintage Air Gen 2 Compact
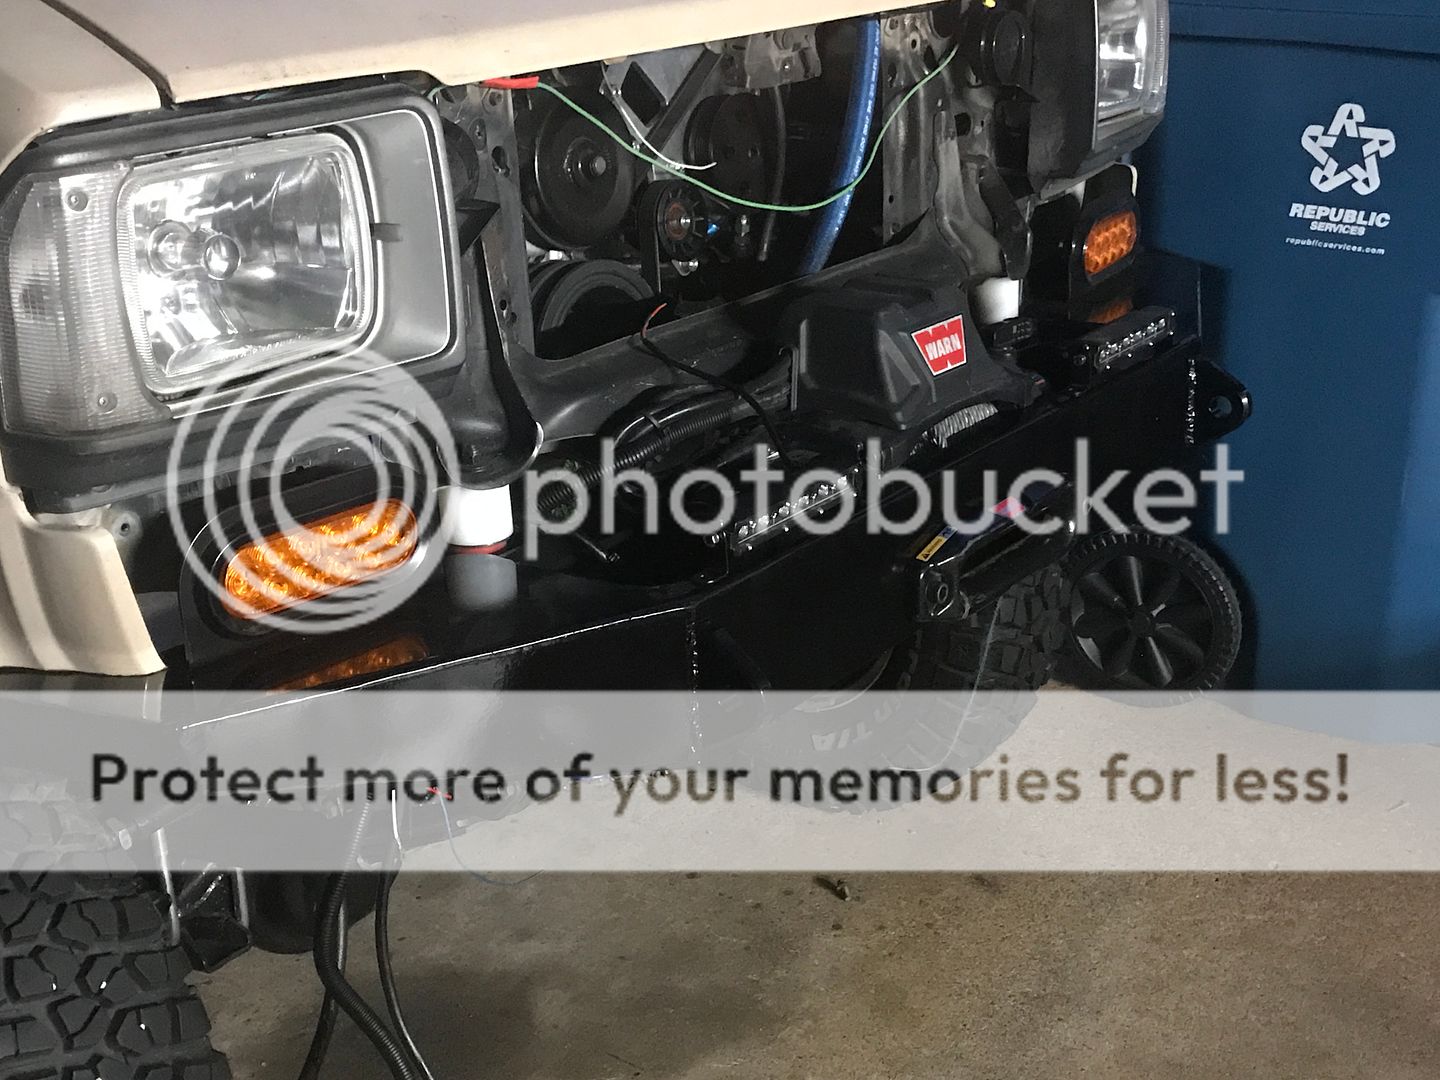
Fabricated a new winch bumper
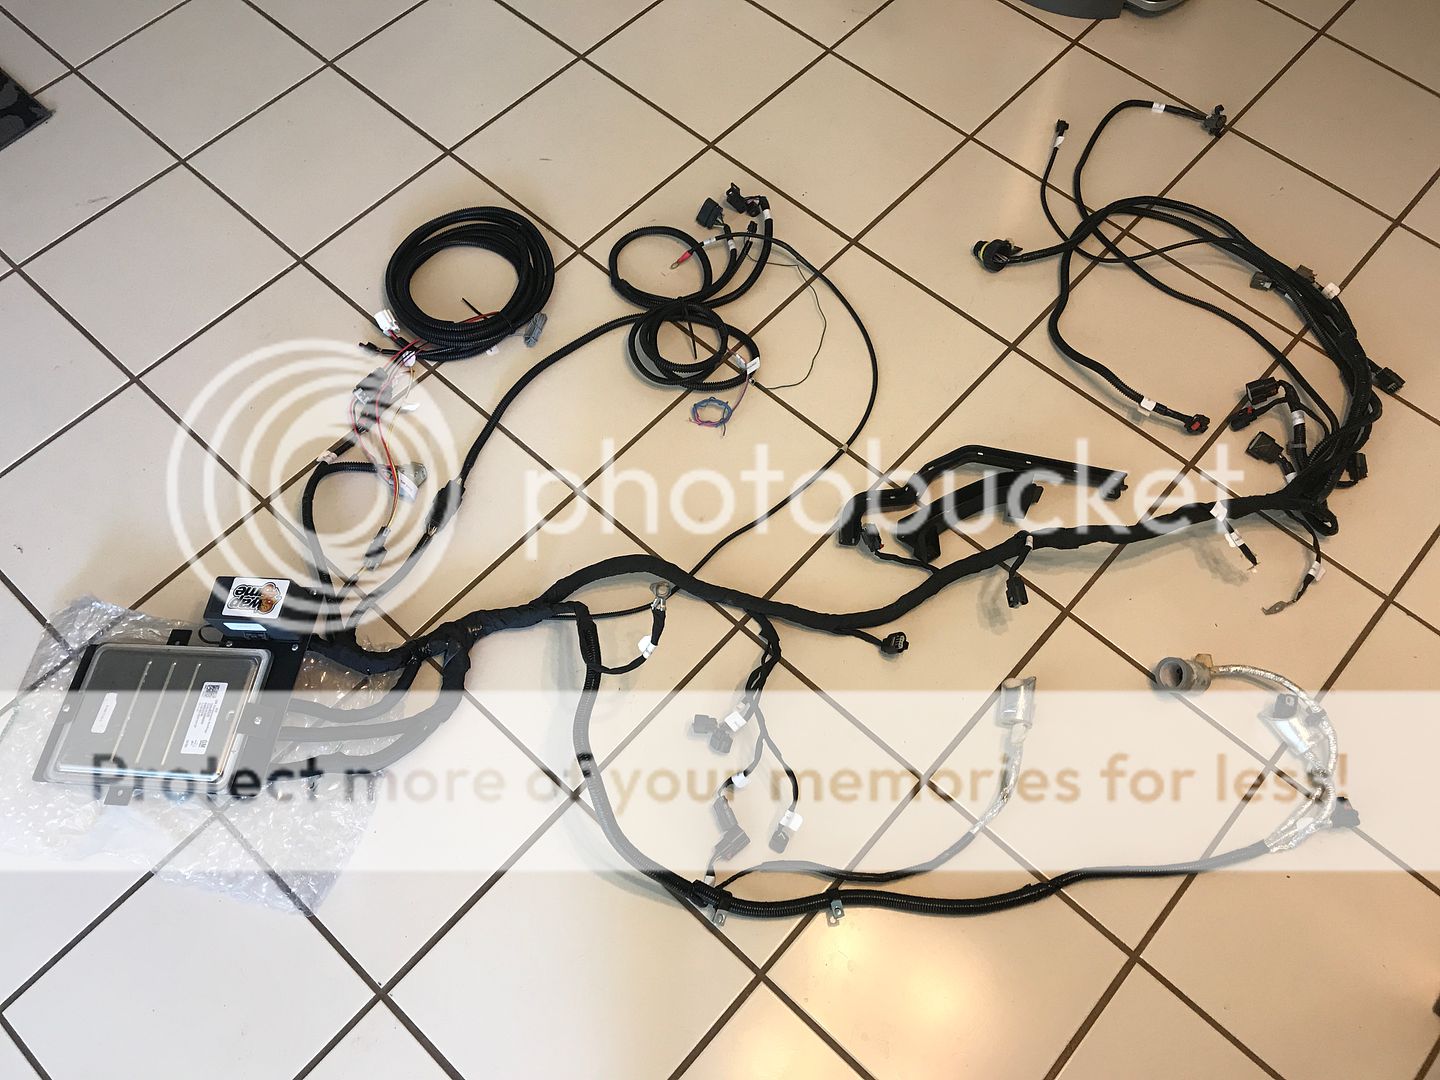
My harness from SwapTime
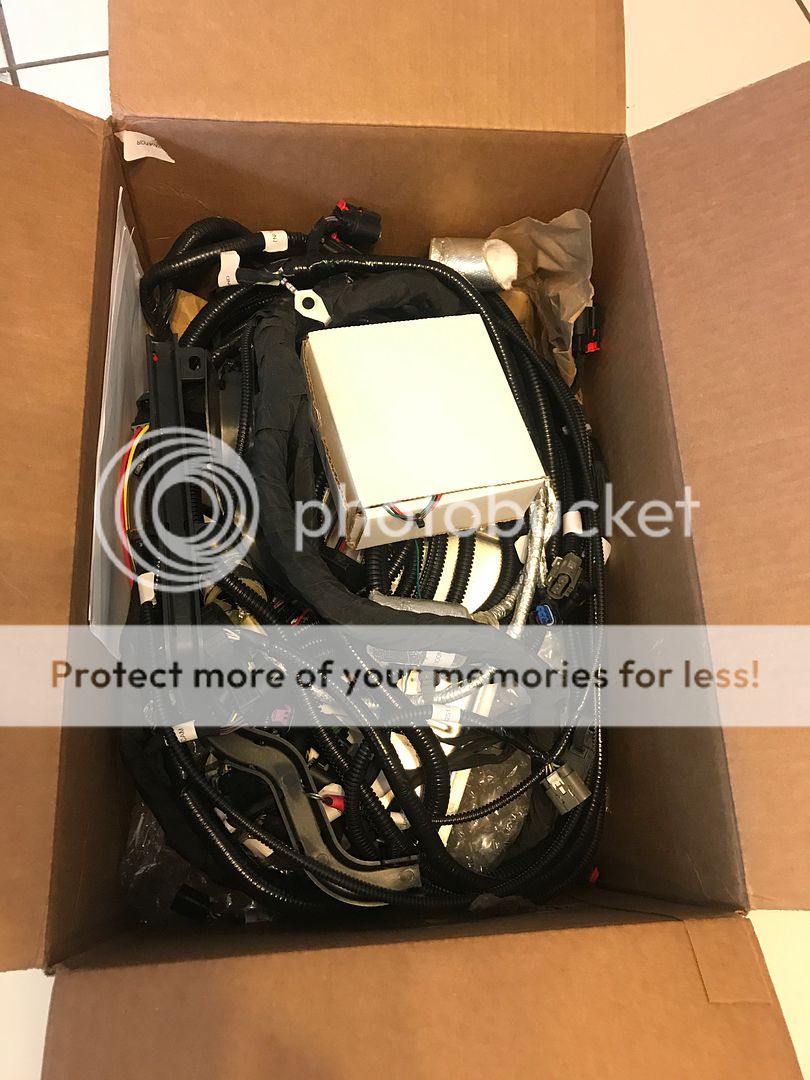
Yep, my dog Ruger was helping me
I think the harness turned out well. Everything connected where it was supposed to
Computer mounted. It's getting pretty crowded in there
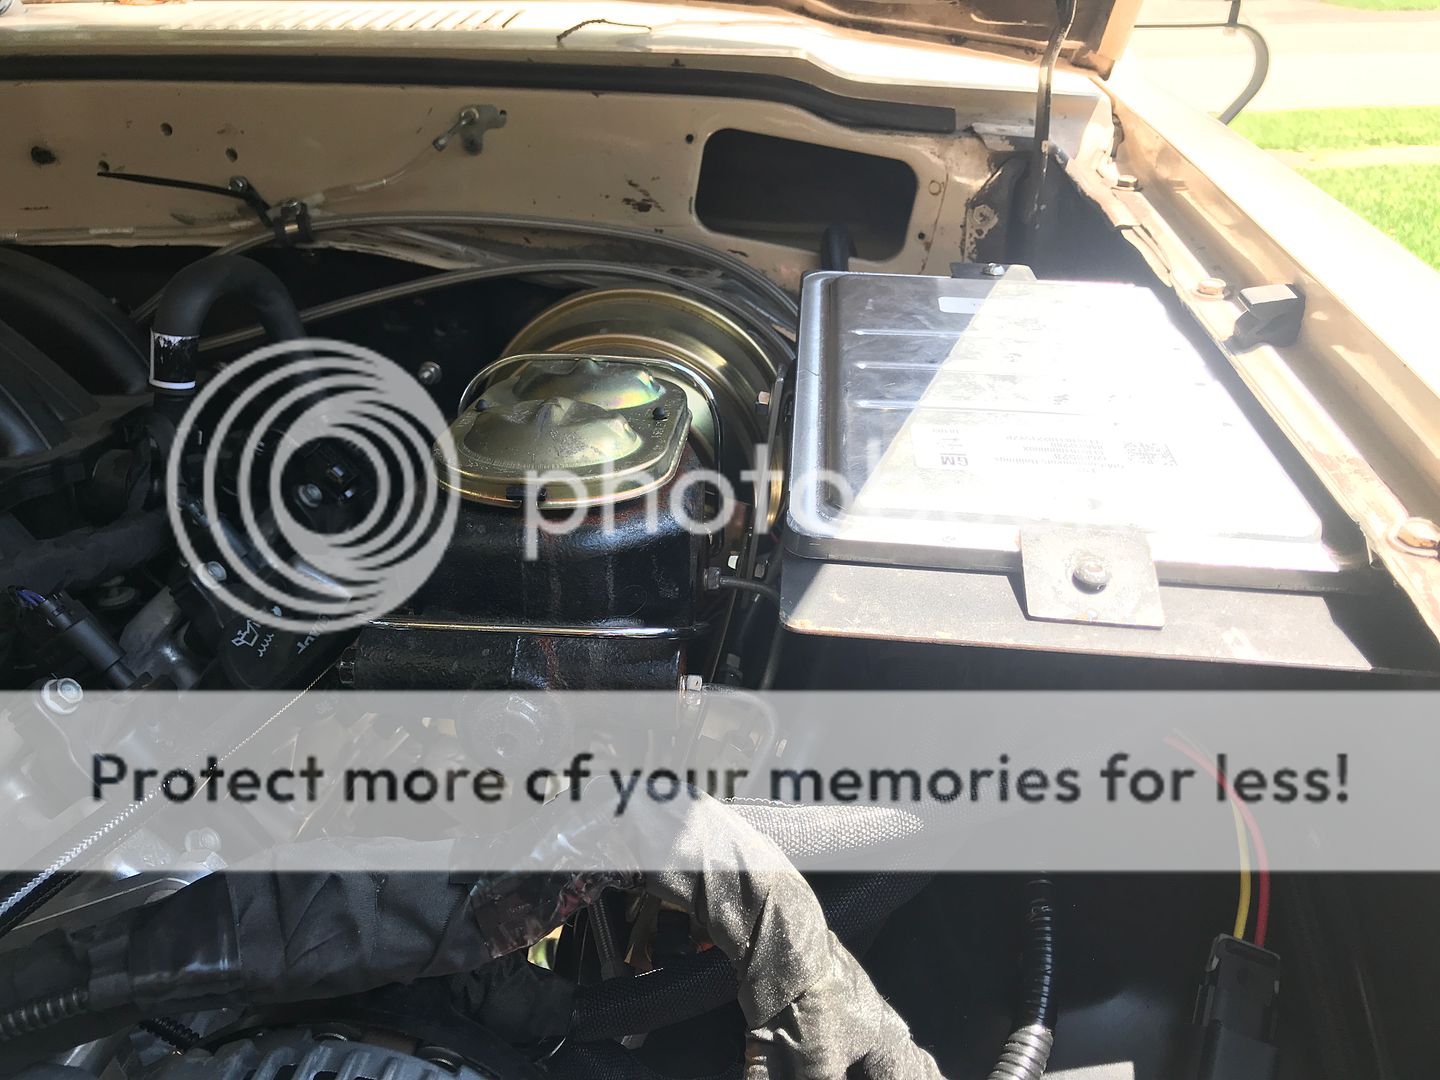
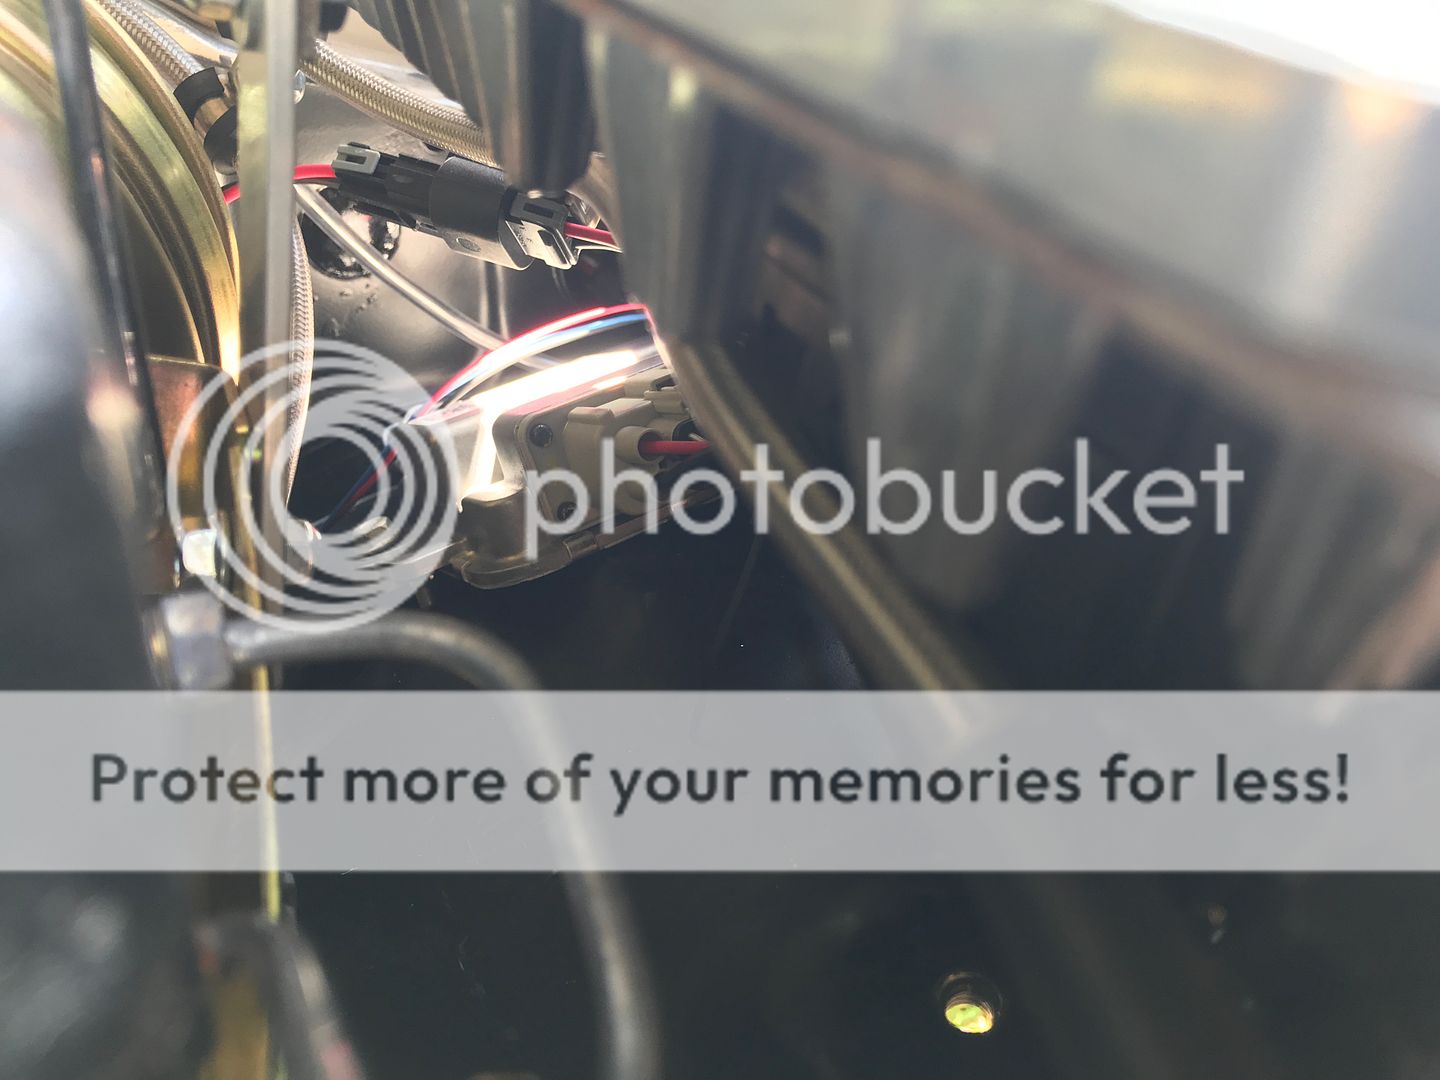
The FPCM mounted under there somewhere, right next to the fire wall
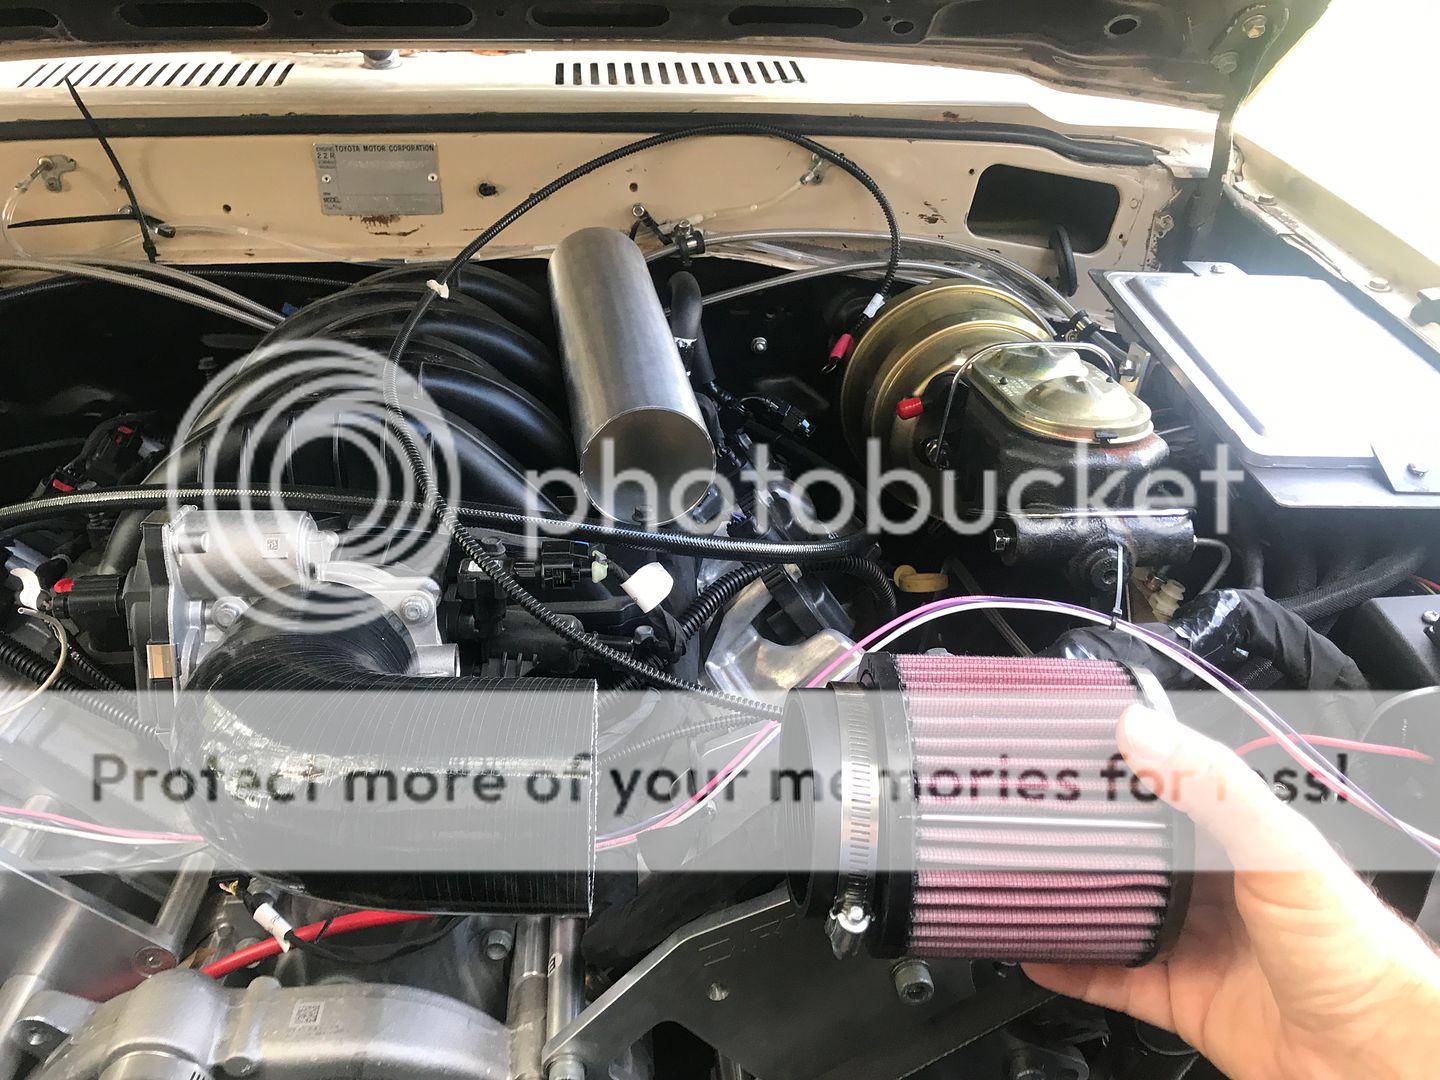
I started mocking up the air intake
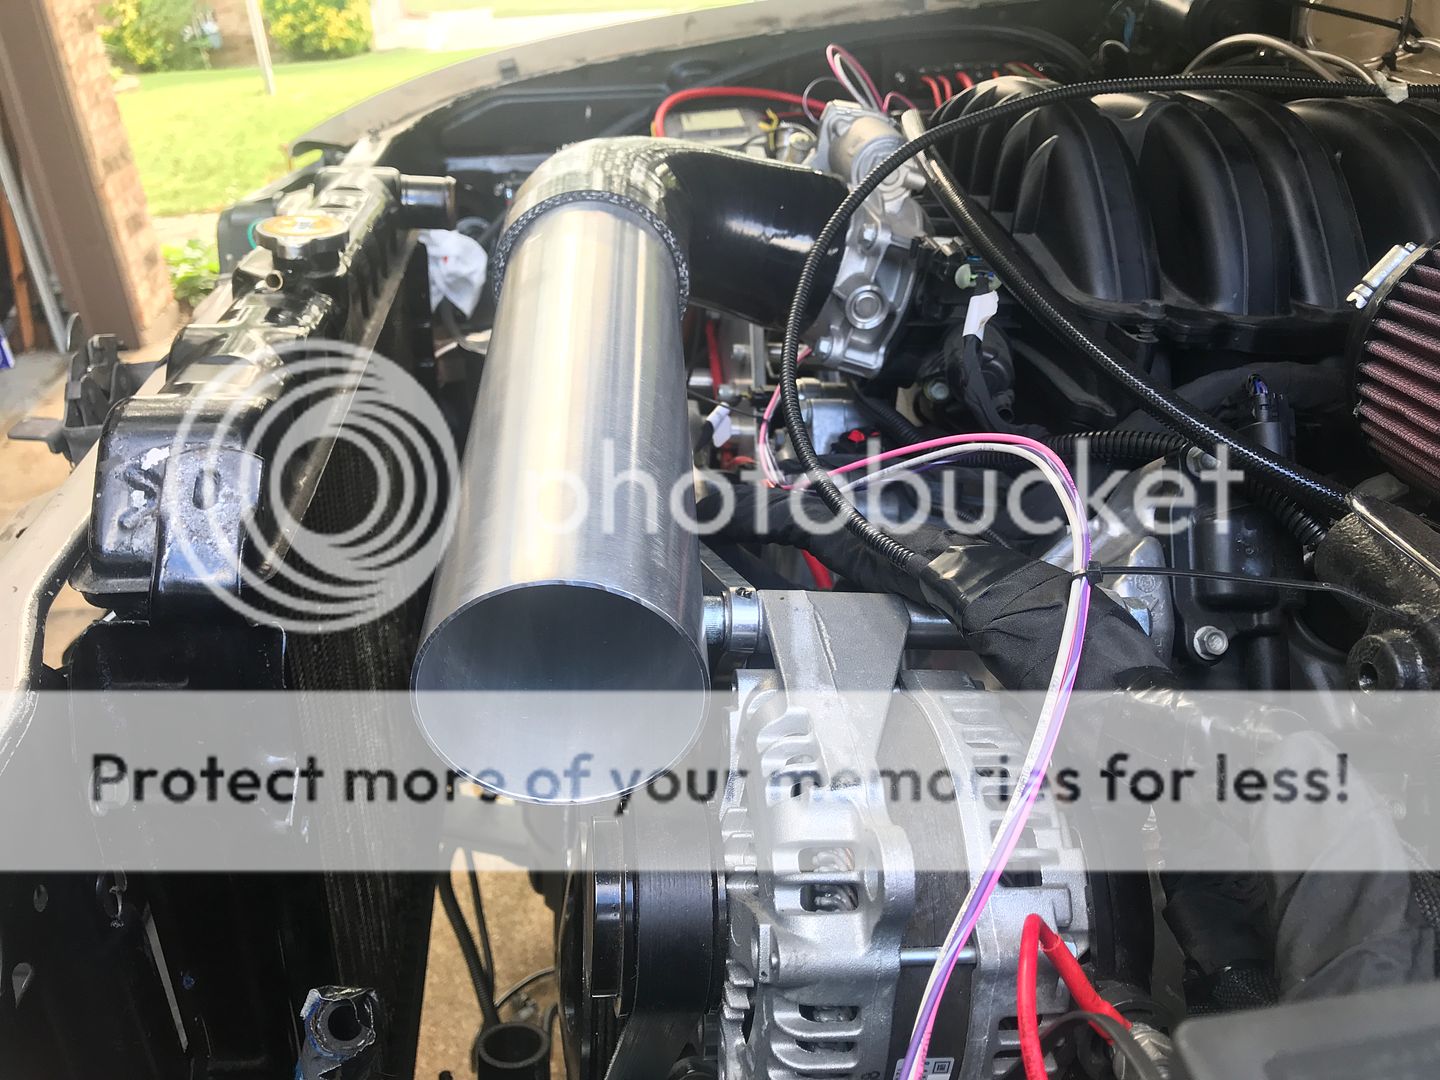
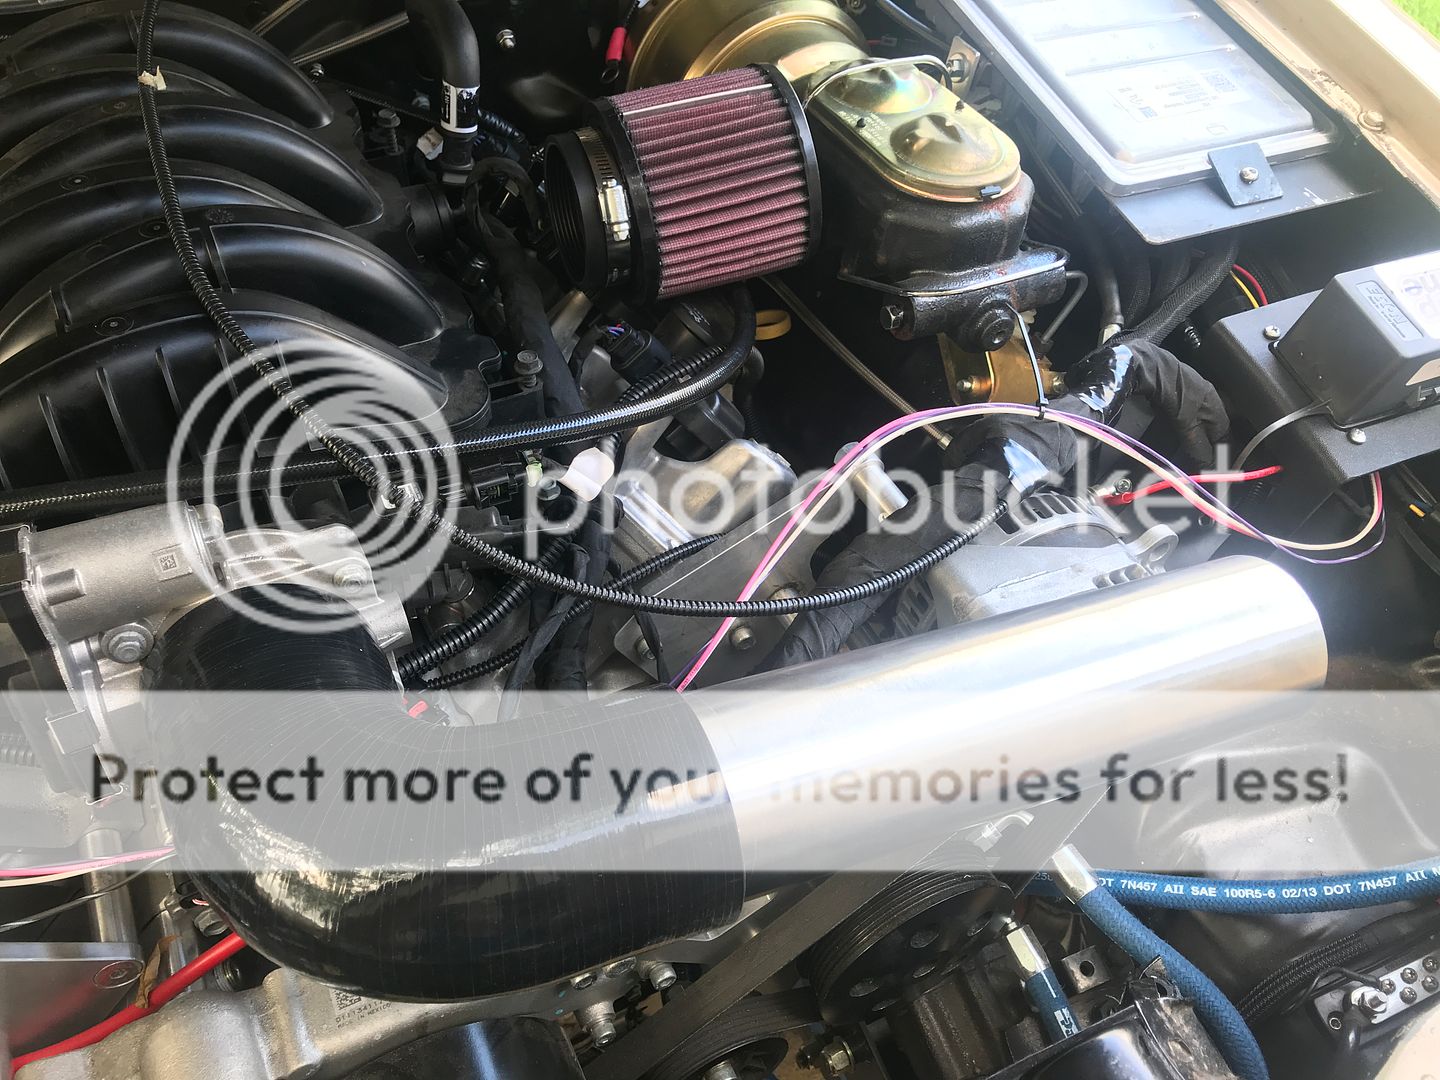
I'm not sure if that filter is going to flow as much air as the engine needs. We'll see. I'm still searching for someone to weld in the MAF boss
I need to rewire the connectors for the fuel pump, low pressure fuel line sensor, and fuel sender. No biggie. I need to finish the exhaust manifolds and put in temporary O2 sensor bosses, fabricate a bracket for the power steering pump, and finish up some other wiring before I can attempt to start it.
The Lokar 6L80 electronic shifter and the triple sticks for the transfer case. BTW, the Lokar electronic shifter, made specifically for the 6L80 manual shifting, has a design flaw. In order for the transmission to go into manual shift mode the gear shifter has to move one more gear past "D". The Lokar is designed to move to the right while in Drive in order to use the the shifter as a manual. It has a gate that only lets you push the stick to the right while in Drive. Once you shift one more gear down, the gate will not let you push the stick over. Mitch from SwapTime has a stand alone module that he invented to allow a manual shift, but you still have to shift the actual lever past Drive in order for the computer to recognize the manual mode. And, the module cost a lot of money just for that function. It provides many other functions that I don't need though, so I can't justify the extra cost for this. Maybe something will play out. He said he was going to call Lokar to discuss it with them but I'm not aware of the outcome.


Dakota Digital VHX-1050 gauges
Aeromotive Phantom 340

Putting in some tunes, not much but it should sound good

High Pinion differential to help with front propeler shaft angle

Vintage Air Gen 2 Compact

Fabricated a new winch bumper

My harness from SwapTime

Yep, my dog Ruger was helping me

I think the harness turned out well. Everything connected where it was supposed to

Computer mounted. It's getting pretty crowded in there

The FPCM mounted under there somewhere, right next to the fire wall

I started mocking up the air intake


I'm not sure if that filter is going to flow as much air as the engine needs. We'll see. I'm still searching for someone to weld in the MAF boss

I need to rewire the connectors for the fuel pump, low pressure fuel line sensor, and fuel sender. No biggie. I need to finish the exhaust manifolds and put in temporary O2 sensor bosses, fabricate a bracket for the power steering pump, and finish up some other wiring before I can attempt to start it.
08-18-2019, 05:09 PM
#18
Update:
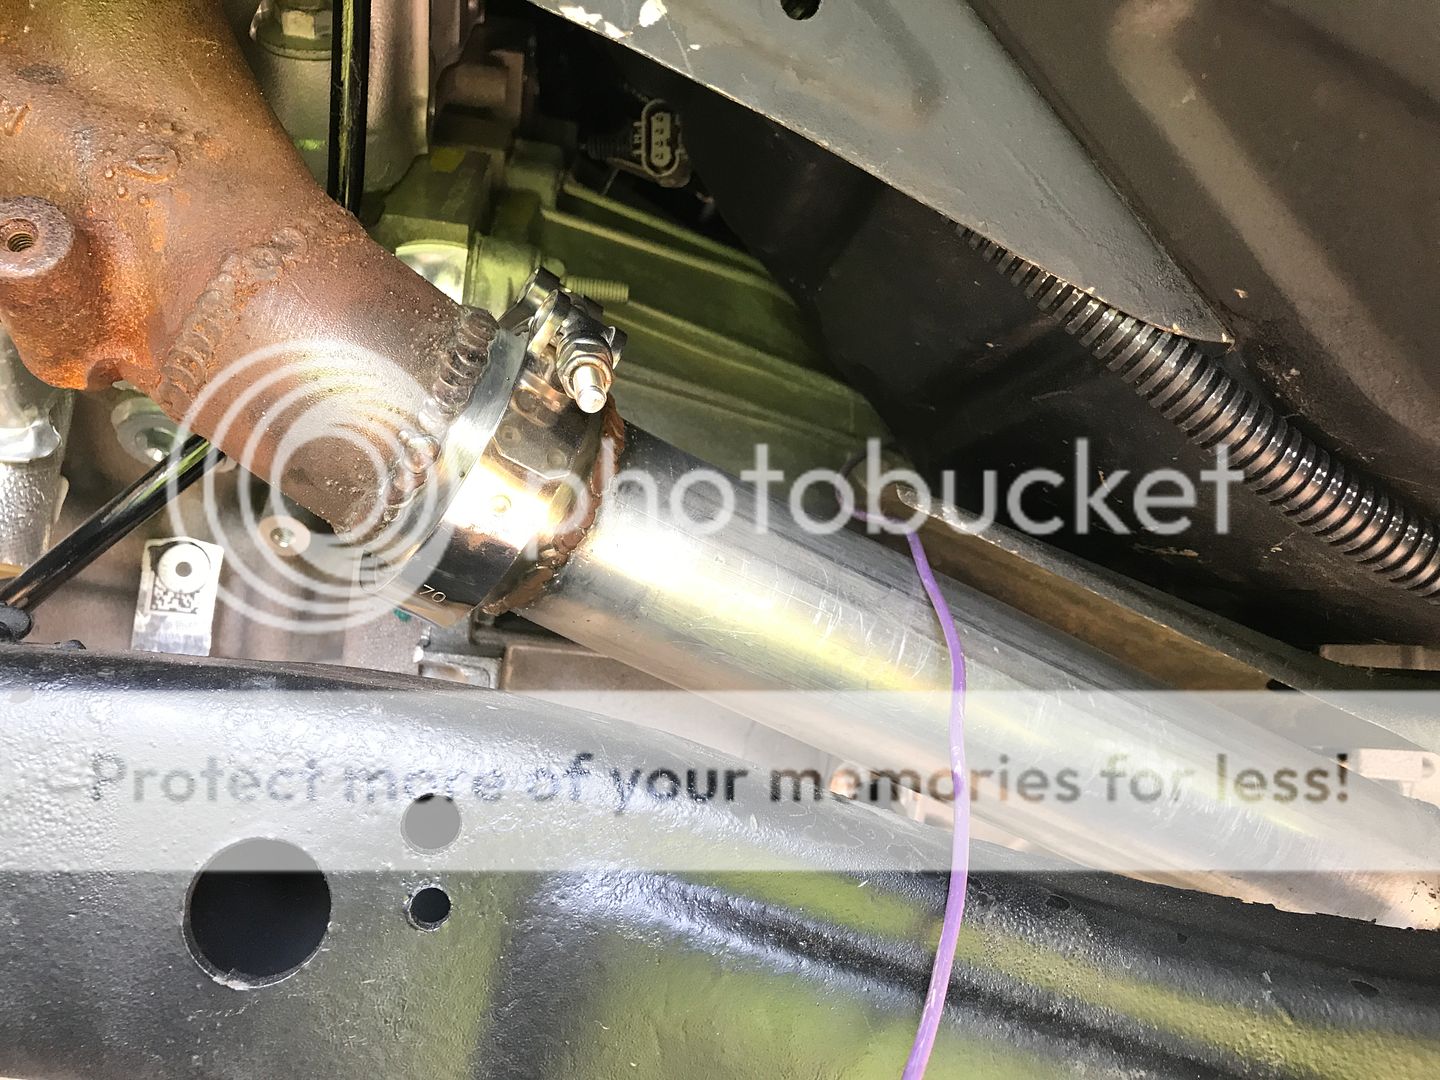
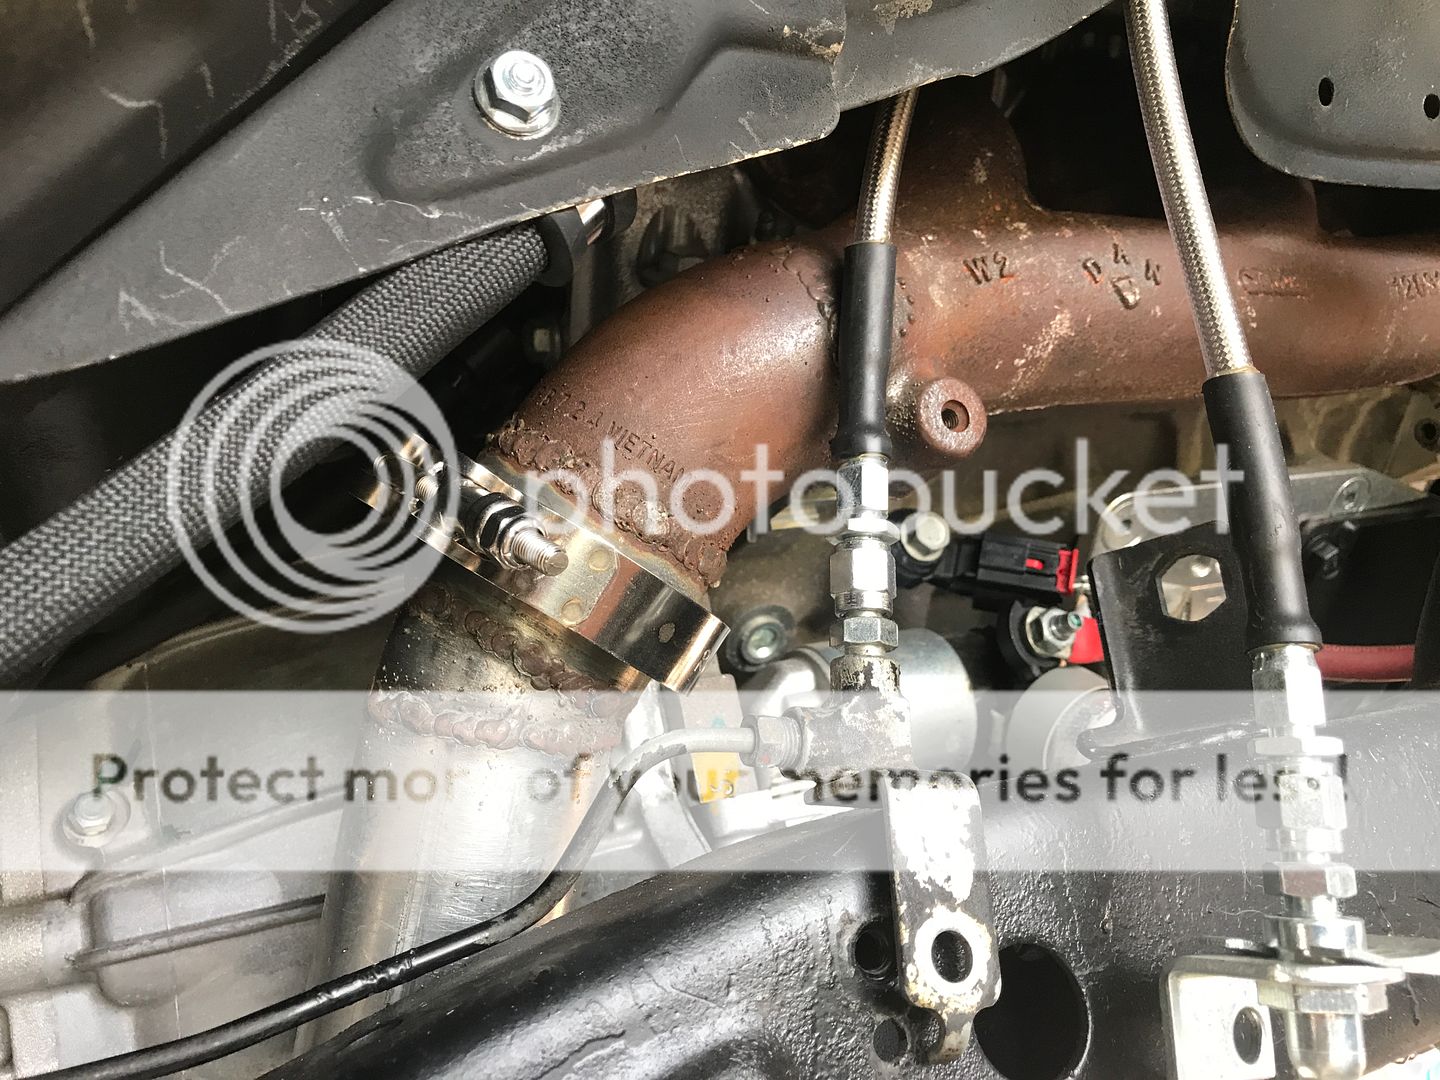
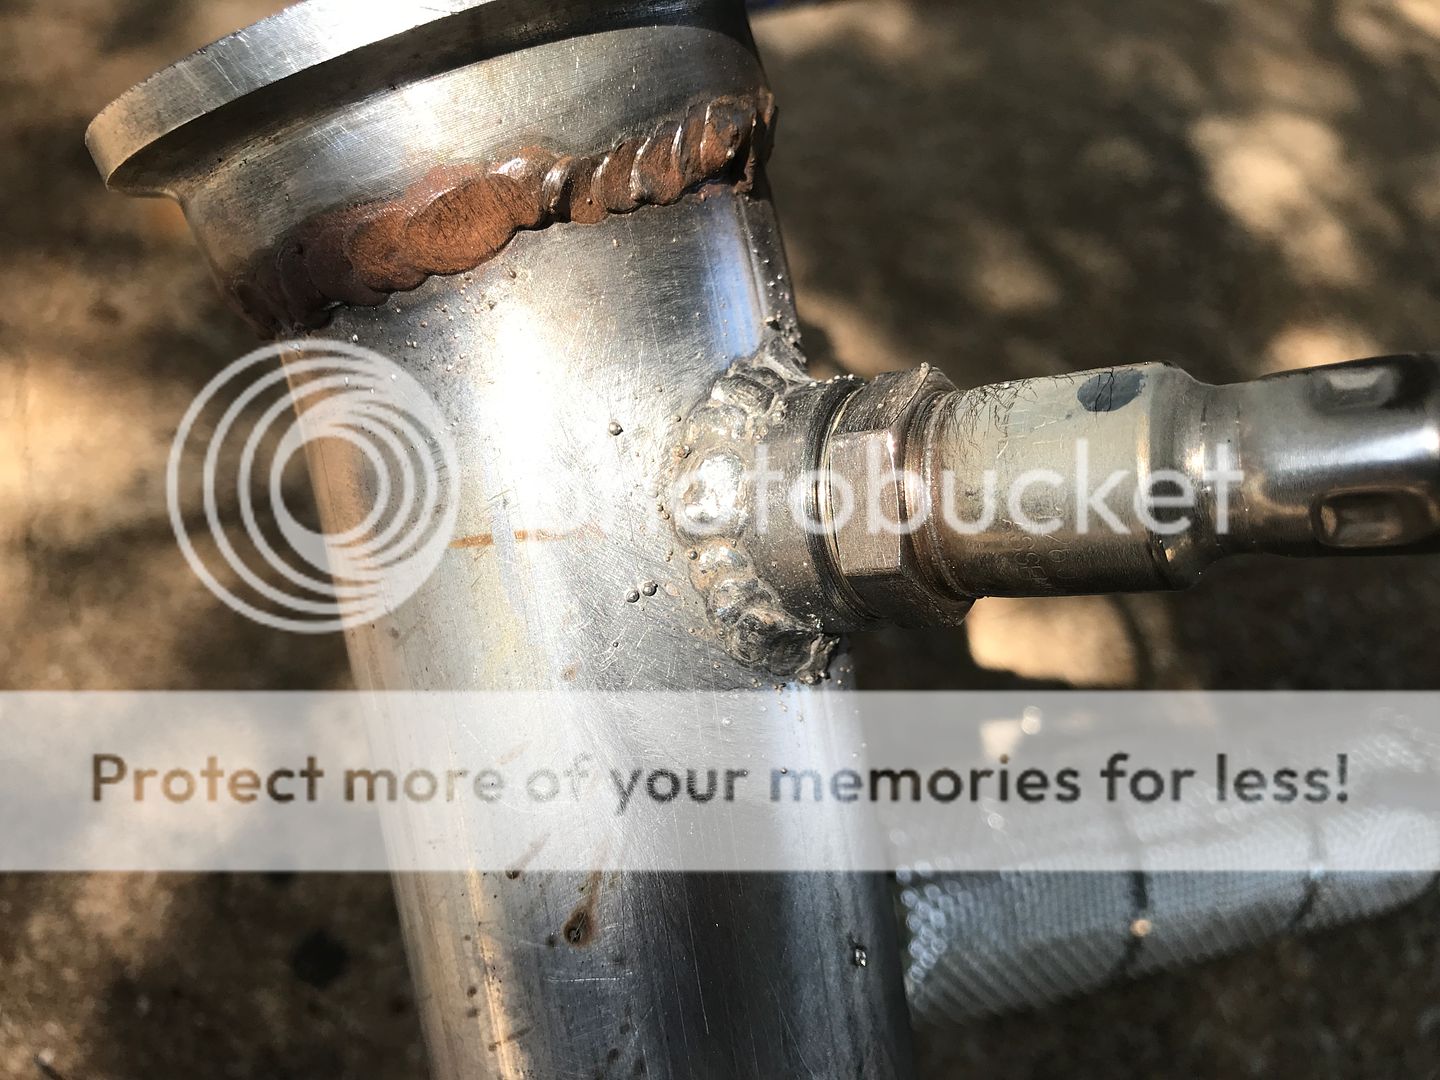
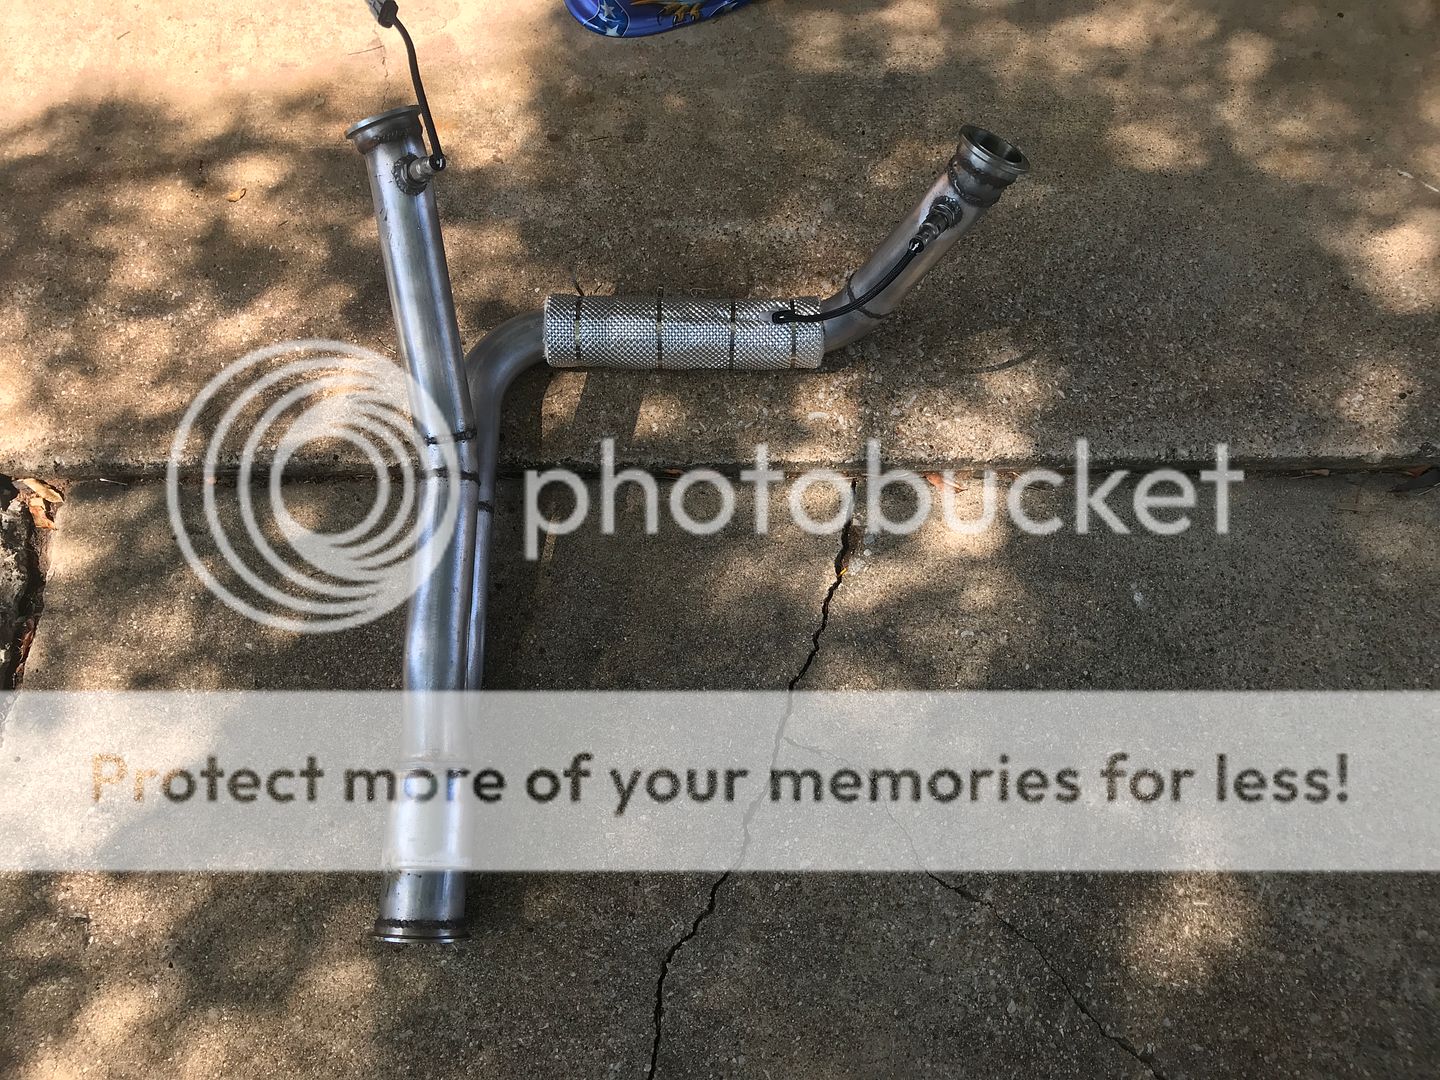
I finished the exhaust manifolds, made a y-pipe, and welded in the O2 sensor bungs.
Driver side
Passenger side
Down from the passenger side, under the transmission and then towards the rear into the y-pipe.

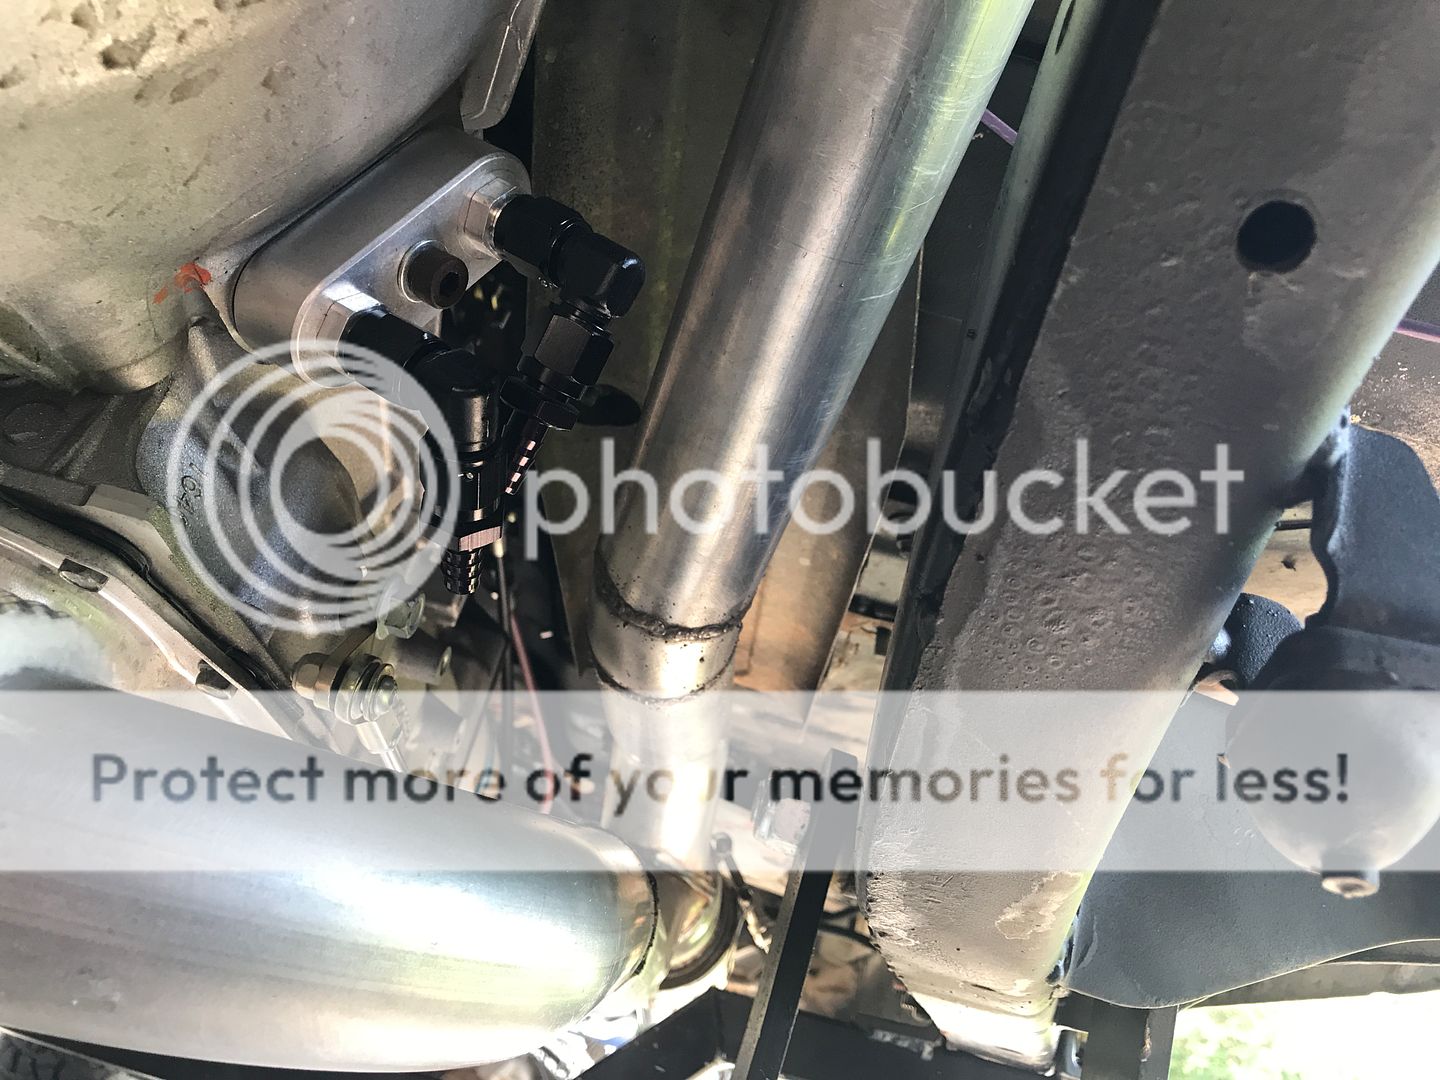
It's 2.25" into 3"


I was able to check every wire circuit on the truck and had to make a couple of minor alterations. Power to the gauges felt like a big step forward.


Set my original mileage into the Dakota Digital cluster

I'm waiting on the Muscle Car Module from SwapTime. It should be here this next week. So far everything is working correctly. The BIM is talking to the ECU and gauge cluster. I was able to crank it to make sure if oil pressure gauge was working properly. Put all the fluids in and had to tighten a few lines.
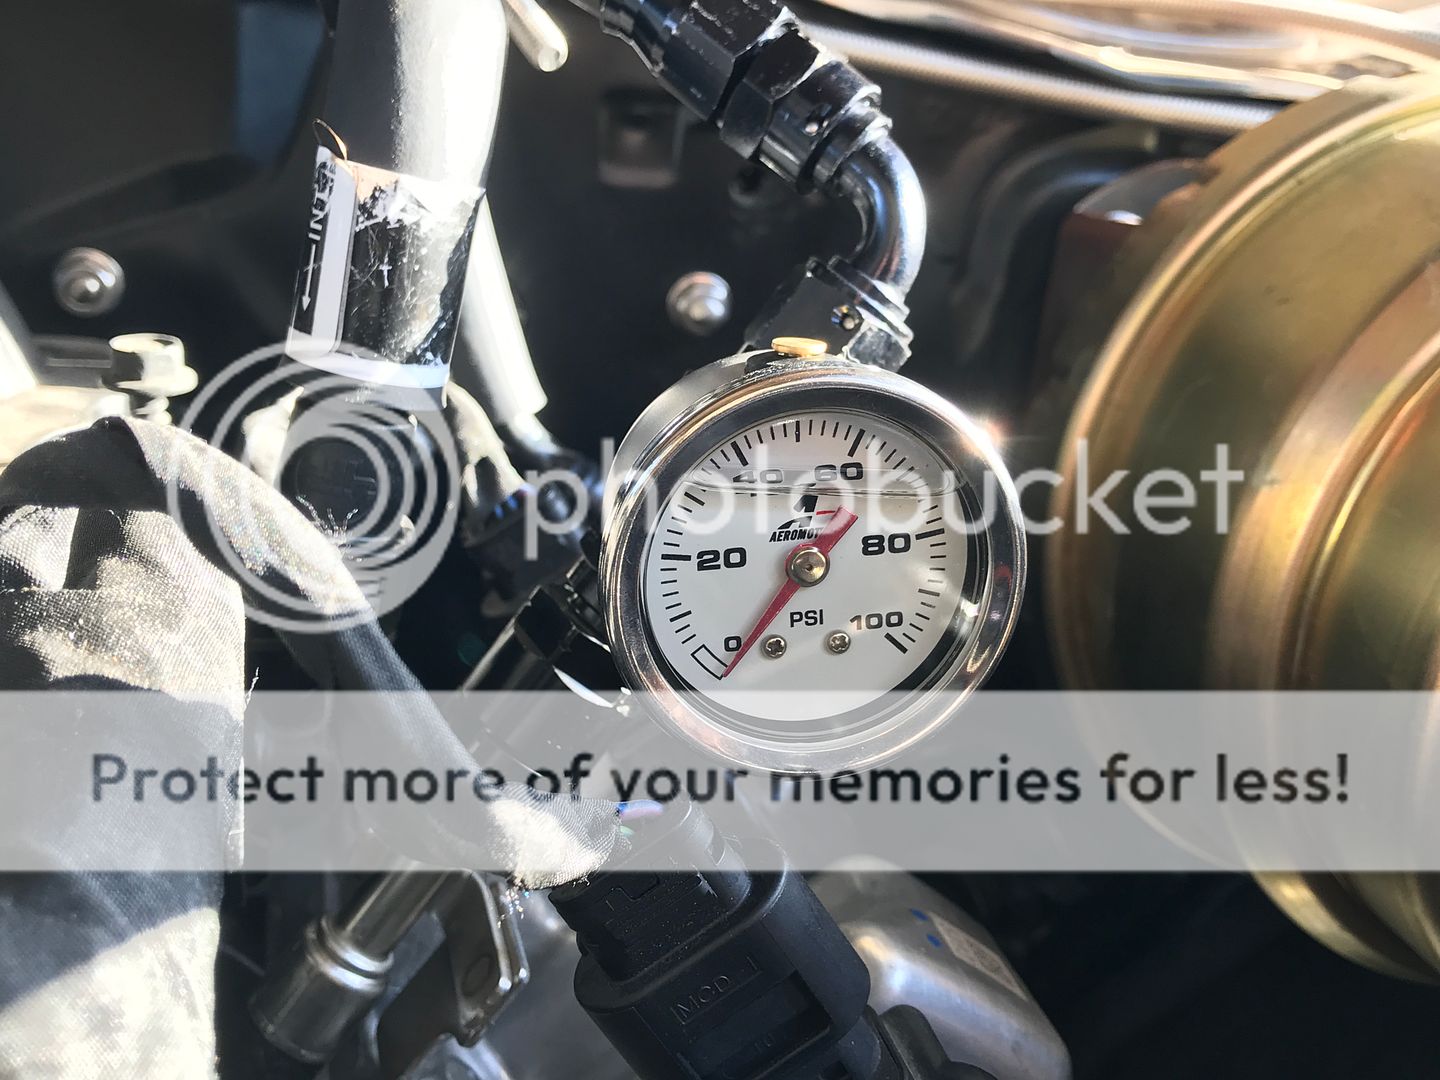
I was able to prime the fuel line by putting on a fused battery powered circuit with a small 12v battery directly to the pump connections. However, when hooked up to the trucks power system (ie. the Fuel Computer Module) it wouldn't prime, not even for a couple of seconds. Does the computer need to see "crank" before it will send power to the pump? I'm afraid to put an ohm meter to the leads because I read that can mess up the computer somehow. If someone knows (and has actually made it this far in reading all of this), inquiring minds want to know. I'm also waiting on a fitting to put a fuel pressure gauge in line. I think that is coming in a couple of days.
So, I think I found a place to weld my MAF bung to the intake tube. Going there tomorrow if I get off work on time. I have to mount the go pedal. After that, I should be able to start this puppy. I'll post results when I get it running.
I finished the exhaust manifolds, made a y-pipe, and welded in the O2 sensor bungs.
Driver side

Passenger side

Down from the passenger side, under the transmission and then towards the rear into the y-pipe.


It's 2.25" into 3"


I was able to check every wire circuit on the truck and had to make a couple of minor alterations. Power to the gauges felt like a big step forward.


Set my original mileage into the Dakota Digital cluster

I'm waiting on the Muscle Car Module from SwapTime. It should be here this next week. So far everything is working correctly. The BIM is talking to the ECU and gauge cluster. I was able to crank it to make sure if oil pressure gauge was working properly. Put all the fluids in and had to tighten a few lines.
I was able to prime the fuel line by putting on a fused battery powered circuit with a small 12v battery directly to the pump connections. However, when hooked up to the trucks power system (ie. the Fuel Computer Module) it wouldn't prime, not even for a couple of seconds. Does the computer need to see "crank" before it will send power to the pump? I'm afraid to put an ohm meter to the leads because I read that can mess up the computer somehow. If someone knows (and has actually made it this far in reading all of this), inquiring minds want to know. I'm also waiting on a fitting to put a fuel pressure gauge in line. I think that is coming in a couple of days.
So, I think I found a place to weld my MAF bung to the intake tube. Going there tomorrow if I get off work on time. I have to mount the go pedal. After that, I should be able to start this puppy. I'll post results when I get it running.
09-08-2019, 12:13 AM
#19
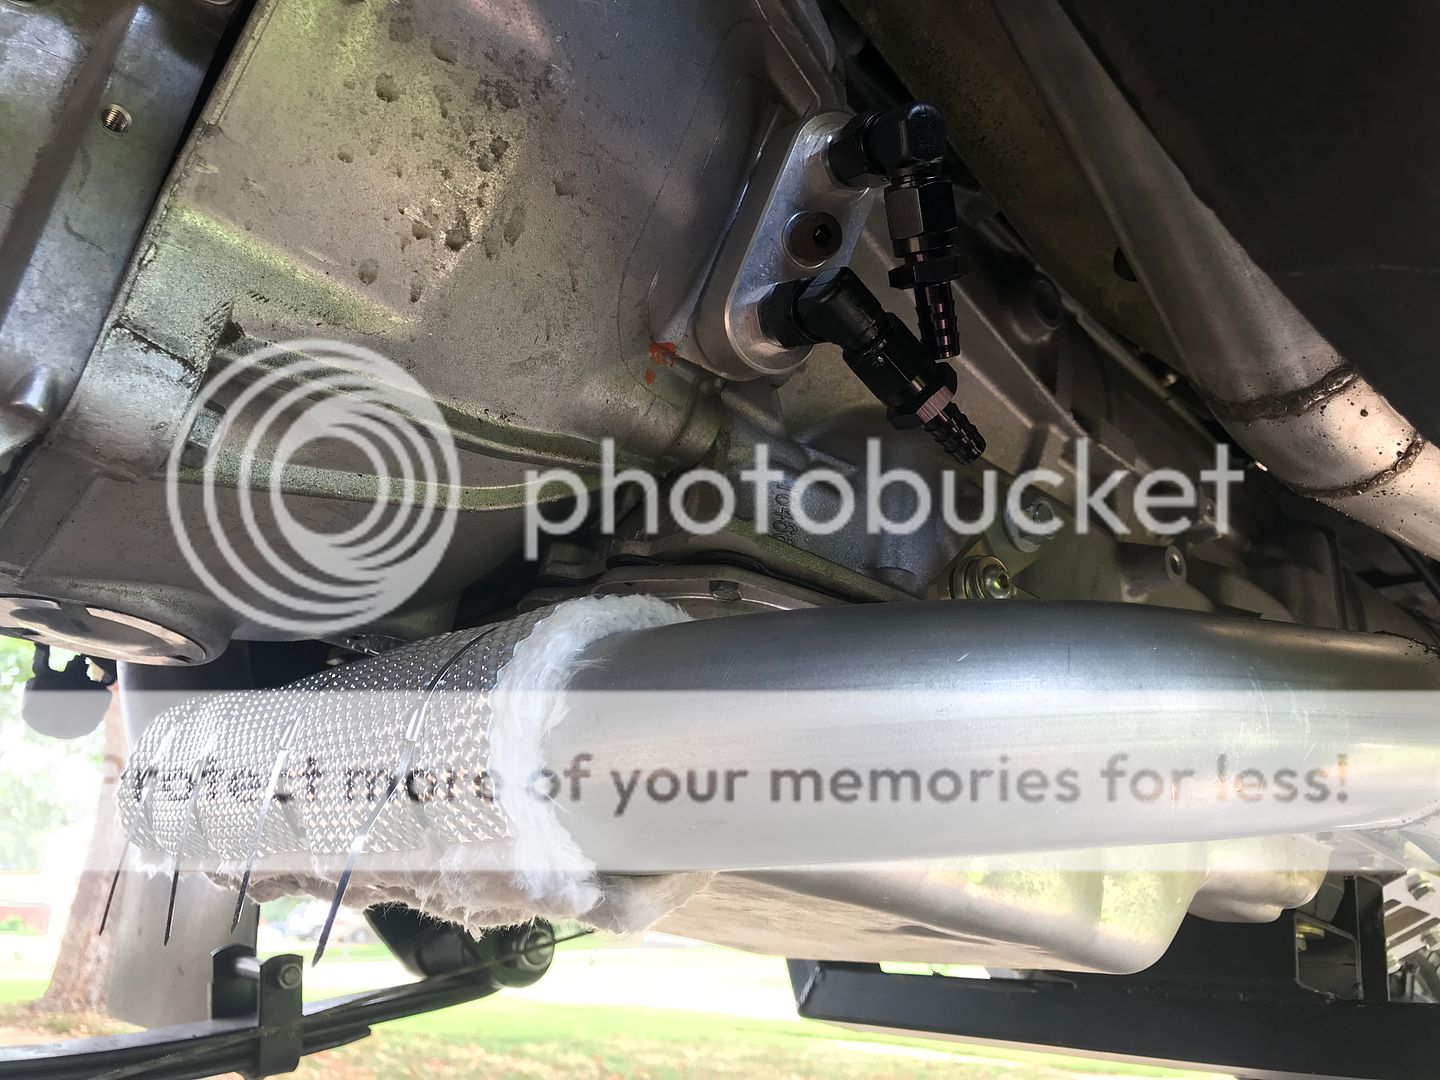
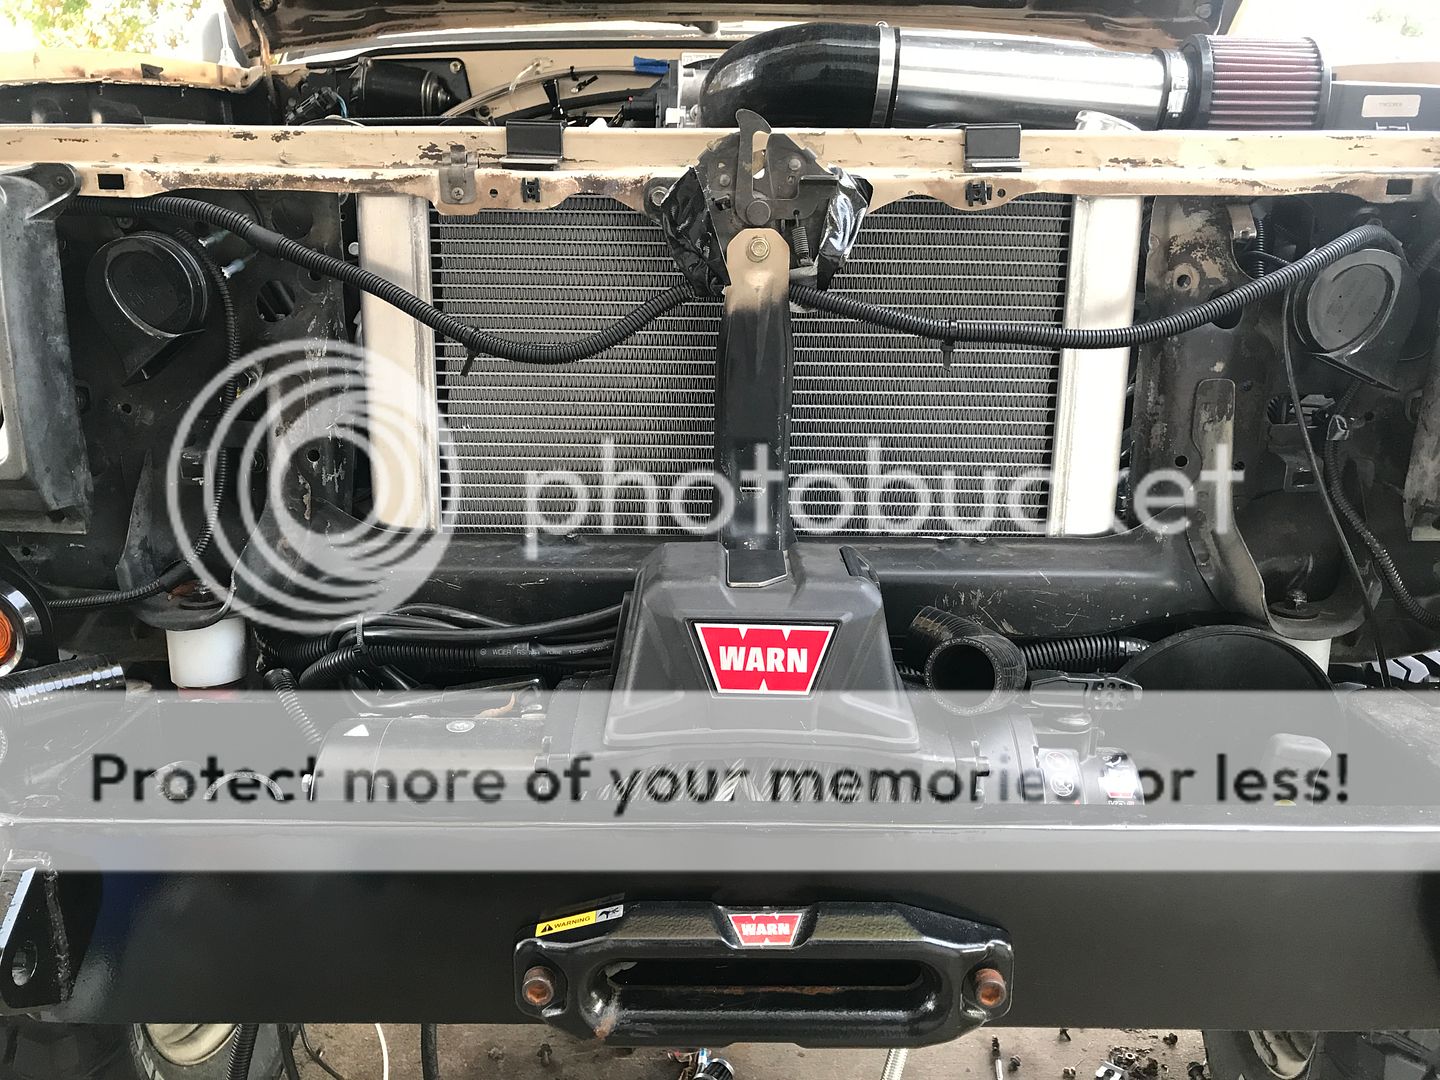
The motor is running. I wisely decided to plumb in a fuel pressure gauge, deleted the EVAP valve?, had the MAF sensor bung welded into the intake pipe, and started the motor. It was running poorly so I called Mitch up and he said to pull the MAF out. It immediately started running normally. After letting it warm up a bit I inserted the MAF back in and it still ran fan. Checked for and made corrections on leaks and stuff. Started it the next morning and same thing happened. It ran rough. I called him back and he suggested to send him the ECU so he could make adjustments and then send it back to me. He also suggested HP Tuners. I chose the latter and the MPVI2 was in my hands the next day thanks to Amazon. Tried to use my wires ancient Windows based computer to no avail. I was able to put Windows 10 on my MacPro for free. If you need to do that for some reason, just google Boot Camp Assistant and follow the directions. After a day of fiddling around with that I was able to get everything running smoothly. I hooked up the MPVI2 and downloaded everything and such but couldn't read the ECU. After some research I found he problem. I am using the Dakota Digital VHX gauges with the BIM module. The MPVI2 can't read two CANs at the same time. I disconnected the BIM and I was in business. Mitch was able to remotely log into my computer while it was running HP Tuners and tune it from Los Vegas. Just blew me away. He really knows his stuff. He had everything fixed up in about 10 minutes. It fuel trims were running almost 40% rich. It starts right up and runs smoothly! Needless to say, I was stoked. I had some cooling issues so I ended up putting in a BeCool Bone Yard LS swap radiator. It keeps it right around 200 degrees at idle in 102 degree heat. I let it run for about an hour while I was checking for leaks and adjusting the PWM fan. The pwm Derale fan controller works great. it ramps up slowly. I can not notice any rpm lag during fan start up or while it's running. I am super happy with the job Mitch has done with the harness and programming. I'm still waiting on some spring shims to adjust my pinion angles and then I can order some driveshafts to get this thing on the road.
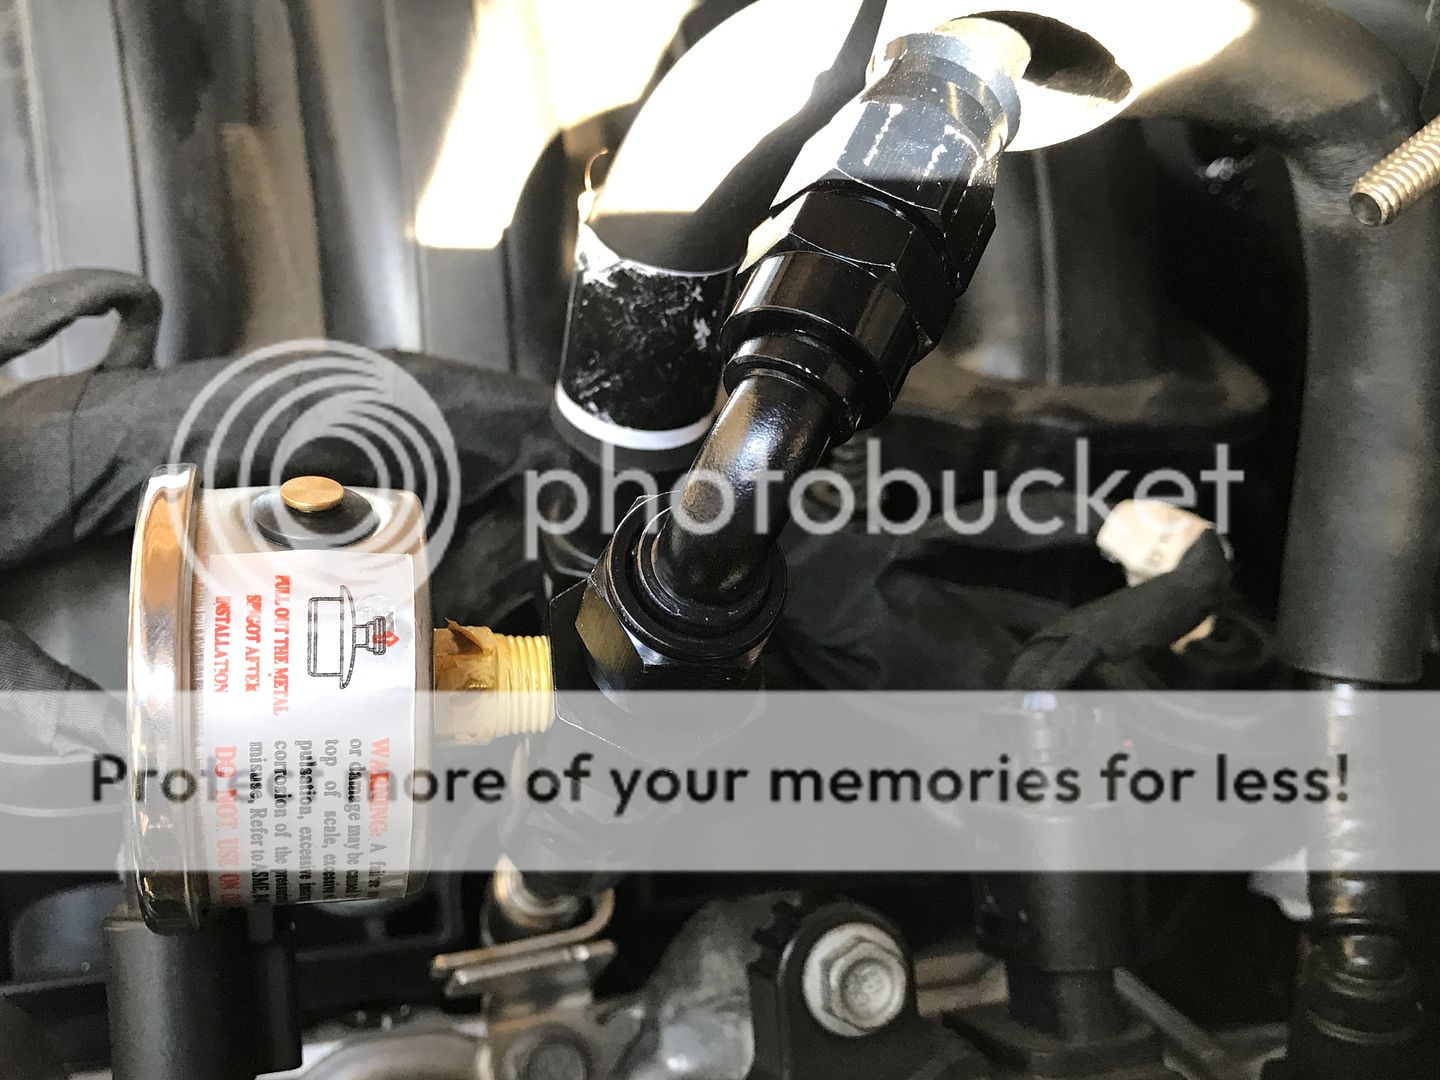
I plumbed in a fuel pressure gauge
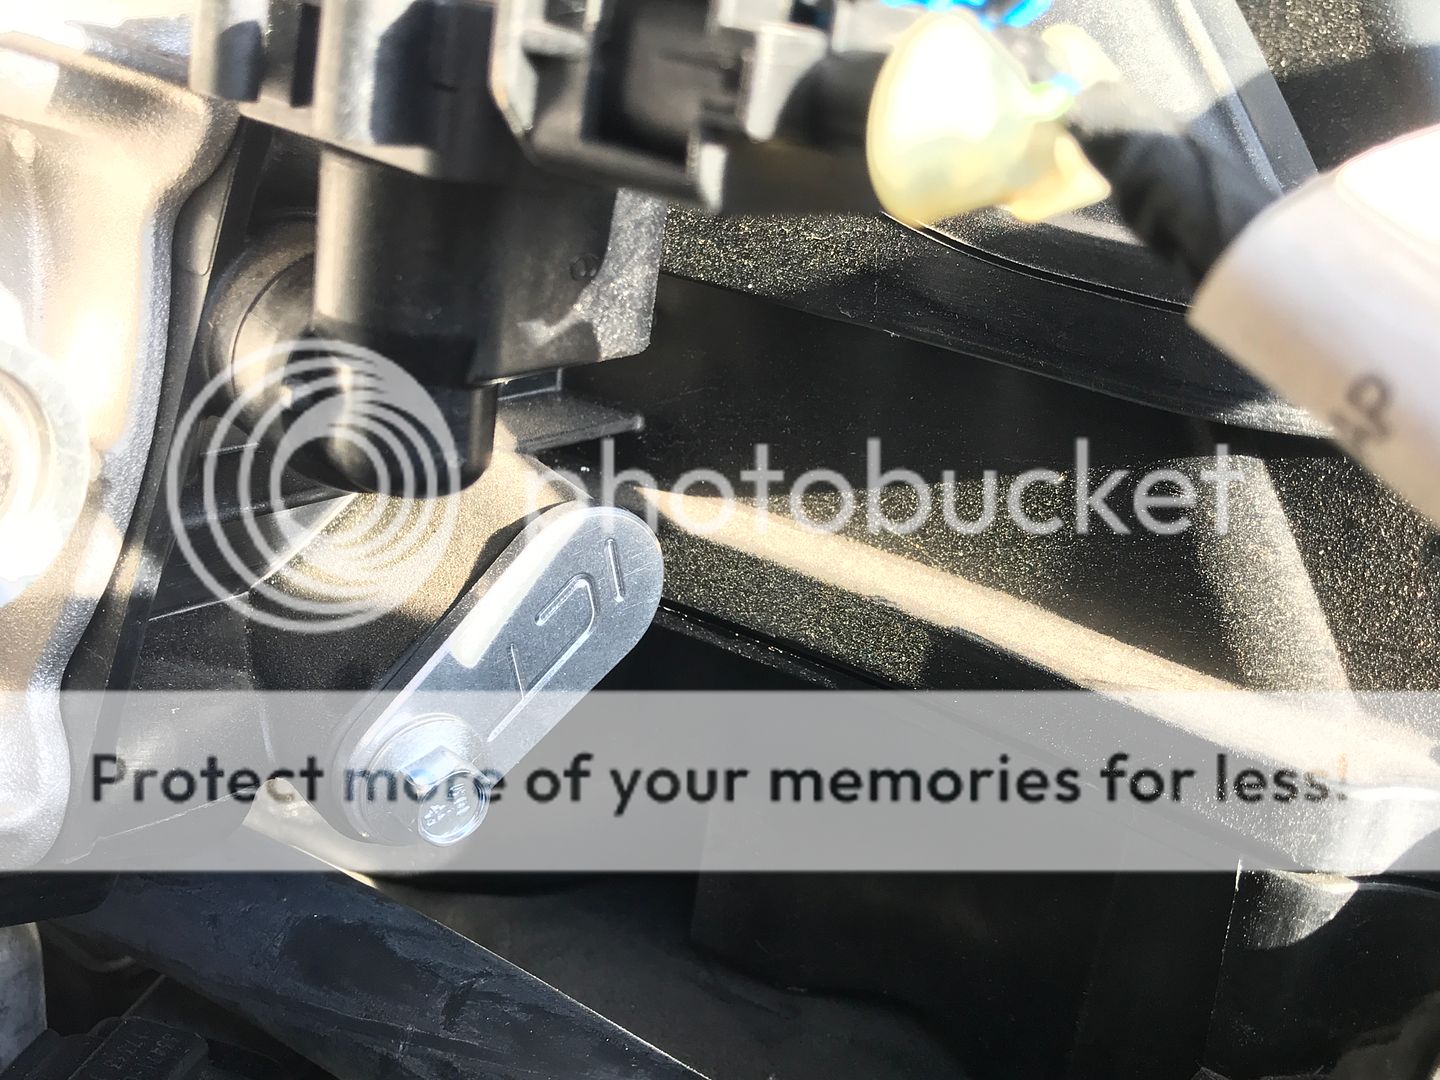
Deleted the EVAP unit
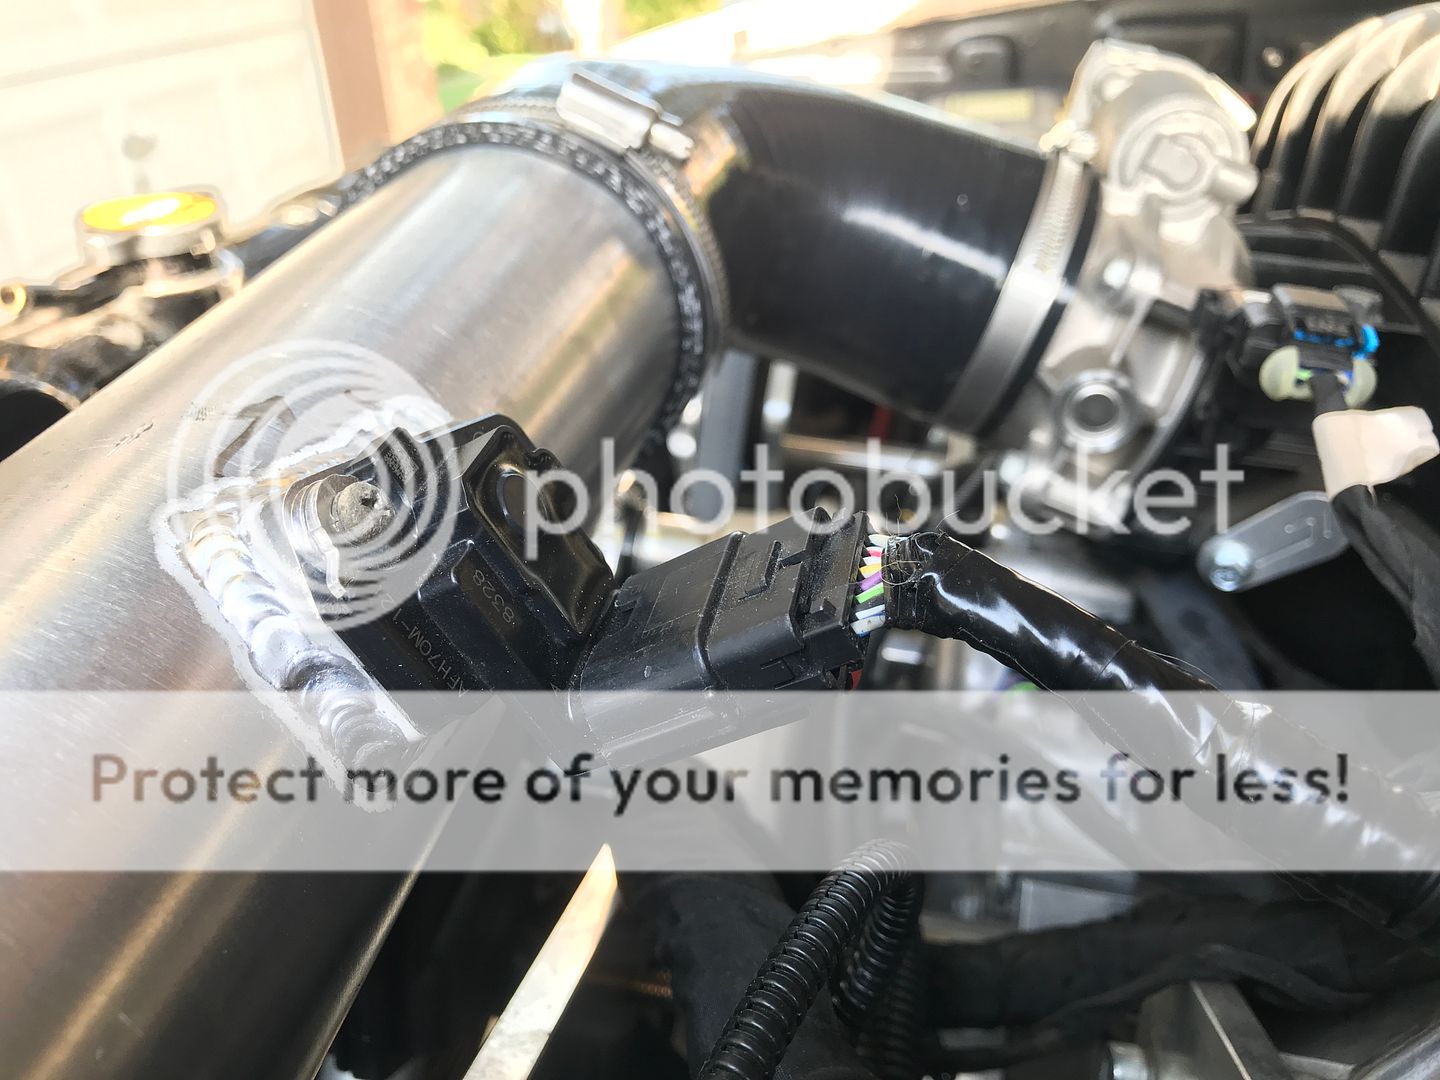
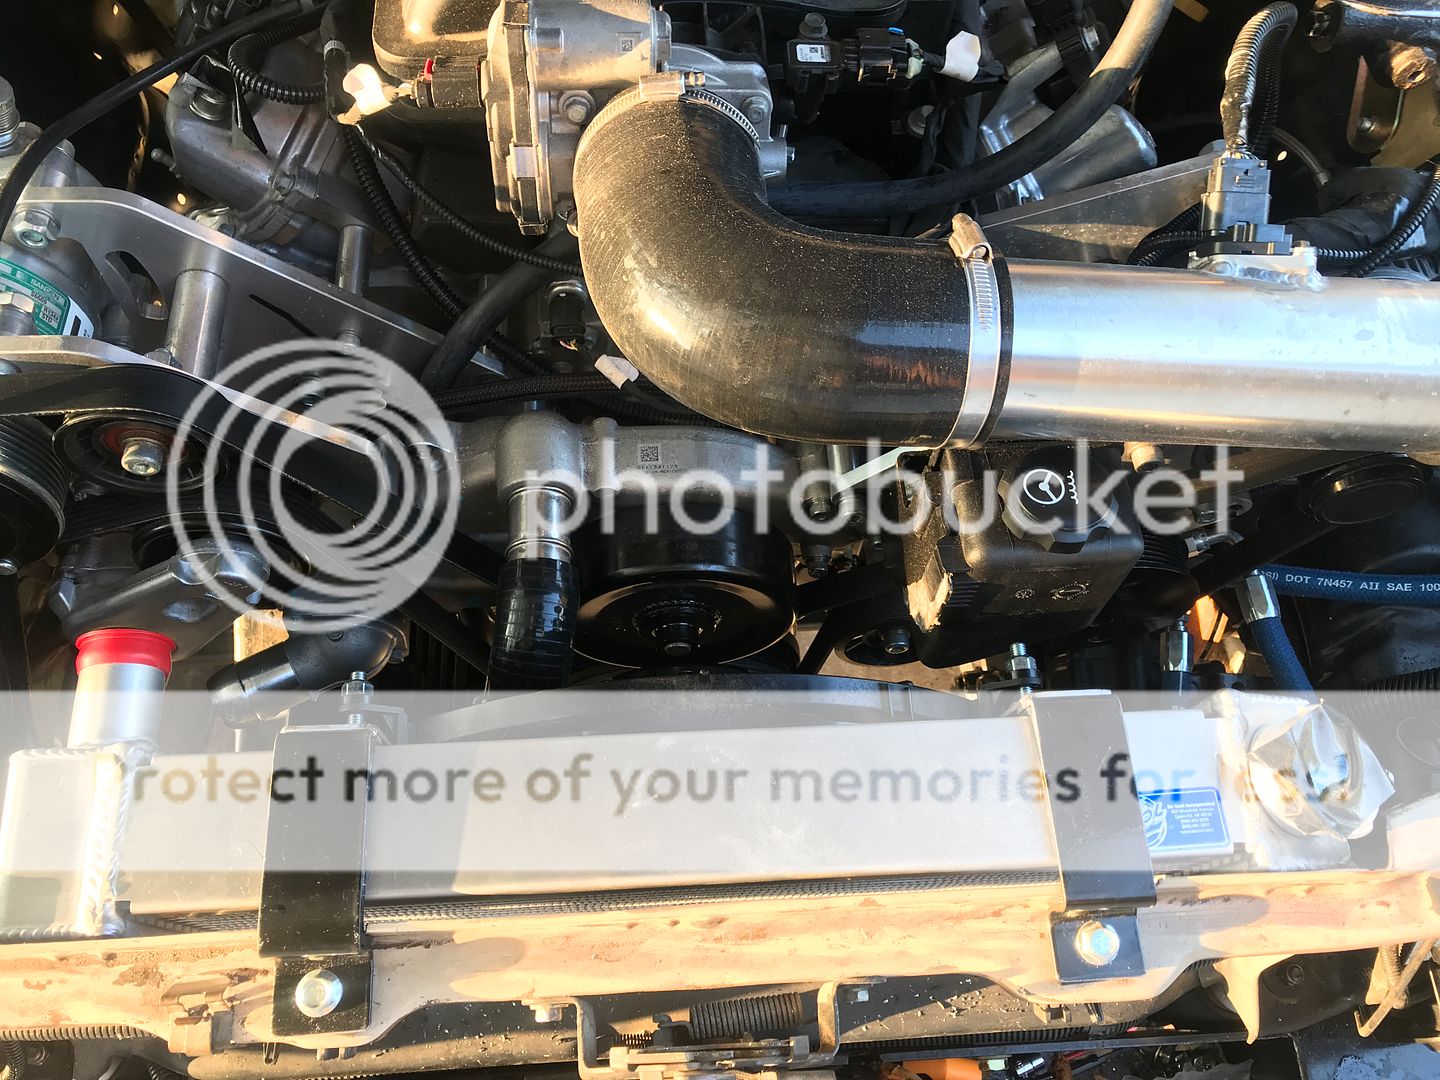
Intake tube

Radiator

A short video of the motor running
I plumbed in a fuel pressure gauge


Deleted the EVAP unit

Intake tube


Radiator


A short video of the motor running