The Ultimate Audio Experience...Speaker Replacement In My GXP
 12-11-2011, 09:46 AM
#1
Staging Lane
Thread Starter
Join Date: Jun 2011
Location: Middle TN
Posts: 84
Likes: 0
Received 0 Likes
on
0 Posts
After receiving such good advice and seeing how friendly you guys are, I figured it was time to make my own contribution... I'm not exactly a gearhead but I am an audiophile, and who doesn't want quality sound in their ride? I know this section is technically "LS4 Performance" but seeing so many different types of posts it should really be called "LS4 General"  but feel free to move it if it's seen fit- just trying to help anyone out who wants to do this too
  So yesterday when I finally had time to put my new speakers in I took as many pictures as I could and what I didn't snap, I'll explain in full detail.
First, the vision. I've had many cars since I started driving and I found all of them to be lacking in sound quality. Mostly I'd just throw a sub in and call it quits, but with this car I wanted to not only turn up the bass, but everything else too. I wanted people to step into my car and come out feeling like they just left a Mudvayne concert. So with that in mind, I started building my system. I did a fairly brief writeup of my stereo install here . To be more specific on that, the DIC center pops out fairly easy. The trim ring around the ignition pops off, and after that it's easy enough to slip your fingers under the plastic trim and pop the whole thing off. There are two connectors to remove, one for the DIC and one for the passenger airbag light. After that, remove the six bolts and get to wiring any quality adapter you buy will have wiring instructions to tell you what wire goes where. And take some advice- MAKE SURE THE HEAD UNIT YOU BUY HAS THREE SETS OF PREOUTS! Mine only had two (front and rear) so without buying some type of line amplifier to split everything off the front output and switch the rear over to sub, I still have to use my line output converter. If you have three (front, rear, sub) you can run RCAs to your sub amp and save yourself time (not to mention $$$)
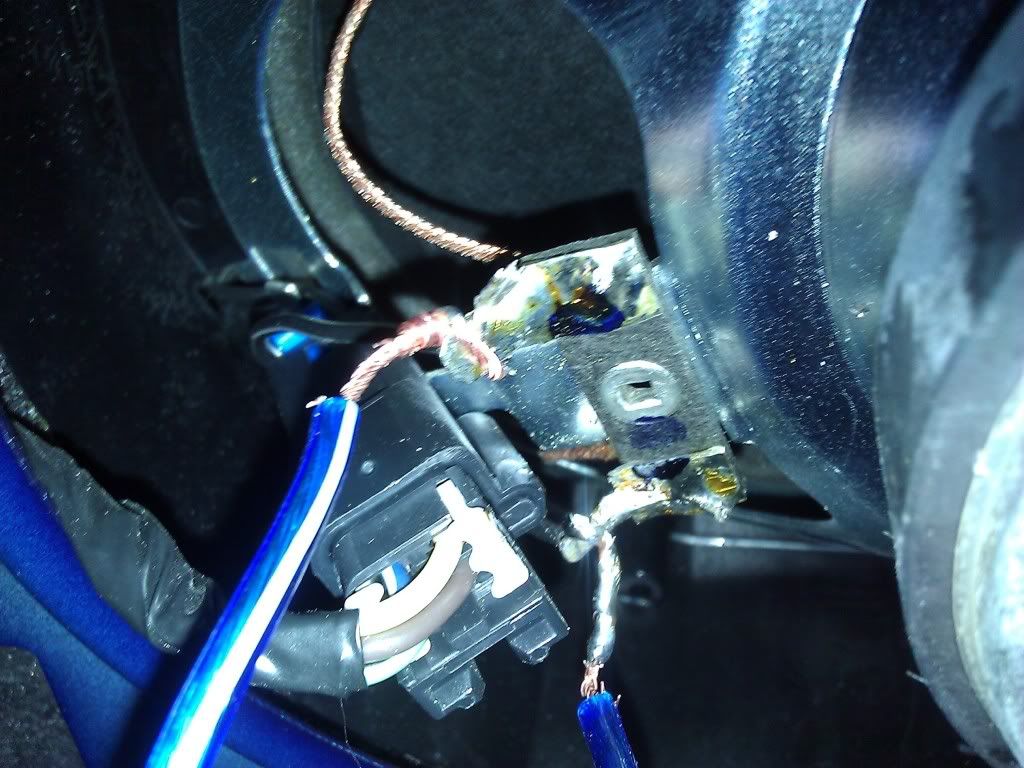
Next, I installed my amp and sub. For my remote turn on lead, i tapped into the PURPLE wire off the Monsoon amp. BE CAREFUL HOW YOU SPLICE IN, THERE IS NO GIVE WHATSOEVER ON THIS HARNESS! Yes, I could've ran a remote wire from my HU to the amp but really, I didn't want to pry up all that trim again for a 20 GA wire- since my amp was actually installed before my head unit, back when I had the factory deck. For power I used 8 GA commercial grade electrical wire- 8GA is capable up to 70A. My amp draws 60A. It's always good to have your wire rated to draw more than what it's actually gonna pull- especially if you plan to upgrade in the future. Also, I recommend if you're installing an amp that draws more than 25A to get yourself a capacitor. When your sub hits those deep lows, I'm sure you've all seen your lights dim- this is because you just pulled an assload of power from the battery and the alternator has to work harder to replace the charge you just displaced. A cap alleviates this- it stores charge whenever it's hooked to a battery, and when your amp calls for that low drop, it pulls from the closest source in the power line first- your cap. My amplifier draws 60A, so I use a 1 farad capacitor. Probably a little overkill but nothing is too much when you're trying to keep your charging system as close to normal as possible. As for your sub, that's all a matter of preference. I personally recommend JL Audio and Memphis- they're two of the best brands (IMO). Another good brand is Rockford Fosgate- they've been around forever.
Box is also a matter of preference. First of all, build your box to spec, or as close as you can. Your sub will be able to better handle its rated power. Yes, you can build a smaller box but it won't be as loud and you wont be able to push as much power to it- it has to do with thermodynamics and other such complicated things. Anyway, if you listen to a lot of rock or country, a sealed box is best- it produces more of a tight, clean sound which is great for catching kick drums and bass lines. If you listen to a lot of rap/hip hop, jazz, etc. you'll want to go with a ported box, probably tuned around 35Hz or so. A port allows for more of a "boomy" sound which is something a lot of people who listen to this type of music look for. A third type is bandpass, which combines the concepts of sealed and ported but I don't see many of these anymore so I won't get into it. Also when dialing in everything on your amp the first time PLEASE KEEP IN MIND that gain is NOT a volume control! It is an AMPLIFICATION setting only- it tells the amp by how much to amplify the input signal. If your input from your head unit is 2V, set the gain to 2V and LEAVE IT BE! Turning the gain up too much will at best make your sub sound like **** and at worst, it'll cook the voice coil. If you're working with line output, become familiar with a multimeter, it'll be your best friend in this endeavor- more on that to come.
Next- crossovers and bass boost/bass eq. The LPF (low pass filter) crossover on your amp specifies at what frequency your sub will peak at. Set this to 70-90 Hz for more of a "centered" sound- it doesn't sound so much like you have a 12 inch speaker in your trunk at this frequency, and it's good for rock (my preferred genre). Set to 100-120 Hz if your music is heavy on bass- it allows for a more broad frequency range. Of course, this is all based off of my taste, so play around until you find what you like. As long as your gain is set correctly and you dont try to set a frequency above what your sub can handle, you run no risk of burning anything up. Next, Bass EQ. This is a specific setting designed to boost a certain frequency by a certain amount (usually 50Hz, YMMV). This is another setting you'll have to find a taste for- my Alpine boosts at 50Hz and I have it set to +3dB and it sounds fine to me.
Without further ado...pictures!
but feel free to move it if it's seen fit- just trying to help anyone out who wants to do this too So yesterday when I finally had time to put my new speakers in I took as many pictures as I could and what I didn't snap, I'll explain in full detail. First, the vision. I've had many cars since I started driving and I found all of them to be lacking in sound quality. Mostly I'd just throw a sub in and call it quits, but with this car I wanted to not only turn up the bass, but everything else too. I wanted people to step into my car and come out feeling like they just left a Mudvayne concert. So with that in mind, I started building my system. I did a fairly brief writeup of my stereo install here . To be more specific on that, the DIC center pops out fairly easy. The trim ring around the ignition pops off, and after that it's easy enough to slip your fingers under the plastic trim and pop the whole thing off. There are two connectors to remove, one for the DIC and one for the passenger airbag light. After that, remove the six bolts and get to wiring
any quality adapter you buy will have wiring instructions to tell you what wire goes where. And take some advice- MAKE SURE THE HEAD UNIT YOU BUY HAS THREE SETS OF PREOUTS! Mine only had two (front and rear) so without buying some type of line amplifier to split everything off the front output and switch the rear over to sub, I still have to use my line output converter. If you have three (front, rear, sub) you can run RCAs to your sub amp and save yourself time (not to mention $$$)Next, I installed my amp and sub. For my remote turn on lead, i tapped into the PURPLE wire off the Monsoon amp. BE CAREFUL HOW YOU SPLICE IN, THERE IS NO GIVE WHATSOEVER ON THIS HARNESS! Yes, I could've ran a remote wire from my HU to the amp but really, I didn't want to pry up all that trim again for a 20 GA wire- since my amp was actually installed before my head unit, back when I had the factory deck. For power I used 8 GA commercial grade electrical wire- 8GA is capable up to 70A. My amp draws 60A. It's always good to have your wire rated to draw more than what it's actually gonna pull- especially if you plan to upgrade in the future. Also, I recommend if you're installing an amp that draws more than 25A to get yourself a capacitor. When your sub hits those deep lows, I'm sure you've all seen your lights dim- this is because you just pulled an assload of power from the battery and the alternator has to work harder to replace the charge you just displaced. A cap alleviates this- it stores charge whenever it's hooked to a battery, and when your amp calls for that low drop, it pulls from the closest source in the power line first- your cap. My amplifier draws 60A, so I use a 1 farad capacitor. Probably a little overkill but nothing is too much when you're trying to keep your charging system as close to normal as possible. As for your sub, that's all a matter of preference. I personally recommend JL Audio and Memphis- they're two of the best brands (IMO). Another good brand is Rockford Fosgate- they've been around forever.
Box is also a matter of preference. First of all, build your box to spec, or as close as you can. Your sub will be able to better handle its rated power. Yes, you can build a smaller box but it won't be as loud and you wont be able to push as much power to it- it has to do with thermodynamics and other such complicated things. Anyway, if you listen to a lot of rock or country, a sealed box is best- it produces more of a tight, clean sound which is great for catching kick drums and bass lines. If you listen to a lot of rap/hip hop, jazz, etc. you'll want to go with a ported box, probably tuned around 35Hz or so. A port allows for more of a "boomy" sound which is something a lot of people who listen to this type of music look for. A third type is bandpass, which combines the concepts of sealed and ported but I don't see many of these anymore so I won't get into it. Also when dialing in everything on your amp the first time PLEASE KEEP IN MIND that gain is NOT a volume control! It is an AMPLIFICATION setting only- it tells the amp by how much to amplify the input signal. If your input from your head unit is 2V, set the gain to 2V and LEAVE IT BE! Turning the gain up too much will at best make your sub sound like **** and at worst, it'll cook the voice coil. If you're working with line output, become familiar with a multimeter, it'll be your best friend in this endeavor- more on that to come.
Next- crossovers and bass boost/bass eq. The LPF (low pass filter) crossover on your amp specifies at what frequency your sub will peak at. Set this to 70-90 Hz for more of a "centered" sound- it doesn't sound so much like you have a 12 inch speaker in your trunk at this frequency, and it's good for rock (my preferred genre). Set to 100-120 Hz if your music is heavy on bass- it allows for a more broad frequency range. Of course, this is all based off of my taste, so play around until you find what you like. As long as your gain is set correctly and you dont try to set a frequency above what your sub can handle, you run no risk of burning anything up. Next, Bass EQ. This is a specific setting designed to boost a certain frequency by a certain amount (usually 50Hz, YMMV). This is another setting you'll have to find a taste for- my Alpine boosts at 50Hz and I have it set to +3dB and it sounds fine to me.
Without further ado...pictures!
 12-11-2011, 10:09 AM
#2
Staging Lane
Thread Starter
Join Date: Jun 2011
Location: Middle TN
Posts: 84
Likes: 0
Received 0 Likes
on
0 Posts
Let's do the line output converter first shall we? A LOC is designed to convert from speaker level to RCA level input. Usually, speakers have a higher voltage than RCAs do, so it also serves to lower the voltage to something your amp can work with. Older amps (like my PPI amp that fried) have settings on them specifically for speaker level- most amps come with the inputs for it and automatically make adjustments. I like RCAs, so I installed an LOC when my last amp finally gave up the ghost.
Solder when connecting to speaker terminals! You will never wonder why your sub just stopped working when you pull a rip on that Honda with a fart can and you run over a pothole.
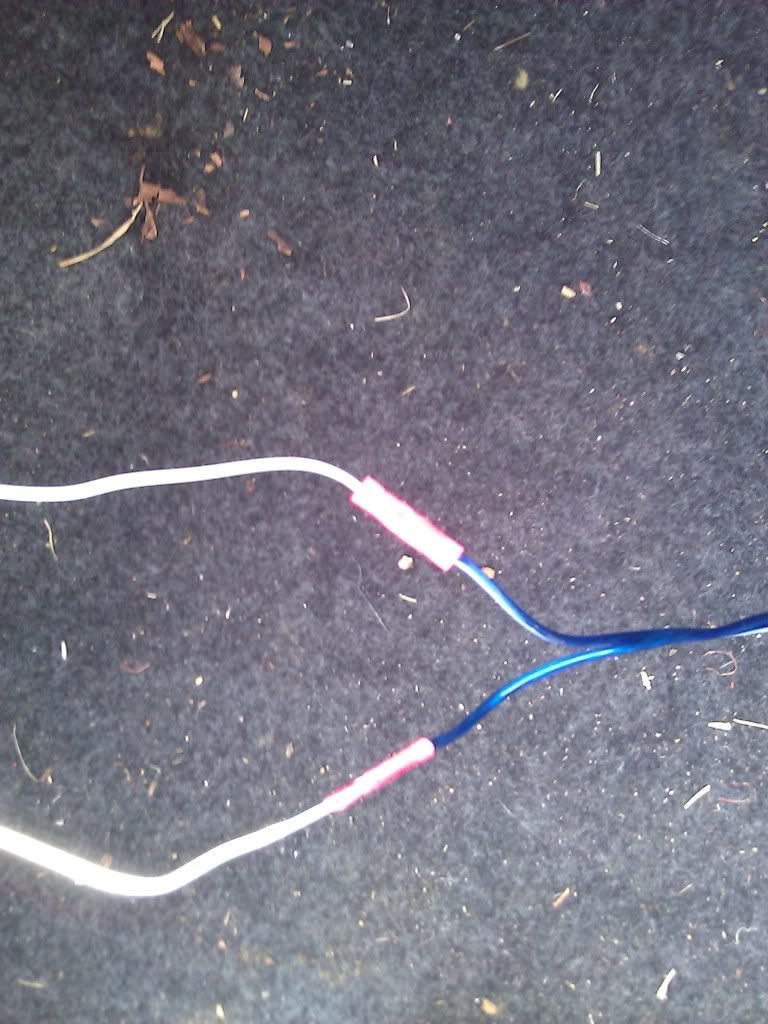
Use crimp connectors or something equivalent to ensure a good connection on everything you do. Bad connections are your worst enemy- they can induce line noise and possibly fry stuff and that's not something you want.
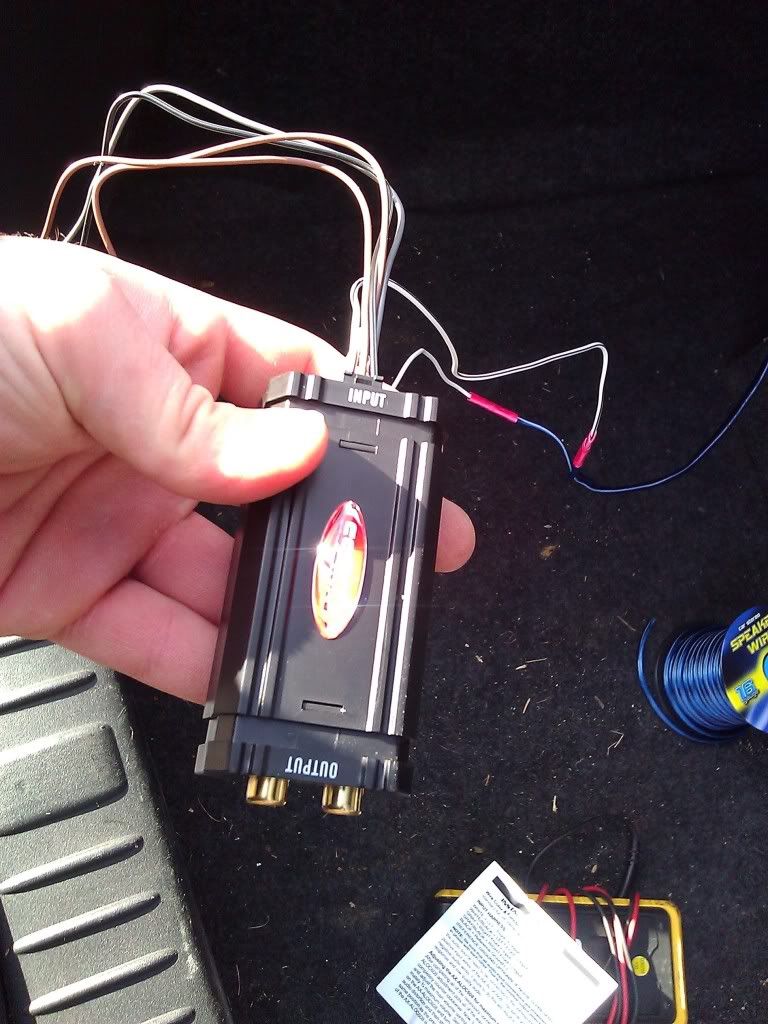
This is a line output converter. RCAS and gain is on one end, speaker level connections on the other.
When I installed mine, I used a multimeter on my RCAs to dial the gain on the LOC in. The middle prong on an RCA jack is positive, the outside ring is negative. Set your probes on each, and record what your voltage is. I think I recorded an original voltage of like 4V, so I turned down the gains on each channel to 2V and left it there- you can set it at whatever you want as long as they match as closely as possible. Also, make sure you do this at the maximum volume your speakers can handle without distorting to ensure the best quality out of your sub. Once you do this, set the gain on your amp to match what's coming out of your LOC and plug your RCAs in. At this point you know what to do
Now the grand finale- speakers! This was an absolute pain in the *** and if I didn't like doing this as much as I do I would've probably given up. Make sure you have some wire strippers, a 10mm deep socket, linesman's pliers, a door puller, good light, a buddy, and a 12 pack of Budweiser before attempting this
First your center speaker. This is a single-way 4 ohm 3.5" speaker. I replaced mine with a Kicker 2-way speaker at matching impedance.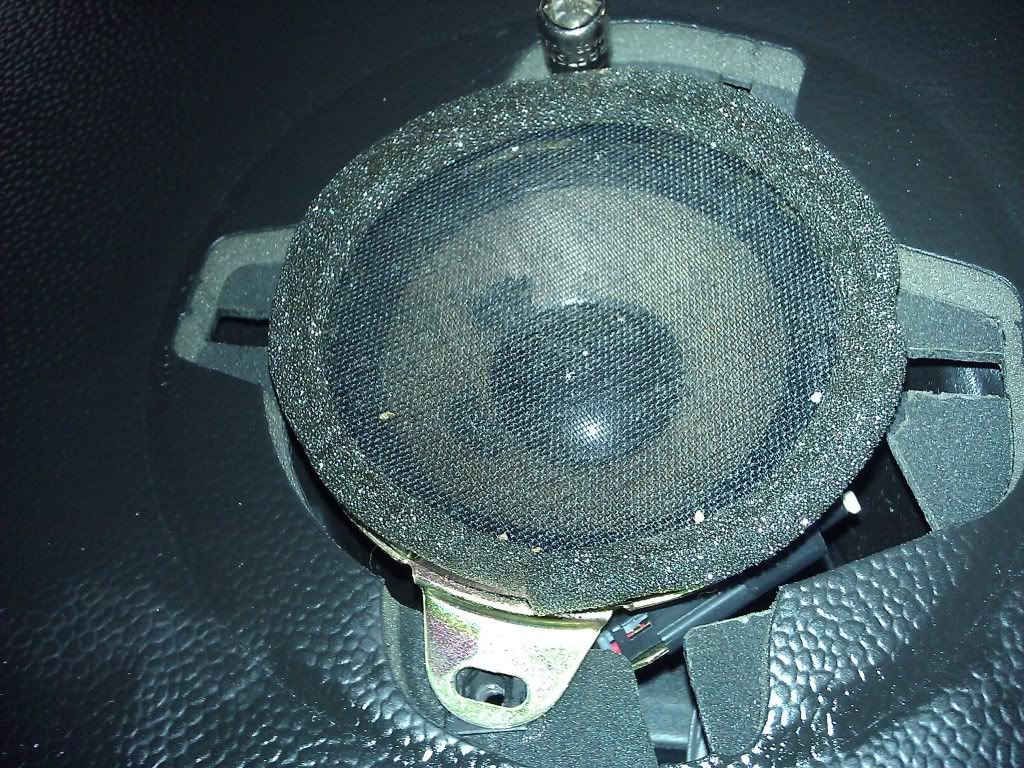
The speaker grille pops off fairly easy and the bolts can be taken out with a stubby Philips screwdriver or a 10mm socket. Unplug the harness and wire your new speaker in- make sure the grille fits back in right! I had a little bit of a clearance issue with my new speaker so I had to have a friend push it over while I bolted it back down but now it fits with no issues.
Next, the doors. Pry your trim ring around the door handle off...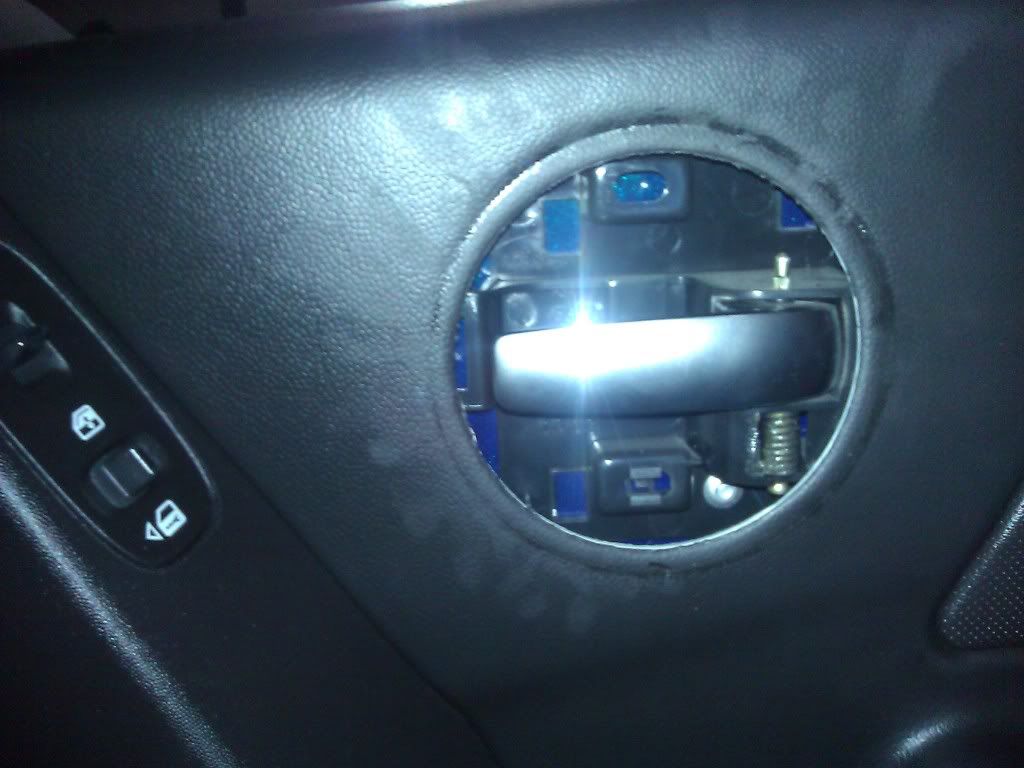
then the chrome trim on the "oh ****" handle...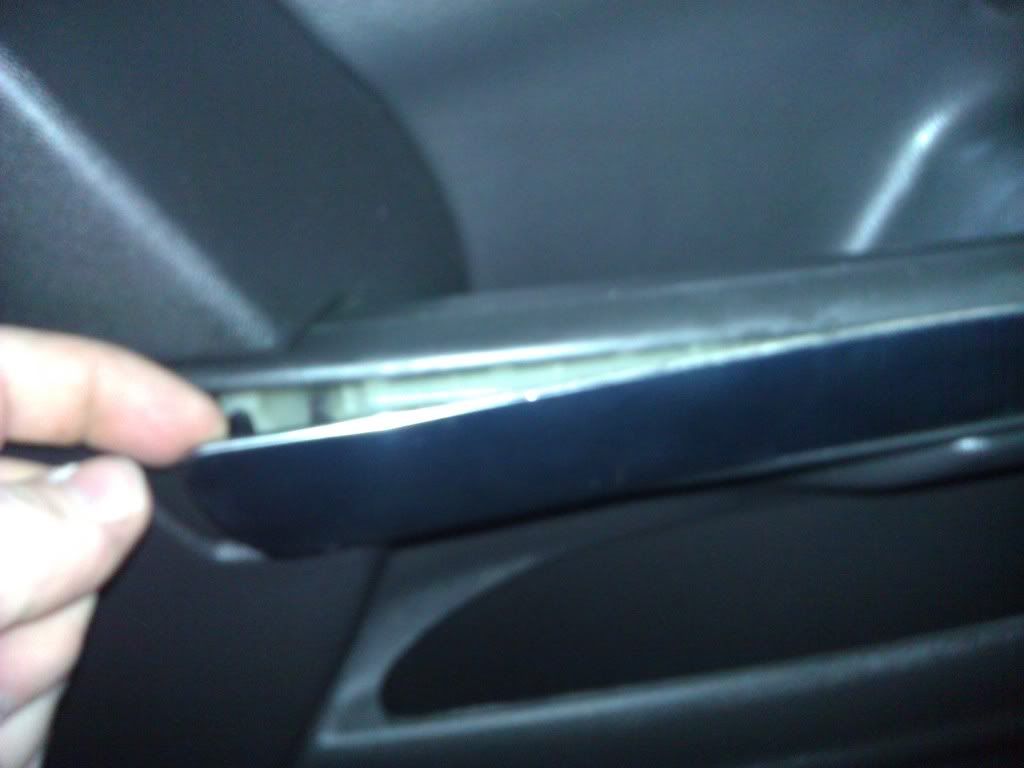
... and after that, you can opt to make the attempt to disconnect the wiring harness for the door lock and window control but I didn't fool with it.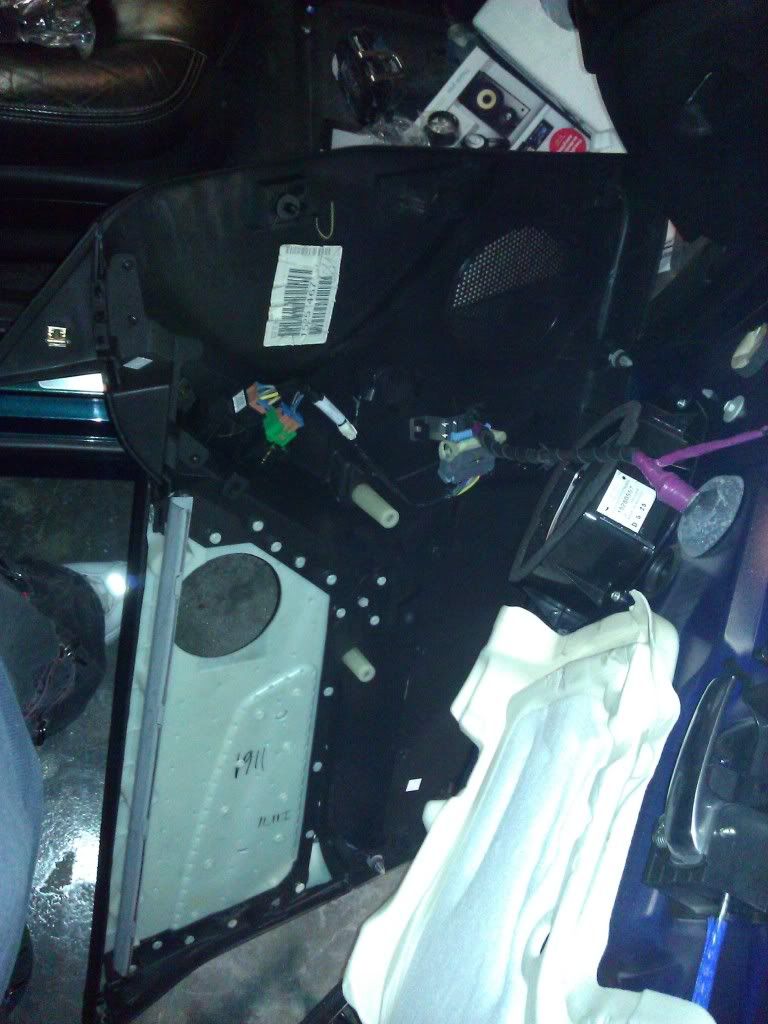
 this plug needs to be disconnected- it's for the tweeter. Installation of the door woofer is fairly easy- four philips screws and pry it out, disconnect the harness, put the new one in.
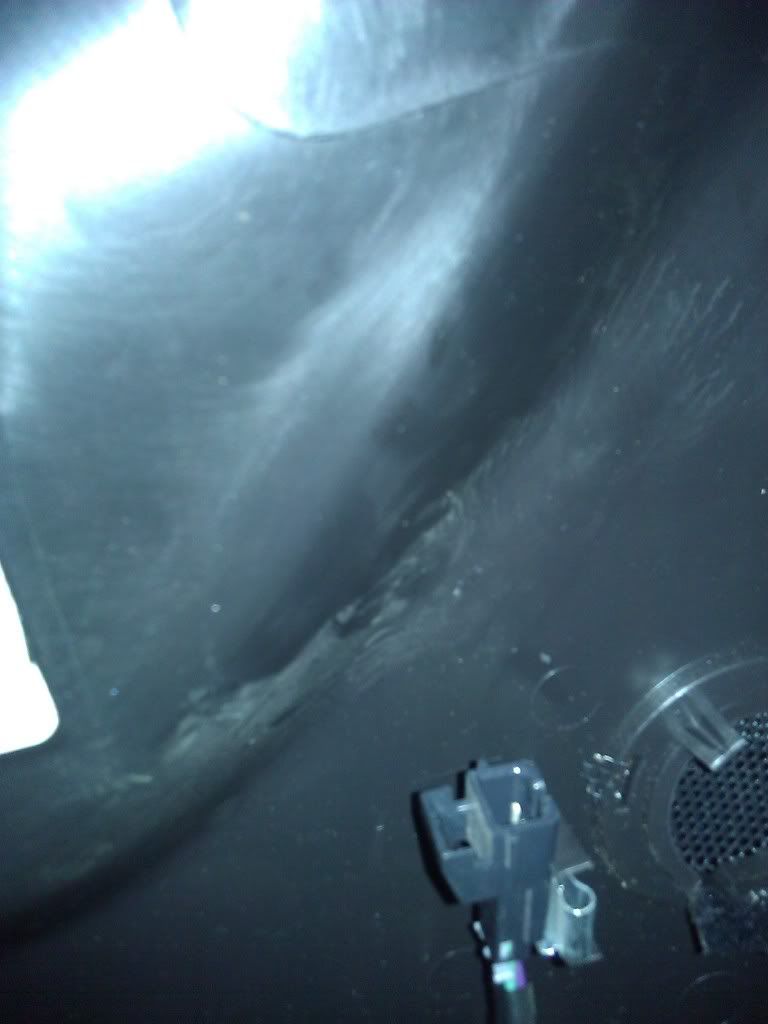
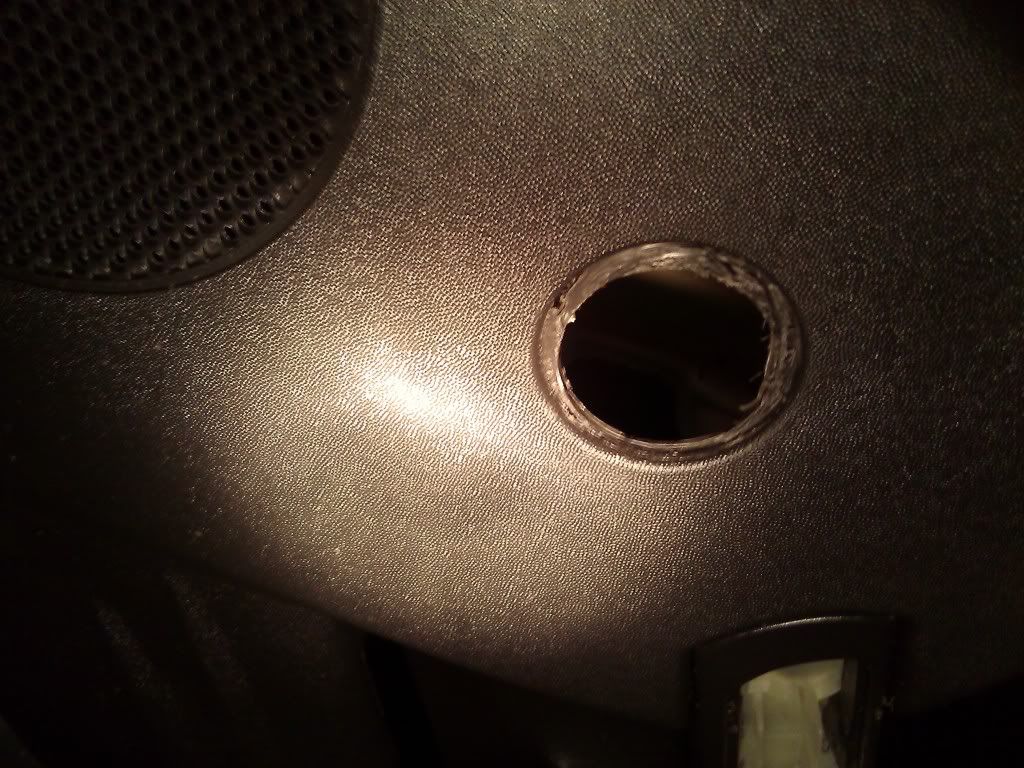 The tweeter may be a different story...
I had to drill mine out with a 1 3/4" hole saw bit to get my tweets to fit.
Next post- rear deck
Solder when connecting to speaker terminals! You will never wonder why your sub just stopped working when you pull a rip on that Honda with a fart can and you run over a pothole.
Use crimp connectors or something equivalent to ensure a good connection on everything you do. Bad connections are your worst enemy- they can induce line noise and possibly fry stuff and that's not something you want.
This is a line output converter. RCAS and gain is on one end, speaker level connections on the other.
When I installed mine, I used a multimeter on my RCAs to dial the gain on the LOC in. The middle prong on an RCA jack is positive, the outside ring is negative. Set your probes on each, and record what your voltage is. I think I recorded an original voltage of like 4V, so I turned down the gains on each channel to 2V and left it there- you can set it at whatever you want as long as they match as closely as possible. Also, make sure you do this at the maximum volume your speakers can handle without distorting to ensure the best quality out of your sub. Once you do this, set the gain on your amp to match what's coming out of your LOC and plug your RCAs in. At this point you know what to do
Now the grand finale- speakers! This was an absolute pain in the *** and if I didn't like doing this as much as I do I would've probably given up. Make sure you have some wire strippers, a 10mm deep socket, linesman's pliers, a door puller, good light, a buddy, and a 12 pack of Budweiser before attempting this
First your center speaker. This is a single-way 4 ohm 3.5" speaker. I replaced mine with a Kicker 2-way speaker at matching impedance.
The speaker grille pops off fairly easy and the bolts can be taken out with a stubby Philips screwdriver or a 10mm socket. Unplug the harness and wire your new speaker in- make sure the grille fits back in right! I had a little bit of a clearance issue with my new speaker so I had to have a friend push it over while I bolted it back down but now it fits with no issues.
Next, the doors. Pry your trim ring around the door handle off...
then the chrome trim on the "oh ****" handle...
... and after that, you can opt to make the attempt to disconnect the wiring harness for the door lock and window control but I didn't fool with it.
this plug needs to be disconnected- it's for the tweeter. Installation of the door woofer is fairly easy- four philips screws and pry it out, disconnect the harness, put the new one in. The tweeter may be a different story...I had to drill mine out with a 1 3/4" hole saw bit to get my tweets to fit.
Next post- rear deck
12-11-2011, 10:24 AM
#3
Staging Lane
Thread Starter
Join Date: Jun 2011
Location: Middle TN
Posts: 84
Likes: 0
Received 0 Likes
on
0 Posts
This is the part where I got severely aggravated and stopped taking pictures so I'll just explain. Your car probably has side curtain airbags like mine. In the Crutchfield papers I received it advised me to remove the sail panel where the airbag is located. DO NOT DO THIS. I pried it away enough to see that there was something attached to the panel and to the airbag. I like quality audio but not enough to mess up my SRS system. It is possible to remove the rear deck carpet without taking off the sail panels...
Lower your seats and with a 10mm socket remove the four bolts holding the trim panel behind the seats on. Next, with a friend, gently but firmly pull on the "corner post" where the seatbelt usually comes down at and work the carpet out. It's best to fold it up in the middle and then work your corners out. Be patient- it will come!
Next comes speaker removal. Go in your trunk and disconnect the wiring harnesses. Then using a stubby philips screwdriver (almost like a jeweler's screwdriver) remove the four screws holding the speaker down. Do this for each side.
At this point, things become hairy. Your rear deck speakers are technically two different speakers- A tweeter assembly mounted over a woofer, fed by two separate channels. I went the route of installing a woofer where the old speakers were and mounting tweets beside the seats- I'll show you in a minute. The worst part about it is, that automotive wiring matches no rhyme or reason as to differentiate positive from negative, or woofer to tweeter. I figured it out, I didn't take pictures but I will later today as I'm running short on time right now. In any case, I stayed with 6.25" speakers in the rear deck as I did in the door to keep everything the same and because I didn't want to pay more for 6x9s.
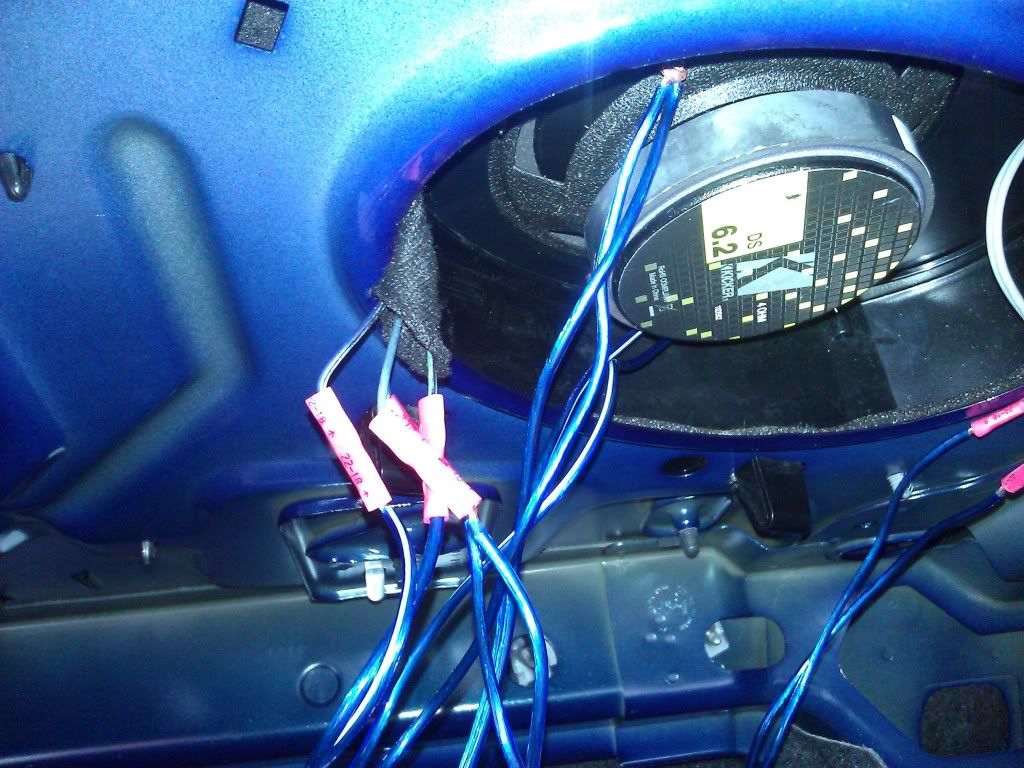
I know it looks like a snake pit but Crutchfield didn't send wiring harnesses with these so I had to tap into the factory wiring and solder to the terminals- it's solid at least, and I plan on finishing my wire cleanup when I get more time.
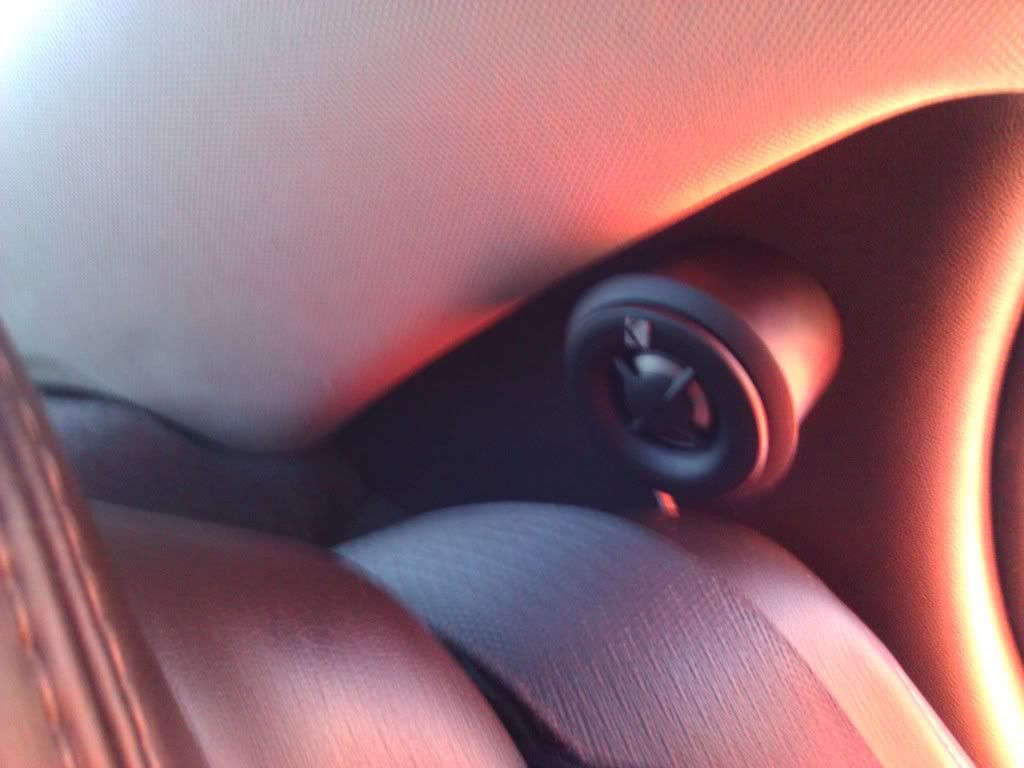
This is where I mounted the rear tweeters, DO NOT MOUNT on the sail panel as that's where your side curtain airbag is!
Lastly. My speaker setup came with four crossovers. Our Monsoon amps have a crossover built in, but as with all things aftermarket these are most likely better. You can choose to install them close to your speaker locations, but as for me I plan on taking the winter to contemplate how I'm going to mount all four, figuring out which wire feeds what speaker off the amp, and then tapping each crossover into its corresponding wire coming from the amp. So, expect more on this subject come spring time.
Sorry for such a long winded explanation but since I like as much detail as possible when someone's explaining something to me, I figured I'd do the same. I hope this helps someone and if you have any questions feel free to ask me, I know a lot about electronics and car audio.
Lower your seats and with a 10mm socket remove the four bolts holding the trim panel behind the seats on. Next, with a friend, gently but firmly pull on the "corner post" where the seatbelt usually comes down at and work the carpet out. It's best to fold it up in the middle and then work your corners out. Be patient- it will come!
Next comes speaker removal. Go in your trunk and disconnect the wiring harnesses. Then using a stubby philips screwdriver (almost like a jeweler's screwdriver) remove the four screws holding the speaker down. Do this for each side.
At this point, things become hairy. Your rear deck speakers are technically two different speakers- A tweeter assembly mounted over a woofer, fed by two separate channels. I went the route of installing a woofer where the old speakers were and mounting tweets beside the seats- I'll show you in a minute. The worst part about it is, that automotive wiring matches no rhyme or reason as to differentiate positive from negative, or woofer to tweeter. I figured it out, I didn't take pictures but I will later today as I'm running short on time right now. In any case, I stayed with 6.25" speakers in the rear deck as I did in the door to keep everything the same and because I didn't want to pay more for 6x9s.
I know it looks like a snake pit but Crutchfield didn't send wiring harnesses with these so I had to tap into the factory wiring and solder to the terminals- it's solid at least, and I plan on finishing my wire cleanup when I get more time.
This is where I mounted the rear tweeters, DO NOT MOUNT on the sail panel as that's where your side curtain airbag is!
Lastly. My speaker setup came with four crossovers. Our Monsoon amps have a crossover built in, but as with all things aftermarket these are most likely better. You can choose to install them close to your speaker locations, but as for me I plan on taking the winter to contemplate how I'm going to mount all four, figuring out which wire feeds what speaker off the amp, and then tapping each crossover into its corresponding wire coming from the amp. So, expect more on this subject come spring time.
Sorry for such a long winded explanation but since I like as much detail as possible when someone's explaining something to me, I figured I'd do the same. I hope this helps someone and if you have any questions feel free to ask me, I know a lot about electronics and car audio.
12-17-2011, 08:43 AM
#5
Staging Lane
Thread Starter
Join Date: Jun 2011
Location: Middle TN
Posts: 84
Likes: 0
Received 0 Likes
on
0 Posts
Man! The quality is unbelievable. The tweets scream and the mids sound so much clearer now, and with my new amp and custom box I had built, it's a dream come true. I am definitely impressed with the Kicker speakers. Other than the crossovers the only other thing I'd really like to do is get a digital readout capacitor, and also Pioneer makes a single-din under-dash 12 band graphic EQ I'd like to mount in that cubbyhole under the climate control. My Kenwood comes with limited EQ settings- gain for each setting, frequency setting and frequency curve, but it doesn't allow fine-tuning of the system. But it's definitely loud and the fidelity is unmatched.
We have a car show that starts up in May, up in Murfreesboro (about 30 mi south of Nashville) that I'm gonna start attending. I may not have the fastest car there but I'm pretty damn sure my system will sound the best
And I'm sorry to hear about your car dude
We have a car show that starts up in May, up in Murfreesboro (about 30 mi south of Nashville) that I'm gonna start attending. I may not have the fastest car there but I'm pretty damn sure my system will sound the best
And I'm sorry to hear about your car dude
12-21-2011, 09:57 AM
#6
TECH Regular

Join Date: Nov 2009
Location: Farmington Hills, MI
Posts: 446
Likes: 0
Received 0 Likes
on
0 Posts

This is a really nice write up. Did you do anything to keep the steering wheel controls? I've kept the stock head unit because I like the integration with the HUD and steering wheel. I'll also give a shout out to MTX. I bought my Road Thunder amp back in the 97-98 time frame. It's been with me through 6 vehicles, some of which were in such a state of decay that they leaked water in the rain, and it is still pounding.