Tick MC adjustment PICS inside
 08-19-2012, 09:30 PM
#1

Just got my setup back together, put exactly 54 easy miles on it. I have the LS7 clutch kit, Tick MC, new slave cylinder, the trans was rebuilt with all new seals, bearings, synchros, etc, steel shift forks, and bronze shift pads. My question is I'm lost when it comes to adjusting the MC. The directions don't really help my situation. Yesterday when I took it on the first drive, the clutch grabbed almost instantly off of the floor, drove it some more, then parked it for the night.
This morning I went out and played with the MC some (pics below are where it sits as of now). Now it seems like its letting out at the very top. I stalled it twice in town today (yes, I'm more then experienced driving stick) because it just grabs out of no where near the top, I'd like it to start grabbing quarter to halfway out. Just wondering if there's a certain "sweetspot" where I can set it and forget it.
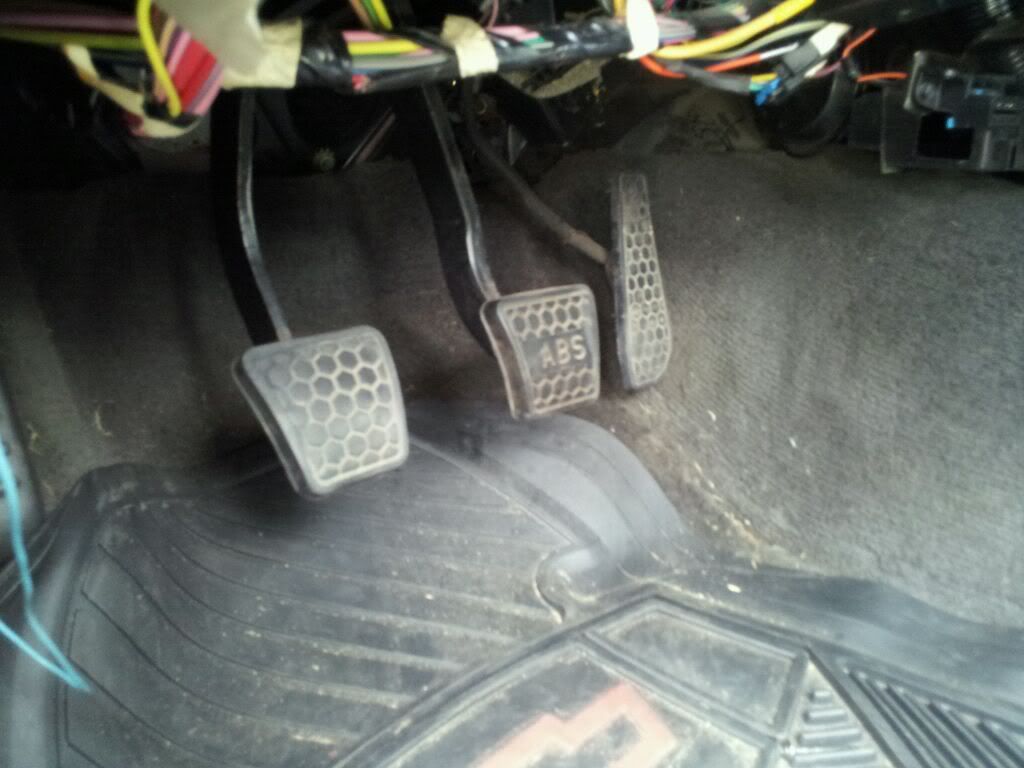
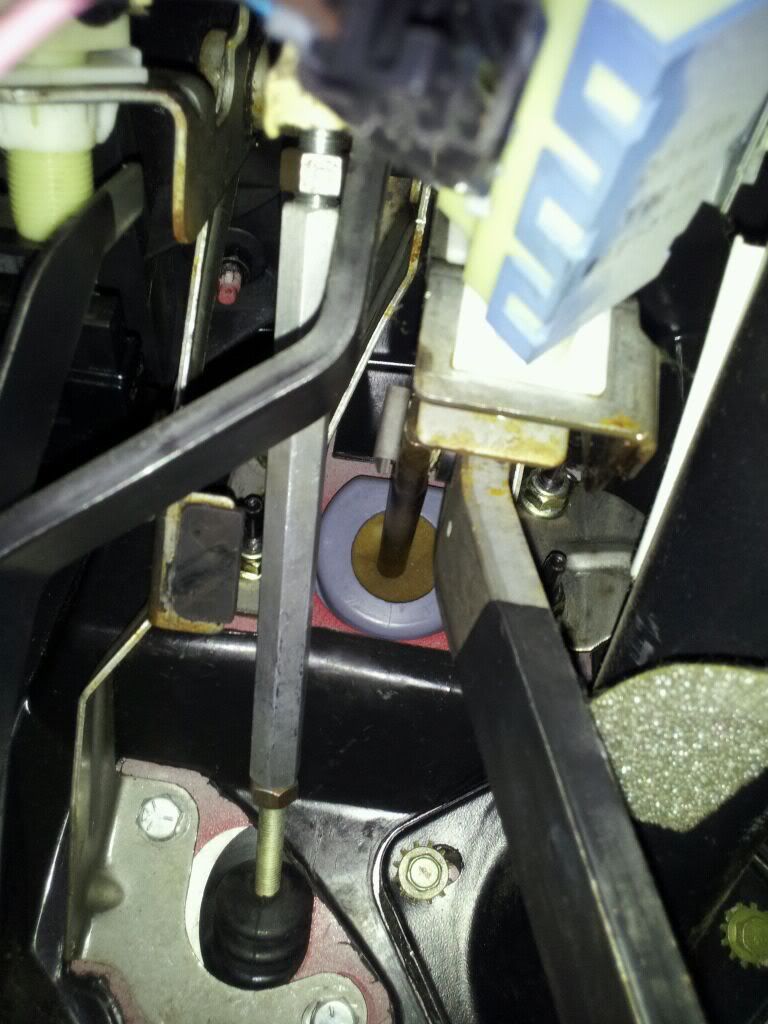
Below are pics of the pedal in relation to the other two, and the MC adjustment, sorry if you can't see the top of it.
This morning I went out and played with the MC some (pics below are where it sits as of now). Now it seems like its letting out at the very top. I stalled it twice in town today (yes, I'm more then experienced driving stick) because it just grabs out of no where near the top, I'd like it to start grabbing quarter to halfway out. Just wondering if there's a certain "sweetspot" where I can set it and forget it.
Below are pics of the pedal in relation to the other two, and the MC adjustment, sorry if you can't see the top of it.


 08-20-2012, 03:28 PM
#7
Ok well I adjusted it so that it's level with the brake. And it seems to be right, about 1/2 way up is where it begins to grab, then 3/4 its fully engaged, then it stops just after that. Just want to make sure thats ok so I don't do any damage
Trending Topics
08-23-2012, 10:53 AM
#9

It is important to make sure our kit is properly bled and adjusted for optimal function of the entire system.
Since you increase the amount of fluid the system flows by setting the clutch pedal higher, adjustment should begin from the shortest setting possible. The pedal will appear to be about halfway down when compared to its location with the factory cylinder installed. Adjust the turnbuckle in 1-2 turn increments to lengthen the rod (be sure that the rod coming out of the master cylinder itself isn’t spinning). After each adjustment, start the car in neutral and attempt to shift into first gear. If it doesn’t go into gear smoothly, don’t force it (you’ll risk damaging your transmission’s fork pads and/or synchronizers). Simply continue to lengthen the rod until the transmission will slide into first gear smoothly while stopped. At this point, test drive the car to fine tune the adjustment to get the necessary release for higher RPM shifting. DO NOT OVERADJUST THE ROD, or adjust it based on pedal height. If you adjust it to position the pedal at the factory height, you risk over-extending (thus damaging) the pressure plate.
You want to set your kit to flow just enough fluid – not too much, not too little. Correctly installed and bled, you will notice a pedal that is shorter and slightly more firm than it was with the factory master cylinder.
The LS7 Clutch is not alone - as ANY clutch breaks in, the amount of fluid that it needs in order to fully disengage may increase. This is common. Readjustment of our kit is easy and should be done periodically to ensure that you're always disengaging your clutch 100%.
08-25-2012, 08:42 AM
#10
TECH Regular

Join Date: Mar 2011
Posts: 496
Likes: 0
Received 0 Likes
on
0 Posts
mine engages just off the floor,monster stage 2 . my adjustment is when i shift to reverse i shifts smoothly with no grind. i have no reverse solinoid and no reverse synocros so i have to be at a dead stop for reverse to engage. sort of a fail safe.

