
Doing my first nitrous install and its a nightmare. Pics please?
 05-07-2010, 09:28 AM
#1
TECH Enthusiast
Thread Starter
iTrader: (6)
Join Date: Sep 2007
Location: Tucson, AZ
Posts: 585
Likes: 0
Received 0 Likes
on
0 Posts
Like the title says, I am attempting my own nitrous install and am pulling my hair out. Its a nitrous outlet plate kit with a purge, bottle heater, and progressive controller. Nitrous outlet is awsome, but the instructions aren't that great and the only picture in the instructions is of the fuel rail hook up. I know there isn't a specific place for the solenoids and purge, but I just do better with pictures, monkey see monkey do lol. Could you guys please put up pictures of your kits so I have a better idea how to hook this up. Also where did you guys put the relay, inside the car, by the bottle, or under the hood? Like I said the instructions really dont cover a whole lot. Thanks guys!
Its a nitrous outlet plate kit with a purge, bottle heater, and progressive controller. Nitrous outlet is awsome, but the instructions aren't that great and the only picture in the instructions is of the fuel rail hook up. I know there isn't a specific place for the solenoids and purge, but I just do better with pictures, monkey see monkey do lol. Could you guys please put up pictures of your kits so I have a better idea how to hook this up. Also where did you guys put the relay, inside the car, by the bottle, or under the hood? Like I said the instructions really dont cover a whole lot. Thanks guys!  05-07-2010, 11:32 AM
#2
11 Second Club
iTrader: (127)
Join Date: Jun 2002
Location: MS
Posts: 984
Likes: 0
Received 0 Likes
on
0 Posts

What kind of solenoid mounting brackets do you have?? The small individual ones?? as for the realay, I mounted it over by the pcm under the hood on the passenger side upper corner. was easier to me.... I ran all my wires up thru the passenger floor board firewall and had easy access to good grounds and the battery if needed from that side of the engine bay. I mounted my fuel solenoid directly on the end of the stock fuel rail. my n2o solenoid and purge are on a Head Mount Plate. i dont have any updated pics since i changed to my plate kit, sorry.
05-07-2010, 11:40 AM
#3
8 second mod
iTrader: (37)
Join Date: Nov 2002
Location: East Side Performance! mASShole
Posts: 17,879
Likes: 0
Received 0 Likes
on
0 Posts

you are probably looking to deep into it. take a step back its very simple to do. very easy just need to step away for a few and go into it with a clean head. if you do a search you will find a lot of pics on here and get lots of good ideas.
like i said, take a step back and go at it with a clean head and you will figure it out.
like i said, take a step back and go at it with a clean head and you will figure it out.
05-07-2010, 12:14 PM
#4
I installed my Nitrous Outlet Halo Kit and I agree, the instructions weren't clear and I found a few typos and mistakes. I purchased a Harris Speed Works Bottle Heater and the instructions were clear as day light and the supplies were top quality perma-seal crimp connectors and butt connectors! I love those now, screw heat shrink wrap!
One tip: Things will be kinda tight in the upper passenger side of the engine bay so I removed the wiper cowl. It is very easy to do. There are 3-4 pins that you lift up with a flathead screw driver. There is one up top close to the windshield by the wiperblade too. Once I cleared that out of the way, I had more room to manuever the PCM and I was able to mount my relay right there.
One tip: Things will be kinda tight in the upper passenger side of the engine bay so I removed the wiper cowl. It is very easy to do. There are 3-4 pins that you lift up with a flathead screw driver. There is one up top close to the windshield by the wiperblade too. Once I cleared that out of the way, I had more room to manuever the PCM and I was able to mount my relay right there.
05-07-2010, 02:55 PM
#5
TECH Enthusiast
Thread Starter
iTrader: (6)
Join Date: Sep 2007
Location: Tucson, AZ
Posts: 585
Likes: 0
Received 0 Likes
on
0 Posts
I installed my Nitrous Outlet Halo Kit and I agree, the instructions weren't clear and I found a few typos and mistakes. I purchased a Harris Speed Works Bottle Heater and the instructions were clear as day light and the supplies were top quality perma-seal crimp connectors and butt connectors! I love those now, screw heat shrink wrap!
One tip: Things will be kinda tight in the upper passenger side of the engine bay so I removed the wiper cowl. It is very easy to do. There are 3-4 pins that you lift up with a flathead screw driver. There is one up top close to the windshield by the wiperblade too. Once I cleared that out of the way, I had more room to manuever the PCM and I was able to mount my relay right there.
One tip: Things will be kinda tight in the upper passenger side of the engine bay so I removed the wiper cowl. It is very easy to do. There are 3-4 pins that you lift up with a flathead screw driver. There is one up top close to the windshield by the wiperblade too. Once I cleared that out of the way, I had more room to manuever the PCM and I was able to mount my relay right there.
Last edited by second_2_none; 05-07-2010 at 03:00 PM.
05-07-2010, 03:20 PM
#6
On The Tree
iTrader: (3)

Join Date: Nov 2006
Location: Plainfield, IL
Posts: 129
Likes: 0
Received 0 Likes
on
0 Posts
you are probably looking to deep into it. take a step back its very simple to do. very easy just need to step away for a few and go into it with a clean head. if you do a search you will find a lot of pics on here and get lots of good ideas.
like i said, take a step back and go at it with a clean head and you will figure it out.
like i said, take a step back and go at it with a clean head and you will figure it out.
05-07-2010, 03:43 PM
#7

I used this as a reference. It is for a C5 but can be used for any LS1. Good pics,info, & wiring diagrams.
http://robertsnitrousservice.com/
Also this helped:
http://www.hotrod.com/howto/3447_che...all/index.html
& this:
http://www.harrisspeedworks.com/instructions/
http://robertsnitrousservice.com/
Also this helped:
http://www.hotrod.com/howto/3447_che...all/index.html
& this:
http://www.harrisspeedworks.com/instructions/
Trending Topics
05-07-2010, 03:50 PM
#8
I mounted the relay to the heater inside my center console. Those should be close to the device it relays. I don't have a progressive controller but I would mount yours somewhere in the interior as well.
Electrical wiring isn't that bad. It jus' gets overwhelming because there are so many wires. But jus' stick with one wire at a time. Invest in a good Racheting Terminal Crimper - it made my install a breeze. Make sure wires are snug in the holes of the butt connectors before crimping. I had one or two that pulled out on me. Buy some shrink wrap for your connections but I would highly recommend Perma-Seal Connections. They are a lil' more expensive but really worth it.
Electrical wiring isn't that bad. It jus' gets overwhelming because there are so many wires. But jus' stick with one wire at a time. Invest in a good Racheting Terminal Crimper - it made my install a breeze. Make sure wires are snug in the holes of the butt connectors before crimping. I had one or two that pulled out on me. Buy some shrink wrap for your connections but I would highly recommend Perma-Seal Connections. They are a lil' more expensive but really worth it.
05-07-2010, 03:55 PM
#9
TECH Enthusiast
iTrader: (20)

Join Date: Mar 2008
Location: KC.
Posts: 542
Likes: 0
Received 0 Likes
on
0 Posts
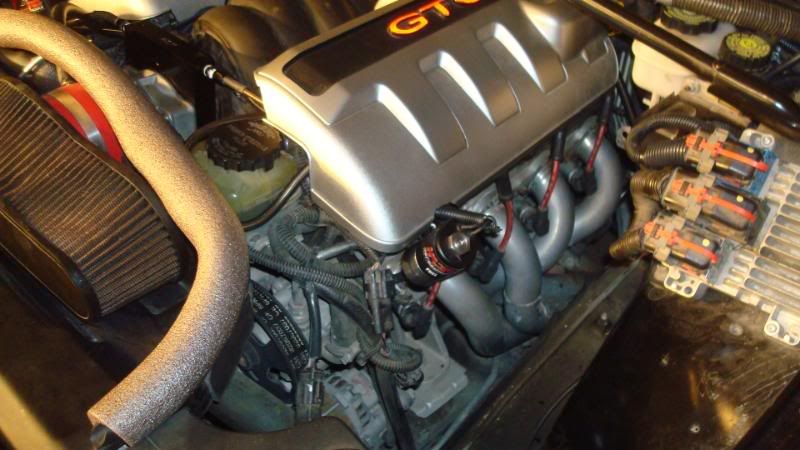
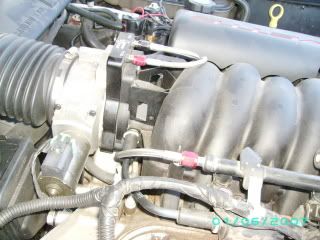
Well I just hooked up my nitrous kit. Here is where I mounted the selonoids. Mounted them to the valve covers. I don't have real clear pics, but hopefully this will give you an idea.
05-07-2010, 06:46 PM
#10
11 Second Club

Join Date: Jul 2008
Location: tulsa ok
Posts: 415
Likes: 0
Received 0 Likes
on
0 Posts
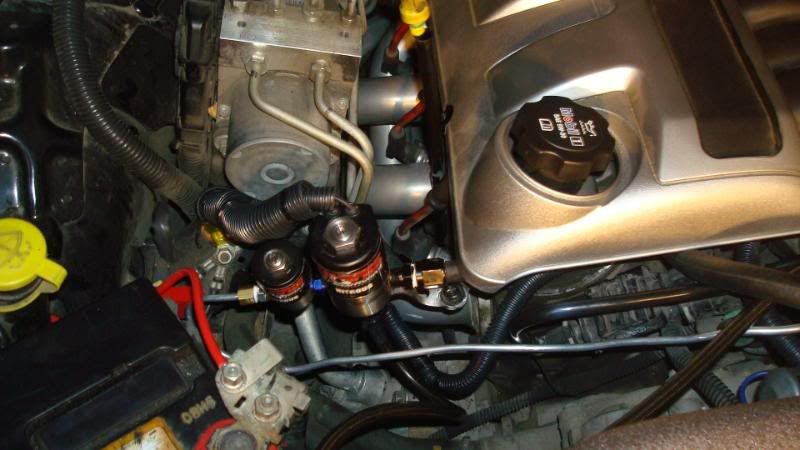
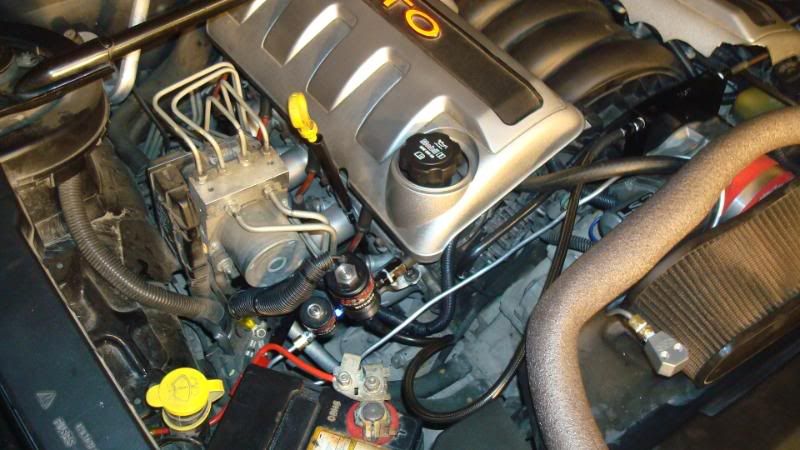
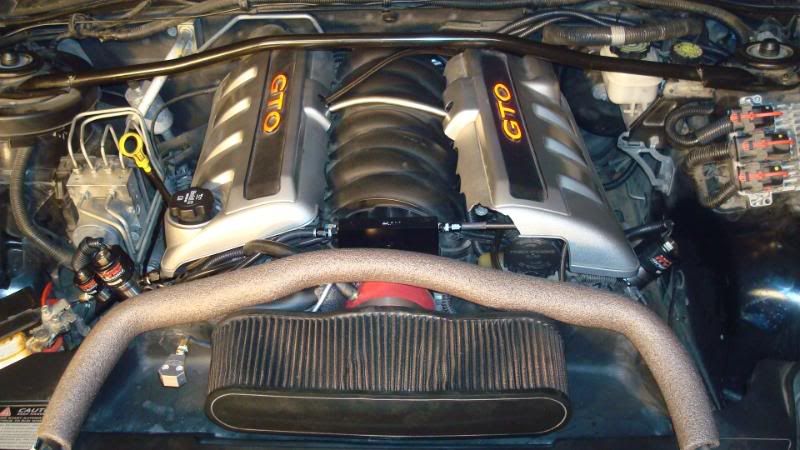
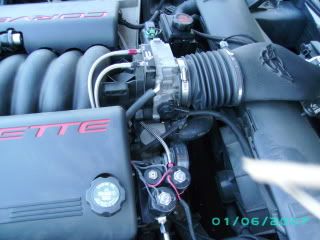
I just did my first install and it was confusing at first. But after looking at it for awhile it was so easy. Here is a few pics of my setup I got the cylinder head mounting bracket from nitrous outlet. Going to clean up my wiring a little more but other than that pretty much done. My only mistake was I didnt tighten the fittings in the solinoids tight enough so just had to crank them a lot more than I would of though.


05-08-2010, 09:10 PM
#11
TECH Enthusiast
Thread Starter
iTrader: (6)
Join Date: Sep 2007
Location: Tucson, AZ
Posts: 585
Likes: 0
Received 0 Likes
on
0 Posts
Still working on this. The wiring of the nitrous and bottle heater suck but aren't horrible, I'm able to track and follow along....BUT my progressive controller looks like a nightmare! I dont even want to start on it. My controller can wire into my tps, but I have a wot switch hooked up so do I need to wire that up or no?
05-08-2010, 10:02 PM
#13
TECH Enthusiast
Thread Starter
iTrader: (6)
Join Date: Sep 2007
Location: Tucson, AZ
Posts: 585
Likes: 0
Received 0 Likes
on
0 Posts
Ok, so if I dont need a WOT switch, what would I plug the wire for my arming switch to? I hate electrical crap! I want to pay a shop to do this, but I'm already ***** deep into it, and I like doing my own work...most the time.
05-09-2010, 04:45 PM
#14
TECH Enthusiast
Thread Starter
iTrader: (6)
Join Date: Sep 2007
Location: Tucson, AZ
Posts: 585
Likes: 0
Received 0 Likes
on
0 Posts
What are you guys splicing into for your keyed 12v source? I'm guessing they mean into the fuse box, does that mean to just pull out a fuse and wrap the wire around it and plug it back in? I'm trying to make this install look as professional as I can and I'm sure there is a wire I can splice into for a keyed 12v source that I can hide, I just dont know where.
05-09-2010, 07:44 PM
#15
8 second mod
iTrader: (37)
Join Date: Nov 2002
Location: East Side Performance! mASShole
Posts: 17,879
Likes: 0
Received 0 Likes
on
0 Posts
What are you guys splicing into for your keyed 12v source? I'm guessing they mean into the fuse box, does that mean to just pull out a fuse and wrap the wire around it and plug it back in? I'm trying to make this install look as professional as I can and I'm sure there is a wire I can splice into for a keyed 12v source that I can hide, I just dont know where.
05-09-2010, 11:24 PM
#17
Did the progressive controller you purchase come with instructions? If you purchased it used from somebody, go to their website and they should have a manual you could check out.
To answer your other question regarding TPS and WOT switch activation, if your Nitrous kit came with a relay, the relay should have a black, red, white and green wire. Green goes to the solenoids. Black goes to positive battery terminal. One of the wires from the progressive controller should hook up to either the white or red wire. I'm 90% sure it's the white wire off the relay. Double check that.
To answer your other question regarding TPS and WOT switch activation, if your Nitrous kit came with a relay, the relay should have a black, red, white and green wire. Green goes to the solenoids. Black goes to positive battery terminal. One of the wires from the progressive controller should hook up to either the white or red wire. I'm 90% sure it's the white wire off the relay. Double check that.
05-10-2010, 12:24 PM
#18
TECH Enthusiast
Thread Starter
iTrader: (6)
Join Date: Sep 2007
Location: Tucson, AZ
Posts: 585
Likes: 0
Received 0 Likes
on
0 Posts
Update;
Alright I pretty much finished all the wiring last under the hood and for the heater. All I had left to do was make my switch panel and hook up the switches...or so I thought. I pulled out my nitrous outlet digital progressive controller and started looking at the instructions, I have to basically undo everything I just got done wiring up. I have to take out the relay and wire the solenoids to a driver. FML
Alright I pretty much finished all the wiring last under the hood and for the heater. All I had left to do was make my switch panel and hook up the switches...or so I thought. I pulled out my nitrous outlet digital progressive controller and started looking at the instructions, I have to basically undo everything I just got done wiring up. I have to take out the relay and wire the solenoids to a driver. FML
05-10-2010, 05:17 PM
#19
TECH Regular
iTrader: (10)

Join Date: Jan 2004
Location: Green Bay, WI
Posts: 440
Likes: 0
Received 0 Likes
on
0 Posts
Yeah, I didn't use any of the instructions from my N20 outlet plate kit, I just used the instrustions from my NOS mini progressive. Im really happy with the way mine turned out. What I did for my 12 volt power sources/ relay mounting was; wring in and mounting a seperate fuse block and all of the relays in my glove box. Now I have seperate fuses for the n20 system, fuel pump for stand alone, and heater. It keeps it very neat and organized, plus I dont have any visible wires in my engine bay.