My 98 TA Build thread: Firestorm
 07-19-2014, 09:53 PM
#1
Thought id start a little build thread for my 98 TRANS AM. I picked up the car 2 years ago. Had 90k on a rebuilt motor and 6k on a rebuilt trans with Viper spec stuff in it. Only had StopTech rotors and a crappy 3 inch exhaust with a Flowcrapper muffler and no cats. Runs and drives great. Body need some love. Its gunna be a project.
Im a big road racing fan. My vision for the car is something i can take to the track (Road America, Blackhawk Farms) and play with on occasion. It will mostly see the street. Every awesome car has a name (ie Fr8Train, Scortch, Lsx ******, BeaterBomb) so i came up with Firestorm. Ill have OE style emblems and stickers made when i get her done.
So far I have the following mods:
SLP Bilsteins w/1le springs
Founders ADJ phb, adj lca, brackets, stb, sfc
UMI rear sway bar
Motive 410s
Hypertech 180
Proform girdle
Prothane engine and trans mounts
Speed engineering LT
3" true duals dumped with Moroso spiralflow bullets
ls6 valley cover
Mike Norris catch can
StopTech rotors
Brembo Pads
Slp Lid and bellows
Last edited by DirtyBirdMKE; 04-13-2015 at 10:24 AM. Reason: i cant spell
 07-19-2014, 10:03 PM
#2
Future Plans include:
Founders TA
BMR front arms
Strano sway bars
Roll Cage (Since it has Ttops)
Firebird front bumper w WW/Sarona Lip
Firebird low spoiler hatch w/ WW lip spoiler
Make my own 6LE style front and side splitters
Make my own rear bumper splitter
Alcantara Dash with CF accents (wrapped or hydrodipped)
c5 brakes
Wrap the car in Matte Blue Metallic vinyl w/ matte black stripes
I will eventually do a H/C/I but id like to do it with a different block and swap it.
I like to do try and do things myself first. Like the splitters. Im excited to try to make my own. Could be awesome. Could be an epic waste of time and money. My interior needs love so im going to try and use that SEM interior spray dye on my plastics. I hate leather seats so im picking up some stock cloth seats.
Ill Post pics soon.... they are on my phone.
Last edited by DirtyBirdMKE; 07-19-2014 at 10:15 PM. Reason: i forget
07-21-2014, 02:27 PM
#5
Im trying to buy a house in the next year-ish. So im trying to do things in an order... sort of.... i have a little bit of go for now. Its more if a rehab project to build it into what i want. Its just a money thing. But i will her here to where i want.


 07-22-2014, 01:31 PM
#7
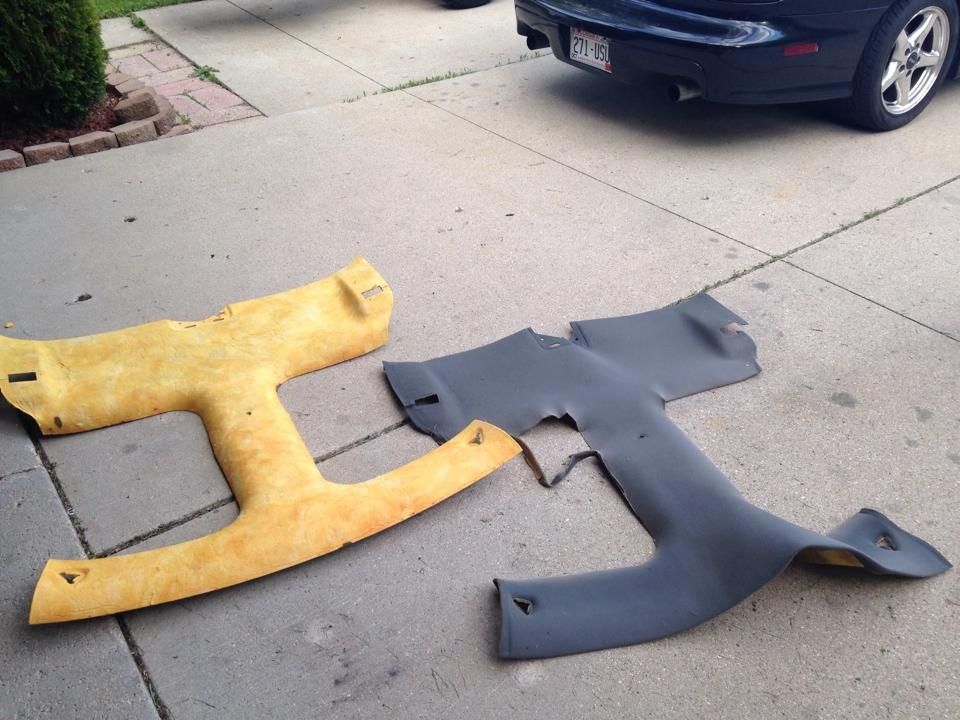
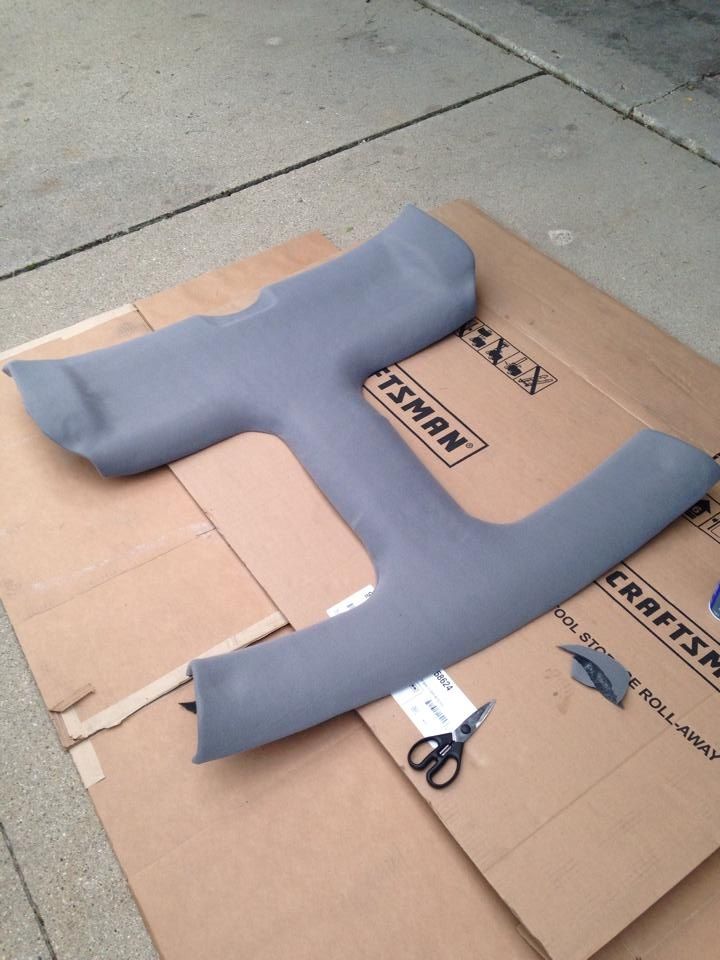
My headliner was ripped so i decided to recover it myself. It was retardedly hard to get the old material off without breaking the backing. Picked up some headliner material from JoAnne Fabrics and some Loctite fabric glue and tried it myself. I gave myself a solid C+ for the effort. Looks good. I also bought some sunvisor delete plates from ICT Billet.


Trending Topics


 08-04-2014, 12:33 PM
#12
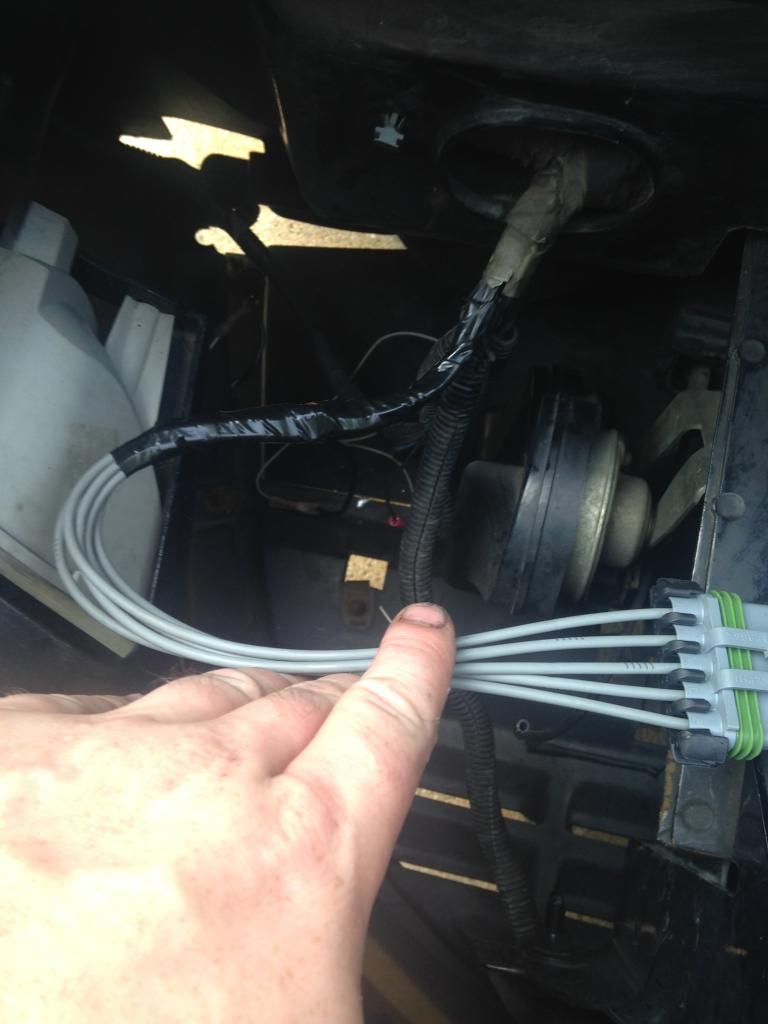
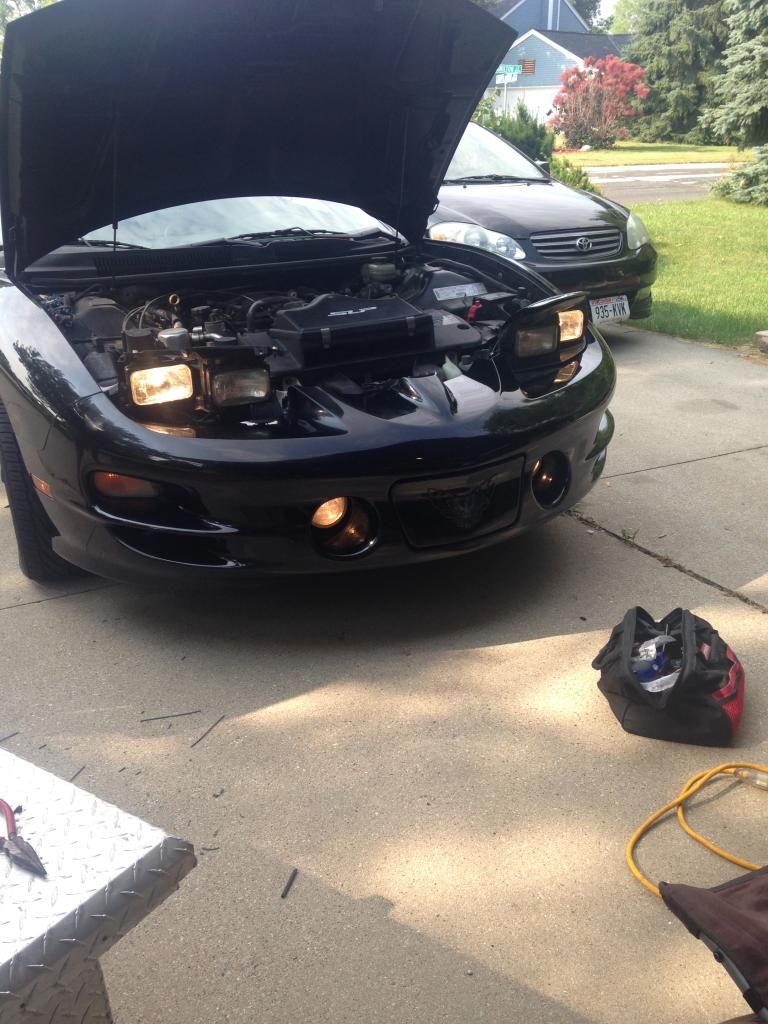
One of the really shitty things when i got the car was the passanger headlight motor was shot. So a couple months ago i got a new (re-man) one from Oreily. When i took the old one out, i found that the harness was corroded to hell. So today i got the motivation to splice in the new connector...
Took out the headlight assembly. This was easier than i thought.
Found that the cover for my 4 month old motor fell off. Still worked so i just used some JB Weld.
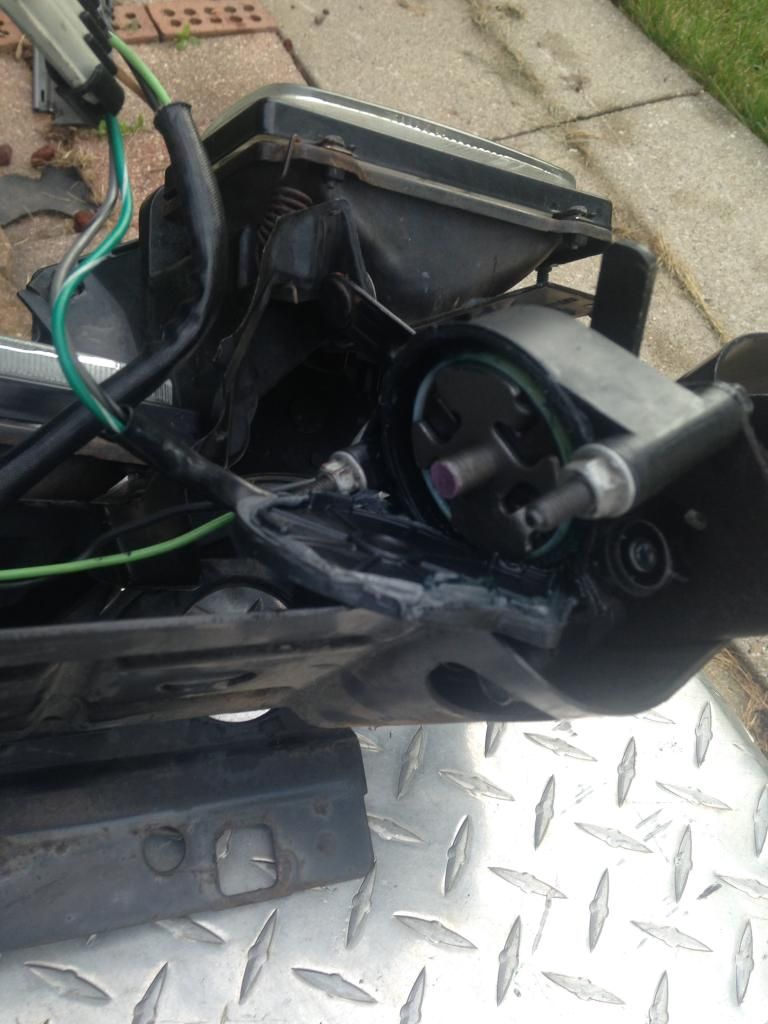
Here is the part number for anyone else who may encounter this problem. Got it on Amazon for $24.
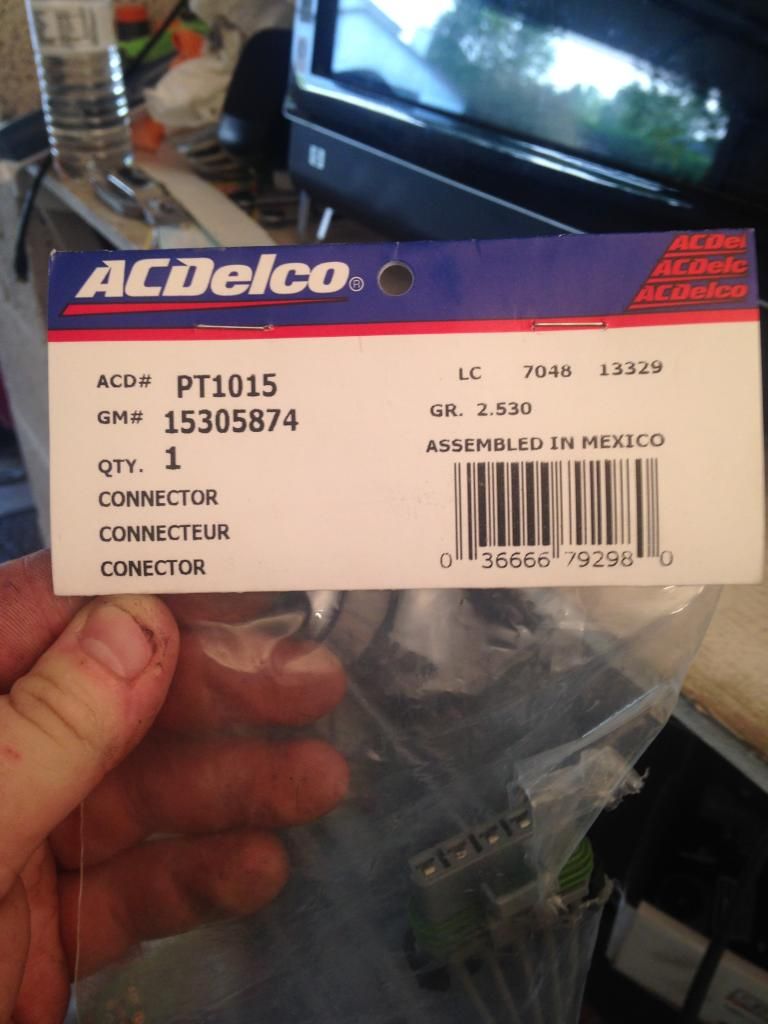
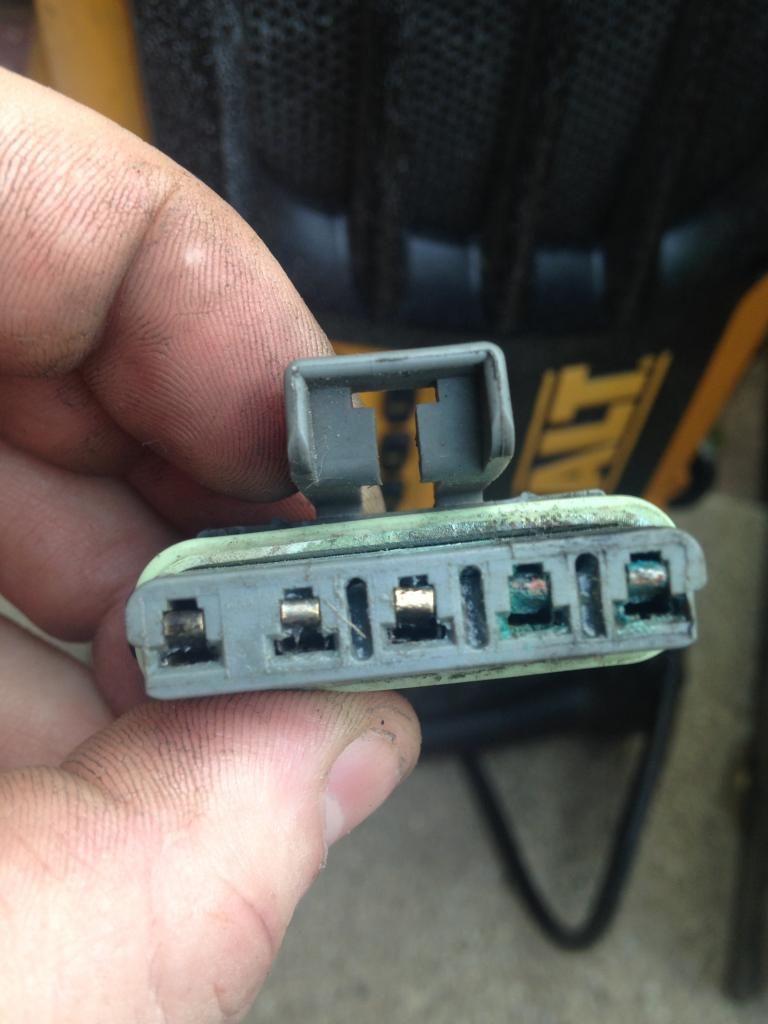
The factory connector has the wires labeled A B C D E. So does the new one but the wires arent colored. Just match up the wires with the right letter
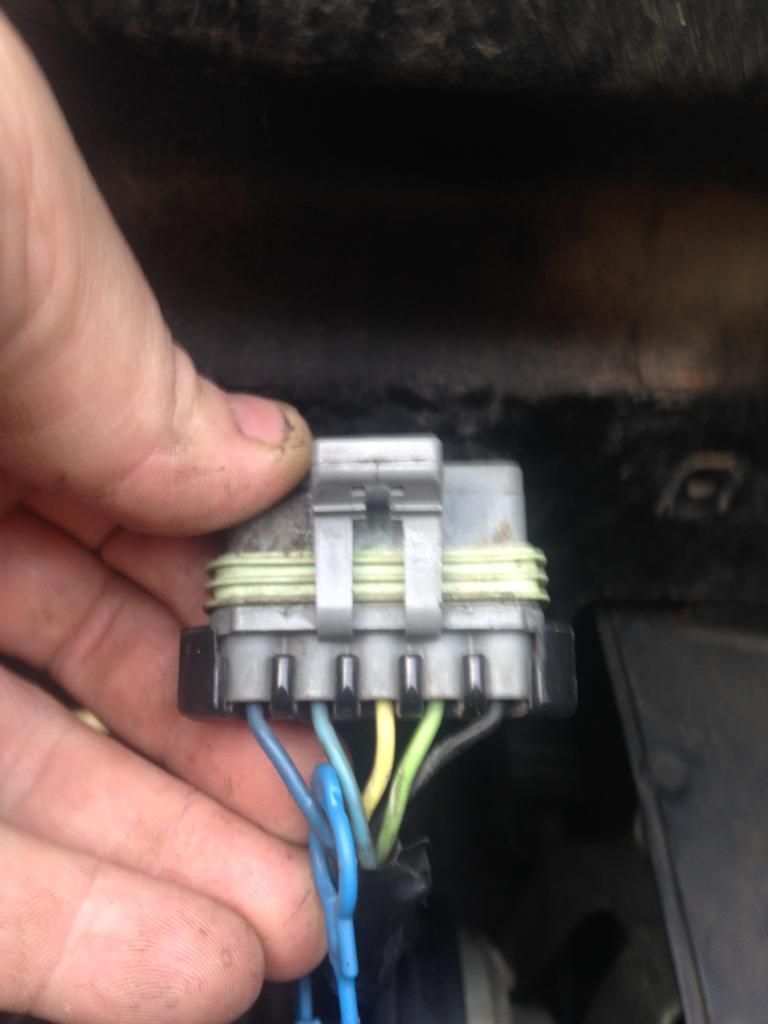
Inside of the old socket. All corroded.
Here are the 2 wires on the motor that control the Up and Down. Alot of people think the put the arm on wrong, when in fact the motors were wires backwards(Mine was a Cardone brand). You will see 4 wires going to the high and low beam sockets, and then 2 more going to the motor. You are going to want to take the 2 goign to the motor and switch them around. Take a needle nose, gently grab the pin on the inside and push it out the back. When you put them back in the right area, take a very small screw driver and push the rubber "gasket" that holds the pin in and stuff in back in the socket. Gently grab the pin and give it a little tuck to seat it. BOOM done.
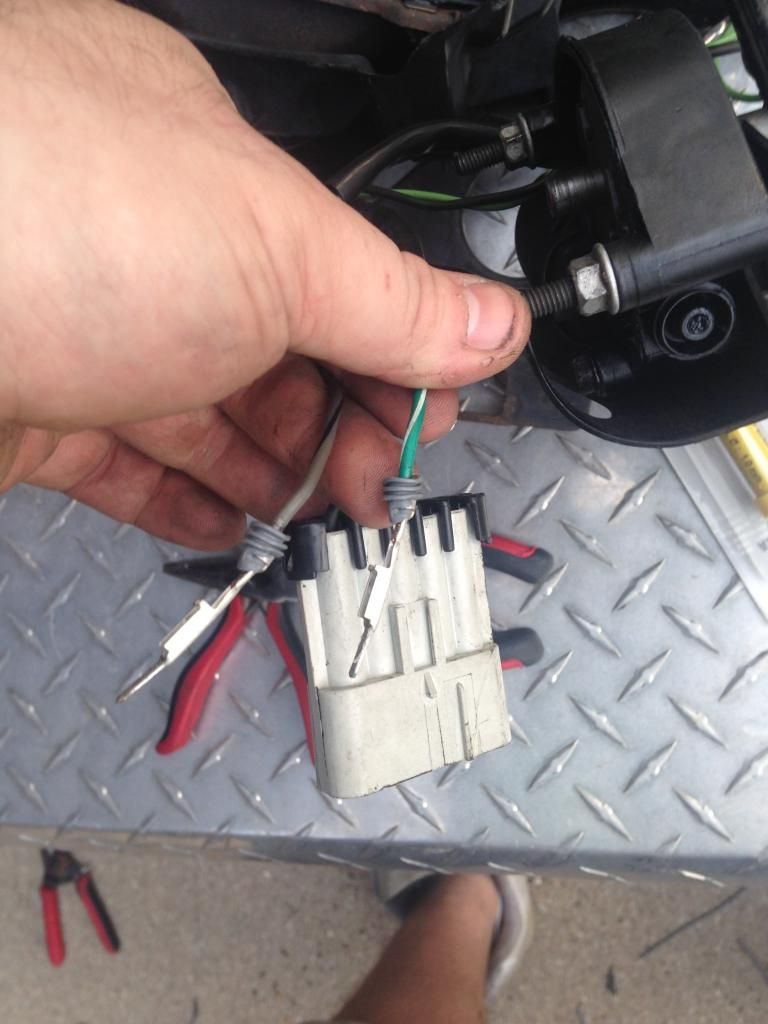
All done. Soldered all the wires. Covered with shrink tuning. Electrical taped everything back together.
Headlight finally work right. Now to do the HIDs
Took out the headlight assembly. This was easier than i thought.

Found that the cover for my 4 month old motor fell off. Still worked so i just used some JB Weld.

Here is the part number for anyone else who may encounter this problem. Got it on Amazon for $24.

The factory connector has the wires labeled A B C D E. So does the new one but the wires arent colored. Just match up the wires with the right letter

Inside of the old socket. All corroded.

Here are the 2 wires on the motor that control the Up and Down. Alot of people think the put the arm on wrong, when in fact the motors were wires backwards(Mine was a Cardone brand). You will see 4 wires going to the high and low beam sockets, and then 2 more going to the motor. You are going to want to take the 2 goign to the motor and switch them around. Take a needle nose, gently grab the pin on the inside and push it out the back. When you put them back in the right area, take a very small screw driver and push the rubber "gasket" that holds the pin in and stuff in back in the socket. Gently grab the pin and give it a little tuck to seat it. BOOM done.

All done. Soldered all the wires. Covered with shrink tuning. Electrical taped everything back together.

Headlight finally work right. Now to do the HIDs


 08-05-2014, 07:28 PM
#16
BTW, The ICT Billet deletes i got are pretty nice. Cheaper than the ones from HAWKS and not as thick. No need for a 1/4" slab of metal just to hold up a headliner.
08-06-2014, 10:33 PM
#18
08-07-2014, 06:05 PM
#20
HAHA awesome. if i were to do it again, i would take more time with the inside corners. they didnt turn out the way id like, but they are ok for now. I should have left more material to fold over........... Good luck!!

