When you click on links to various merchants on this site and make a purchase, this can result in this site earning a commission. Affiliate programs and affiliations include, but are not limited to, the eBay Partner Network.
Night shots are really hard to get. The reflective portions of the lens screw with the camera sensors, makes the lights appear to have wavy lines. I'll need to try some LEDs in these to see what difference it makes, in person they're wicked
Night shots are really hard to get. The reflective portions of the lens screw with the camera sensors, makes the lights appear to have wavy lines. I'll need to try some LEDs in these to see what difference it makes, in person they're wicked
I was going to try and mimic the '67-'69, but the back end of the 4th gen is too tall. I think these turned out really close to the original photoshop of the retro tails... Still haven't been able to get a good night shot, they're so much better in person, may just have to drive it by the shop one of these days...
What was the process and materials used for this project?
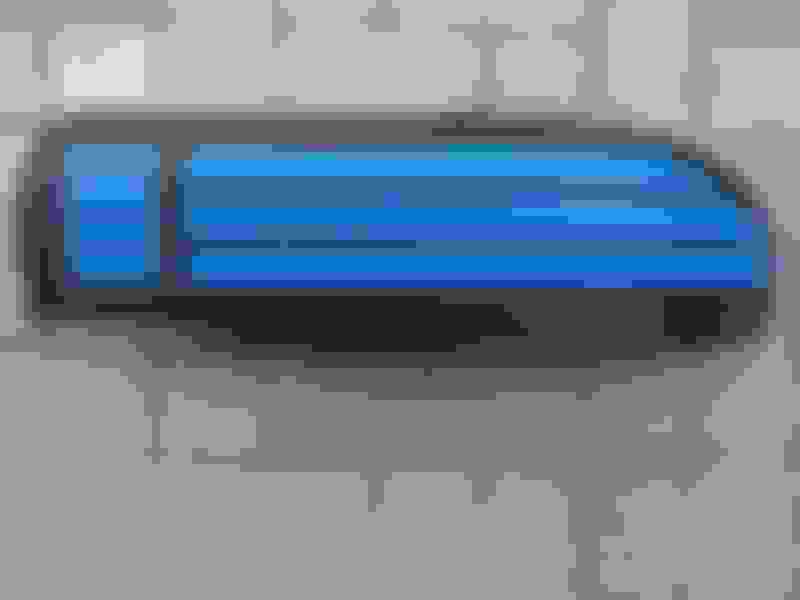
Wet sand the **** out of a set of 93-97 Firebird lights. I ended up filling in quite a few low spots with epoxy to have a smooth finish.
I chose to keep the three 'small' reflective stripes of the lens visible, along with one row of the 'beads' or 'squares' on the top and bottom of the smaller stripes. The black stripes between the three red ones are only two beads/squares thick, mask off the reverse lights however you choose. Getting the masking just right is the hardest part.
After you're done masking, wipe the lenses with a damp cloth, or with paint thinner, then spray multiple coats of whatever black paint you choose. Be sure to spray down inside the gap around the reverse lights. I let the paint dry for 3-4 hours, removed the tape, and sprayed a few coats of clear coat on top.
I used a couple of spray cans, certainly the results would have been better with an actual paint sprayer. We'll see how they look once I wet sand and buff them.


 12-07-2016, 11:27 AM