My girlfriend's 2002 Collector Edition
 10-18-2018, 07:30 PM
#101
On The Tree
Thread Starter
Those are gnarly. The one by the windshield may be OK, but it looks like the rear flap may need to be removed, flattened and glued back on. (Super glue, if I recall correctly, should do the job.)
When you put the T-Tops in, you need to make sure that the corners go under those flaps, otherwise they get bent out of shape. It's just something that you'll need to be careful with after you fix these. For example, after seeing the front passenger corner, you'd want to pull the top back out, get it under the tab, and then everything will settle back into the proper place.
If you take the T-Tops out, you can remove the screws holding the plastic bar down and then pop it off. It should be held down with those lightly tightened screws and some foam tape. (You can get the new tape at any auto parts store.)
Once the center bar is out, you should be able to put it in a warm place and the rubber ends should start to relax. You may have to heat them up with a low temperature heat gun to get the flat shape back if you can't park the car with the tops off (in a garage) for a while. Once you have everything flat again, the bar goes back on top of the car and then the rubber ends get bent and tucked under the front and back lips again.
I got the driver's window adjusted today. Had to adjust the stabilizers, and I moved it up and forward some. It still goes up and down without issue and seems much tighter. I sprayed the door with the hose on jet while she was inside (before I moved it forward the last little bit) and she said only a tiny bit made it in. Huge improvement!
I went ahead and did some plastic welding on the passenger door panel to re-repair the infamous crack. I used the little metal mesh this time, it really beefed it up!
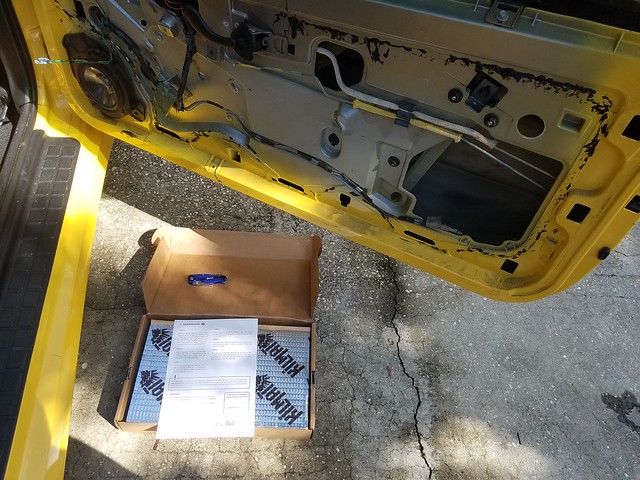
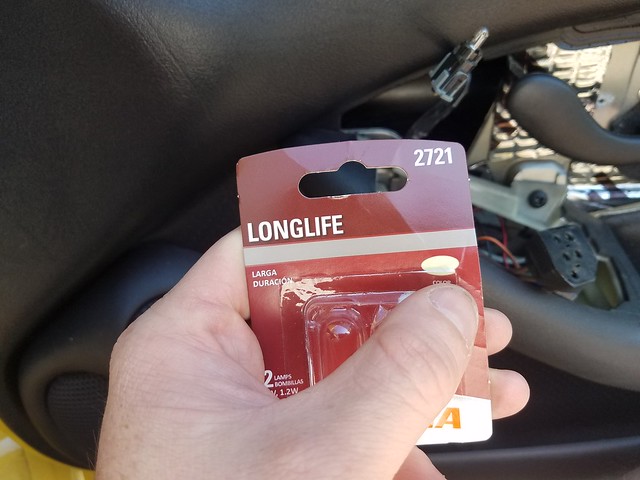
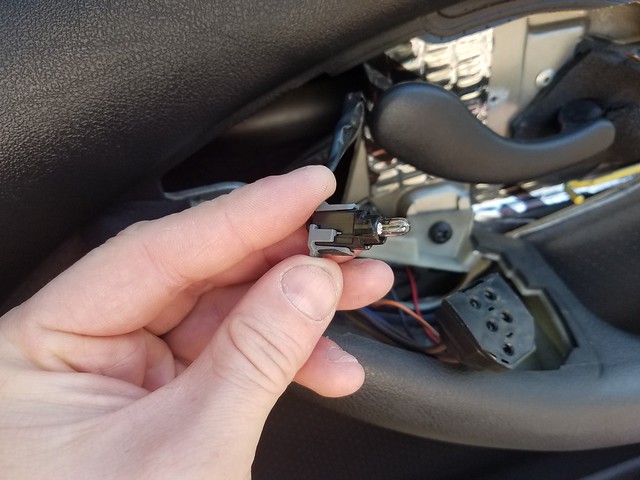
Hopefully in the next couple weeks we will have it lowered with the SFCs on. I also ordered some sound deadening to skin the doors, mostly just to make it a tighter overall feeling. Also, need to pick up the tiny bulbs for the lights, I can stop by Autozone tomorrow at work.
As always, I really appreciate all the help!
 10-19-2018, 07:51 AM
#102

Had to adjust the stabilizers, and I moved it up and forward some. It still goes up and down without issue and seems much tighter. I sprayed the door with the hose on jet while she was inside (before I moved it forward the last little bit) and she said only a tiny bit made it in. Huge improvement!
10-19-2018, 07:41 PM
#103
On The Tree
Thread Starter
Cool. The stabilizers are the hard part. If they are not in the right place, they cause a lot of issues... They should not contact the glass all the time and this is what usually sidetracks people. shbox has great guidance on this whereas the factory service manual saus nothing on the subject.
10-22-2018, 01:36 AM
#104
On The Tree
Thread Starter
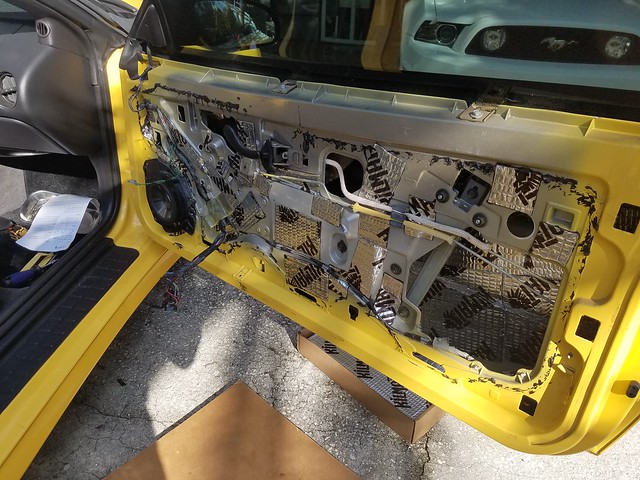
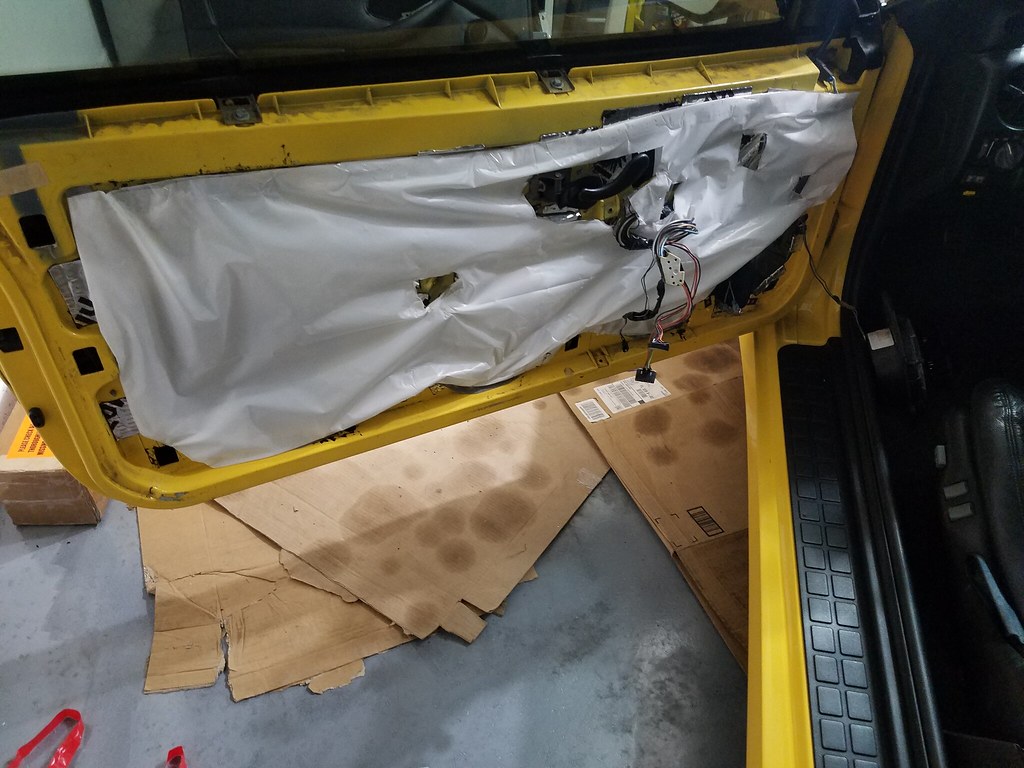
Alright, as far as I can tell the windows are all adjusted! I went ahead and added some Kilmat to the doors, changed the bulbs out (they have never worked) and put everything back together. I think I made need to make a new vapor barrier. The ones on there were so messed up I just tossed them. But knowing my luck, that’s going to be one of those weirdly impossible things to replace ha!
Anyhow, some pics:
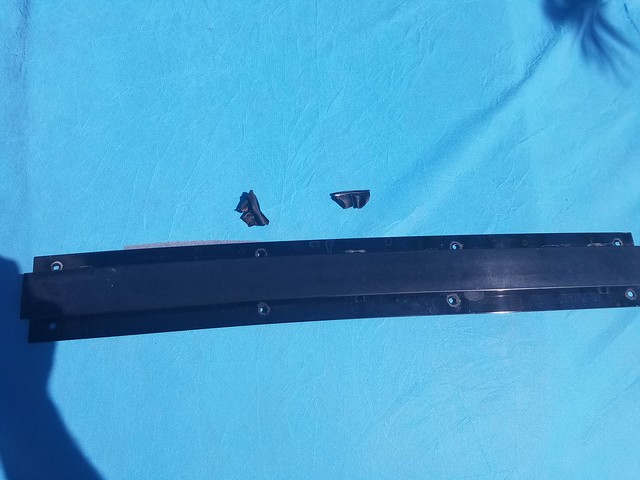
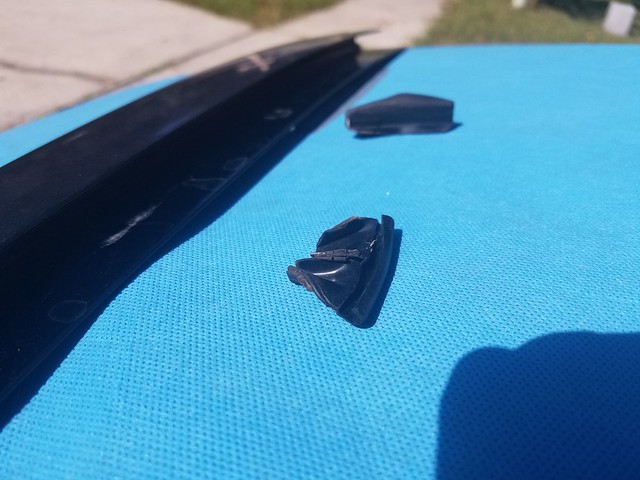
I popped off the center piece and I’ve been putting the ends in the sun. They seem to be flattening out some. Tonight I might try to hit them with a little heat to try putting everything back together. I really wish I could find a new set of these, I’d be much happier.
Thanks for looking!
Anyhow, some pics:
I popped off the center piece and I’ve been putting the ends in the sun. They seem to be flattening out some. Tonight I might try to hit them with a little heat to try putting everything back together. I really wish I could find a new set of these, I’d be much happier.
Thanks for looking!
10-22-2018, 08:04 AM
#105
Were you able to find the step-by-step shbox instructions on the stabilizers and adjustment?
We've had some really good threads over these vapor barriers over the years. GM may still have them stocked. (They come like a peel-and-stick roll-up.) Either way, you need to remove the old goo. This takes a while. The trick is to put on a rubber glove and get a gob of the old goo in your hand. Then dab it on the other goo and it will all congeal into a ball, slowly pulling away from the door. Just keep dabbing and using it to pull itself off. (We haven't found a solvent that will dissolve the sealant and not ruin the door! So, you have to use this method.)
You can also get comparable plastic and cut new vapor barriers yourself. The messy sealant shouldn't be necessary anymore with modern tarp/plastic tape. When I need to do this again - that's what i"m going to do. I will cut my own and use tarp/plastic tape to secure it to the door; bypassing the messy sealant. (The sealant doesn't really do anything. The plastic just needs to be in place to protect the inside of the panel.
You may also try using a book or other flat, weighty materials to press the pieces thin. That may move things along and accelerate undoing what was done to them originally. More heat should help, but if you melt the things... you are in BIG trouble!
Alright, as far as I can tell the windows are all adjusted! I went ahead and added some Kilmat to the doors, changed the bulbs out (they have never worked) and put everything back together. I think I made need to make a new vapor barrier. The ones on there were so messed up I just tossed them. But knowing my luck, that�s going to be one of those weirdly impossible things to replace ha!.
You can also get comparable plastic and cut new vapor barriers yourself. The messy sealant shouldn't be necessary anymore with modern tarp/plastic tape. When I need to do this again - that's what i"m going to do. I will cut my own and use tarp/plastic tape to secure it to the door; bypassing the messy sealant. (The sealant doesn't really do anything. The plastic just needs to be in place to protect the inside of the panel.
I popped off the center piece and I�ve been putting the ends in the sun. They seem to be flattening out some. Tonight I might try to hit them with a little heat to try putting everything back together. I really wish I could find a new set of these, I�d be much happier.
10-22-2018, 09:58 PM
#106
On The Tree
Thread Starter
We've had some really good threads over these vapor barriers over the years. GM may still have them stocked. (They come like a peel-and-stick roll-up.) Either way, you need to remove the old goo. This takes a while. The trick is to put on a rubber glove and get a gob of the old goo in your hand. Then dab it on the other goo and it will all congeal into a ball, slowly pulling away from the door. Just keep dabbing and using it to pull itself off. (We haven't found a solvent that will dissolve the sealant and not ruin the door! So, you have to use this method.)
You can also get comparable plastic and cut new vapor barriers yourself. The messy sealant shouldn't be necessary anymore with modern tarp/plastic tape. When I need to do this again - that's what i"m going to do. I will cut my own and use tarp/plastic tape to secure it to the door; bypassing the messy sealant. (The sealant doesn't really do anything. The plastic just needs to be in place to protect the inside of the panel.
You can also get comparable plastic and cut new vapor barriers yourself. The messy sealant shouldn't be necessary anymore with modern tarp/plastic tape. When I need to do this again - that's what i"m going to do. I will cut my own and use tarp/plastic tape to secure it to the door; bypassing the messy sealant. (The sealant doesn't really do anything. The plastic just needs to be in place to protect the inside of the panel.
You may also try using a book or other flat, weighty materials to press the pieces thin. That may move things along and accelerate undoing what was done to them originally. More heat should help, but if you melt the things... you are in BIG trouble!
While you're here, since we're planning on changing the front shocks and putting on the lowering springs, is there anything you recommend as a "while you're in there" sort of thing? For instance, ball joints, tie rods, etc.
I usually abide by the "if it's not broke, don't fix it" mentality, but at the same time, I can tell this car was a bit neglected, and I don't like the idea of ticking time bombs, especially when it comes to steering components.
Thanks for the help!
10-23-2018, 07:10 AM
#107
For ball joints - you should make the call when you have the suspension apart. If they aren't tight or move loosely, then they should be replaced.
I like to hold off on tire rod ends and just replace those whenever I do something that requires an alignment anyway. (They are pretty easy to get at and do whenever needed.)
10-24-2018, 12:08 AM
#108
On The Tree
Thread Starter
How many miles again? If you are over 75K, you could pre-emptively replace the front hubs and bearings. (They won't go much longer after that.)
For ball joints - you should make the call when you have the suspension apart. If they aren't tight or move loosely, then they should be replaced.
I like to hold off on tire rod ends and just replace those whenever I do something that requires an alignment anyway. (They are pretty easy to get at and do whenever needed.)
Are bushings a big issue? I know they're usually a major pain to replace (burning, pressing, etc.) - so I am half on the side of replace the whole control arm, unless that's a waste. I'm big on spending the extra $40 if it saves me hours, you seem to be the same way.
10-24-2018, 07:32 AM
#109
I would do an alignment after lowering, just to be sure everything is OK. (I'm not sure if the geometry changes as the car squats, or not.)
If you don't know, I'd just hold off until you have a problem. You could spend more than the value of the car replacing the entire suspension. It's and old car and you just probably aren't going to escape having to go back and do repairs as time goes on.
After 10 years, rubber starts to oxidize. Like our own soft body parts, they get hard, brittle, and nasty over time. Since the bushings are so thick, I'd expect them to go longer than most other rubberized parts and I haven't seen many posts of members with LS cars having problems with them yet. Would new bushings feel better - probably. Are they "bad" or dangerous to keep using - probably not.
10-25-2018, 06:38 AM
#110
On The Tree
Thread Starter
I would do an alignment after lowering, just to be sure everything is OK. (I'm not sure if the geometry changes as the car squats, or not.)
If you don't know, I'd just hold off until you have a problem. You could spend more than the value of the car replacing the entire suspension. It's and old car and you just probably aren't going to escape having to go back and do repairs as time goes on.
After 10 years, rubber starts to oxidize. Like our own soft body parts, they get hard, brittle, and nasty over time. Since the bushings are so thick, I'd expect them to go longer than most other rubberized parts and I haven't seen many posts of members with LS cars having problems with them yet. Would new bushings feel better - probably. Are they "bad" or dangerous to keep using - probably not.
If you don't know, I'd just hold off until you have a problem. You could spend more than the value of the car replacing the entire suspension. It's and old car and you just probably aren't going to escape having to go back and do repairs as time goes on.
After 10 years, rubber starts to oxidize. Like our own soft body parts, they get hard, brittle, and nasty over time. Since the bushings are so thick, I'd expect them to go longer than most other rubberized parts and I haven't seen many posts of members with LS cars having problems with them yet. Would new bushings feel better - probably. Are they "bad" or dangerous to keep using - probably not.
In that case I think I'll just hold off.
I think I screwed up on the T-Top seals and glued the front to the back, vice versa. I thought that bar was reversible, but it turns out it only goes one way. I can't find any pics of how those seals are supposed to go, so I am positive they are on wrong. I am ashamed to post pictures of them right now!
I've been searching and can't find any good close up shots of them.
Though, I saw you say in a thread from several years ago that these seals are mostly just aesthetic. I feel better if that's the case. I ended up using a low heat gun and clamping them to the bar to straighten them out by the way. I think I just glued them on in the wrong orientation since I had nothing to base off of.
I need to figure out why we are leaking behind the mirror. I saw in an older thread you mentioned that though there is a gap between this center bar and the windshield, there should be windshield sealant the entire way around the window. I wonder if maybe this one is just not sealed well there.
10-25-2018, 07:31 AM
#111
Yea, they are just gap fill and probably help with the aero on the roof. Any water that gets in that space should fall into the gutters that the T-Tops fit in to and be handled there. If you look at the roof with the tops out and the bar out, you'll see how the water is handled. As long as the center bar screw holes have something in them, the whole roof can handle water with its gutters - no need for any seals in the center bar. The seals on the bottom of the T-Tops is what keeps water out.
10-25-2018, 10:18 AM
#112

my front t-top seal fell off and was warped. I cleaned it up, and i used 3M adhesive on it and then (with the t-tops off) i put the seal on, and used wood shims (like for door framing) and slid them under the seal and wedged it to the rail it glues on. worked awesome. then where the seal meets the frame rail, i applied adhesive there as well. I'll snap a pic of it tonight. been fine now for 2 years
11-06-2018, 11:43 PM
#113
On The Tree
Thread Starter
For some reason I forgot to reply to this. I have been super busy at the house and have not had a chance to re-address this. Luckily it's cooling down now so I'll be more apt to get to work. On the immediate to-do - get the T-Top bar correct with the seals properly oriented, then seal up the screws, use some plastic to make new vapor barriers.
11-24-2018, 07:01 AM
#114
On The Tree
Thread Starter
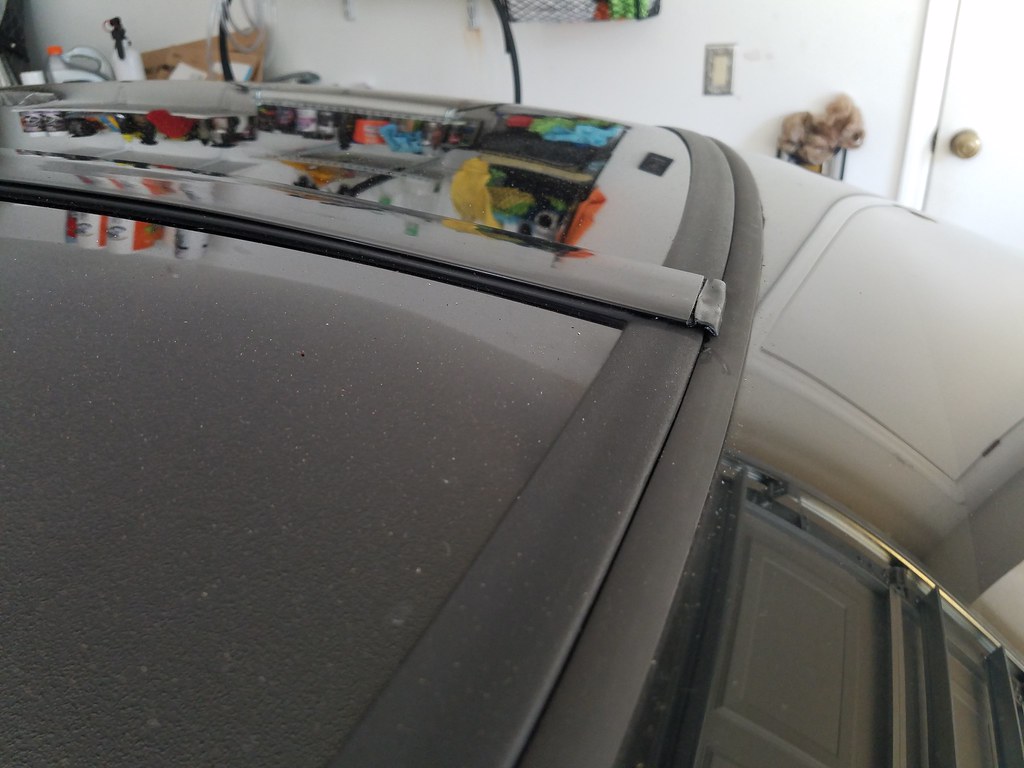
Alright so it’s time for a little update. To start with, I will point out how I screwed up doing those little T-Top Bar “seals:”
I managed to get both of the pieces fairly well straightened out. For those who do not know, these pieces are very difficult (read: impossible) to find and have not been in production for a number of years. The only real option is a junk yard and hoping for the best. I was short on time to go hunt, so I wanted to make these work.
All was going well until I went to put them on, with no reference.
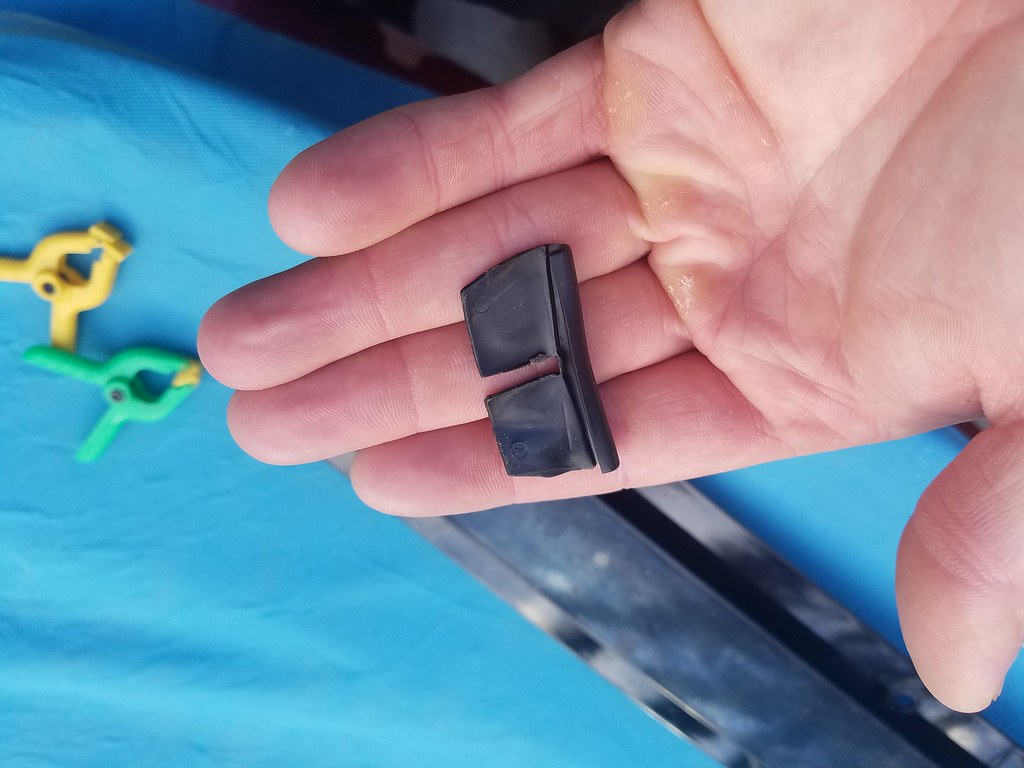
And like a total idiot, I glued them down and folded them over. Not only is the flip wrong, but I also glued the front to the back and vice versa, expecting that this piece could go either way.
These pieces do go on with super glue for anyone wondering what adhesive to use on theirs.
So, with much wailing and gnashing of teeth, I managed to undo my blunder, and get the pieces on correctly/better than they were before.
While I had the bar out, I did shoot a little bit of RTV in the front gap near the windshield. If it does absolutely nothing, great, it’s hidden. If it helps prevent any leaks, great, I hate leaks. Win-win unless I’m told the car will fall apart with it there or something (knowing my luck!)
If you decide to tackle this job, make sure to put some sealant in the screw holes/on the screws as well when setting it back down. I have not checked for leaks since the repair, but I am confident the sealant is much better than what was there.
Anyways:
Front
Rear
They probably got a little disfigured from the heat, but overall better than they were, by a long shot. And now there are close up shots of those pieces on the car, which I had a very difficult time finding any when I was hunting (which is why I made my initial blunder!)
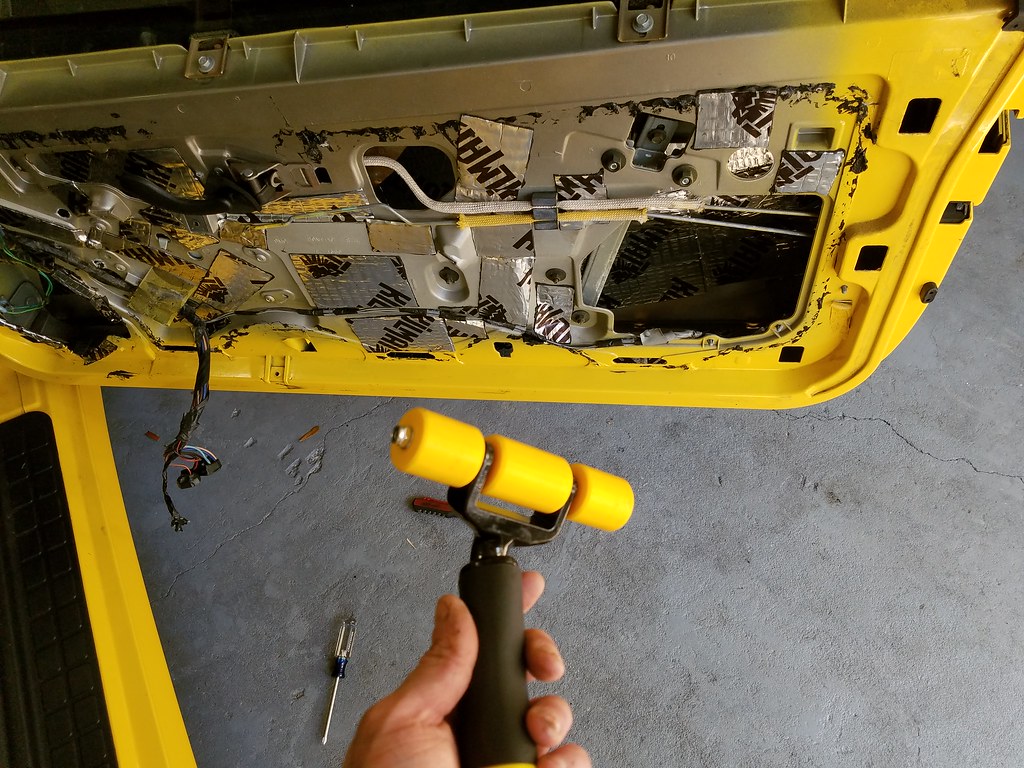
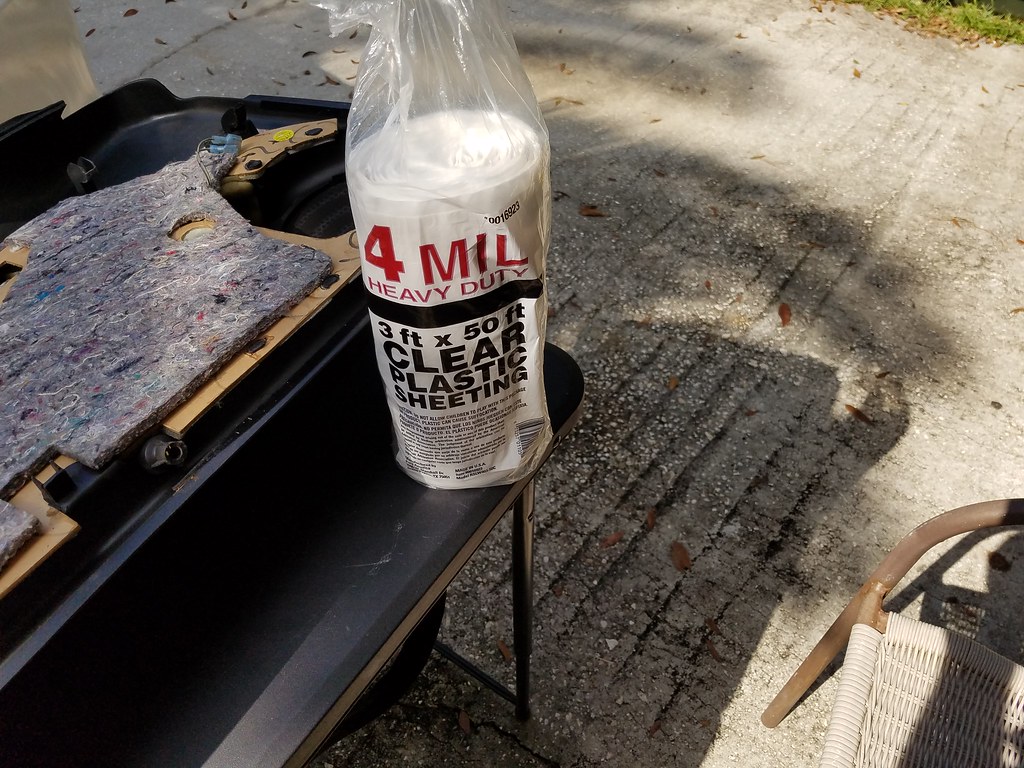
Next on the list was re-making some vapor barriers. I will admit, I sort of rushed through this in a day. They could probably be better, and I will probably make some changes in the future.
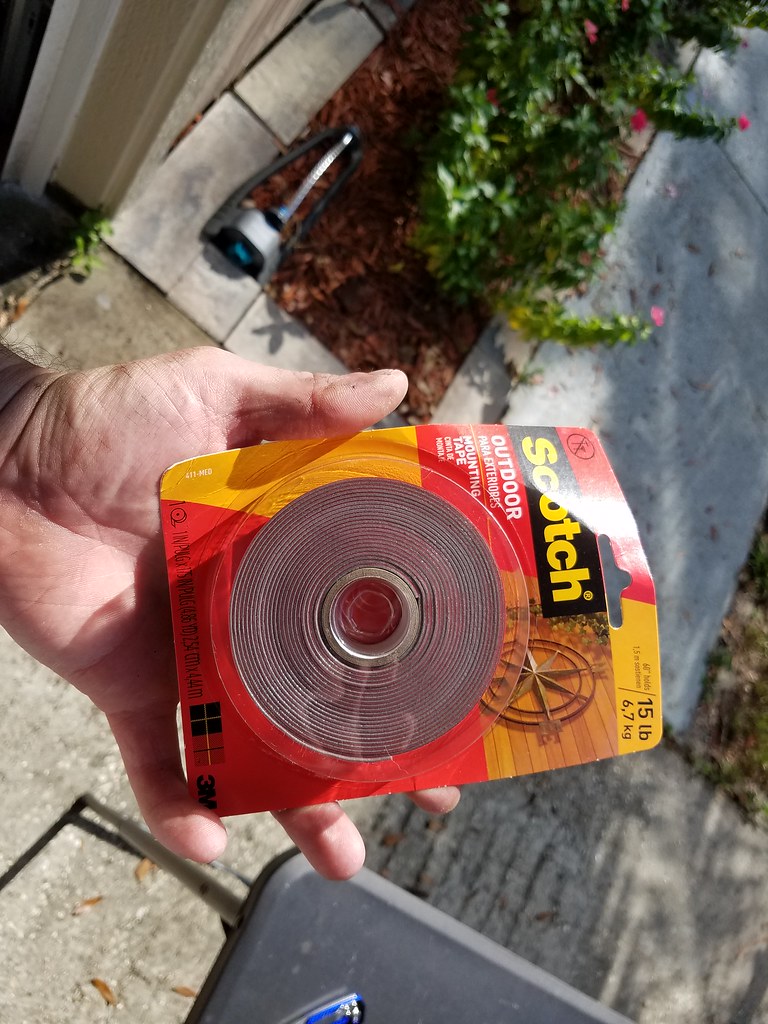
I ultimately used some 4-mil plastic doubled over (so 8-mil) and double sided tape, in more or less the same pattern the original followed.
But first! I bought a laminate roller to use to roll down all of the sound deadening material:
It worked fairly well; obviously it gets tight trying to roll inside the door. Overall I think it made it a bit better than not having it.
So after that I put it all back together, and all seems fine. I have noticed the door seems slightly more difficult to shut since the window adjustment. I am not sure if this is wrong, or if I just made it seal really well. I will say, you don’t have to “Slam” the door, but you need to mean it when you shut it. You can close it softly then push the door in though, which is what I typically do anyways.
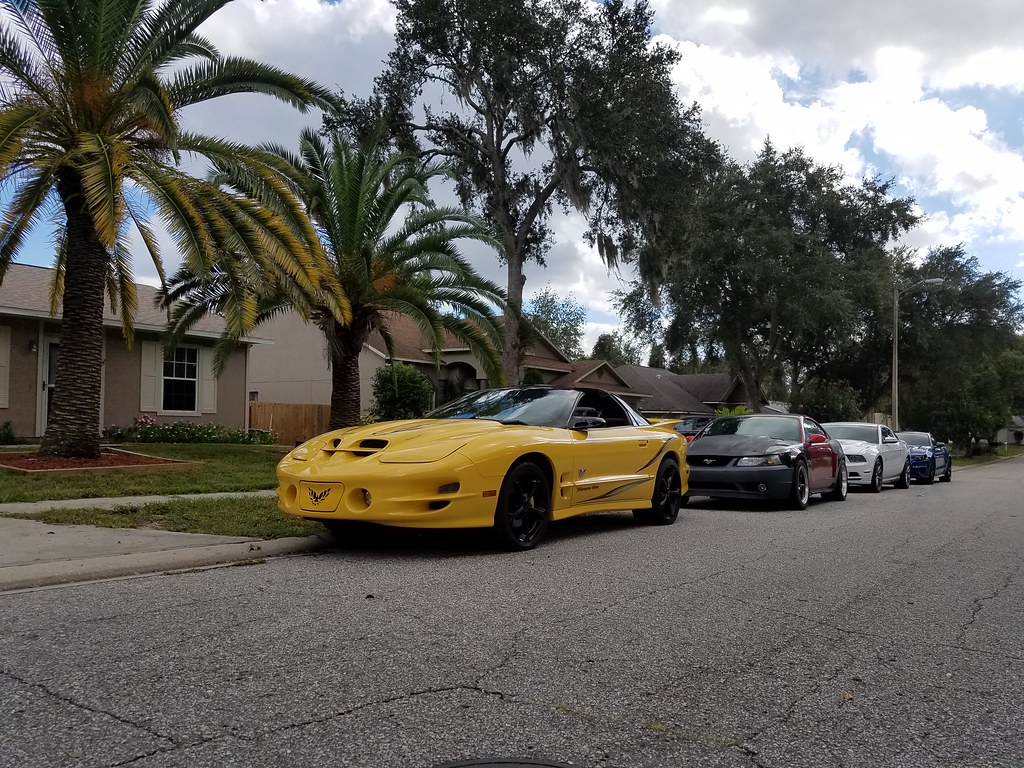
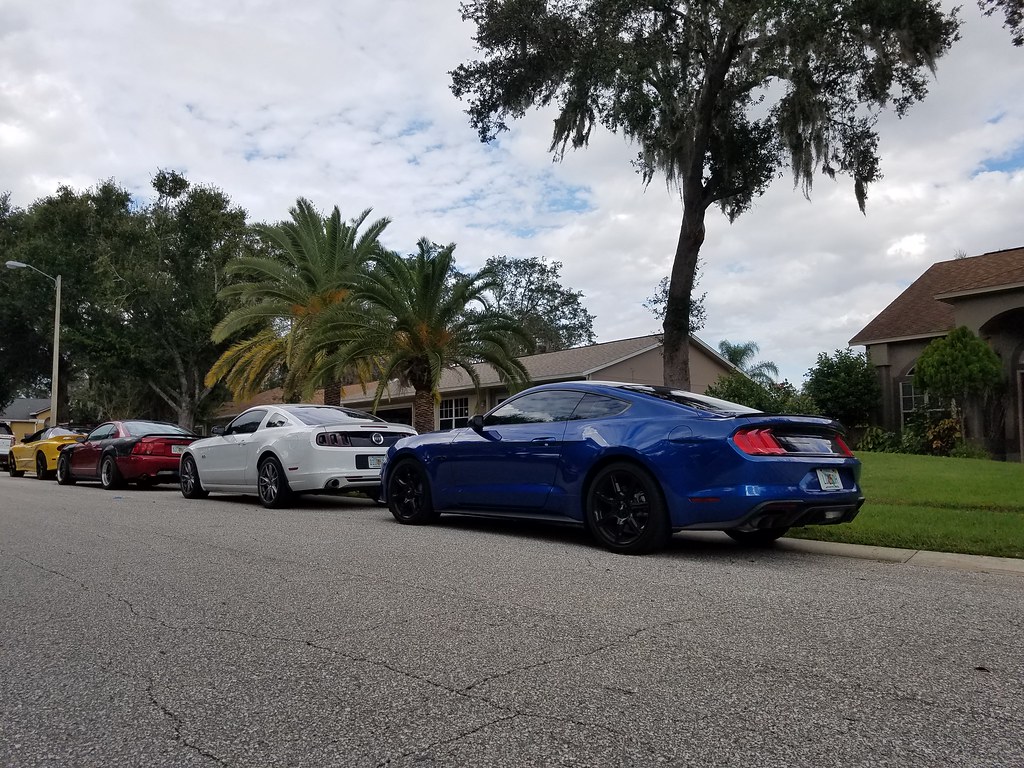
That said, I had the whole fleet out while I was cleaning up some stuff in the garage so:
Thanks for looking! I am hoping to have it lowered with subframe connectors installed in the next couple weeks. I am tired of those parts and the shocks taking up space in the garage!
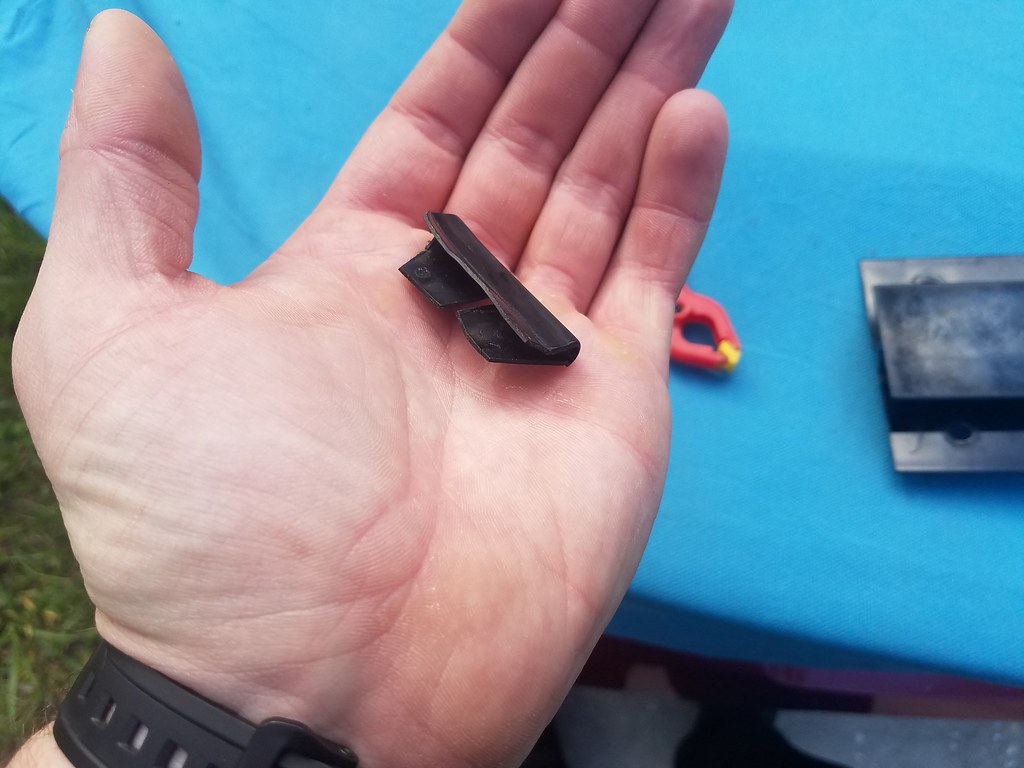
I managed to get both of the pieces fairly well straightened out. For those who do not know, these pieces are very difficult (read: impossible) to find and have not been in production for a number of years. The only real option is a junk yard and hoping for the best. I was short on time to go hunt, so I wanted to make these work.
All was going well until I went to put them on, with no reference.

And like a total idiot, I glued them down and folded them over. Not only is the flip wrong, but I also glued the front to the back and vice versa, expecting that this piece could go either way.
These pieces do go on with super glue for anyone wondering what adhesive to use on theirs.
So, with much wailing and gnashing of teeth, I managed to undo my blunder, and get the pieces on correctly/better than they were before.
While I had the bar out, I did shoot a little bit of RTV in the front gap near the windshield. If it does absolutely nothing, great, it’s hidden. If it helps prevent any leaks, great, I hate leaks. Win-win unless I’m told the car will fall apart with it there or something (knowing my luck!)
If you decide to tackle this job, make sure to put some sealant in the screw holes/on the screws as well when setting it back down. I have not checked for leaks since the repair, but I am confident the sealant is much better than what was there.
Anyways:
Front

Rear
They probably got a little disfigured from the heat, but overall better than they were, by a long shot. And now there are close up shots of those pieces on the car, which I had a very difficult time finding any when I was hunting (which is why I made my initial blunder!)
Next on the list was re-making some vapor barriers. I will admit, I sort of rushed through this in a day. They could probably be better, and I will probably make some changes in the future.
I ultimately used some 4-mil plastic doubled over (so 8-mil) and double sided tape, in more or less the same pattern the original followed.
But first! I bought a laminate roller to use to roll down all of the sound deadening material:
It worked fairly well; obviously it gets tight trying to roll inside the door. Overall I think it made it a bit better than not having it.
So after that I put it all back together, and all seems fine. I have noticed the door seems slightly more difficult to shut since the window adjustment. I am not sure if this is wrong, or if I just made it seal really well. I will say, you don’t have to “Slam” the door, but you need to mean it when you shut it. You can close it softly then push the door in though, which is what I typically do anyways.
That said, I had the whole fleet out while I was cleaning up some stuff in the garage so:
Thanks for looking! I am hoping to have it lowered with subframe connectors installed in the next couple weeks. I am tired of those parts and the shocks taking up space in the garage!
11-25-2018, 08:49 AM
#115
Nice job!
I expect that some of the shape will come back over time as the car sits out in some natural heat. Just tuck each of the rubber pieces in and you should be set.
It looks like your rear seal may be mounted on the front and vice/versa, but that shouldn't make a big difference.
It looks like your rear seal may be mounted on the front and vice/versa, but that shouldn't make a big difference.
11-25-2018, 10:08 AM
#116
On The Tree
Thread Starter
Nice job!
I expect that some of the shape will come back over time as the car sits out in some natural heat. Just tuck each of the rubber pieces in and you should be set.
It looks like your rear seal may be mounted on the front and vice/versa, but that shouldn't make a big difference.
I expect that some of the shape will come back over time as the car sits out in some natural heat. Just tuck each of the rubber pieces in and you should be set.
It looks like your rear seal may be mounted on the front and vice/versa, but that shouldn't make a big difference.
The boss lady does not like the way the door shuts, so I may have to do some more window adjustment. Sigh. lol!
12-13-2018, 07:45 PM
#117
On The Tree
Thread Starter
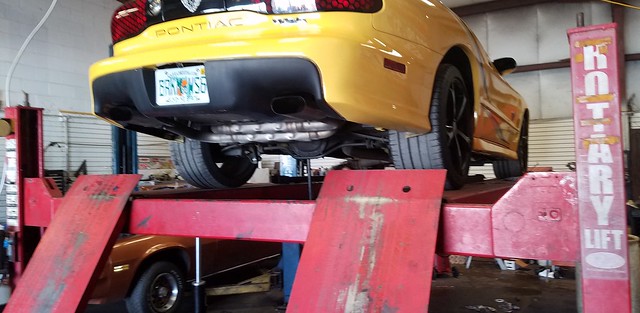
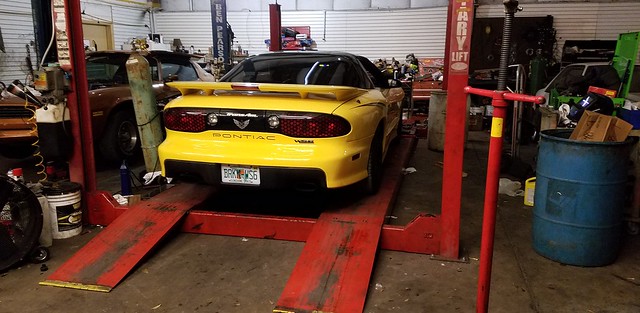
Not much of an update, but I took the car to get the Sinister boxed subframe connectors installed the other day. Fairly straightforward installation, and they really beef up the mounting point for the front of the rear lower control arm.
We’ve not really driven the car enough to notice a big difference, but I’d like to think it handles better. The ride seems less jarring, but that will probably get much better with new shocks and springs. Either way, I’m happy to have a great place to jack the car up the whole way down either side of the car! Anyhow, just a couple shots of it on the lift. Will try to get better pictures later (when I install the lowering springs).
Thanks for looking!
08-20-2019, 07:13 PM
#118
Teching In
This was/is a great post! I have spent the last few nights reading through it all and bookmarking like crazy in preparation to do many (but not all) of the upgrades Number Tew has done to my just purchased 1999 Firehawk. I am sorry to see it end last December. Perhaps he will start again as I am on the edge of my seat to see how everything worked out. I've ordered the Strano Master Cylinder brace (in red to match my 'Hawks paint) after hearing his resounding praises. And his fix for the corroded wiring harness was marvelous, although I hope my car hasn't been exposed to the elements as much since it was in storage or lightly driven for most of it's 20 years. His thoroughness in researching fixes and the forums' membership's support was top notch. Glad I joined.
So how about it Number Tew? What's the latest??

So how about it Number Tew? What's the latest??
08-21-2019, 06:46 PM
#119
On The Tree
Thread Starter
This was/is a great post! I have spent the last few nights reading through it all and bookmarking like crazy in preparation to do many (but not all) of the upgrades Number Tew has done to my just purchased 1999 Firehawk. I am sorry to see it end last December. Perhaps he will start again as I am on the edge of my seat to see how everything worked out. I've ordered the Strano Master Cylinder brace (in red to match my 'Hawks paint) after hearing his resounding praises. And his fix for the corroded wiring harness was marvelous, although I hope my car hasn't been exposed to the elements as much since it was in storage or lightly driven for most of it's 20 years. His thoroughness in researching fixes and the forums' membership's support was top notch. Glad I joined.
So how about it Number Tew? What's the latest??
So how about it Number Tew? What's the latest??
I appreciate the kind words, I figure if there's something worth doing, it's worth over doing.
08-22-2019, 11:41 AM
#120
Teching In
Glad to see you checking in Number Tew. Sorry to hear about your ongoing additions to your to-do list. I admire your stick tutiveness! I am gearing up to do fluid changes and address my slow power windows, as well a the blown woofers in the sail panels, etc. My Hawk is going to remain stock, except for perhaps the tranny oil pan with drain bolt to ease future drain and fills as I plan on keeping this one for as long as I can drive. Although the tranny fluid doesn't smell burned, it is a bit dark, which I suspect is due to mainly age rather than usage with only 30k miles on the clock. Per PO, oil is "old" (about a year) but not worn out with less than 100 miles on it since the last change. It is fairly clear so I will do the engine oil/filter change before winter storage. Coolant is due as well as brake line bleed/flush.
Btw: I am considering a catch as well for my LS1. I was going to go with the Norris CC with AN fittings, but noticed you went for the Mighty Mouse mild setup, which I had considered but thought it may not fit without some creative positioning while the Norris CC is tall and narrow, making it easy to bolt to one of the open bolt holes in the passenger side head.
Your pics show a nice clean install, albeit a bit tight. Was your install trouble-free? And, have you checked to see if the MM can is catching oil?
Thanks again for documenting everything in such detail. And thanks to all who contributed to this thread. Appreciated.
Keep the shiny side up!
Last edited by gusser; 08-22-2019 at 11:55 AM.