When you click on links to various merchants on this site and make a purchase, this can result in this site earning a commission. Affiliate programs and affiliations include, but are not limited to, the eBay Partner Network.
I’m also limited to a 3” downpipe. So based off what you said with the boost controller. I’ve read that too about higher spring pressures cause laggy boost buildup and also wastegate flutter. Which is why I’m trying to keep spring pressure lower and use the MBC to the top of the gate. There are two types of MBC with location, a bleed style that goes between the pressure source and the bottom of the gate which bleeds boost so you run more off spring pressure only. Or the one I have which still allows full boost to the bottom but then bleeds some to the top to help the spring. When I installed mine I was getting about 8.5psi over the 6psi without, but I had it cranked down as low as possible. I was afraid to crank it up but I’ve read that a MBC can only DOUBLE the gate spring presssure which is fine but I had a lot of adjustment to go to get there. I was afraid I would overboost cranking down on the MBC. Can you confirm what the max pressure will be with a MBC? I adjusted mine from the base 6psi spring, 8.5psi low settting on MBC and then cranked the MBC 2 full turns and went out. Datalogs show lower boost.... think I’m back to about 6psi but I wasn’t able to get on it as much.
also with what your saying, no one runs these tiny 76/65 and it’s called a bastard bc of the split and it’s a poorly designed turbo, mine came in a kit and didn’t have too much choice. I’m not disappointed in its performance tho, car is still faster than it was on 9psi with the supercharger. I just want to get boost to where I was before which was 9-12psi. I just don’t want to put a **** ton of spring in there and get slow boost etc. I think my 10-12psi is a low goal and shouldn’t really cause too much exhaust backpressure.
So the MBC will more than likely be used as I want to keep the gate shut till Boost is met. I just feel like going to the top port while the bottom port still gets full boost was still allowing my gate to open prematurely. But as I explained I only had it at 2 turns and prob had another 30 to go lol. But if I knew I could only double the spring pressure for sure then I could crank it down as the PCM is “tuned” to 250kpa for timing and fuel is automatic.
in theory without your MBC teed into top signal line you should achieve double spring rating in boost pressure. however every combo is different and without actual data its impossible to calculate the effect exhaust manifold back pressure and pressure drop across cooler will have. so many variables that cant be estimates without actual data from the specific combo.
my preferred method is an electronic boost controller to the bottom of the gate and top to atmosphere. I don't allow signal to go to bottom of gate until about 2-3psi than my targeted boost pressure. smaller the turbo harder they come on so sometimes this variation needs to be bigger that 3-4. then I start at 20% solenoid DC and add DC until I reach target boost.
the controller is still limited my mechanical factors. like youre not going to get 20psi from a 6 psi spring. I usually fit a spring about 5-7psi lower than target boost. if youre getting to the point where adding 10-15%DC has little to no effect you've now got a rough idea how much exhaust backpressure you have. if youre having to fit 20psi of spring for 22psi of boost youre well beyond the flow limits of your turbo.
this doesn't apply for serious racers using Co2 control and running 25-30psi etc.
ideally it would be perfect to have a pressure sensor in the exhaust manifold/s at the turbine housing flange/s or manifold collector.
a ratio of 1-1.5 time your boost pressure is about all that is acceptable. more than that youre beyond the flow capability. LS are effected so drastically by the exhaust flow in camshaft, manifold flow, manifold size, crossover size, turbine wheel, turbine housing, dump pipe, cats, wastegate size, wastegate signal plumbing and wastegate placement in comparison to compressor configuration. that changes with every combo. cubes, heads, twin or single, power goals and power rpm range
So how do you normally hook up a single stage manual boost controller? I've seen so many different variations I'm curious.
for street car I use eboost too which comes with 3 port mac valve.
port 3 pressure
port 2 boost only signal
port 1 atmosphere.
I don't normally connect speed or rpm signal for a street car.
set GP to about 3psi lower that target boost
set SN to 33 on big or 55 on little
start SP at 20 and slowly add 8-10 % at a time when on the dyno
set OBS to 5psi higher than target.
that will not compensate for boost creep or boost fade which are mechanical influences.
I also use braided lines and anodized fitting. silicone and plastic is too vulnerable and for $100 extra id rather have quality signal equiptment to one of the main things to cause engine failure.
my opinion and experience only. there are many ways to skin a cat "so to speak"
Im talking strictly manual, not electronic. Like a 2 port hallman.
Im talking strictly manual, not electronic. Like a 2 port hallman.
you haven't lived buddy hahah. nothing like having effectively a broken gate signal line until youre turbo is on. so much stronger ramping up than manual controller.
also great for dyno. no burnt hands. A/C on and more boost by a few buttons pressed
each to their own though. I do not intend any offence at all just having a laugh
I had the Eboost 2 and thought it was a giant piece of crap. I am asking about a manual 2 port hallman style because a friend is trying to sort out his setup.
I had the Eboost 2 and thought it was a giant piece of crap. I am asking about a manual 2 port hallman style because a friend is trying to sort out his setup.
ive used an eboost 2 in probably 15 street turbo LS cars from 500rwhp 7psi things up to 1164rwhp 22psi things.
as long as the mechanical side is set up correctly they work well. no electronic device can work perfectly with mechanical faults or restrictions.
the more + direction turns you give it the less air it sends to the gate and the more boost you make.
but it cant work beyond the capabilities of the gate spring and exhaust flow
What I find so interesting is that we looked at that pic and he has it hooked up exactly like this and yet it is not giving him spring pressure with the controller fully backed out. He's +4 psi above spring pressure and it keeps wanting to increase.
cubes
manidolf size
crossover size
turbo
rear housing flange and A/R
gate
gate position
gate spring
target boost
I don't have all the info but from memory it's a 5.3 with a 2.5 inch hotside, 44mm WG, 3 inch down pipe with a cutout right off the down pipe. .81AR on a 76mm turbo. Spring is 9psi and target target istarget i anything close to spring lol
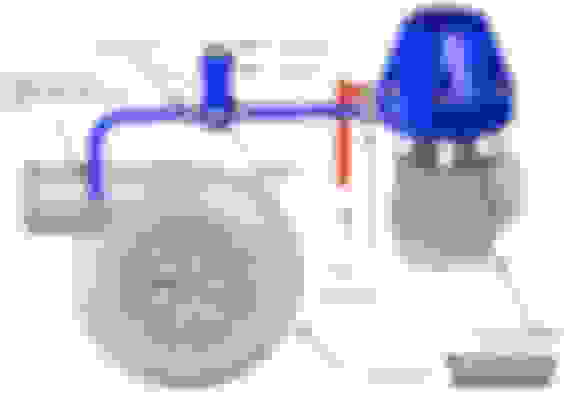
You sure it’s not this style? This is the one I have. The solenoid version is the same as the below ball/spring type etc, it just adds boost to the top to cancel out the boost at the bottom and your basically left with spring pressure and a slight amount of boost on the underside as it bleeds off a bit through the MBC vent hole.
It's def the ball and spring style with the bleed hole. I have a theory I'm working on that the spring is too strong so when it spikes it's hitting a boost that is uncomfortable and he let's let before he sees boost level out. I suggested putting in a lighter spring and see if it levels off.
What I find so interesting is that we looked at that pic and he has it hooked up exactly like this and yet it is not giving him spring pressure with the controller fully backed out. He's +4 psi above spring pressure and it keeps wanting to increase.
Sounds like either there is a leak at the controller or it's plumbing and/or a w/g setup that offers insufficient flow.
Sounds like either there is a leak at the controller or it's plumbing and/or a w/g setup that offers insufficient flow.
It's got a bleed hole in the back of the controller, so yes there is a leak I have wondered about the location of the WG, but a 44mm should be plenty for a 5.3/T76 at these boost levels. I think its a pretty easy test, put a light spring in it and see if it levels off at something reasonable. If it still climbs to 15+, something is broke.
Originally Posted by stevieturbo
And the EBoost2 is an excellent controller.
Everyone is entitled to an opinion. I didn't care for it at all.
Updates (without the MBC) and I added a 2nd light spring to the original 6psi, got 8.2ish psi on the way to work, leaving work I cranked down on the preload all the way and Its making a solid 172.8kpa or about 10.2psi! My injector duty is around 86% now at 60lb injector flow at 43.5psi. That calculates me at about 640ish hp at the crank. Car is an animal and breaks the tires loose pretty easily, AFR looks good and the meth is pumping, IATs are good. I might just try to remove the small spring and just crank up on the MBC but Id be happy with the 10psi.
FWIW I pressure tested the double spring at 20psi cracking pressure on the bench and it gave me 8psi, preload added 2psi. So the dual spring that I was getting at 25psi would prob net me the correct 10psi that I was after. Might just do it for peace of mind, But I would rather a low spring rate and MBC for the safety factor.
Hey guys got some interesting data I would like to confirm.
I decided to get some data on the spring opening pressures and how much boost that netted me. I also wanted to verify the MBC was working correctly and how much boost it could add. All testing was done with a air compressor (bench test).
I tried my MBC via the instructions, teed into bottom port to bottom of MBC, the output of the MBC to the top port on the WG. With the MBC backed all the way out (least amount of spring pressure) the WG didn’t want to open. It was letting all the pressure to the top of the WG and thus canceling out any boost keeping it closed. Screwing in the MBC adjuster to max spring pressure (spring and ball fully compressed) it diverted the air pressure and the WG opened at normal spring pressure... weird since that’s how they describe to hook it up in the instructions. It’s a voodoo with ceramic ball upgrade.
I then tested with the MBC being fed the air pressure directly and then the MBC output going to the side bottom port on the WG, the top was vented to atmosphere. Now the MBC operates correctly, backed all the way out (least spring pressure on ball) the gate opens at the same spring PSI. Increasing MBC by screwing in the adjuster and it bleeds off more compressed air to the bottom spring and thus boost increases since less pressure is getting to the WG bottom port.
With my WG hooked up to the bottom with no MBC, just on spring pressure my valve cracks open at 10psi (air compressor) this netted me 6psi boost with my 60mm WG. With 2 springs the valve cracked at 18psi and this netted me 8.5psi. Cranking down the preload adjuster on my HKS style 60mm netted me 10.2psi with the dual springs. I didn’t get a bench testing valve crack pressure to confirm what it opened at on the bench. I went back to the single 6psi spring and I installed the MBC to the bottom port which netted me 10psi cracking pressure. I’m half way through my MBC adjustment range approximately and I got this thing cracking open at 22psi which is already double the original spring cracking pressure. So what gives?
I have it installed this way but dunno when I will get time to drive the car to test. I’m hoping the 6psi spring and MBC in the new config hooked to the bottom of the WG will net me my 10psi but with the lighter spring. Hopefully boost comes on harder too.
Updates (without the MBC) and I added a 2nd light spring to the original 6psi, got 8.2ish psi on the way to work, leaving work I cranked down on the preload all the way and Its making a solid 172.8kpa or about 10.2psi! My injector duty is around 86% now at 60lb injector flow at 43.5psi. That calculates me at about 640ish hp at the crank. Car is an animal and breaks the tires loose pretty easily, AFR looks good and the meth is pumping, IATs are good. I might just try to remove the small spring and just crank up on the MBC but Id be happy with the 10psi.
FWIW I pressure tested the double spring at 20psi cracking pressure on the bench and it gave me 8psi, preload added 2psi. So the dual spring that I was getting at 25psi would prob net me the correct 10psi that I was after. Might just do it for peace of mind, But I would rather a low spring rate and MBC for the safety factor.
Heres a log I broke down.
Was this pull done at WOT or did you roll into it? You should be making max boost way before you are if it was WOT.

 04-29-2018, 09:44 AM


 I have wondered about the location of the WG, but a 44mm should be plenty for a 5.3/T76 at these boost levels. I think its a pretty easy test, put a light spring in it and see if it levels off at something reasonable. If it still climbs to 15+, something is broke.