Battery Relocation Tutorial
 05-28-2015, 09:11 AM
#1
TECH Veteran
Thread Starter
iTrader: (14)
For those reading this a travel day for me so when I have wifi Ill attach pics, but wanted to get the wording up.
So as promised here is the how to I said I would put together. First Im gonna show the parts that I purchased for the swap.
Taylor relocation kit 48010 (1 gauge wire)
this kit comes with a universal tray and 16' of red wire and 20" of ground both of which have post style terminals rather than the thread in type.
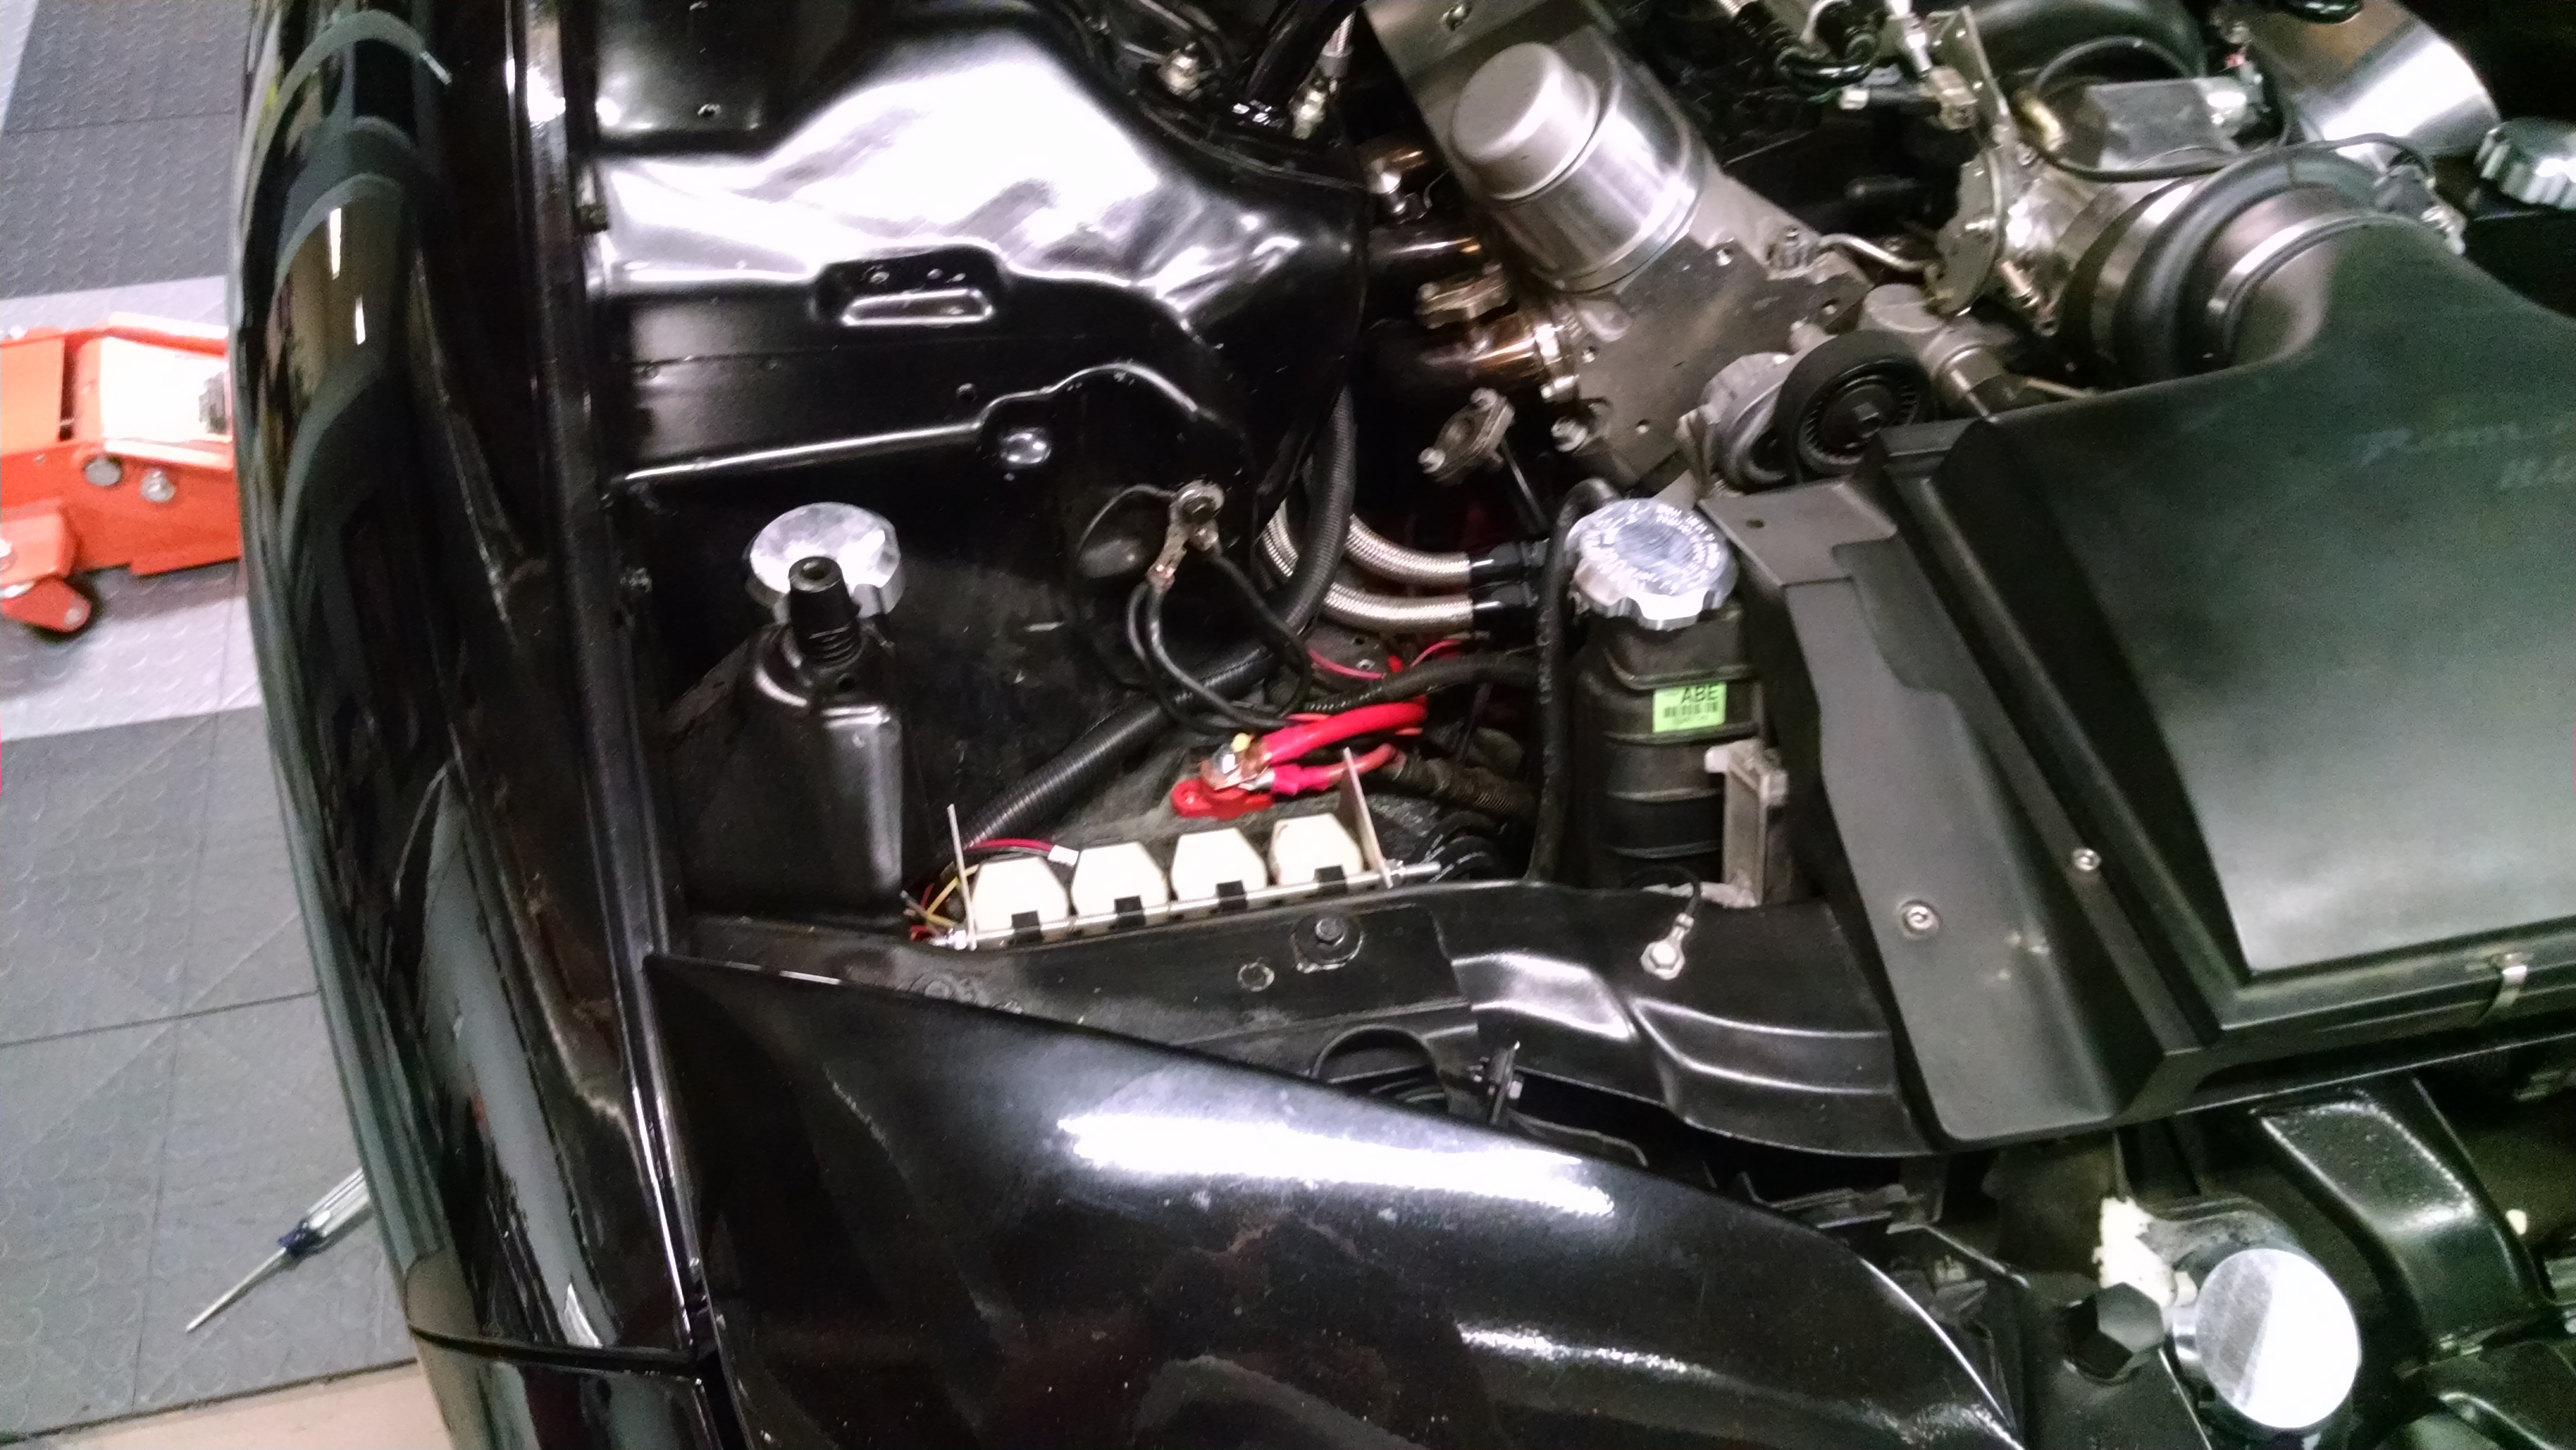
second was a battery junction terminal for the positive in the engine bay
http://www.ebay.com/itm/RED-Positive-Battery-relocation-aux-auxilary-power-post-terminal-junction-block-/301569089317?hash=item4636eb1f25&vxp=mtr
I ended up needing a few other odd and ends at the end of this but id say im under the $140 mark here.
So the obvious starting point here is removing the battery from the car. I will start by saying there have been some changes to my car that may make this write up a little different than what you experience but the general Idea will be the same.

Once the battery is out, cut the rubber terminal covers off the positive and the ground wires, keep the actual bolt though you can use them once the battery is in the back.
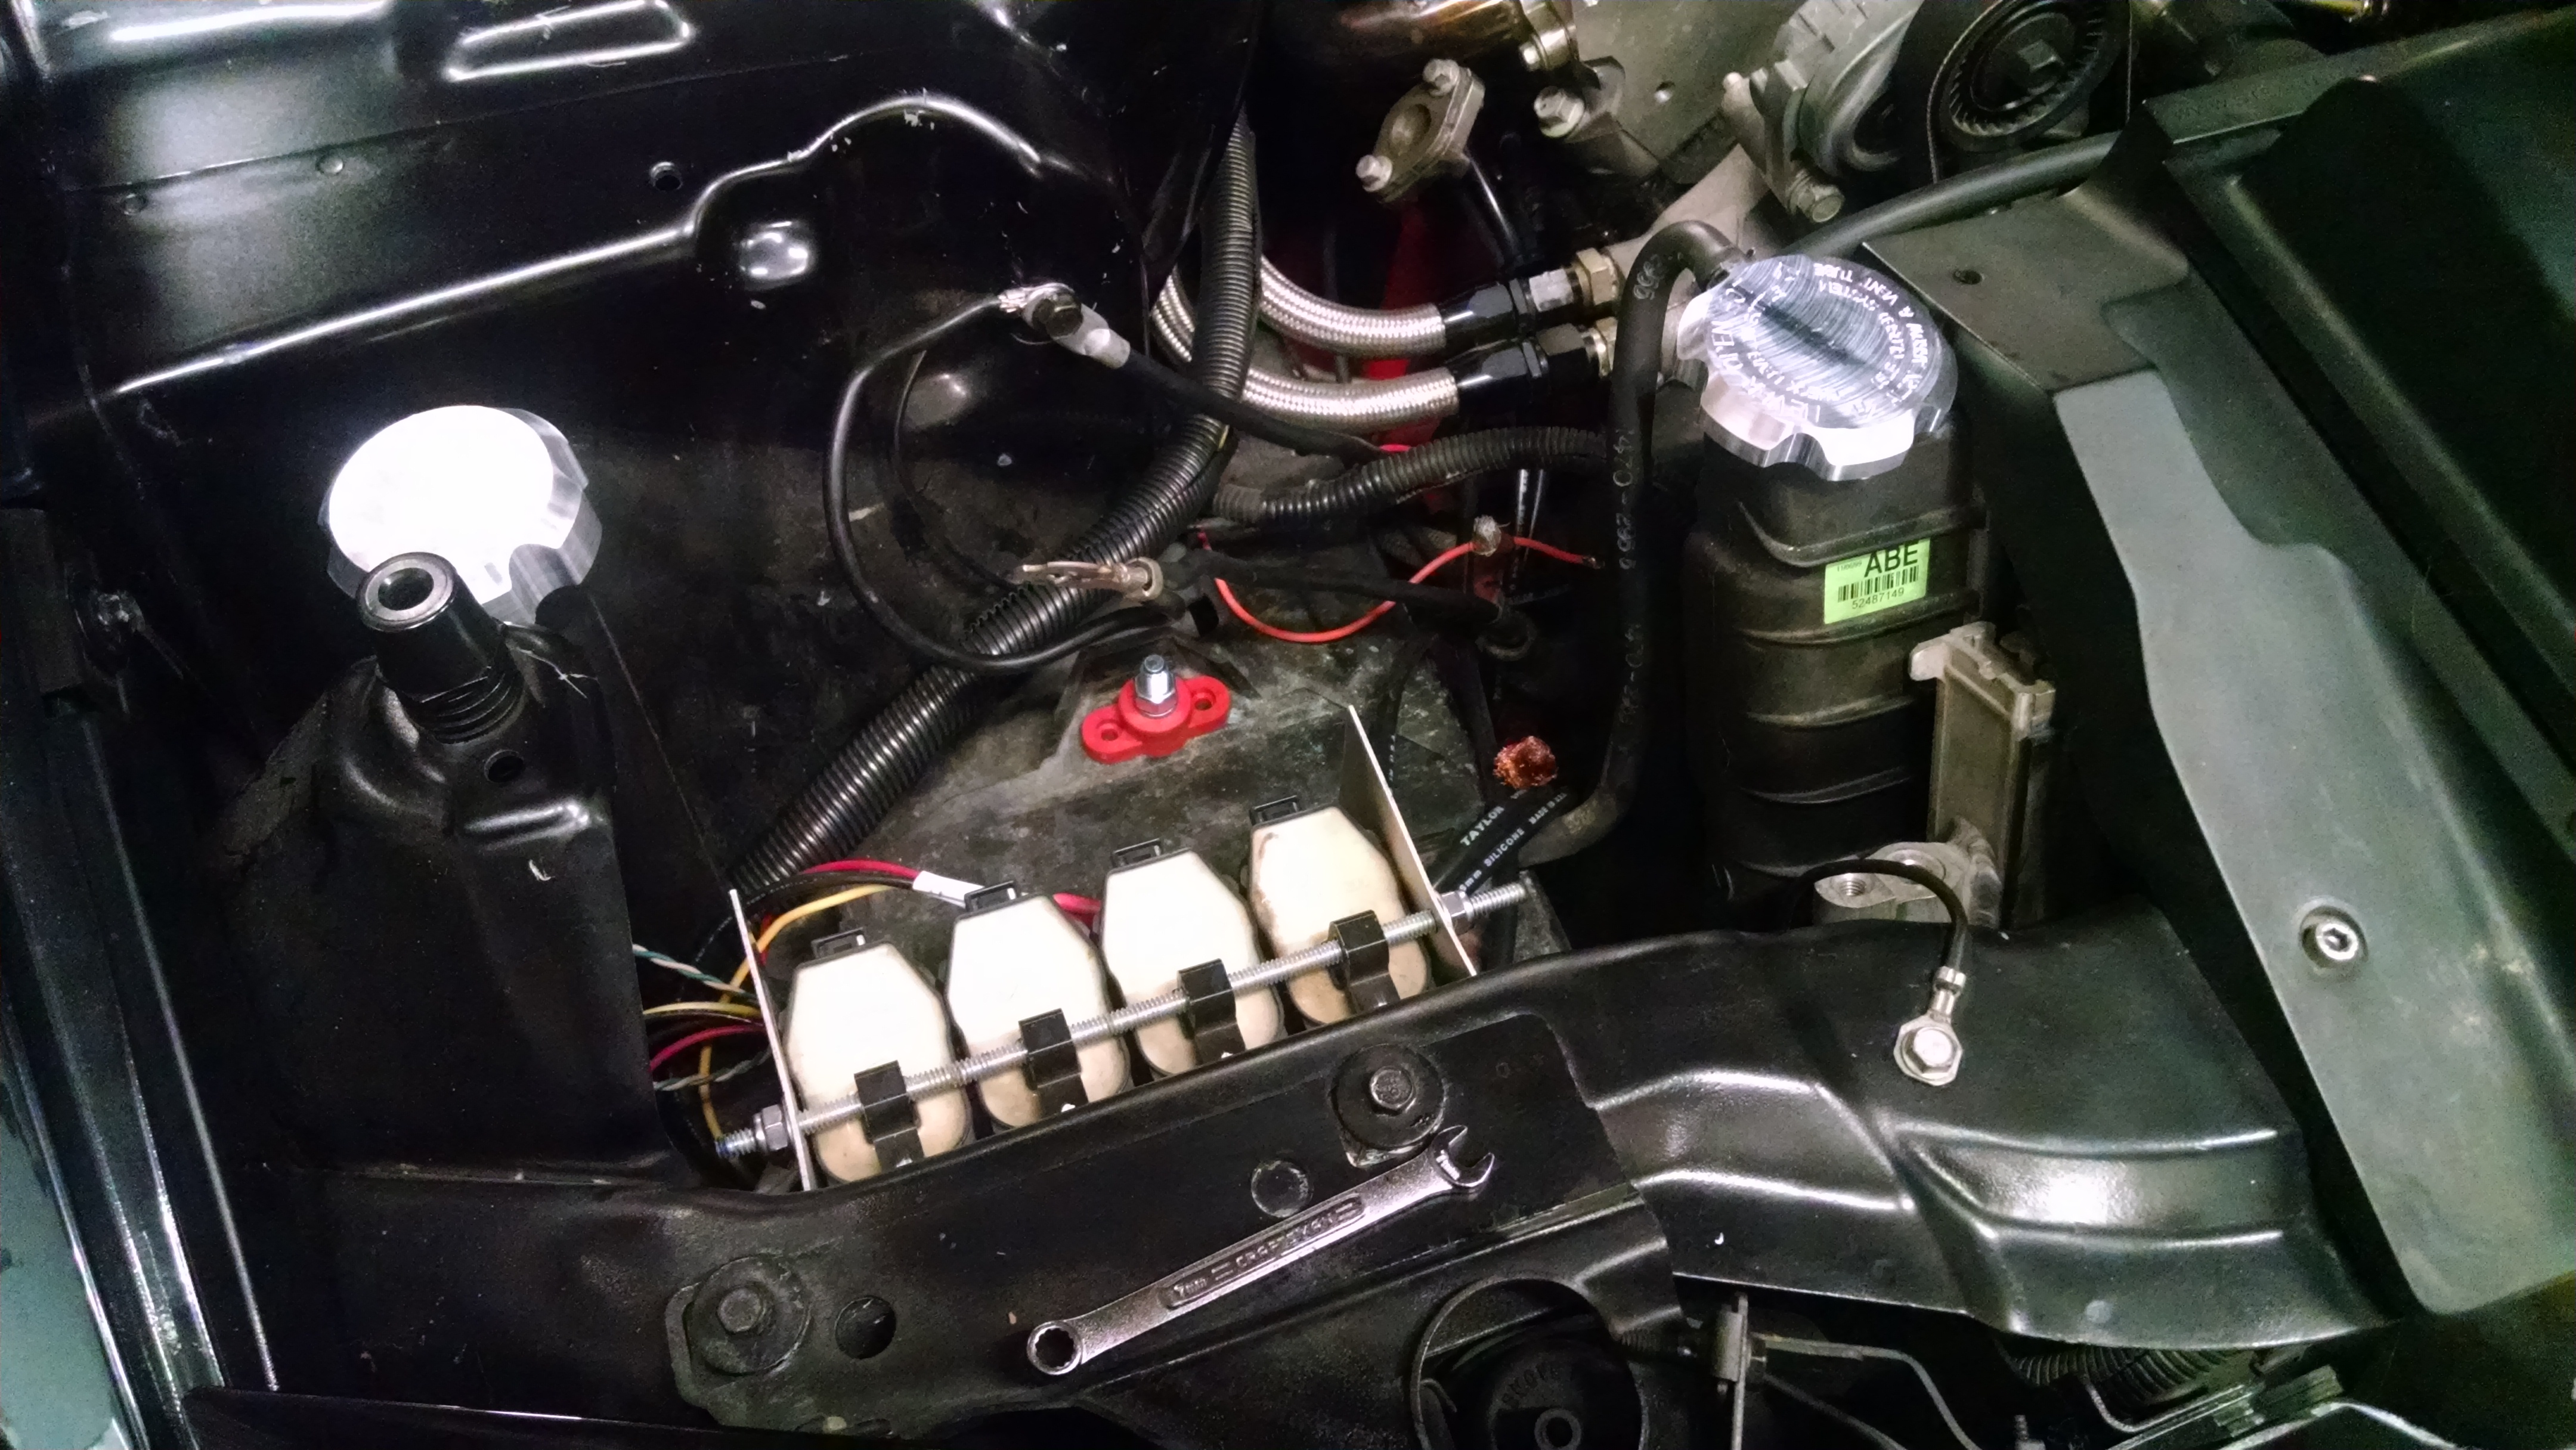
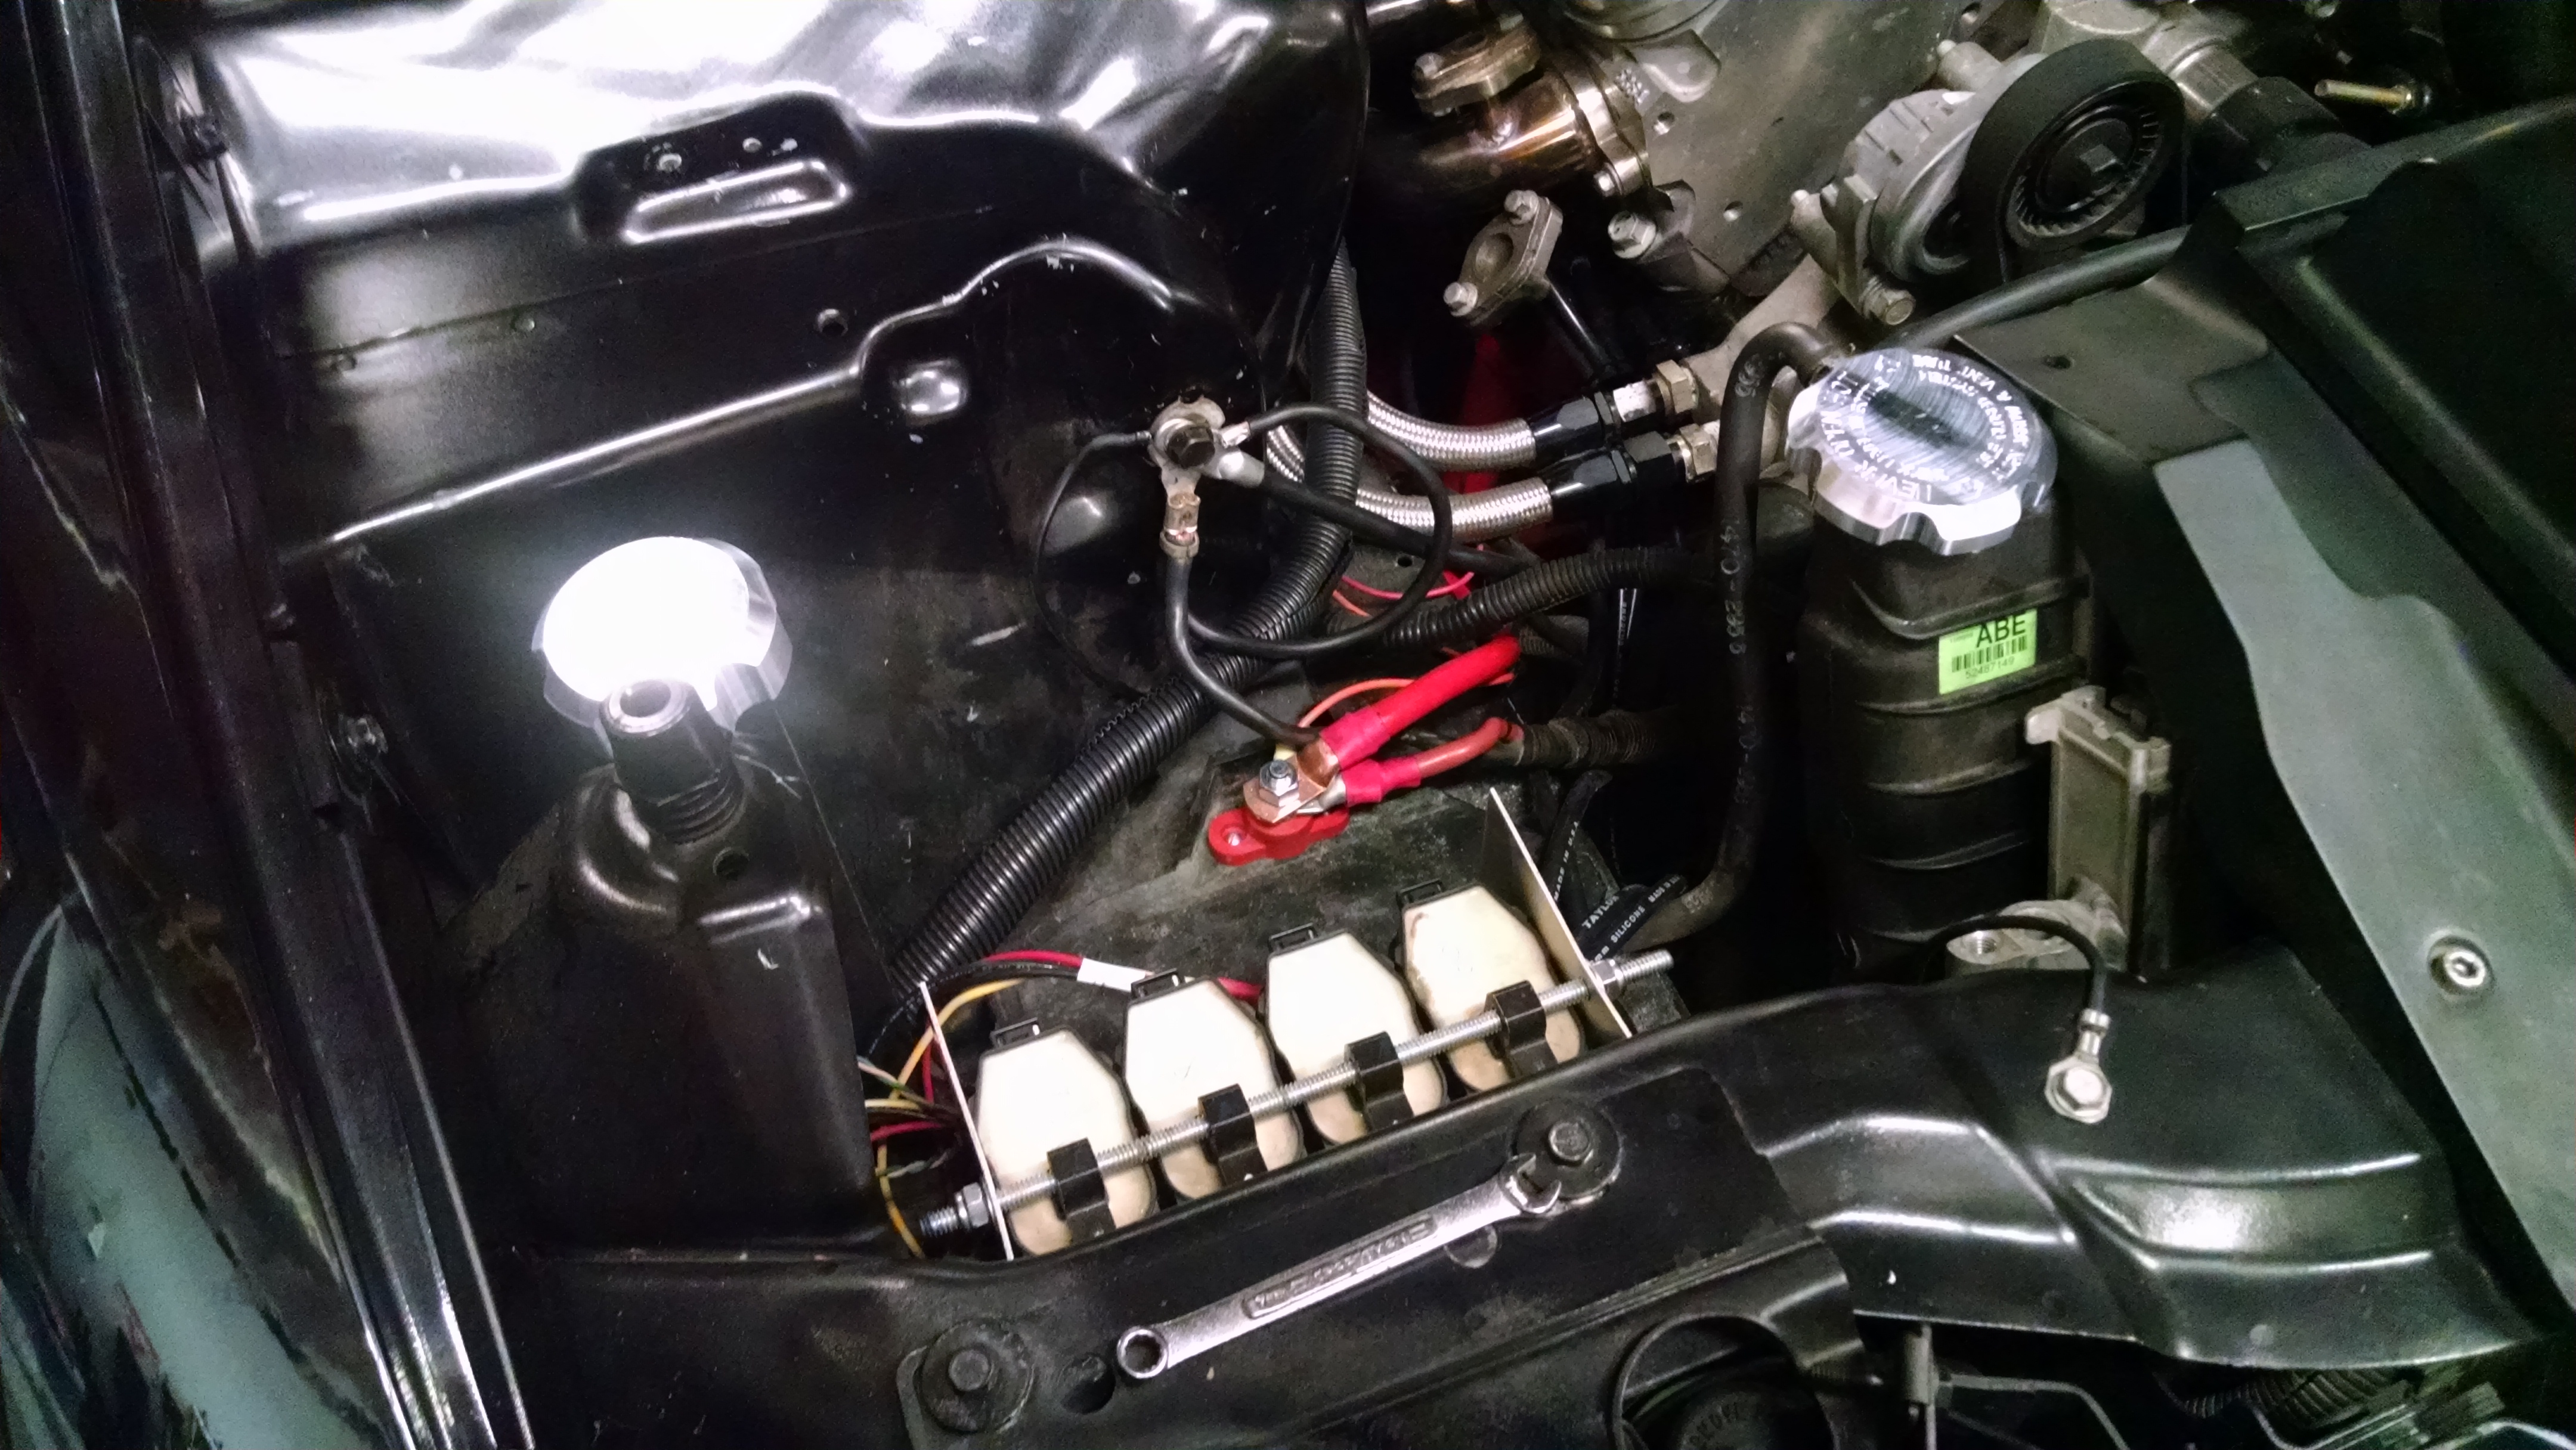
I mounted the junction terminal to the existing plastic battery tray with some self tapping screws, than get the positive wires ready to go onto the post

I had a stinger battery terminal on the positive since I had a stereo with a 0 gauge power wire so the stock terminal was already cut. You may want to cut yours off or you may be able to secure that to the junction terminal I linked above. If not you will need to add an eye connecter to the end of the wire so you can secure it to your positive junction post/terminal.
The ground is much easier just secure that terminal to the chassis and you are good.
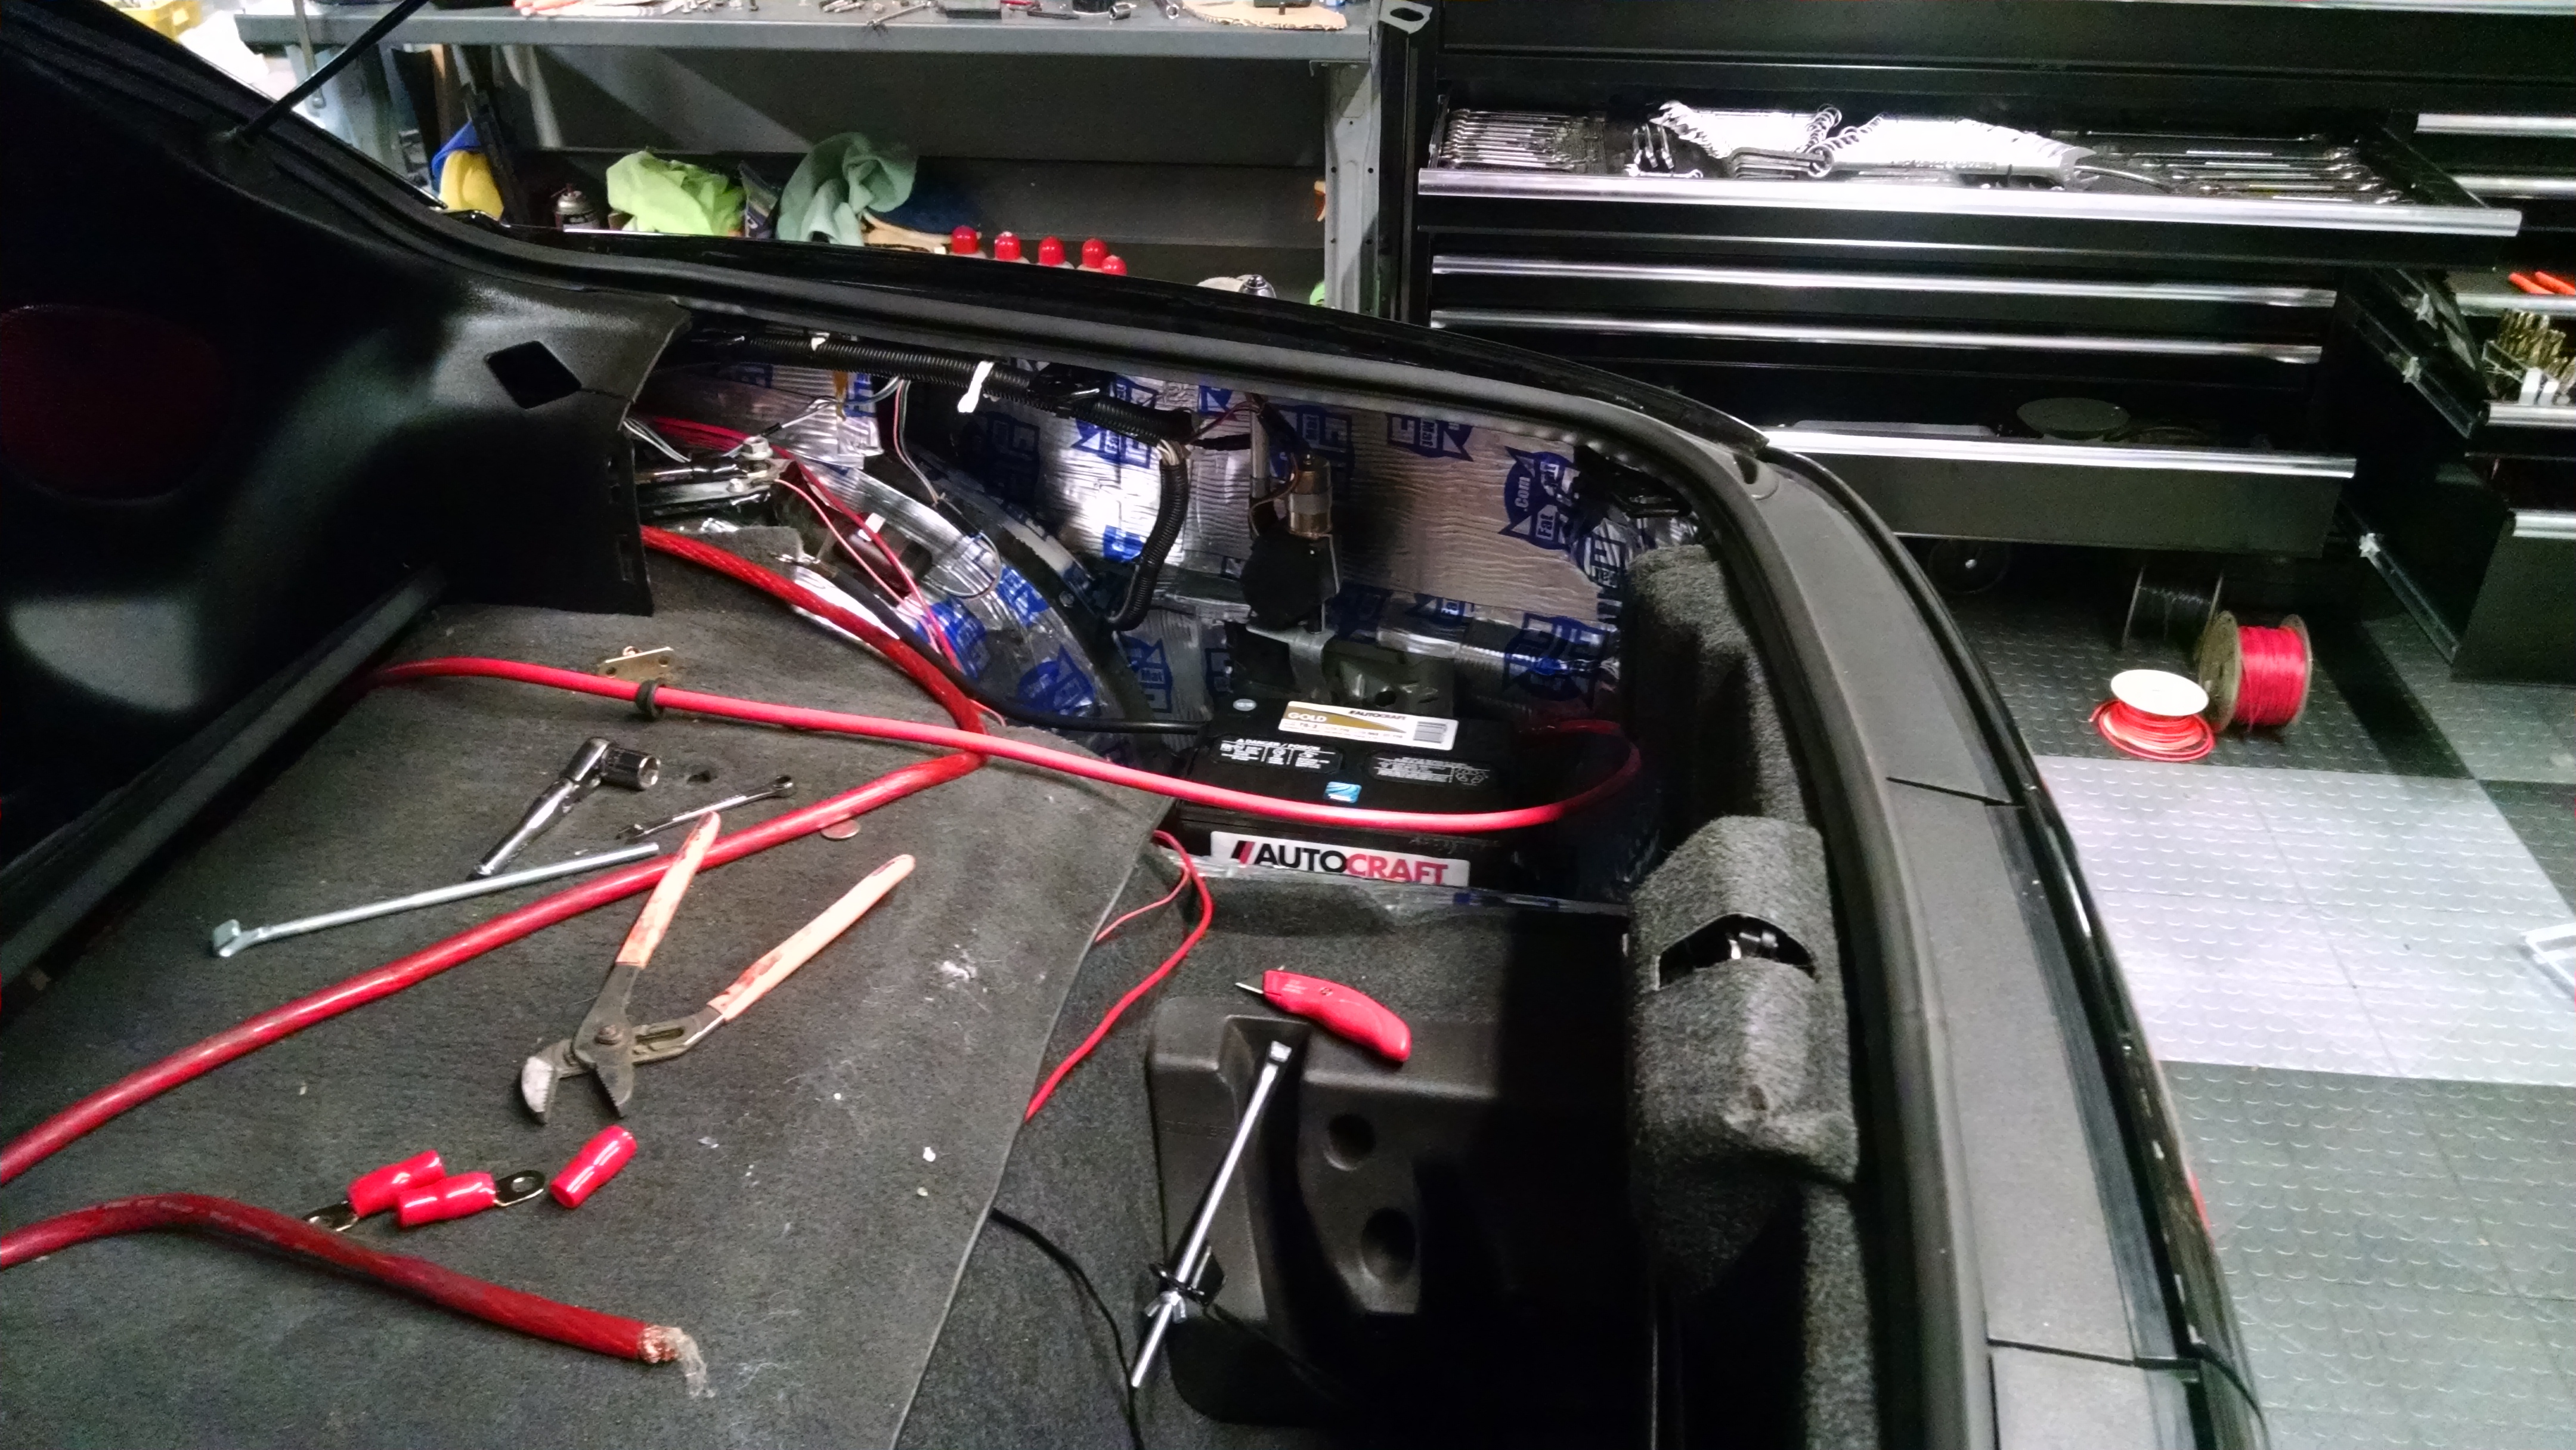
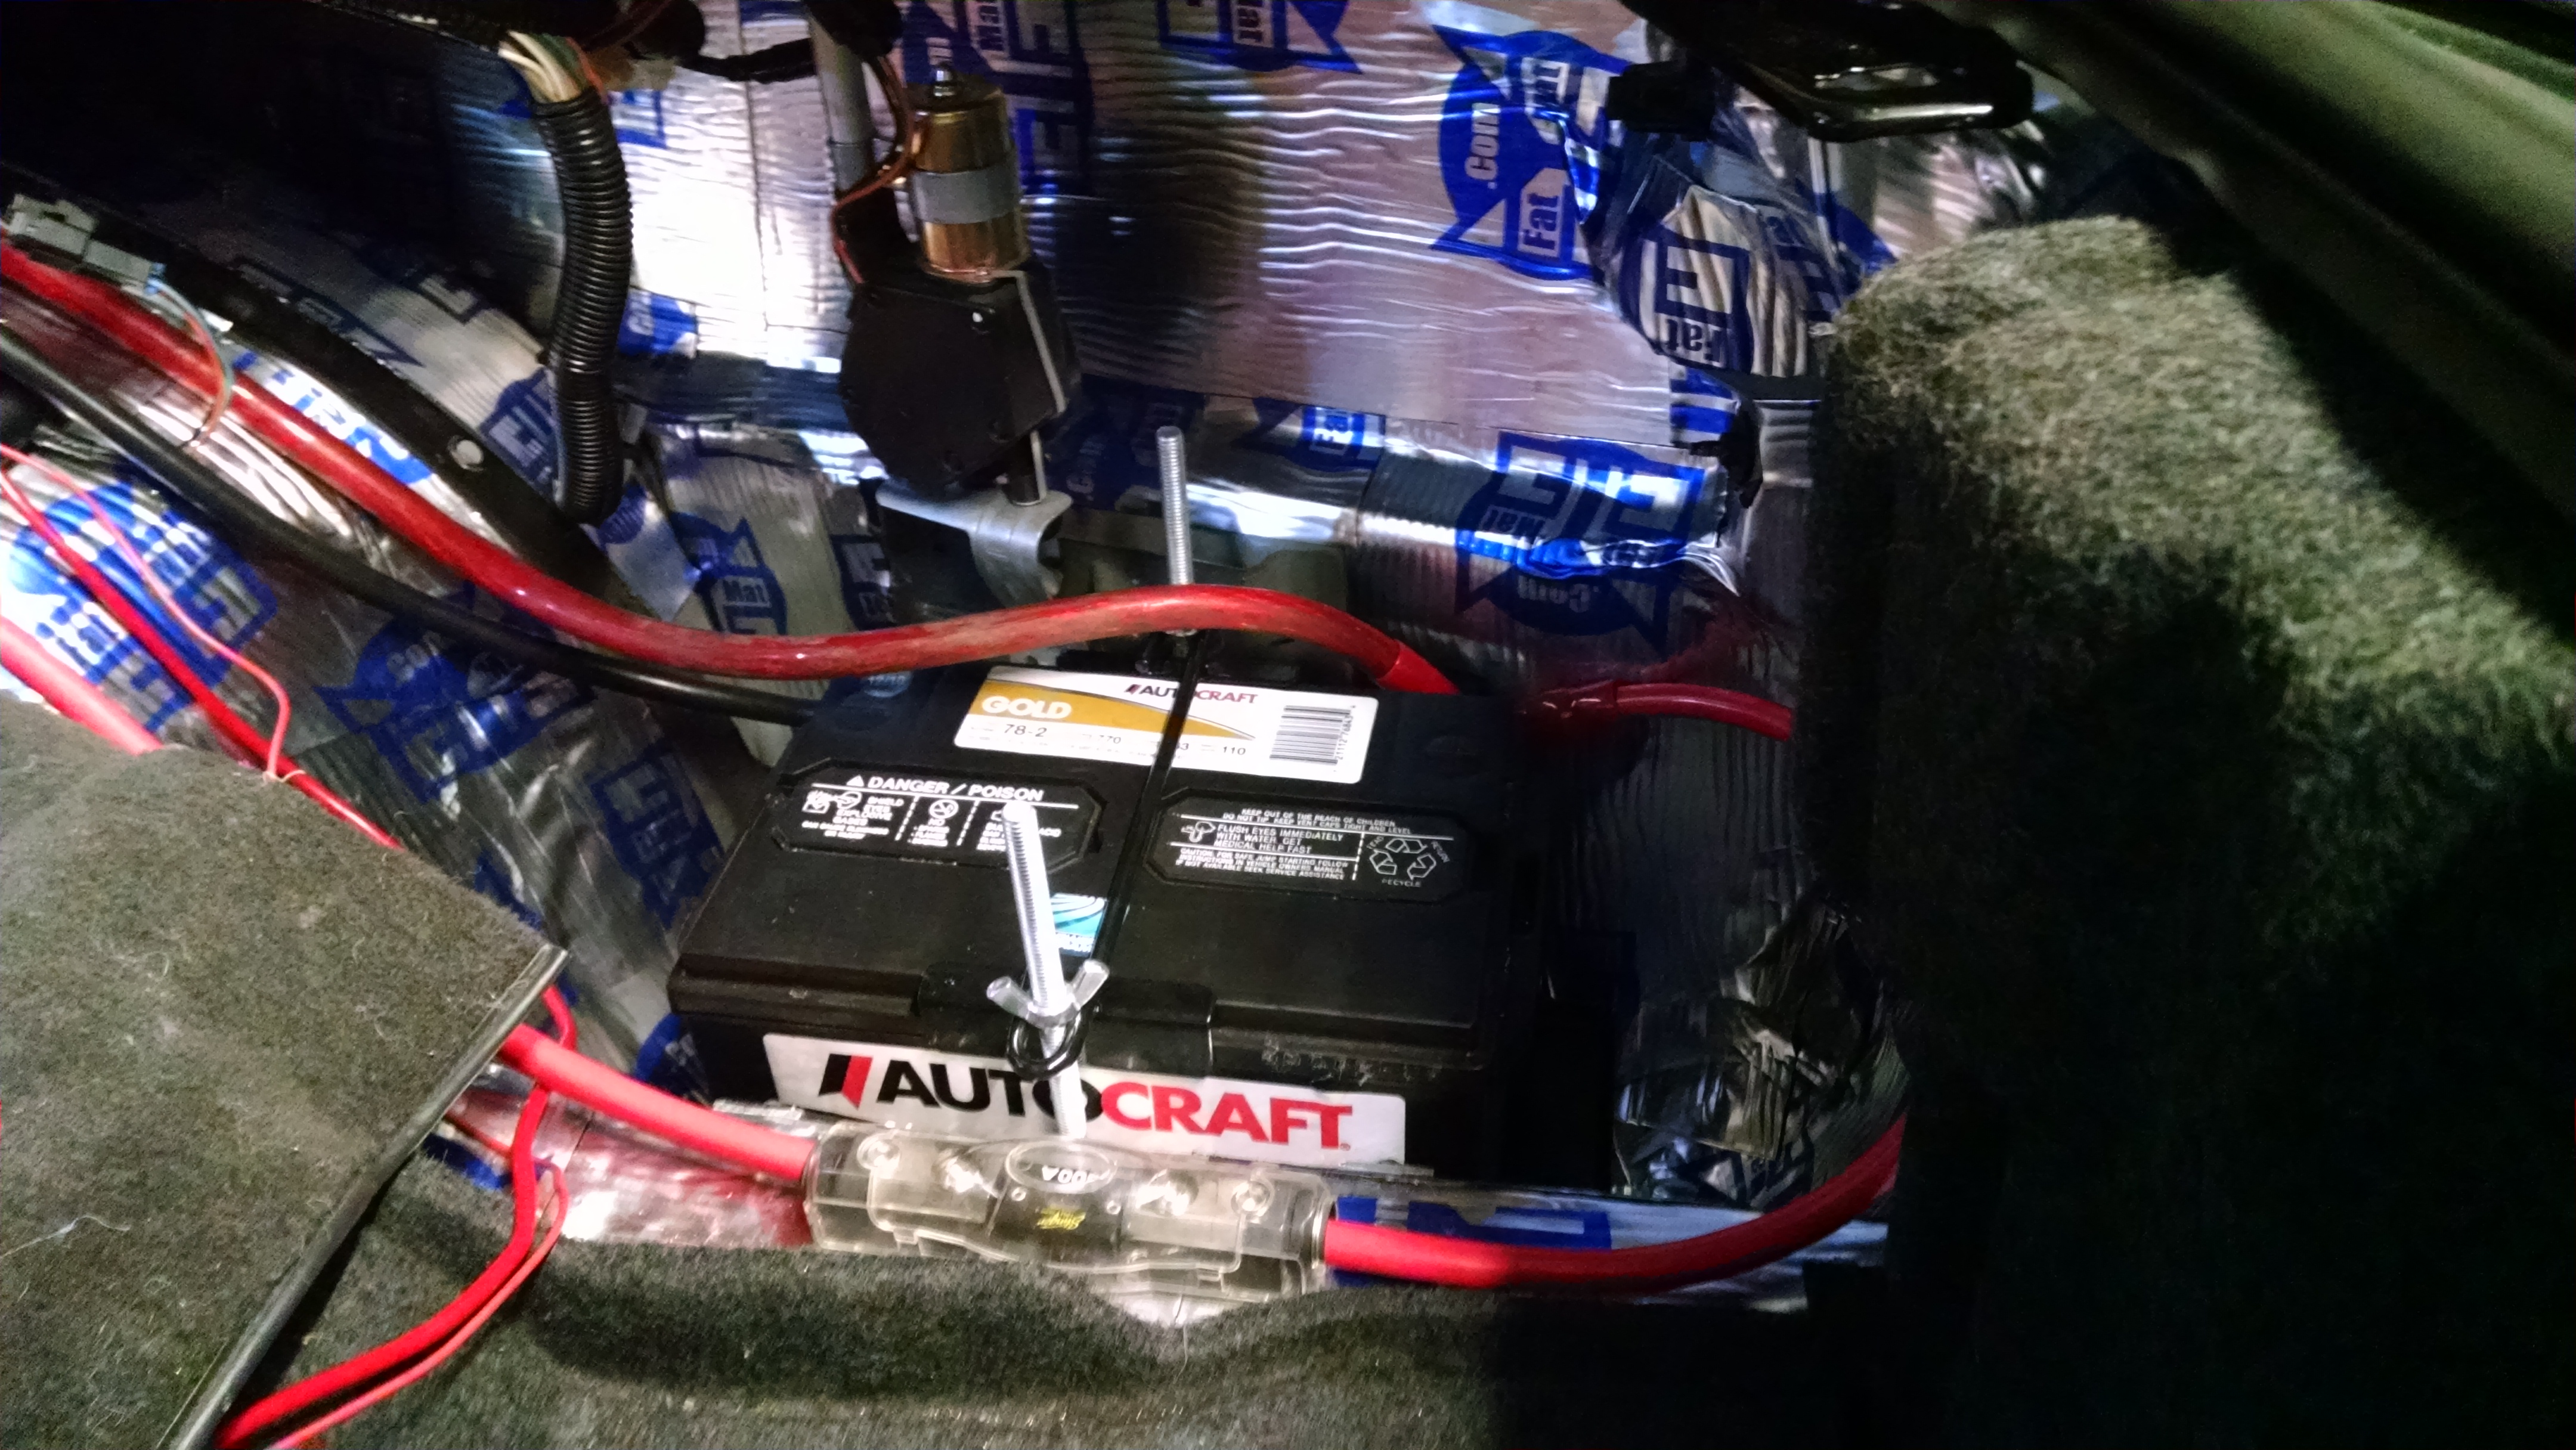
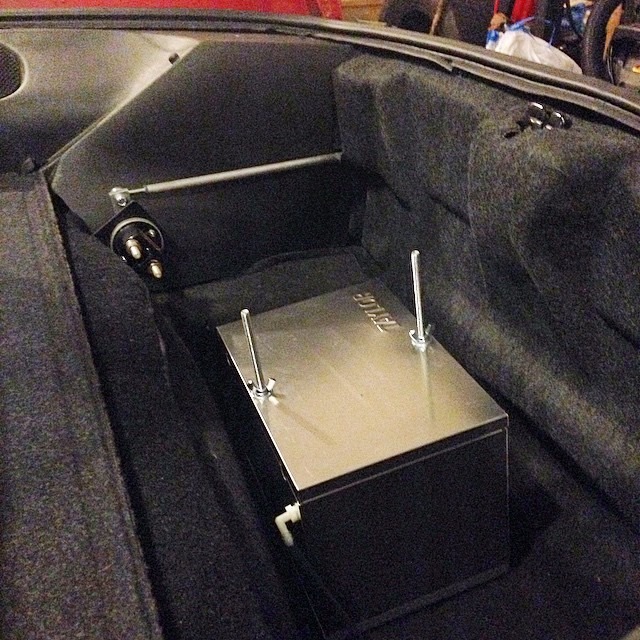
Now I chose to mount my battery tray where the spare tire and jack were on the passenger side. you can go about mounting the tray a few different ways. I went to lowes and got a set of 90 degree brackets and mounted them to the bottom of the tray and than secured the brackets to the inner side of the lower cavity. This area is just sheet metal so it will flex a bit without some re reinforcement. From under the car you can clearly see the area I used to mount them and wouldnt take much effort to put a piece of metal behind it to give it some more structure. The brackets themselves do not flex just the panel they are mounted to. I'm not familiar with the drag racing regs on battery relocation so this may not pass for that application but its not what I use the car for so im happy. That said I will likely replace the battery with a top mount rather than side mount just for added security. Depending on how many things you hook up to it, the post gets rather close to the outer fender. I could have orientated the battery the opposite way but than I would have needed a longer ground wire than the kit comes with to reach where I wanted to locate it.
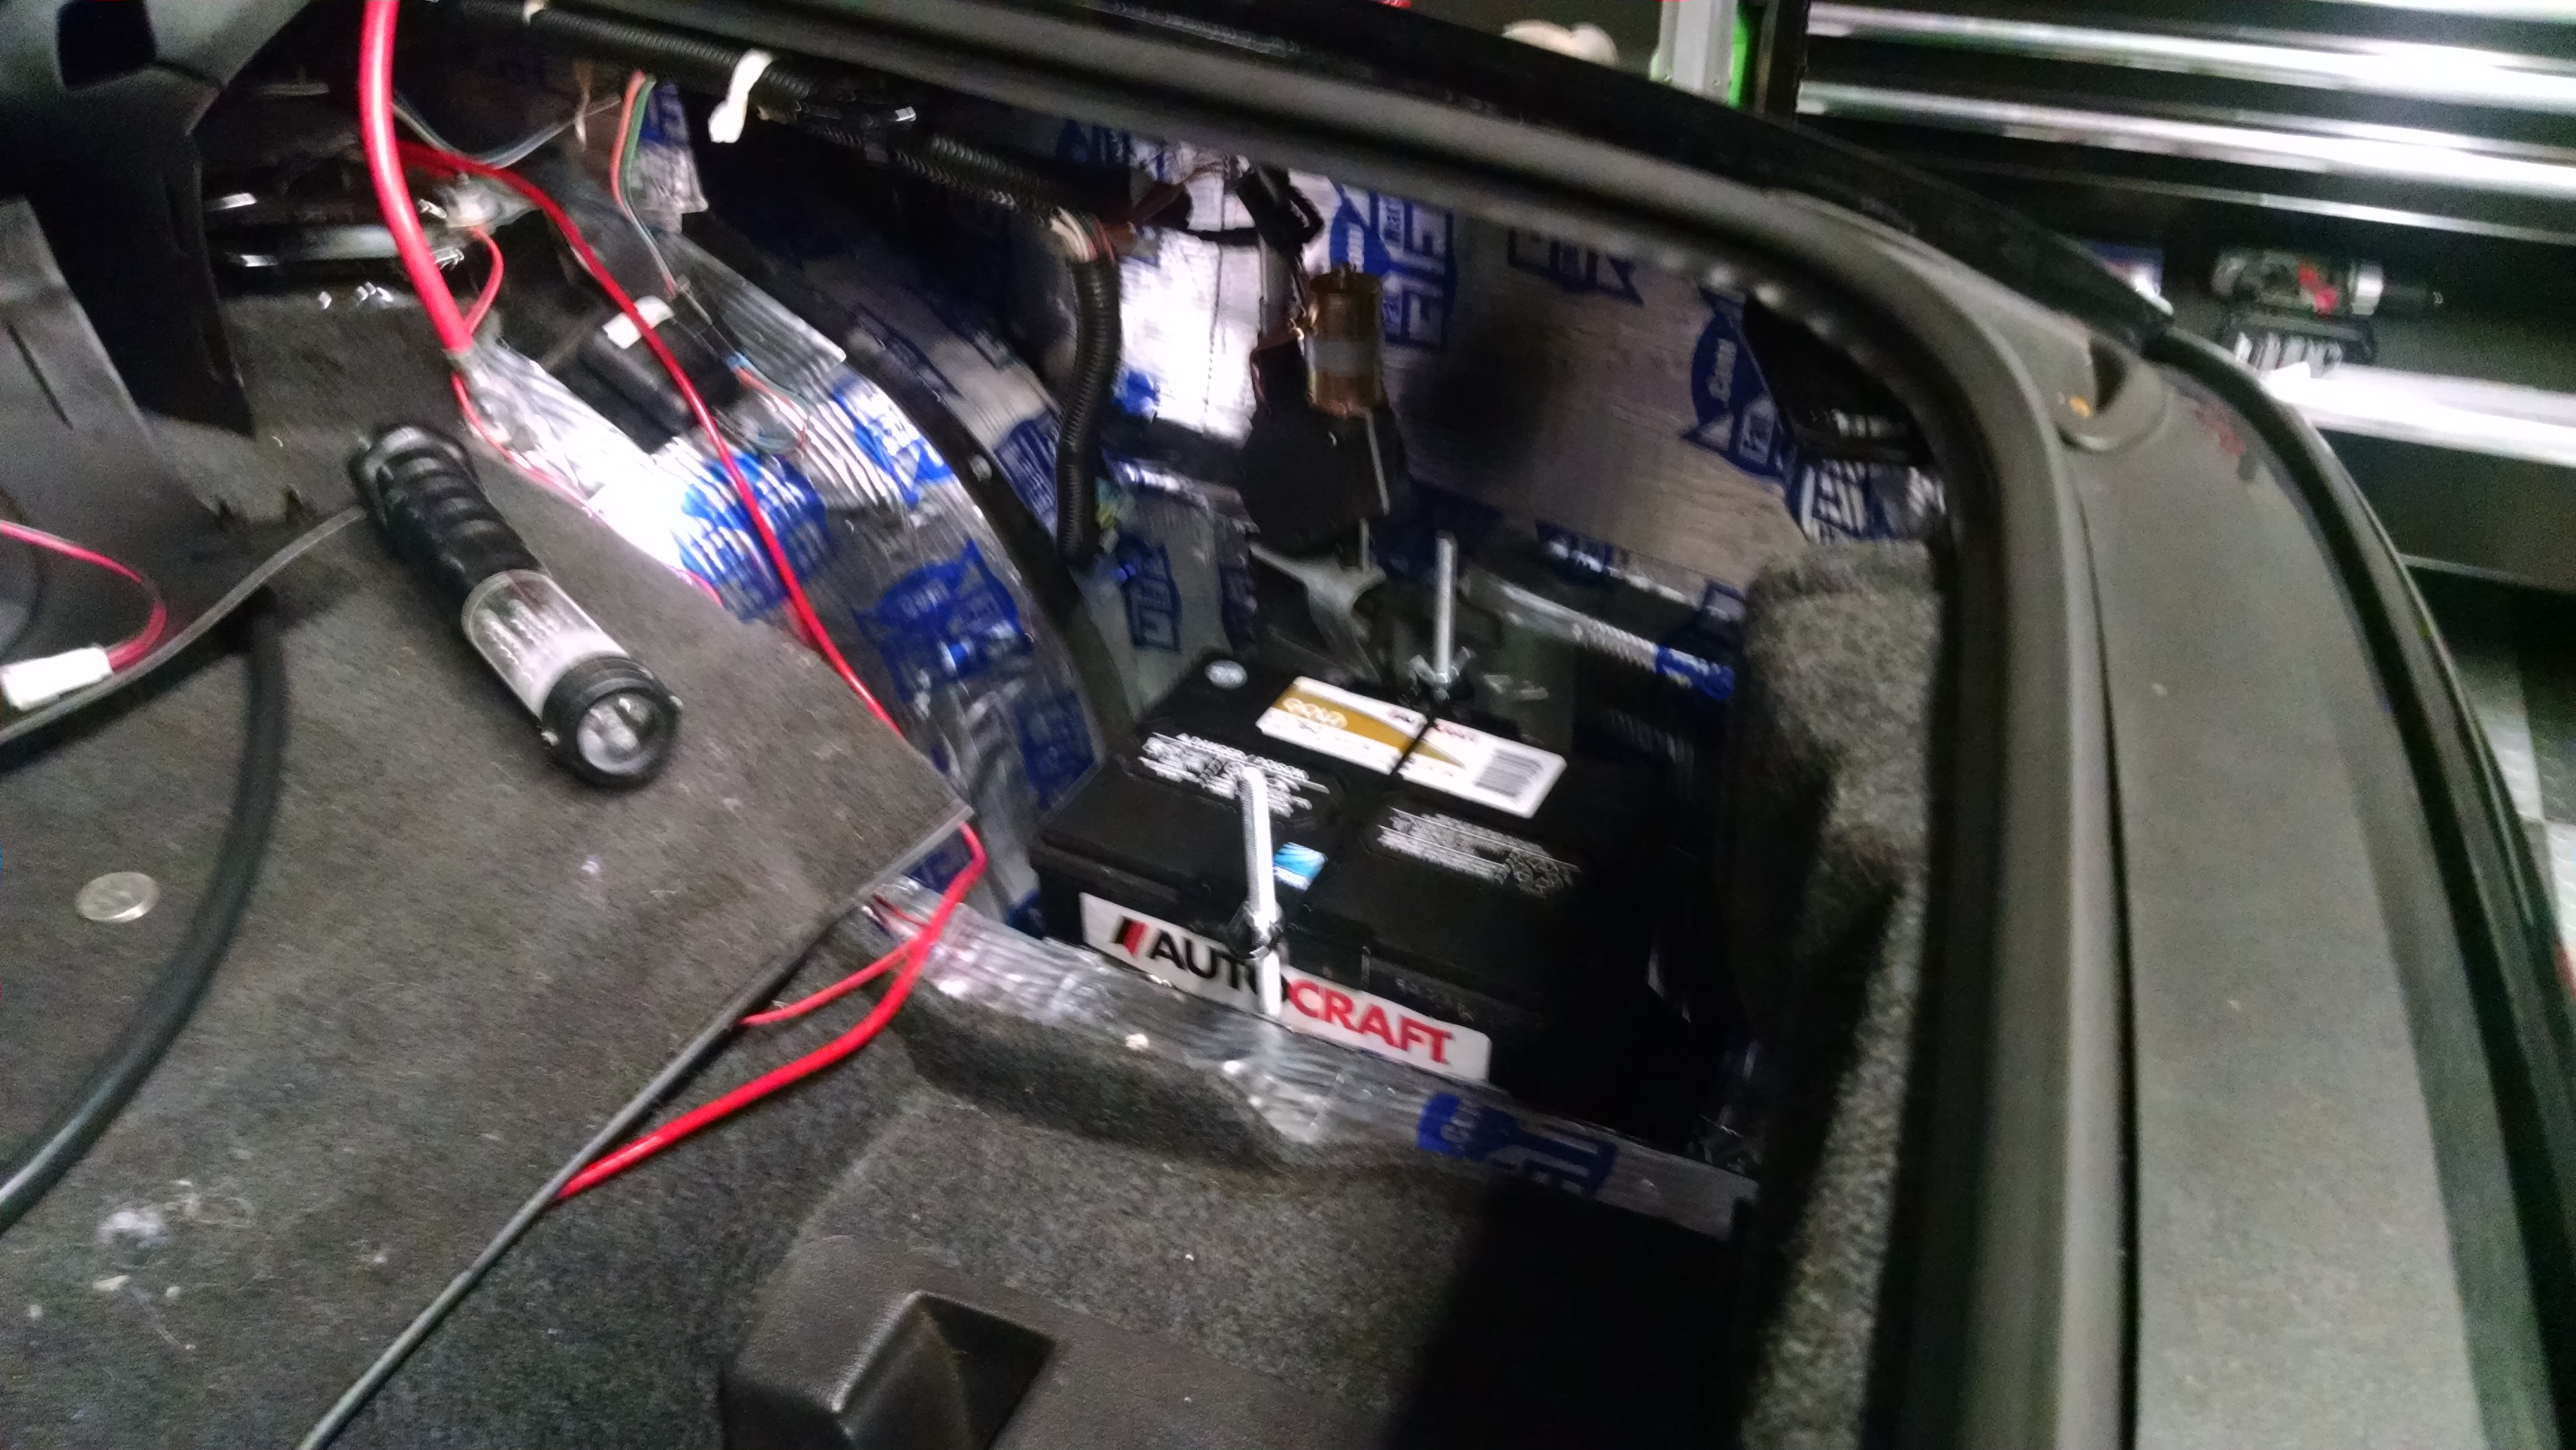
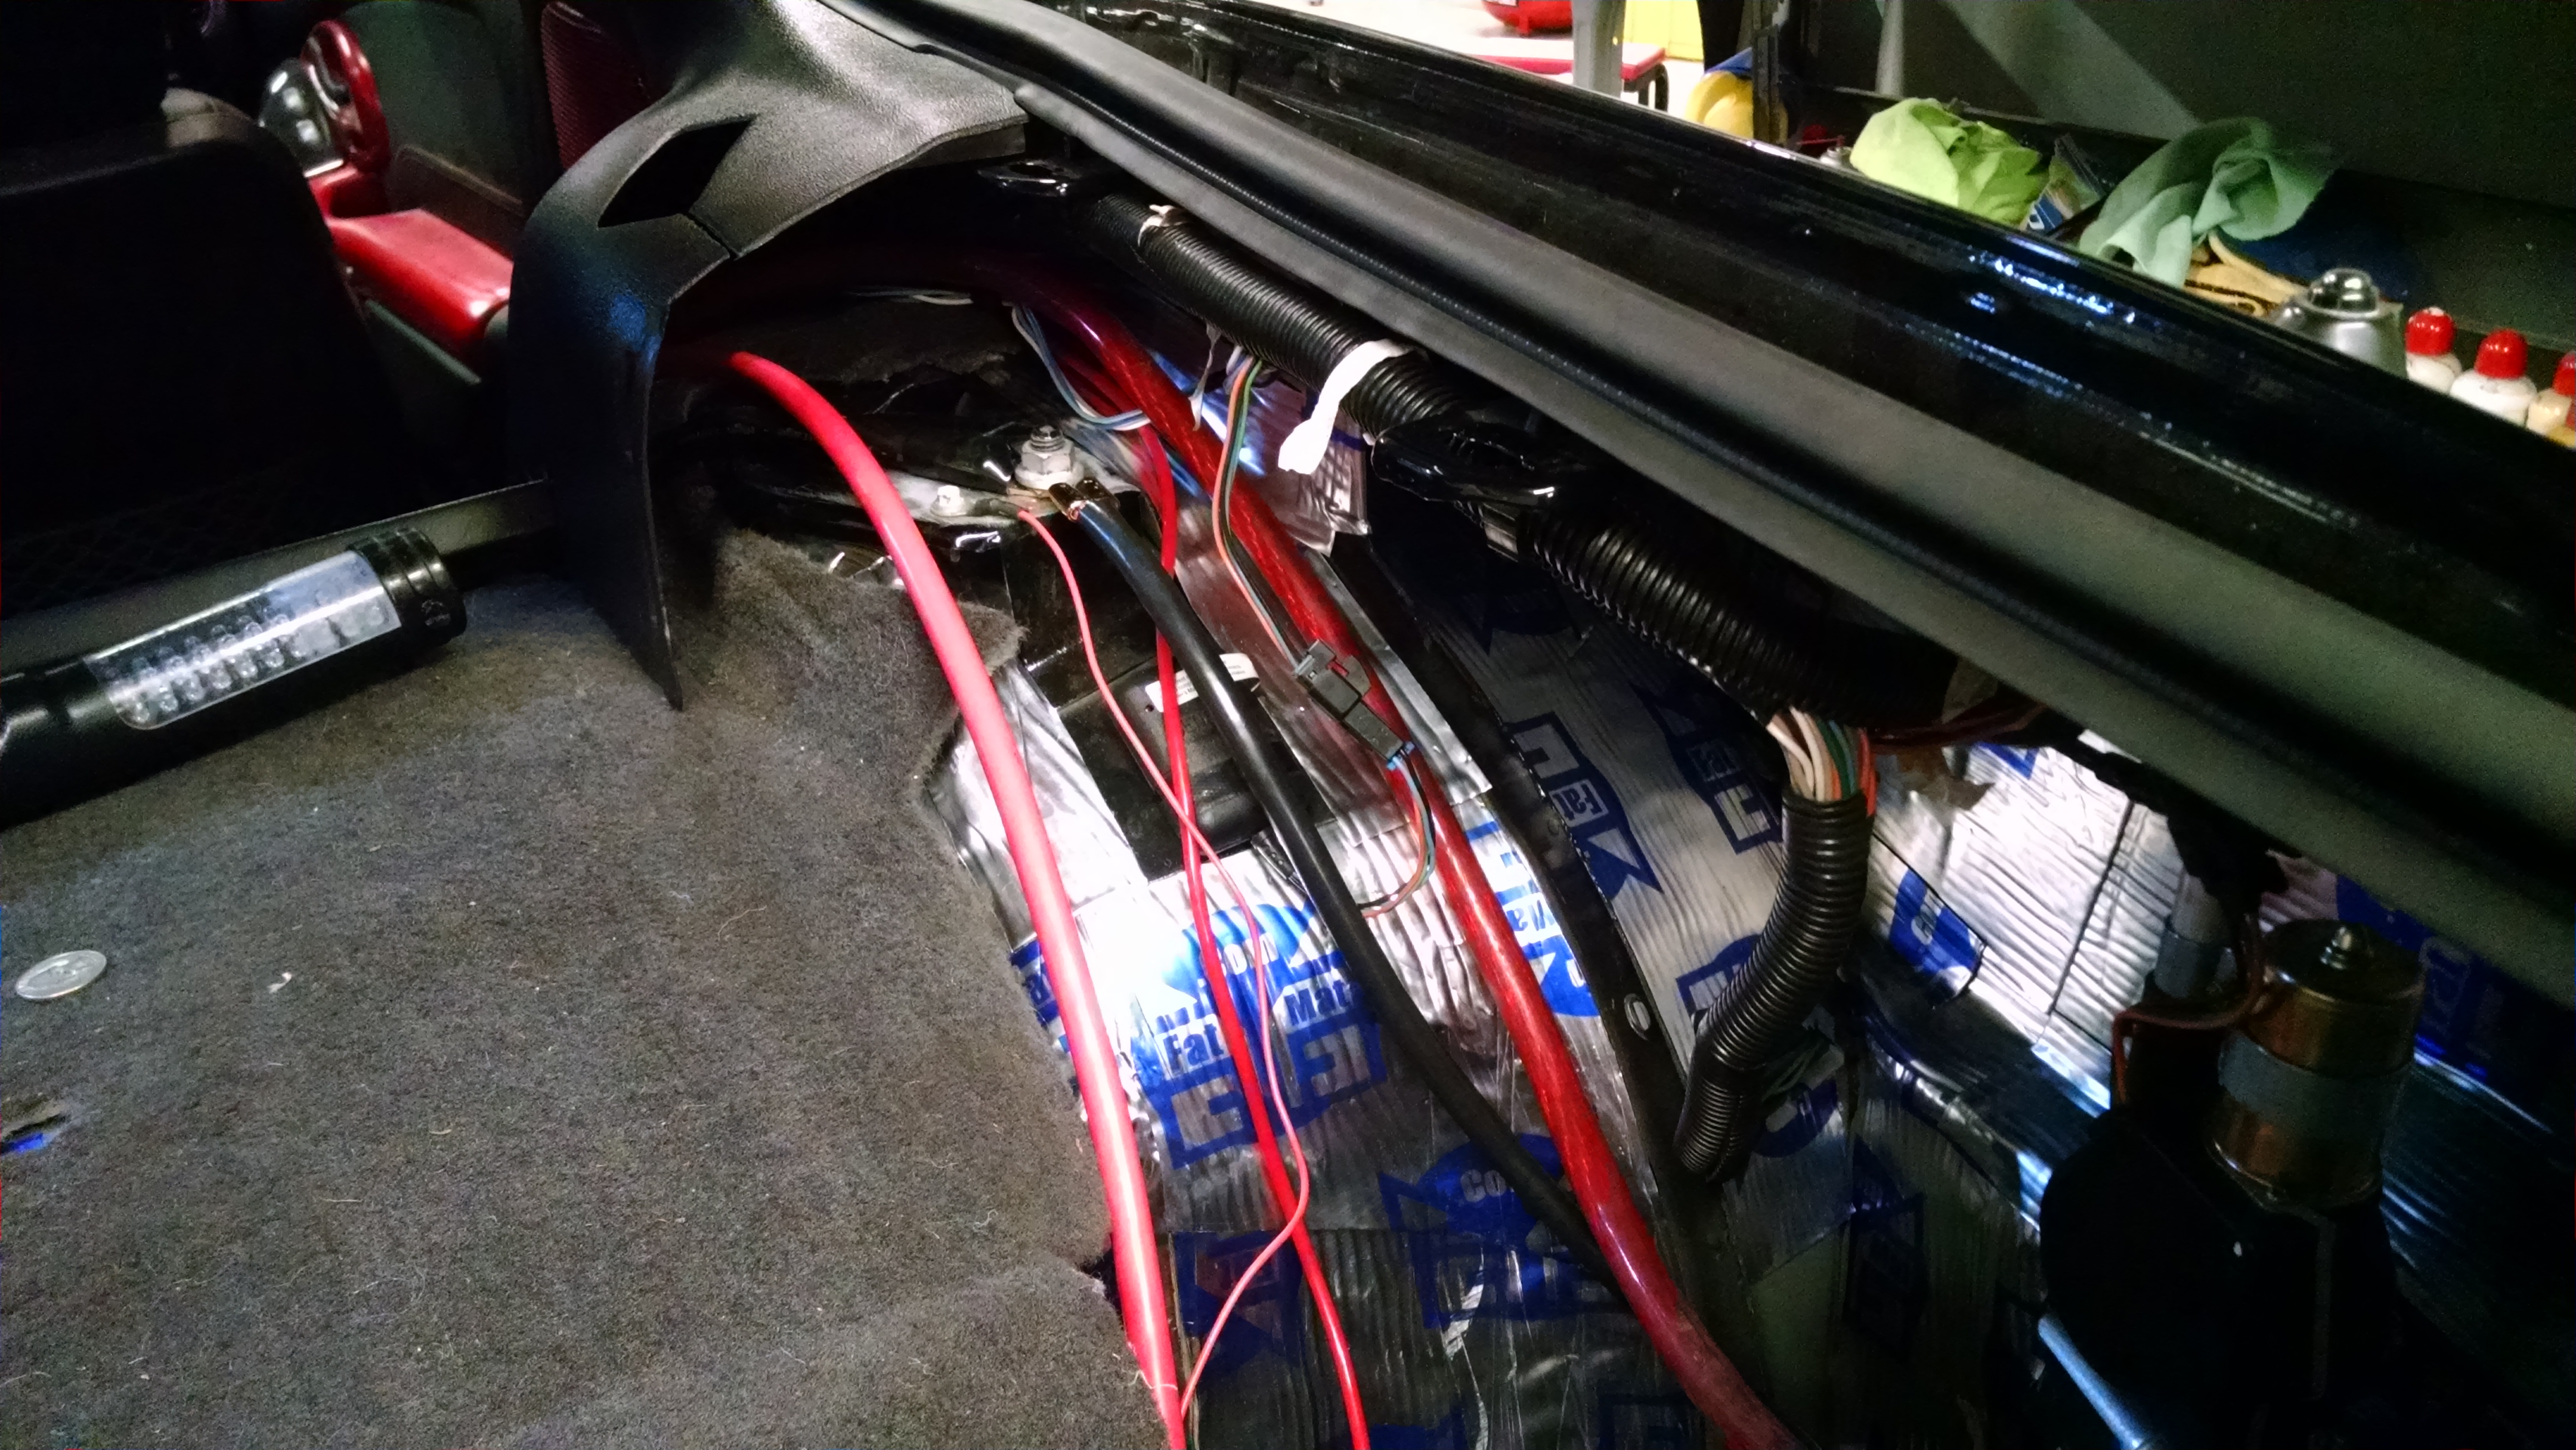
Now the tray is mounted and its time to route the main positive wire from the engine bay to the trunk. There are several ways to go about it and you can choose one that best fits what you are doing. I routed mine under the car since I had my stereo power wire routed that way and had the hardware in place to secure it. BE SURE AND USE A RUBBER GROMMET WHERE THE WIRE ENTERS THE CAR IF YOU DO THIS. once that's done choose where you are going to tie in your ground from the battery to the chassis in the rear. For me it was one of the posts that held the rear seat belts in (when I had them) and I had sanded down the paint to bare metal to get good contact, and that is something to keep in mind that for a good connection it needs to connect to bare metal. I also added an inline fuse from an old stinger power wire setup I had left over right before the battery on the positive side just to be safe.

Now connect the battery and make sure all the wires are secured to ensure good connection and start it up. I have not run into any issues yet but I still need to go drive the car, but even with my stereo hooked up it had no issues.
Button it back up and enjoy.
Hope this helps anyone wanting to do this, I knew nothing going into this and I have to say it was really straight forward and easier than thought it would be, just took some time. Thanks
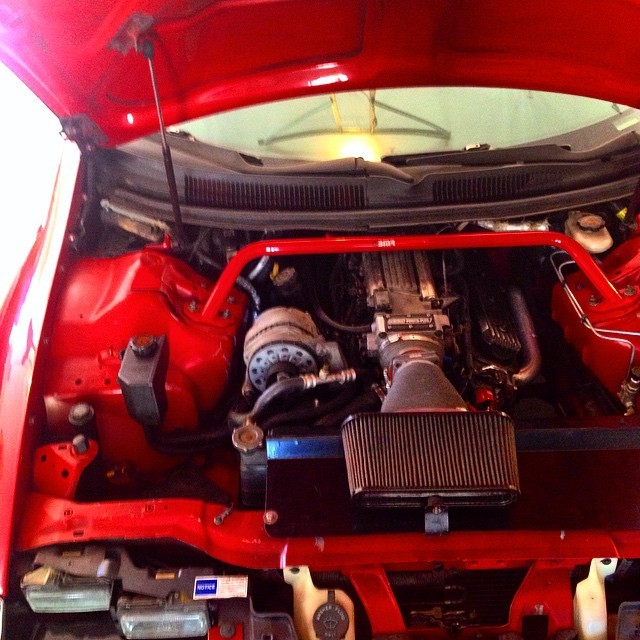
Finished engine bay shots

So as promised here is the how to I said I would put together. First Im gonna show the parts that I purchased for the swap.
Taylor relocation kit 48010 (1 gauge wire)
this kit comes with a universal tray and 16' of red wire and 20" of ground both of which have post style terminals rather than the thread in type.
second was a battery junction terminal for the positive in the engine bay
http://www.ebay.com/itm/RED-Positive-Battery-relocation-aux-auxilary-power-post-terminal-junction-block-/301569089317?hash=item4636eb1f25&vxp=mtr
I ended up needing a few other odd and ends at the end of this but id say im under the $140 mark here.
So the obvious starting point here is removing the battery from the car. I will start by saying there have been some changes to my car that may make this write up a little different than what you experience but the general Idea will be the same.
Once the battery is out, cut the rubber terminal covers off the positive and the ground wires, keep the actual bolt though you can use them once the battery is in the back.
I mounted the junction terminal to the existing plastic battery tray with some self tapping screws, than get the positive wires ready to go onto the post
I had a stinger battery terminal on the positive since I had a stereo with a 0 gauge power wire so the stock terminal was already cut. You may want to cut yours off or you may be able to secure that to the junction terminal I linked above. If not you will need to add an eye connecter to the end of the wire so you can secure it to your positive junction post/terminal.
The ground is much easier just secure that terminal to the chassis and you are good.
Now I chose to mount my battery tray where the spare tire and jack were on the passenger side. you can go about mounting the tray a few different ways. I went to lowes and got a set of 90 degree brackets and mounted them to the bottom of the tray and than secured the brackets to the inner side of the lower cavity. This area is just sheet metal so it will flex a bit without some re reinforcement. From under the car you can clearly see the area I used to mount them and wouldnt take much effort to put a piece of metal behind it to give it some more structure. The brackets themselves do not flex just the panel they are mounted to. I'm not familiar with the drag racing regs on battery relocation so this may not pass for that application but its not what I use the car for so im happy. That said I will likely replace the battery with a top mount rather than side mount just for added security. Depending on how many things you hook up to it, the post gets rather close to the outer fender. I could have orientated the battery the opposite way but than I would have needed a longer ground wire than the kit comes with to reach where I wanted to locate it.
Now the tray is mounted and its time to route the main positive wire from the engine bay to the trunk. There are several ways to go about it and you can choose one that best fits what you are doing. I routed mine under the car since I had my stereo power wire routed that way and had the hardware in place to secure it. BE SURE AND USE A RUBBER GROMMET WHERE THE WIRE ENTERS THE CAR IF YOU DO THIS. once that's done choose where you are going to tie in your ground from the battery to the chassis in the rear. For me it was one of the posts that held the rear seat belts in (when I had them) and I had sanded down the paint to bare metal to get good contact, and that is something to keep in mind that for a good connection it needs to connect to bare metal. I also added an inline fuse from an old stinger power wire setup I had left over right before the battery on the positive side just to be safe.
Now connect the battery and make sure all the wires are secured to ensure good connection and start it up. I have not run into any issues yet but I still need to go drive the car, but even with my stereo hooked up it had no issues.
Button it back up and enjoy.
Hope this helps anyone wanting to do this, I knew nothing going into this and I have to say it was really straight forward and easier than thought it would be, just took some time. Thanks
Finished engine bay shots
Last edited by blackbyrd; 06-18-2015 at 05:14 PM.

The following users liked this post:
BennyB (04-15-2024)
05-28-2015, 12:42 PM
#2

Great write-up! in for pictures! so did you not put any fuses? maybe something to consider especially since you ran your power outside your car. I have an aluminum box for mine and while tightening my positive terminal down my wrench slipped and touched the box for just a split second it still popped some good sparks and melted a little bit of my wrench and box lol I would hate to see what would happen if a wire got pinched and left shorting out.
05-28-2015, 01:37 PM
#3
TECH Veteran
Thread Starter
iTrader: (14)
hmm must have left out that, I put an old stinger inline fuse holder right before the battery, its in the pics but I must have left it out of the write up.
edited
Thanks for the compliment on the write up hope it helps people out
edited
Thanks for the compliment on the write up hope it helps people out
 06-01-2015, 09:49 AM
#6
TECH Veteran
Thread Starter
iTrader: (14)
average battery is around 40lbs I think, didnt put this one on the scale, but I would say I have officially compensated for the ironblock being upfront, with umi upper and lower a arms as well as K-member and my lack of AC. Not that I didnt want it just never put it back on the car from the swap, and I think eventually I would like to do a Vintage Air swap so I could smooth the firewall and still have heat and AC. I focus more on appearance with my cars.
Trending Topics
06-18-2015, 03:41 PM
#9
Good write up  I need to get this done. Ive just been putting it off. Maybe Im looking wrong but have you relocated your fuse boxes? If so Im guessing they are under the area where they come stock.
I need to get this done. Ive just been putting it off. Maybe Im looking wrong but have you relocated your fuse boxes? If so Im guessing they are under the area where they come stock. Last edited by WidowMaker_13; 06-18-2015 at 05:16 PM.
06-18-2015, 05:07 PM
#10
TECH Veteran
Thread Starter
iTrader: (14)
correct they have been dropped down under....not sure what to call that area but there is a write up on that in the appearance section.
Ultimately I would like to get rid of my ABS module as well as the other stuff I've mentioned so the bay would be really clean with just the engine being present but I have some other issues to work through at the moment.
Glad the write up is being received well, I put it off on mine for several years as well and ended up with a lot of free time to finally add some of the finishing touches I wanted to do..........I have a list haha
06-18-2015, 05:19 PM
#11
I feel ya, I have a whole list of stuff to do, but then I just get lazy. I would like to relocate my battery, hide the fuse box, delete my ac, and delete my ABS. Then of course do the wire mod.
I love the look of a clean engine bay. But then I get in my car and crank the AC, and worry about not having ABS, and pop the hood to work on the car and realize that the wire mod and fuse box relocation may be a pain. Im constantly working on the car so I have just left it all alone lol maybe one day
I love the look of a clean engine bay. But then I get in my car and crank the AC, and worry about not having ABS, and pop the hood to work on the car and realize that the wire mod and fuse box relocation may be a pain. Im constantly working on the car so I have just left it all alone lol maybe one day
06-29-2015, 07:15 AM
#14
TECH Apprentice
iTrader: (5)
Join Date: Jul 2010
Location: Pasadena, Maryland
Posts: 320
Likes: 0
Received 0 Likes
on
0 Posts

I just did my relocation not too long ago with a taylor box and a flaming river cutoff switch. I can post some more pictures if people would like. I used 1/0 Gauge wire to the starter, 4 gauge to the alternator, and 1/0 to ground to the body.

 01-23-2021, 08:03 PM
#16
11 Second Club
I just did my relocation not too long ago with a taylor box and a flaming river cutoff switch. I can post some more pictures if people would like. I used 1/0 Gauge wire to the starter, 4 gauge to the alternator, and 1/0 to ground to the body.
Attachment 654698
Attachment 654698