Joying Android Head Unit Into a 4th Gen - Back Up Camera - PIC HEAVY
 12-29-2017, 09:28 AM
#1
On The Tree
Thread Starter
Excited to document the install.This is a guide for installing a double-din Joying Android head unit, an Auto-Vox back-up camera in a 98-02 Firebird or Camaro. From what I understand the installation procedure is the same on older models, I just don’t want to claim something and have it not work for you.
I am writing this guide down to the very basics. I know there have been plenty of guides to come and go over the years, however most of them are missing pictures at this point, and could bear to be updated. I am writing this as someone who is not super familiar with F-Body terminology, so forgive me if the nomenclature I use is inaccurate. I am a pic heavy sort of person, in an attempt to really show how I accomplish the tasks, and I want anyone to be able to follow and replicate what I did.
That said, let’s dive right into it.
The shopping list:
Joying JY-UM124N2 because it was on sale for $230. For $20 extra they have one with the Atom X3 chip inside, but I don't think we HAVE to have it. I may be completely wrong, who know! This unit has 2 gigs of ram, and 32 gigs of internal storage, as well as the physical volume ****. From a thread on here, I have heard a lot of good stuff about it, and love the ability to do anything with it because it runs Android.
https://www.carjoying.com/joying-2gb...audio-764.html

All of the peripheral items to go along with it:
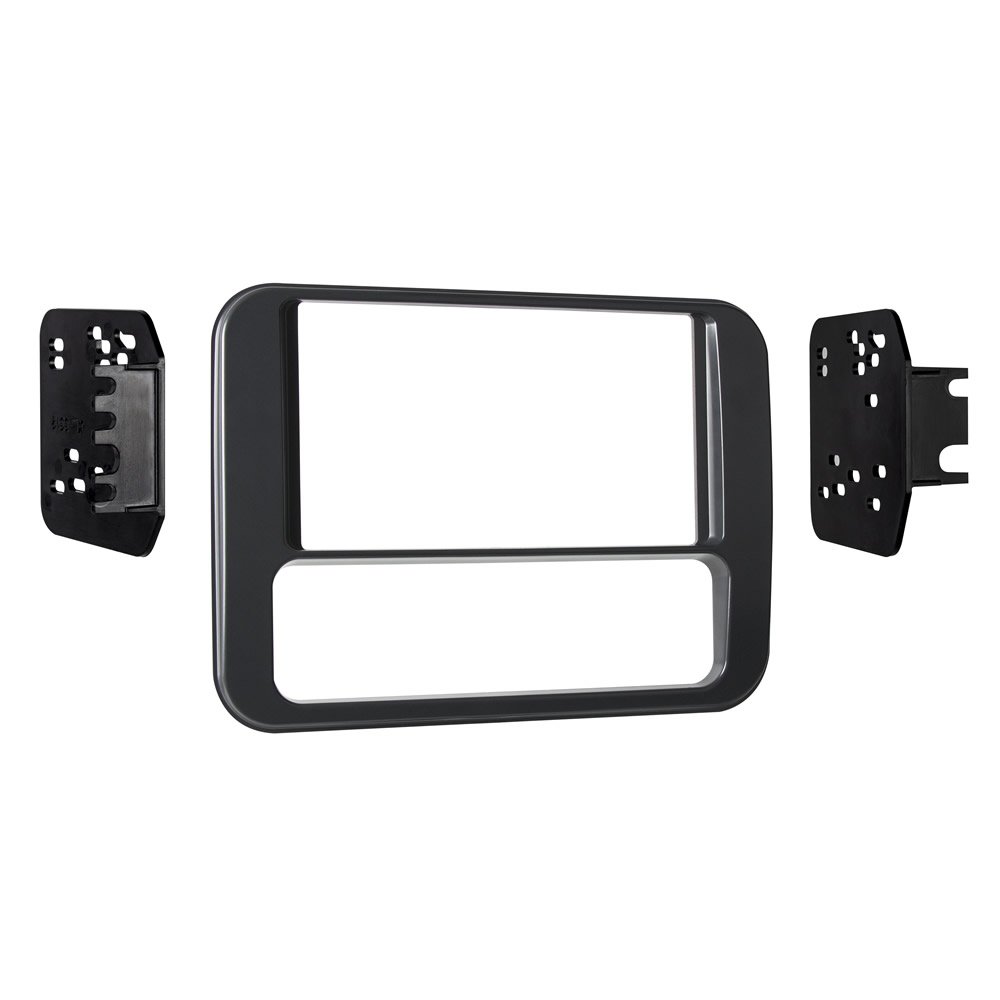
A Metra 95-3312G Double Din dash kit for Firebirds:
Metra 70-1858 Radio Wiring Harness. This hopefully right:

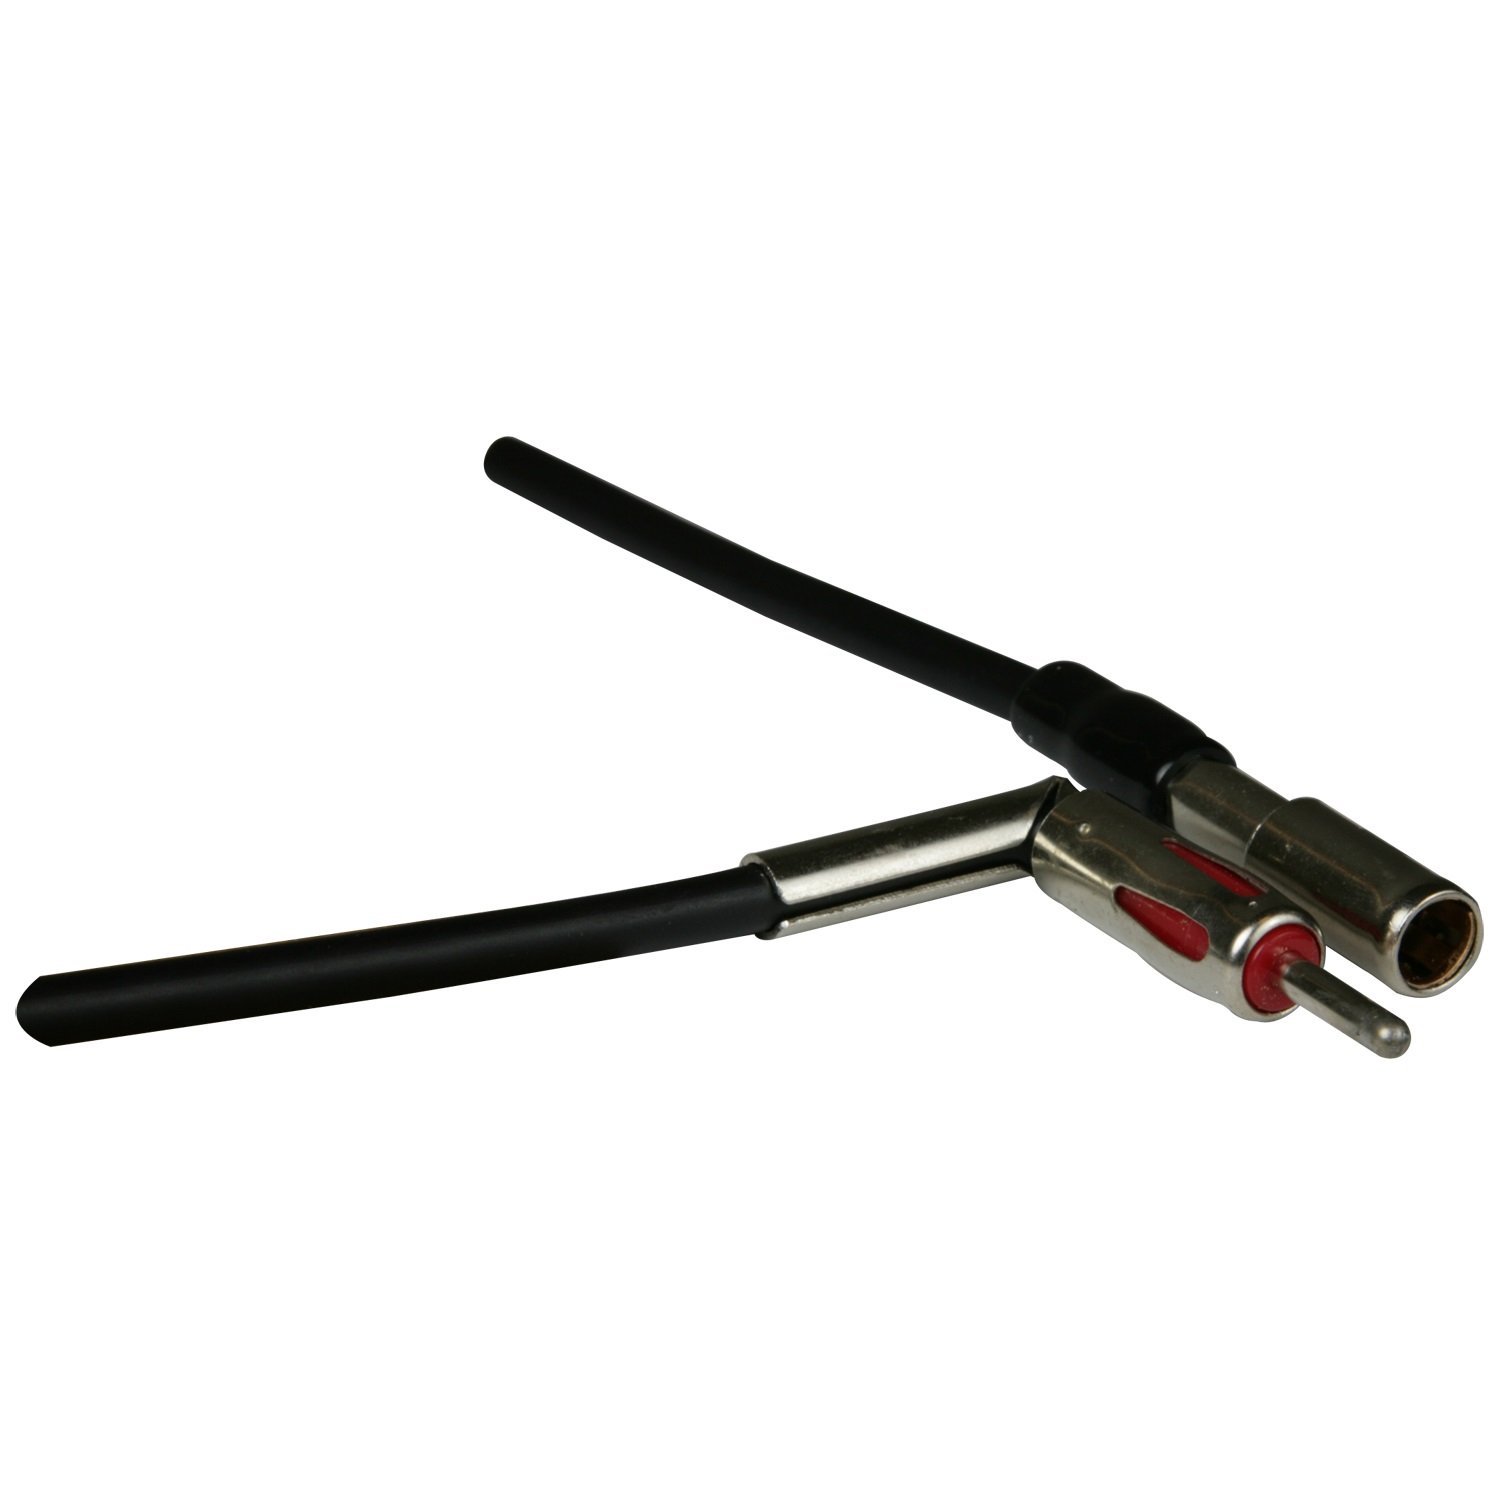
Metra 40-GM10 GM antenna Adapter:
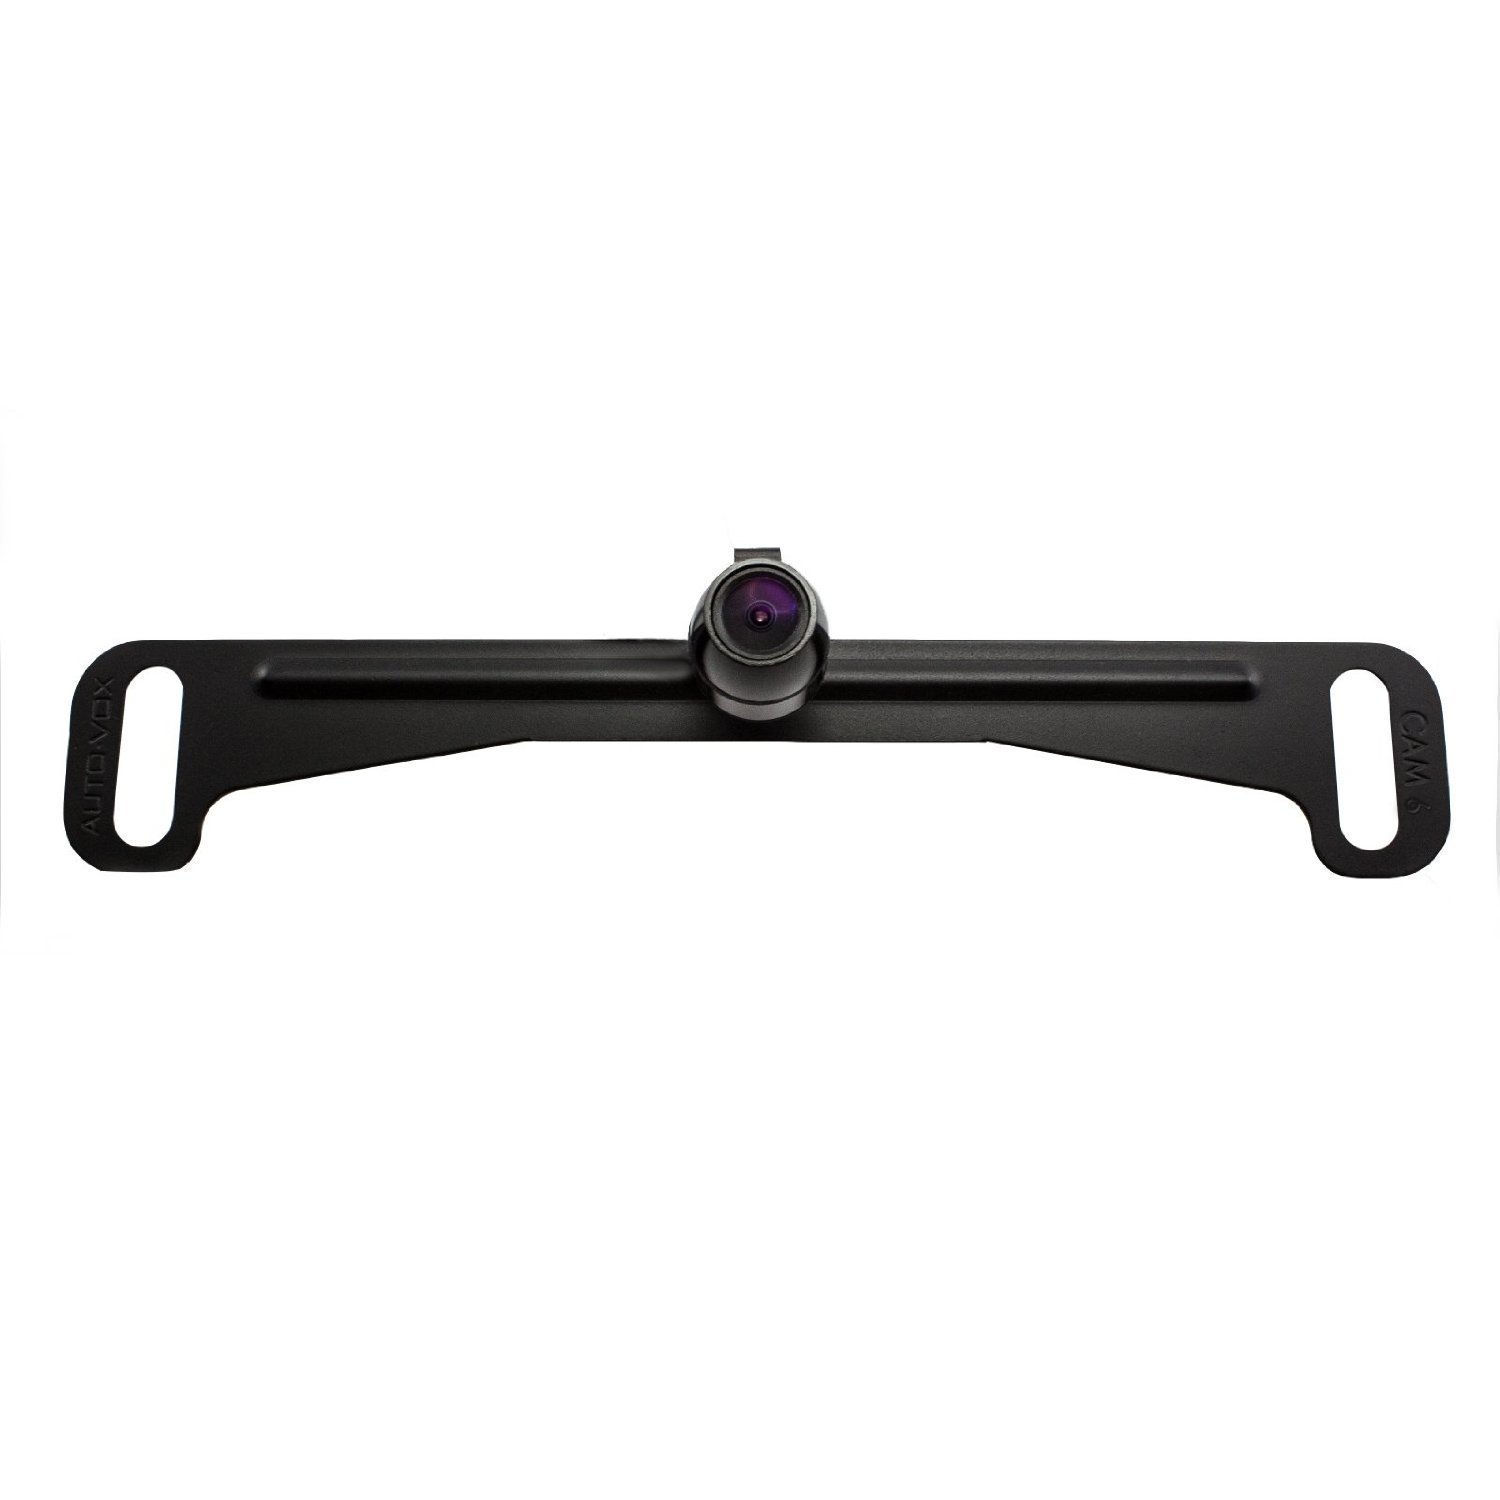
An Auto-Vox backup camera that others have used with this radio with success. She is really excited about this:
A Samsung 32 gig USB 3.0 thumb drive, and a SanDisk 32 gig Micro SD card.
We will see what memory it likes the most!
Now to the install:
The most extensive part of this process (in my opinion) was the back-up camera, so I decided to start by running it:
First things first, take the plate off by removing the two screws at the top. I already had the plate removed prior to this step.
In my particular case, I did not know where the wires ran from inside to outside, so I removed both tail lights. This allowed for some extra cleaning under the lights anyhow. We also wanted to remove the spare for now, so it all worked out. Anyhow, pictures of that process:
Go ahead and remove the cargo cover thing.
The passenger side has these twist clips to hold the rear panel in. I like to use trim tools for turning them, using a metal screwdriver has a tendency to chew pieces like these up. Turn the three of them to unlock, and lift from the front. It should come right out. I left the speakers all attached and just set it aside on the “tray.”
The driver’s side is all “Christmas tree” style clips, without the twist-locks. Go ahead and remove it as well.
Once the panel is out of the way, you will have access to these nuts. There are five in total holding the tail light in place. The fifth one is behind the spare tire. If you have tiny hands you may be able to reach it. I don’t, and could not.
Good luck with that!
So, with the spare tire removed, it looks like this. All access pass to the nuts that hold the tail light in place. Removing the spare is also good weight reduction!
Passenger side tail light removed.
Remove the driver’s side tail light by removing the plastic nuts. The center portion will simply slide out once both tail lights are removed.
With the tail lights removed, I mounted the camera onto the license plate bracket to run the cable. I left everything loose for now to make sure there was plenty of slack:
As you can see, I attempted to follow the path of the license plate lamps. I managed to push the end of that wire through to somewhere I could reach from under the car.
It is difficult to see, but this is the cable coming through under the car.
After pulling the slack up from the plate, I used a flash light from the top side to find anywhere I could see through on the bottom. There is a small space under the driver’s side tail light that is perfect for passing this cable through. Seen here:
I guess the big fear is “What if you get rear ended??” I suppose if I get rear ended, the first thing on my mind will not be the back-up camera. This is a good spot and the cable has room to breathe.
From there, I shoved it through the existing grommet:
On the other side.
At this point, go ahead and re-attach your tag. This camera is designed to be mounted behind the tag, for some reason a lot of people put it in front. This is how it should go:
Impressive blurring skills, I know.
Now to run the power tap for the reverse signal:
I used a very small punch and taped the power wire to it, this aided in getting through the grommet from the inside to the outside. Then remove the tape and go.
Probably the quickest way to do this, but certainly not the best, is to use a wire-tap to tap the hot reverse bulb power wire with the power wire for the camera. I used one for now, but may go back and solder and shrink them for peace of mind. For now, this will do just fine.
EDIT: Please read my entire install before doing this!
Once you have it tapped, go ahead and reinstall the tail lights. The rest of the install moves inside the car!
I am writing this guide down to the very basics. I know there have been plenty of guides to come and go over the years, however most of them are missing pictures at this point, and could bear to be updated. I am writing this as someone who is not super familiar with F-Body terminology, so forgive me if the nomenclature I use is inaccurate. I am a pic heavy sort of person, in an attempt to really show how I accomplish the tasks, and I want anyone to be able to follow and replicate what I did.
That said, let’s dive right into it.
The shopping list:
Joying JY-UM124N2 because it was on sale for $230. For $20 extra they have one with the Atom X3 chip inside, but I don't think we HAVE to have it. I may be completely wrong, who know! This unit has 2 gigs of ram, and 32 gigs of internal storage, as well as the physical volume ****. From a thread on here, I have heard a lot of good stuff about it, and love the ability to do anything with it because it runs Android.
https://www.carjoying.com/joying-2gb...audio-764.html
All of the peripheral items to go along with it:
A Metra 95-3312G Double Din dash kit for Firebirds:
Metra 70-1858 Radio Wiring Harness. This hopefully right:
Metra 40-GM10 GM antenna Adapter:
An Auto-Vox backup camera that others have used with this radio with success. She is really excited about this:
A Samsung 32 gig USB 3.0 thumb drive, and a SanDisk 32 gig Micro SD card.
We will see what memory it likes the most!
Now to the install:
The most extensive part of this process (in my opinion) was the back-up camera, so I decided to start by running it:
First things first, take the plate off by removing the two screws at the top. I already had the plate removed prior to this step.

In my particular case, I did not know where the wires ran from inside to outside, so I removed both tail lights. This allowed for some extra cleaning under the lights anyhow. We also wanted to remove the spare for now, so it all worked out. Anyhow, pictures of that process:

Go ahead and remove the cargo cover thing.

The passenger side has these twist clips to hold the rear panel in. I like to use trim tools for turning them, using a metal screwdriver has a tendency to chew pieces like these up. Turn the three of them to unlock, and lift from the front. It should come right out. I left the speakers all attached and just set it aside on the “tray.”
The driver’s side is all “Christmas tree” style clips, without the twist-locks. Go ahead and remove it as well.

Once the panel is out of the way, you will have access to these nuts. There are five in total holding the tail light in place. The fifth one is behind the spare tire. If you have tiny hands you may be able to reach it. I don’t, and could not.

Good luck with that!

So, with the spare tire removed, it looks like this. All access pass to the nuts that hold the tail light in place. Removing the spare is also good weight reduction!


Passenger side tail light removed.

Remove the driver’s side tail light by removing the plastic nuts. The center portion will simply slide out once both tail lights are removed.
With the tail lights removed, I mounted the camera onto the license plate bracket to run the cable. I left everything loose for now to make sure there was plenty of slack:

As you can see, I attempted to follow the path of the license plate lamps. I managed to push the end of that wire through to somewhere I could reach from under the car.

It is difficult to see, but this is the cable coming through under the car.
After pulling the slack up from the plate, I used a flash light from the top side to find anywhere I could see through on the bottom. There is a small space under the driver’s side tail light that is perfect for passing this cable through. Seen here:


I guess the big fear is “What if you get rear ended??” I suppose if I get rear ended, the first thing on my mind will not be the back-up camera. This is a good spot and the cable has room to breathe.
From there, I shoved it through the existing grommet:


On the other side.
At this point, go ahead and re-attach your tag. This camera is designed to be mounted behind the tag, for some reason a lot of people put it in front. This is how it should go:


Impressive blurring skills, I know.
Now to run the power tap for the reverse signal:
I used a very small punch and taped the power wire to it, this aided in getting through the grommet from the inside to the outside. Then remove the tape and go.


Probably the quickest way to do this, but certainly not the best, is to use a wire-tap to tap the hot reverse bulb power wire with the power wire for the camera. I used one for now, but may go back and solder and shrink them for peace of mind. For now, this will do just fine.
EDIT: Please read my entire install before doing this!

Once you have it tapped, go ahead and reinstall the tail lights. The rest of the install moves inside the car!

Last edited by Number Tew; 12-29-2017 at 09:38 AM.
 12-29-2017, 09:29 AM
#2
On The Tree
Thread Starter
Inside the vehicle, use the existing ground beside the latch mechanism to ground the camera:
I wrapped everything up with tape to clean the look up a bit. With everything taped and set in place, the control module thing that this camera comes with ends up right below the latch. This gives easy access to the unit which is good in the event I want to turn off grid lines or something in the future:
Because we are installing a new radio, it seemed silly to hang onto the 12 disc changer (especially since it was not working!) so, to remove it, simply remove this nut with a 14mm wrench, then pry the Christmas tree clip off. I included a close up of the clip attached to the changer for reference:
The nut to be removed.
The clip on the changer.
This is the hole that the clip passes through on the body. Luckily the car is yellow so things like this really stick out!
Time to start running the RCA cable forward! I decided to go up the passenger side for no particular reason. First, I pushed the cable through where shown. All the way to the passenger side, and down towards the front of the vehicle.
I tied it around the edge using a zip tie through the other hole on the ear the interior panel clips to.
Here you can see the cable running around the edge of the vehicle and forward.
Undo this screw to separate the upper and lower panel. You only need to make enough room to slide your hand in and grab the cable. Once you have the cable, pull it all the way forward.
Go ahead and replace the rear trim. You�re done back there once you have that bit of slack pulled forward!
I removed this whole panel which obviously ties into the kick panel. This is the most difficult screw to remove. I ended up using a ratcheting 1/4 inch wrench with a Phillips bit on it to eventually get it.
Once that panel is out of the way, tuck the cable under the carpet. I used a trim removal tool to push it down further to make sure it stays in place.
I removed this panel to gain better access. To do so, pull on the metal tab that is towards the transmission tunnel, and remove the two Christmas tree clips towards the rear.
From here, use the same method as before. Tuck the cable under the carpet as much as possible.
While you have those pieces out, go ahead and run the microphone for your Bluetooth. This is how I did it:
I used the existing clip and just put it under the headliner. This may or may not hold well, but only time will tell.
Use a trim tool to shove the wire under the headliner.
If you tug on this panel a bit, it will allow you to pass the mic cable through. Then you can route it around and down. A person with small hands is especially useful here, however I am a goliath and I managed to make it work:
It is worth noting (as you can see) that I did not run this wire while the kick panel was out. I wish I had because it would have been much easier, which is why I am putting it here in the guide to remind you. But, from here you basically follow the same path you did with the RCA cable, and tie in behind the radio.
It�s time to take out the factory unit. As you can see, the previous owners already cut out the trim piece between the radio and HVAC. This would be an additional step to the whole process, but I am not able to show it. Anyhow, removing the plate is as simple using a trim panel tool and carefully pulling back. It�s only held in by 4 clips.
Then remove the three Phillips screws that hold the factory unit in place:
The clip on the left comes off by pushing up from the bottom side of the radio and pulling off. The clip in the center comes off by pressing from the top and pulling off. The antenna simply pulls out; just give it a good tug.
Go ahead and pop on your antenna adapter:
Then, run the cable from the passenger side through the front of the dash. It might get caught because the plug is sort of large, so just look for the path of least resistance. I was not really able to fit my phone in for pictures here. I tried to run the cable with the existing runs to the dash.
Go ahead and put the interior back together and pat yourself on the back a little bit. The hard part is over! Take this time to make sure your interior panels are properly seated. I found the driver�s side had a few panels out of whack (NOT MY DOING) but got it sorted right out.
In my particular case, my radio was not here yet, so I went ahead and did the peripheral things. I opened up and plugged in the BAFX Bluetooth OBDII reader, just because.
Then I opened up the new dash kit to get it ready:
People mention needing to do some trimming to the sides of this dash kit to fit the Joying units, which are just a hair over a double-din size. A Dremel will make short work of it.
Put the clips on the back side. This was fairly tough on the hands. The clips want to thread/bite into the plastic bits on the back of the face. With much perseverance you will make it happen!

I wrapped everything up with tape to clean the look up a bit. With everything taped and set in place, the control module thing that this camera comes with ends up right below the latch. This gives easy access to the unit which is good in the event I want to turn off grid lines or something in the future:

Because we are installing a new radio, it seemed silly to hang onto the 12 disc changer (especially since it was not working!) so, to remove it, simply remove this nut with a 14mm wrench, then pry the Christmas tree clip off. I included a close up of the clip attached to the changer for reference:

The nut to be removed.

The clip on the changer.

This is the hole that the clip passes through on the body. Luckily the car is yellow so things like this really stick out!
Time to start running the RCA cable forward! I decided to go up the passenger side for no particular reason. First, I pushed the cable through where shown. All the way to the passenger side, and down towards the front of the vehicle.

I tied it around the edge using a zip tie through the other hole on the ear the interior panel clips to.


Here you can see the cable running around the edge of the vehicle and forward.

Undo this screw to separate the upper and lower panel. You only need to make enough room to slide your hand in and grab the cable. Once you have the cable, pull it all the way forward.
Go ahead and replace the rear trim. You�re done back there once you have that bit of slack pulled forward!

I removed this whole panel which obviously ties into the kick panel. This is the most difficult screw to remove. I ended up using a ratcheting 1/4 inch wrench with a Phillips bit on it to eventually get it.
Once that panel is out of the way, tuck the cable under the carpet. I used a trim removal tool to push it down further to make sure it stays in place.

I removed this panel to gain better access. To do so, pull on the metal tab that is towards the transmission tunnel, and remove the two Christmas tree clips towards the rear.


From here, use the same method as before. Tuck the cable under the carpet as much as possible.
While you have those pieces out, go ahead and run the microphone for your Bluetooth. This is how I did it:


I used the existing clip and just put it under the headliner. This may or may not hold well, but only time will tell.

Use a trim tool to shove the wire under the headliner.

If you tug on this panel a bit, it will allow you to pass the mic cable through. Then you can route it around and down. A person with small hands is especially useful here, however I am a goliath and I managed to make it work:

It is worth noting (as you can see) that I did not run this wire while the kick panel was out. I wish I had because it would have been much easier, which is why I am putting it here in the guide to remind you. But, from here you basically follow the same path you did with the RCA cable, and tie in behind the radio.
It�s time to take out the factory unit. As you can see, the previous owners already cut out the trim piece between the radio and HVAC. This would be an additional step to the whole process, but I am not able to show it. Anyhow, removing the plate is as simple using a trim panel tool and carefully pulling back. It�s only held in by 4 clips.

Then remove the three Phillips screws that hold the factory unit in place:

The clip on the left comes off by pushing up from the bottom side of the radio and pulling off. The clip in the center comes off by pressing from the top and pulling off. The antenna simply pulls out; just give it a good tug.

Go ahead and pop on your antenna adapter:


Then, run the cable from the passenger side through the front of the dash. It might get caught because the plug is sort of large, so just look for the path of least resistance. I was not really able to fit my phone in for pictures here. I tried to run the cable with the existing runs to the dash.

Go ahead and put the interior back together and pat yourself on the back a little bit. The hard part is over! Take this time to make sure your interior panels are properly seated. I found the driver�s side had a few panels out of whack (NOT MY DOING) but got it sorted right out.

In my particular case, my radio was not here yet, so I went ahead and did the peripheral things. I opened up and plugged in the BAFX Bluetooth OBDII reader, just because.


Then I opened up the new dash kit to get it ready:


People mention needing to do some trimming to the sides of this dash kit to fit the Joying units, which are just a hair over a double-din size. A Dremel will make short work of it.

Put the clips on the back side. This was fairly tough on the hands. The clips want to thread/bite into the plastic bits on the back of the face. With much perseverance you will make it happen!
 12-29-2017, 09:30 AM
#3
On The Tree
Thread Starter
Now, let’s move on to the reason we are all here:
Little bit of unboxing:
They include a pretty easy to follow picture to give you an understanding.
Here you can see the trimming that needs to be done.
I work best at the table. I did not encounter any surprises with the harness. Everything needed to be in line with its corresponding color. There is an orange wire from the head unit labeled “BACK” – you will use this for the back-up camera signal, so you can strip it.
I used marine grade heat shrink butt connectors to put this stuff together. I am sure some of you might have some fancy Deutsch connector system, or you might have soldered it all together. These will work for several years, I am quite confident. Though, we all know soldering is the best option. If I do end up with any failure issues, the butt connectors will be where I start looking.
Once you have it all wired up, take it on out to the car! This was my first start up:
It comes preloaded with some an odd voice saying directional phrases like “Stop” and “Turn Ahead” – they probably correlate to the existing nav software. I deleted these because I kept accidentally playing them all.
Anyhow, so it works! Now, to do the important stuff:
The Metra kit comes with brackets that pig-ear onto the sides to be bolted in. Well, I could only get one hole in either side, which means this would have been held in all flimsy. So, I used a dremel and made a few new holes and widened some of the existing ones, as seen below:
Next, we had to use the dremel on the trim. There may be a better way to do this, I am not sure. I actually needed to trim down on the sides and the bottom, your experience may be different:
After hacking away at the trim piece, move back inside the car. The camera I installed has this signal wire along with the RCA jack, some vehicles use it, some don’t; apparently just the video signal alone is enough to trip some systems. You guessed it, the Firebird loves this wire. Go ahead and strip this back, then tie it into the orange wire on the harness. I used Male/Female spade connectors for this, so it is easily removable if I need to pull the head unit out in the future:
Plug everything in. The GPS screws on like a coaxial cable. I just pushed the GPS unit forward on the transmission tunnel. I was not able to snap a photo of it. It has a strong magnet and seemed to be stuck. If I need to move it later, I will.
Here is everything hooked up. I loosened the one bundled cable seen here, that is one of the USB ports. I have them both coming out near the passenger cup holder for easy access.
So, with everything in, try, try, and try as I may, I was not able to get the backup camera working and it was driving me crazy. I used a 9-volt battery to jump the spade connector I used for the signal wire, and sure enough the camera turned on. I started checking voltage with the car in reverse and saw no real change. I figured that wire-tap was not doing its job.
I pulled the tail light back out, pulled the tap off and replaced it with a butt connector with heat shrink. Put the car in reverse and the camera fired right up. Please, just don’t bother with the wiretap; it is not effective in this particular install.
On the camera, they have their own grid line option as I mentioned earlier, the head unit does as well. Pictured, both of them are activated. She likes that, so for now it will stay that way. Also, it was super foggy out; camera is not really that blurry!
And here we have it with the CETA background I found!
So, first impressions:
This thing is SNAPPY! I was honestly worried it would be sluggish, but that is not the case at all. It feels just as powerful as having my phone in the dash. Plus, the beauty of running Android, you can change EVERYTHING!
I tried to download a local area on Google Maps, but still was not able to navigate without the data. The stock navigation program, iGo does work, but it is a little less than intuitive. Based on recommendations, we downloaded Here WeGo – a dedicated offline system, but obviously you download maps online to set it up.
The default weather app would not change from Celsius, and well, here in America we have no idea what that means. So, I downloaded Local Weather Widget & Forecast. It looks clean and gives the important info.
Torque, once connected, works great. The BAFX OBDII connector has a Bluetooth code of 1234. It would not connect to the Joying unit until I changed the corresponding Bluetooth code to 1234, after that it worked out as usual.
Driving at night, the screen does not auto dim, so I need to find a way to dim the screen easily for night drives. In the day time, it is fantastic. Radio sounds much clearer than the dated Monsoon. We have a 32gig thumb drive and SD card inserted, plus the unit itself has 32 gigs of space, so it should be good to go for a while.
Made a few phone calls with the Bluetooth setup and it seems to work out great!
I still cannot find the folder for the startup logo, but I am working on it. I may need to download ES File Explorer and dig around after connecting to my computer.
The installation is not totally complete. I still need to do some more trimming on the trim piece, but I should have that squared away soon.
Thanks for looking!

Little bit of unboxing:


They include a pretty easy to follow picture to give you an understanding.


Here you can see the trimming that needs to be done.

I work best at the table. I did not encounter any surprises with the harness. Everything needed to be in line with its corresponding color. There is an orange wire from the head unit labeled “BACK” – you will use this for the back-up camera signal, so you can strip it.
I used marine grade heat shrink butt connectors to put this stuff together. I am sure some of you might have some fancy Deutsch connector system, or you might have soldered it all together. These will work for several years, I am quite confident. Though, we all know soldering is the best option. If I do end up with any failure issues, the butt connectors will be where I start looking.
Once you have it all wired up, take it on out to the car! This was my first start up:

It comes preloaded with some an odd voice saying directional phrases like “Stop” and “Turn Ahead” – they probably correlate to the existing nav software. I deleted these because I kept accidentally playing them all.
Anyhow, so it works! Now, to do the important stuff:
The Metra kit comes with brackets that pig-ear onto the sides to be bolted in. Well, I could only get one hole in either side, which means this would have been held in all flimsy. So, I used a dremel and made a few new holes and widened some of the existing ones, as seen below:


Next, we had to use the dremel on the trim. There may be a better way to do this, I am not sure. I actually needed to trim down on the sides and the bottom, your experience may be different:

After hacking away at the trim piece, move back inside the car. The camera I installed has this signal wire along with the RCA jack, some vehicles use it, some don’t; apparently just the video signal alone is enough to trip some systems. You guessed it, the Firebird loves this wire. Go ahead and strip this back, then tie it into the orange wire on the harness. I used Male/Female spade connectors for this, so it is easily removable if I need to pull the head unit out in the future:

Plug everything in. The GPS screws on like a coaxial cable. I just pushed the GPS unit forward on the transmission tunnel. I was not able to snap a photo of it. It has a strong magnet and seemed to be stuck. If I need to move it later, I will.
Here is everything hooked up. I loosened the one bundled cable seen here, that is one of the USB ports. I have them both coming out near the passenger cup holder for easy access.

So, with everything in, try, try, and try as I may, I was not able to get the backup camera working and it was driving me crazy. I used a 9-volt battery to jump the spade connector I used for the signal wire, and sure enough the camera turned on. I started checking voltage with the car in reverse and saw no real change. I figured that wire-tap was not doing its job.
I pulled the tail light back out, pulled the tap off and replaced it with a butt connector with heat shrink. Put the car in reverse and the camera fired right up. Please, just don’t bother with the wiretap; it is not effective in this particular install.

On the camera, they have their own grid line option as I mentioned earlier, the head unit does as well. Pictured, both of them are activated. She likes that, so for now it will stay that way. Also, it was super foggy out; camera is not really that blurry!

And here we have it with the CETA background I found!

So, first impressions:
This thing is SNAPPY! I was honestly worried it would be sluggish, but that is not the case at all. It feels just as powerful as having my phone in the dash. Plus, the beauty of running Android, you can change EVERYTHING!
I tried to download a local area on Google Maps, but still was not able to navigate without the data. The stock navigation program, iGo does work, but it is a little less than intuitive. Based on recommendations, we downloaded Here WeGo – a dedicated offline system, but obviously you download maps online to set it up.
The default weather app would not change from Celsius, and well, here in America we have no idea what that means. So, I downloaded Local Weather Widget & Forecast. It looks clean and gives the important info.
Torque, once connected, works great. The BAFX OBDII connector has a Bluetooth code of 1234. It would not connect to the Joying unit until I changed the corresponding Bluetooth code to 1234, after that it worked out as usual.
Driving at night, the screen does not auto dim, so I need to find a way to dim the screen easily for night drives. In the day time, it is fantastic. Radio sounds much clearer than the dated Monsoon. We have a 32gig thumb drive and SD card inserted, plus the unit itself has 32 gigs of space, so it should be good to go for a while.
Made a few phone calls with the Bluetooth setup and it seems to work out great!
I still cannot find the folder for the startup logo, but I am working on it. I may need to download ES File Explorer and dig around after connecting to my computer.
The installation is not totally complete. I still need to do some more trimming on the trim piece, but I should have that squared away soon.
Thanks for looking!
The following users liked this post:
sts103 (05-20-2023)
12-29-2017, 04:37 PM
#4
10 Second Club

Good write up dude! It looks real good!
01-03-2018, 08:02 PM
#6
I use Blue Light Filter to dim mine more. If anybody is looking for one of these I run a Joying 135N2D which is the top of the line that they sell and i'll probably be getting rid of it soon. I installed it about two months ago, but I think i'll be switching to a Kenwood. It works great and does some fancy stuff, but the audio quality is to be expected from a $300 chinese headunit in my opinion even with everything else in the car upgraded as well. I also miss having SiriusXM without needing to run the app through my phone's wifi hotspot
01-04-2018, 01:52 AM
#7
On The Tree
Thread Starter
I use Blue Light Filter to dim mine more. If anybody is looking for one of these I run a Joying 135N2D which is the top of the line that they sell and i'll probably be getting rid of it soon. I installed it about two months ago, but I think i'll be switching to a Kenwood. It works great and does some fancy stuff, but the audio quality is to be expected from a $300 chinese headunit in my opinion even with everything else in the car upgraded as well. I also miss having SiriusXM without needing to run the app through my phone's wifi hotspot
She also thinks the GPS signal could bear to be moved. When I was in the car it seemed good to go, but we might try moving the antenna around a bit to get a better signal, it could be that she doesn't like the apps either. Trying to sort it out.
Those things aside, I think she is happy with it overall. Though, like you said, an American version would almost undoubtedly be better quality.
Trending Topics
 02-05-2018, 03:11 PM
#9
Try this for better GPS reception (I did both the GPS and satellite radio antennas): https://ls1tech.com/forums/stereo-el...-location.html
The reception is as good as you will get without mounting the antenna on the outside. It's completely hidden and it's really easy to route the wire from the head unit through the large openings.
The reception is as good as you will get without mounting the antenna on the outside. It's completely hidden and it's really easy to route the wire from the head unit through the large openings.
02-18-2018, 10:05 PM
#10
On The Tree
Thread Starter
Thanks man I appreciate it!
Thanks! We will look into that!
Try this for better GPS reception (I did both the GPS and satellite radio antennas): https://ls1tech.com/forums/stereo-el...-location.html
The reception is as good as you will get without mounting the antenna on the outside. It's completely hidden and it's really easy to route the wire from the head unit through the large openings.
The reception is as good as you will get without mounting the antenna on the outside. It's completely hidden and it's really easy to route the wire from the head unit through the large openings.

