Camaro 1990-2002: How to Make LED Turn Signals
LED turn signals are an easy way to add some more visual appeal to your Camaro. Here's how to get it done.
This article applies to the Camaro (1990-2002).
There are a couple of very good reasons why LED lighting is standard on more and more new cars these days. It's brighter than old incandescent lighting, uses less power, and it just plain looks great. While we often focus on retrofitting LED lighting in the form of low and/or high beam lights, many don't think about the lowly old turn signals when making this conversion. But it's such an easy and difference-making mod that we thought it was definitely worth shedding some light on.

Materials Needed
- All black, reflective turn signal housings (available on eBay)
- Epoxy or silicone
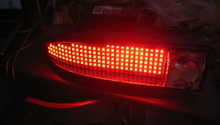
- (4) LED light strips, such as Superbrights
- Soldering tool
- Dremel tool
Step 1 – Prepare the housings
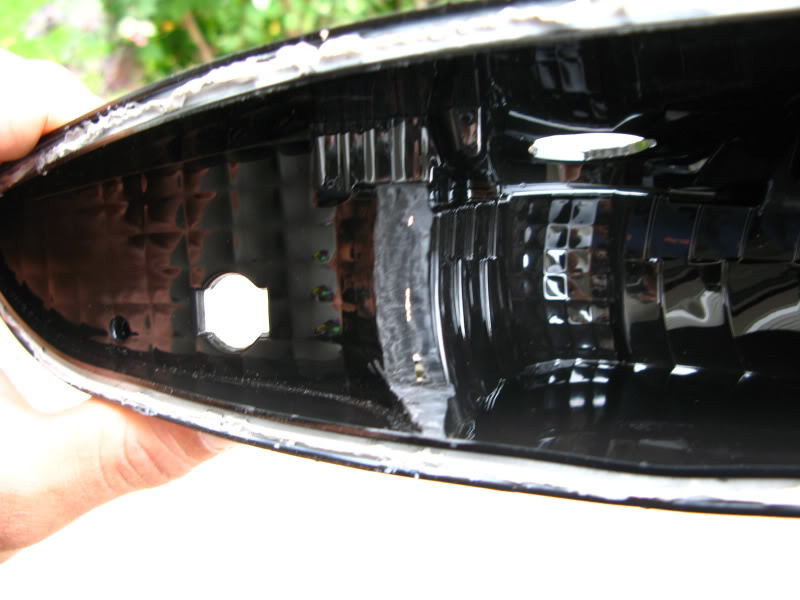
The turn signal housings are designed to hold stock turn signal bulbs, so they'll require a little bit of fabrication to make them work with the LED lighting. Use a Dremel tool to cut out the separators from the housings, which will make room for the LED strips. Fill the holes in the housing with epoxy or silicone to keep the housing water-tight.
Step 2 – Assemble the turn signal housings
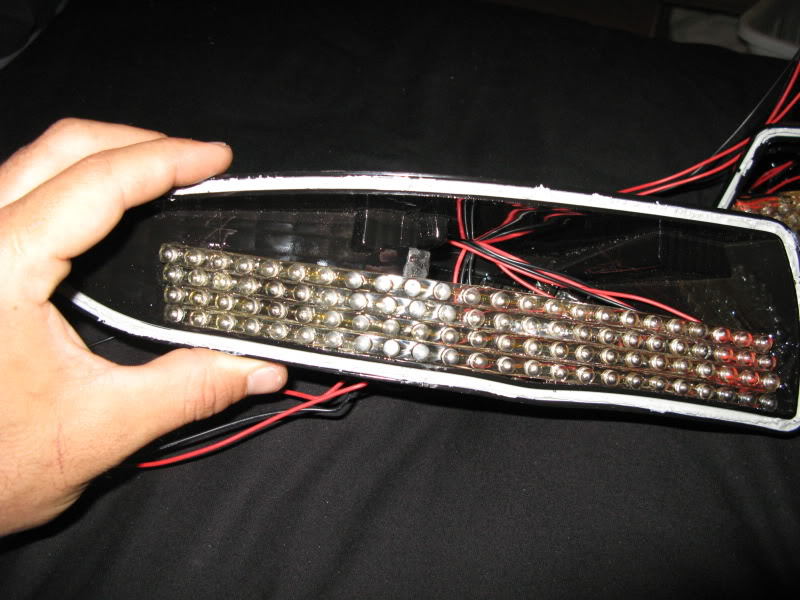
Epoxy each light strip so that the front of the LEDs are flush with the front of the housing where the lens will go. Stack the strips on top of each other, with four total going in each housing. Run the wiring for the LED strips through one of the holes in the back of the housing.
Step 3 – Solder the LED wiring to the factory connector
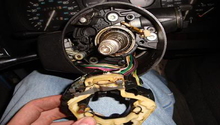
Take the factory turn signal bulbs and break the glass off each bulb. Pull the elements off each prong and fold two of the contacts outside and two of the contacts inside. Solder the positive to one side of the contacts, and the negative to the other side (Figure 3). Before moving on, it's a good idea to hook up each light and check to make sure it works. Use silicone around the exposed wiring to keep it waterproof.
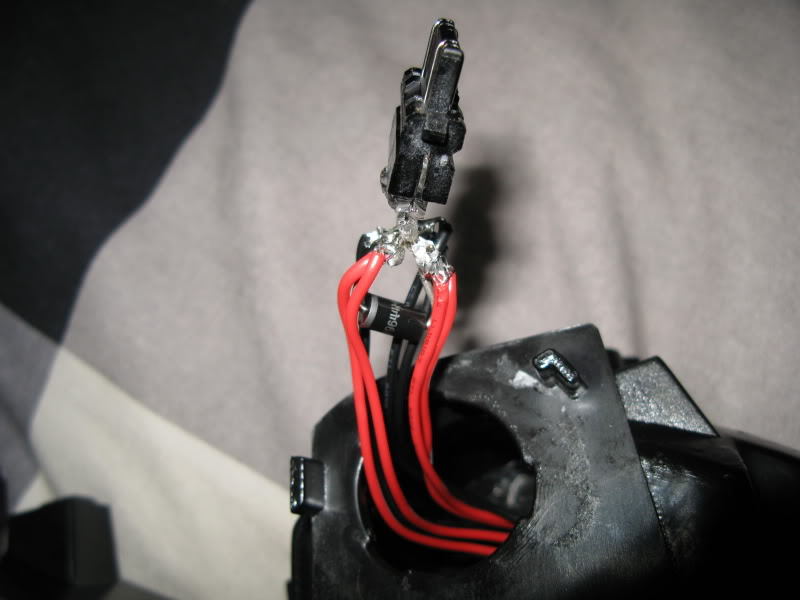
Figure 3. Solder the contacts to the wiring. 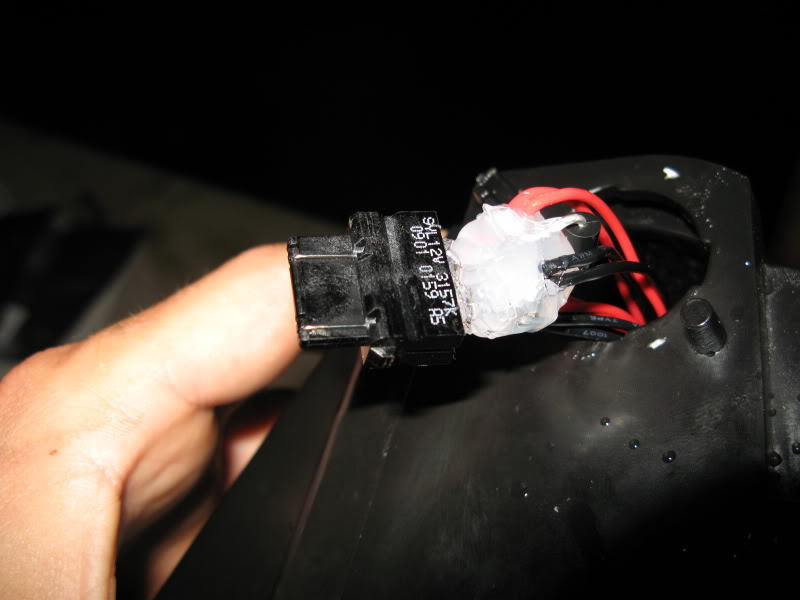
Figure 4. Epoxy around the exposed wires to keep them from shorting out.
Step 4 – Assemble and install the turn signal housings
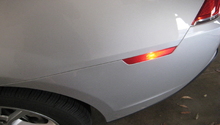
Silicone the lens on the turn signal housings and allow it to dry. Reinstall the housings on the car and enjoy!
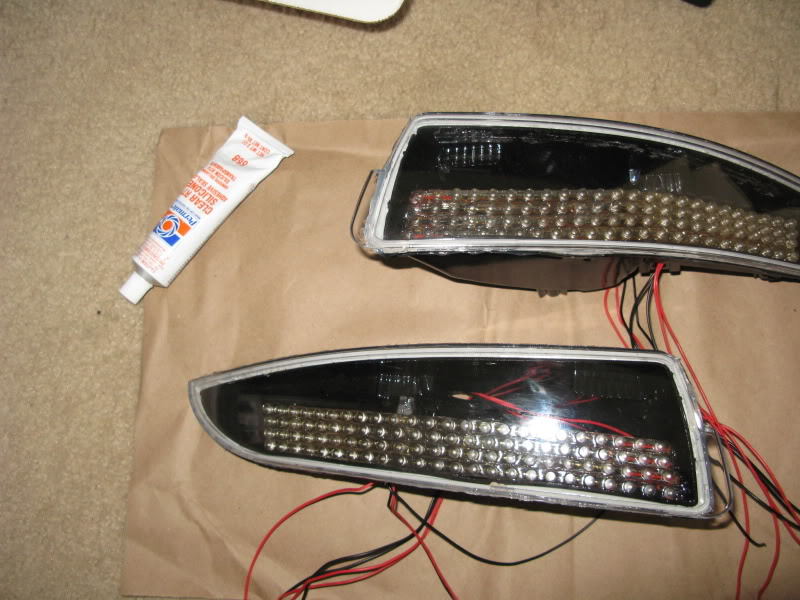
Figure 5. Silicone the lens on the housings. 
Figure 6. Install the turn signal housings on the car.
Related Discussion
- LED Turn Signal Installation - LS1Tech.com