new splitter installed
 10-12-2016, 10:43 AM
#21
TECH Resident
Thread Starter

bump. i got these rods installed last week friday. it no longer is floppy, pulling on the bumper at speed, etc. it actually feels really solid in front right now, which is great.
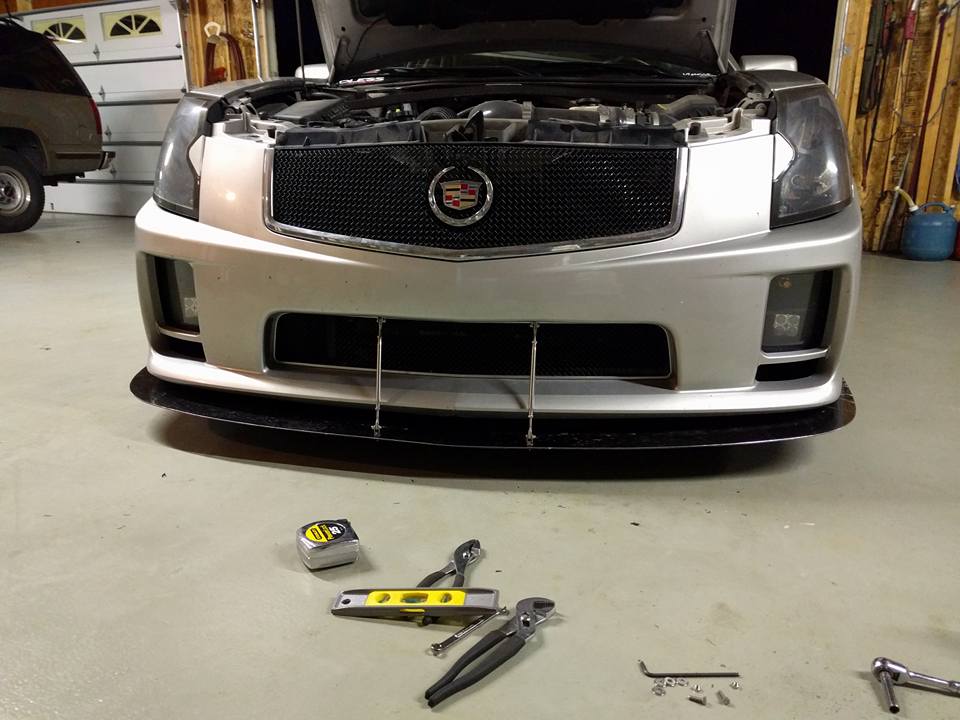
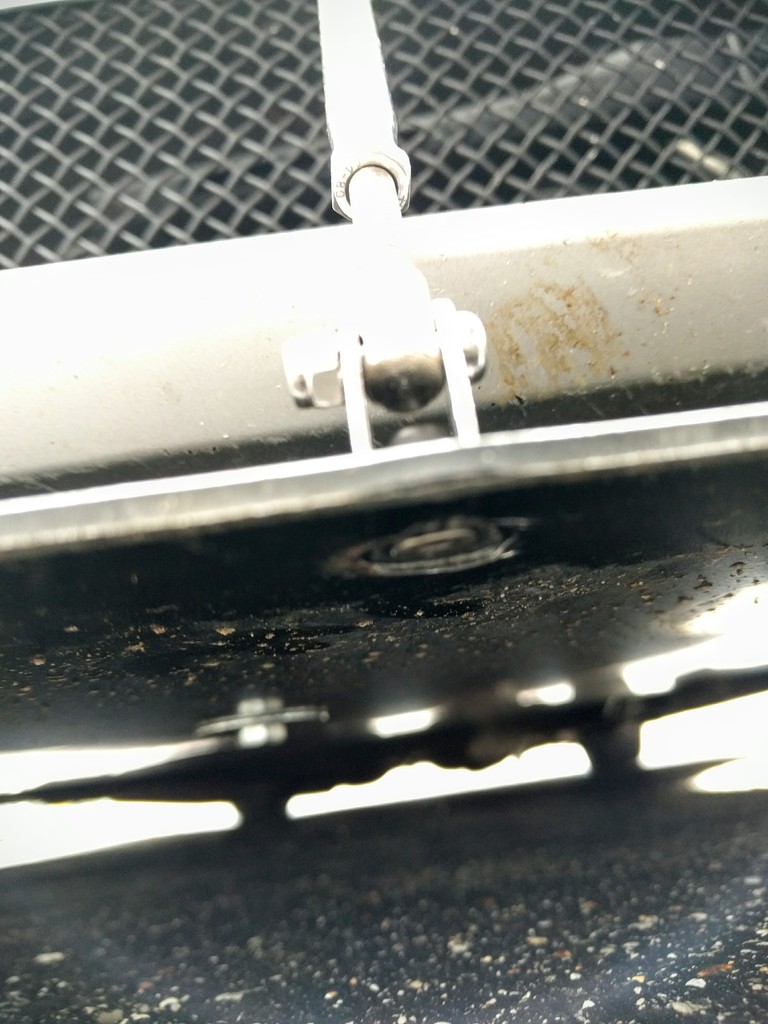
however, now the front end is rigid and no longer able to flex when i hit things with the splitter. i'm pretty familiar with driving a pretty low car so i don't hit it often. the bolts hanging below the splitter by a good margin are what catch and have actually started creasing the splitter. case in point:
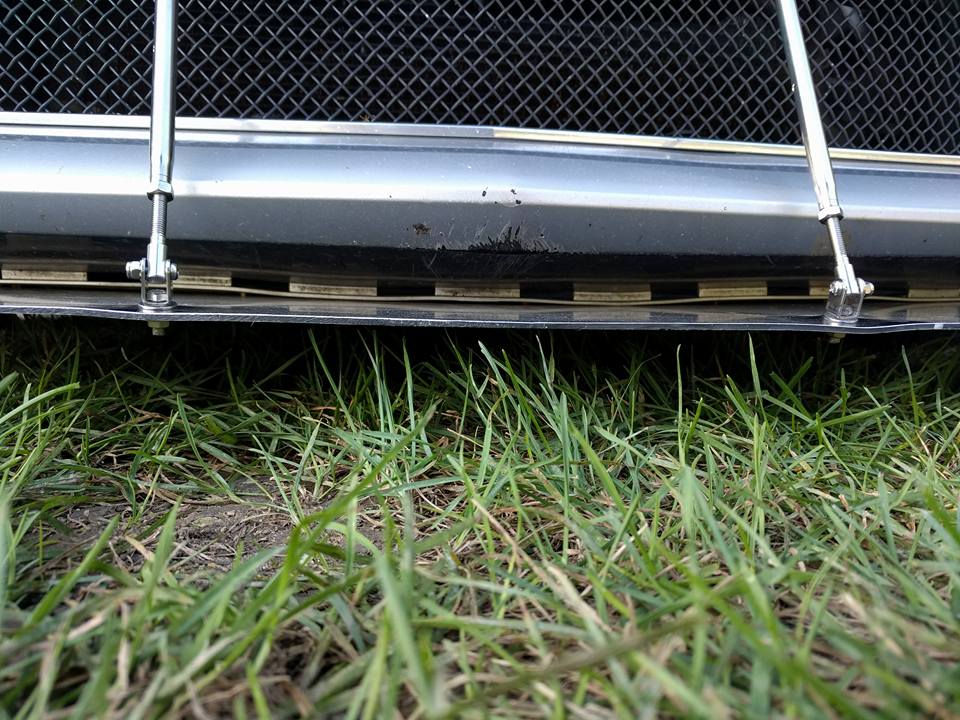
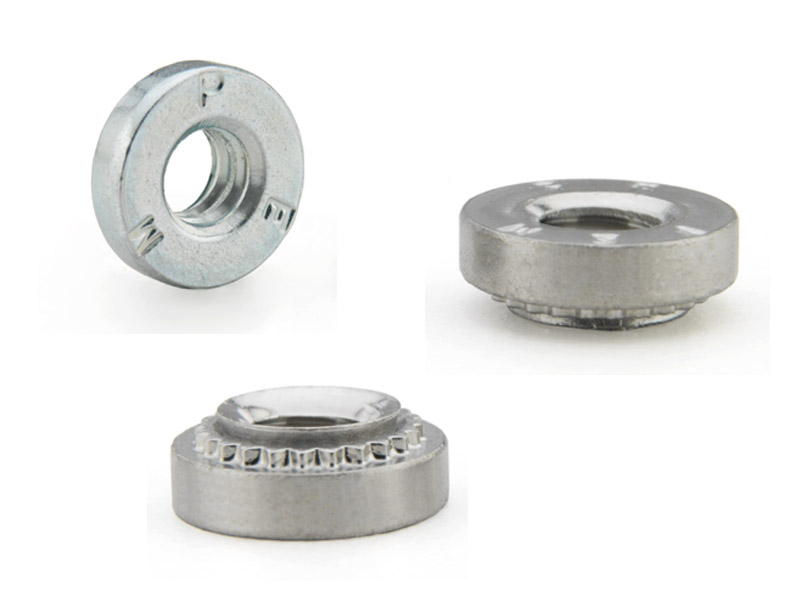
therefore i just put in an order for some self clinching nuts and i'll have to replace that bolt with a shorter one (or cut the current one). this will give me max clearance underneath and nothing to snag on and bend the splitter itself. these are what i'm talking about:
i'll report back one more time with some final results. i'm also banking on that since this is a prototype splitter that the real version is thicker, therefore being more beefy and resistant to bending deforming when it has to fight the pavement.
however, now the front end is rigid and no longer able to flex when i hit things with the splitter. i'm pretty familiar with driving a pretty low car so i don't hit it often. the bolts hanging below the splitter by a good margin are what catch and have actually started creasing the splitter. case in point:
therefore i just put in an order for some self clinching nuts and i'll have to replace that bolt with a shorter one (or cut the current one). this will give me max clearance underneath and nothing to snag on and bend the splitter itself. these are what i'm talking about:
i'll report back one more time with some final results. i'm also banking on that since this is a prototype splitter that the real version is thicker, therefore being more beefy and resistant to bending deforming when it has to fight the pavement.

 10-12-2016, 12:42 PM
#23
TECH Resident
Thread Starter
the self clinching nuts will be about the same as you using a round head bolt on the bottom. either way you have to use a shorter bolt that fits more appropriately. welding aluminum, especially this thin, is going to be an issue.

 10-13-2016, 04:00 PM
#25
Teching In
iTrader: (1)

Join Date: May 2016
Location: Muskegon, MI
Posts: 41
Likes: 0
Received 0 Likes
on
0 Posts
I really like the looks of that. I think I will make one when I pull my bumper this winter to replace the headlight assemblies. I'm thinking a piece of 1/8" Masonite type materialwith 1/8" fiberglass sheet bonded to each side while leaving a small slot all around with bonding agent squeezed into the slot to seal the core edge to the fiberglass and sanded smooth so the whole thing can be painted after fitting has been done. Pretty much a Lowes/Menards/Home Depot sourced job other than some old style Corvette bonding agent.
I might swing for some stainless steel hardware though.
Nice job Bio248.
I might swing for some stainless steel hardware though.
Nice job Bio248.
10-14-2016, 07:32 AM
#26
TECH Resident
Thread Starter
realistically this is all in an attempt to test fit and work out any bugs for this particular splitter.
given that i was going to install it for real on my car i would have more than likely cut off the lower edge so it would sit tight up against the bumper cover. this would require drilling more holes in the bumper cover, but i'm not afraid of doing things that aren't reversible.
once i figure out the rod mounting stuff i should be pretty good to go for recommending what i have done for others. there's also the fact that the "real" version, not my prototype, is going to be of thicker material so there's a chance that you could counter sink holes on the bottom side which would allow you to use more normal hardware and not worry about shearing it off.
10-17-2016, 01:07 PM
#28
TECH Resident
Thread Starter
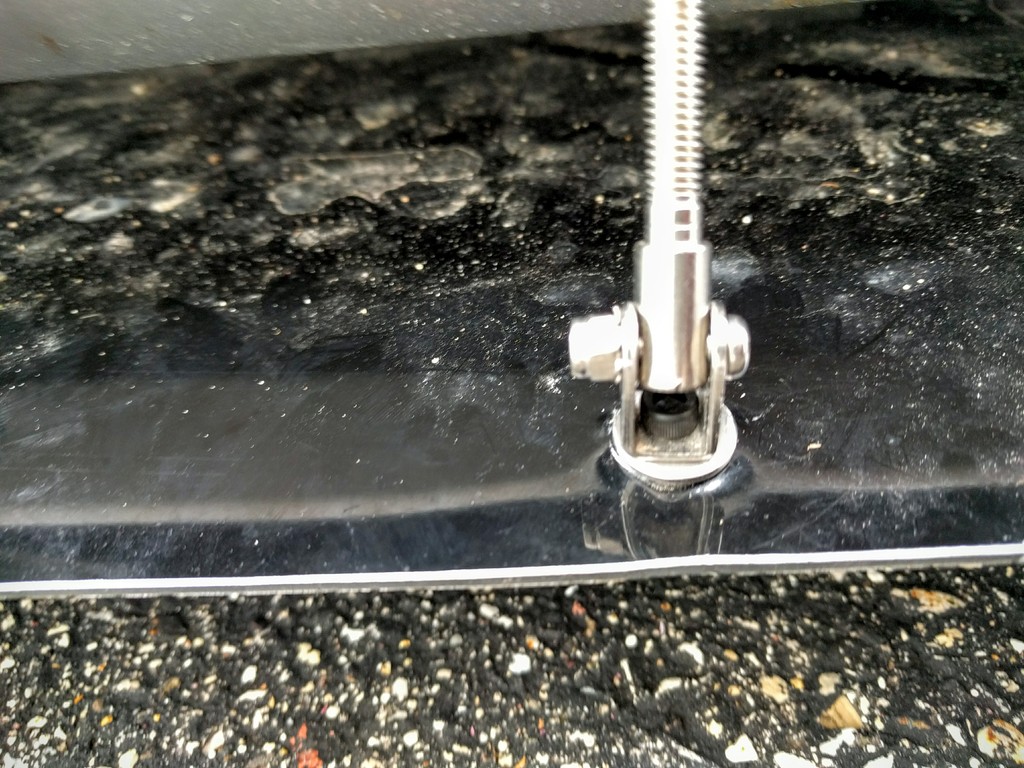
boom, mission accomplished. 8-32 PEM nuts (P/N CLS-832-2), 8-32 x 1/4" socket head cap screws, reuse washers. took about 1/2" off the bottom of the splitter from the bolts no longer protruding below it. yesssss.

 03-13-2017, 11:06 PM
#31
TECH Resident
Thread Starter
Paragon Autosport is now up and running with this splitter.
https://www.paragonautosport.com
Buy them up. Mine is a rough, rough prototype compared to this.
https://www.paragonautosport.com
Buy them up. Mine is a rough, rough prototype compared to this.

 03-16-2017, 07:34 AM
#34
TECH Resident
Thread Starter
i've used these in the past for other applications so i wanted to make use of them again, otherwise you're right. however, it would have been difficult to get the right length screw to fit appropriately from the bottom as well as tightening it up well. either way.