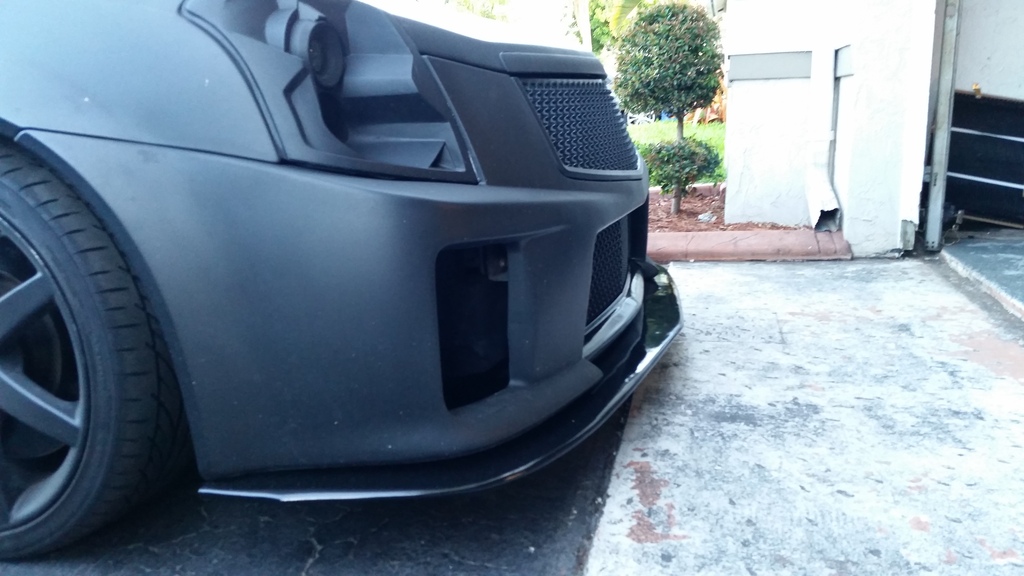
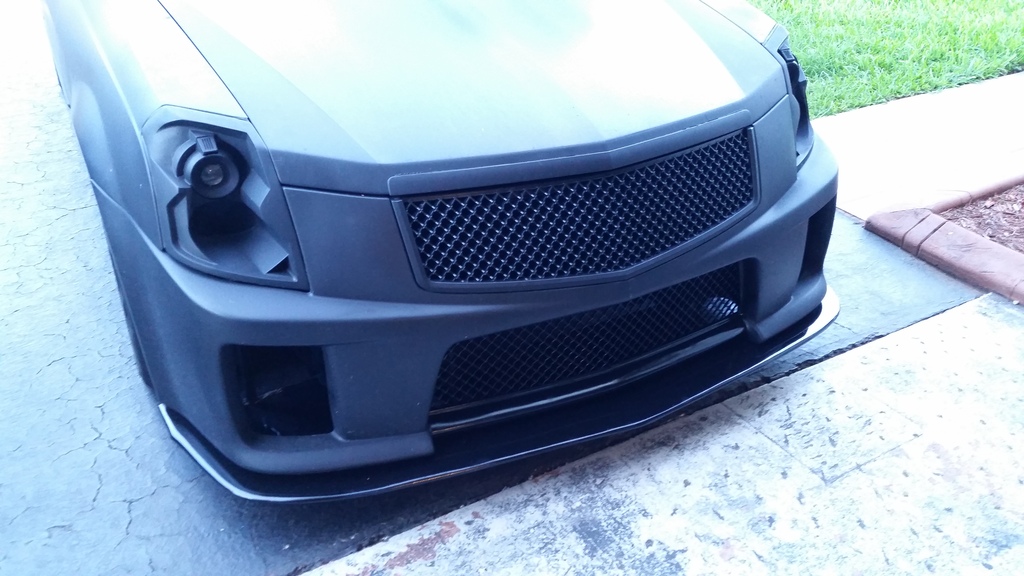
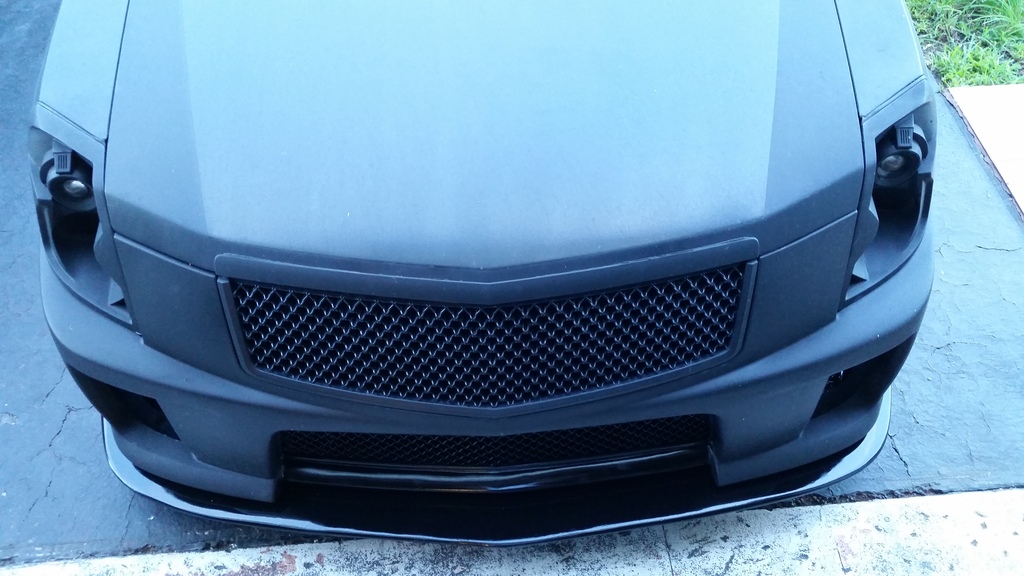
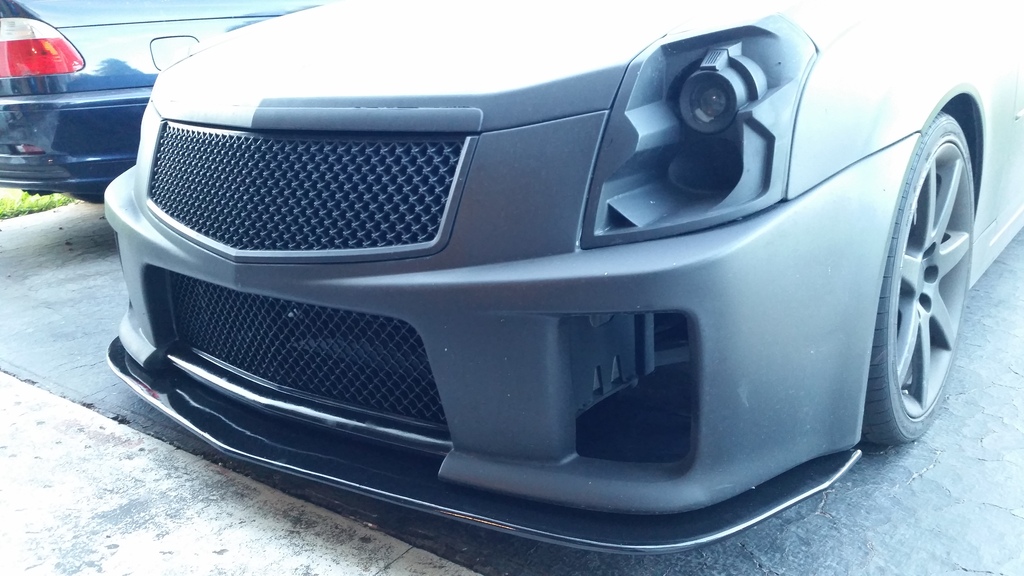
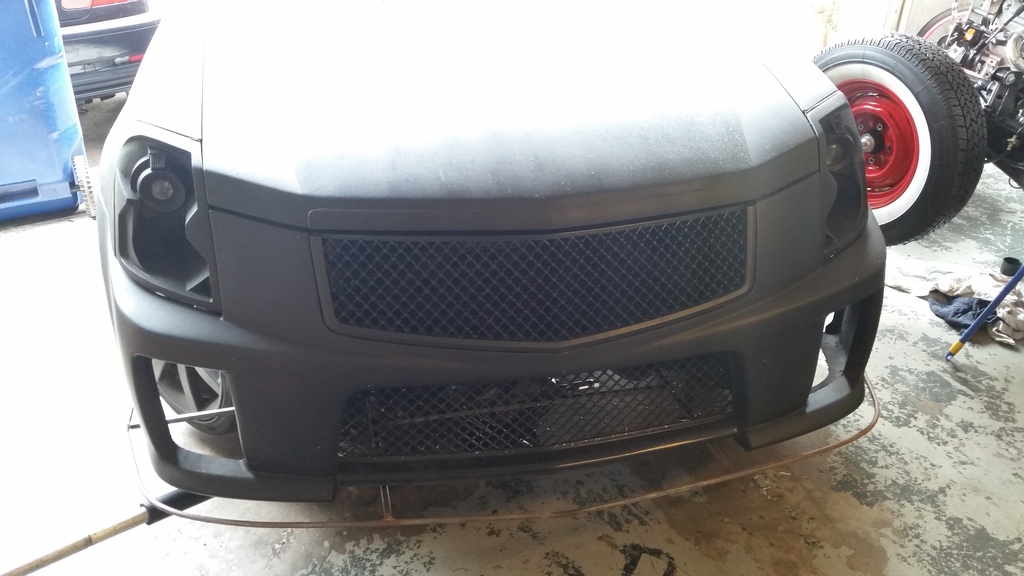
The monstrosity that I've done. V2 lower grille on a V1 bumper.
 09-16-2014, 03:44 PM
#41

 09-16-2014, 03:49 PM
#42
I'm keeping the car forever, so why not make it look like a race car.
But first, currently saving for twin turbos (half way there) (don't want to be all show and no go)
 09-16-2014, 07:16 PM
#44
I'll be posting pics the more I do on the car. Forgot to mention, I'm also shaving the side molding and the door handles. I plan on putting the door opener button under the side mirrors so no one can see them unless you lay down. That way I can just keep my keyless entry and not have to use those ugly cheap ones that come with shave door kits. Basically my door handle will turn into a button under the side mirror.
09-30-2014, 01:44 PM
#45
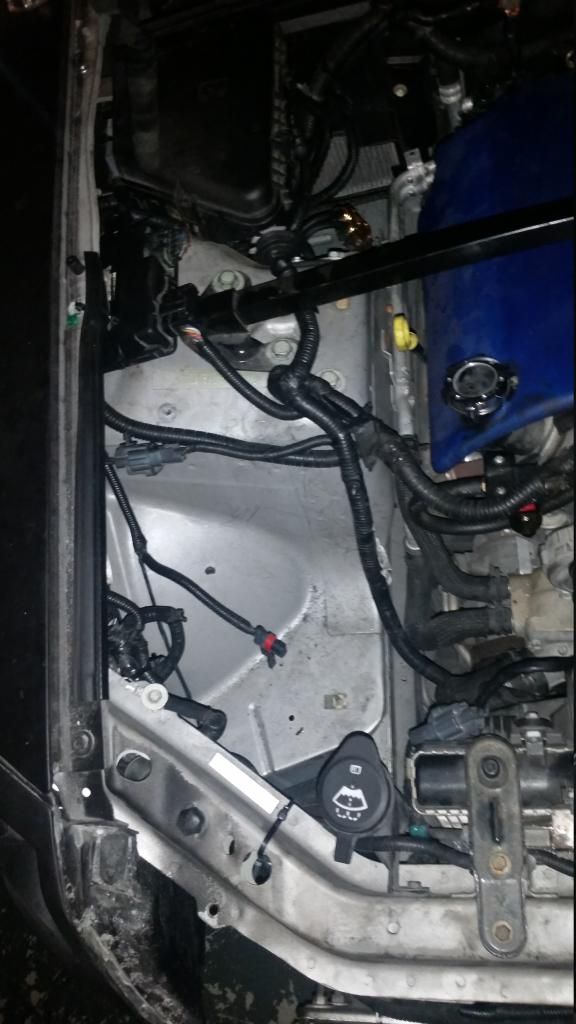
So I'm almost done moving the fusebox to the original battery location. So far, the only wire that needs to be extended is the plug with the red rubber, it's only 2 wires and it goes to the wind shield washer tank. It's taken a lot of moving around wires a lot of unplugging and replugging but I think I got. The original fuse box is going in the trash, it won't fit at all so I'm going to make a new one. Since I have some sheet metal laying around, I think i'll use that or would that get to hot??. Anyways , here is a pic. I'll post more once it's done.
09-30-2014, 04:23 PM
#46
Very surprised you were able to get the fuse box there with only having to extend one pigtail with two wires. Any chance you could post some pictures closer of the original fuse box location as well as the present?
09-30-2014, 05:45 PM
#47
TECH Enthusiast
iTrader: (4)
Join Date: Apr 2014
Location: San Jose, CA
Posts: 602
Likes: 0
Received 0 Likes
on
0 Posts
I think he had to move more than that, but he only has those two left?
Reckless was there any oppurtunity to do a wire tuck while doing this? I know on my old WS6 I had cut a hole in the wheel well and tucked the harnesses and ecu under there and weather sealed it, that along with some cleanup on the other side made for a beautiful engine bay.
Looking good, keep us posted! Are you soldering or what?
09-30-2014, 06:41 PM
#48
I'm trying to tuck them as much as i can. The one wire loom going in the middle of the opening, is the one that's messing me up. I had to unbolted the radiator and pull it up to allow the wire under the radiator to move up 2-3 inches allowing it to extend far enough to hook up to the fusebox (it's about 2 inches from a/c compressor but it doesn't hit). Other than that and the one pigtail, it all moved. But of course, I had to trash the fusebox, there is a good 4 inches of wire inside under the fusebox so that helps with distance. The hardest part is probably just going to build the new fusebox just because I wish it was built already haha. I definitely have plenty of space to run my single turbo there now. Tomorrow I'll finish it and post more pics.
10-02-2014, 06:38 AM
#49
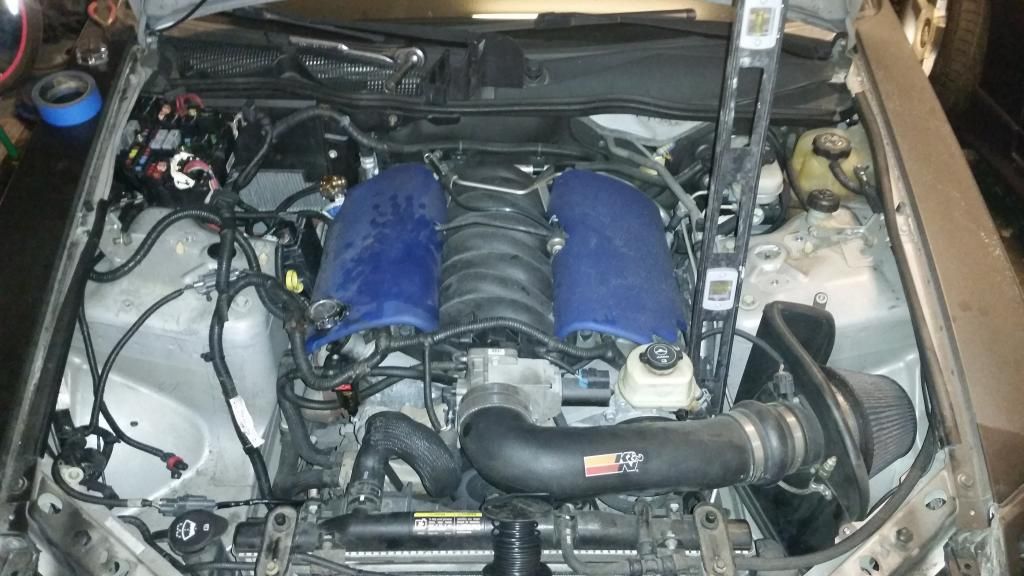
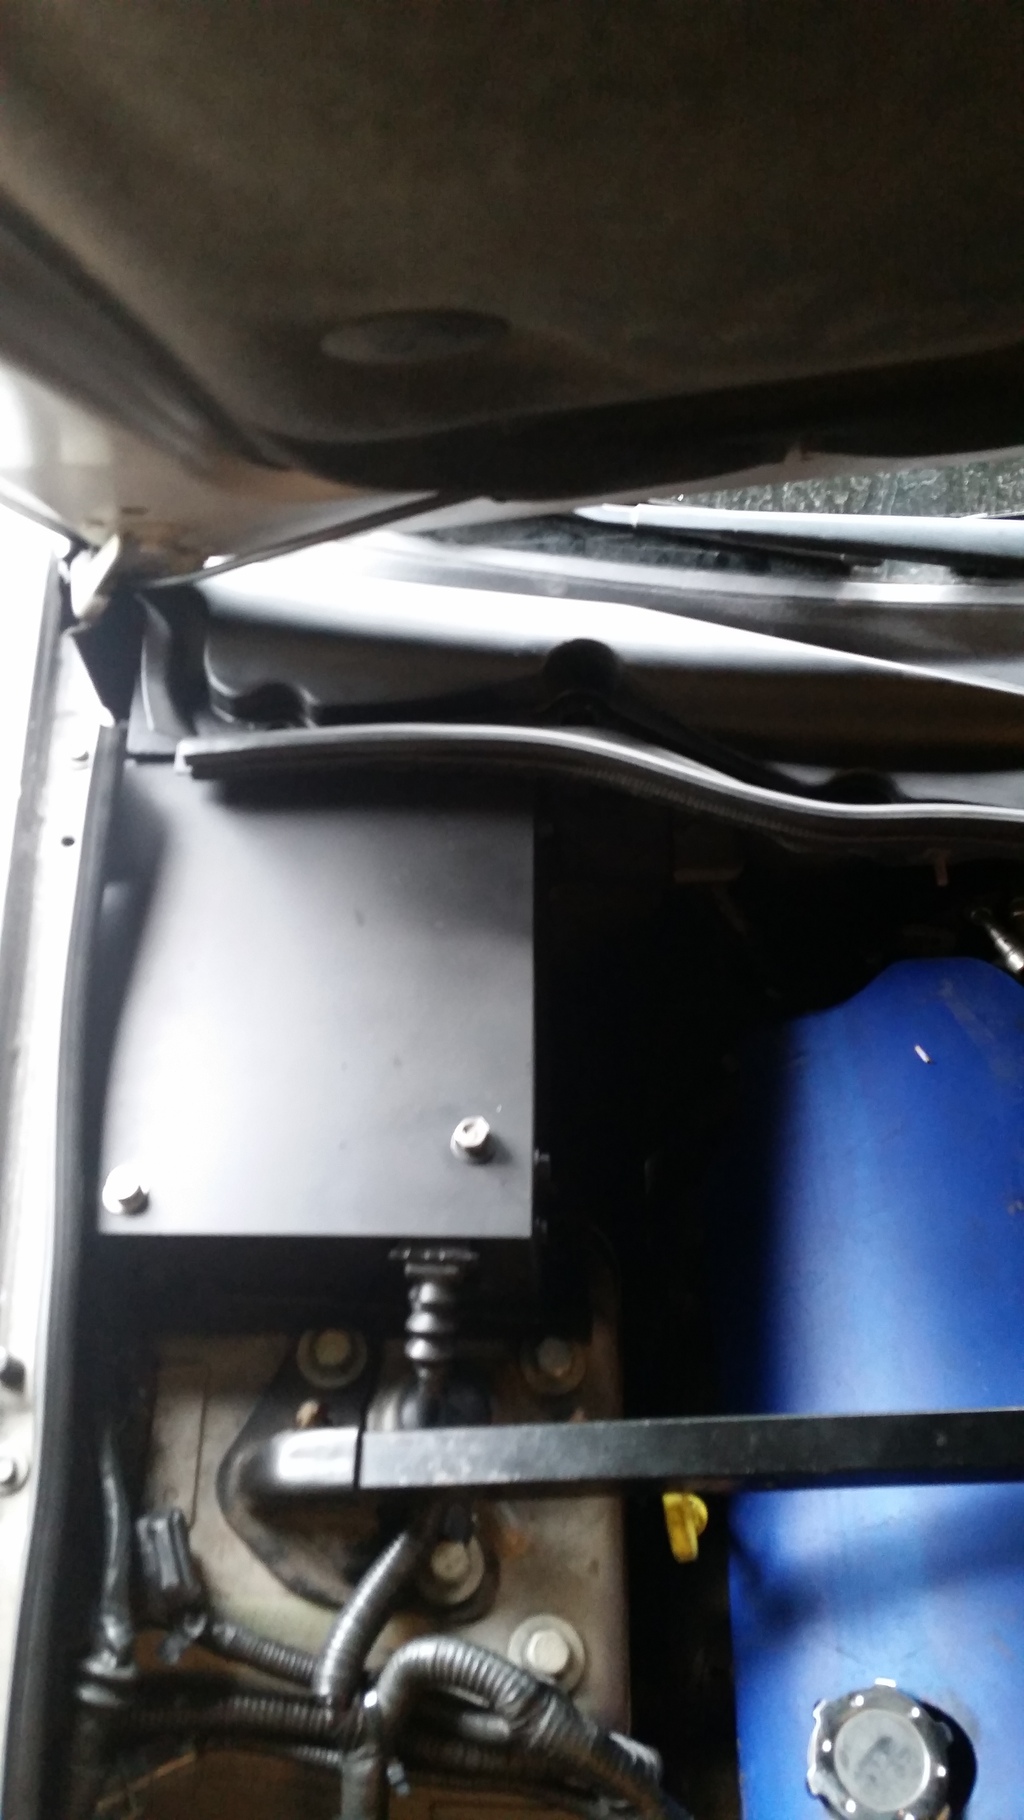
So I kept trying to move wires around but it's pretty tight so it's seems like the wires are going to stay where they are. I ended up extending the passenger side radiator fan wire just so it tucked under the core support, and I forgot to extend the windshield washer pigtail, but it's just 2 wires. I moved the hood strut to the drivers side so I can cut into that mount above the fender and put that module (don't know what it is) into that slot but a cleaner look, I still need to make a bracket for a permanent fit. I still have to build the fusebox. Probably make it out of a thick piece of plexiglass and add a heat shield to the outside where the future down pipe will run. Drove the car to work this morning and everything seems fine. The opening is so big i can fit my welding mask! And the headers are right there, so hopefully minimal plumbing for the turbo. Oh and sorry about the dust/mess in the engine bay haha. Pictures aren't the best but here you go..
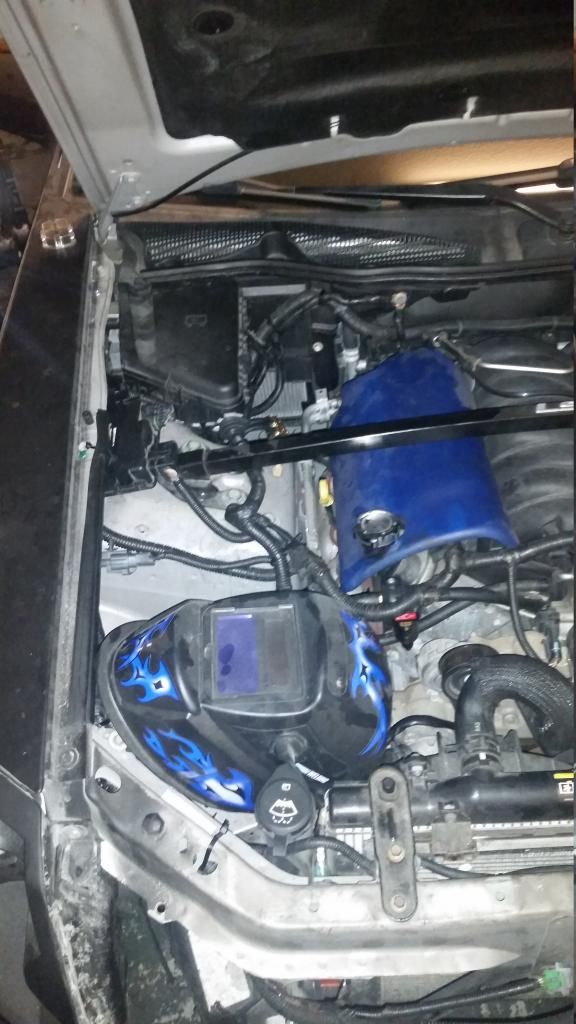
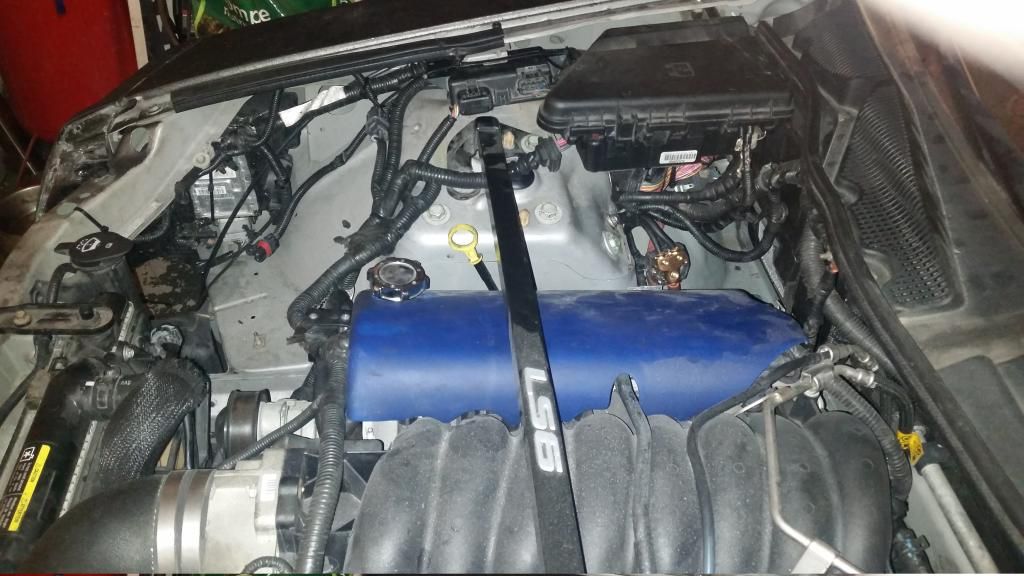
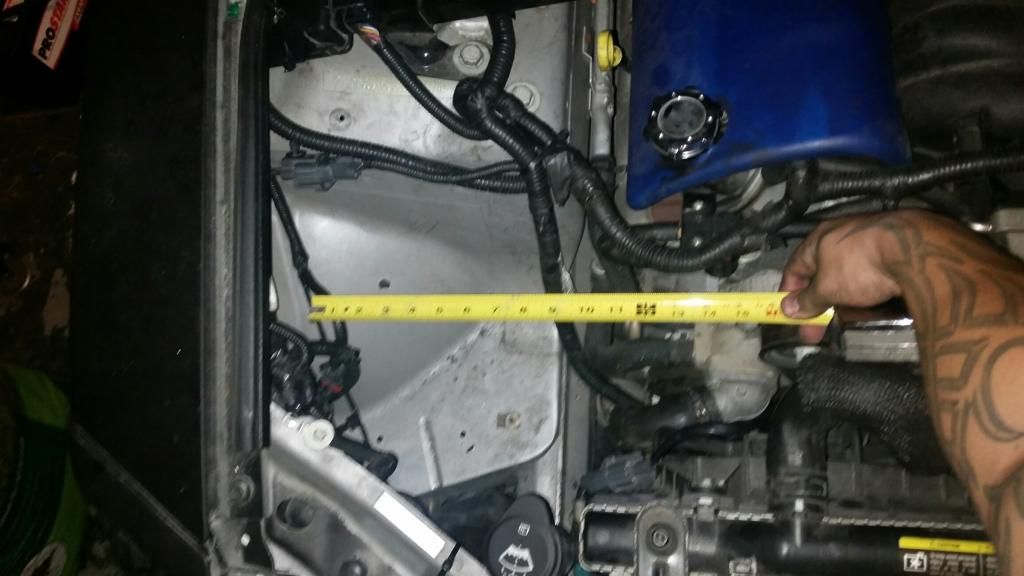 plenty of space for a turbo!!!
plenty of space for a turbo!!!
10-02-2014, 06:56 AM
#50

I hope your not tryin to do a dual intake tube...Maf is on one side so the readings will be dependable on the air resistance of the airfilter...
As for extra projectors talk with retrofit, they will get you the needed parts...AWESOE QUALITY...
keep moving forward with your vision...Its a nice hobby to have
As for extra projectors talk with retrofit, they will get you the needed parts...AWESOE QUALITY...
keep moving forward with your vision...Its a nice hobby to have
10-02-2014, 07:08 AM
#51
I hope your not tryin to do a dual intake tube...Maf is on one side so the readings will be dependable on the air resistance of the airfilter...
As for extra projectors talk with retrofit, they will get you the needed parts...AWESOE QUALITY...
keep moving forward with your vision...Its a nice hobby to have
As for extra projectors talk with retrofit, they will get you the needed parts...AWESOE QUALITY...
keep moving forward with your vision...Its a nice hobby to have
No I moved it back to put in a single turbo. Figure Id get it ready so when I do get my turbo system (hopefully in 2-3 months) it'd be all ready to install.
I have 2 projectors already from the other set of headlights I have, so far I made one side of the fog lights. A lot of fiberglass I'll post pics when I get further along with them.
And thank you, I have many ideas in the works and eventually I'll get to all of them. Time and money become factors lol I'm sure many guys can relate.
06-15-2015, 12:12 PM
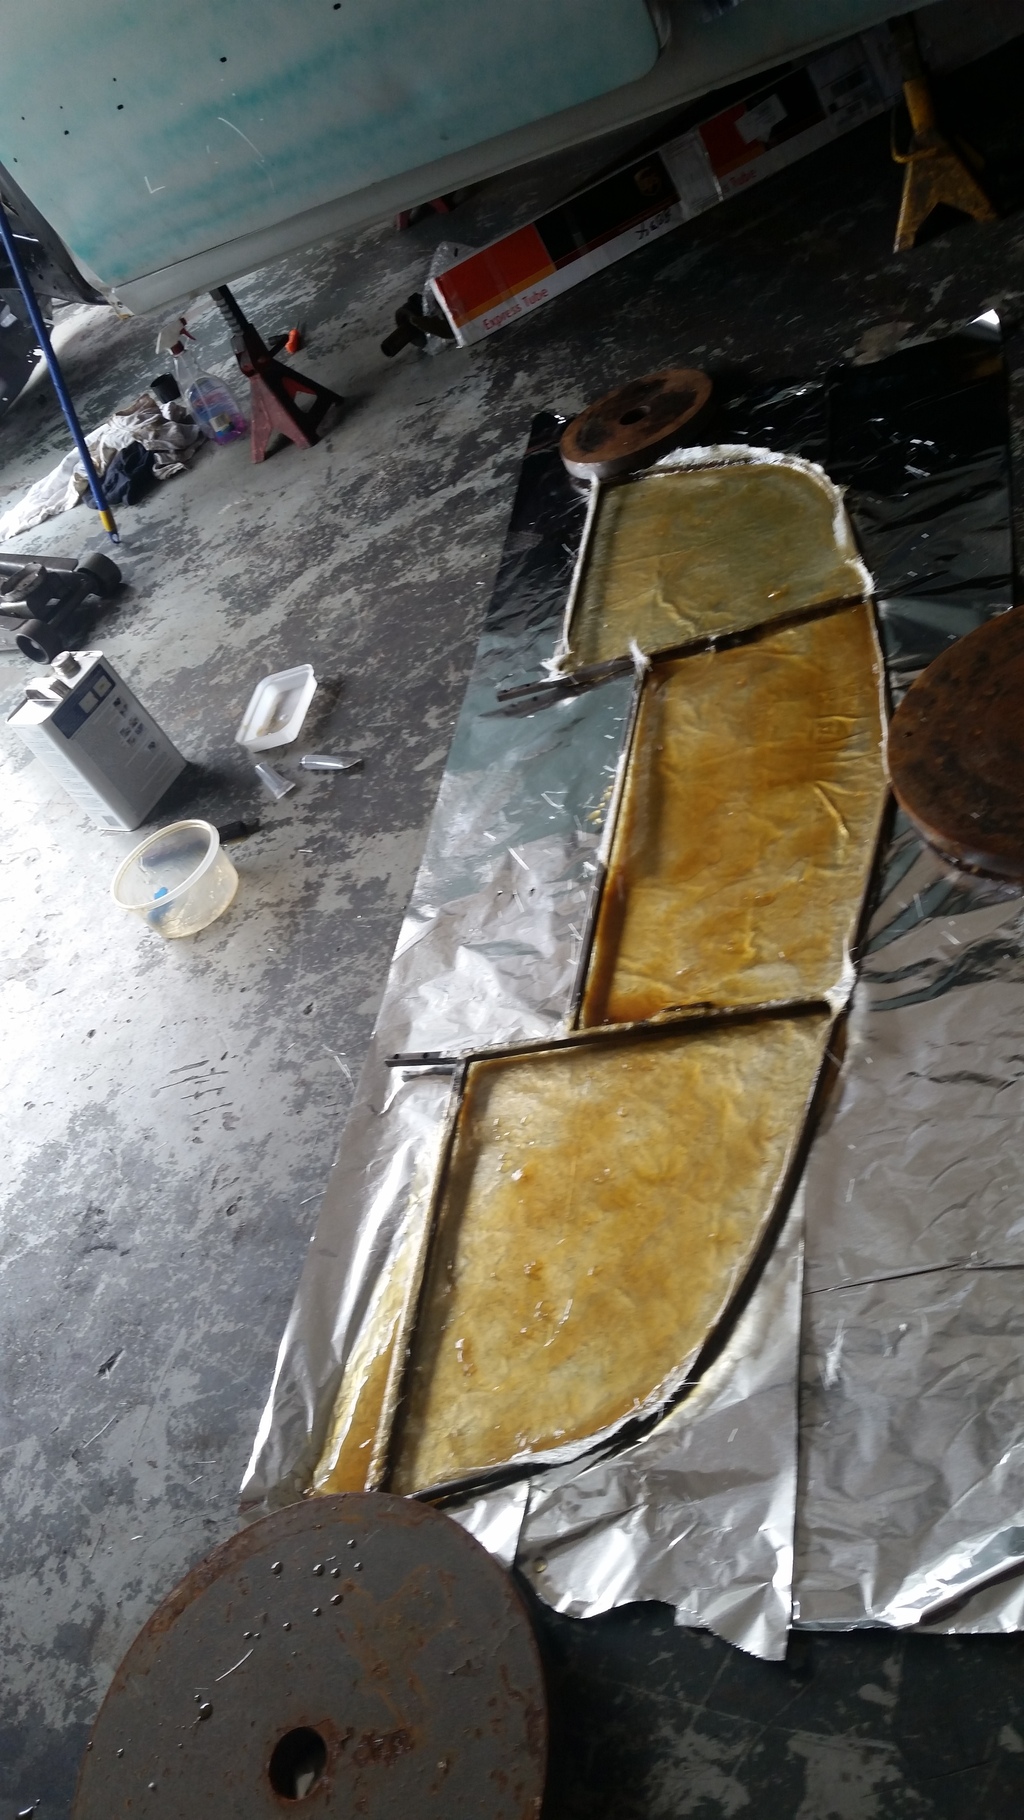
#52
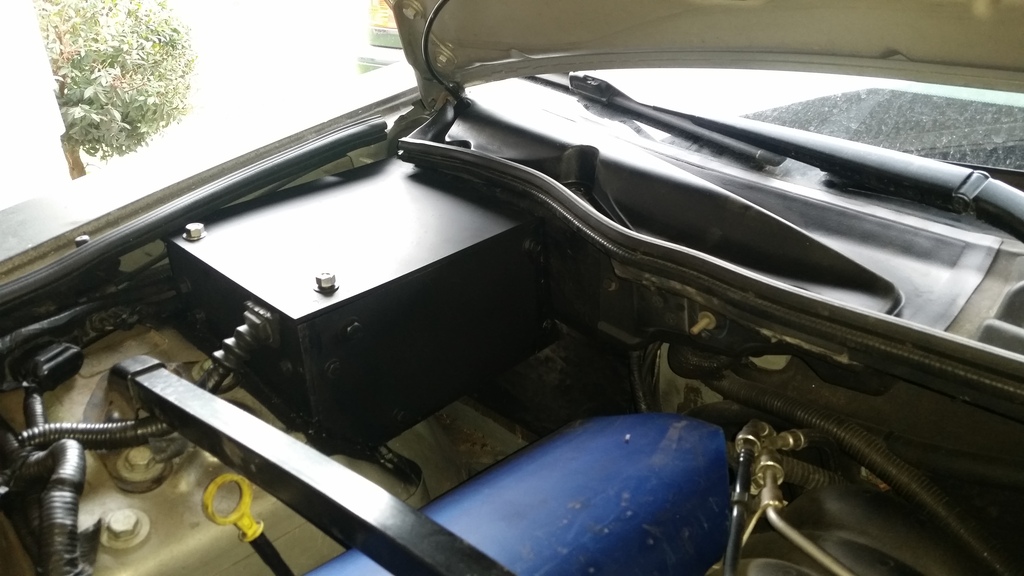
So after almost a year of neglecting the V, I decided to start working on her again. I finally finished the fusebox, completely sealed. It's not oem pretty but gets the job done. Also, since I ran some wires above the cabin filter, I sealed up the vent so no water gets in. Didn't make it deep so I can still run the downpipe under it and around the frame rail back into the Y to the dual exhaust. I'm doing a single turbo now so the crossover pipe is going where the cats are.
Also finally put some fiberglass on the splitter, still needs a ton of bodywork.
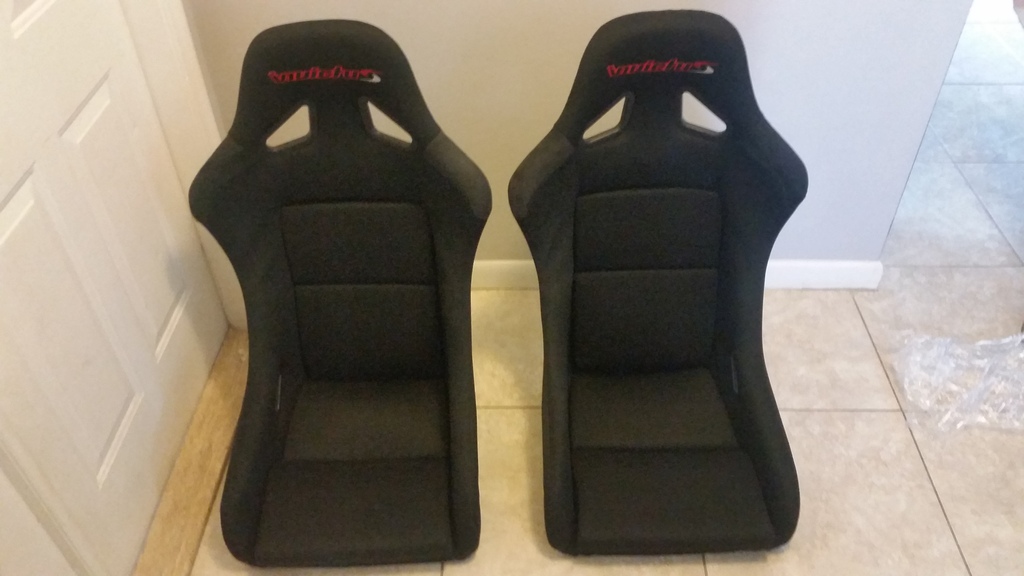
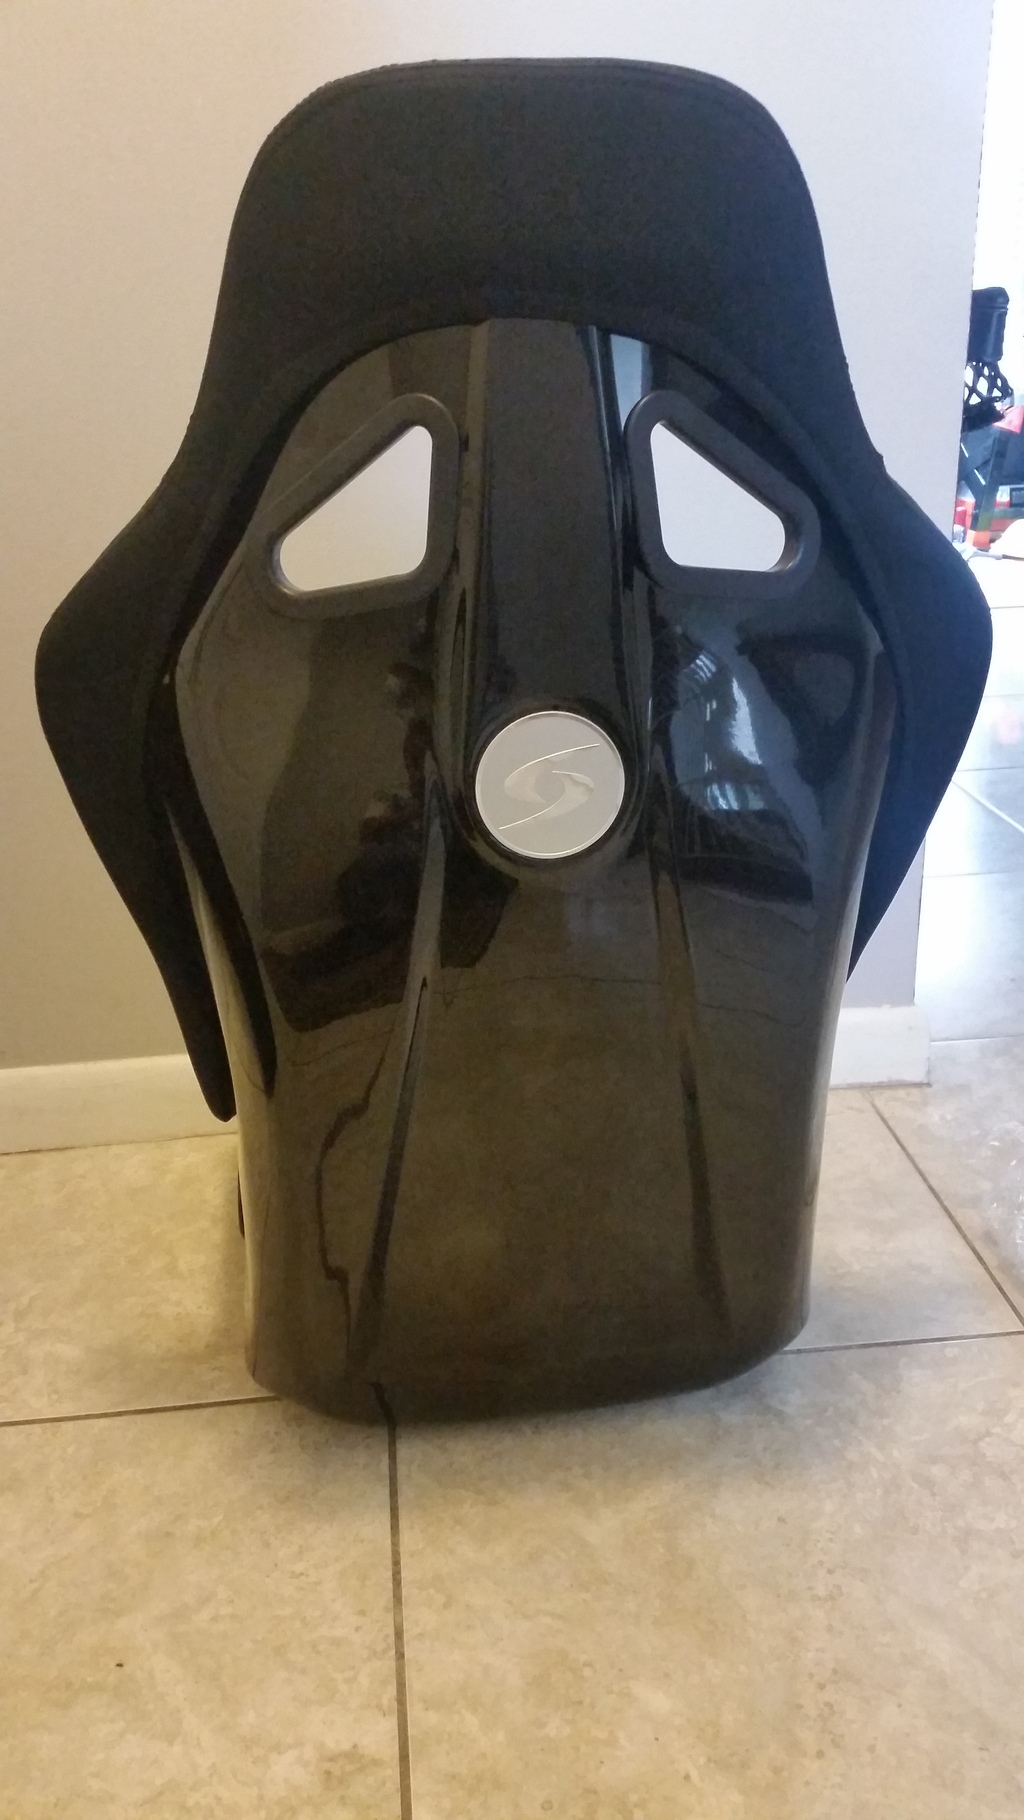
Oh and got some seats to get rid of the boat anchors that are in there now. Pretty! And only 23 lbs each.
Also finally put some fiberglass on the splitter, still needs a ton of bodywork.
Oh and got some seats to get rid of the boat anchors that are in there now. Pretty! And only 23 lbs each.
06-15-2015, 02:47 PM
#54
06-15-2015, 06:03 PM
#56
TECH Fanatic

 great thread.
  06-17-2015, 07:25 PM
#58
TECH Regular
06-17-2015, 07:30 PM
#59
Yup tell me about it. The wife and I are still trying to get them to nap at the same time so we can take a break in between. She does kind of understand how much I want to work on the car so she's giving me some time here and there, just can't push my luck.
06-22-2015, 06:52 PM
#60
So I finished the splitter. Pretty happy with it, don't know if I want to keep it like that or add the 2 adjuster bar things up front. Next is the heat extractor hood, then the front end will be done. Turbo is going to have to wait for a long while due to a few specialty classes I need to take for work. Damn out of pocket expense, they should pay for them lol. Anyway... pics!!