1972 el camino ls1 swap
 03-20-2013, 09:55 PM
#21

Definitely swap over all four disc brakes, its not that hard. If you look over on chevelles.com in the forums or just search google for "ls1 brake swap" you should find everything you need. I did the swap on my 67 chevelle but the car is still a project so i dont know how well they work yet.
For the front you will need to turn down your hub outer diameter so that the camaro disk brake will fit over it. Then you can use your original hub spindles with brackets that a guy on the chevelle forum sells for $50 or make your own. For the rear you just need to take off the rear caliper bracket and they will bolt right up to your 10 or 12 bolt axle. Both the front and rear calipers will need to be shimmed to be centered. Then you just need to plump them up and get a different master cylinder with a proportioning valve. Also will need larger wheels(could use the camaro wheels) and longer wheel studs.
here are some links I had
http://www.pozziracing.com/12_corvet...es_on_fgen.htm
http://www.sloppymechanics.com/archi...entry_867.html
http://www.chevelles.com/forums/showthread.php?t=215679
 03-20-2013, 11:01 PM
#22
On The Tree
Thread Starter
iTrader: (3)

Join Date: Sep 2012
Location: Newcastle, Ok
Posts: 113
Likes: 0
Received 0 Likes
on
0 Posts
Definitely swap over all four disc brakes, its not that hard. If you look over on chevelles.com in the forums or just search google for "ls1 brake swap" you should find everything you need. I did the swap on my 67 chevelle but the car is still a project so i dont know how well they work yet.
Headers and mounts ordered. $250 Shipped for all on ebay.
Here are the mounts i bought.. http://www.ebay.com/itm/Adjustable-LS1-Engine-Swap-Brackets-LS2-LS6-Motor-Mount-Adapter-Plates-/300863652782?pt=Motors_Car_Truck_Parts_Accessories&hash=item460cdf03ae&vxp=mtr
Last edited by shanex25; 03-20-2013 at 11:13 PM.
03-21-2013, 09:14 PM
#23
On The Tree
Thread Starter
iTrader: (3)
Join Date: Sep 2012
Location: Newcastle, Ok
Posts: 113
Likes: 0
Received 0 Likes
on
0 Posts
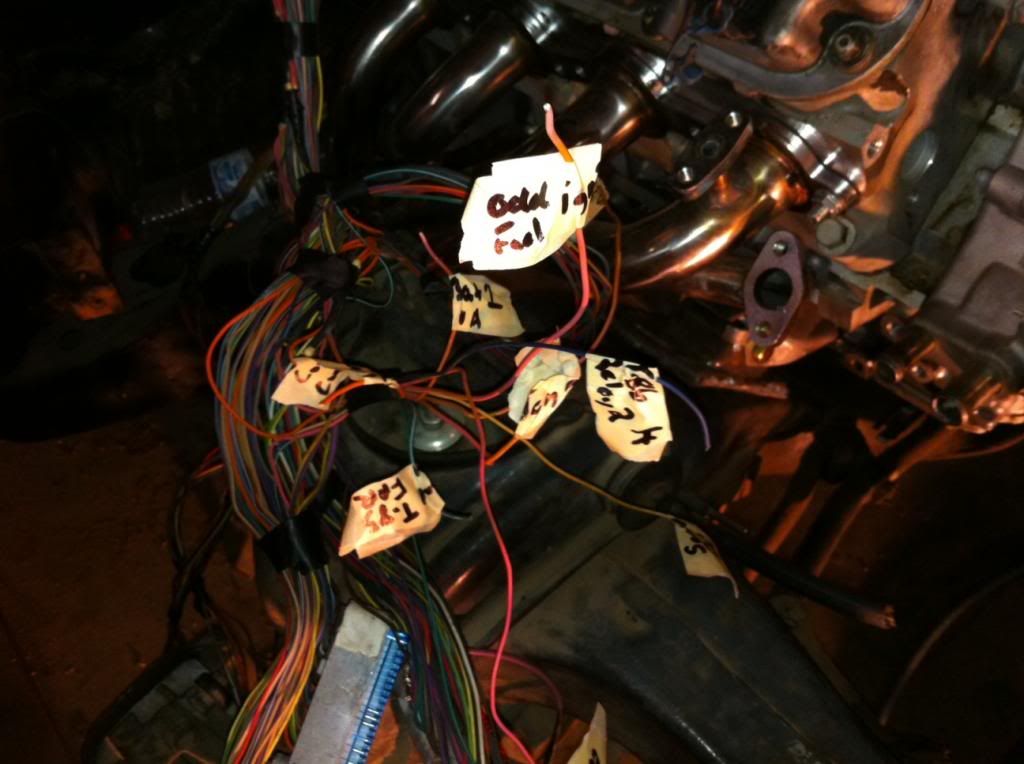
Since im waiting on parts i decided that im going to start doing my stand alone wire harness. Pics up soon. Anyone have the pin numbers on the pcm plugs for a 98 fbody?
03-21-2013, 10:03 PM
#24
On The Tree
Join Date: Nov 2011
Location: South east Wisconsin
Posts: 159
Likes: 0
Received 0 Likes
on
0 Posts
I ordered those same motor mount adapter plates from ebay. I was not happy with them. With the chevy small block engine stands I used the tall and narrow engine mounts and when using those ebay plates the mounts bolt holes would not line up to put a bolt in for test fitting the engine. This is where you see alot of people shimming up the frame stands(1/4 to1/2 inch!) to make these style adapters work. I used the dougs headers ls engine mount adapters. After having both adapters and comparing them side by side you can see how the dougs adapters dropped the engine mounting holes down further than the block mounting holes causing the engine to sit properly on the engine stands. Where those ebay mounts have the motor mount holes in line with the block mounting holes on the adapter. Heres a link to compare the dougs brackets
http://www.jegs.com/i/Dougs-Headers/776/SK100/10002/-1
Others have made theres work but from my experience this was a no brainer!
Cheers!
http://www.jegs.com/i/Dougs-Headers/776/SK100/10002/-1
Others have made theres work but from my experience this was a no brainer!
Cheers!


 03-22-2013, 08:16 PM
#27
On The Tree
Thread Starter
iTrader: (3)
Join Date: Sep 2012
Location: Newcastle, Ok
Posts: 113
Likes: 0
Received 0 Likes
on
0 Posts
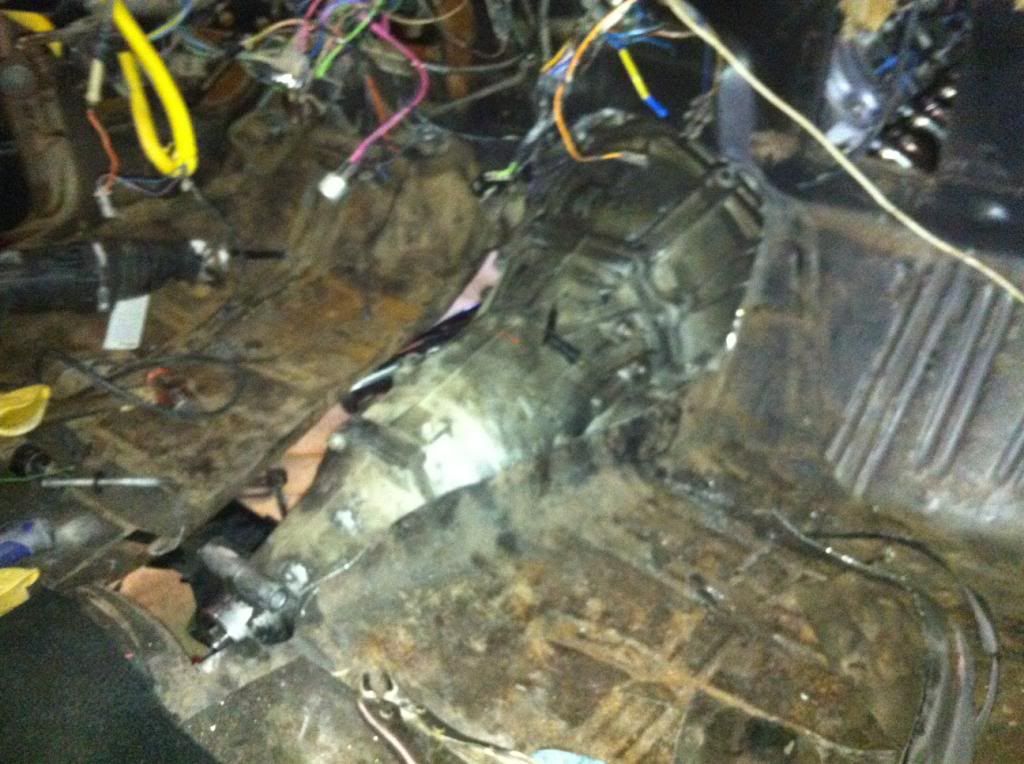
I was going to order those dirty dingo mounts, i guess i just got too stingy when i saw the cheap ebay ones! haha Ill see if i can make them work, if not i will probably go with the dirty dingos. Not much to update today, ive been helping a friend do the body work on his car, i should get to paint it tomorrow. So after that.. The work on the el camino will start back up. Last night i tore into the wire harness though, Removed the egr wires, and ac wires. Then i sat and stared at it in confusion, I think i have read every standalone wiring thread on the internet now. Nobody really shows a good breakdown guide for the complete idiot though, tons of great info, but unless you are familiar with wiring it can be overwhelming. Mine is the 98 harness and pcm, I think i have removed the necessary wires, I just dont quite understand how to break it down to a simple hook up. Ill figure it out eventually though. Hopefully have it done within the next couple evenings. Ill try and post a "How To" if i can figure it out.
03-22-2013, 11:31 PM
#28
On The Tree
Thread Starter
iTrader: (3)
Join Date: Sep 2012
Location: Newcastle, Ok
Posts: 113
Likes: 0
Received 0 Likes
on
0 Posts
Figured the harness out. Actually pretty easy to do a standalone. For anyone who is questioning their ability to make a standalone harness themselves, i would probably say that if you're mechanically inclined enough to do an ls1 swap into a non ls vehicle... Then you could probably figure out the wiring. Save that cash for other performance goodies!
03-26-2013, 08:46 PM
#29
On The Tree
Thread Starter
iTrader: (3)
Join Date: Sep 2012
Location: Newcastle, Ok
Posts: 113
Likes: 0
Received 0 Likes
on
0 Posts
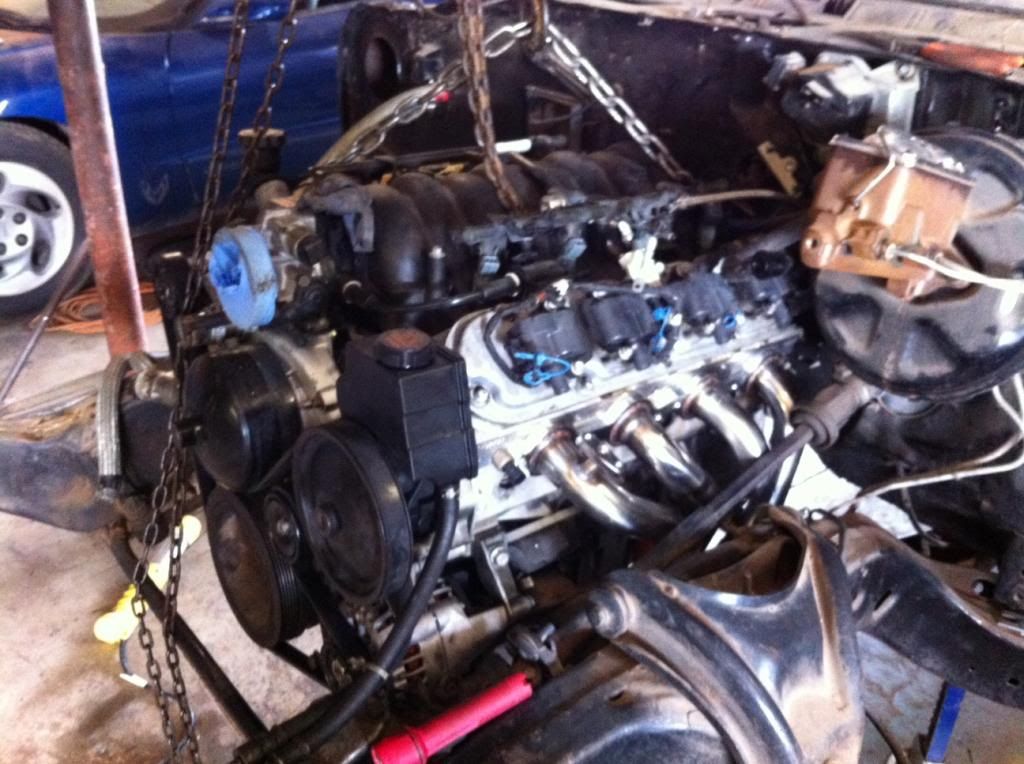
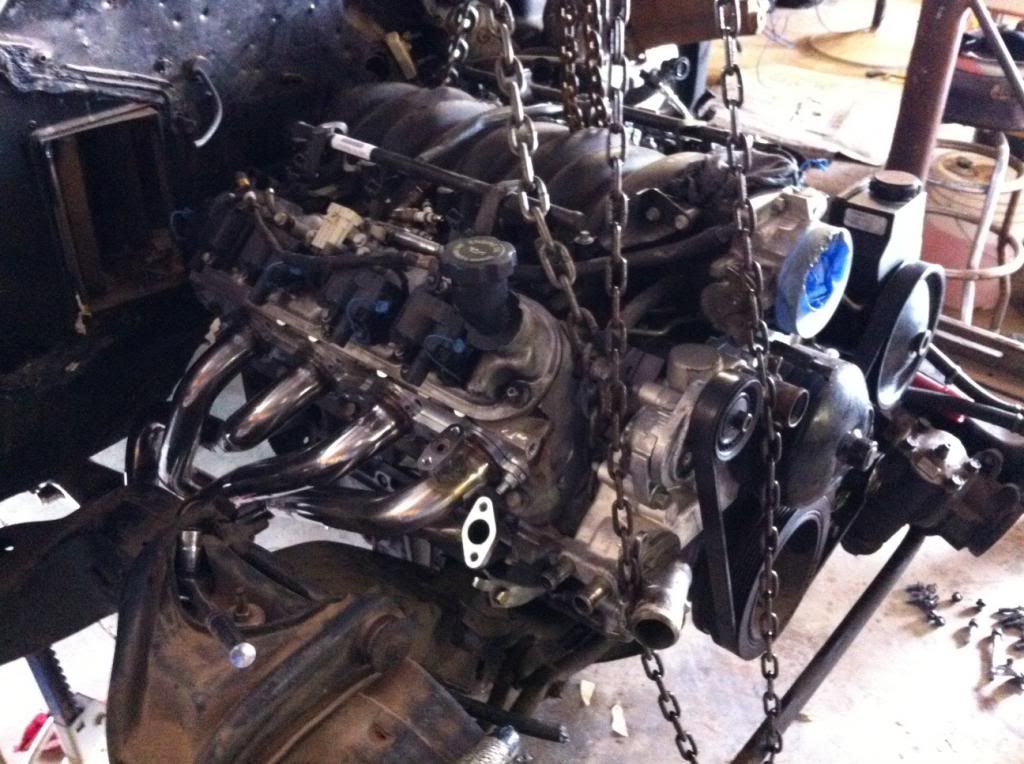
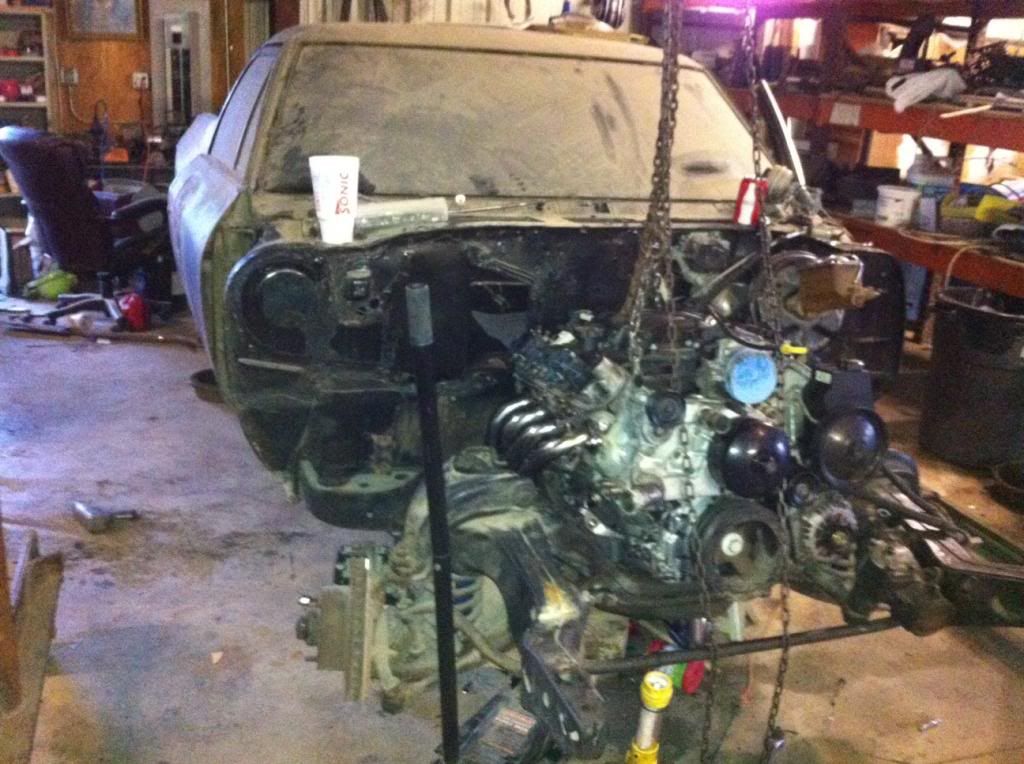
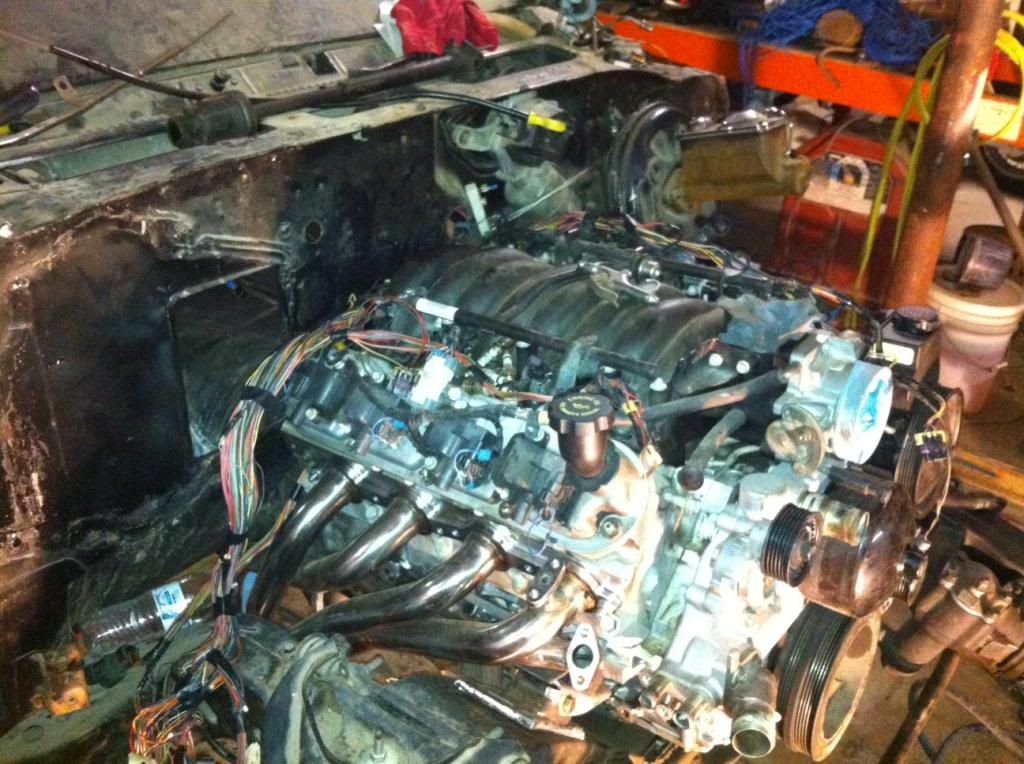
Scored an SS dash on craigslist for $50! Headers came in! Mounts should be in tomorrow, I will get the motor test fitted in this weekend. And i should have the wire harness done this week. Many more pictures will be posted this weekend, heres a pic of the headers on the motor. Now that i have been looking at other guys using fbody headers, i realized that my 02 sensor holes point outward, everyone elses seem to point inward... Idk if this will end up being a clearance issue or not any ideas?... 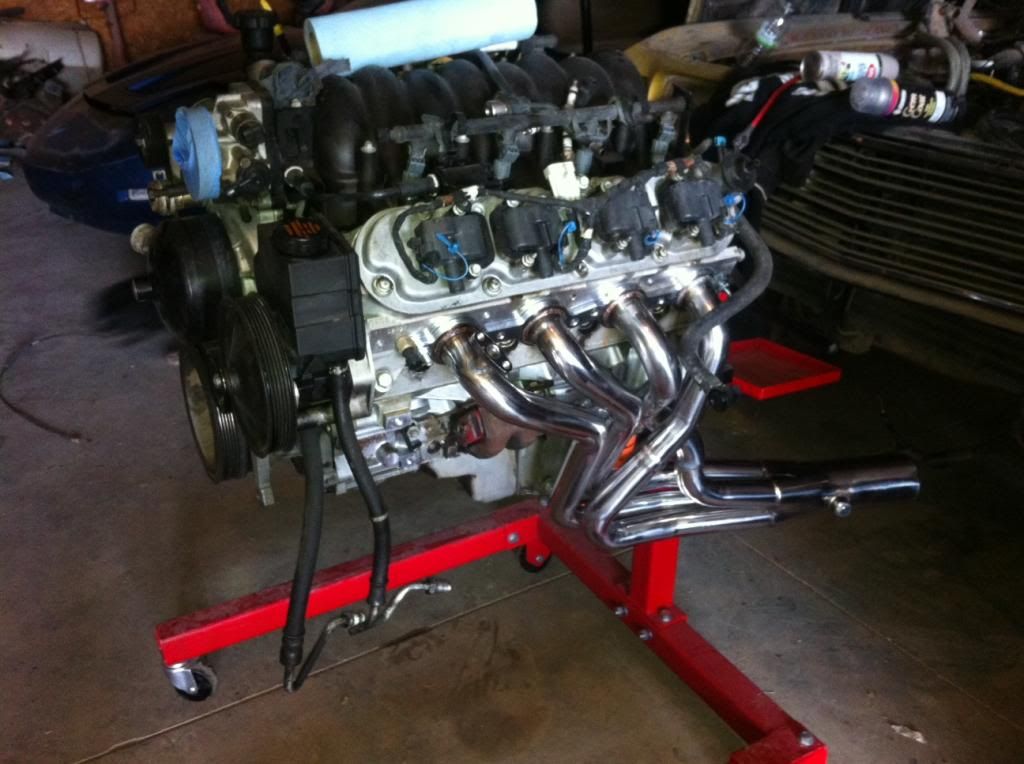
Last edited by shanex25; 03-26-2013 at 09:07 PM.
03-29-2013, 07:42 PM
#30
On The Tree
Thread Starter
iTrader: (3)
Join Date: Sep 2012
Location: Newcastle, Ok
Posts: 113
Likes: 0
Received 0 Likes
on
0 Posts
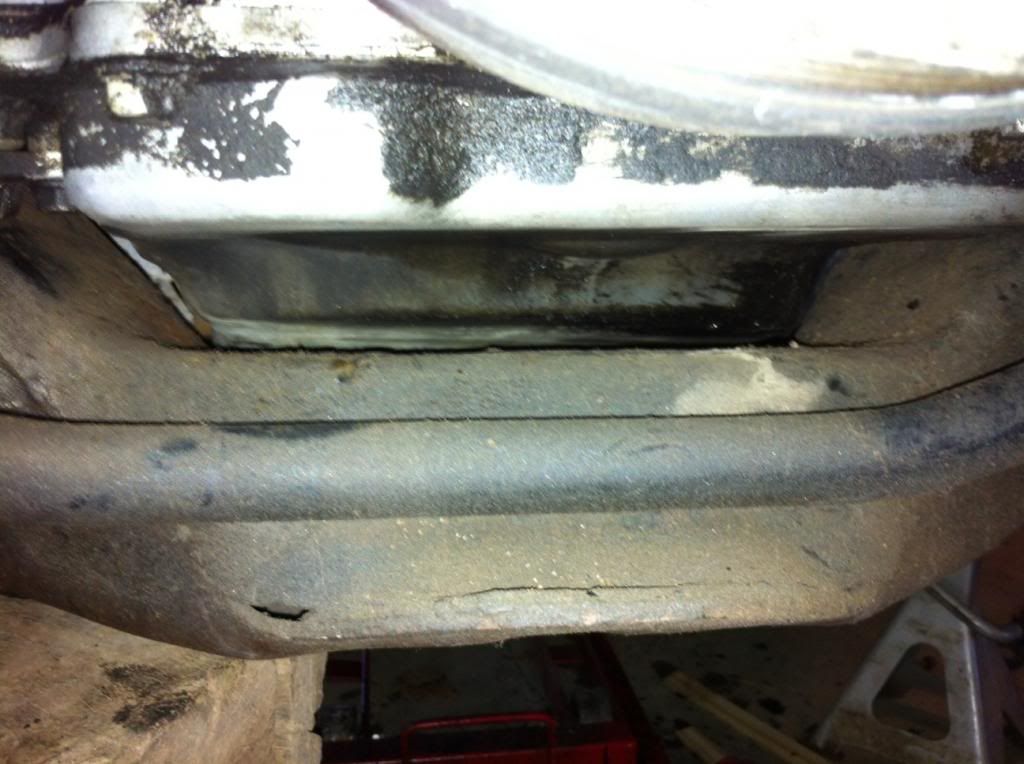
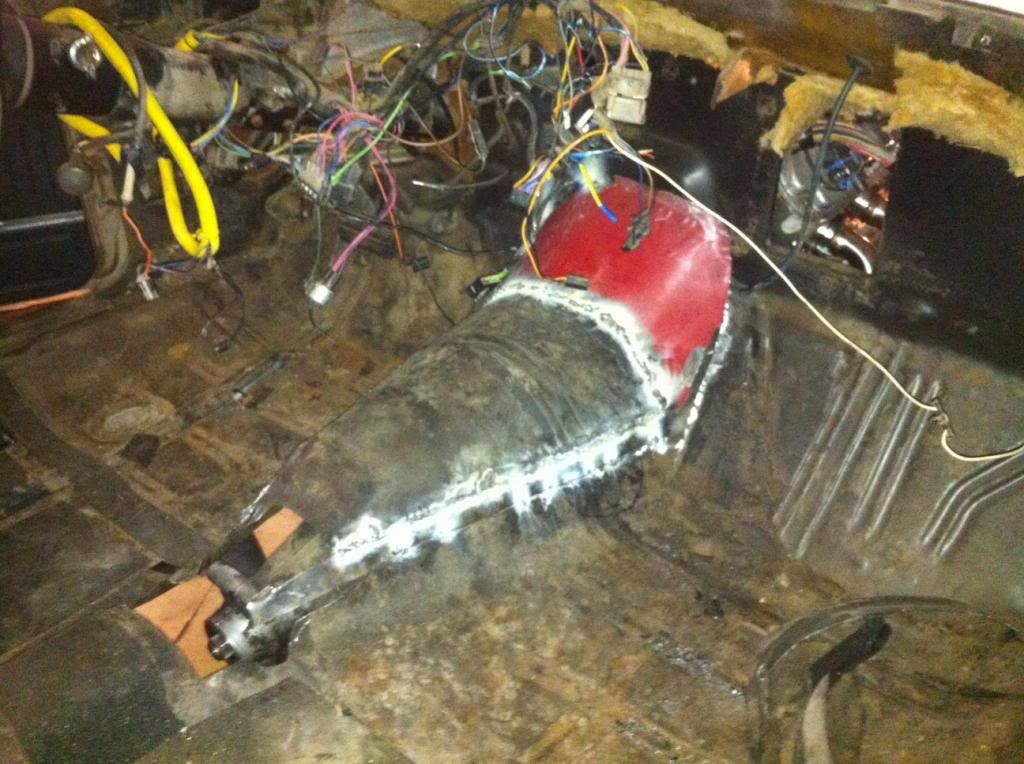
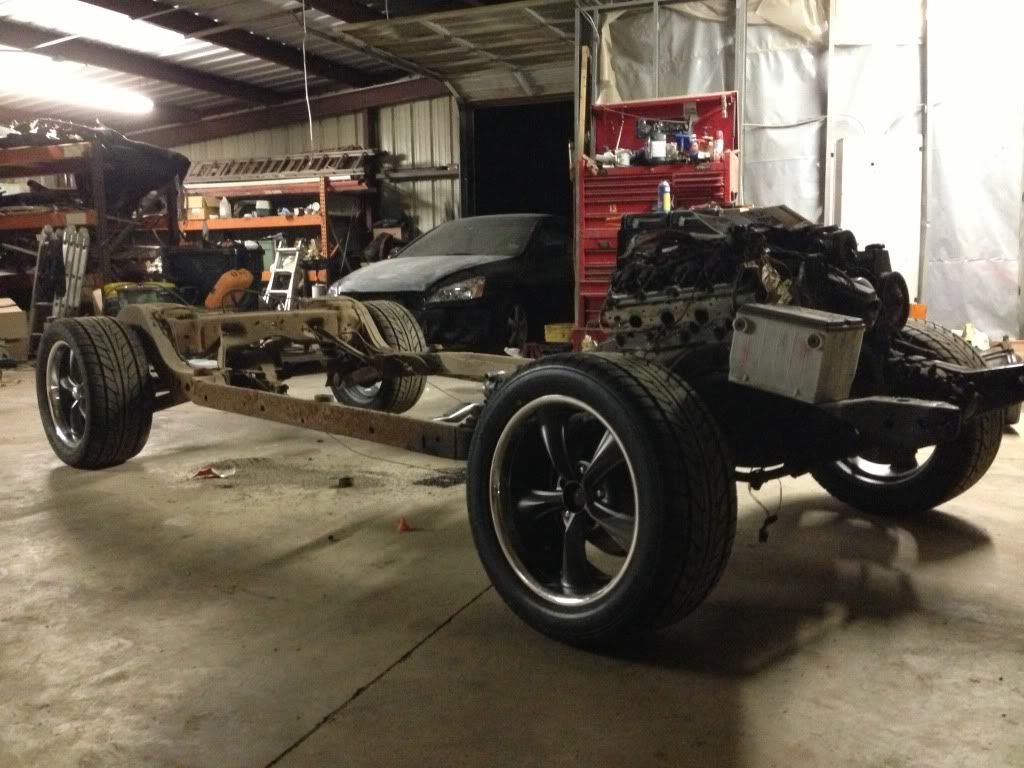
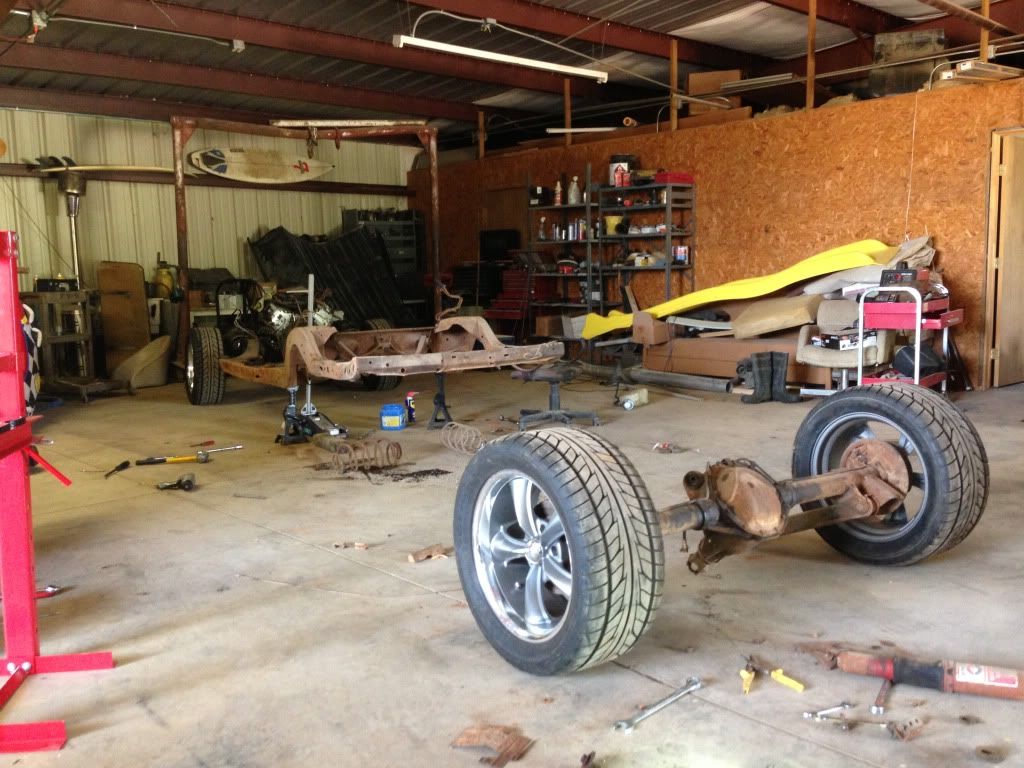
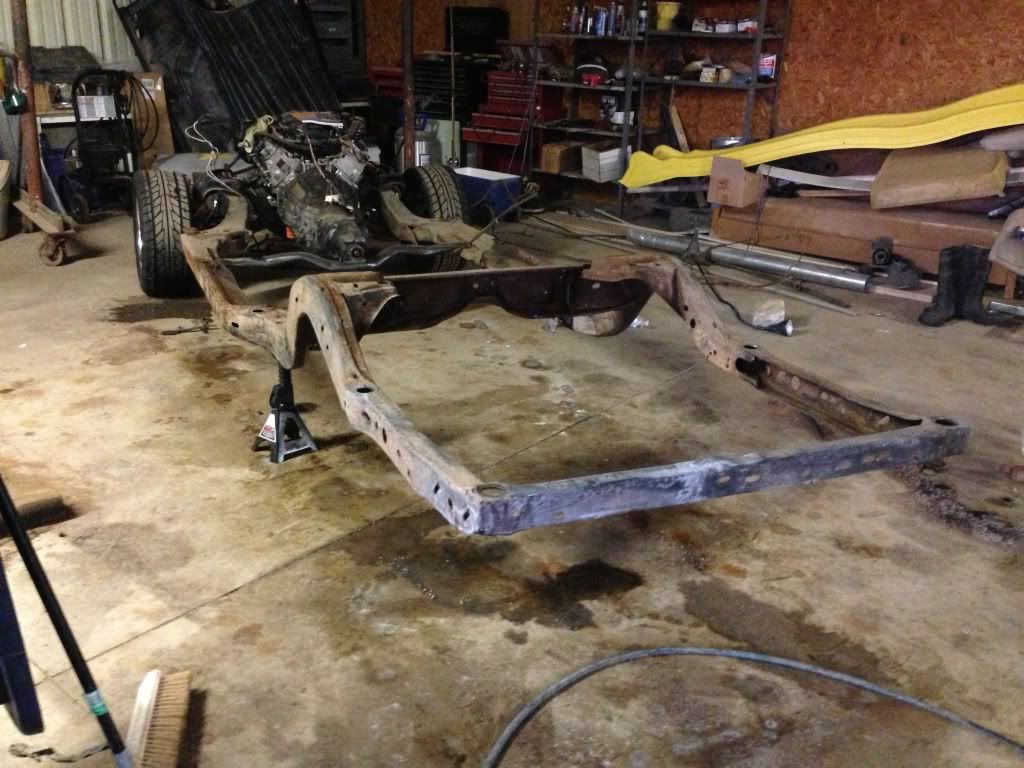
Well i got a lot done today! I put the motor in, the cheap ebay adaptor plates worked great! I had to grind about a 1/16th off each one, and i used simple oriellys sbc motor mounts. F-body headers fit just fine! i have the adaptor plates as a 1in set back, even the stock alternator location was no issue! The oil pan is barely touching in one spot, but i think when i get the tranny in itll raise the back of the motor up enough. Ive got plenty of clearance with the steering box. The passenger side header is only about an 1/8th inch off the frame, but with a little help with a BFH it'll be no problem. Driver side header is close to the steering shaft, but should be fine. The little bow out at the collector on the drivers side header is no issue, ill have my exhaust guy handle it when i have him finish out the exhaust. I also got the interior ripped out, and the dash off. I have not put the tranny in yet, i was going to cut my tunnel tonight, but my welder broke and i wanted to wait till i got another welder (hopefully this weekend). So far there has been no issues though! Here are some pictures! 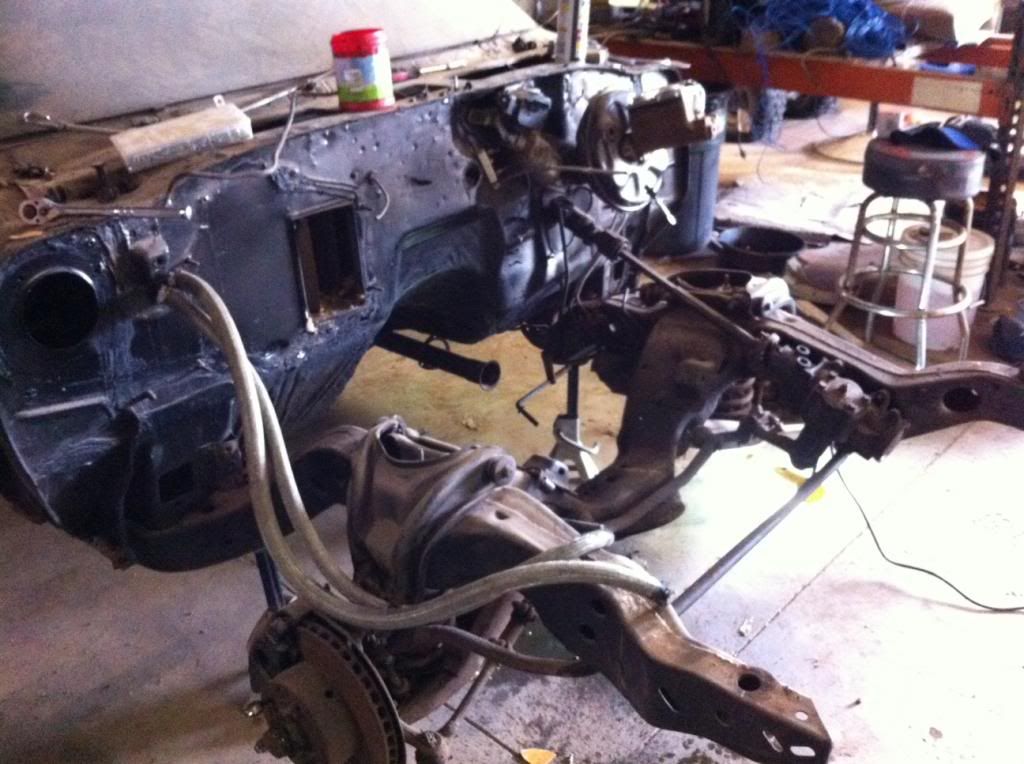
03-30-2013, 09:19 PM
#32
On The Tree
Thread Starter
iTrader: (3)
Join Date: Sep 2012
Location: Newcastle, Ok
Posts: 113
Likes: 0
Received 0 Likes
on
0 Posts
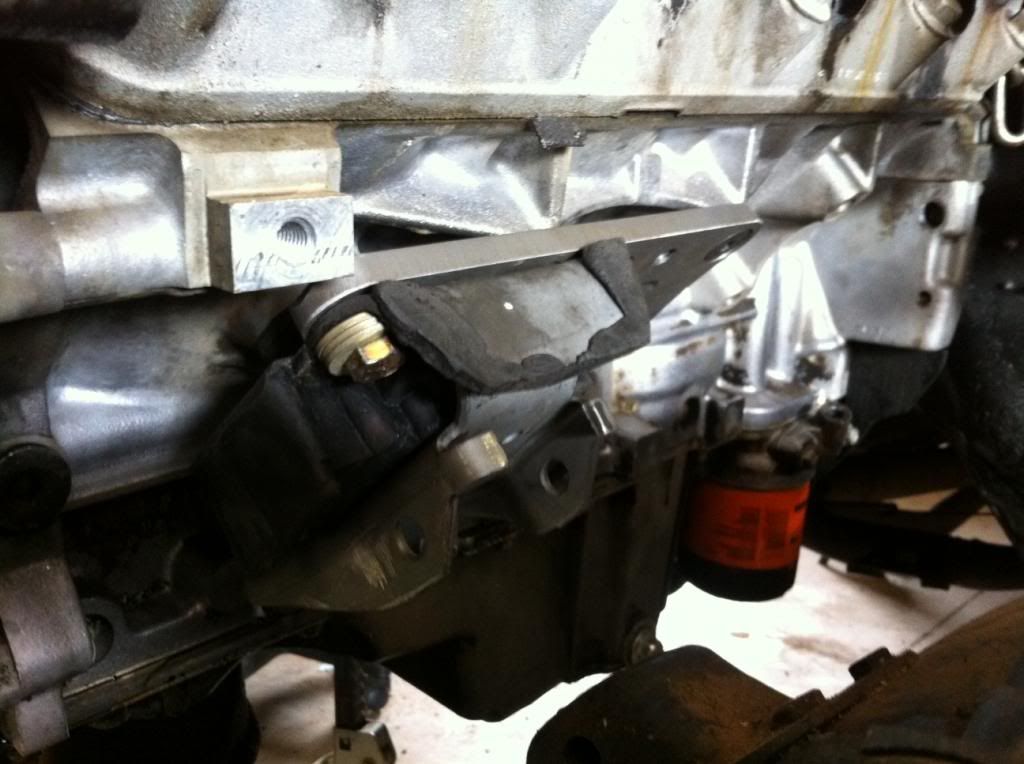
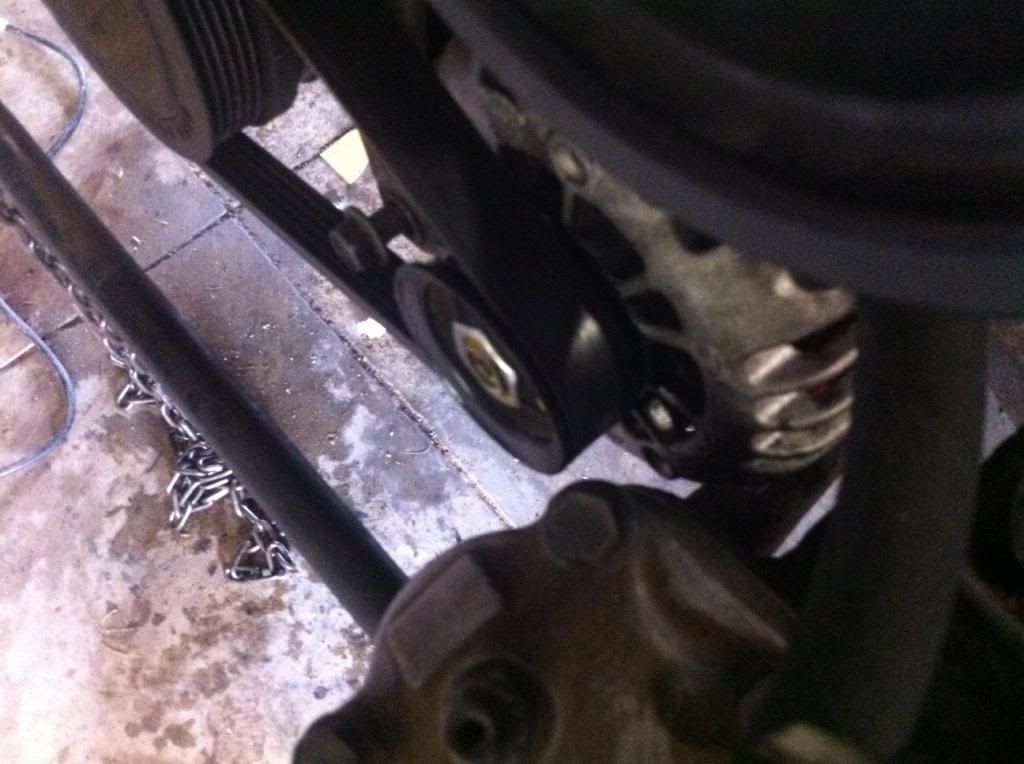
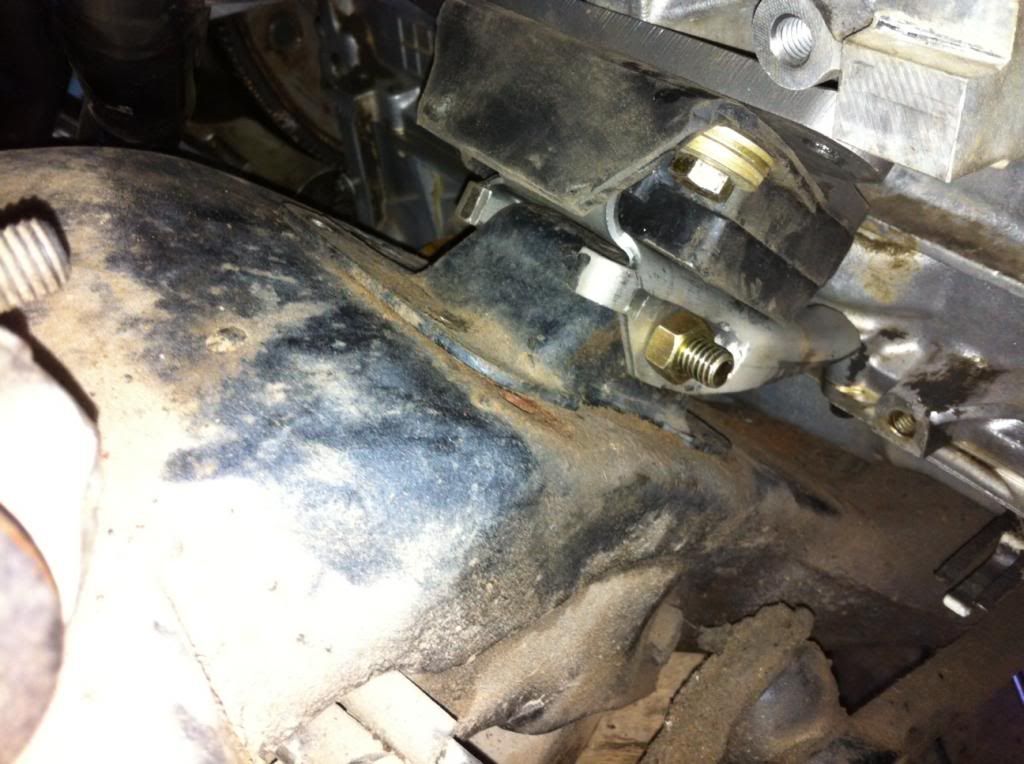
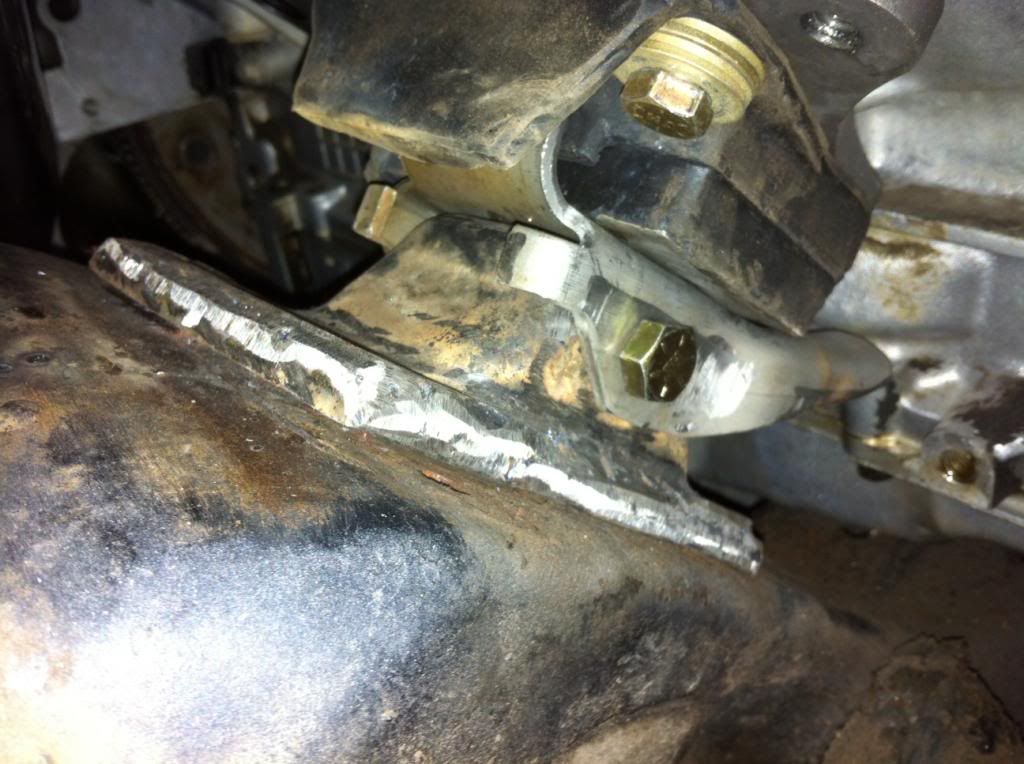
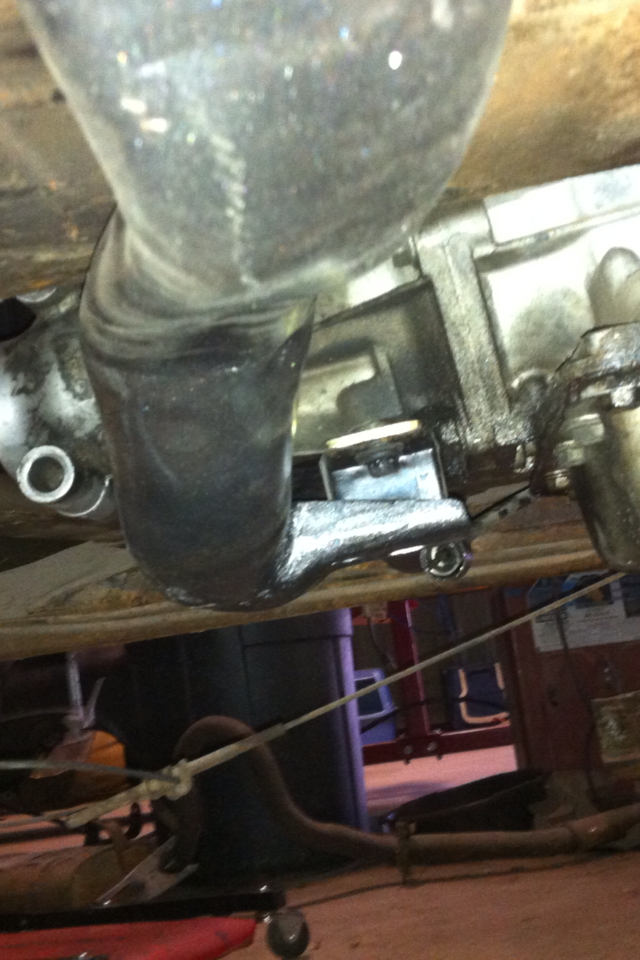
Well i got the transmission in today, that was a pain. Ended unbolting the frame stands, flipping them around, then i moved my motor mounts to the standard sbc location on the adaptor plates, and just moved the motor around until i had it where i wanted it, then i tack welded the frame stands on. Now i have 0 clearence issues, alternator has all sorts of space now, headers have a lot of clearence and are easy to take on and off with it all together, and the oil pan clears now. The back of the heads are about an inch from the firewall but im okay with that, i can still unbolt the bellhousing with a wrench from the top. Ill get the crossmember, and trans tunnel welded back up next week. 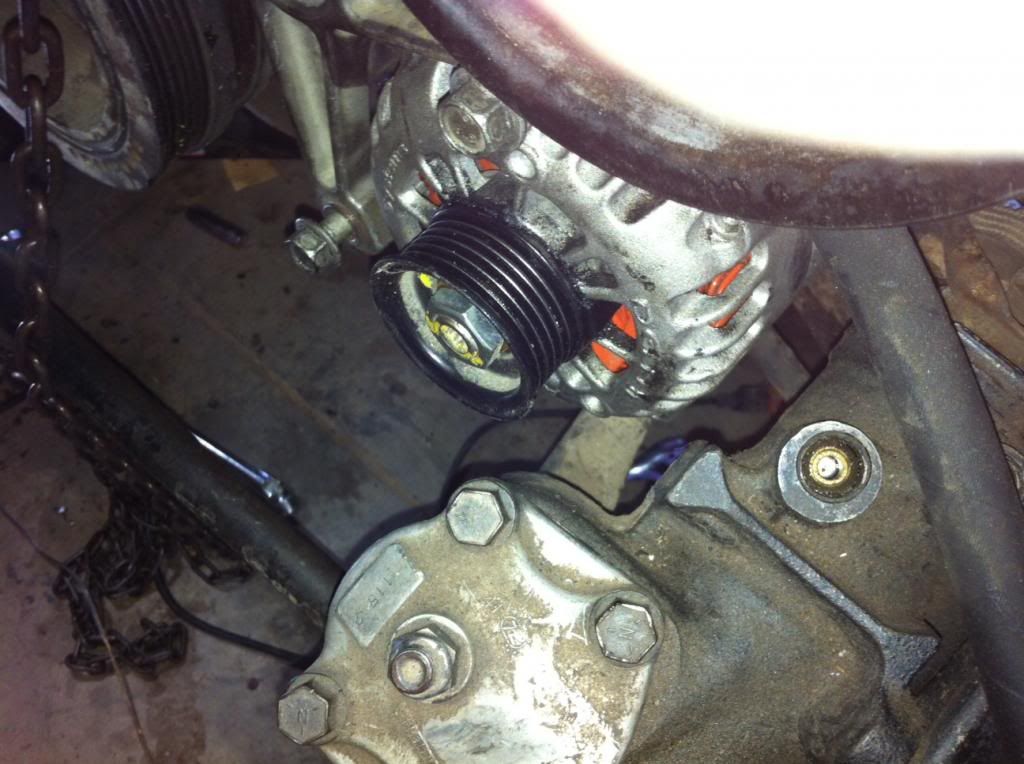
04-06-2013, 12:00 AM
#33
On The Tree
Thread Starter
iTrader: (3)
Join Date: Sep 2012
Location: Newcastle, Ok
Posts: 113
Likes: 0
Received 0 Likes
on
0 Posts
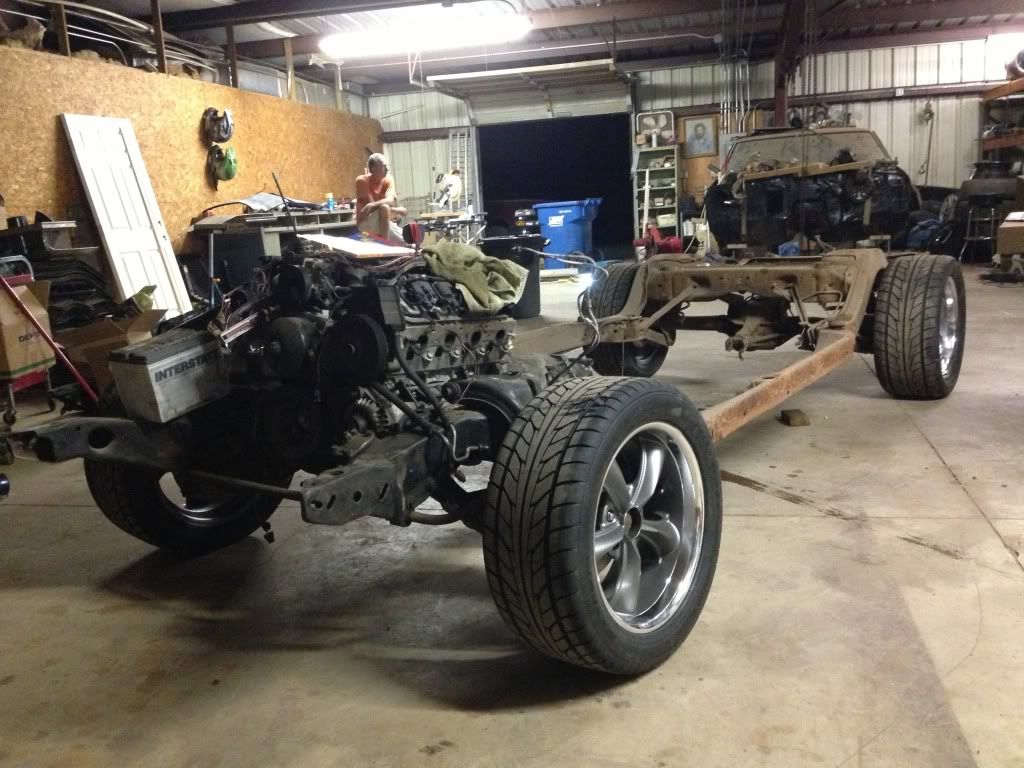
Made some progress today... After reading some other build threads during the week, i never thought to check if the steering would clear the oil pan.... Which it hit when the wheels were locked to the right. So i took my frame stands out and welded a 1/4 spacer on the back side, then tacked them back in. I also got the crossmember tranny mount cut, flipped, and re welded. Fits nice. I have officially pulled and reinstalled the engine about 3 times today lol I think that ive finally got it in there! By next weekend i hope to have the frame out, coated, all new bushings and ball joints installed, and have the underside of the car bedlined. Here is some boring pictures that i took of my motor mounts installed, and tranny crossmember, also the space between the firewall and motor "Closer than id like to have, but id rather have my fbody headers, acc's, and oil pan all fit with no mods. Feel free to chime in if anyone notices anything wrong, this is somewhat of a learning process.

04-06-2013, 01:14 PM
#35
Teching In
Join Date: Apr 2013
Location: newcastle, ok
Posts: 1
Likes: 0
Received 0 Likes
on
0 Posts
shane you better get that garage cleared out we will need room to install the truck load of parts i got. Two of three weeks and im back so you better get ready and get the lift already so i dont have to crawl around on your broken creepers. ha good job so far dont get to far i have to do something over at your shop when im not under my car.
04-16-2013, 09:55 PM
#36
On The Tree
Thread Starter
iTrader: (3)
Join Date: Sep 2012
Location: Newcastle, Ok
Posts: 113
Likes: 0
Received 0 Likes
on
0 Posts
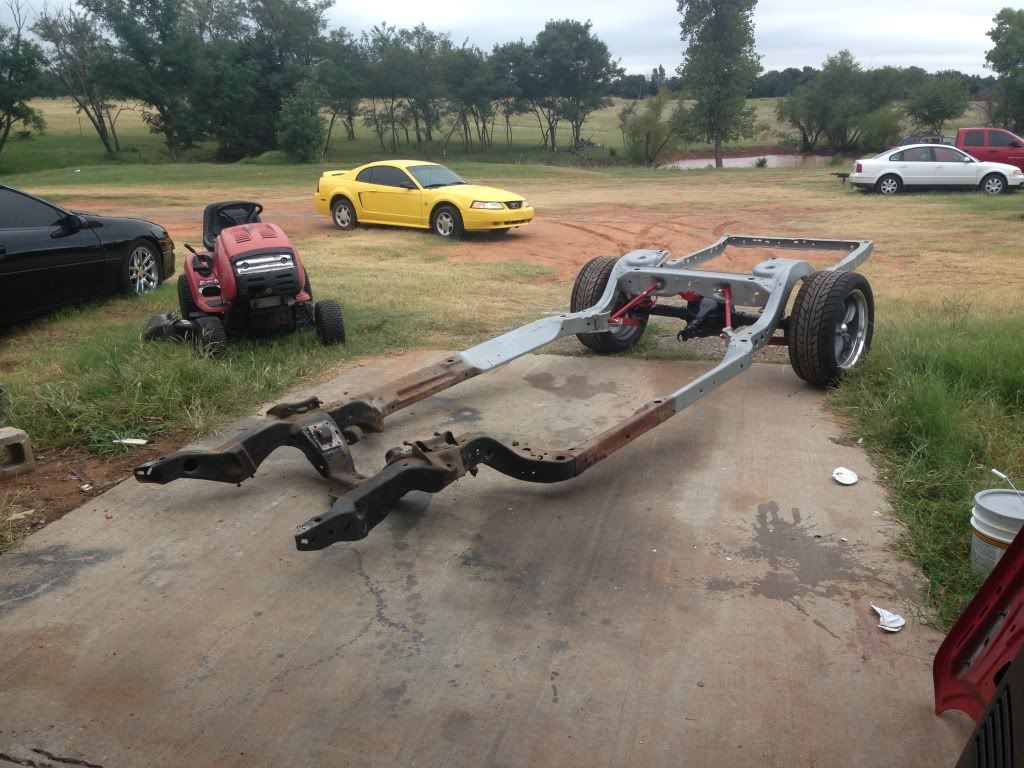
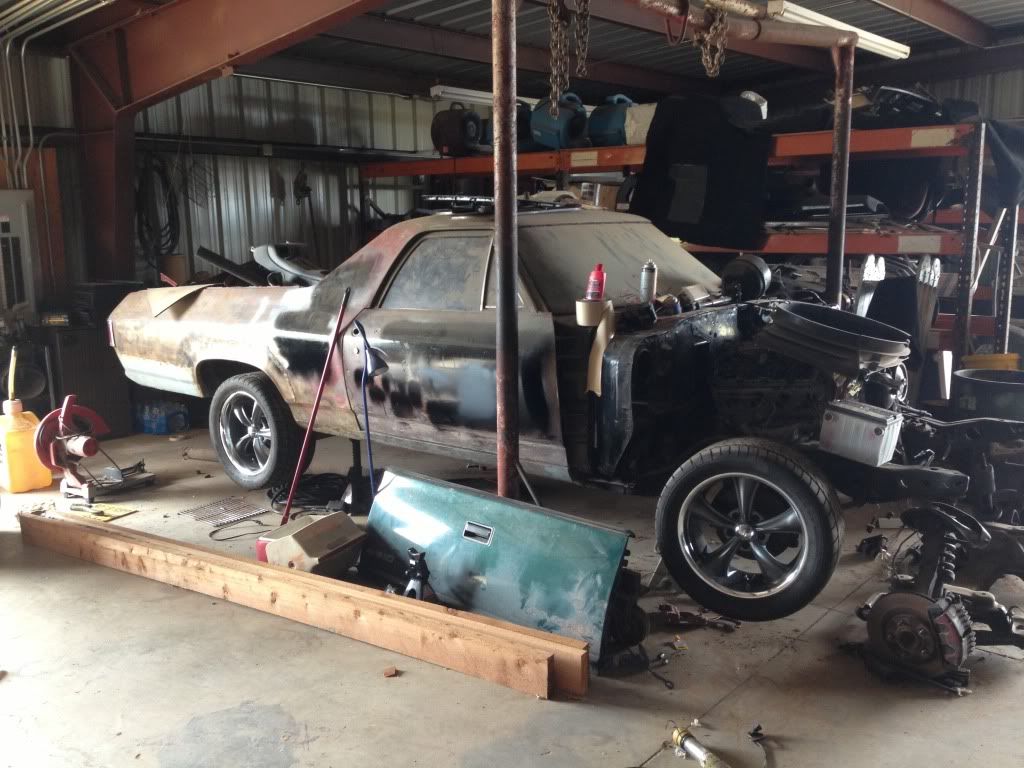
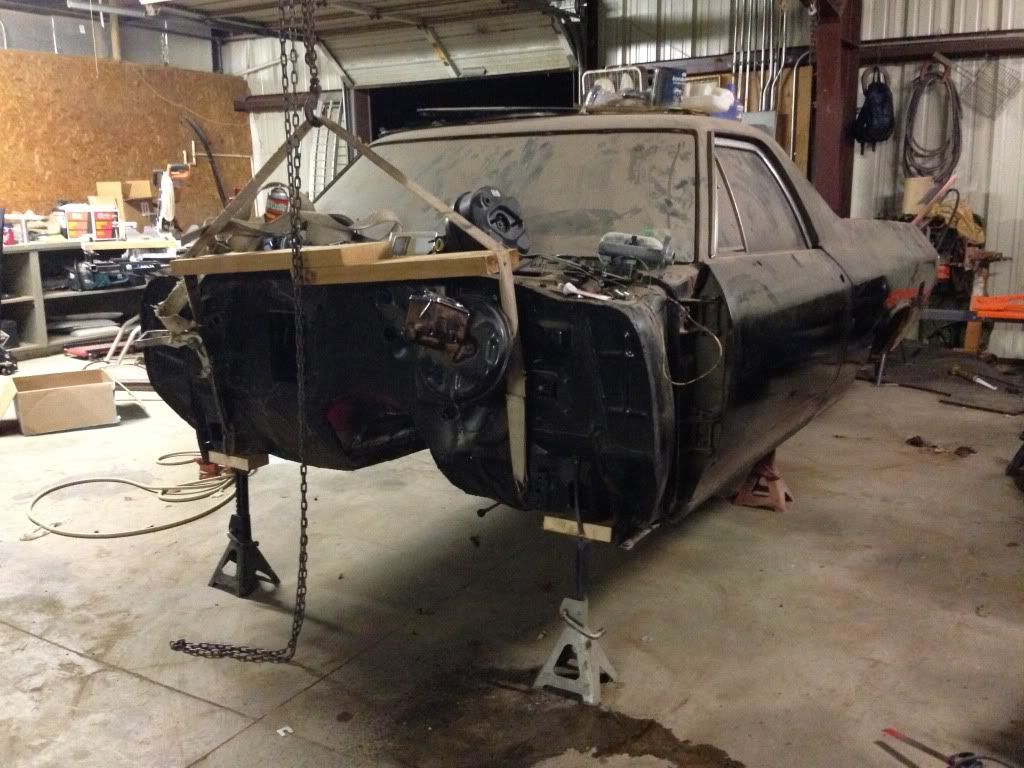
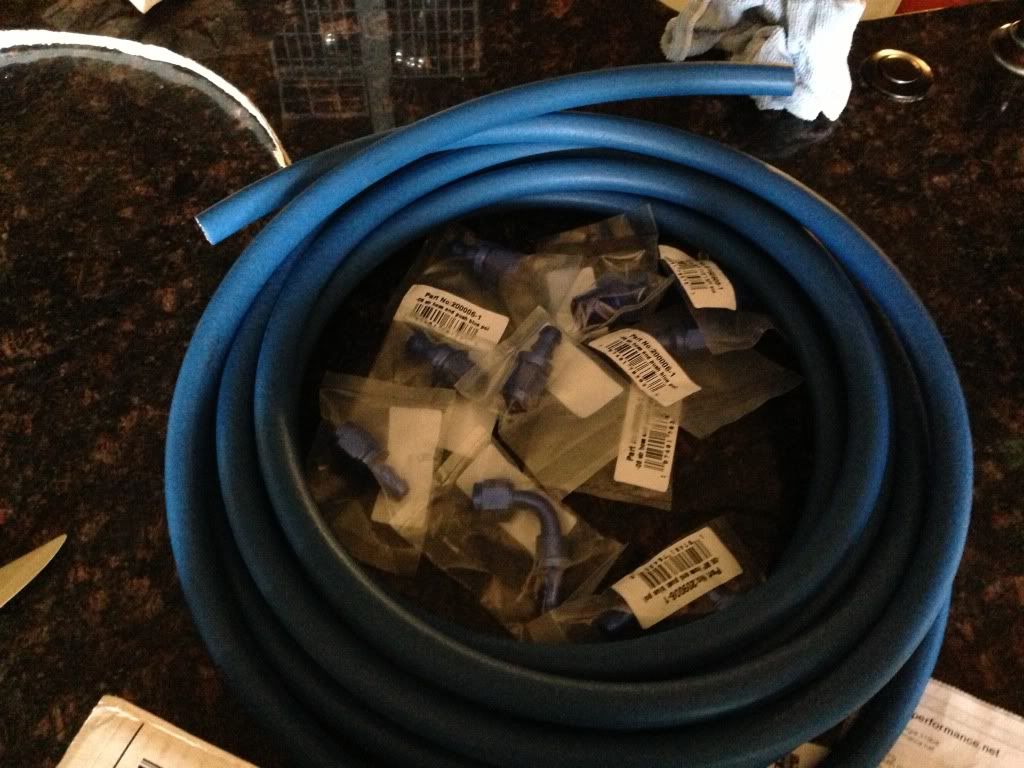
Been awhile since ive updated, unexpected time and cash had to go into my other vehicles lately. I did however finally get my tranny tunnel mocked up for the most part, that thing is taking me forever to do. Im going to wait until i get the body off to finish it up. I also plugged up my wiring harness to make sure i didnt remove any wrong connecters, and to figure out where im going to put the pcm. Im going to run it through the firewall and under the dash. Ive got the body ready to separate from the frame, that's my next step. Gonna order a front end rebuild kit, all the bushings for the chassis, and my fuel setup and then when they come in I will pull the frame and knock it out in one shot. Still deciding on what springs to go with front and back, and also deciding if i'm gonna change the control arms to some tubular ones. My fuel system is gonna consist of a walbro 255, corvette regulator, and all -6an lines and fittings. Maybe next year i'll do an air ride set up. I was planning to get to working pretty hard on the car this whole month, but college is taking over... Classes end the second week of may and then i will be able to really get at it! I will be at Holley LS Fest in September in this car! I am also almost ready to get this camaro out of my shop, i still have the rearend, front k-member, and the dash. I think the rear end may be bent, so it will most likely go to the scrapyard with the car. Sorry for the crappy pictures, camera is screwed up so they are cell shots.
09-16-2013, 03:05 PM
#37
On The Tree
Thread Starter
iTrader: (3)
Join Date: Sep 2012
Location: Newcastle, Ok
Posts: 113
Likes: 0
Received 0 Likes
on
0 Posts
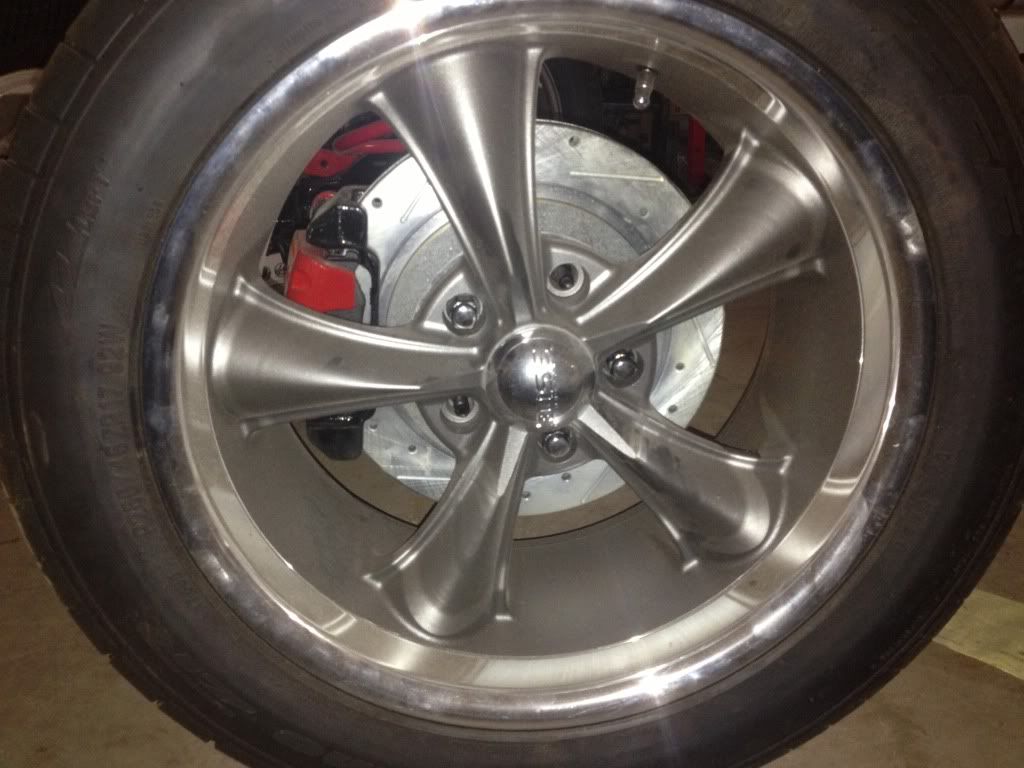
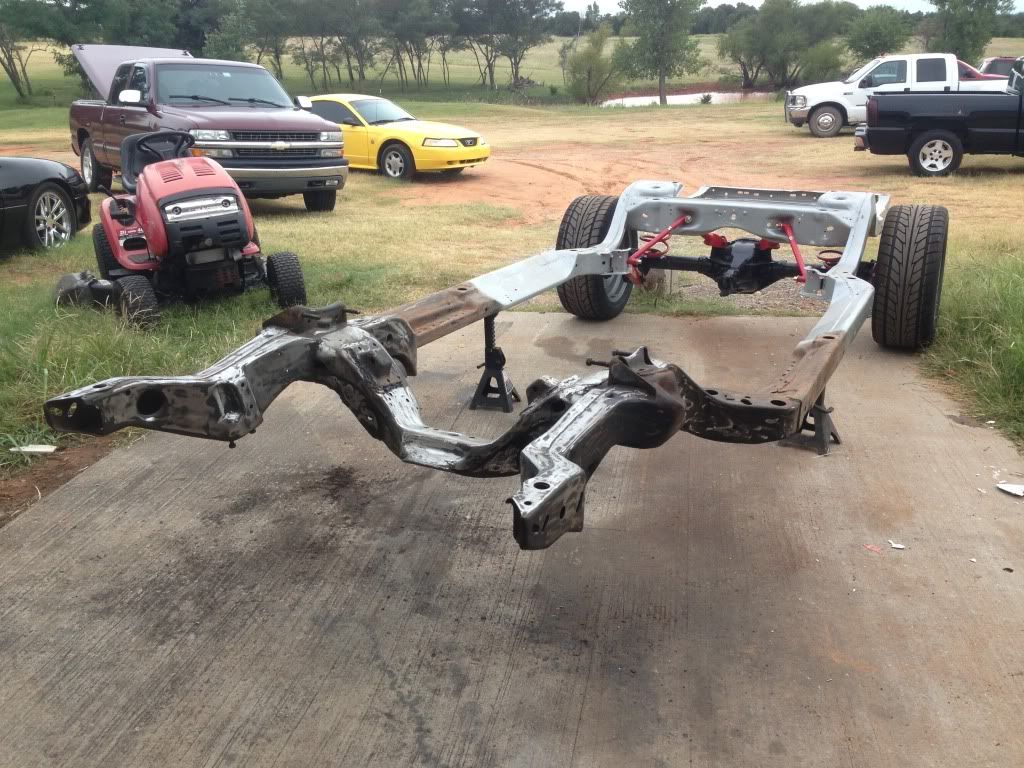
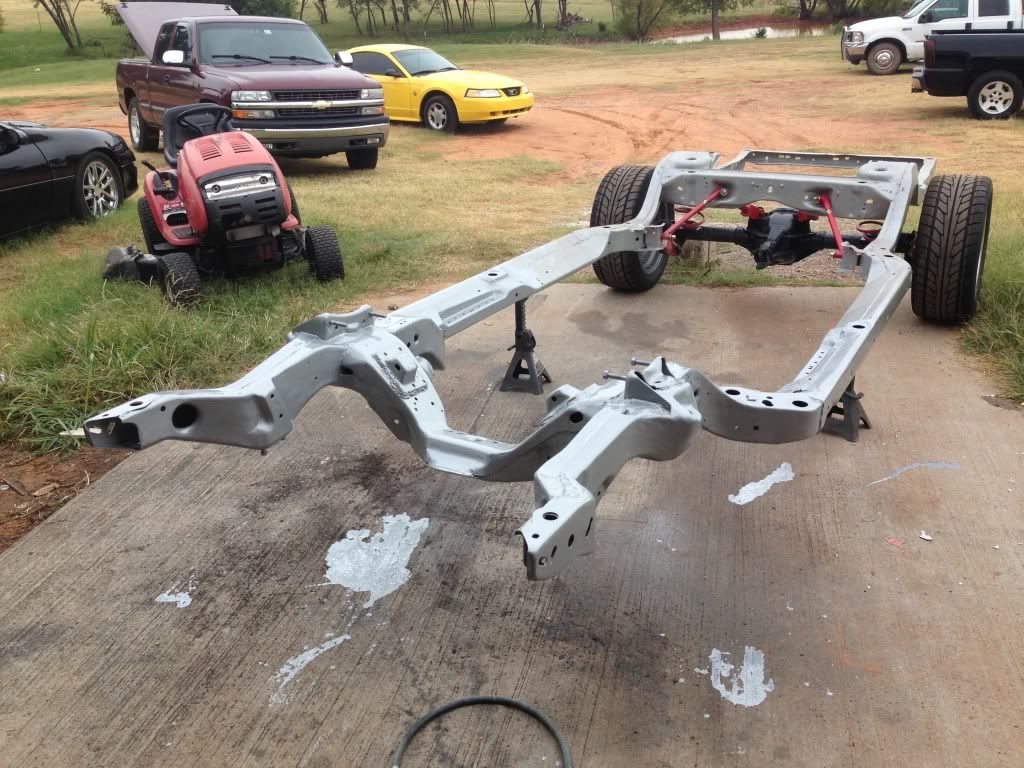
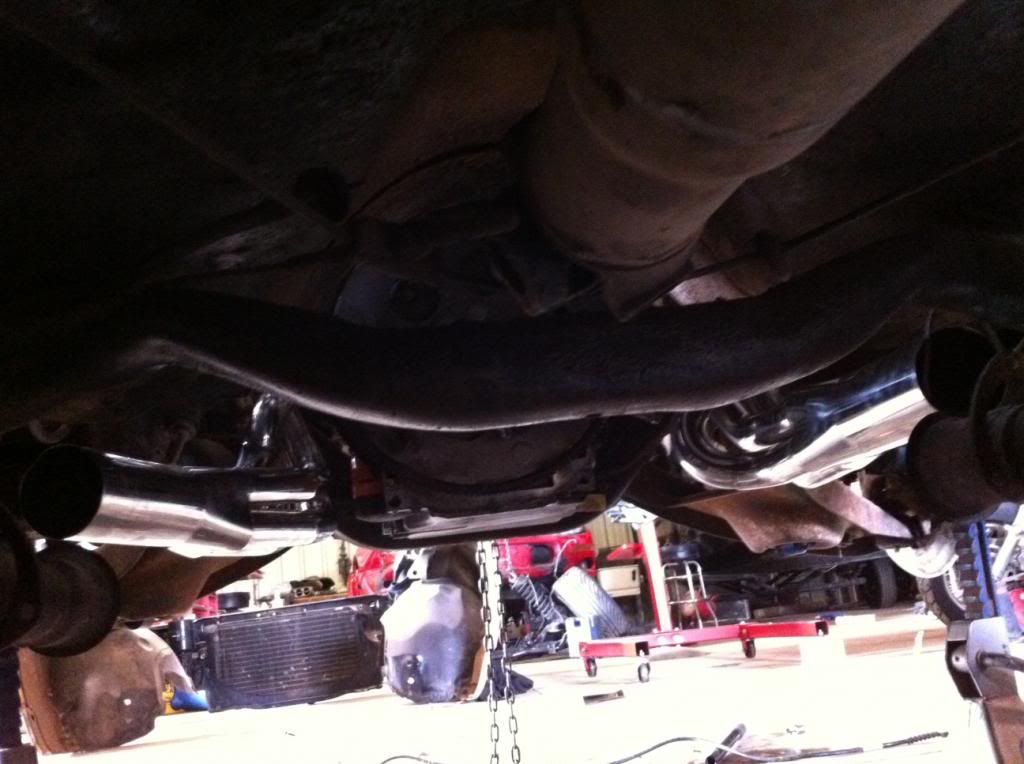
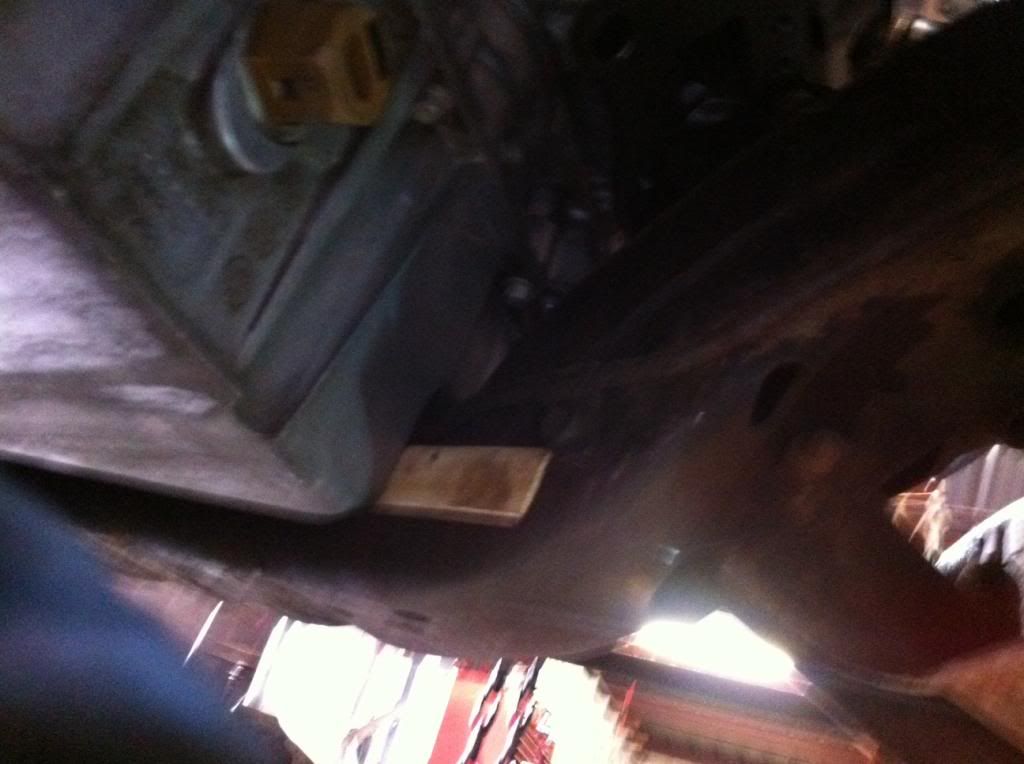
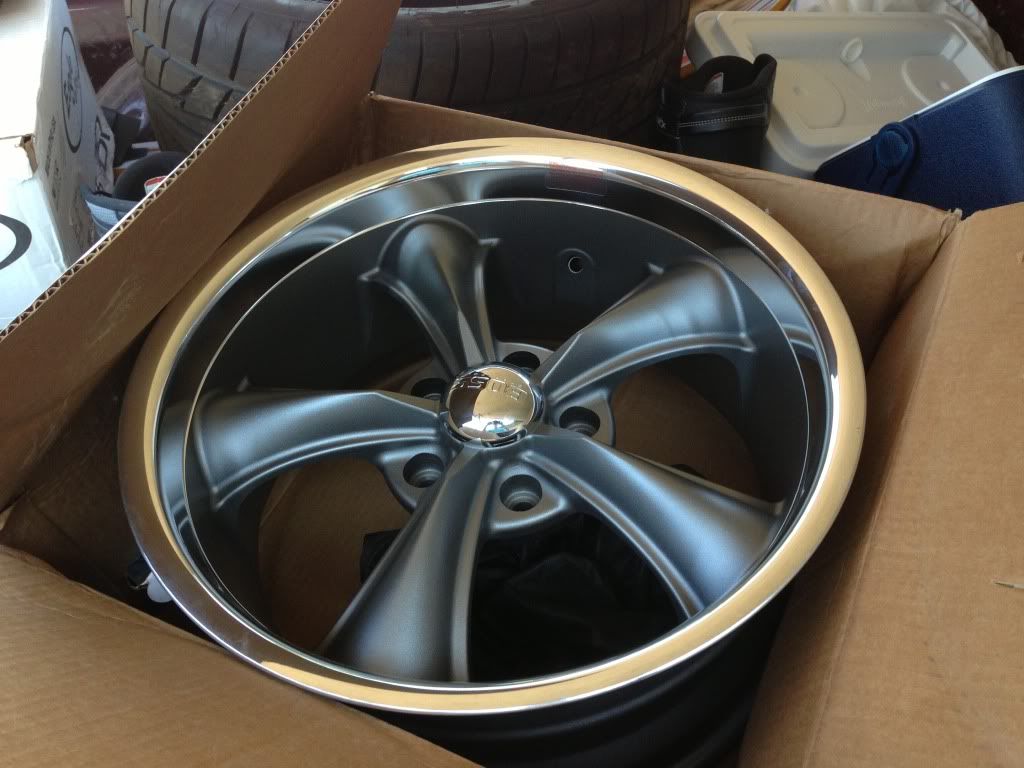
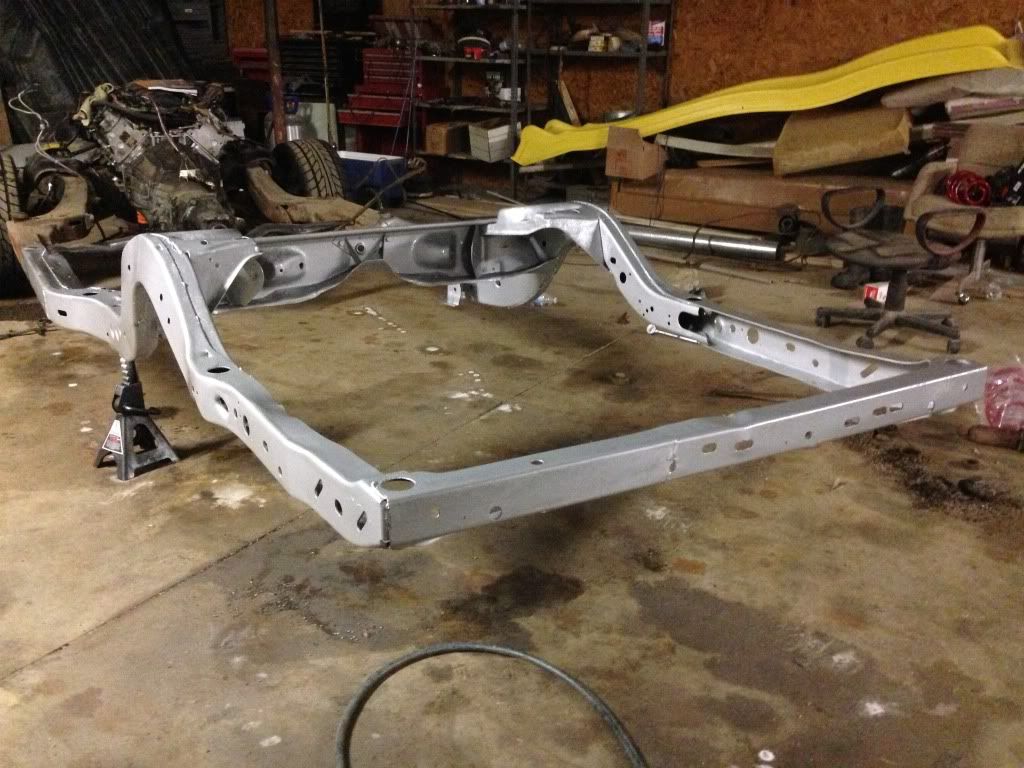
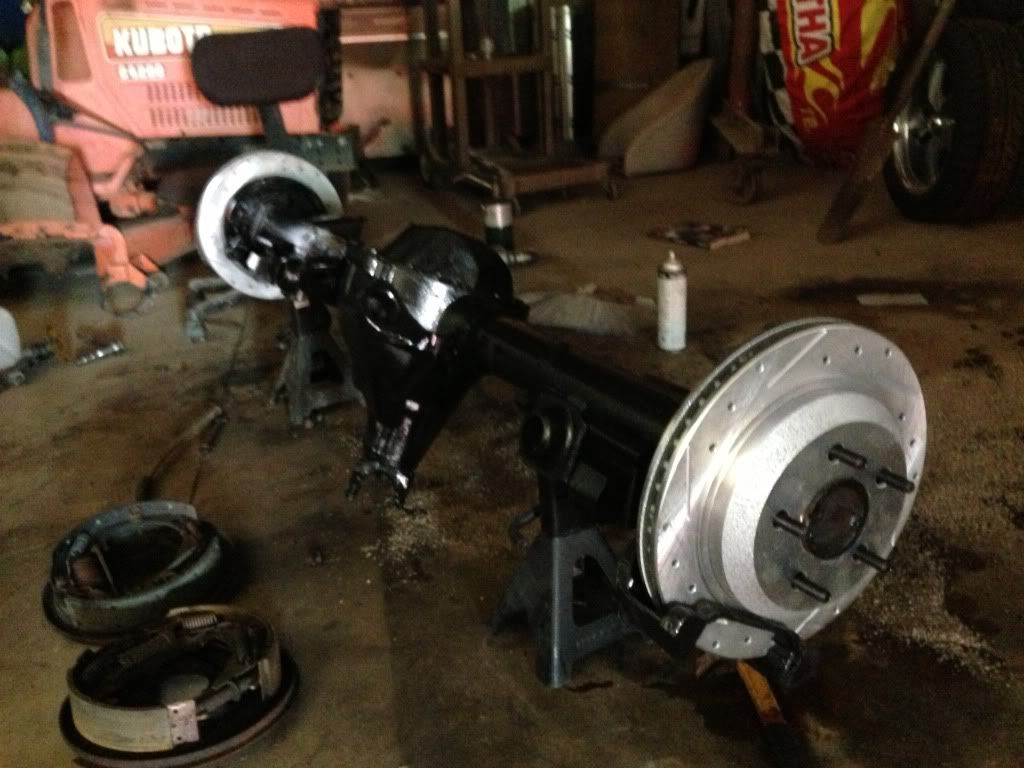
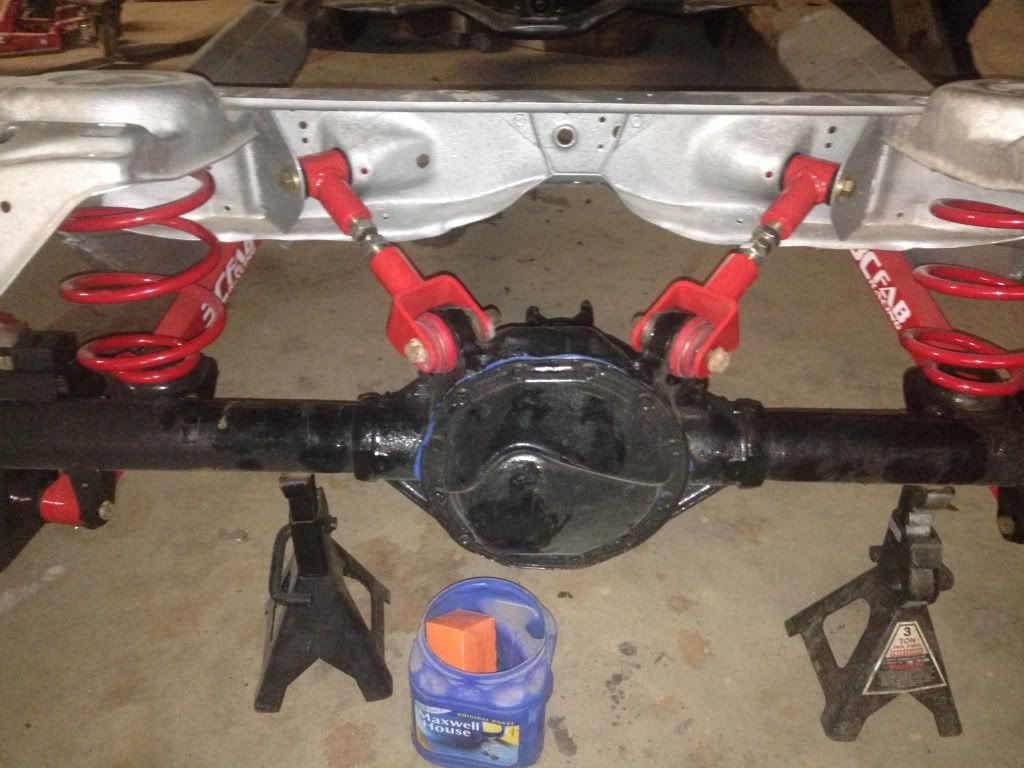
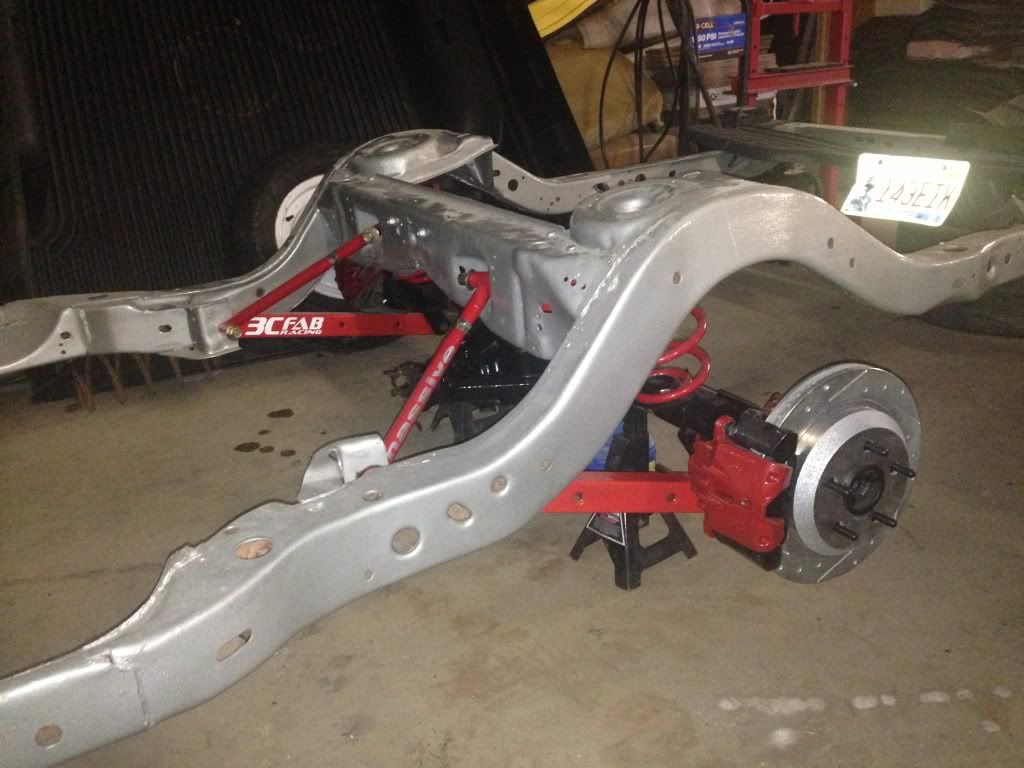
Well i havent posted any updates lately. Hit a lot of speed bumps and didnt get to work on everything as much as i wanted too. But getting back on it and starting to pick the pace up quite a bit. I have recently pulled the frame out from under the car and stripped the back of it and starting cleaning and painting things. Ive got my whole suspension set up in the mail along with my brake set up, and a nice new set of wheels and tires. Ive finished the back and finally got the rear end hanging back in place with the 4th gen f-body brakes. Soon to start stripping the front and installing my tubular control arms. Heres what pictures i snagged along the way.
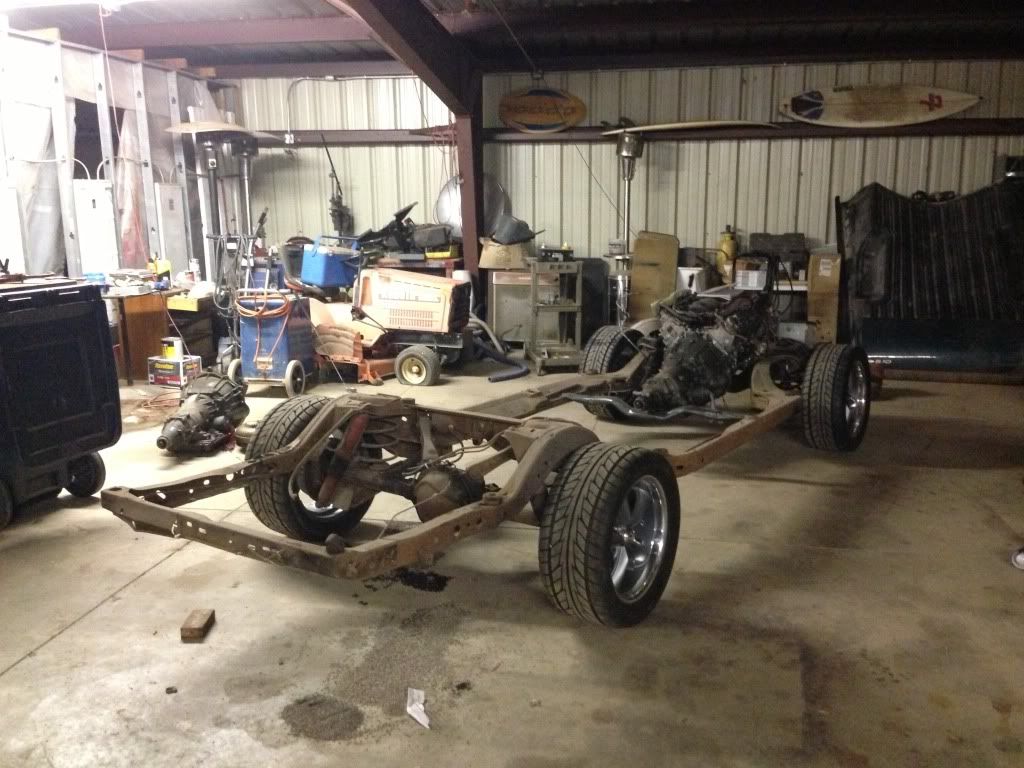
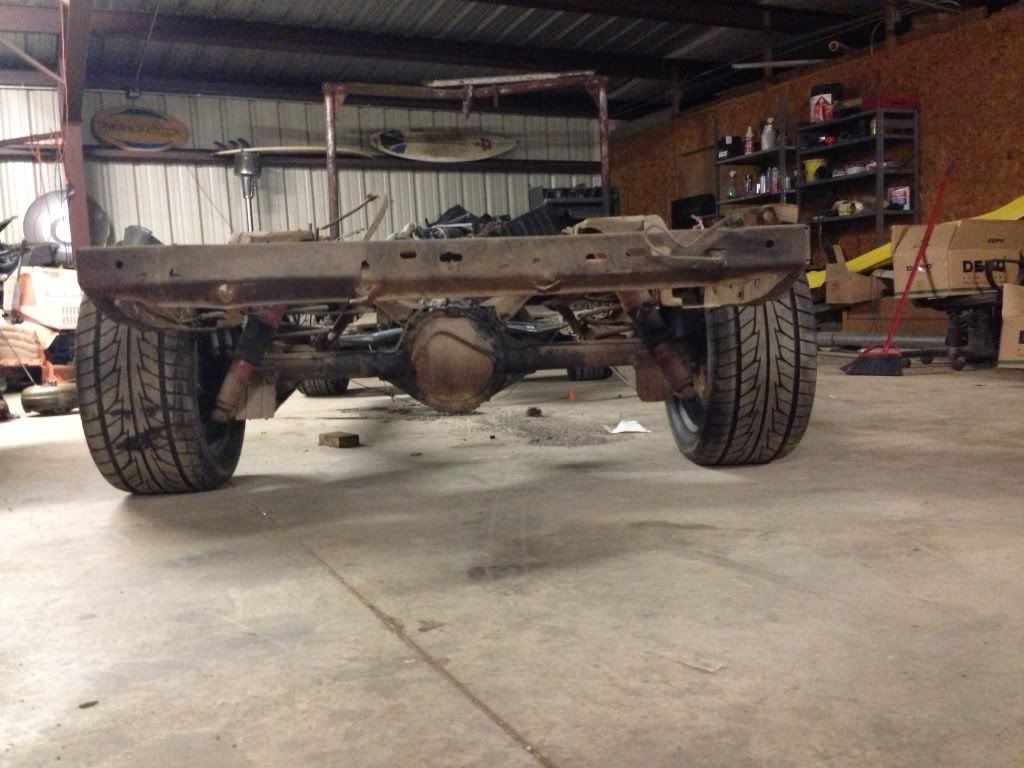

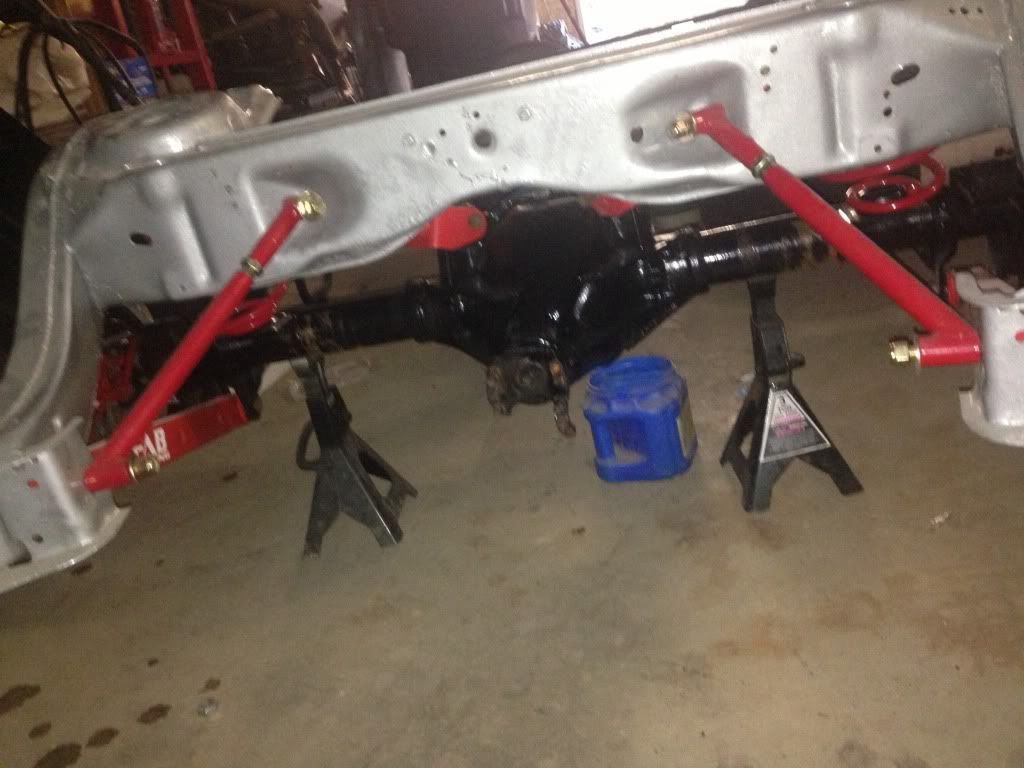 09-20-2013, 06:08 PM
#39
On The Tree
Thread Starter
iTrader: (3)
Join Date: Sep 2012
Location: Newcastle, Ok
Posts: 113
Likes: 0
Received 0 Likes
on
0 Posts
Got some more stuff done today, waiting on the frame to dry and i may try to install my control arms, springs, and spindles tonight. I stripped the front suspension and steering components this morning and that was a pain!!! Many years of rust and corrosion! Also snapped a picture of my rear 98-02 fbody brake set up with my wheels. For any one that is considering the brake swap i just wanna tell you that its totally worth it. For the rears you just have to space out the backing plate from the camaro about an 1/8th inch from your axle housing flange and the backing plate bolts right up, then slide your rotor on the axle, and finally bolt up your caliper bracket and calipers! I will explain more on the front brakes when i get to them.