When you click on links to various merchants on this site and make a purchase, this can result in this site earning a commission. Affiliate programs and affiliations include, but are not limited to, the eBay Partner Network.
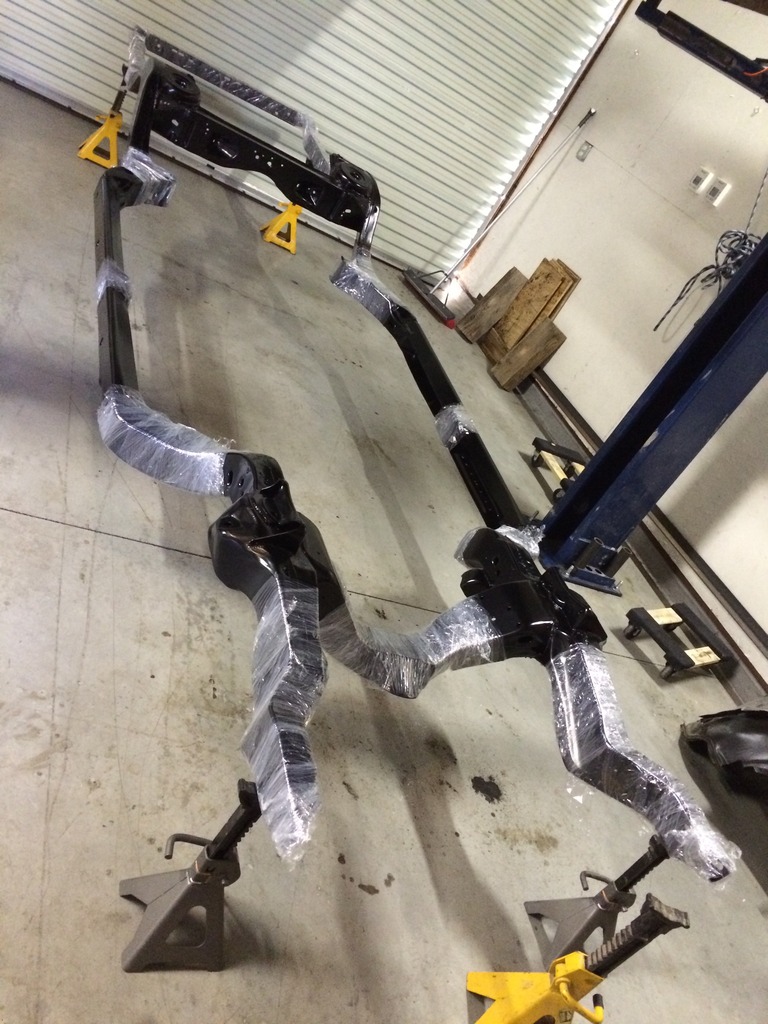
Thanks. That is the old fuel line before it was removed. The plan is to run ptfe fuel line with AN fittings from the tank up along the drivers side frame rail and to the fire wall.
That issue with the media blaster might be caused by moisture. You are in an area of low humidity, I know, but I recently experience the same problem and I solved it by installing a water/moisture filter just before the media blaster. I think one should be included or they should at least mention it in the directions.
Got the frame back from the powder coater and got the front control arms back from Dan's Driveline. As a result of my pending relocation to Chicago, time is of the essence. I made a mistake when trying to epoxy paint the frame and just didn't have the time to prep it all over again.
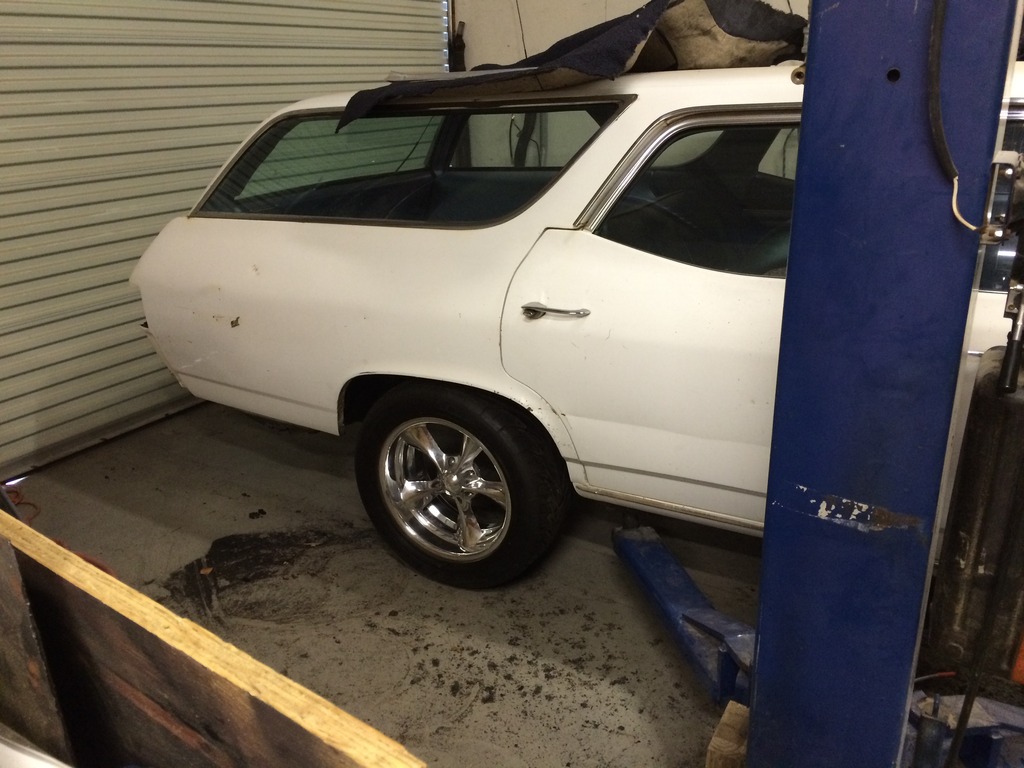
I also finally picked up the hood and the wheels. This is what they'd look like on the car even though in these pics, the frame and suspension are not there.
Been a little while since I've updated, but I have been working diligently on the project amongst other things.
Today, I got the engine back in the frame, hopefully for the last time.
I put the body back on temporarily after cutting a big "I" in the tunnel. I didn't go as far as the BRP guid says to go, but it's still a little bit bigger than I probably needed. Prior to cutting it, the tail of the 6L90 was hitting the tunnel, but it looks like it was just barely. I'm going to weld in a 3/4" piece of flat stock and there should be more than enough room. I can get my fingers between the body and the bell housing with no issue.
This is with the motor in and the body sitting back on the frame.
Not a great picture of it back on frame, a little dark. The front coil overs still need to be adjusted and the rear upper control arms need to be adjusted a bit.
Another shot
I also got a good deal on a non-operable cow hood
I also cleared off the firewall so I can paint it with POR15. The undercarriage has been cleaned up and the Lizard Skin is waiting to go on. A Vintage Air a/c setup will be going in place of the heater box. Looks like at one point someone made it a room without a view.
What is this? ^
I also ordered a bunch of parts including the exhaust, well part of it.
Hooker 42114 G-body swap downpipes. Not sure if these will work and I'm not sure about the quality, plus they showed today, two weeks before Jegs said they would. Not that it's a bad thing, just frustrating. As far as the quality, and I'm not sure if it is an issue or not, but the bung on one of the pips was not aligned with the hole drilled into the pipe itself. I'll have to see if it's going to cause an issue with the instal of the O2 sensor.
Pypes XVA10: I think That I probably should have ordered the XVF10 as those run down the tunnel.
Driveshaft: 2010 Chevy Express van aluminum shaft with 6L90 yoke. I'm going to have it shortened and a conversion joint put in so it will bolt up to the 10 bolt.
That is a circuit breaker for a high current draw accessory. In your case probably the power rear window if it has one but it could be for power seats, power windows, ect.
That is a circuit breaker for a high current draw accessory. In your case probably the power rear window if it has one but it could be for power seats, power windows, ect.
I received my G-body downpipes and they look like they are going to clear just fine. I need to run apex a 9" extension off them to get the X pipe to cross in the right spot, but I may abandon the X pipe as a whole and do individual dual exhaust out the rear if I can't make this work the way I want it to.
On one of the downpipes the bung seems to be offset a little from the pipe material, and I haven't checked it yet, but I'm worried it's going to interfere with the O2 sensor.
Offset a little more to the 11 o'clock position.
The other downpipe which appears to have the bung properly centered.
Installed based on recommendation, with the bungs facing out.
Installed the opposite way, just to see how it fit.
top view
With Pypes X-pipe. Needs about a 9" extension off of the Hooker downpipes to clear everything.
You want the O2 bungs at a 45* degree angle, in other words at about 11 or 2 o'clock position. This is to let any moisture run off of the O2 sensor.
From what I understand you want them at least at 90*, but the preferred angle is 45*. I think these are a little are maybe 85* or so, but definitely not the 45* angle. I can always modify when I get to that point.
From what I understand you want them at least at 90*, but the preferred angle is 45*. I think these are a little are maybe 85* or so, but definitely not the 45* angle. I can always modify when I get to that point.
Just run it, it'll be fine. The slight misalignment of the O2 bung is fine too. The tip of the sensor is way smaller than the threads.
Just run it, it'll be fine. The slight misalignment of the O2 bung is fine too. The tip of the sensor is way smaller than the threads.
Andrew
Thanks Andrew. The additional reading I did about the O2 clocking said at least 9 and 3, but I understand the condensation issue. I'm figuring if Holley/Hooker built them the way they did, I trust their engineering.
I also had figured the alignment of the bung probably wouldn't matter, but I hadn't had a chance to check the clearance for it just yet.
Man, I'm not sure how I was that far off on my driveshaft measurements.
j/k. This driveshaft is out of a 2010 Express Van, thanks to Stu and the folks over at JustChevyTrucks.com. Once the body is back down, I'll get it measured. I adjusted up the pinion angle, but need to get a finder on there to dial it in.
I got a bunch of work done this weekend including measuring for the driveshaft and modifying the fuel tank for the Tanks Inc. pickup. I used 2 -6 90* bulkead connectors and threaded in a -6 to NPT to the main pickup tube. The plan is to run 3/8" fuel line to both bulkhead fittings as they will be used to secure the EP381. The one with the inlet facing the same way as the black fitting will be the return which will dump right next to the pickup in the pump, the other, facing backwards will be used to rout the witlring to the pump. It'll be filled with a fuel resistant exact in all likelihood.
Not at the moment. I was under there yesterday measuring for the driveshaft and thought about taking a couple of pictures. I did a hybrid trans pan using the 6L90 pan and a 6L80 pan. The oil pan hangs about an inch below the cross member though, which isn't too bad. I know some people have issues with this, but I'm not too worried about it although I'm trying to figure out whether or not to install the autokraft pan or sell it.
Any pictures showing ground clearence ( I'm guessing you are around 5 inches from trans pan to ground) would be great, also showing the relationship in clearence from headers etc. Thanks
Interesting build. I am wondering what is exactly involved in making the trans fir into an A body. This is the first of heard of one of these transmissions being swapped into an A body car.


 06-22-2015, 09:28 AM