
1991 Nissan 240sx – T76 LQ4 with T56
 01-27-2012, 04:59 PM
#21

 01-27-2012, 05:26 PM
#22
Thanks for the compliments guys.
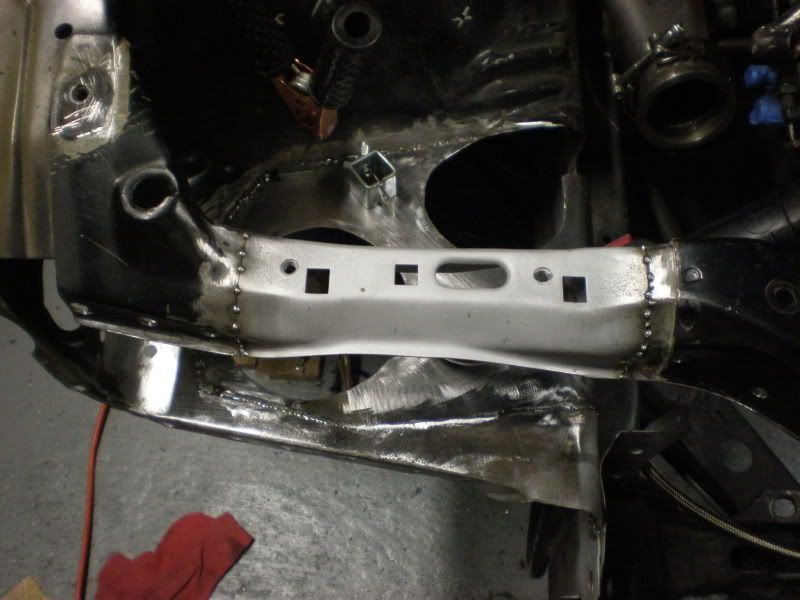
Progress has been a little slow on the fun stuff, i've been cleaning some rust issues and welding in some sheet metal.
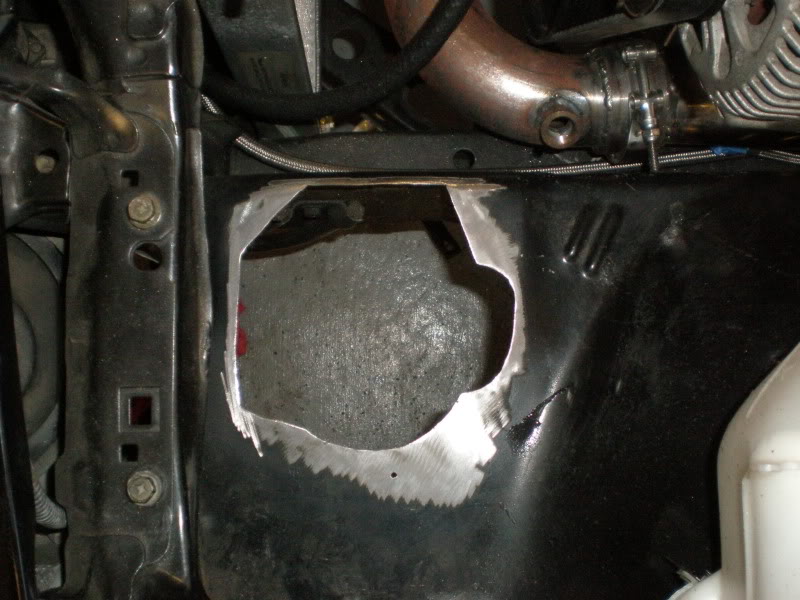
The battery must have exploded before i bought the car back in 1997, there was rust everywhere behind the passenger headlight. I cut the headlight panel and part of the core support out so i could sand blast the rust and weld everything back in. I cut out the front fender wells due to a shady shop's work cutting holes for intercooler piping and welded in new patch panels.
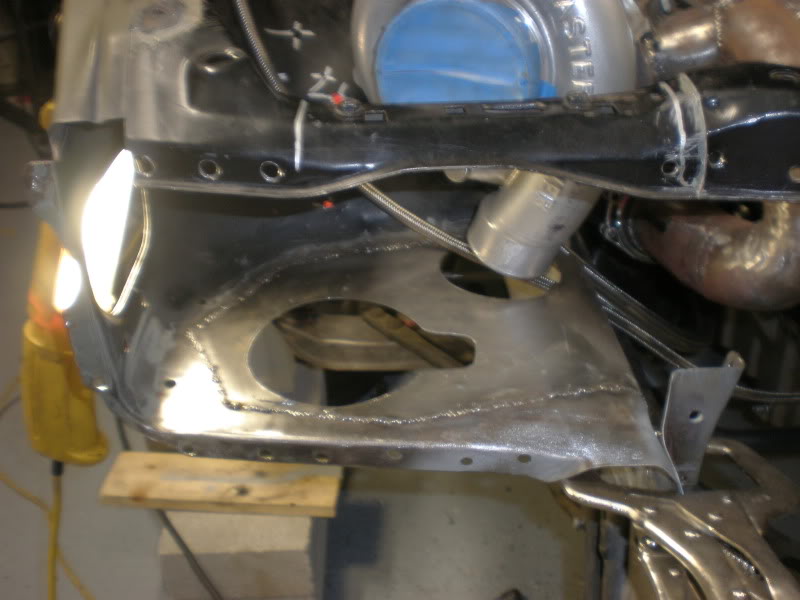
drivers side - still have to finish welding and grinding. it'll be easier to finish after i pull the motor.
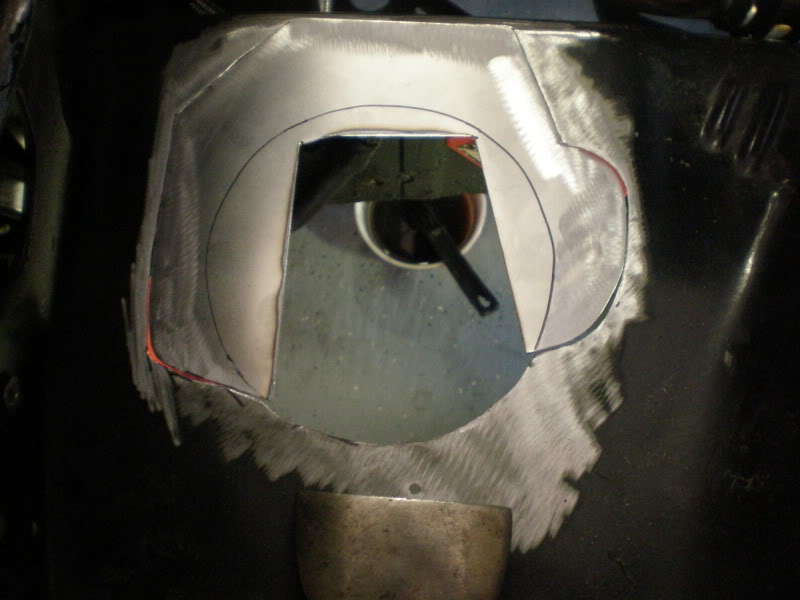
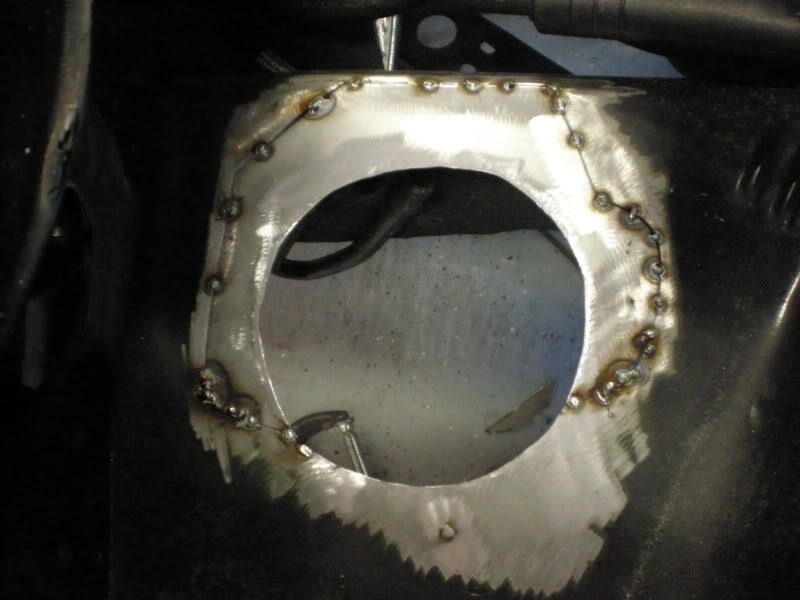
passenger side
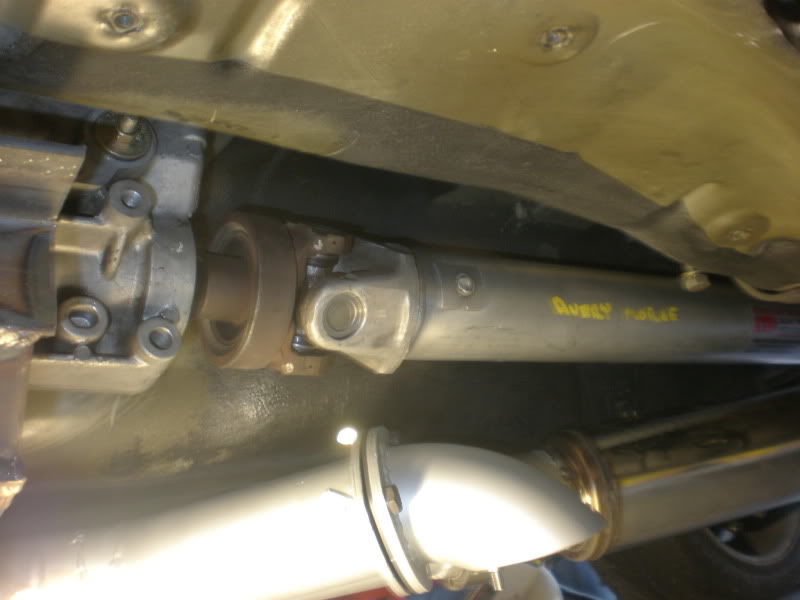
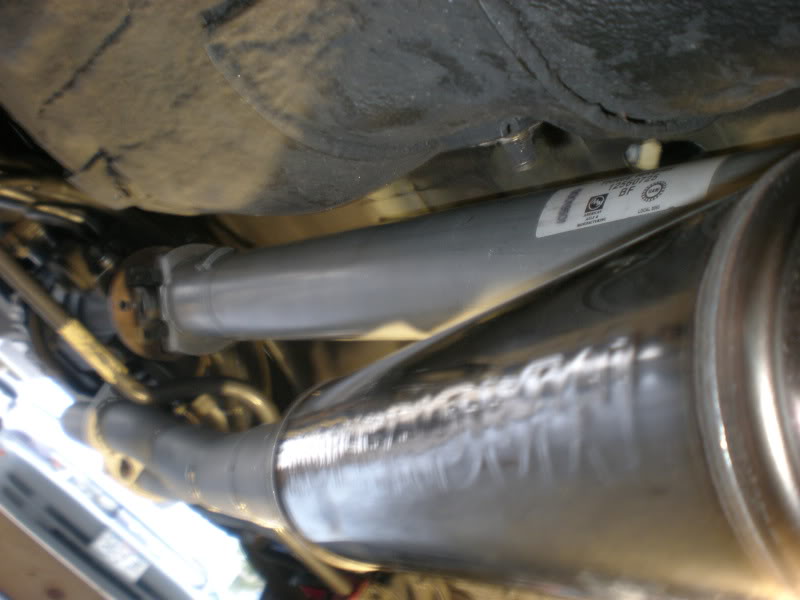
I also got an Fbody aluminum driveshaft that i had shorted 2" and replaced the u-joints. I also had to use a 1310 to Nissan differential flange to mount to my rear end. fits perfect with plenty of exhaust clearance.
Louie,
thanks for the heads up on the pre filter. its a Trick Flow 100 micron pre filter (pn 23004). i'm going to keep it for now, if it hurts flow i'll ditch it. i've got a little ways to go before its running.
Satan,
i'm sticking keeping the stock subframe along with solid aluminum bushings. I'm also keeping the R200, but using the 3.54 out of the Q45...needed a little more gear and the bigger axles are an added bonus.
i'm starting to pull everything out now. just need to add the oil drain to the pan or front cover. the motor should be going to the machine shop sometime in Feb or March. While it's there i'll be filling some holes in the engine and getting the bay ready for paint. i hope to have a little more time to work on it now.
Progress has been a little slow on the fun stuff, i've been cleaning some rust issues and welding in some sheet metal.
The battery must have exploded before i bought the car back in 1997, there was rust everywhere behind the passenger headlight. I cut the headlight panel and part of the core support out so i could sand blast the rust and weld everything back in. I cut out the front fender wells due to a shady shop's work cutting holes for intercooler piping and welded in new patch panels.
drivers side - still have to finish welding and grinding. it'll be easier to finish after i pull the motor.
passenger side
I also got an Fbody aluminum driveshaft that i had shorted 2" and replaced the u-joints. I also had to use a 1310 to Nissan differential flange to mount to my rear end. fits perfect with plenty of exhaust clearance.
Louie,
thanks for the heads up on the pre filter. its a Trick Flow 100 micron pre filter (pn 23004). i'm going to keep it for now, if it hurts flow i'll ditch it. i've got a little ways to go before its running.
Satan,
i'm sticking keeping the stock subframe along with solid aluminum bushings. I'm also keeping the R200, but using the 3.54 out of the Q45...needed a little more gear and the bigger axles are an added bonus.
i'm starting to pull everything out now. just need to add the oil drain to the pan or front cover. the motor should be going to the machine shop sometime in Feb or March. While it's there i'll be filling some holes in the engine and getting the bay ready for paint. i hope to have a little more time to work on it now.
02-06-2012, 03:17 PM
#23
I was able to get a little more work done this weekend. nothing earth shattering, but still progress.
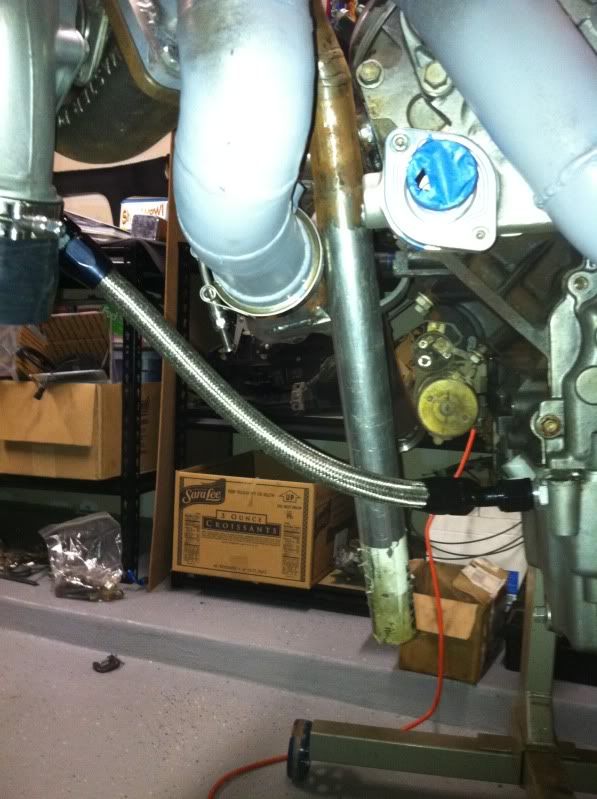
i pulled the motor and tranny from the car and assembled everything on the engine stand.
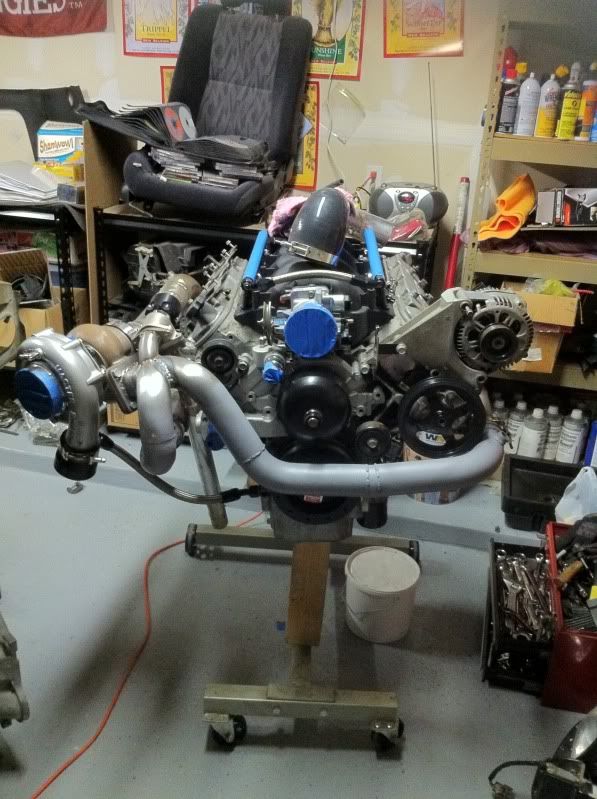
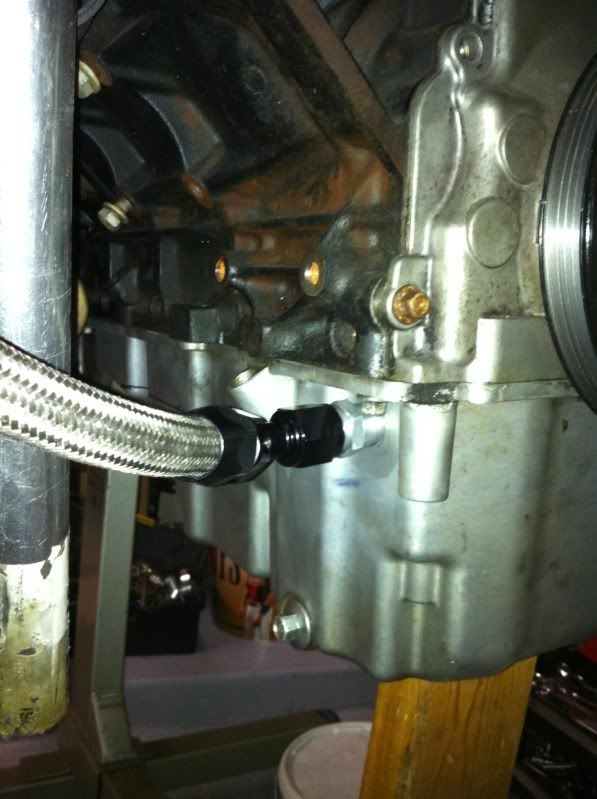
i needed to add a few things that were damn near impossible to do with the motor in the car. first off was tapping the oil pan for the oil drain line. this looked like a good spot. clears everything inside and out.
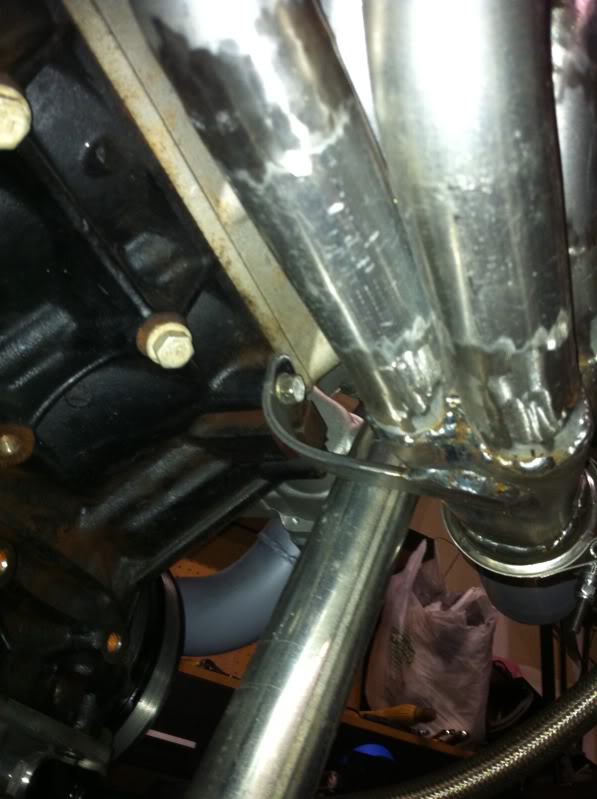
Next i wanted to add some support braces to the collectors....all that weight would eventually causing some cracking somewhere.
Drivers side
Pass side
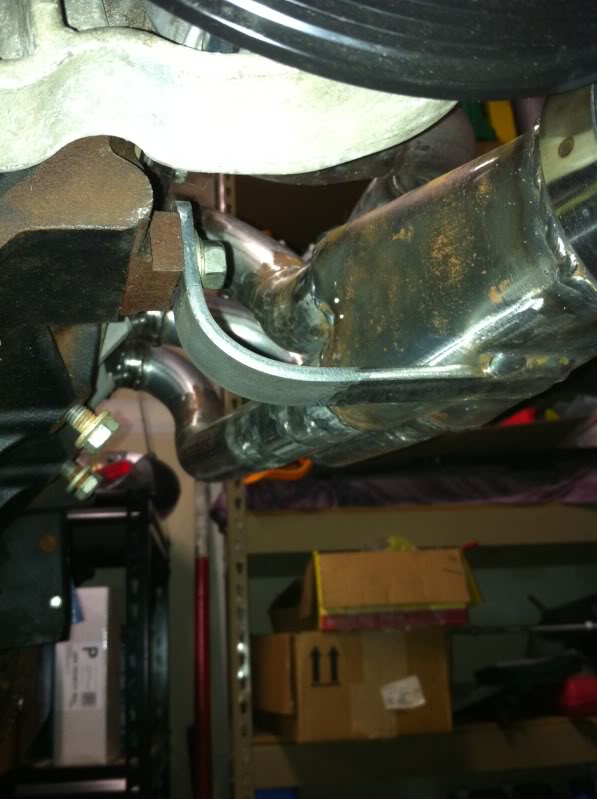
these 2 braces helped out a ton, it's pretty solid now. I'm thinking of possibly adding another one on the crossover pipe and attaching it to the pass side head.
i'm about ready to tear down the motor again and ship it off to the machine shop.
i pulled the motor and tranny from the car and assembled everything on the engine stand.
i needed to add a few things that were damn near impossible to do with the motor in the car. first off was tapping the oil pan for the oil drain line. this looked like a good spot. clears everything inside and out.
Next i wanted to add some support braces to the collectors....all that weight would eventually causing some cracking somewhere.
Drivers side
Pass side
these 2 braces helped out a ton, it's pretty solid now. I'm thinking of possibly adding another one on the crossover pipe and attaching it to the pass side head.
i'm about ready to tear down the motor again and ship it off to the machine shop.
02-07-2012, 05:58 PM
#24

Nice! Good to see more S13's.
Couple of questions - do you leave S13 front suspension/shocks? Asking because my S13 only get 2.0+s second 60ft and I'm thinking where to get some front shocks/springs more suitable for dragrace (terrible tarmac here so need all weight transfer that is possible).
Also, did you leave differential case and just got 3.54 core in there, or complete 3.54 differential from Infinity?
02-08-2012, 05:13 PM
#25
Nice! Good to see more S13's.
Couple of questions - do you leave S13 front suspension/shocks? Asking because my S13 only get 2.0+s second 60ft and I'm thinking where to get some front shocks/springs more suitable for dragrace (terrible tarmac here so need all weight transfer that is possible).
Also, did you leave differential case and just got 3.54 core in there, or complete 3.54 differential from Infinity?
Couple of questions - do you leave S13 front suspension/shocks? Asking because my S13 only get 2.0+s second 60ft and I'm thinking where to get some front shocks/springs more suitable for dragrace (terrible tarmac here so need all weight transfer that is possible).
Also, did you leave differential case and just got 3.54 core in there, or complete 3.54 differential from Infinity?
I've never run on stock suspension at the drag strip, i've always had some sort of after market strut/spring combo or coilovers.
for the diff, i swapped in the entire Q45 pumpkin, just switched the rear cover to match the s13 subframe mounting points. i could be wrong, but i dont think there is an issue swapping the internals from the Q45 diff into a 240 pumpkin, as long as it was a VLSD pumpkin to begin with.
05-14-2012, 05:54 PM
#27
Damn, 3 months since my last update. My wife is 33 weeks pregnant so time has been flying by getting ready for our little one that i haven't had too much time to devote to the car. But i finally have some progress to share.
In March i dropped my motor off at a machine shop to hone the block .030 over, polish the crank, balance rotating assembly, deck block and heads, and do a 3 angle valve job. I picked everything up a couple weeks later with the plan to start building right away, but that didn't happen as i wanted to be sure everything was good to go. I bought a micrometer set and a dial bore gauge to blueprint the motor and get the correct bearings needed. It took me a while to find a place that had the needed 0.001" undersized bearings (both rods and mains) in stock. Finally got those in last week and the fun began.
Wiseco 4.030 pistons and Compstar H beam rods
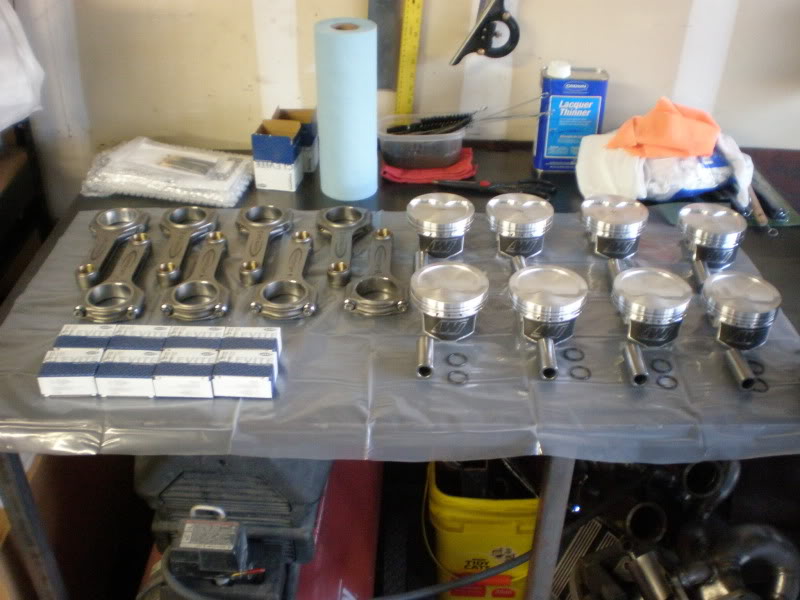
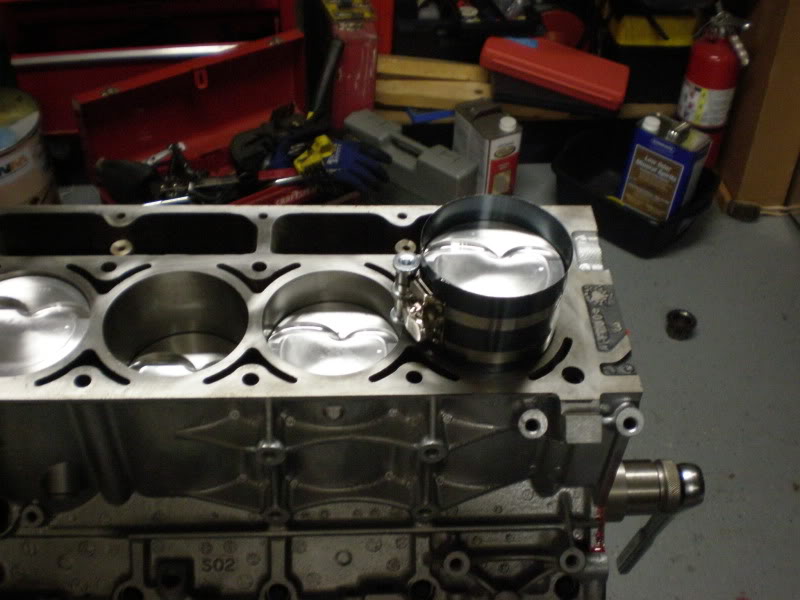
Installing the last rod/piston combo
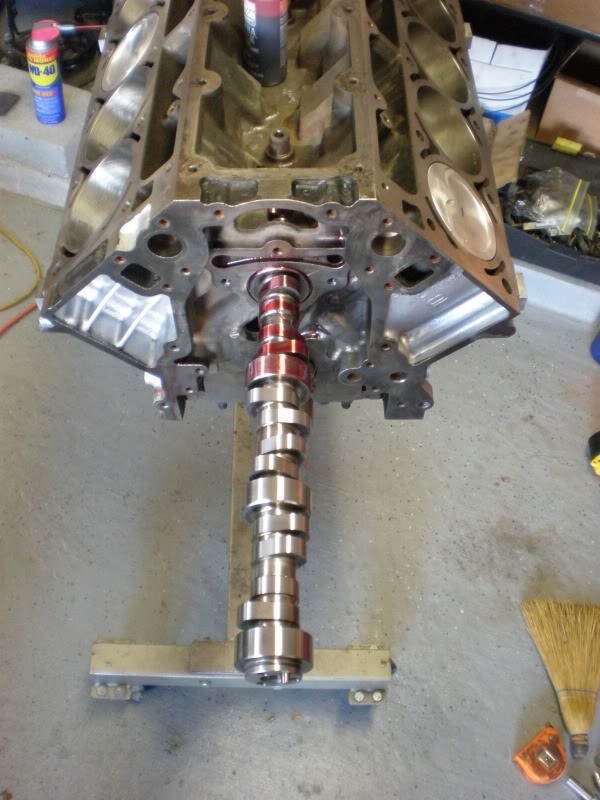
Installing BruteSpeed's Blower Cam. Thanks Bob!
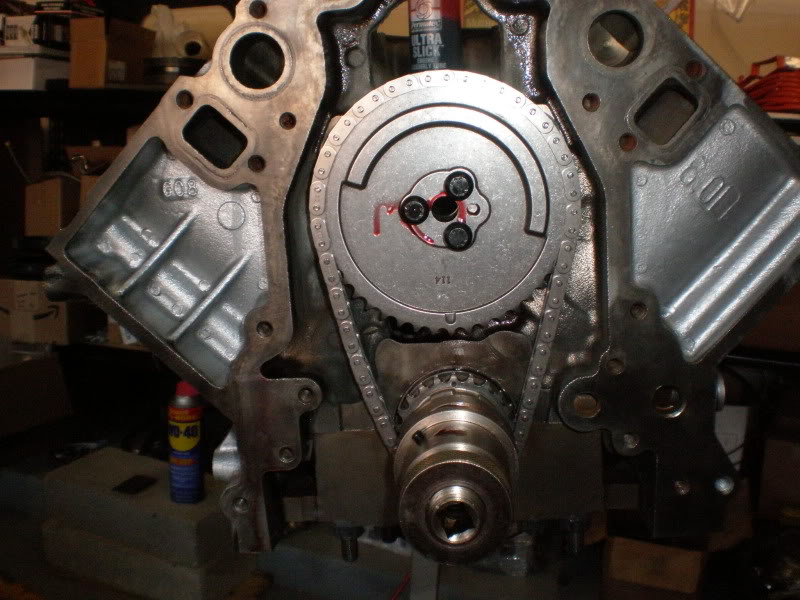
New LS2 Timing set
That's as far as i was able to get this weekend. This week i'm planning to degree the cam, install the oil pump, pick, and pan, install heads and measure pushrod length.
I hope to have more updates this weekend.
In March i dropped my motor off at a machine shop to hone the block .030 over, polish the crank, balance rotating assembly, deck block and heads, and do a 3 angle valve job. I picked everything up a couple weeks later with the plan to start building right away, but that didn't happen as i wanted to be sure everything was good to go. I bought a micrometer set and a dial bore gauge to blueprint the motor and get the correct bearings needed. It took me a while to find a place that had the needed 0.001" undersized bearings (both rods and mains) in stock. Finally got those in last week and the fun began.
Wiseco 4.030 pistons and Compstar H beam rods
Installing the last rod/piston combo
Installing BruteSpeed's Blower Cam. Thanks Bob!
New LS2 Timing set
That's as far as i was able to get this weekend. This week i'm planning to degree the cam, install the oil pump, pick, and pan, install heads and measure pushrod length.
I hope to have more updates this weekend.
 05-14-2012, 08:35 PM
#31
On The Tree

Join Date: Mar 2010
Location: SpringCity Tn
Posts: 153
Likes: 0
Received 0 Likes
on
0 Posts
Awesome build. nice to see some more s13 ls turbo cars out there. I also have one. stock suspension stock r200 rear end with 3.54 gear swap only. so far my best pass is 6.23@119mph 1.45 60ft on 93 pump gas. 3200lbs. u will enjoy the power that motor is going to make and the reliability it will have. I ran mine all last yr and never even pulled a spark plug lol. good luck on finished product. looks really good.
05-15-2012, 10:31 AM
#32

I am very interested in this 3.54 gear swap you guys are talking about. I really want to stay 4 lug as I have many sets of wheels for the car now. Do you have to redrill the flange on the diff for the larger ring gear? And custom shims for the pinion gear? Link or info please.
05-15-2012, 10:47 AM
#33
On The Tree
Join Date: Mar 2010
Location: SpringCity Tn
Posts: 153
Likes: 0
Received 0 Likes
on
0 Posts
I am very interested in this 3.54 gear swap you guys are talking about. I really want to stay 4 lug as I have many sets of wheels for the car now. Do you have to redrill the flange on the diff for the larger ring gear? And custom shims for the pinion gear? Link or info please.
05-16-2012, 03:26 AM
#34
Awesome build. nice to see some more s13 ls turbo cars out there. I also have one. stock suspension stock r200 rear end with 3.54 gear swap only. so far my best pass is 6.23@119mph 1.45 60ft on 93 pump gas. 3200lbs. u will enjoy the power that motor is going to make and the reliability it will have. I ran mine all last yr and never even pulled a spark plug lol. good luck on finished product. looks really good.

P.S. Do you have to run cages in US when running those kind of times?
05-16-2012, 05:26 AM
#35
On The Tree
Join Date: Mar 2010
Location: SpringCity Tn
Posts: 153
Likes: 0
Received 0 Likes
on
0 Posts
Ya you got to have a cage. My local track requires minimum 6point. I have the min cause I still drive mine on the street a lot. its not a drag only car. I like hitting the street car shootouts
01-07-2013, 04:12 PM
#36
Wow! Over 6 months since my last update, sorry guys. Had a baby girl in June and she has kept us very busy ever since, I’m lucky if I can get an hour or so a week to work on the car.
Since my last update I’ve finished assembling the motor, I’ve installed an ACT 6 puck clutch kit, new slave cylinder/lines and mated the T56. Before putting the motor and trans back in the car for the final time, I wanted to take time and clean up the engine. This started as a simple cleaning project that turned into stitch welding, shaving and re-painting the bay. All the time spent welding and grinding and adding body filler was brutal, way more than I had expected. Hopefully it will pay off in the long run. I don’t have any pics of the shaving process, but here are some pics of the first few coats of primer (iphone pics, sorry)
2 coats of Epoxy primer
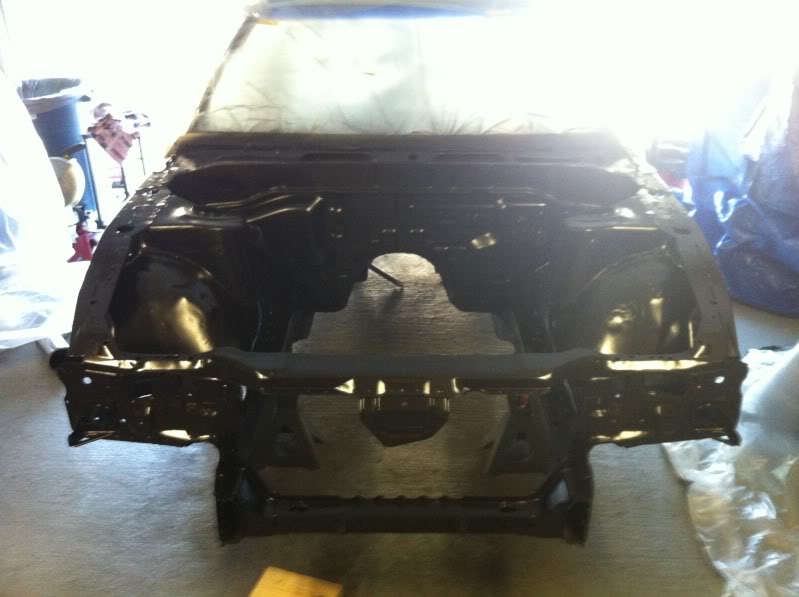
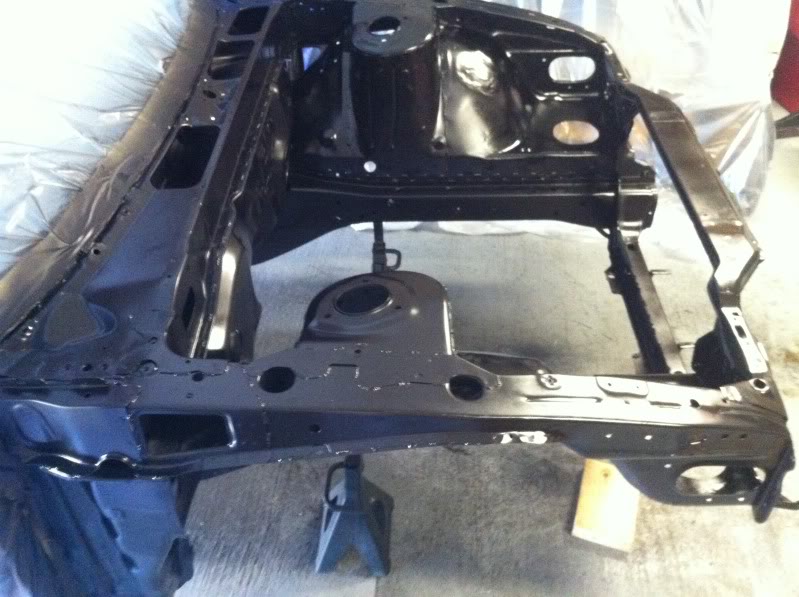
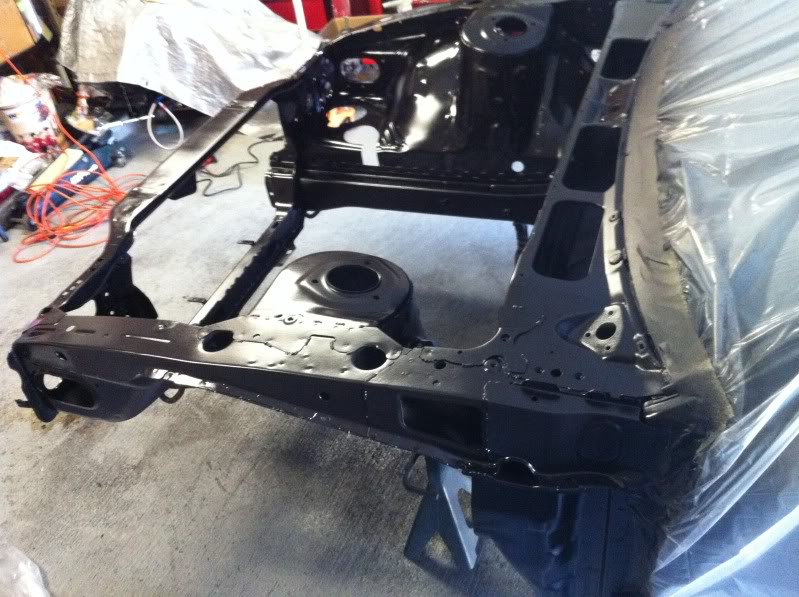
Here it is after 2 coats of high build primer/surfacer
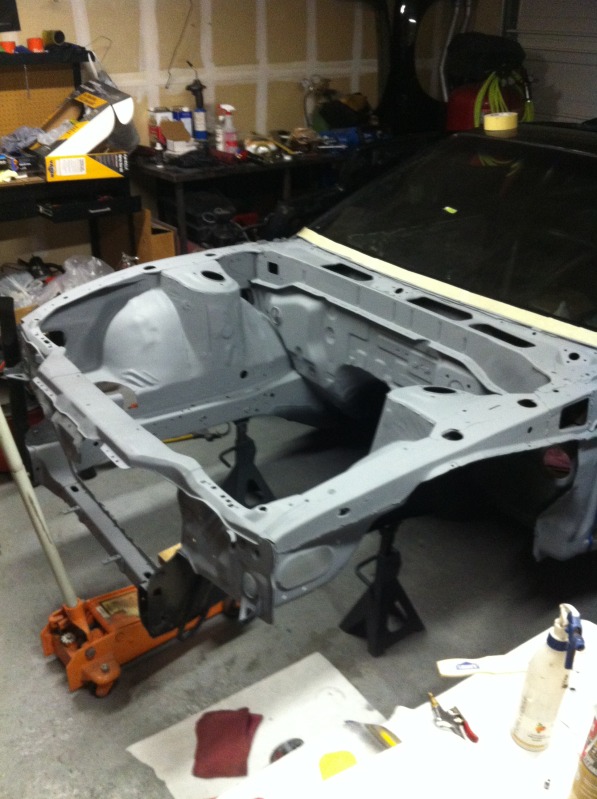
This weekend I’m hoping to get another coat or 2 of primer/surface laid down and block sand to get ready for the base coat.
I’ve been brainstorming on how to make my car different visually to help separate it from other 240sx’s and make it different. I’m not a fan of body kits or big wings. I’ve been intrigued with the hood scoops from the Toyota Tacoma, 4runner, and Rav4 and thought that might a way to spruce up the looks. I came across a hood from an early 90’s Toyota Celica GT All Trac locally on Craigslist for $75 so I jumped on it. This scoop is functional and could help with under hood temps, whereas the Tacoma/4runner/Rav4 are non-functional. I’m planning to cut the scoop out and weld it in to my stock hood. The lines and shape are very similar so hopefully after body filler it will all look good.

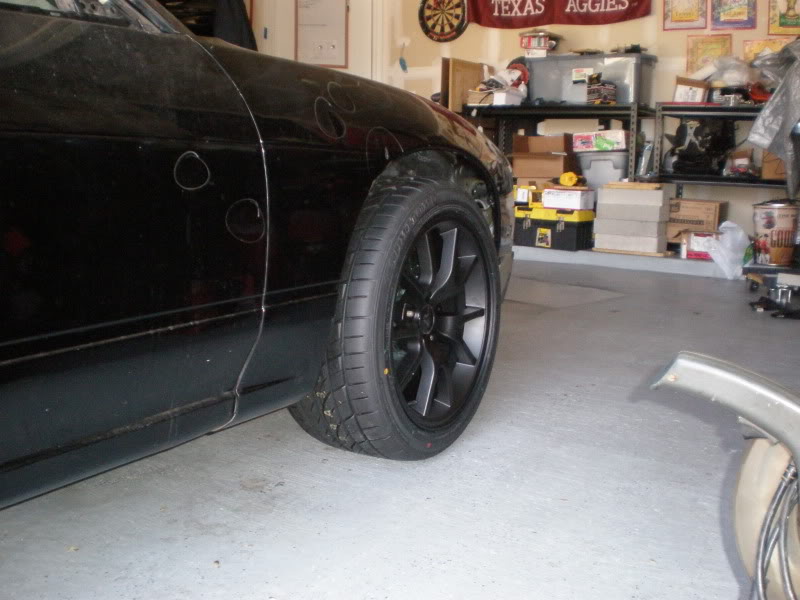
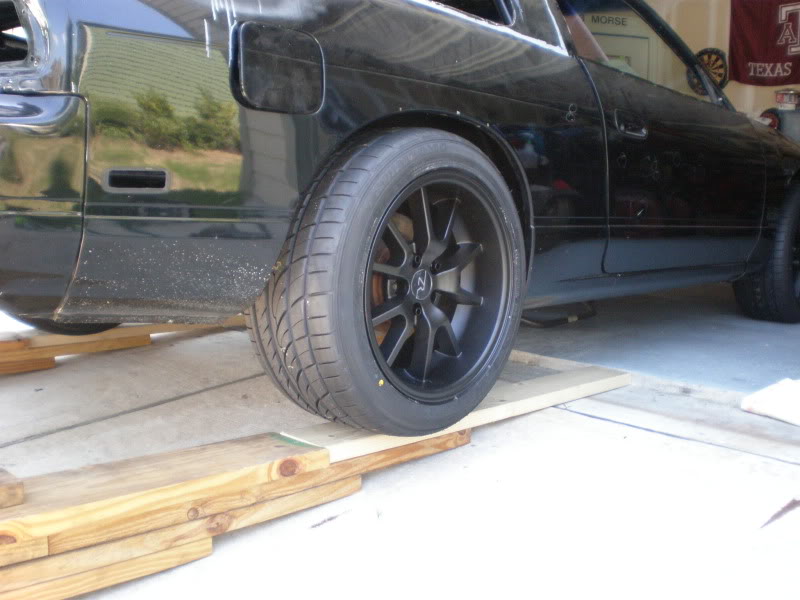
the only other thing I’ve been able to do has been to get a new set of wheels/tires. Nothing special, but they are Mustang replica FR500 in a matte black finish (17x9 and 17x10.5) with Sumitomo HTRZ3’s 245/40 and 275/40.

Hopefully I’ll have more updates in the next few weeks.
Since my last update I’ve finished assembling the motor, I’ve installed an ACT 6 puck clutch kit, new slave cylinder/lines and mated the T56. Before putting the motor and trans back in the car for the final time, I wanted to take time and clean up the engine. This started as a simple cleaning project that turned into stitch welding, shaving and re-painting the bay. All the time spent welding and grinding and adding body filler was brutal, way more than I had expected. Hopefully it will pay off in the long run. I don’t have any pics of the shaving process, but here are some pics of the first few coats of primer (iphone pics, sorry)
2 coats of Epoxy primer
Here it is after 2 coats of high build primer/surfacer
This weekend I’m hoping to get another coat or 2 of primer/surface laid down and block sand to get ready for the base coat.
I’ve been brainstorming on how to make my car different visually to help separate it from other 240sx’s and make it different. I’m not a fan of body kits or big wings. I’ve been intrigued with the hood scoops from the Toyota Tacoma, 4runner, and Rav4 and thought that might a way to spruce up the looks. I came across a hood from an early 90’s Toyota Celica GT All Trac locally on Craigslist for $75 so I jumped on it. This scoop is functional and could help with under hood temps, whereas the Tacoma/4runner/Rav4 are non-functional. I’m planning to cut the scoop out and weld it in to my stock hood. The lines and shape are very similar so hopefully after body filler it will all look good.
the only other thing I’ve been able to do has been to get a new set of wheels/tires. Nothing special, but they are Mustang replica FR500 in a matte black finish (17x9 and 17x10.5) with Sumitomo HTRZ3’s 245/40 and 275/40.
Hopefully I’ll have more updates in the next few weeks.
01-26-2013, 11:57 PM
#37
I got some work done over the last week or so, not as much as i would have liked but fate had something else in store for me this weekend.
last week i was able to wet sand the primer/surfacer smooth and get it ready for base/clear.
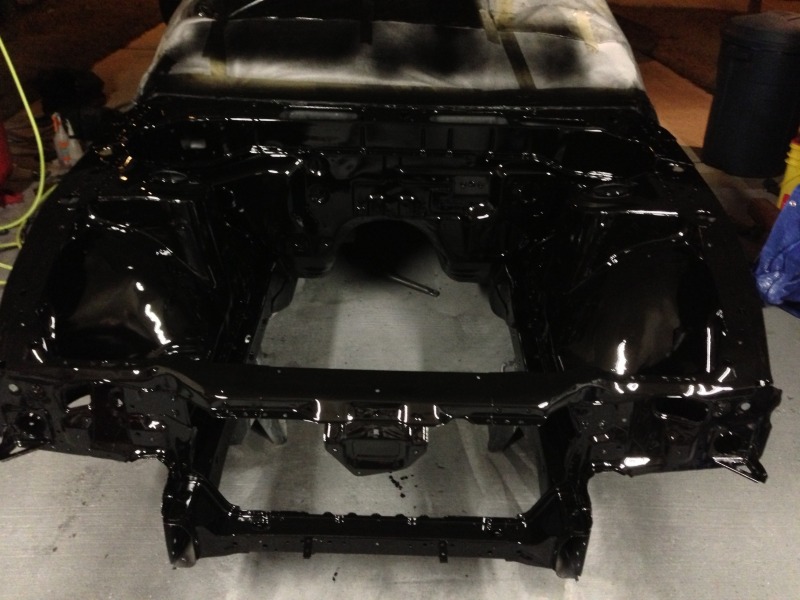
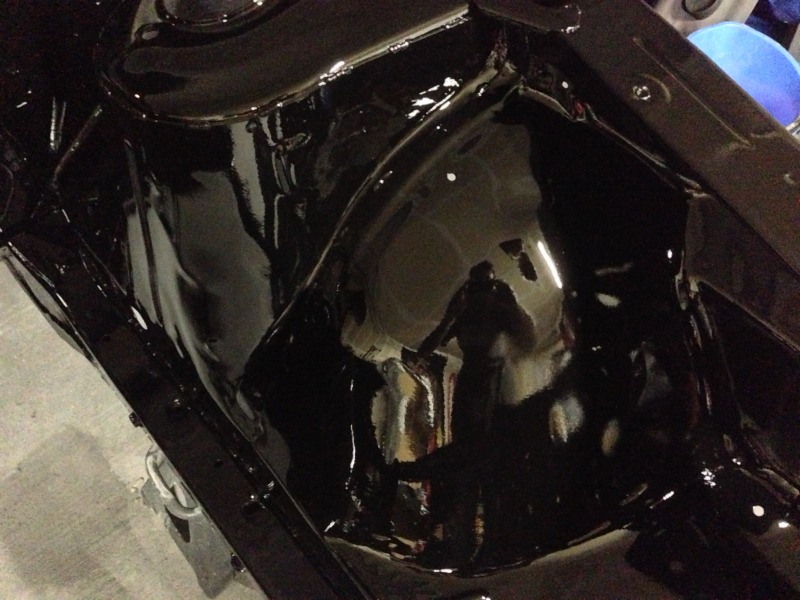
today i wanted to get 3 coats of base and 3 coats of clear, but i was able to get 2 full coats of base before my compressor decided to crap out on me.
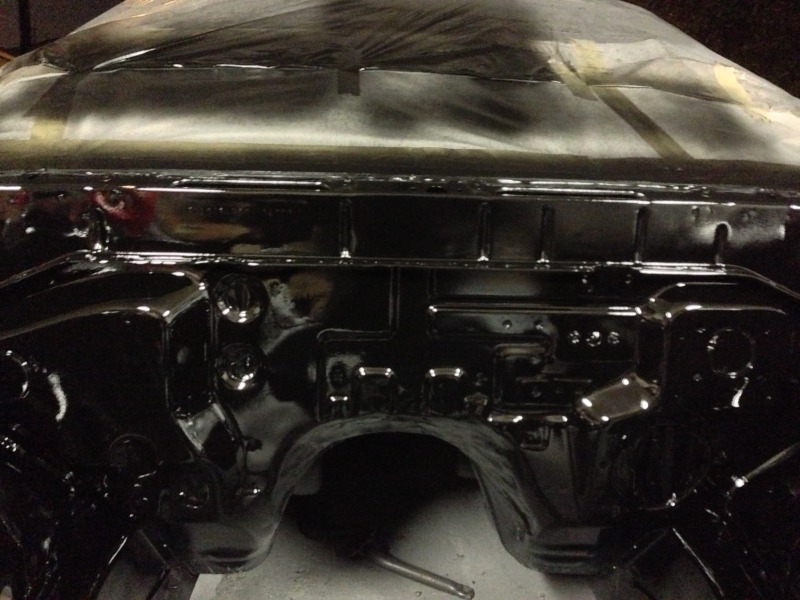
Here are a couple pics of Summit Racing's single stage Jet Black base. Honestly, i think it turned out ok for my first time painting using a Devilbiss Starting line gun.
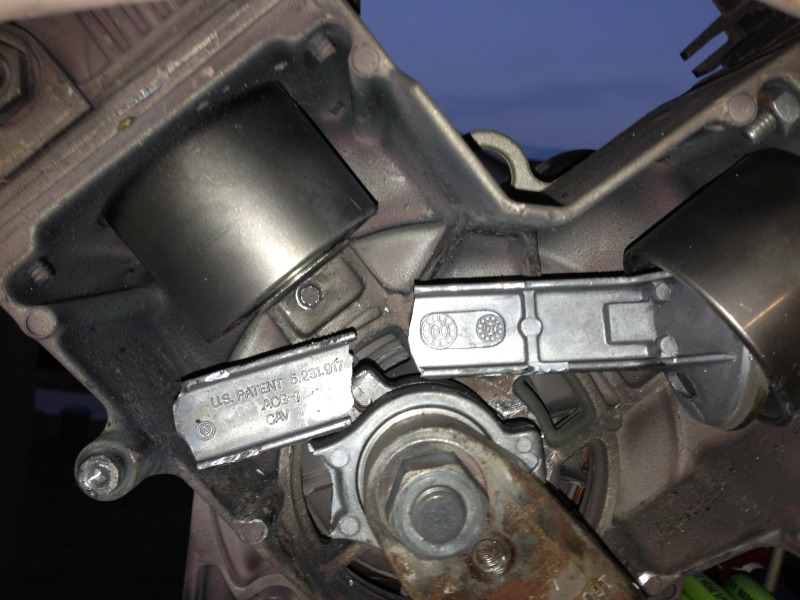
Now on to what really ruined my day/night. I was just starting my 3rd coat of base when clanking from my compressor. I quickly shut it down and took off the plastic casing around the compressor motor.
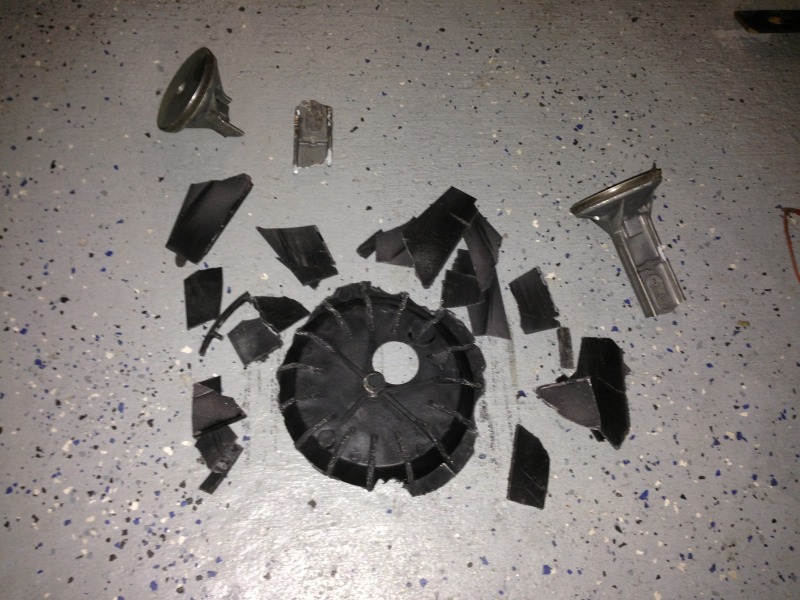
Some how I was able to snap both connecting rods and shatter the cooling fan in my Craftsman 60 gal 6.5hp compressor. Not sure how, but now i get to track down a rebuild kit to hopefully try again next week.
I'm calling this damn car Jack Stand Rocket, cause it's apparently never going to get off these jack stands.
last week i was able to wet sand the primer/surfacer smooth and get it ready for base/clear.
today i wanted to get 3 coats of base and 3 coats of clear, but i was able to get 2 full coats of base before my compressor decided to crap out on me.
Here are a couple pics of Summit Racing's single stage Jet Black base. Honestly, i think it turned out ok for my first time painting using a Devilbiss Starting line gun.
Now on to what really ruined my day/night. I was just starting my 3rd coat of base when clanking from my compressor. I quickly shut it down and took off the plastic casing around the compressor motor.
Some how I was able to snap both connecting rods and shatter the cooling fan in my Craftsman 60 gal 6.5hp compressor. Not sure how, but now i get to track down a rebuild kit to hopefully try again next week.
I'm calling this damn car Jack Stand Rocket, cause it's apparently never going to get off these jack stands.
01-27-2013, 09:29 AM
#38
On The Tree
iTrader: (5)

Join Date: Sep 2009
Location: California
Posts: 120
Likes: 0
Received 0 Likes
on
0 Posts

Keep up the good work, it always pays off to do it right the first time! What are your goals as for rwhp? I am build 91 240sx LQ9 GT47 lol, its crazy how many people are doing this now.