'83 Monte Twin Turbo LQ4 Build
 04-24-2013, 12:25 AM
#41
Launching!
iTrader: (4)

Join Date: May 2010
Location: asheboro, nc
Posts: 289
Likes: 0
Received 0 Likes
on
0 Posts
Sweet mcss man like your turbo setup glad to see someone remove the inner headlights an put funnels in to feed air to some turbos lol ive had the same id for my 79 mailbu i swapped to the four eye clip off a 83 bu just so i can do that lol

 04-25-2013, 09:25 PM
#43
Staging Lane
Thread Starter
Join Date: Nov 2007
Location: Connecticut
Posts: 86
Likes: 0
Received 0 Likes
on
0 Posts

Thanks guys!
slowbu- Getting the funnels to fit took some headlight bucket trimming, no big deal though.
denmah- thanks! when we get to the point, we'll be contacting you for your advice/input. We've been following your builds and we like what we see too
slowbu- Getting the funnels to fit took some headlight bucket trimming, no big deal though.
denmah- thanks! when we get to the point, we'll be contacting you for your advice/input. We've been following your builds and we like what we see too
04-28-2013, 11:18 PM
#44
Launching!
iTrader: (4)
Join Date: May 2010
Location: asheboro, nc
Posts: 289
Likes: 0
Received 0 Likes
on
0 Posts
is your bothers bu still running a 402?(I think) he put in it back when he first built it, I'm on Maliburacing board too, I remember his thread on his build, I really love that color blue
04-28-2013, 11:24 PM
#45
Launching!
iTrader: (4)
Join Date: May 2010
Location: asheboro, nc
Posts: 289
Likes: 0
Received 0 Likes
on
0 Posts
O btw loving the center exit exhaust id, something different from all the other gbodys with the same ol' exhaust either behind the tires or out the back on each side lol
04-29-2013, 02:40 AM
#46
Damn, this thing is SEXY... Love the pic of the high rise, as well. Was wondering how far up it was. What mounts did you use? Also, could you post a picture of the clearance between the firewall and the engine? (Thinking about a possible Whipple  )
)
)
04-29-2013, 04:37 PM
#47
Staging Lane
Thread Starter
Join Date: Nov 2007
Location: Connecticut
Posts: 86
Likes: 0
Received 0 Likes
on
0 Posts
slowbu- Thanks! And he has a pretty potent 496 in it now, wanted to expand from the 402.
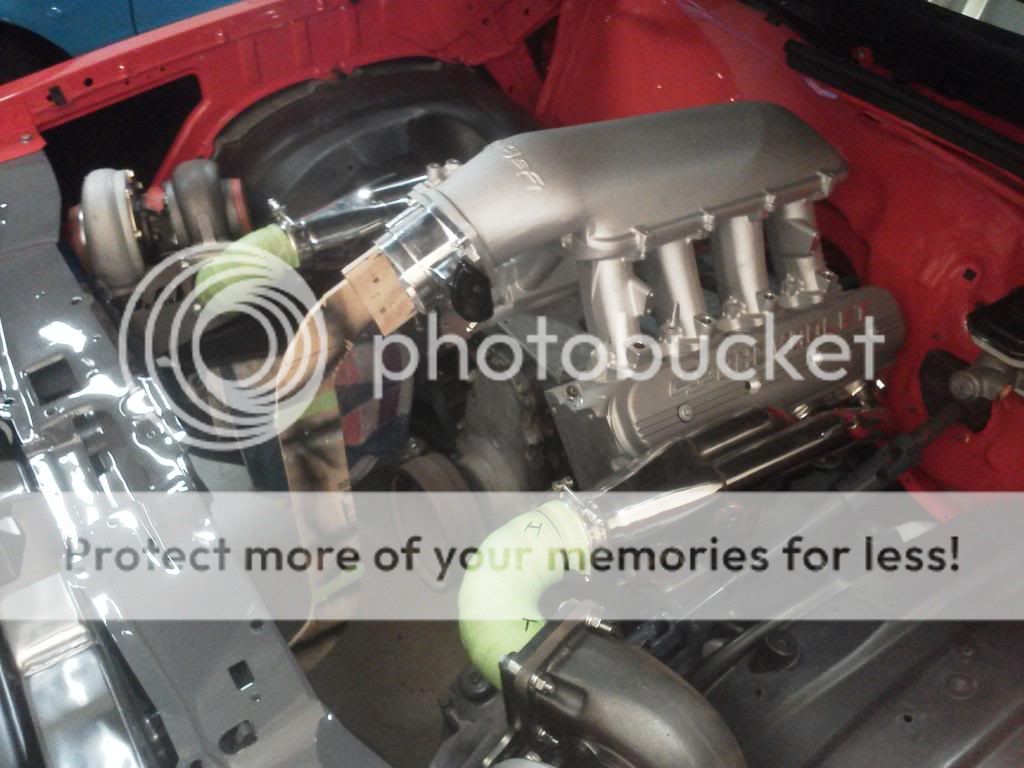
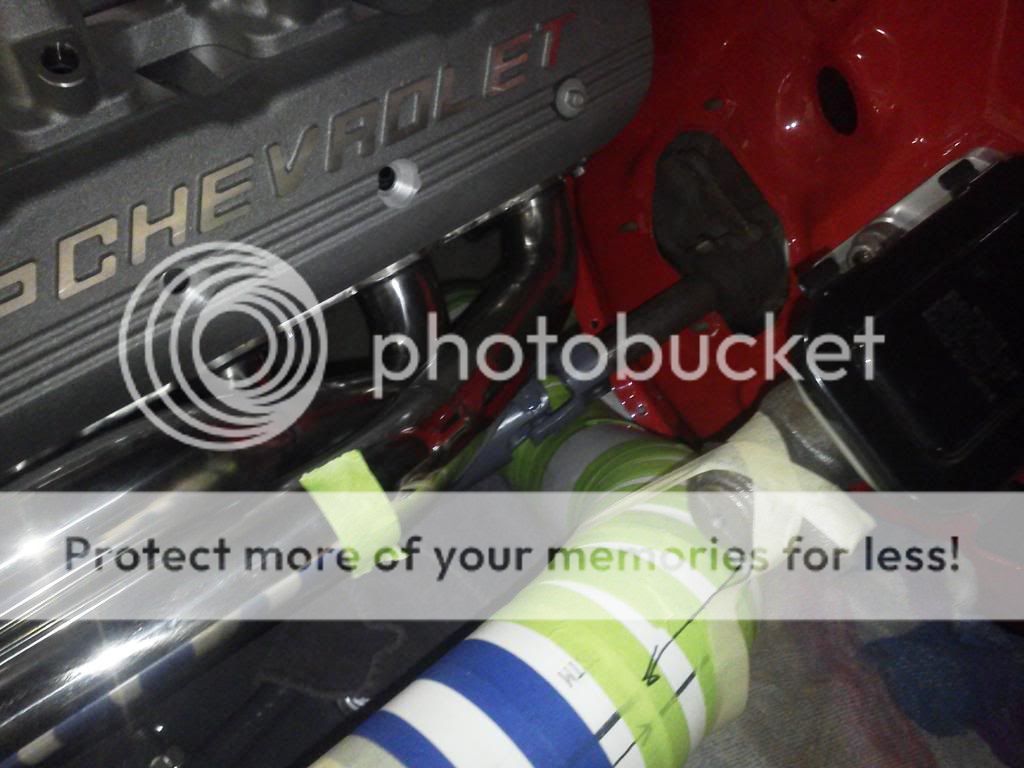
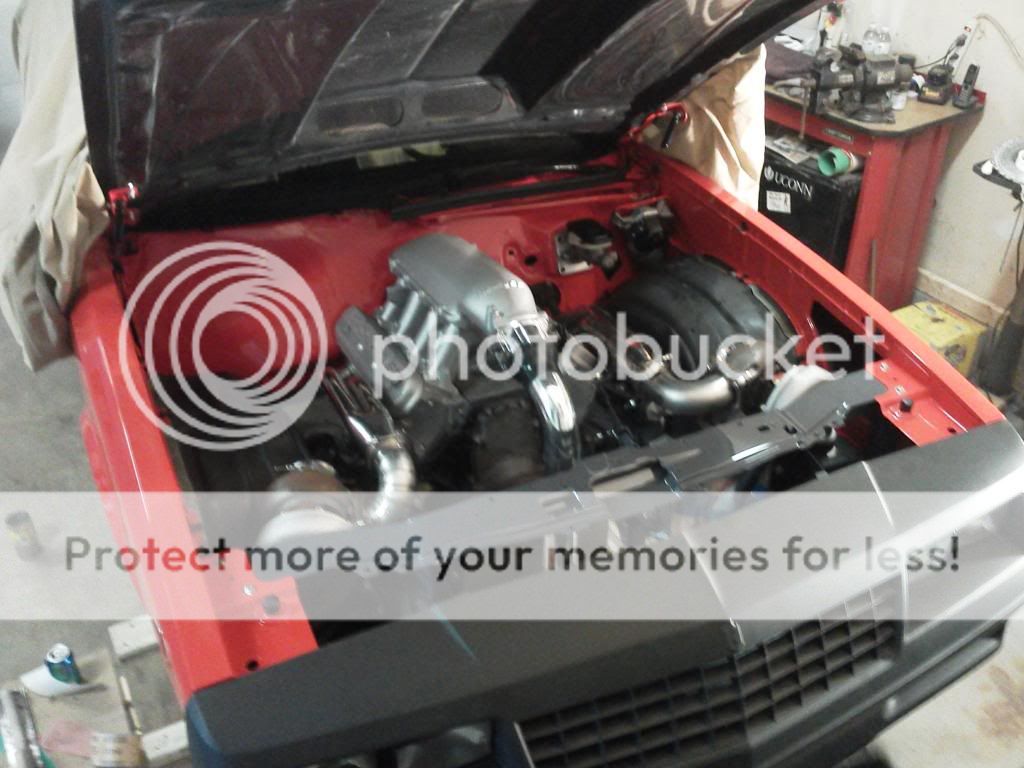
roninsonic- thank you as well! The intake is tall, but it might fit under a 2" cowl, I'm using a 4" cowl. Mounts as in engine? Used Edelbrock 6701 adapter plates and solid motor mounts for any bb/sbc. I will get some pictures of the clearance, it's probably not too far off from any other bb/sbc as the bellhousing is in the same spot when using the adapter plates I mentioned.
roninsonic- thank you as well! The intake is tall, but it might fit under a 2" cowl, I'm using a 4" cowl. Mounts as in engine? Used Edelbrock 6701 adapter plates and solid motor mounts for any bb/sbc. I will get some pictures of the clearance, it's probably not too far off from any other bb/sbc as the bellhousing is in the same spot when using the adapter plates I mentioned.
04-29-2013, 11:36 PM
#48
Launching!
iTrader: (4)
Join Date: May 2010
Location: asheboro, nc
Posts: 289
Likes: 0
Received 0 Likes
on
0 Posts
Can't wait to see how them Ebay gt45s spool on there, they maybe a little slow on the spool rate but should kick like a shotgun lol, ..... U know u would think by now as popular as them Ebay gt45s are that someone would try an make a smaller a/r hotside housing or machine one off like a Garrett etc. to work on them.. Hint hint to all u Ebay vendors lol
08-25-2013, 08:57 PM
#49
Staging Lane
Thread Starter
Join Date: Nov 2007
Location: Connecticut
Posts: 86
Likes: 0
Received 0 Likes
on
0 Posts
Alright alright!! I guess its long overdue for an update.
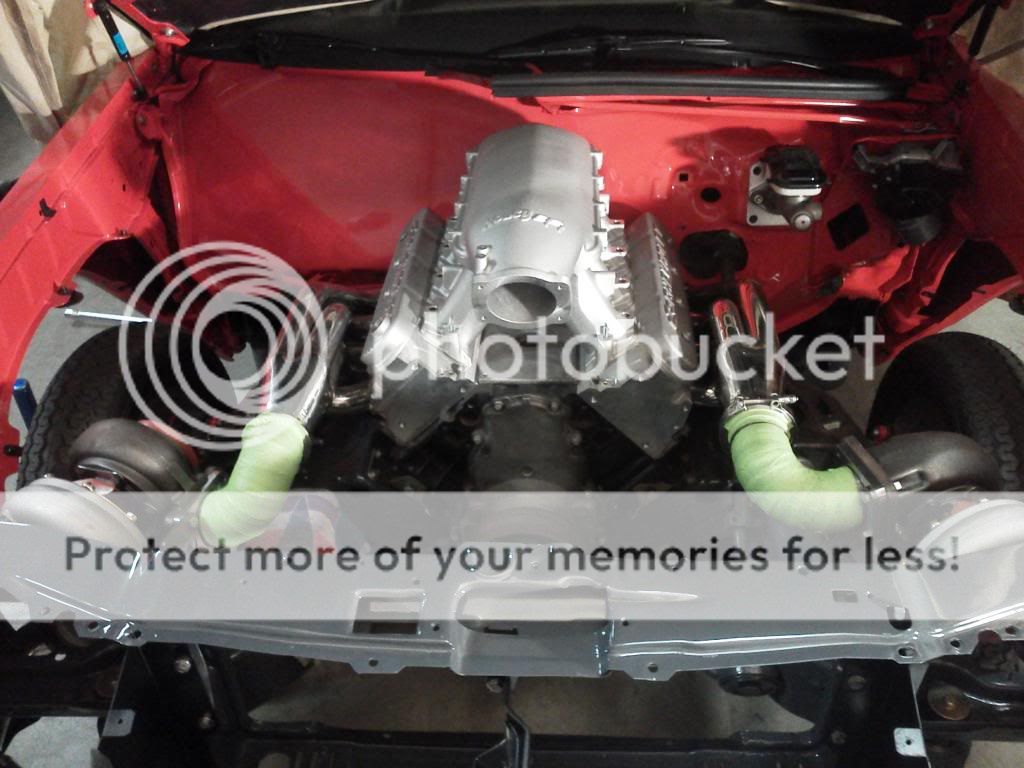
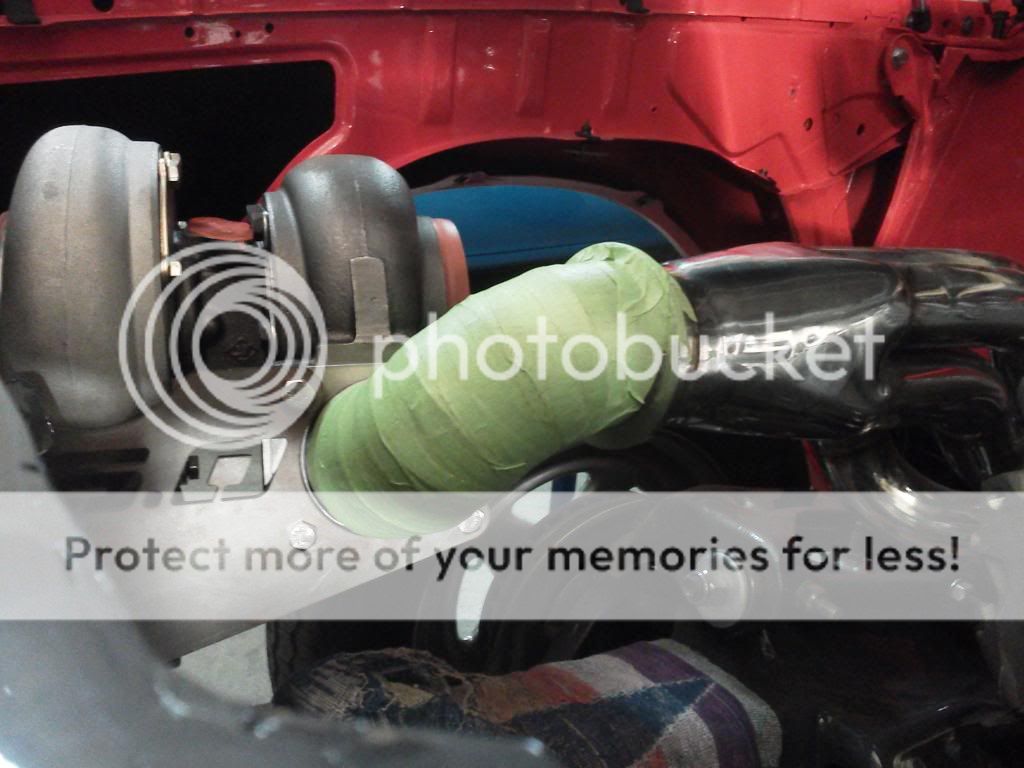
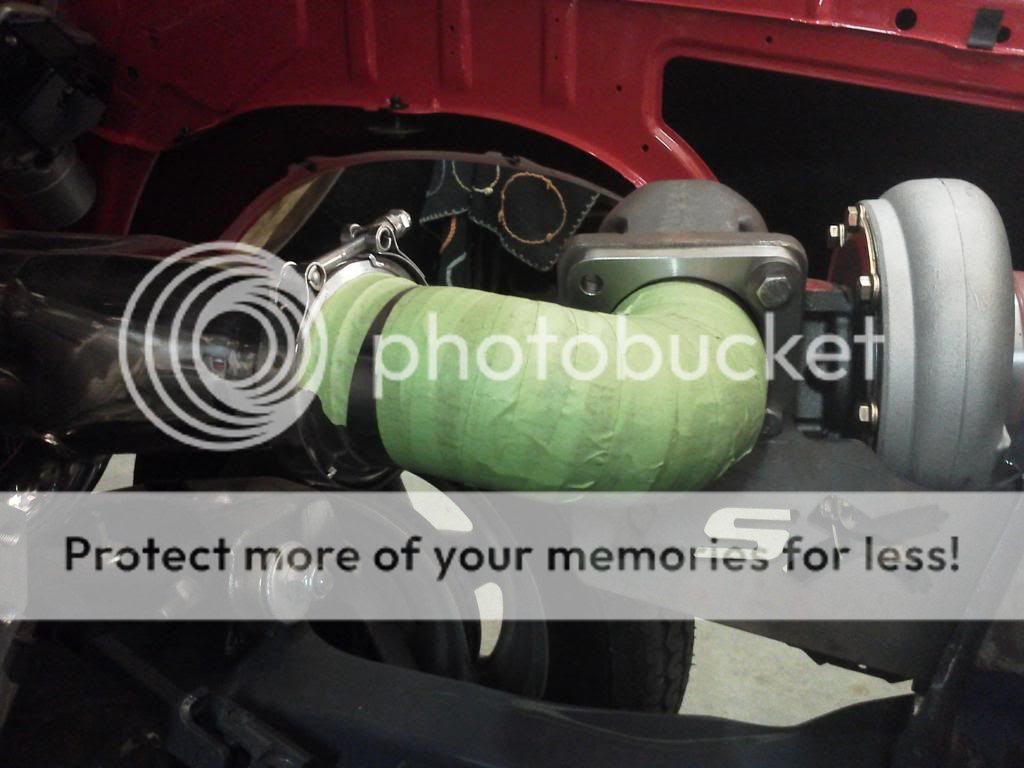
It has been a long process, but the turbo tubing as about complete. From earlier posts for the turbo to intercooler pipes, we mocked it up with PVC tubing before we cut into just-purchased tubing. Well we did that for everything else too (and before that used 1/4'" plywood for one). The hot-side was more of a challenge for mockup and completion. The header to turbo tubes had to be a tight radius..something impossible to bend, so we had to pie cut those, driver's side not as bad as passenger side. Then the downpipes had to be snaked all the way down around in between everything. Can't say we've ever really seen a turbo G-body run inner fenderwells, maybe a few here and there, but never seen a twin turbo with fenderwells. We wanted to be different and use them. We found a place online that sells long radius tubes. We figured out the curve or the wheel well to be 24" radius. But before buying that, we pie-cut a PVC pipe to form that radius, along with all the other 4.5" and 6" radius tubes we anticipated we would need. Built those pieces of artwork and actually got them to fit, not touch anything, and be fairly symmetrical. From there, bought all the tubing (mild steel for the downpipes. we would rather had polished stainless, but for how close the HOT pipes will get to the painted frame, wheel wells, brakes...everything! we decided to ceramic coat and heat wrap the downpipes. Also going to wrap the header to turbo tight bends to hide the pie-cuts. And to match, throw a blanket on the turbos). Built tall the tubes, I tack welded everything, then had a friend of ours finish TIG them. I can weld pretty nice, but for stuff that really matters and will be seen, I wanted a person that welds for a living to do this part for me. Once everything was finally finished, bought wastegates and blow off valves. Mounted the blow off valves so far, still need to figure out wastegates...(can the wastegate outlet be aluminum tubing?? we have an idea of how to run them if that's possible). Pretty sure I covered all the bases, so here are some pictures to go with the story..
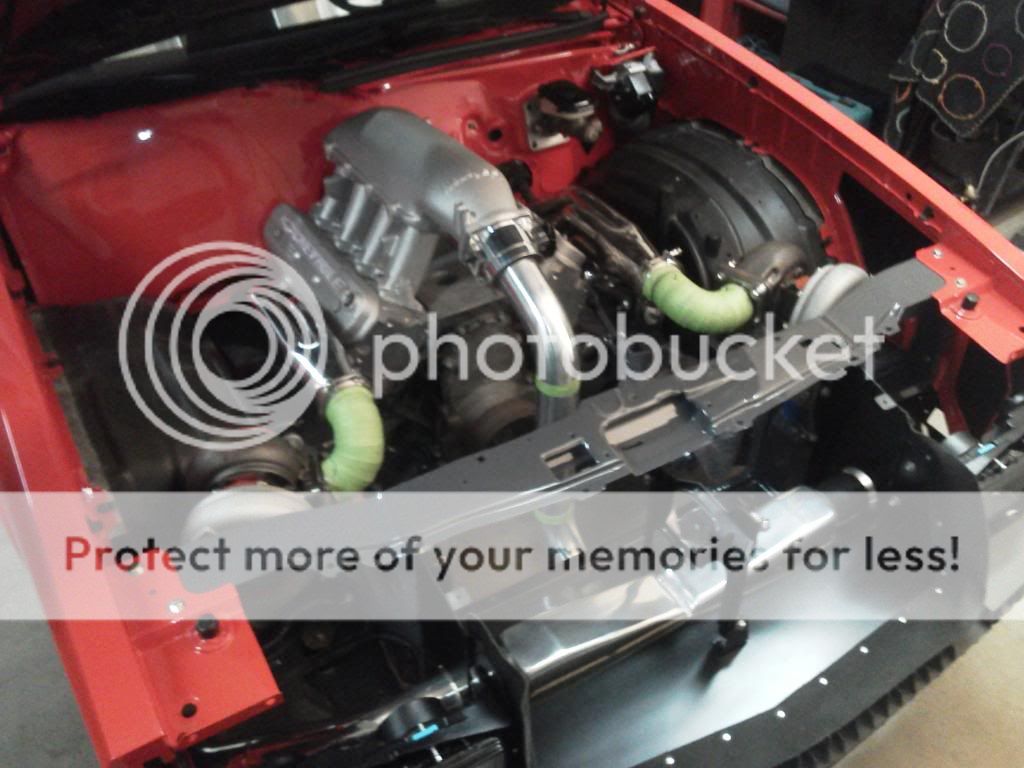
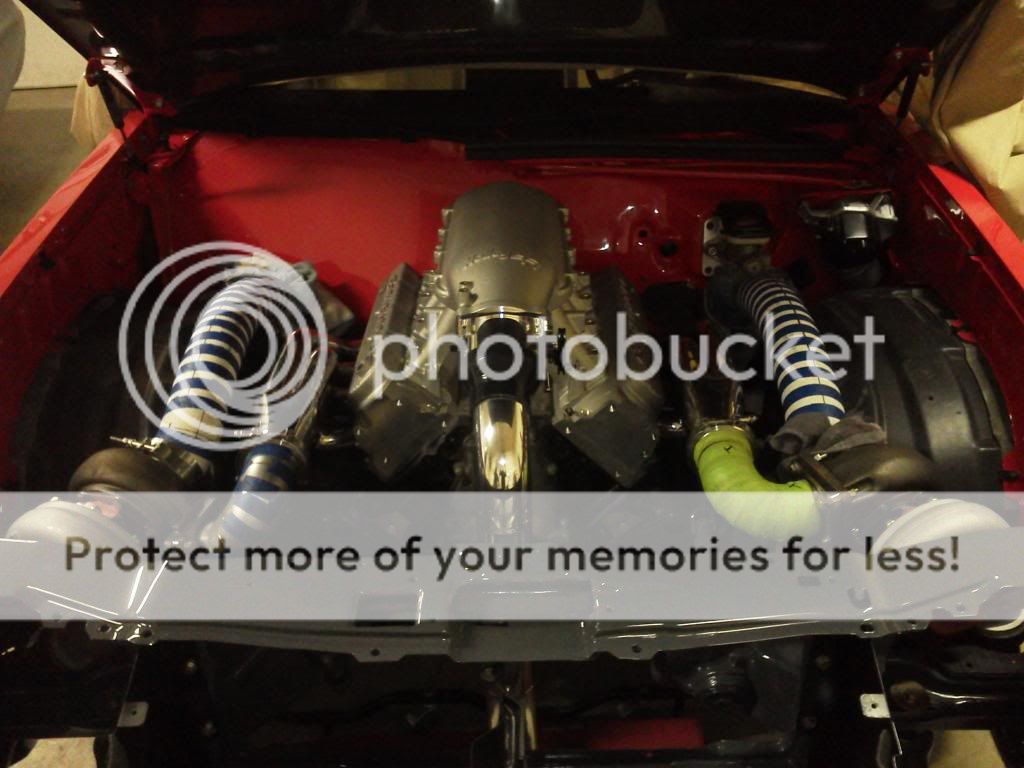

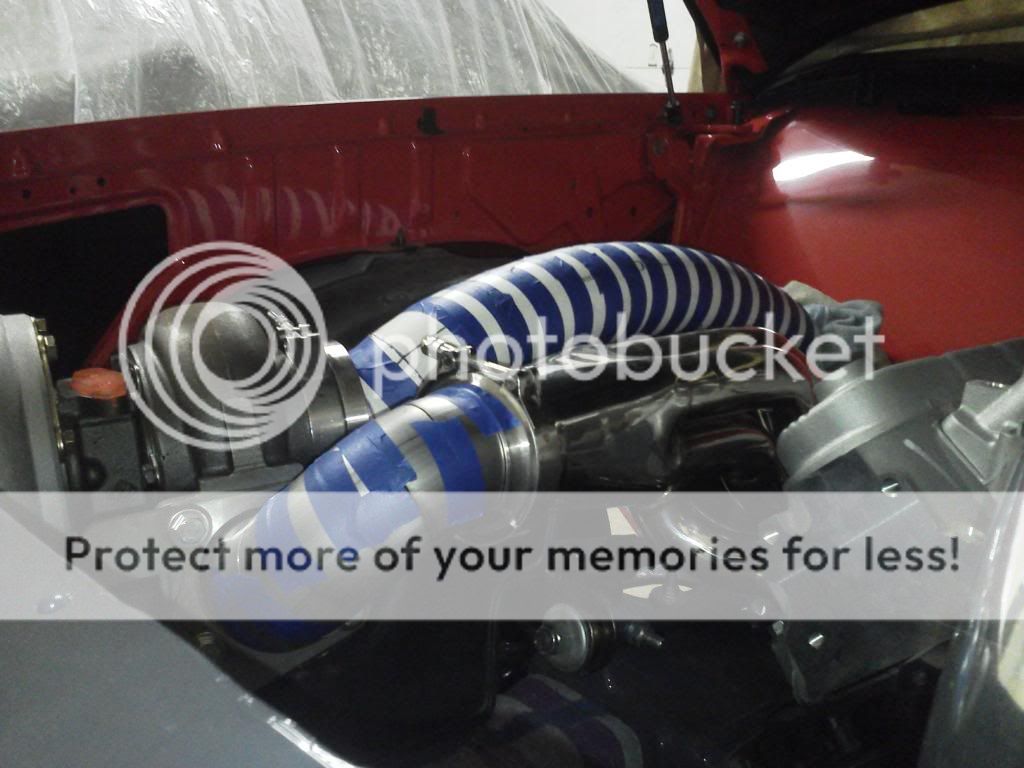
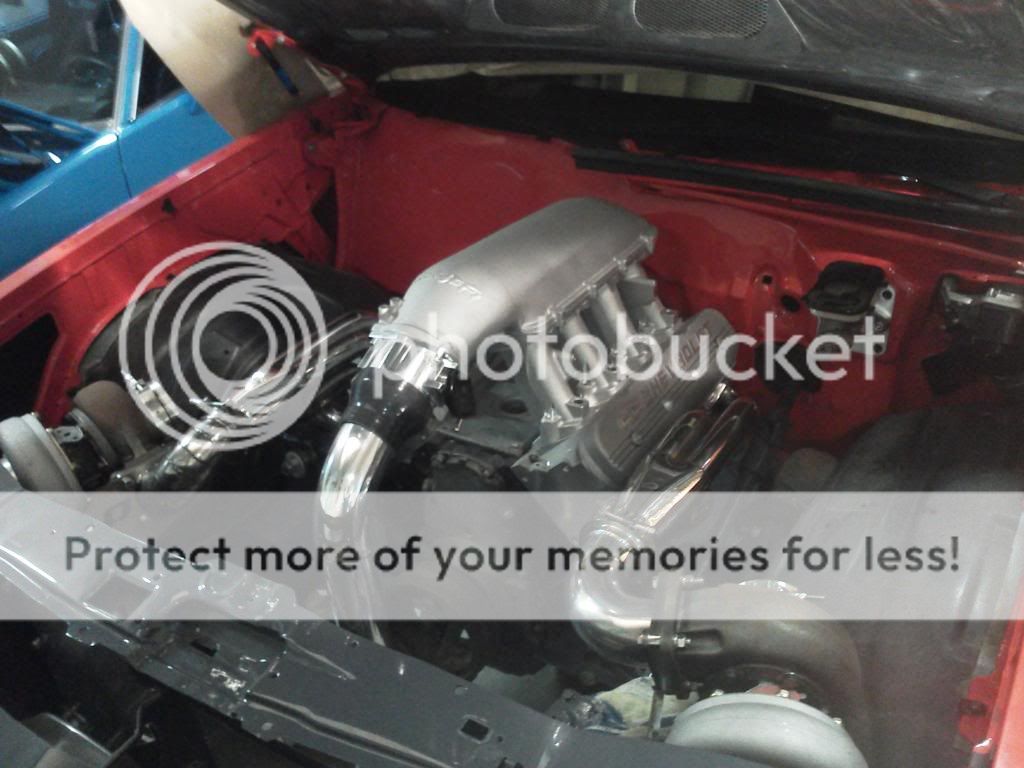

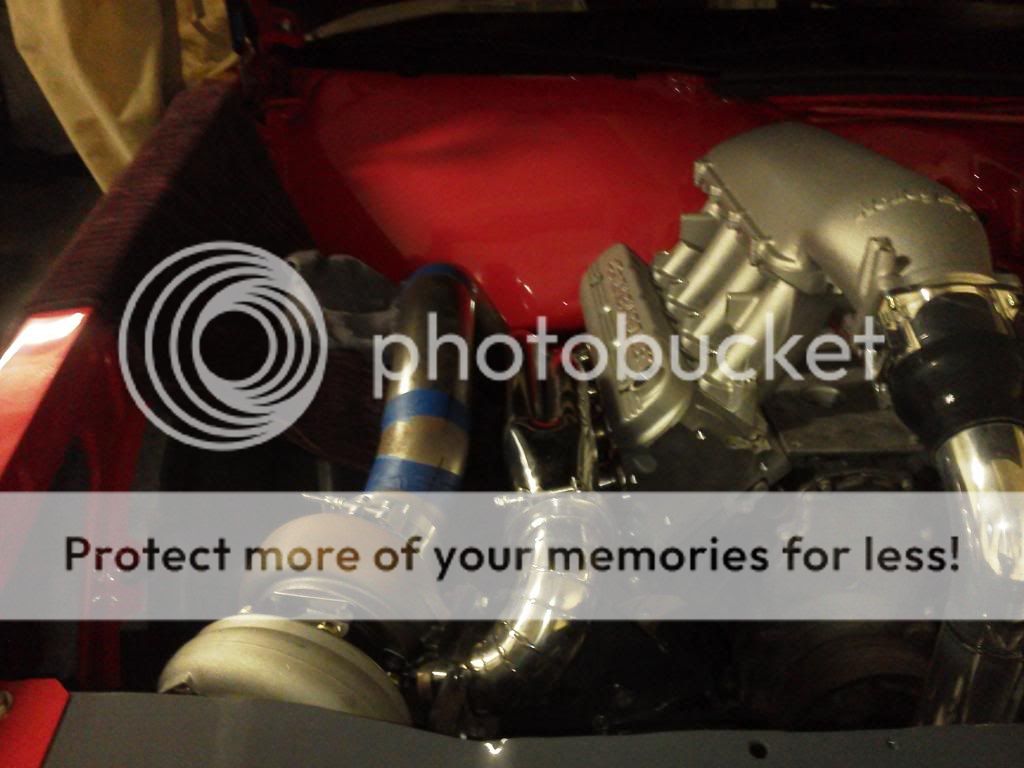
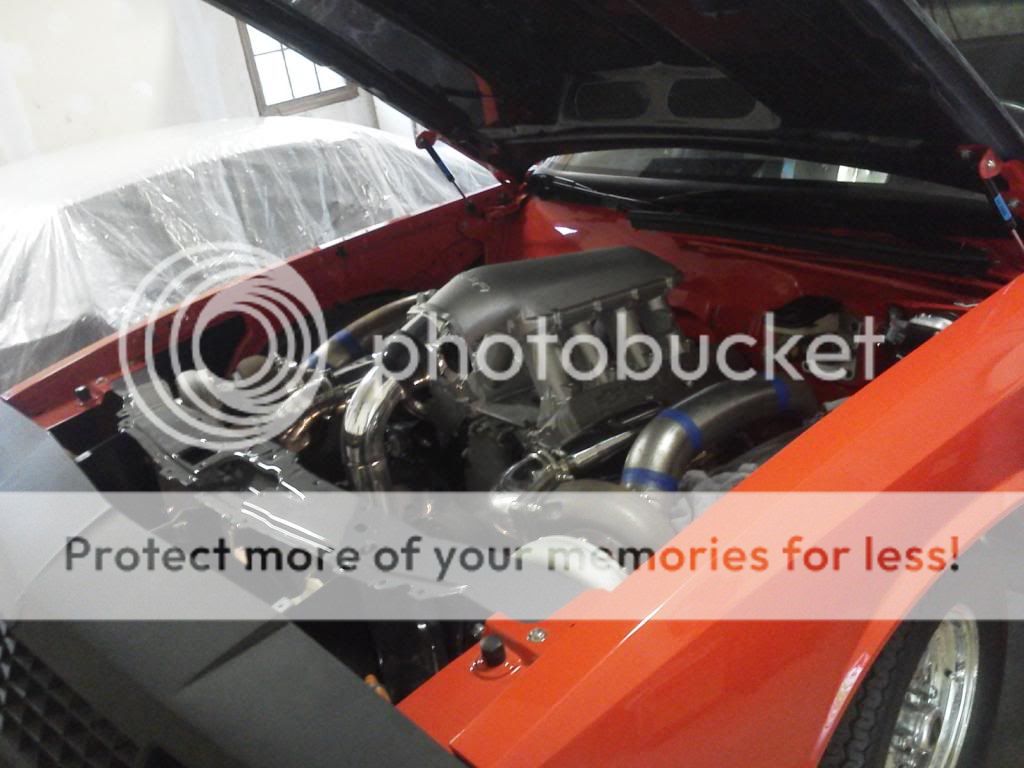
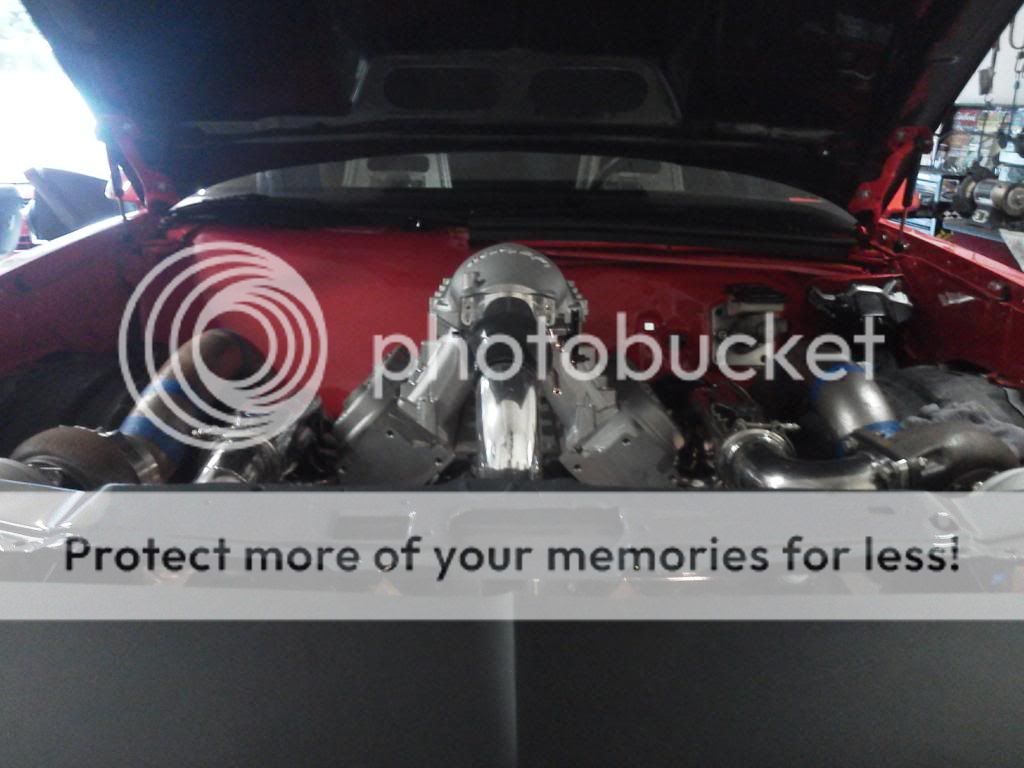
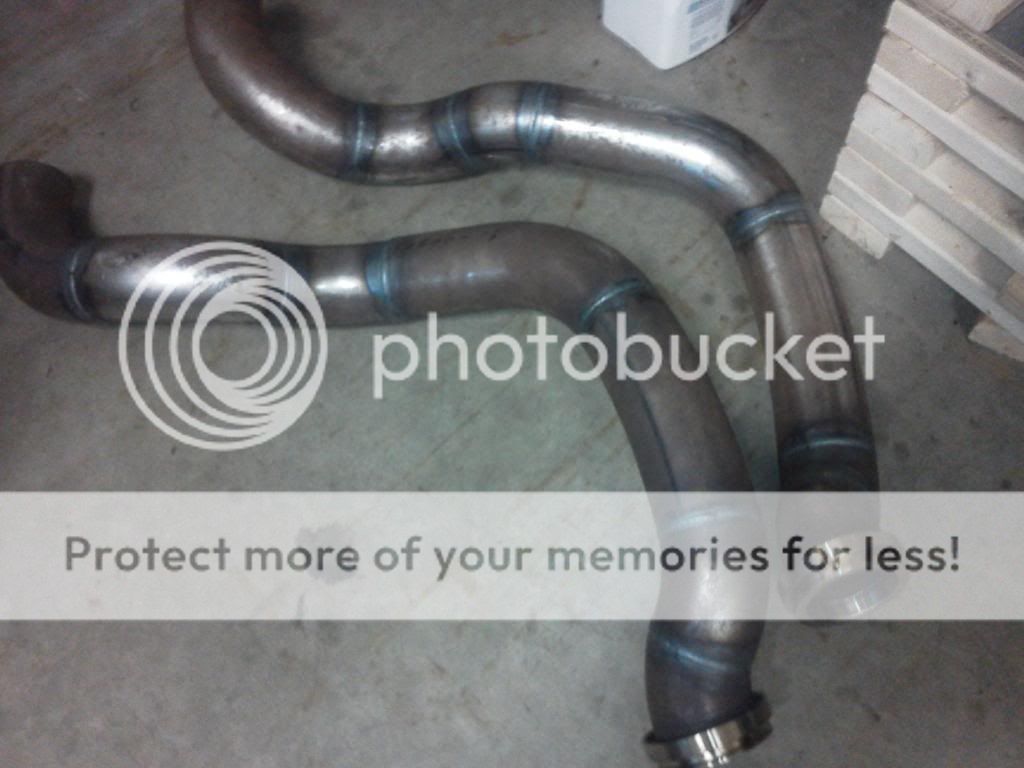
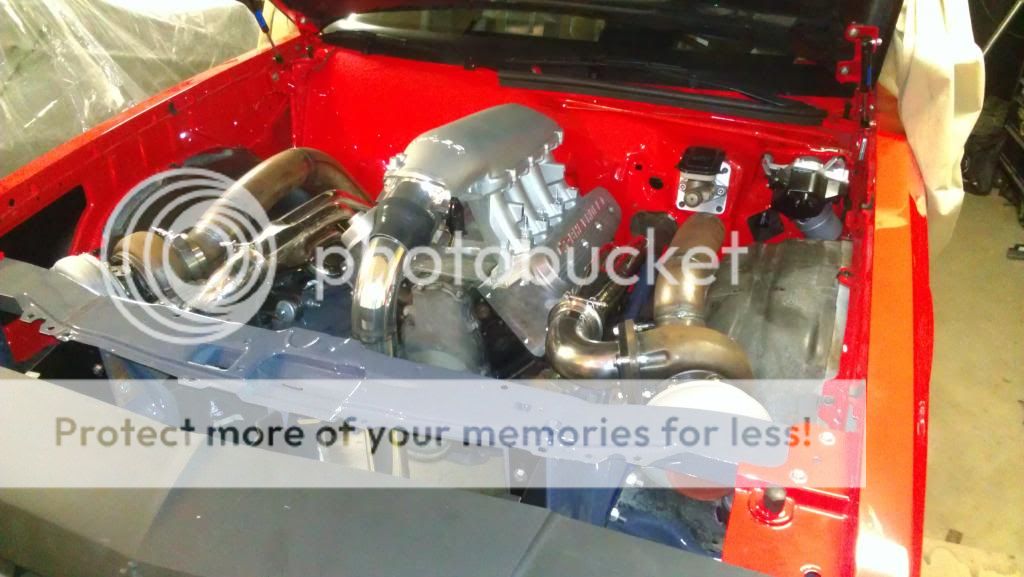
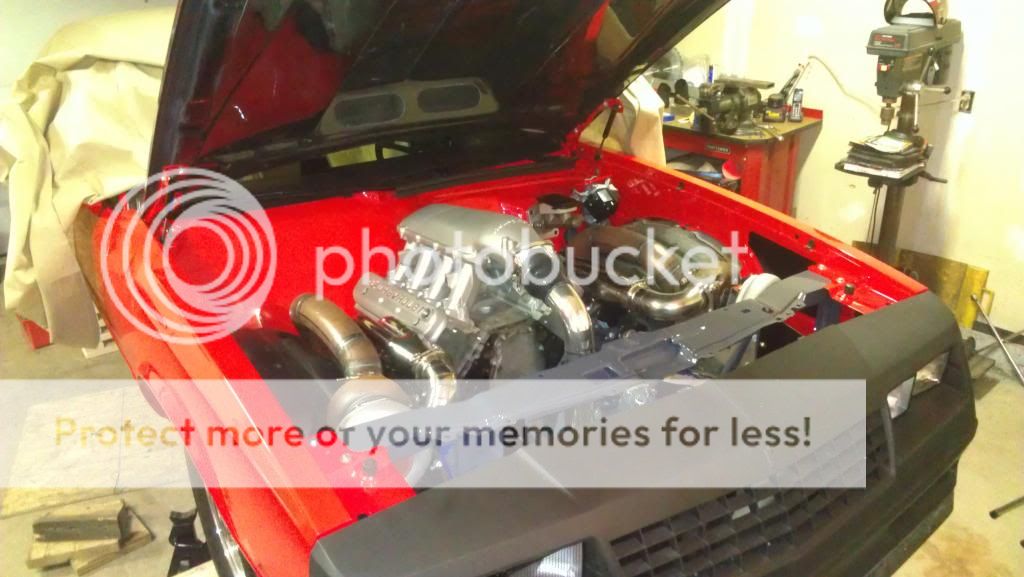
It has been a long process, but the turbo tubing as about complete. From earlier posts for the turbo to intercooler pipes, we mocked it up with PVC tubing before we cut into just-purchased tubing. Well we did that for everything else too (and before that used 1/4'" plywood for one). The hot-side was more of a challenge for mockup and completion. The header to turbo tubes had to be a tight radius..something impossible to bend, so we had to pie cut those, driver's side not as bad as passenger side. Then the downpipes had to be snaked all the way down around in between everything. Can't say we've ever really seen a turbo G-body run inner fenderwells, maybe a few here and there, but never seen a twin turbo with fenderwells. We wanted to be different and use them. We found a place online that sells long radius tubes. We figured out the curve or the wheel well to be 24" radius. But before buying that, we pie-cut a PVC pipe to form that radius, along with all the other 4.5" and 6" radius tubes we anticipated we would need. Built those pieces of artwork and actually got them to fit, not touch anything, and be fairly symmetrical. From there, bought all the tubing (mild steel for the downpipes. we would rather had polished stainless, but for how close the HOT pipes will get to the painted frame, wheel wells, brakes...everything! we decided to ceramic coat and heat wrap the downpipes. Also going to wrap the header to turbo tight bends to hide the pie-cuts. And to match, throw a blanket on the turbos). Built tall the tubes, I tack welded everything, then had a friend of ours finish TIG them. I can weld pretty nice, but for stuff that really matters and will be seen, I wanted a person that welds for a living to do this part for me. Once everything was finally finished, bought wastegates and blow off valves. Mounted the blow off valves so far, still need to figure out wastegates...(can the wastegate outlet be aluminum tubing?? we have an idea of how to run them if that's possible). Pretty sure I covered all the bases, so here are some pictures to go with the story..


 08-25-2013, 09:06 PM
#50
Staging Lane
Thread Starter
Join Date: Nov 2007
Location: Connecticut
Posts: 86
Likes: 0
Received 0 Likes
on
0 Posts
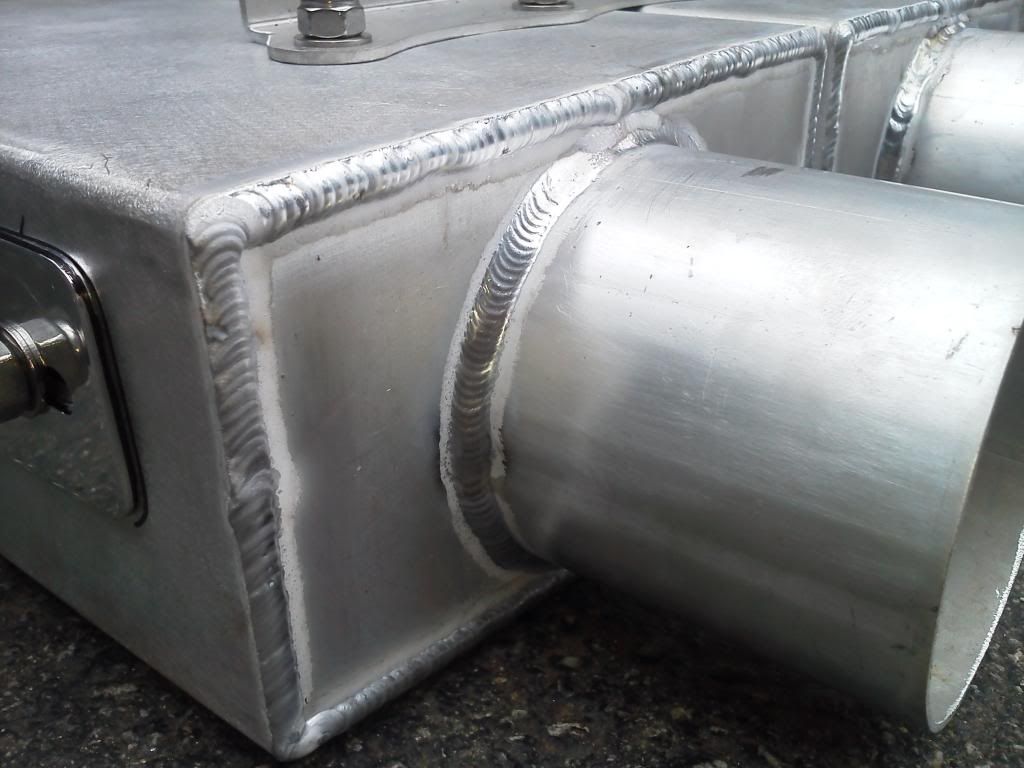
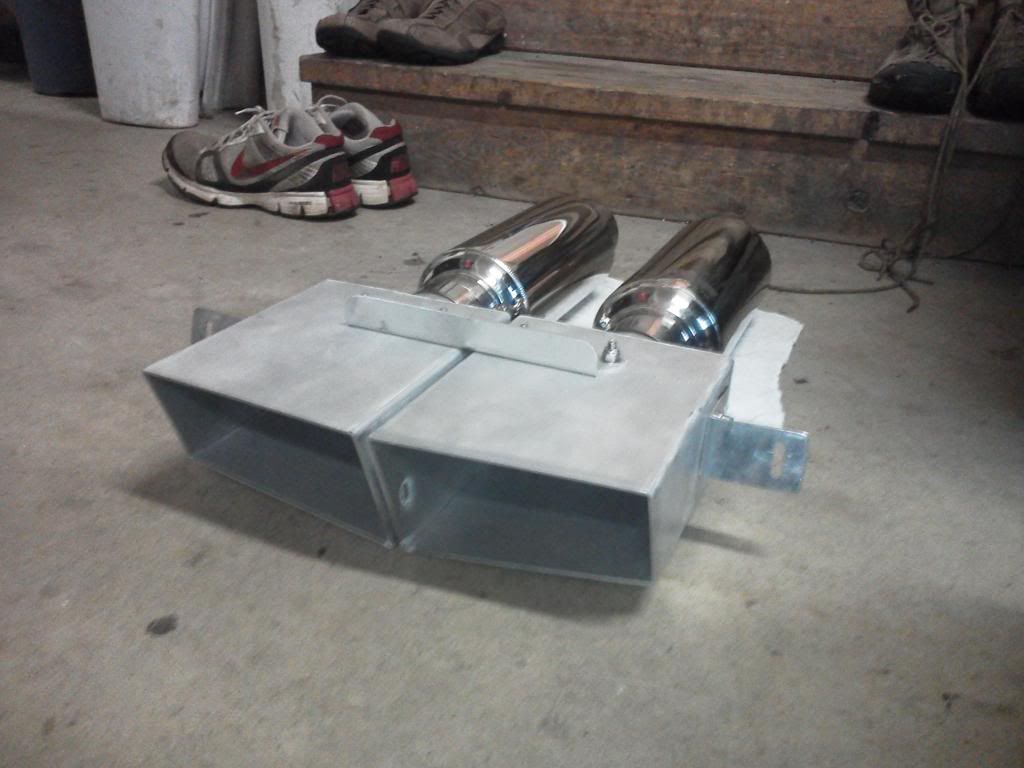
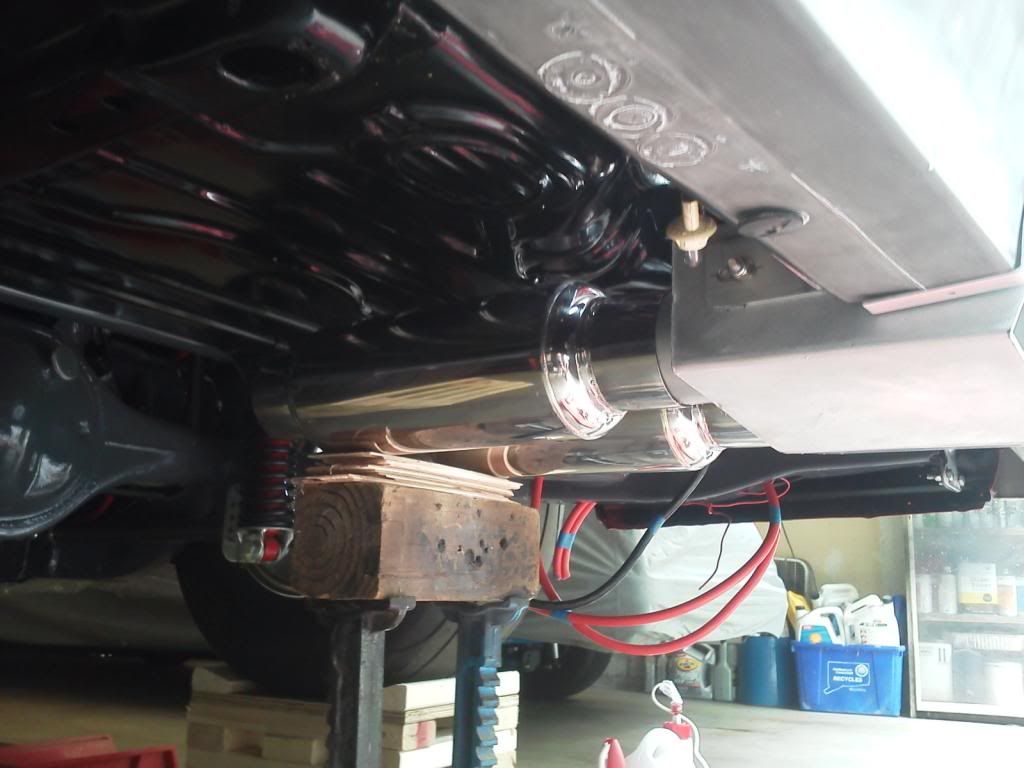
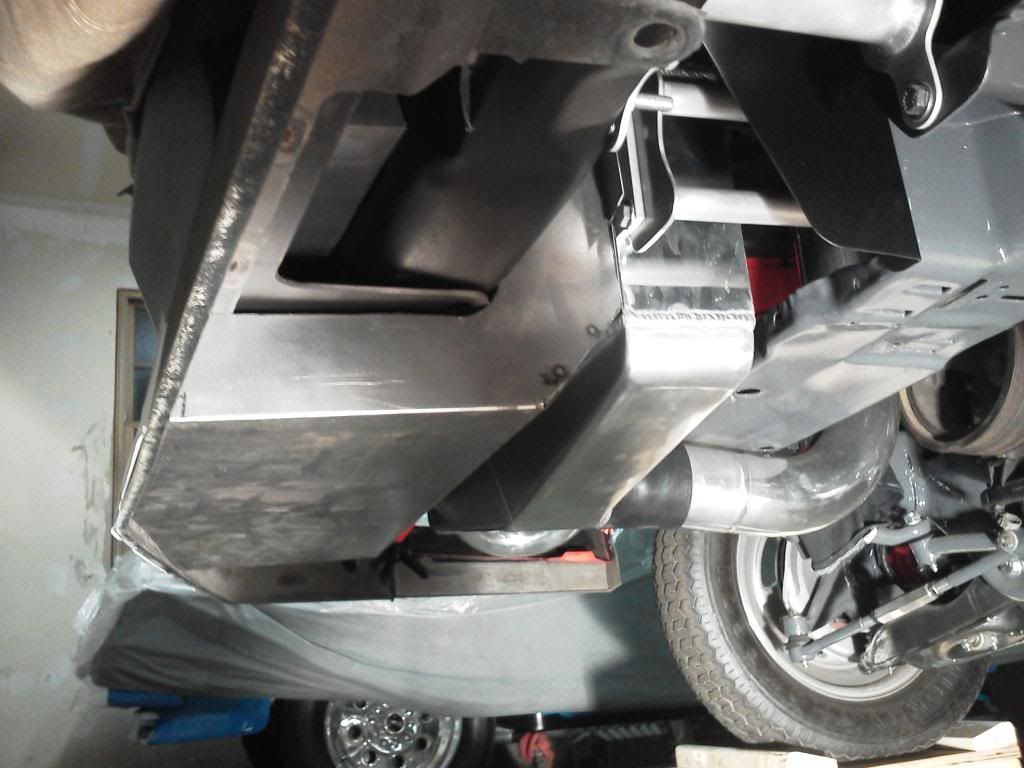
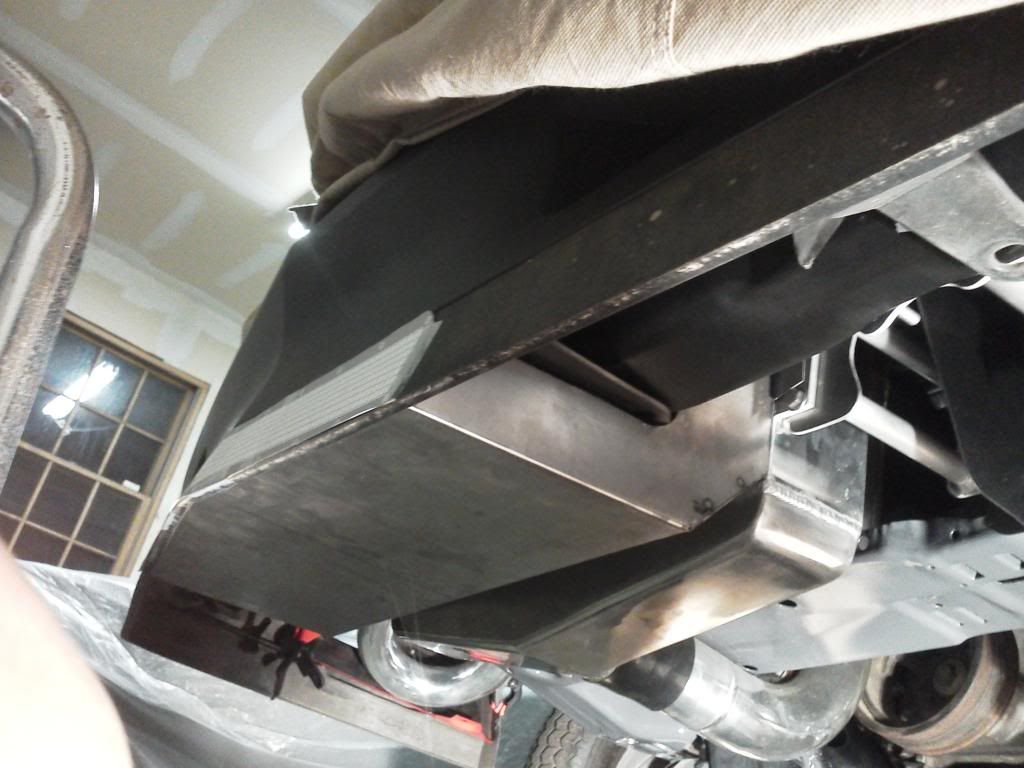
We have also been working on my "Cadillac" exhaust tips. Dad made some CAD drawings and sent them to be cut and bent out of aluminum. The place made three sets since we waited so long for them. Using the header mufflers my brother had oh his Malibu for a little bit. Same person that welded the turbo piping did these as well.


 08-25-2013, 09:16 PM
#52
Staging Lane
Thread Starter
Join Date: Nov 2007
Location: Connecticut
Posts: 86
Likes: 0
Received 0 Likes
on
0 Posts
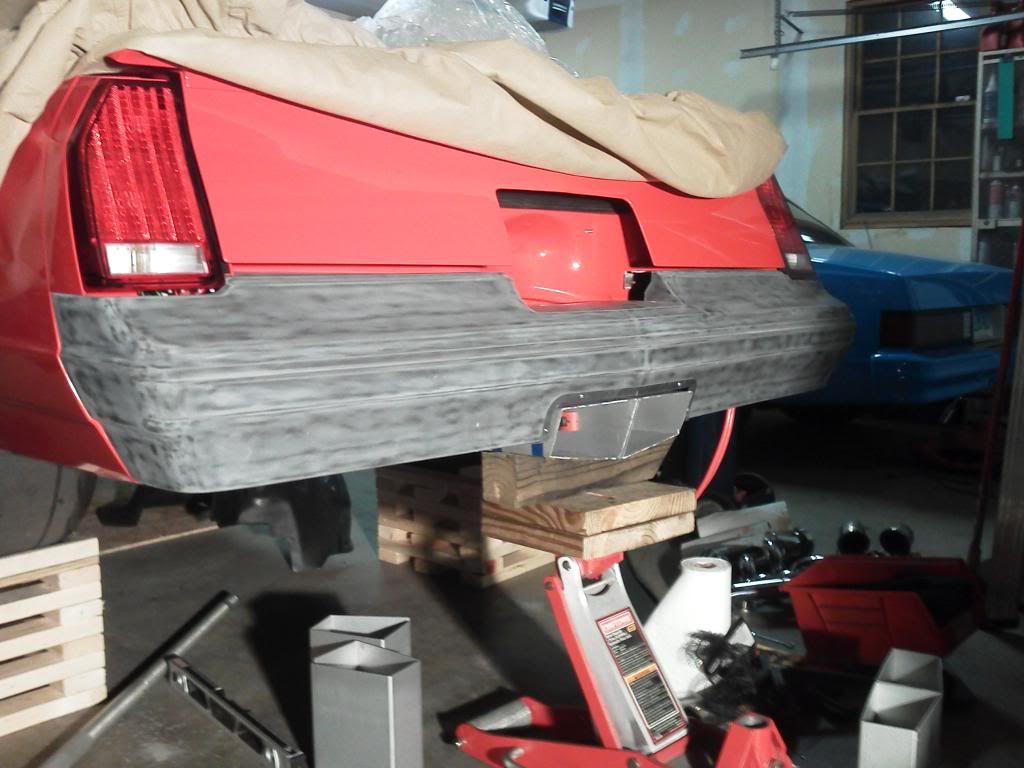
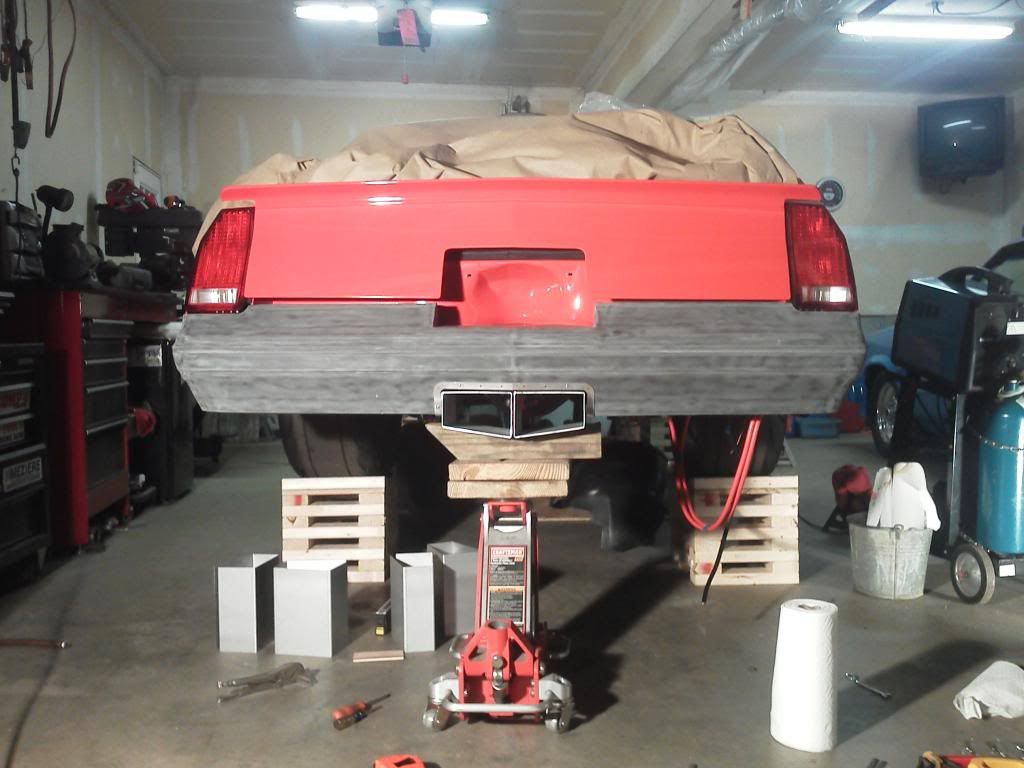
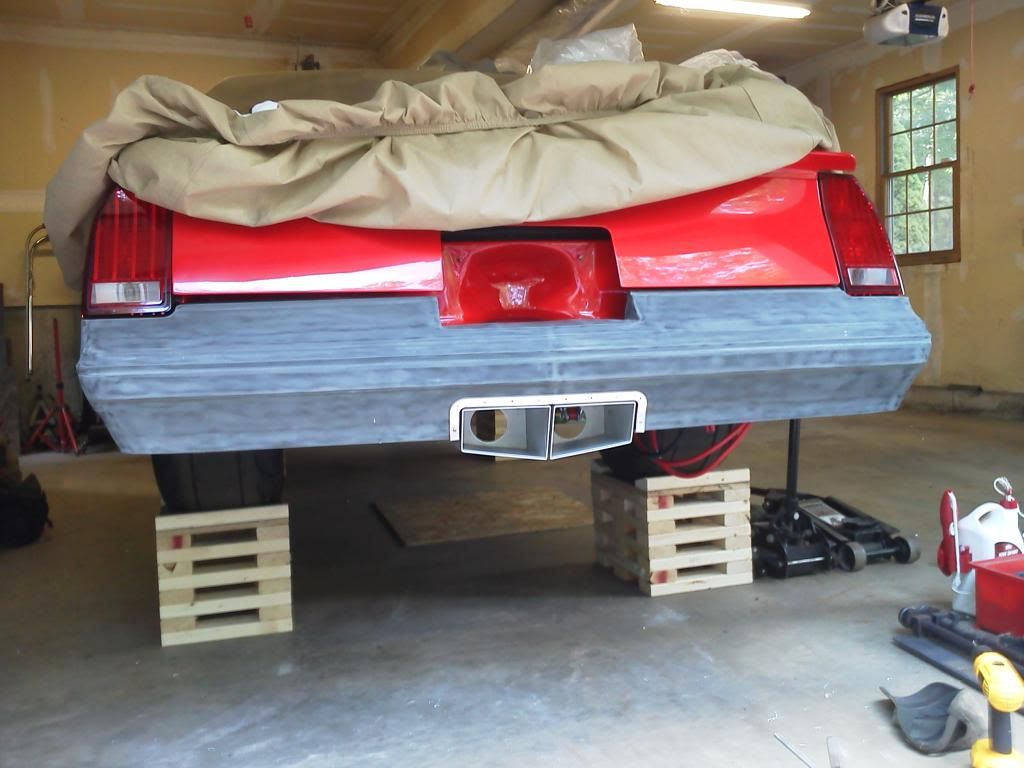
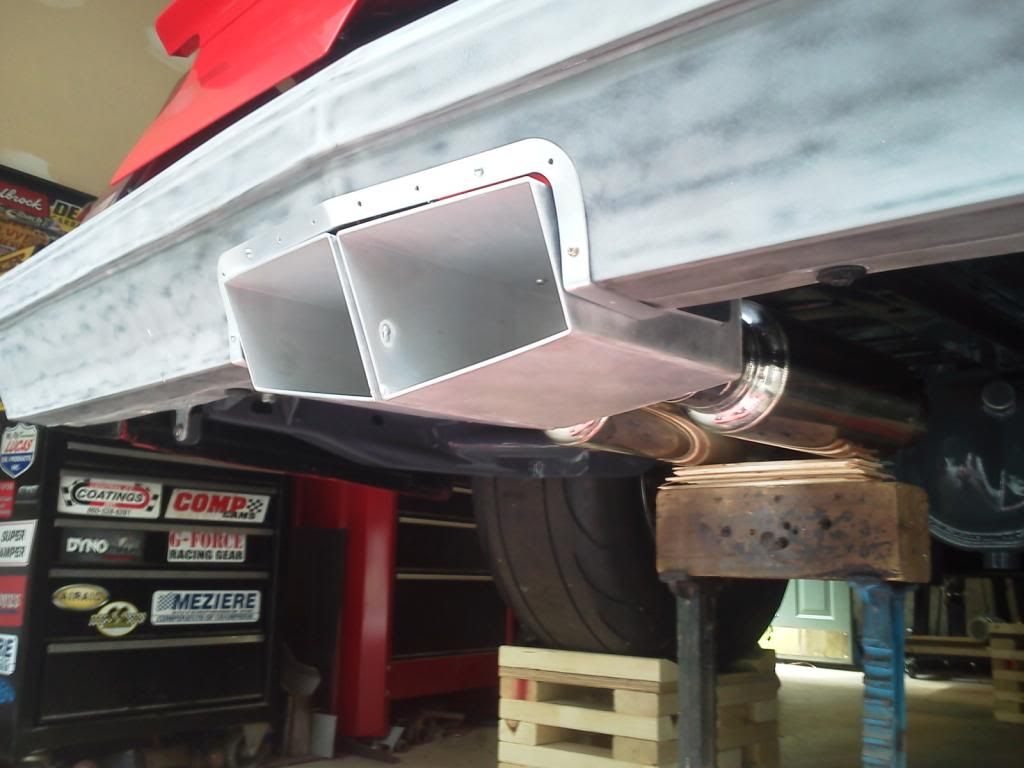
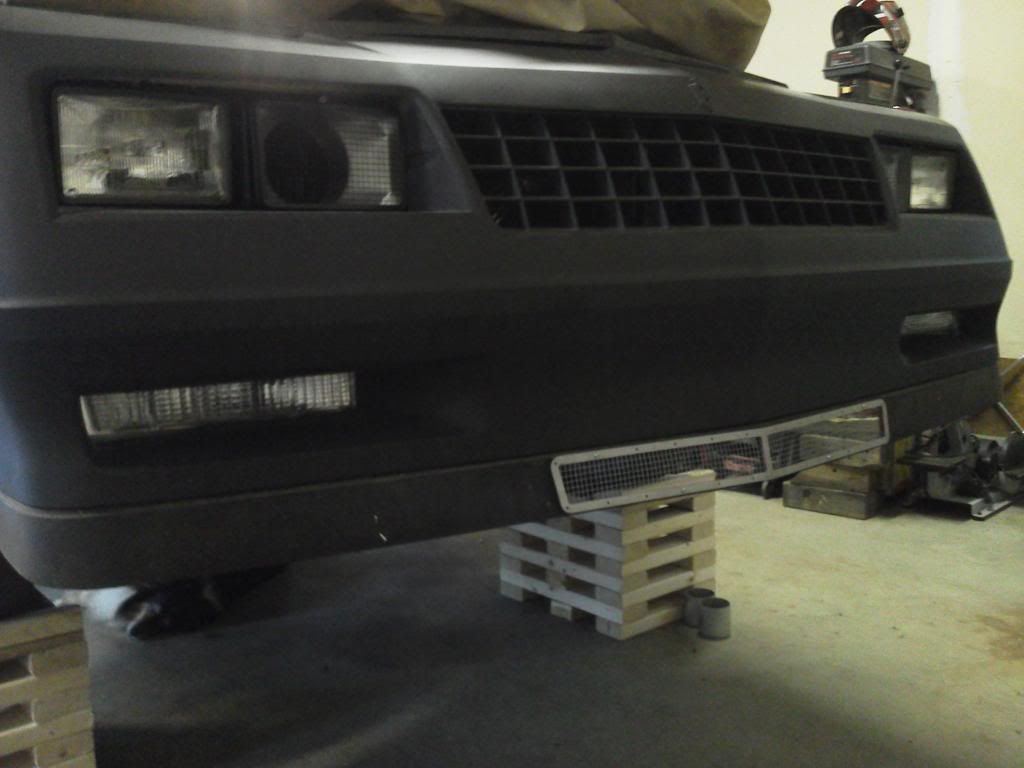
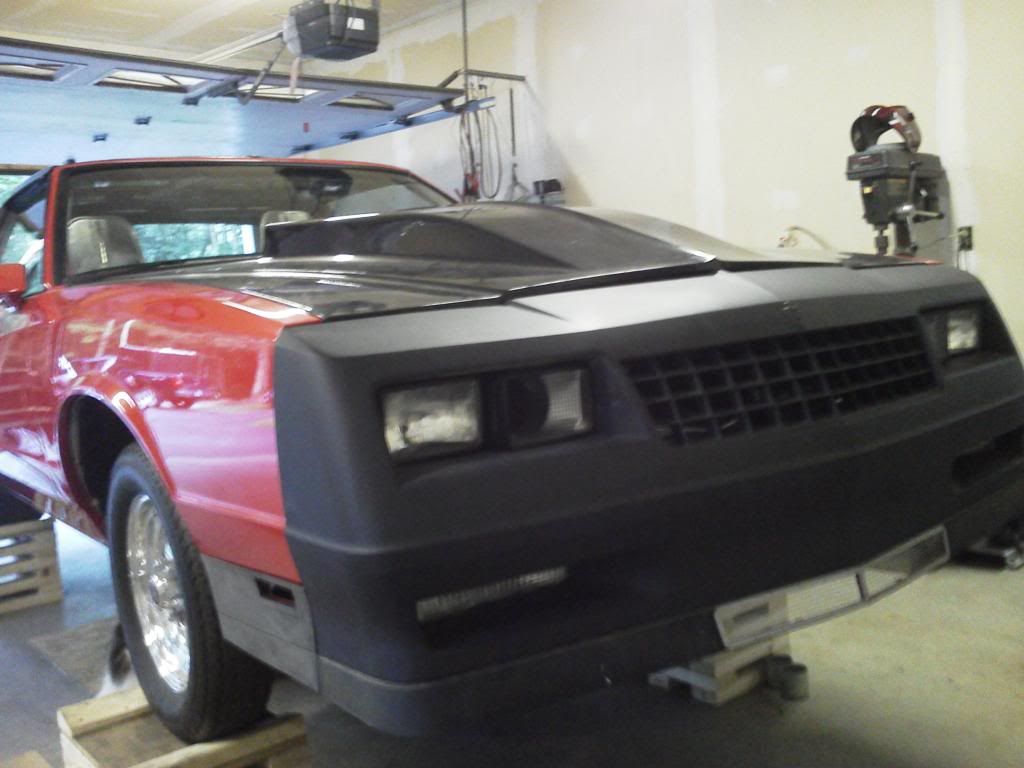
And finally, our idea for how to get somee air to the intercooler. Not much room to mount an intercooler (on a somewhat stock configuration Monte..radiator, radiator support, frame...) So the cooler is pretty much blocked by the bumper and nose. We cut out a section of the lower lip of the front nose to match the actual grille width and shape. Then did the same border as you see in the exhaust tip pictures..the aluminum "frame." Also, the same 1/4" mesh as the inner headlights for the turbo intake. Behind that, we fabricated an "air scoop" .. duct .. tunnel, whatever you want to call it..
Poor man's metal break...but it works.
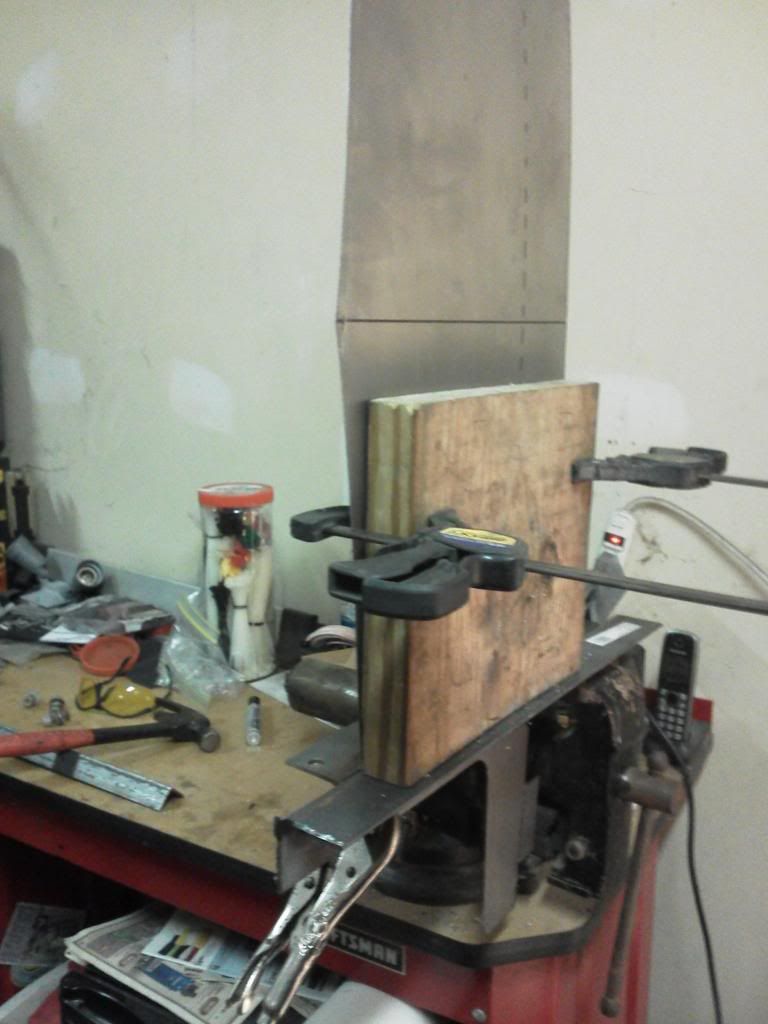
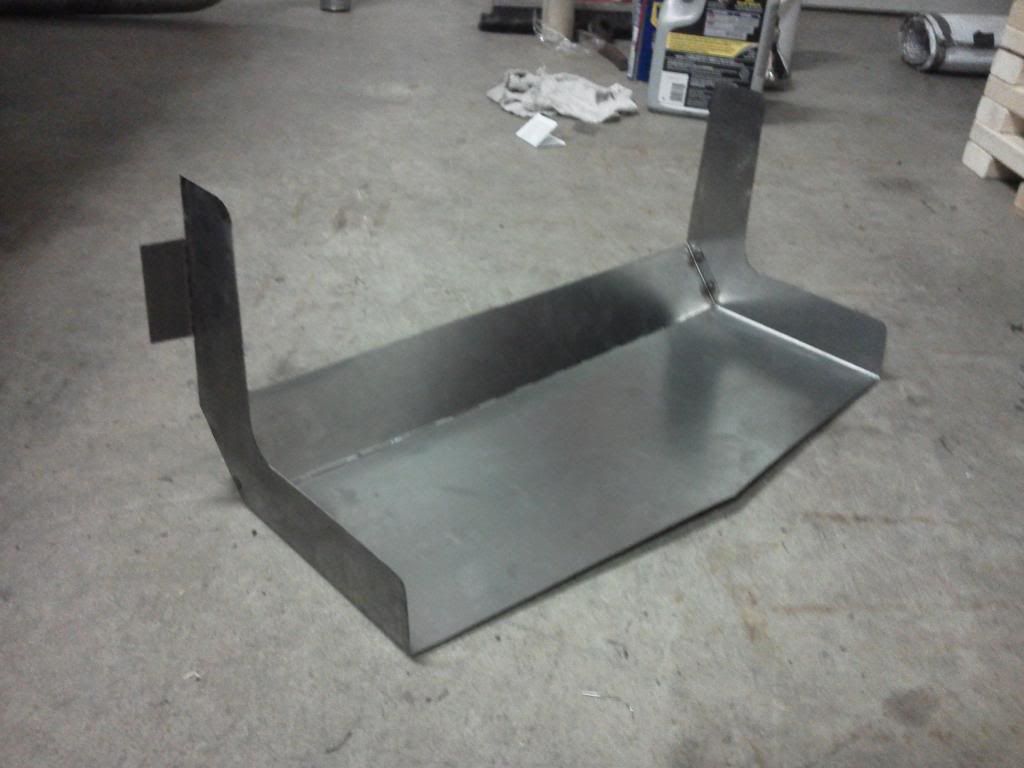
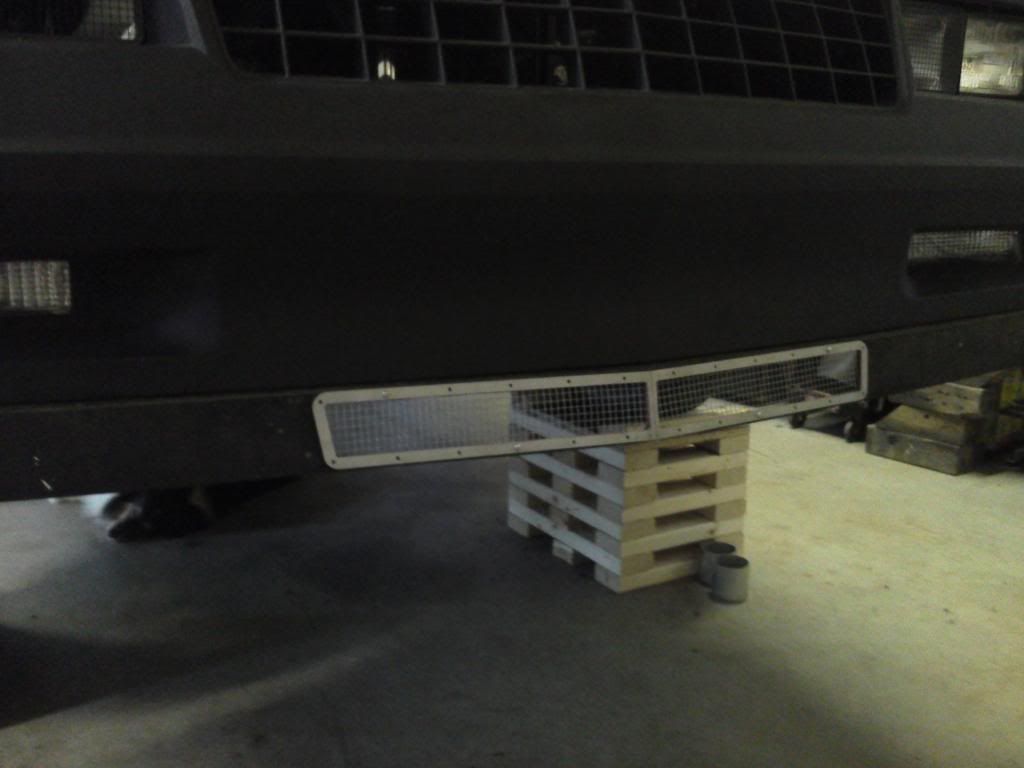
Poor man's metal break...but it works.


