Sweet Pea 1968 Chevy II Moar Door 4.8/7675/PG


 01-09-2016, 10:42 PM
#42
9 Second Club
Thread Starter
Join Date: Jan 2013
Location: Just outside Memphis
Posts: 394
Likes: 0
Received 0 Likes
on
0 Posts
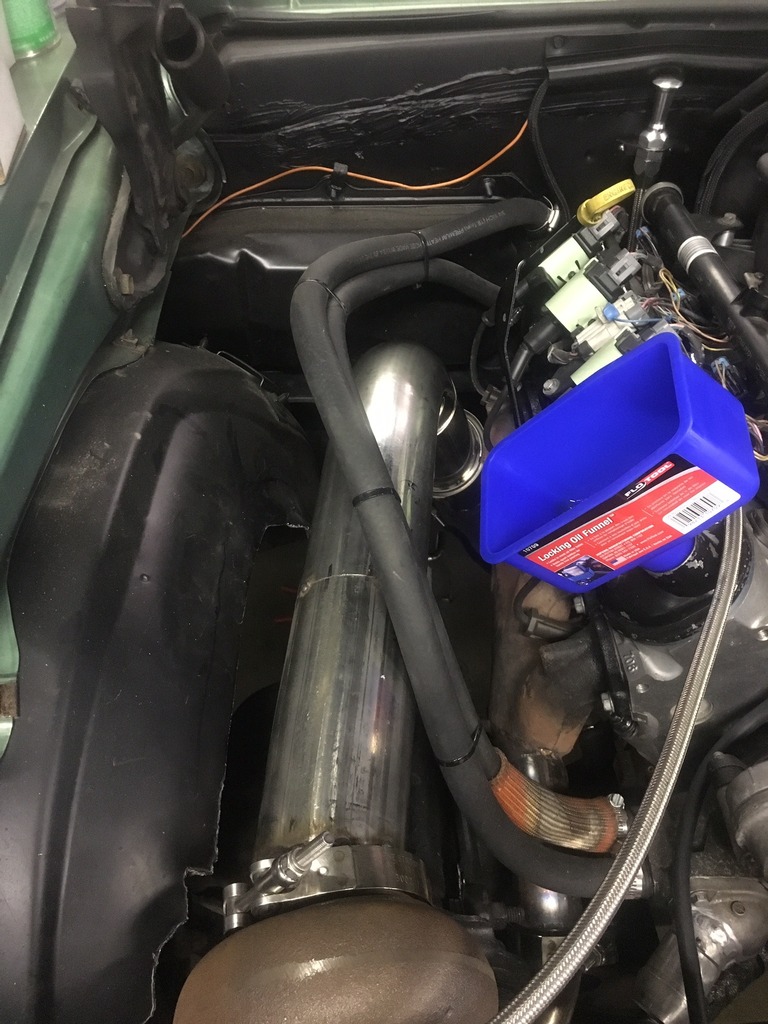
Oil drain fitting placed in the front cover and intercooler inlet modified to accept the 3 inch silicon elbow.
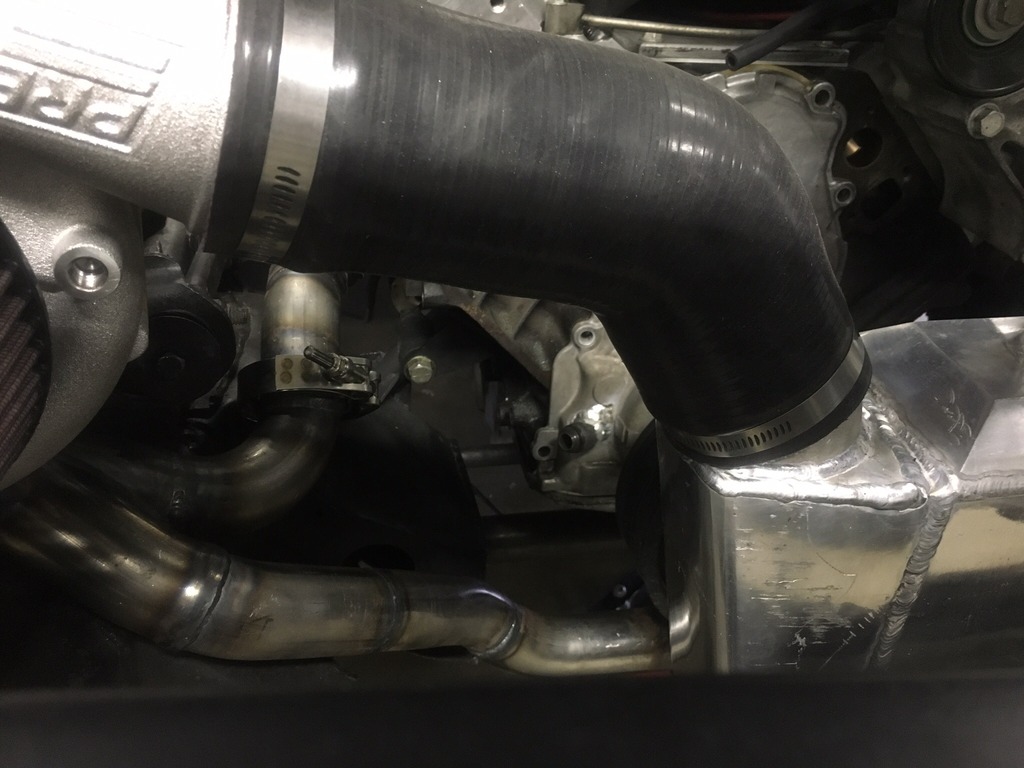
Looks like the oil drain will be a straight shot with a nice slope from the turbo to the fornt cover.
Now the oil lines need to be run, BOV installed (it will go on the intercooler), mount the radiator and figure out the trunk tank. Ordered a Rule 2000 for an in tank pump.

Looks like the oil drain will be a straight shot with a nice slope from the turbo to the fornt cover.

Now the oil lines need to be run, BOV installed (it will go on the intercooler), mount the radiator and figure out the trunk tank. Ordered a Rule 2000 for an in tank pump.
 01-18-2016, 03:54 PM
#45
9 Second Club
Thread Starter
Join Date: Jan 2013
Location: Just outside Memphis
Posts: 394
Likes: 0
Received 0 Likes
on
0 Posts
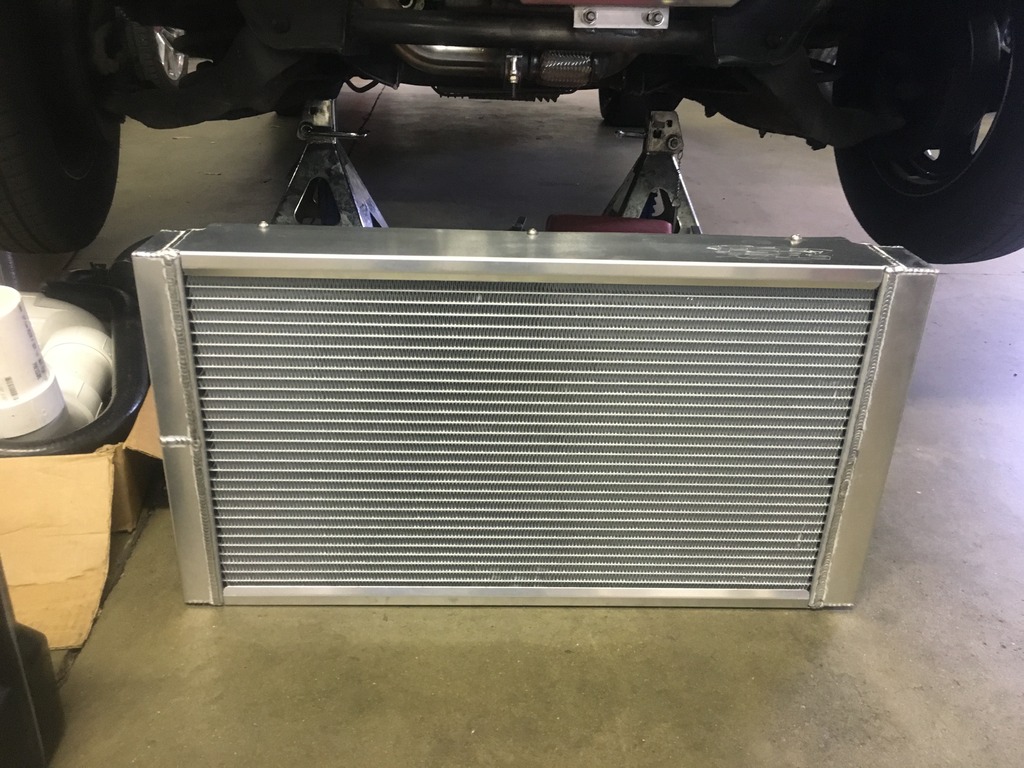
Plan was to move the radiator forward and down for a puller fan to clear the A2W intercooler but that not only looks terrible...
It just doesn't quite fit.
I can't live with the radiator hanging down from right behind the bumper so I'm going with plan B which is an odball sized radiator with some low profile puller fans. Maybe not the best choice for the budget but I don't want to compromise on cooling since this car will be driven everywhere.

It just doesn't quite fit.

I can't live with the radiator hanging down from right behind the bumper so I'm going with plan B which is an odball sized radiator with some low profile puller fans. Maybe not the best choice for the budget but I don't want to compromise on cooling since this car will be driven everywhere.
02-01-2016, 07:41 PM
#46
9 Second Club
Thread Starter
Join Date: Jan 2013
Location: Just outside Memphis
Posts: 394
Likes: 0
Received 0 Likes
on
0 Posts
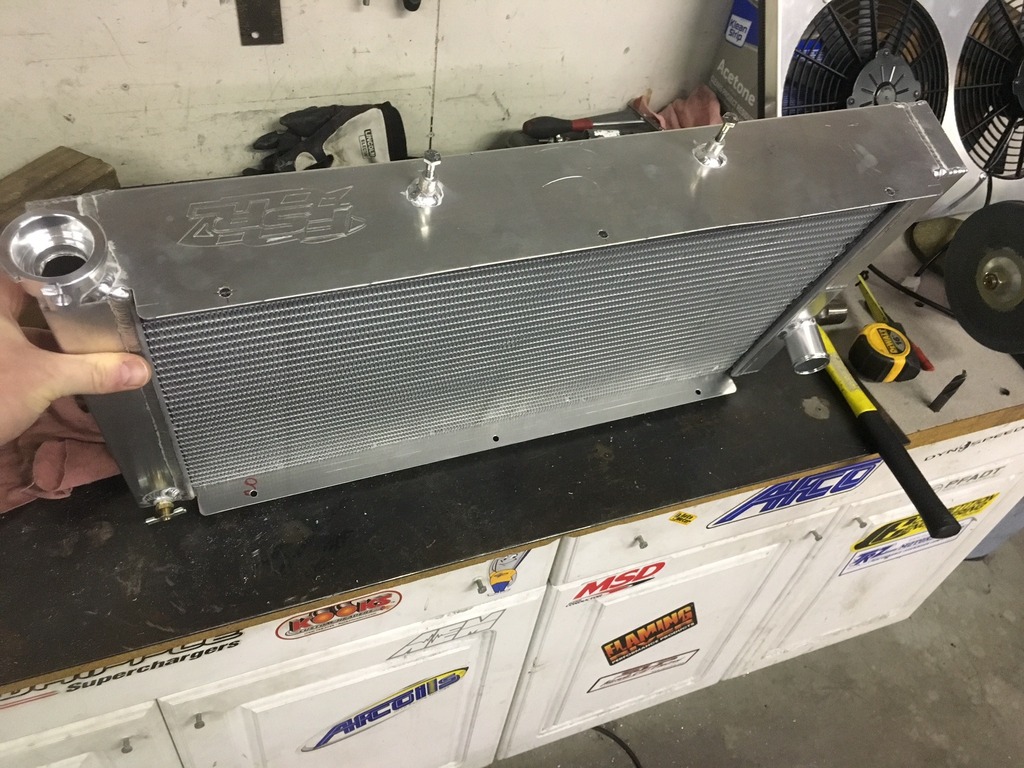
I've been waiting for the new radiator and it showed up today. It fits perfectly and doesn't hang down below the bottom of the bumper at all and it is 2" thinner than the first combo. There should be no cooling problems here with this double pass radiator.
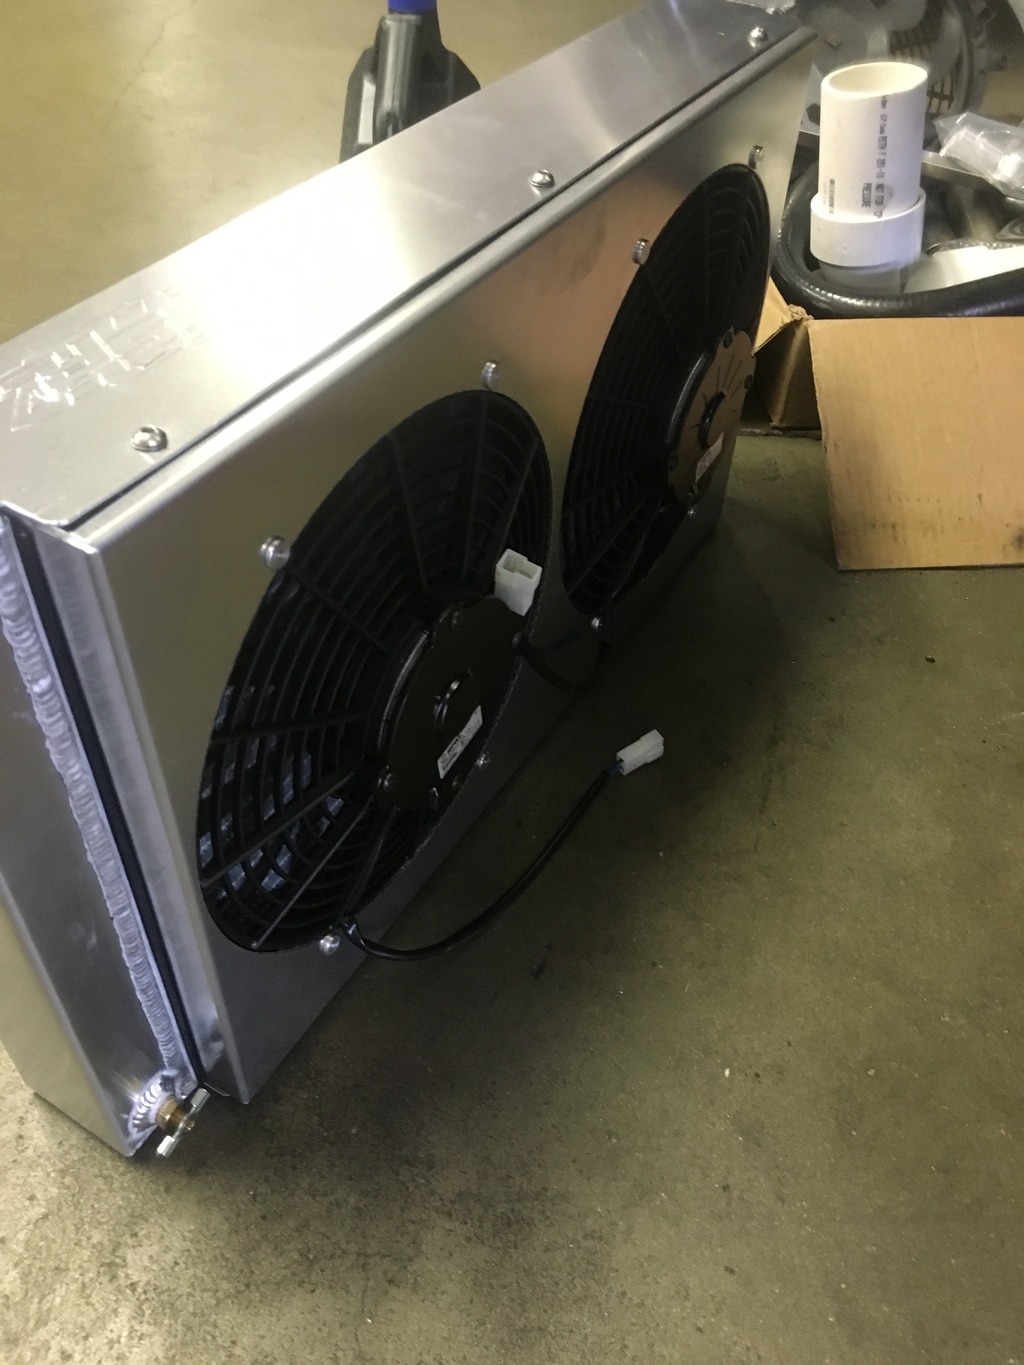
The company that built it asked where we wanted the inlets and outlets for the radiator and we told them,"in a bag." That will allow perfect placement of the bungs for this setup. Still going to use the leftover truck radiator hose to get this plumbed. Then it needs a downpipe and the intercooler hooked up and she should run. I'm looking forward to Sweat Pea moving under her own power.


The company that built it asked where we wanted the inlets and outlets for the radiator and we told them,"in a bag." That will allow perfect placement of the bungs for this setup. Still going to use the leftover truck radiator hose to get this plumbed. Then it needs a downpipe and the intercooler hooked up and she should run. I'm looking forward to Sweat Pea moving under her own power.

 02-10-2016, 07:46 PM
#49
9 Second Club
Thread Starter
Join Date: Jan 2013
Location: Just outside Memphis
Posts: 394
Likes: 0
Received 0 Likes
on
0 Posts
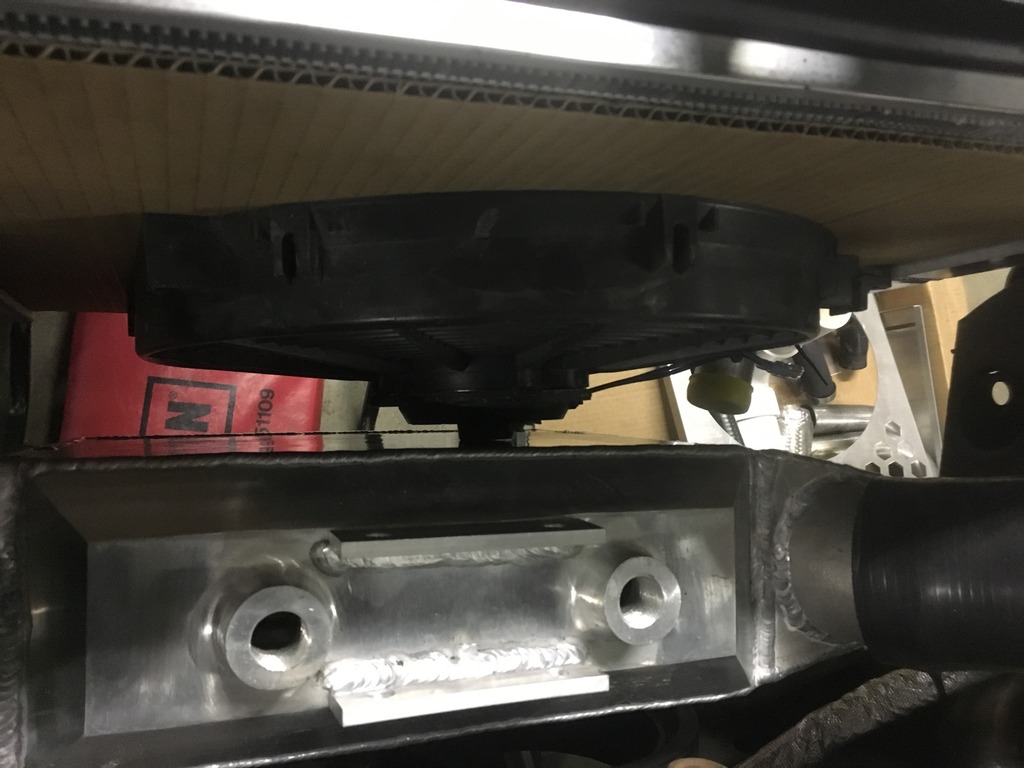
Radiator mount is done and painted. The lower radiator support has two holes drilled into it with an upside down top hat style bushing (I think they are from a ford intake) in each hole that will hold a piece of aluminum rod snugly.
Two short pieces of the aluminum rod are welded to the bottom of the radiator so that they drop into the bushings from above (one of the bushings still holding on to the radiator).
Then the radiator simply tilts forward to allow two bolts to pass through the upper radiator support which screw into two pieces of threaded aluminum tube welded to the top of the radiator. The two screws then hold the radiator in place.
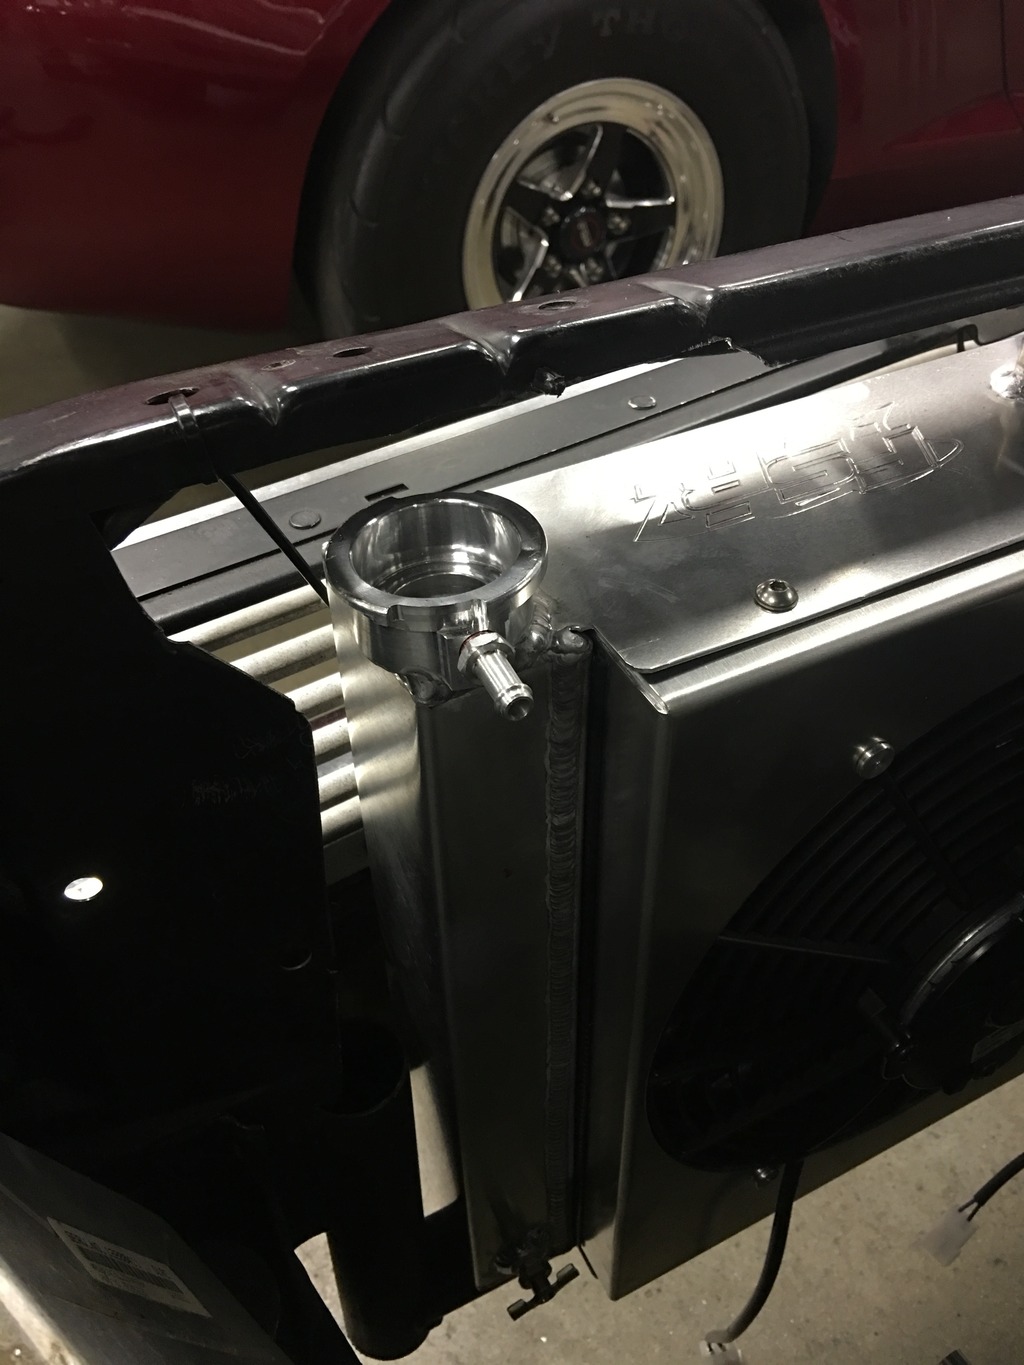
The filler cap and lower outlet is welded on. Now the upper inlet needs to go on and the radiator can go in the car after being painted. This will allow the radiator to easily pull out from the top once the two top screws are removed. The water inlet and outlet on the engine will be modified a bit so there is a straight shot to and from the radiator.

Two short pieces of the aluminum rod are welded to the bottom of the radiator so that they drop into the bushings from above (one of the bushings still holding on to the radiator).

Then the radiator simply tilts forward to allow two bolts to pass through the upper radiator support which screw into two pieces of threaded aluminum tube welded to the top of the radiator. The two screws then hold the radiator in place.

The filler cap and lower outlet is welded on. Now the upper inlet needs to go on and the radiator can go in the car after being painted. This will allow the radiator to easily pull out from the top once the two top screws are removed. The water inlet and outlet on the engine will be modified a bit so there is a straight shot to and from the radiator.
02-11-2016, 07:04 AM
#51
9 Second Club
Thread Starter
Join Date: Jan 2013
Location: Just outside Memphis
Posts: 394
Likes: 0
Received 0 Likes
on
0 Posts
Thanks for the kind comments y'all. I really wish I could have used the stock radiator but this car has been speaking to me and I feel like I need to give it what it wants since its been neglected. I've got a vision for Sweet Pea and I just hope it turns out half as cool as it is in my head lol.
02-12-2016, 09:03 PM
#52
9 Second Club
Thread Starter
Join Date: Jan 2013
Location: Just outside Memphis
Posts: 394
Likes: 0
Received 0 Likes
on
0 Posts
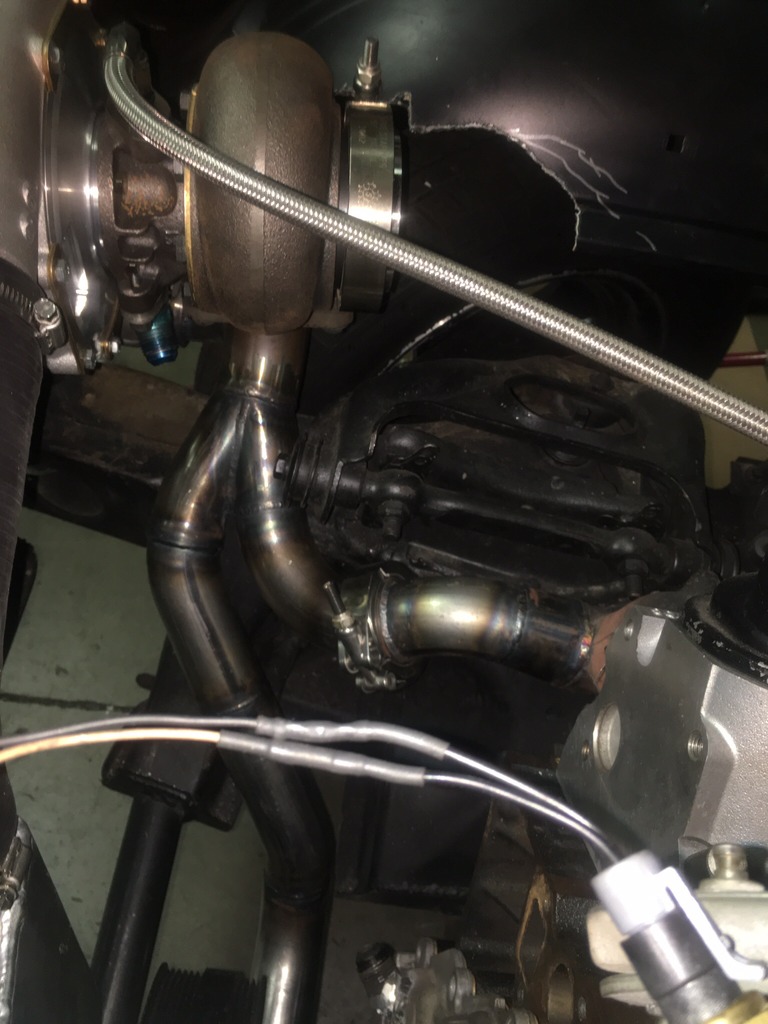
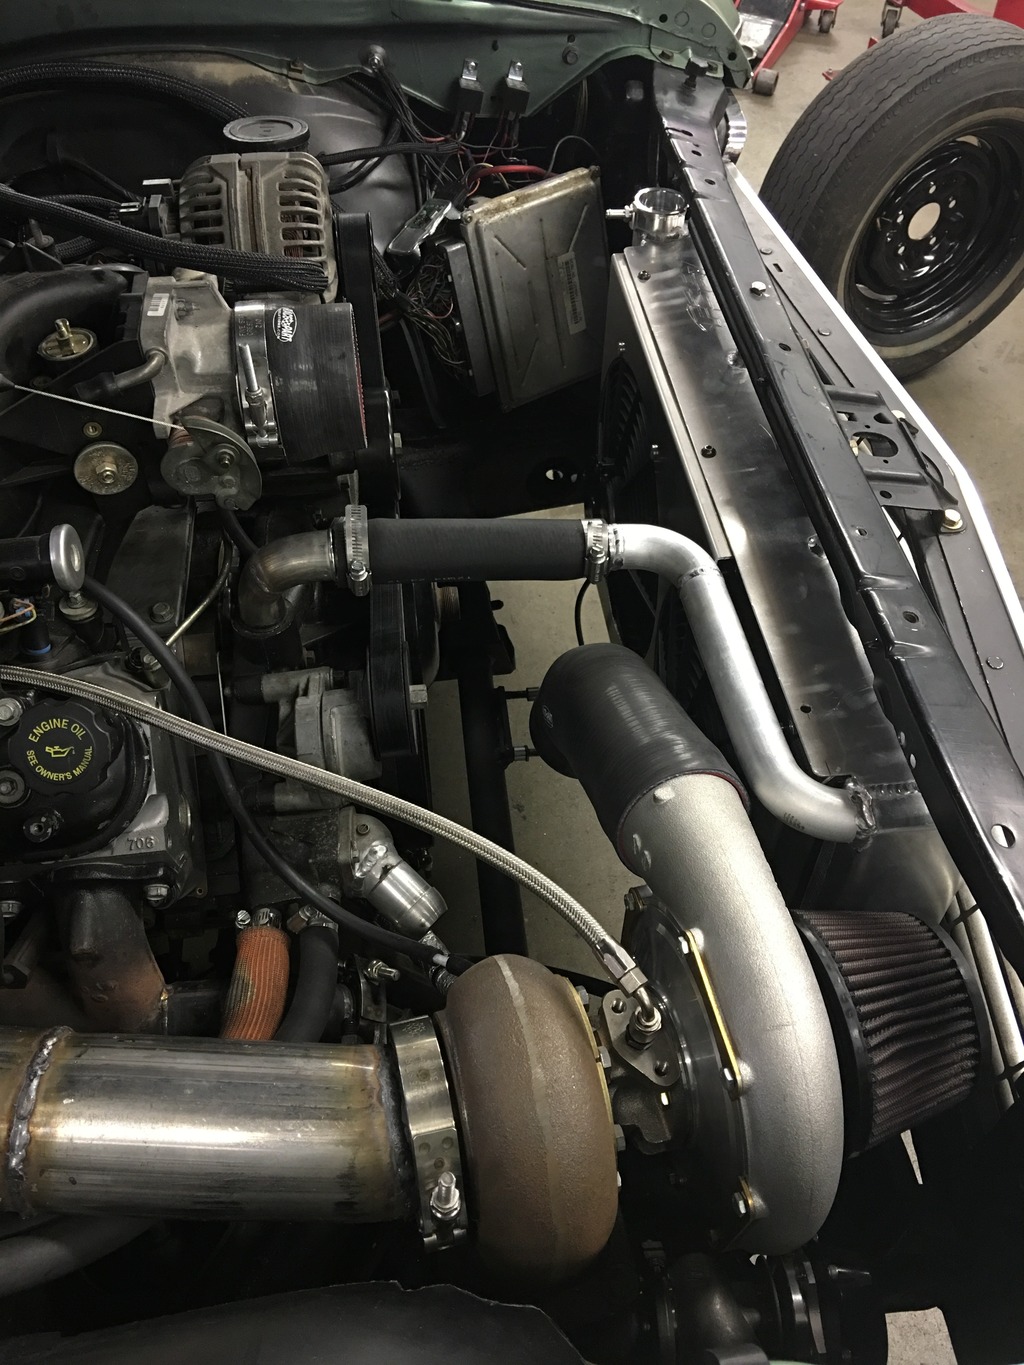
Broke down and built an aluminum intake out of 3.5" tube. Managed to make it work with one U bend.
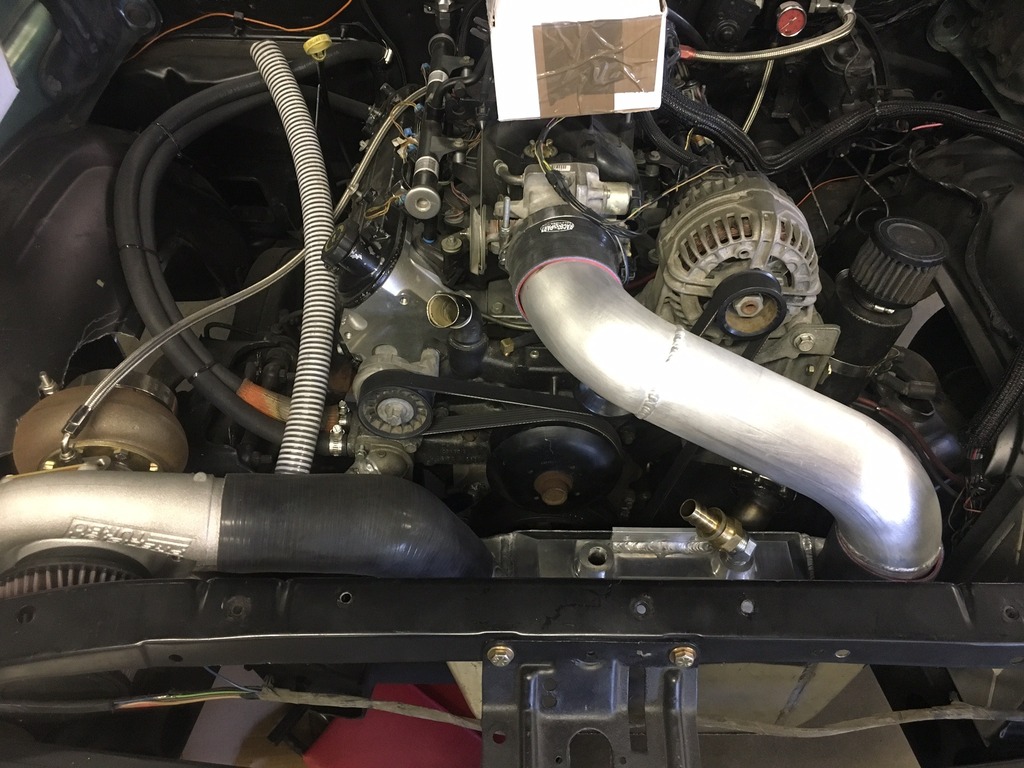
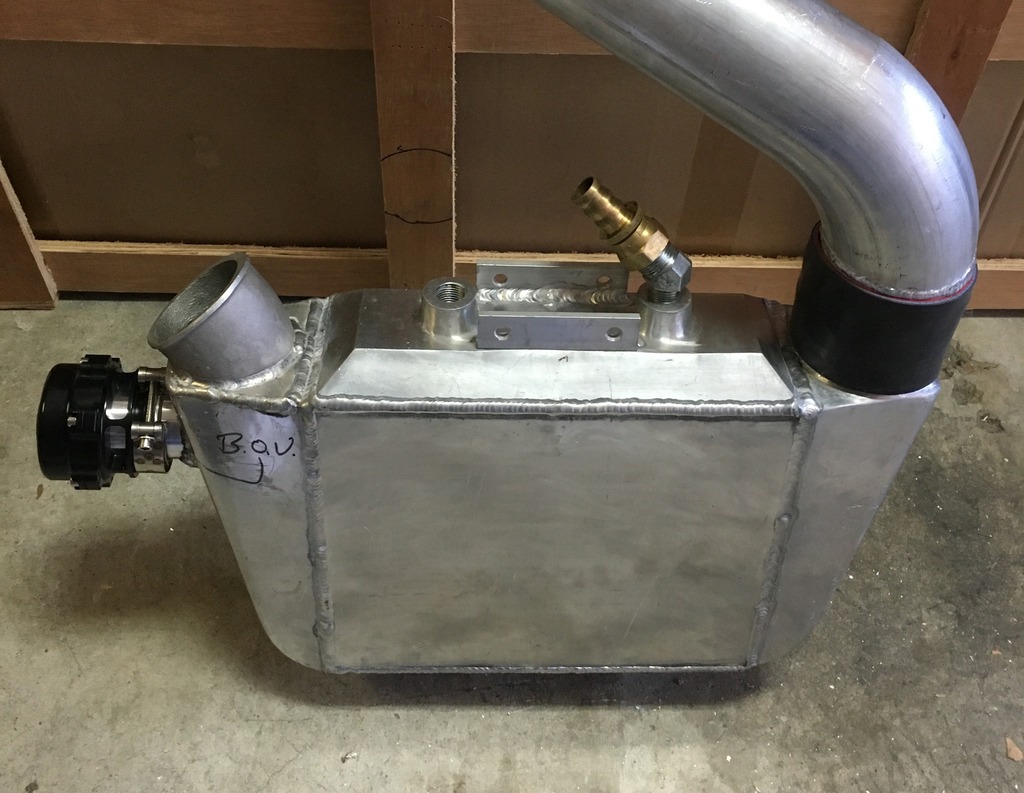
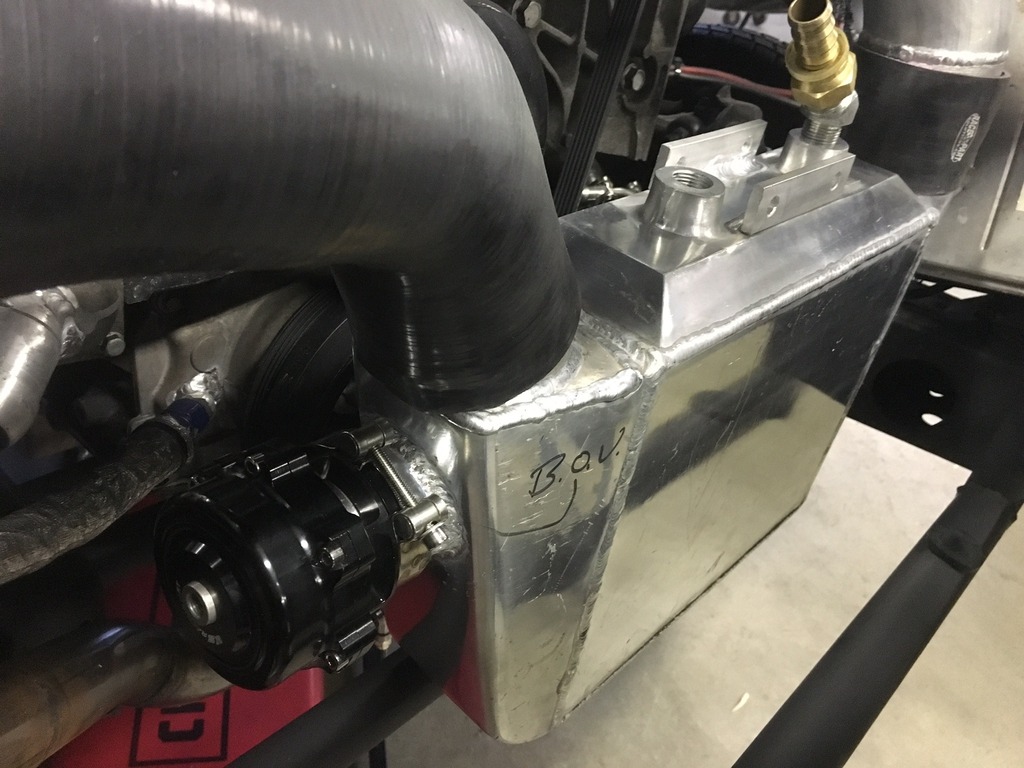
Also welded the VS racing BOV to the inlet side of the intercooler.

Also welded the VS racing BOV to the inlet side of the intercooler.

 02-15-2016, 04:00 PM
#53
9 Second Club
Thread Starter
Join Date: Jan 2013
Location: Just outside Memphis
Posts: 394
Likes: 0
Received 0 Likes
on
0 Posts
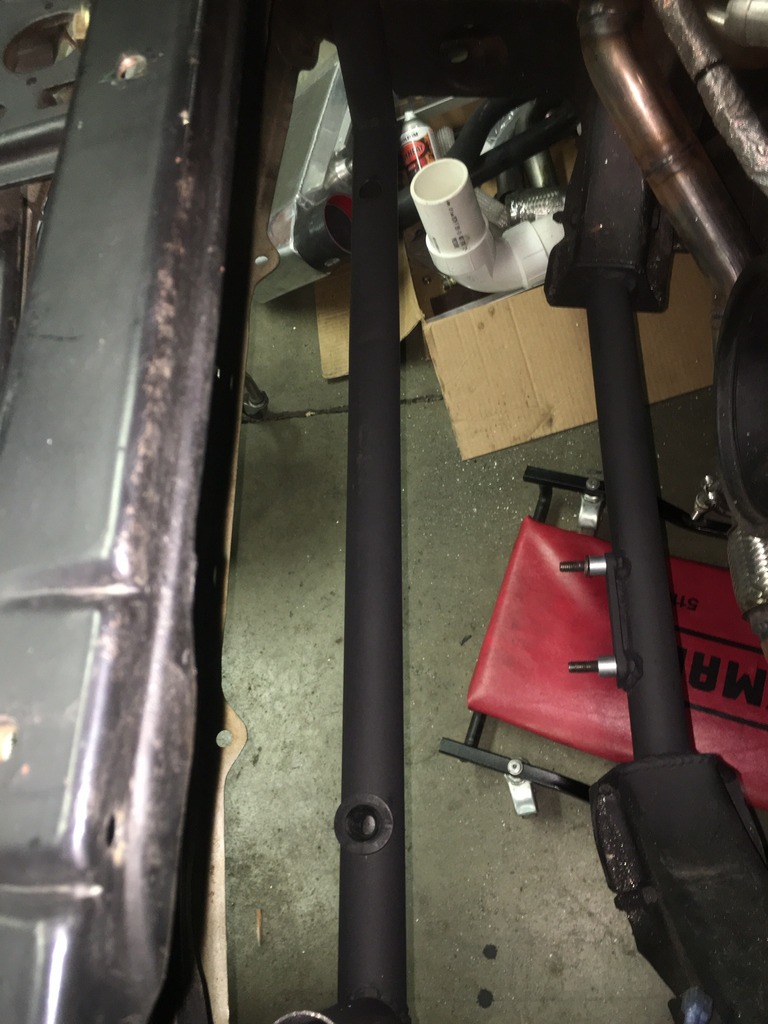
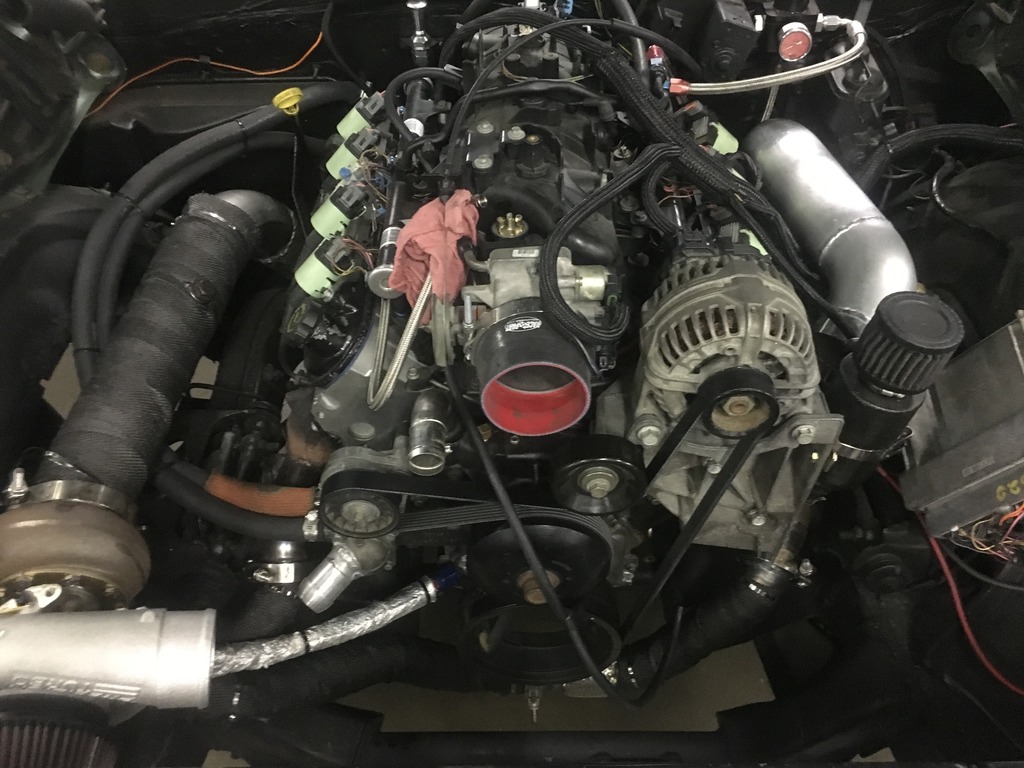
Big news! Test fired Sweet Pea today! She has 50psi oil pressure at idle and sounds pretty good. Also built the down pipe today. I used some 3.5" stainless tube leftover from another project and ran it just past the firewall with a turndown next to the trans pan. I'm surprised how much room there is under this car. I also added a used 3.5" V band from that other project to allow removal of the upper and lower halves of the downpipe. You can see where I trimmed some of the inner fender well for clearance.
I just ball peen hammered the edges of the 3.5" stainless down till it fit over the outside of the 3" V band flange attached to the turbo and TIG'd it up. Now the heater hose will need to be rerouted over the fender well and under the fender.
Fixed some wires for headlights and turn signals and test fired her. She has 50psi of oil pressure . That's 50psi more than when I got it lol.
All in all, a good car day. Once the water pump inlets and outlets are modified, the radiator will go in and hopefully stay in. Then it's figuring out the A2W tank and lines. After she is up a running around, I plan to put the old girl on a diet.

I just ball peen hammered the edges of the 3.5" stainless down till it fit over the outside of the 3" V band flange attached to the turbo and TIG'd it up. Now the heater hose will need to be rerouted over the fender well and under the fender.
Fixed some wires for headlights and turn signals and test fired her. She has 50psi of oil pressure
. That's 50psi more than when I got it lol.All in all, a good car day. Once the water pump inlets and outlets are modified, the radiator will go in and hopefully stay in. Then it's figuring out the A2W tank and lines. After she is up a running around, I plan to put the old girl on a diet.

 02-15-2016, 09:36 PM
#55
9 Second Club
Thread Starter
Join Date: Jan 2013
Location: Just outside Memphis
Posts: 394
Likes: 0
Received 0 Likes
on
0 Posts
Thanks, I think there's a good chance I'll be collecting timeslips in Sweet Pea before the end of spring. I ordered some suspension upgrades in December but they still haven't shipped. I'm going to need those parts soon.
 02-21-2016, 10:54 PM
#58
9 Second Club
Thread Starter
Join Date: Jan 2013
Location: Just outside Memphis
Posts: 394
Likes: 0
Received 0 Likes
on
0 Posts
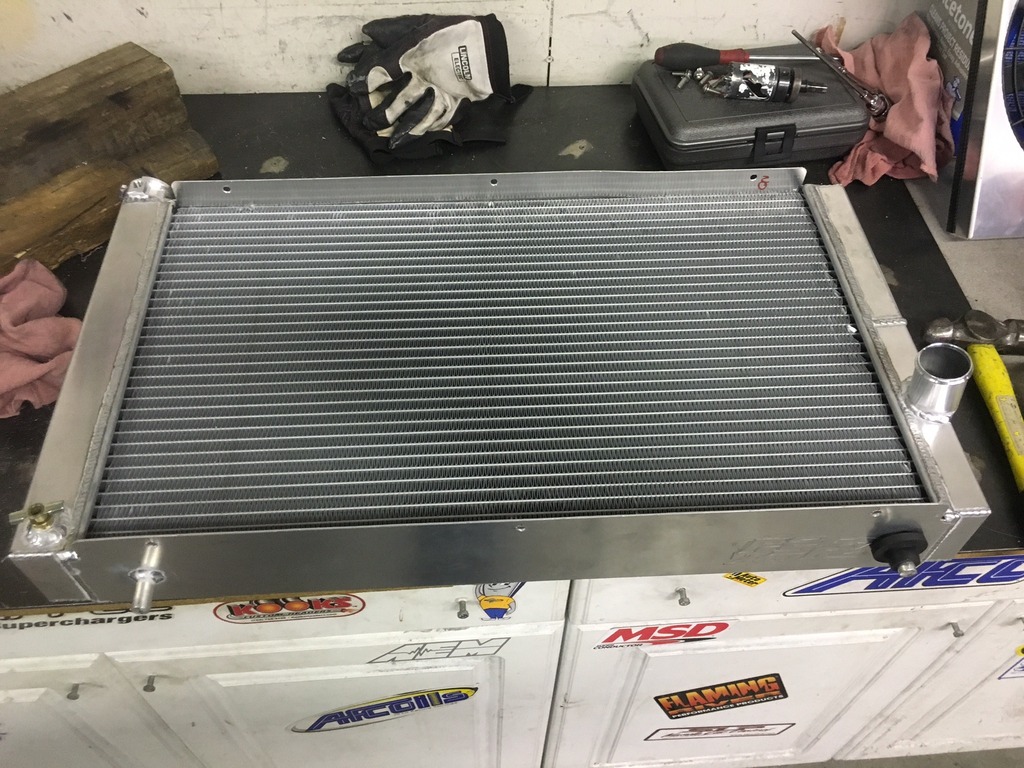
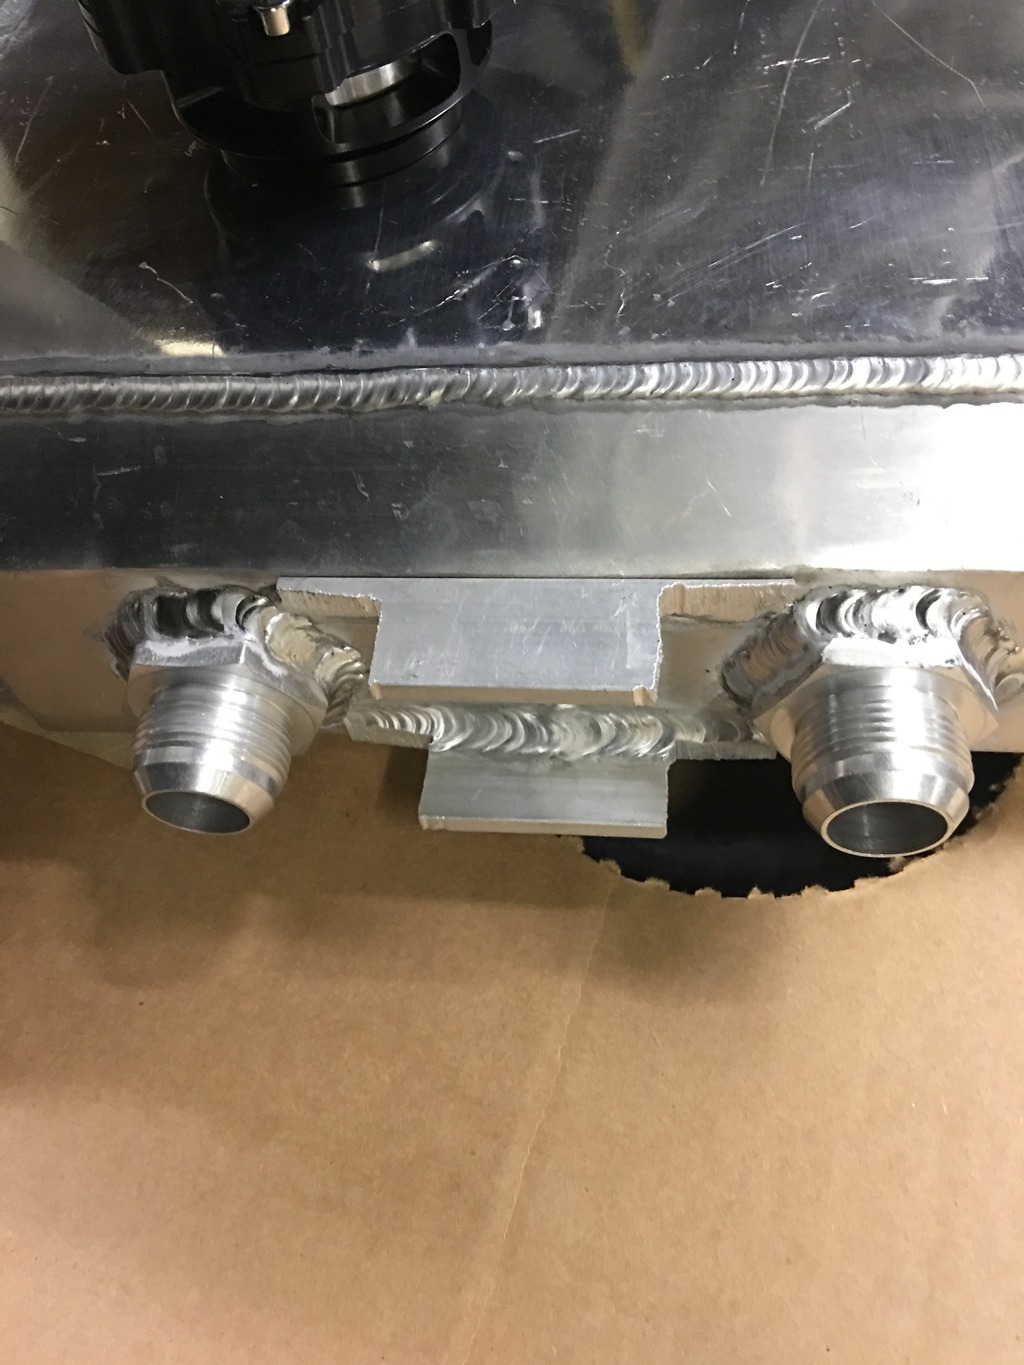
The water inlets for the intercooler now have proper AN bungs welded on.
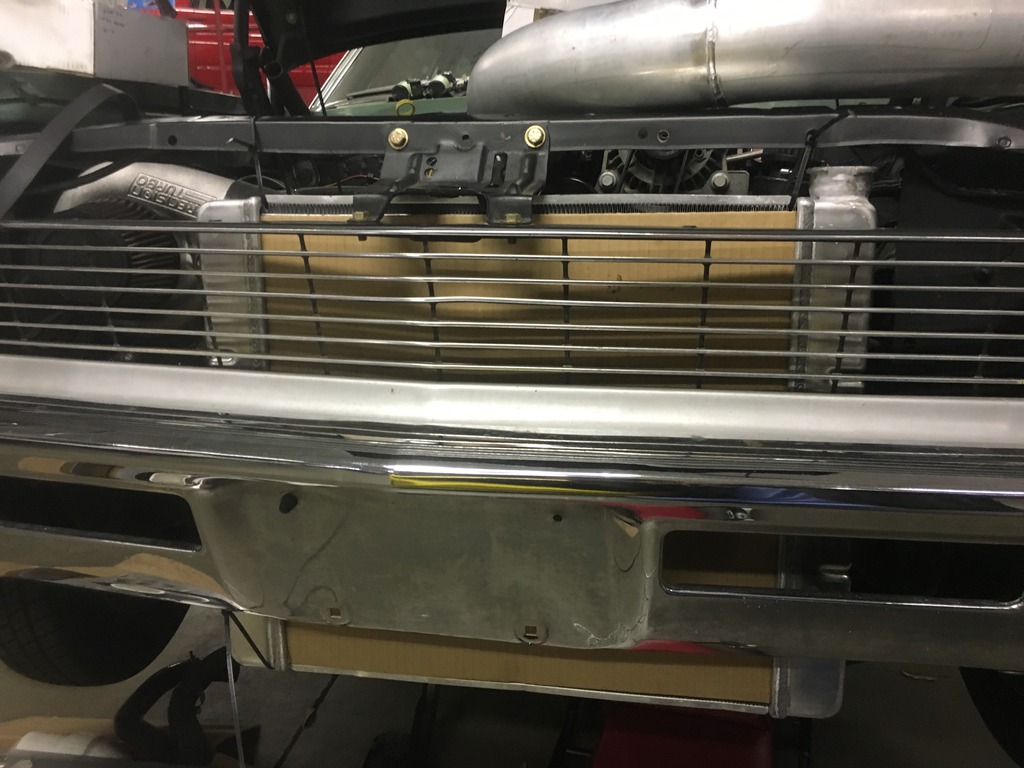
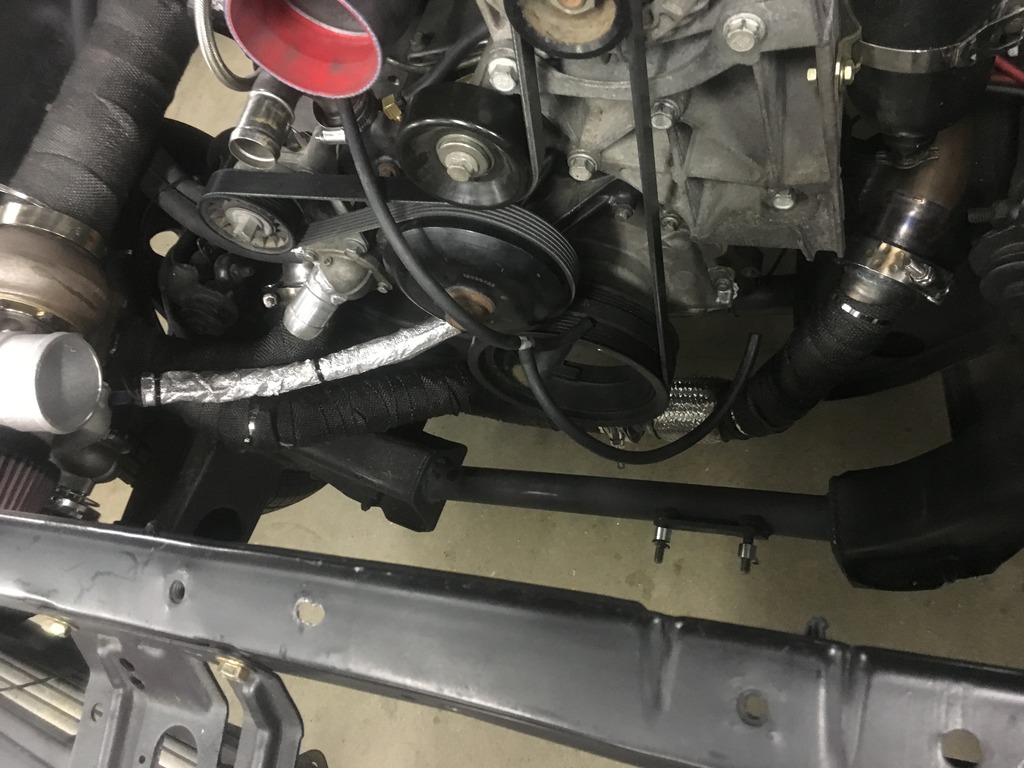
Radiator test fit in its home. It just needs a lower radiator hose from NAPA that I'll get later this week.
With a little core support trim, looks like there will be plenty room to access the radiator cap.
Once the lower hose is fit, radiator will come out for some black paint. I can't have a fancy, shiny aluminum radiator peeking through ol' Sweet Pea's grille.
Then once it's painted, the radiator should go back to its home for good. Then will come the intercooler tank system and the suspension. I'm thinking about upgrade the fronts to manual disc brakes and I know I'm going to need a rear end. I'd like to go ford 8.8 which should be plenty strong and the least expensive option.

Radiator test fit in its home. It just needs a lower radiator hose from NAPA that I'll get later this week.

With a little core support trim, looks like there will be plenty room to access the radiator cap.

Once the lower hose is fit, radiator will come out for some black paint. I can't have a fancy, shiny aluminum radiator peeking through ol' Sweet Pea's grille.
Then once it's painted, the radiator should go back to its home for good. Then will come the intercooler tank system and the suspension. I'm thinking about upgrade the fronts to manual disc brakes and I know I'm going to need a rear end. I'd like to go ford 8.8 which should be plenty strong and the least expensive option.
02-22-2016, 07:19 PM
#59
9 Second Club
Thread Starter
Join Date: Jan 2013
Location: Just outside Memphis
Posts: 394
Likes: 0
Received 0 Likes
on
0 Posts
Got a chance to paint the radiator today.

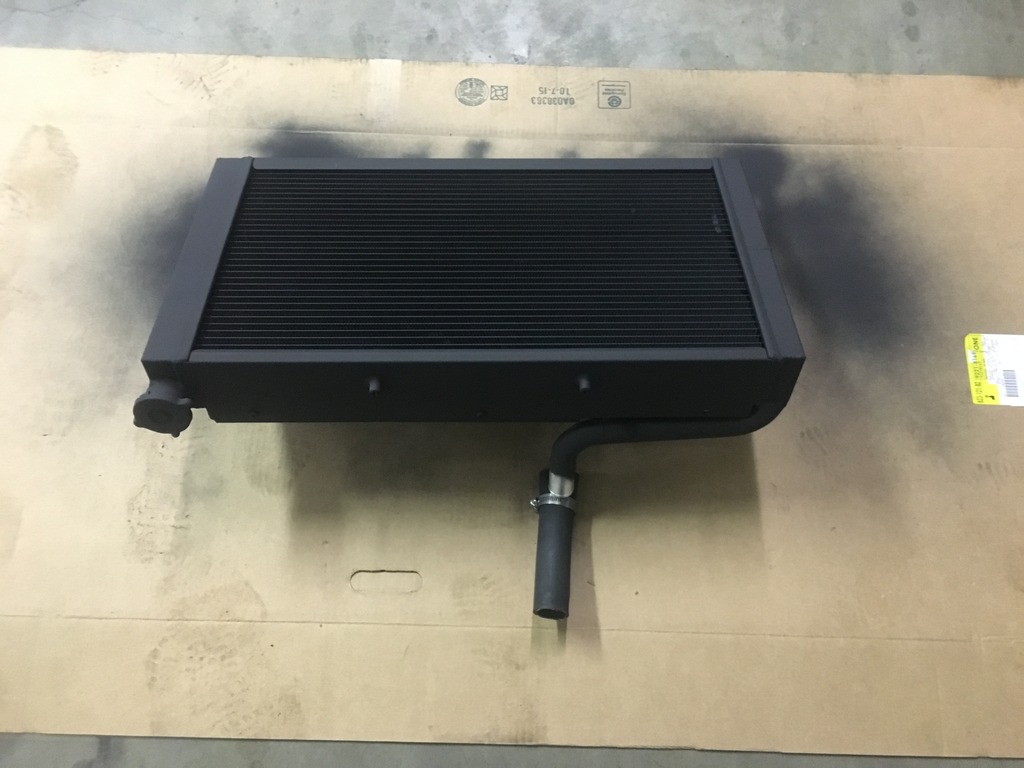
Also, heat wrapped the hotside and some of the downpipe.
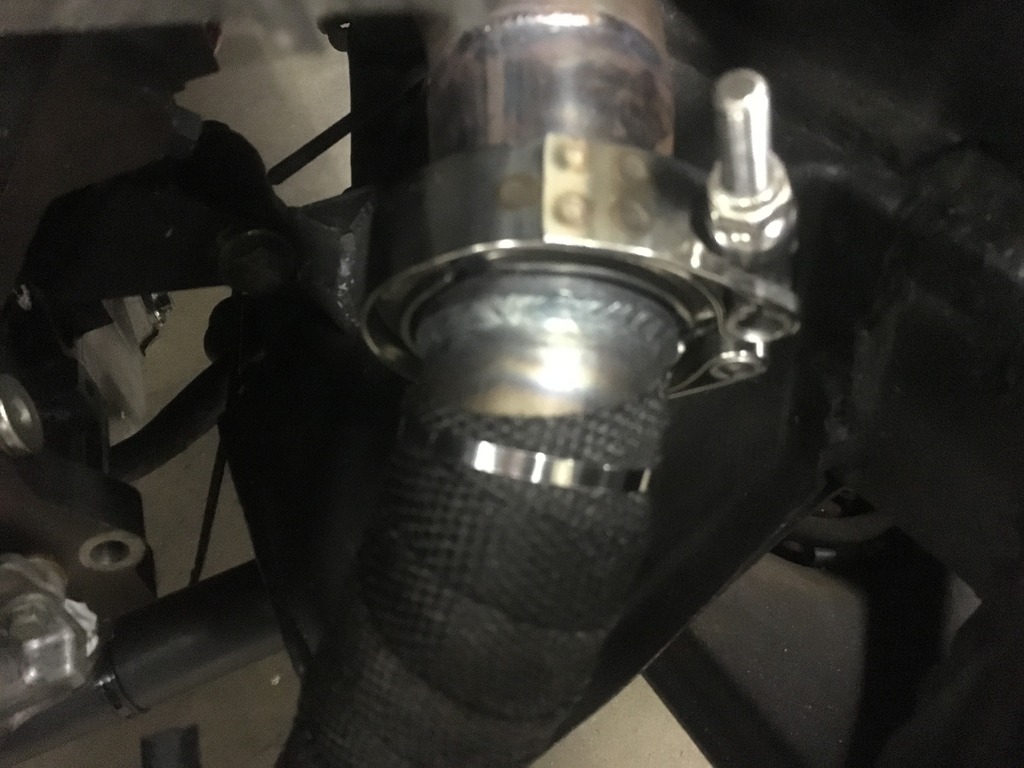
I had someone ask me what the fillet welds around the V bands look like so I snapped a pic of one.
Radiator should be in the car with coolant this week and she should move under her own power. Then the focus will be on the A2W tank.


Also, heat wrapped the hotside and some of the downpipe.


I had someone ask me what the fillet welds around the V bands look like so I snapped a pic of one.

Radiator should be in the car with coolant this week and she should move under her own power. Then the focus will be on the A2W tank.