
THE TRANSFORMATION IS COMPLETE..completely upgraded red TRANS AM-lots of pics-UPDATED
 10-17-2009, 07:50 PM
#1
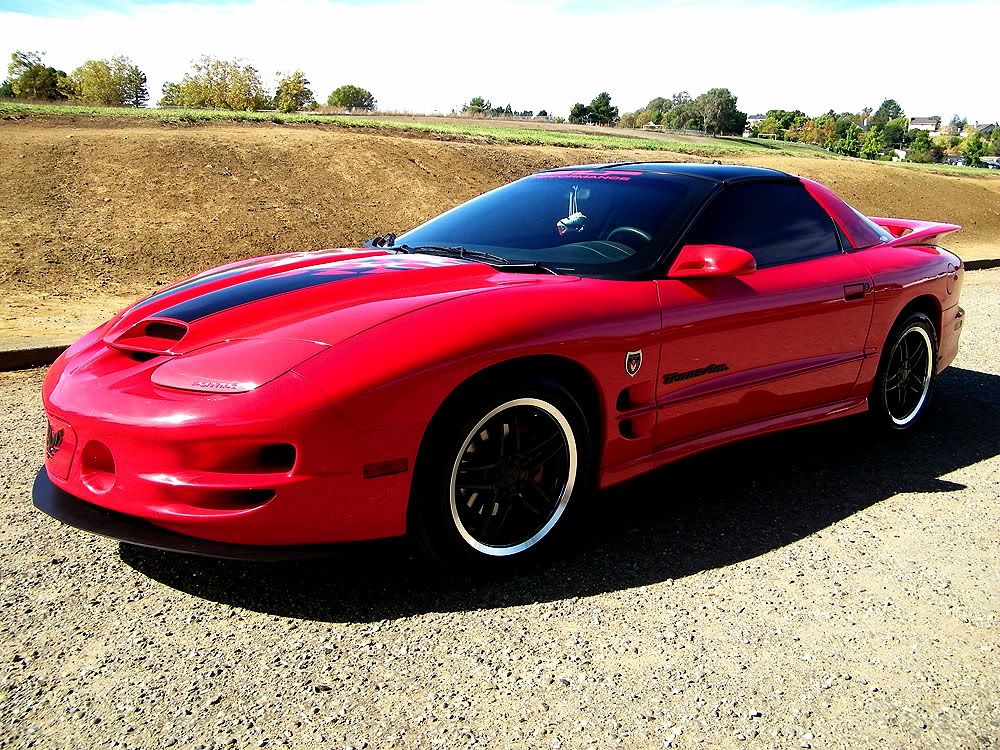
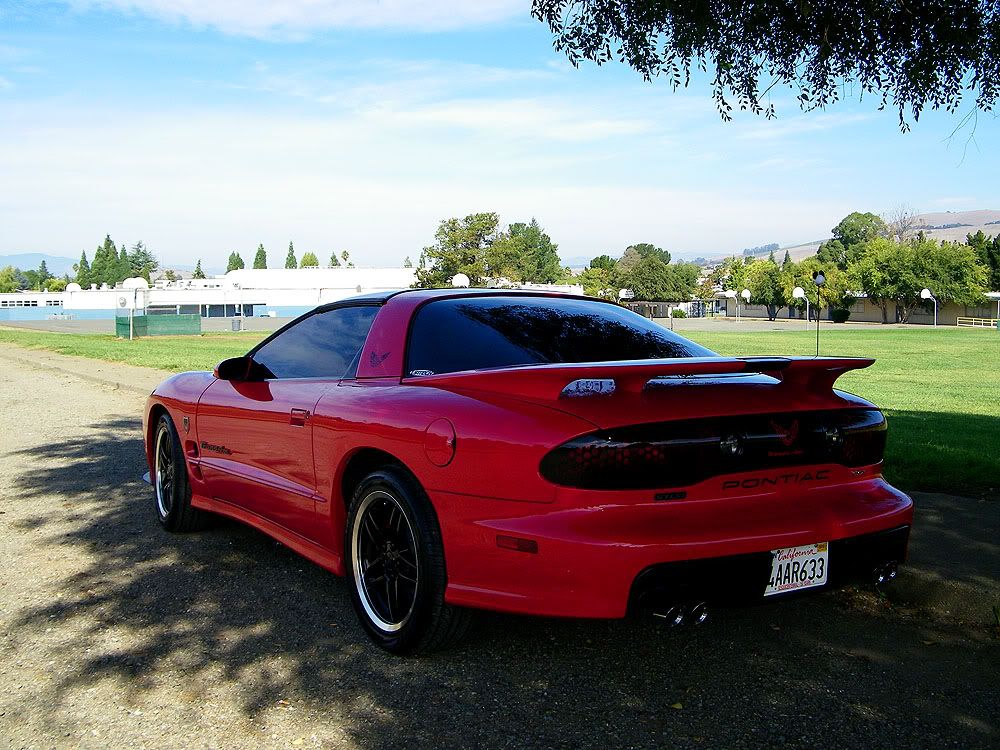
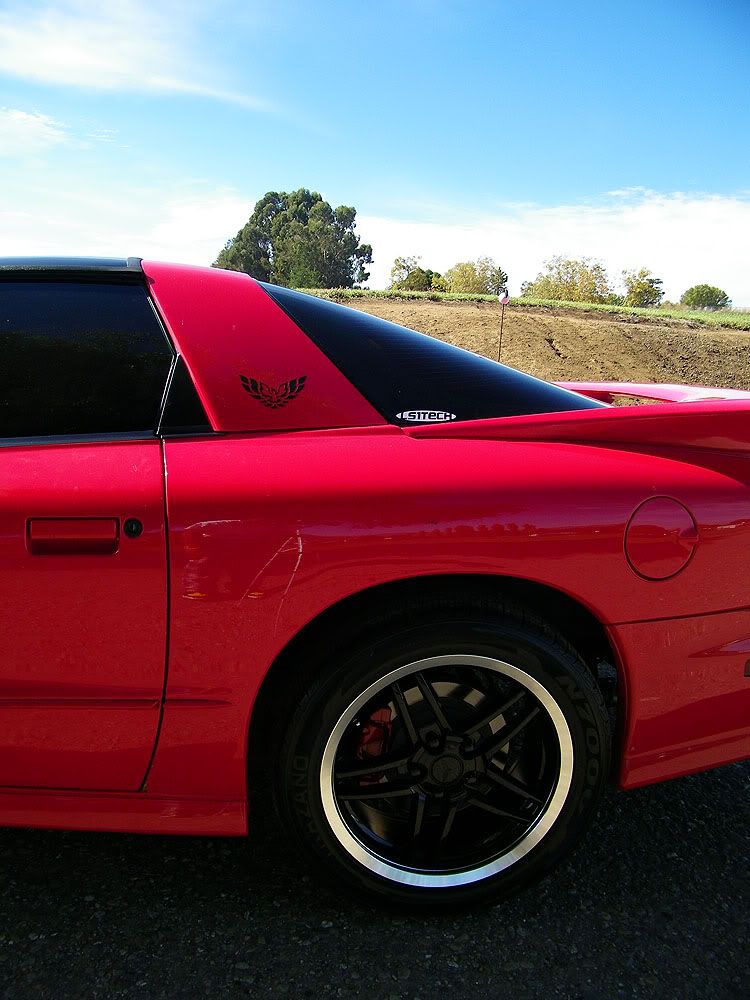
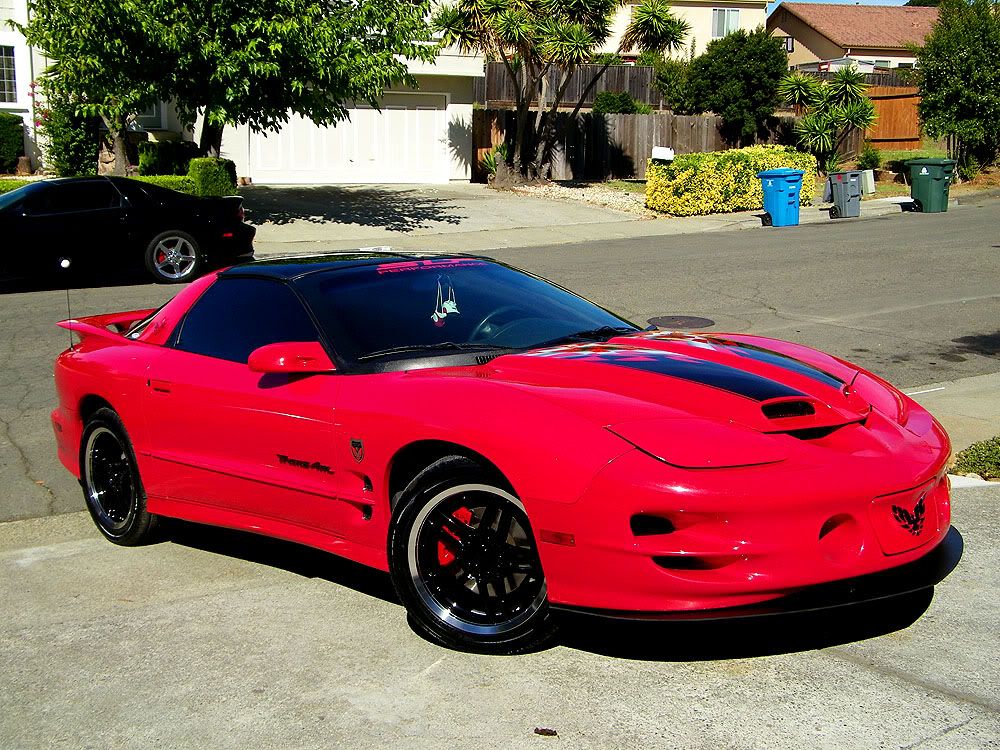
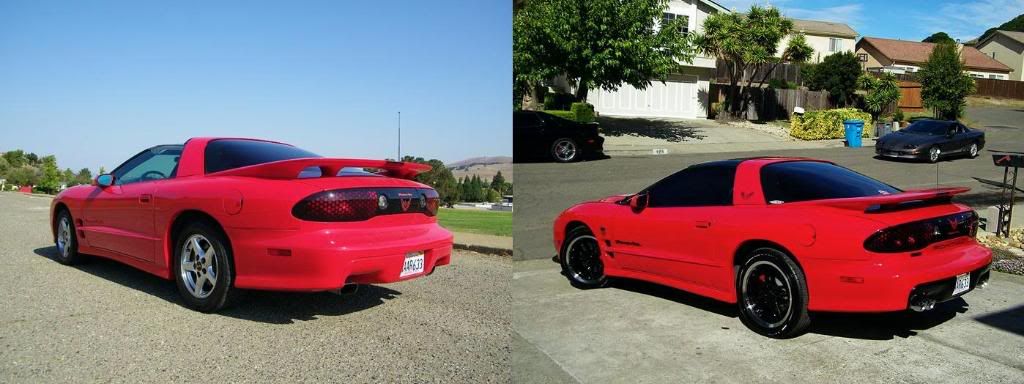
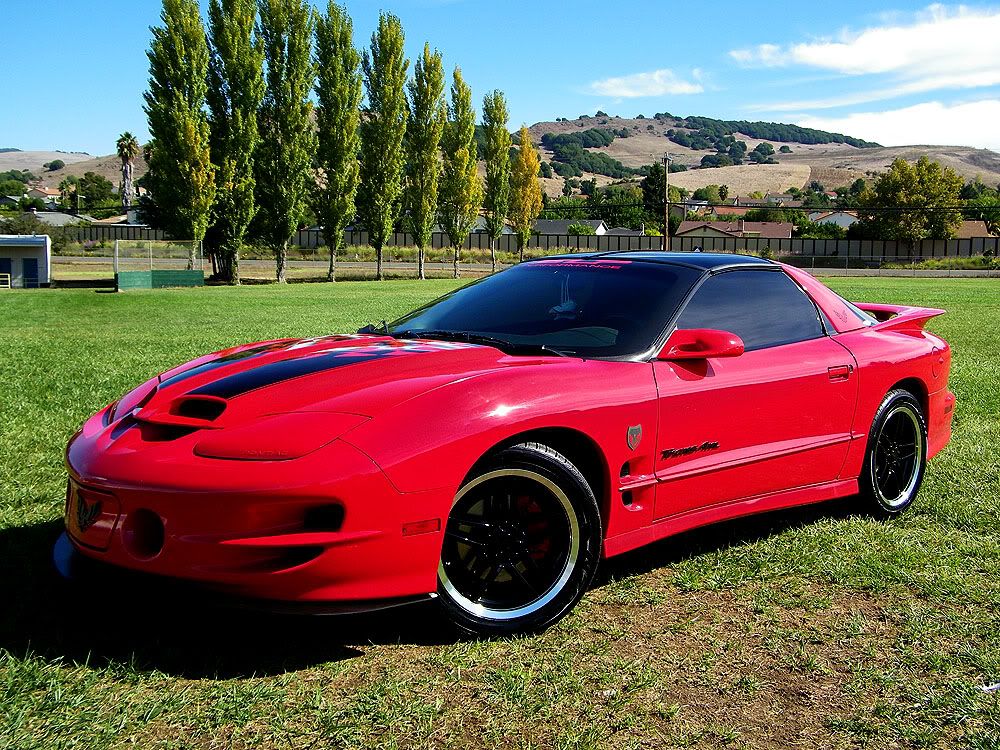
brought this car home on August 26, 2009, it is now October 17, 2009. after starting bone stock when i got the car, it's seen a pretty big change. it feels great looking at it now.
Please let me know what you think.
MORE UPDATES ON PAGE 2 (abs cover and side molding)
MODS:
-Appearance
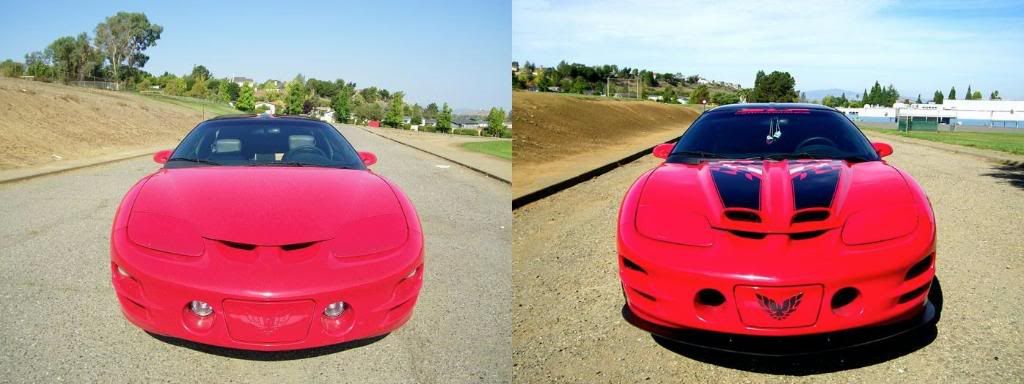
1) ws6 hood painted to match
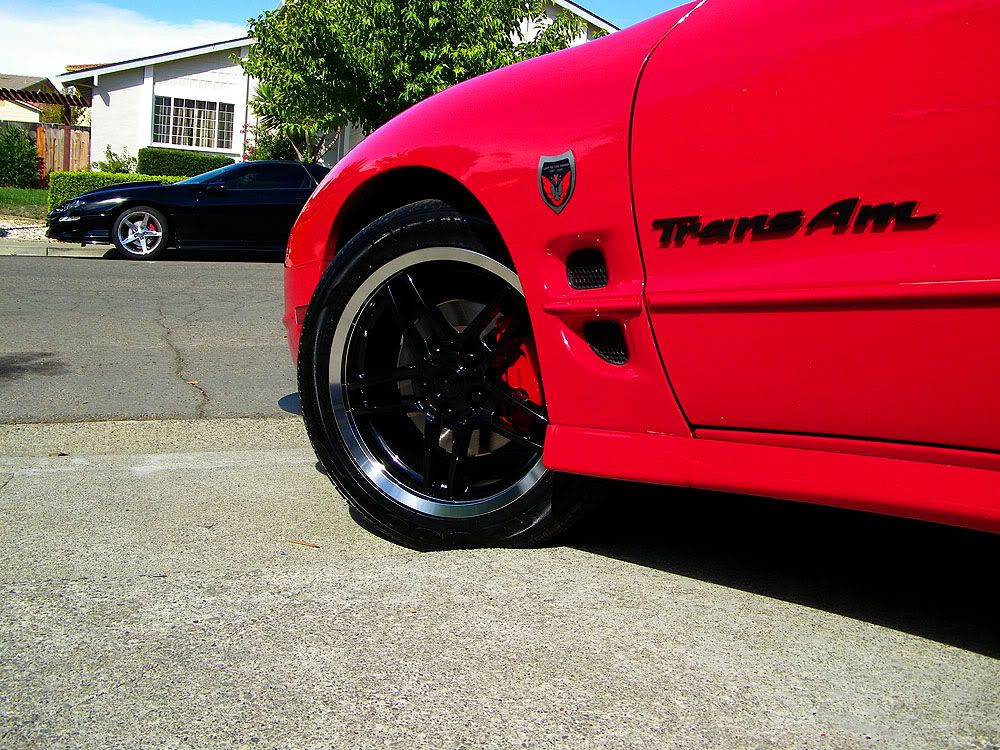
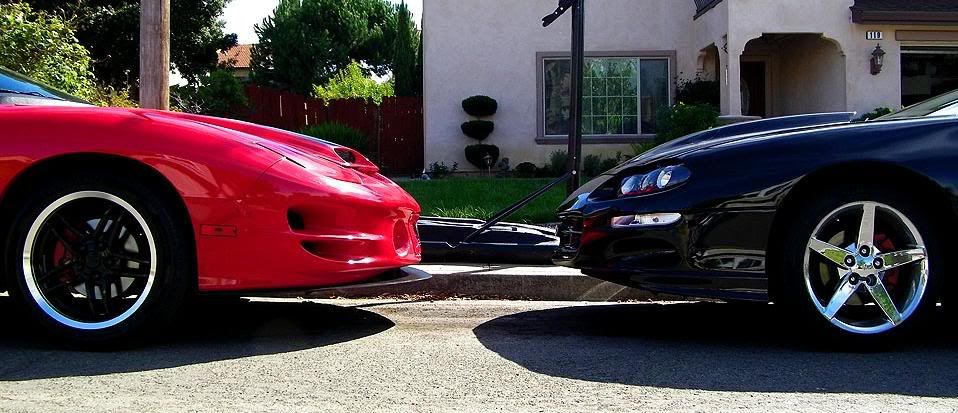
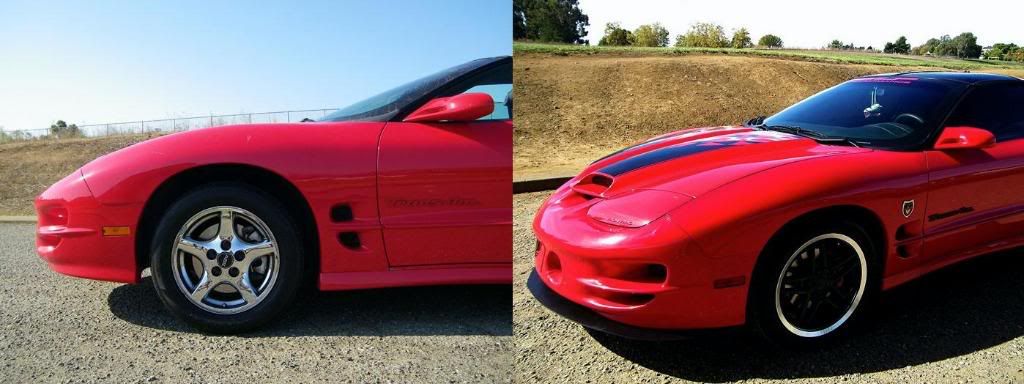
2) 18x8.5 C6 ZO6 rims, black with polished lip. 255x45x18 all the way around. lugnuts painted black
3) checkered flag stripes from 3rdgendecals.com
4) 5% tint on back window, 15% on doors, and t-tops painted black to prevent any light from getting in.
5) LOTS of stuff from emblempros.com (emblems and a lot of stuff for under the hood)
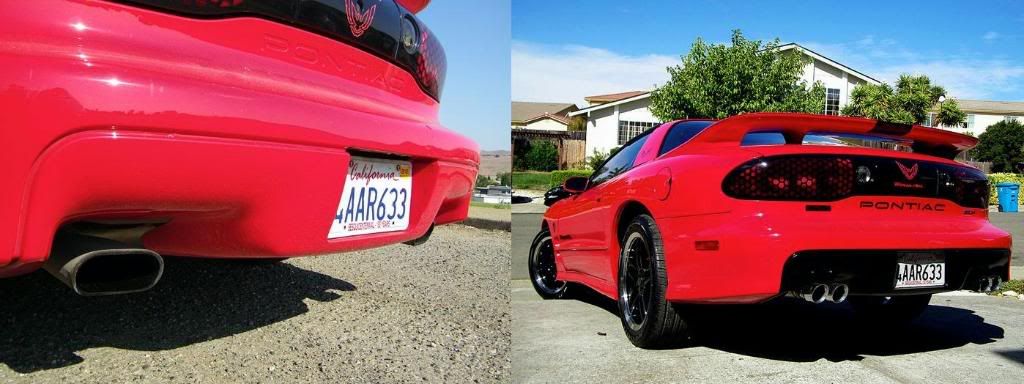
6) shaved center tail panel (no more keyhole)
7) ceta mod
8) vht nightshaded turn signals and foglights
9) red front side markers, to match the rears and compliment the car.
10) custom painted 3rd brake light
11) custom 17" shorty antenna from indy-motorwerks (ebay)
12) SLP logo emblem and windshield banner
13) red painted calipers
14) 6LE front splitter
15) LS1 tech decals- thanks Big Worm
16) lots of stuff from Specialized Stainless for under the hood.
-Perfromance (not much, money held me back)
1) SLP cold air induction
2) SLP LoudMouth I catback, with Corsa Clones tips from afterthoughtsauto
3) tune up, NGK spark plug wires, MSD spark plug wires
-Suspension
1) BMR strut toer brace
2) Edelbrock shocks
-A few last things to do
1) wash the car (i havent since the first week i got it), polish, and wax
2) oil change
3) DRIVE AROUND AND SHOW IT OFF
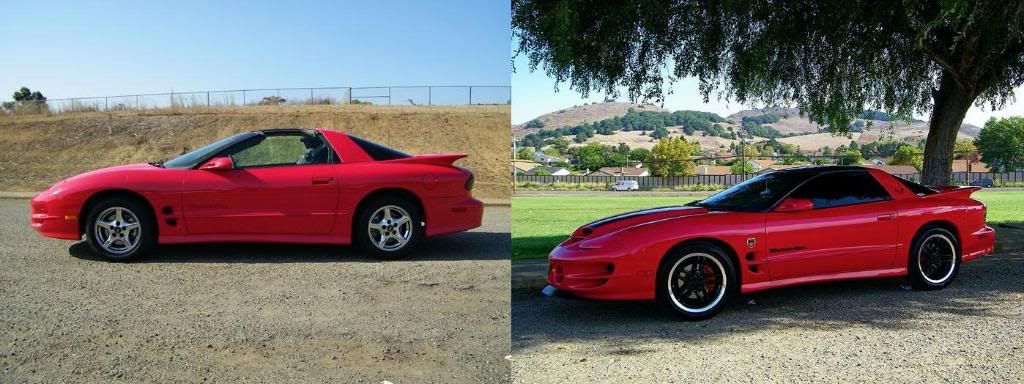
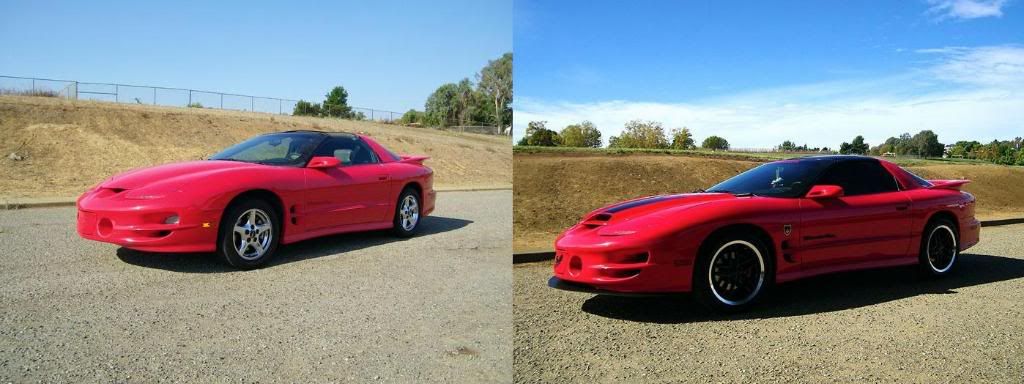
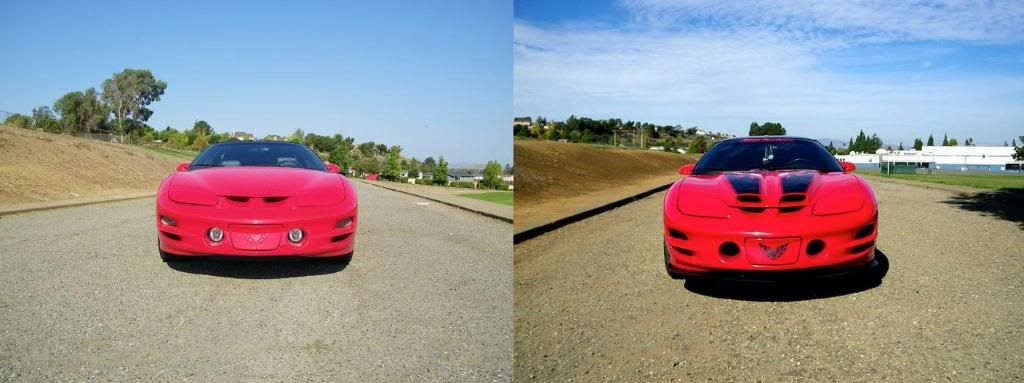
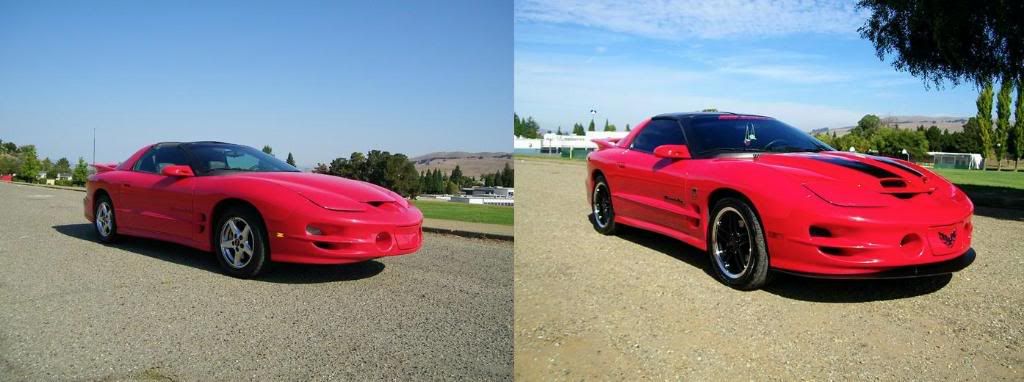
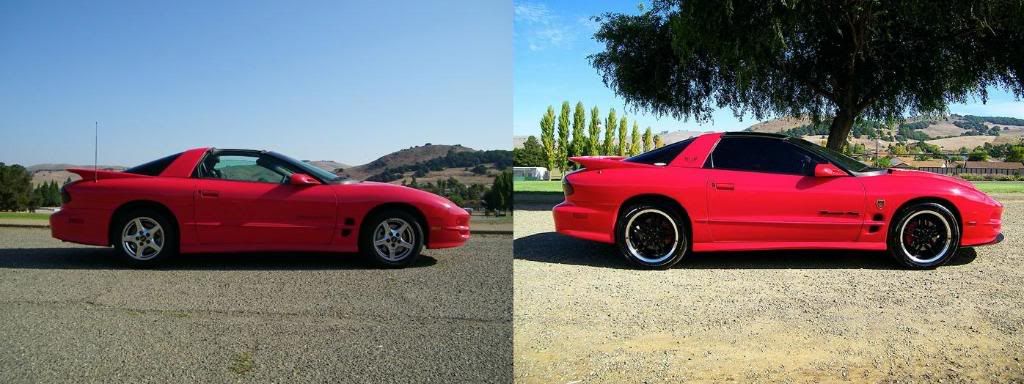
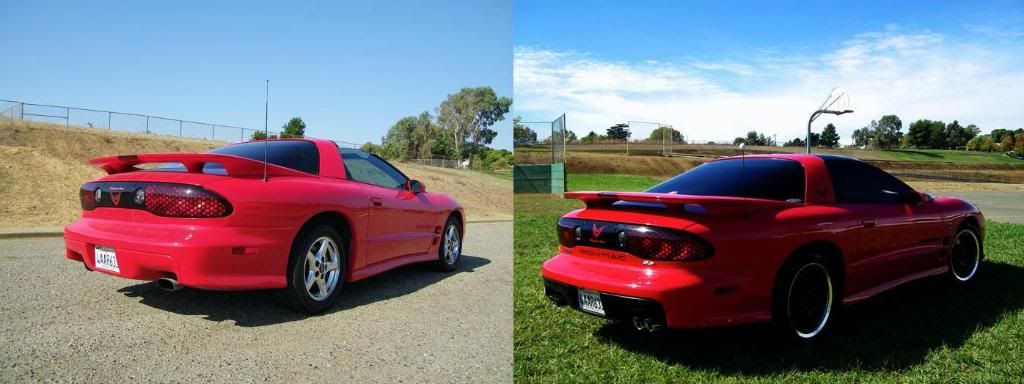
BEFORE and AFTER pictures
MY LICENSE PLATE SHOULD BE HERE WITHIN THE NEXT WEEK

Please let me know what you think.
MORE UPDATES ON PAGE 2 (abs cover and side molding)
MODS:
-Appearance
1) ws6 hood painted to match
2) 18x8.5 C6 ZO6 rims, black with polished lip. 255x45x18 all the way around. lugnuts painted black
3) checkered flag stripes from 3rdgendecals.com
4) 5% tint on back window, 15% on doors, and t-tops painted black to prevent any light from getting in.
5) LOTS of stuff from emblempros.com (emblems and a lot of stuff for under the hood)
6) shaved center tail panel (no more keyhole)
7) ceta mod
8) vht nightshaded turn signals and foglights
9) red front side markers, to match the rears and compliment the car.
10) custom painted 3rd brake light
11) custom 17" shorty antenna from indy-motorwerks (ebay)
12) SLP logo emblem and windshield banner
13) red painted calipers
14) 6LE front splitter
15) LS1 tech decals- thanks Big Worm
16) lots of stuff from Specialized Stainless for under the hood.
-Perfromance (not much, money held me back)
1) SLP cold air induction
2) SLP LoudMouth I catback, with Corsa Clones tips from afterthoughtsauto
3) tune up, NGK spark plug wires, MSD spark plug wires
-Suspension
1) BMR strut toer brace
2) Edelbrock shocks
-A few last things to do
1) wash the car (i havent since the first week i got it), polish, and wax
2) oil change
3) DRIVE AROUND AND SHOW IT OFF
BEFORE and AFTER pictures
MY LICENSE PLATE SHOULD BE HERE WITHIN THE NEXT WEEK
Last edited by crimson_bird; 04-17-2012 at 12:01 AM.
 10-17-2009, 07:51 PM
#2
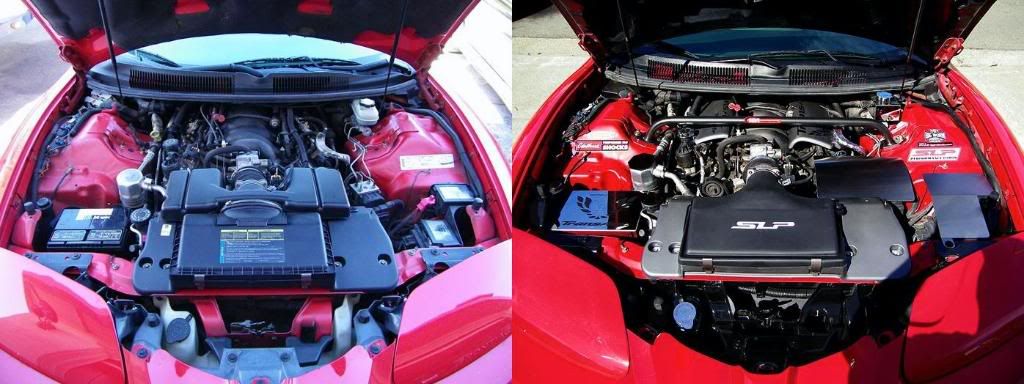
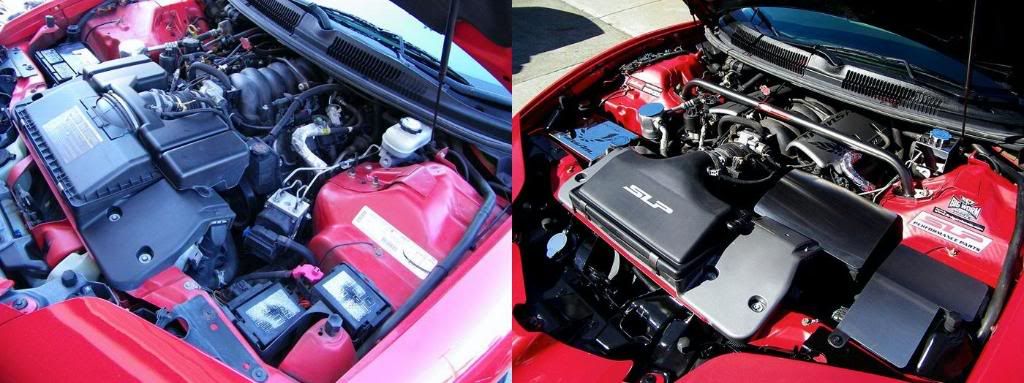
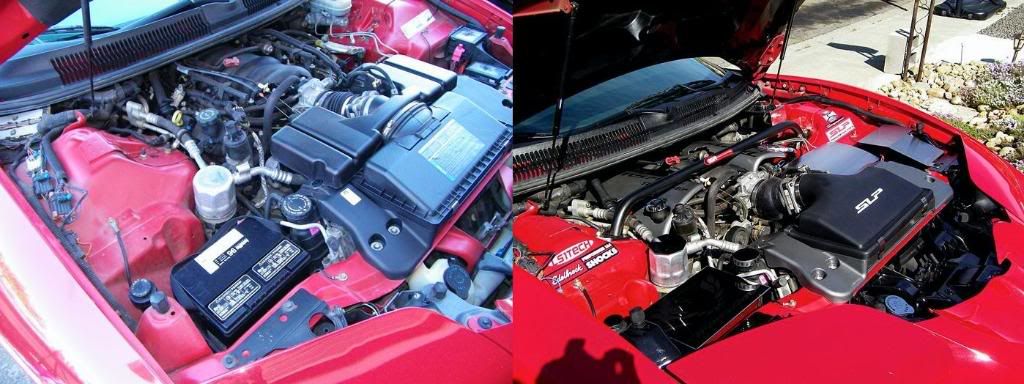
Cant forget some before and after engine bay pics
1) Thanks to emblempros and Specialized Stainless for all the great stuff.
2) custom painted the Fuel rail covers in a hammered color, the same as i did the lower part of the air box.
3) lots of stuff repainted black
4) chrome Pontiac LS1 engine oil cap
-you might notice the air box looks a little worn, i sanded it down so i can glear coat it. trying to give it a nice shine. (not completed yet)
-one of these days i'll get around to the hidden wire mod
Last edited by crimson_bird; 04-16-2012 at 11:37 PM.
10-17-2009, 08:00 PM
#4


looks sick, wayyy better than it was. pretty unique too, but no so far out there that it looks odd.
now you just need to work on making the performance list longer than the appearance mod list mwahaha.
now you just need to work on making the performance list longer than the appearance mod list mwahaha.
10-17-2009, 09:50 PM
#6
oh and i forgot to add an exhaust clip.
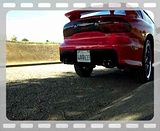
before (stock with only SLP CAI):
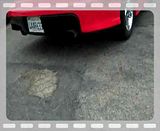
And after getting the LoudMouth installed:
-excuse the pajamas, i got up and HAD to go take some pics of the finished priduct since i just got the rims and splitter on last night.
before (stock with only SLP CAI):
And after getting the LoudMouth installed:
-excuse the pajamas, i got up and HAD to go take some pics of the finished priduct since i just got the rims and splitter on last night.
Trending Topics
10-17-2009, 10:12 PM
#8
Car looks good except for the side Trans Am emblems. If you're gonna keep em, you should move them to the proper position.
The big cover over the ABS looks outta place IMO, but otherwise everything flows together really well.
Shay
The big cover over the ABS looks outta place IMO, but otherwise everything flows together really well.
Shay
Last edited by 98-mongooSSe; 10-17-2009 at 10:23 PM.
10-17-2009, 11:02 PM
#9
TECH Enthusiast
iTrader: (4)
Join Date: Jul 2008
Location: Oklahoma
Posts: 540
Likes: 0
Received 0 Likes
on
0 Posts
car looks amazing. definately a nice choice of wheels. it feels so good to look at your car and see all the work you've put into it, it did for me at least... the only personal touch i would add would be to take the side moldings off, other than that awesome job.
10-17-2009, 11:41 PM
#11
Not bad, ..., it is an improvement!
I was gonna mention the placement of the Trans Am emblems also. I highly doubt that was a factory job. Most likely someone placed them there on purpose, whether it was wrecked, or just repainted for some reason. But someone didn't know where they were supposed to go originally.
Sometimes there's a point where ya just gotta say, "enough's enough", ..., & stop addin' things. And from there I'll just shut-up, ...
 10-18-2009, 03:29 AM
#13
I was gonna mention the placement of the Trans Am emblems also. I highly doubt that was a factory job. Most likely someone placed them there on purpose, whether it was wrecked, or just repainted for some reason. But someone didn't know where they were supposed to go originally.
what exactly do you have to do to remove it? just a screw driver/putty knife, pull it off, and some goof off to clean the residue? if its pretty simple i'll definitely look into it.
 10-18-2009, 10:50 AM
#20
11 Second Club
iTrader: (127)
Join Date: Jun 2002
Location: MS
Posts: 984
Likes: 0
Received 0 Likes
on
0 Posts

Amazing Change!!! Great Job. On the side moldings.... just heat them up with a hairdryer or low heat heat gun. Then slowly and gently pull them off. DO NOT use a screwdriver or putty knife or ANYTHING Sharp and Metal!!!!! Then use GooGone, or 3M Adhesive Remover, or WD40 to remore any remaining adhesive. Enjoyed the pics!!!!!!