Nasty Nate Tank and DIY Hot wire kit layout...
 07-30-2011, 11:41 AM
#1
On The Tree
Thread Starter
iTrader: (6)
Join Date: Aug 2007
Location: seabrook
Posts: 193
Likes: 0
Received 0 Likes
on
0 Posts

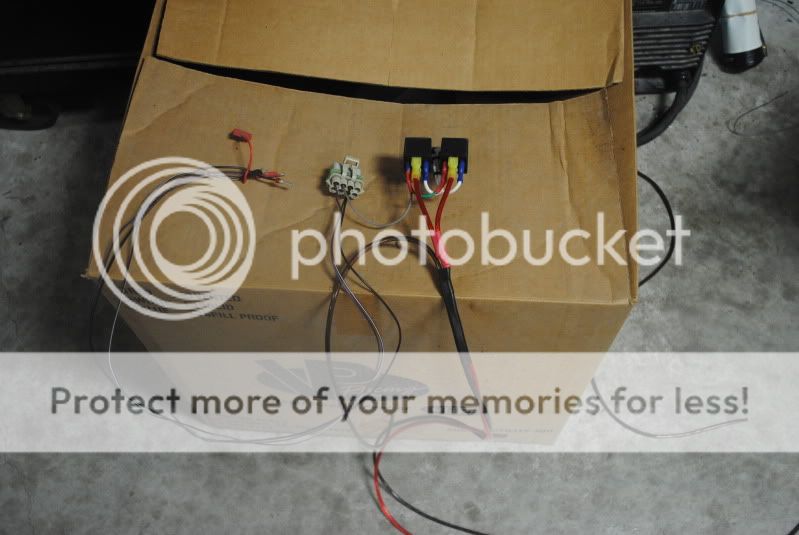
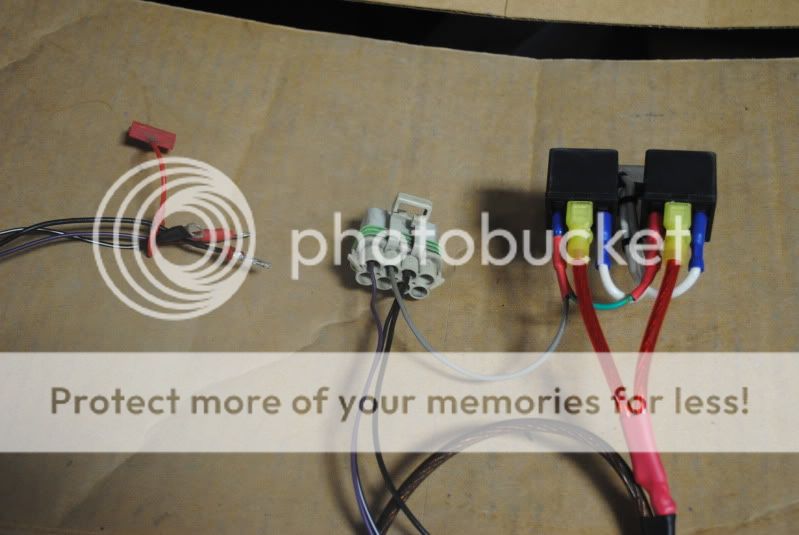
This is basically a layout of how to do your own hotwire kit for Nasty Nate's tank/Magnafuel pump combo and or a big external pump using 2 relay's, and tagging the factory trigger wire, and sending unit wire's out of the bulkhead connector on the body.. Wires u will need from factory harness... Picture's are below write up!
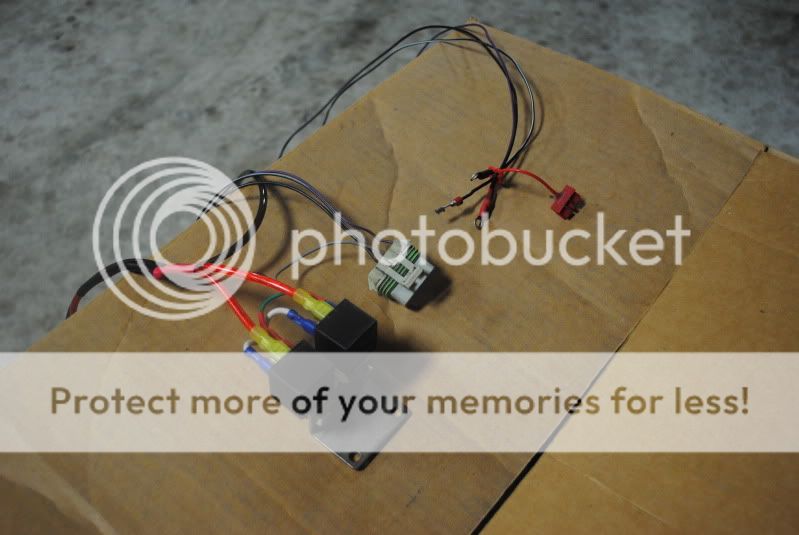
Big Bulkhead 8- pin connector above rearend on body-
Grey wire- Pump trigger wire
Purple wire- Sending unit wire
Black wire w/white tracer- Sender ground
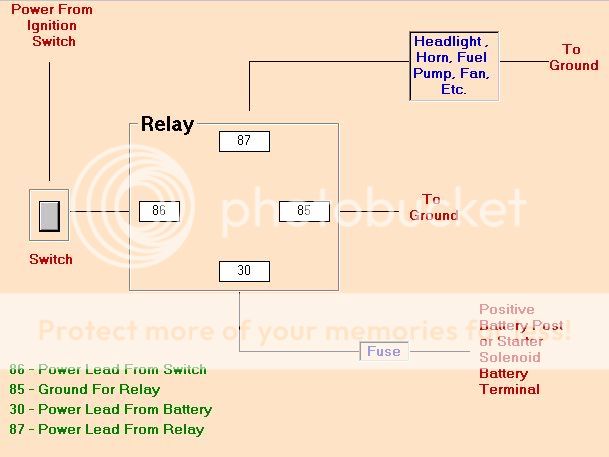
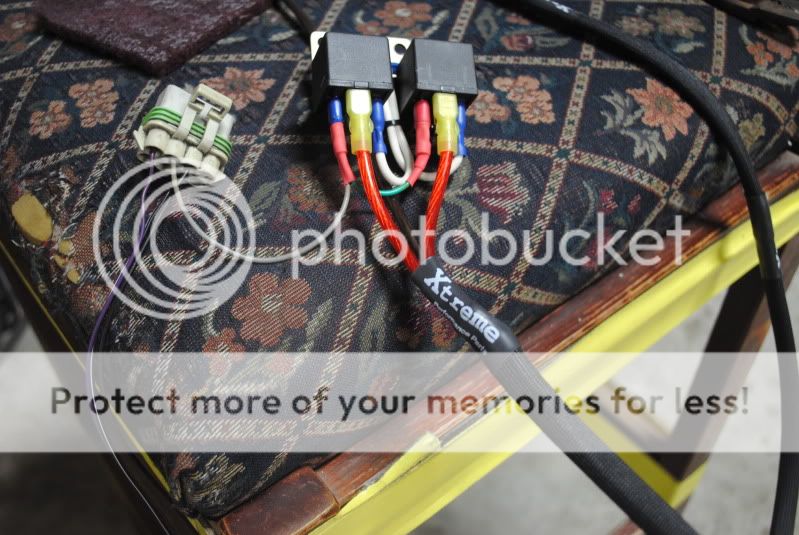
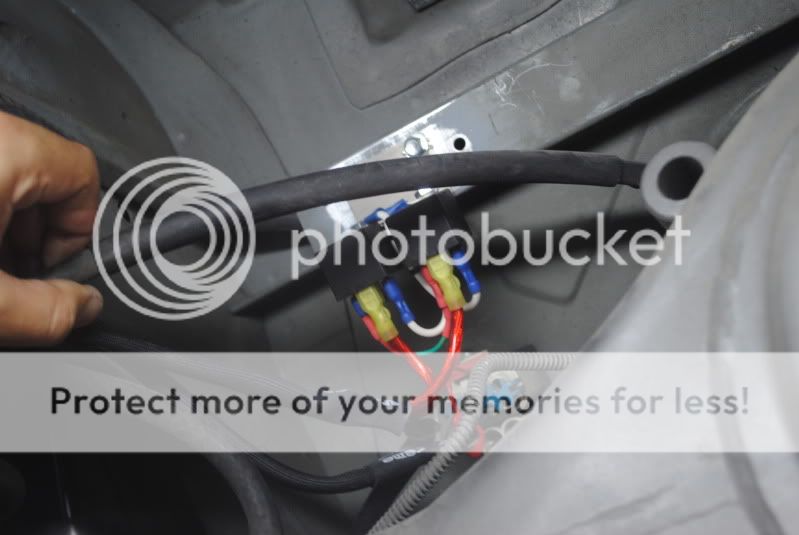
Break down of Relay wiring..
Ok here are a few steps..
1) I pulled out any unused wiring from that connector, as in ABS/Evap etc etc. U may leave it if u want..
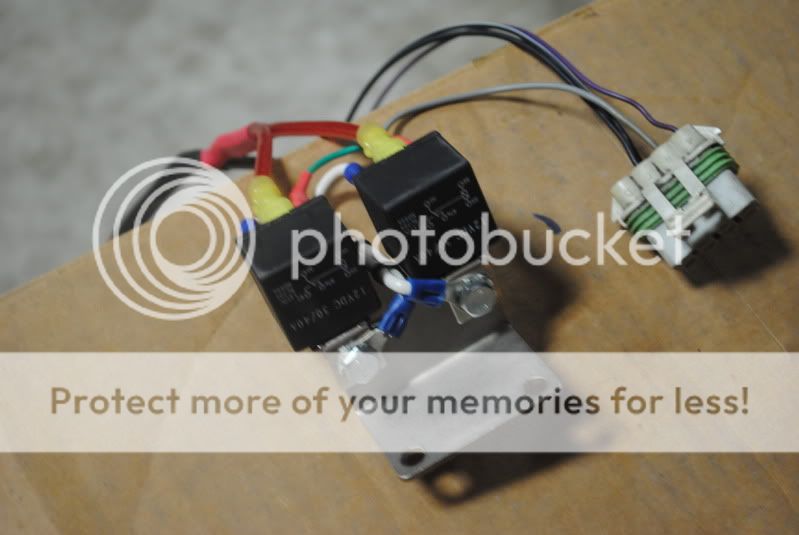
2) take the trigger wire from the connector (grey) and go to pin 86 on the relay and jumper it over to pin 86 on the other relay as well..
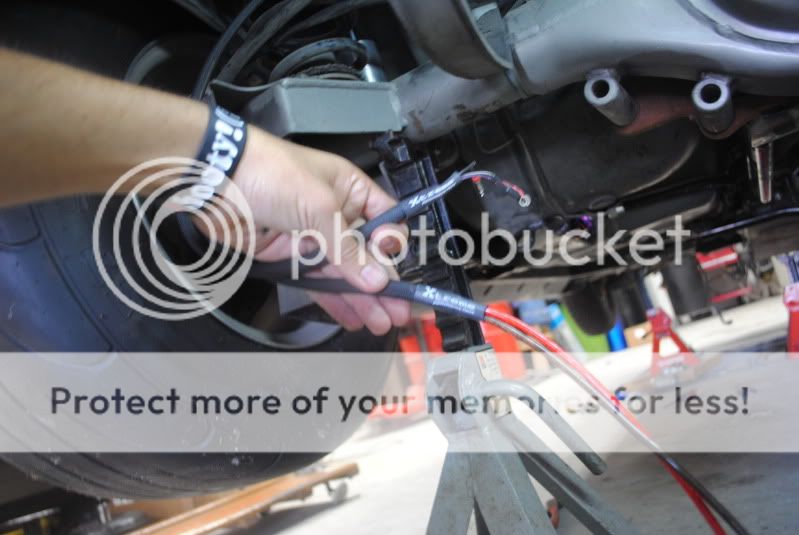
3) come off both 85 pins on the relay to a ground (i used the mounting point of the relays to Bracket, but make sure ur bracket is mounted to a good spot on the body that will make a good ground and scuff the paint before mounting!!)
4) Take 10gauge wire and jumper both 87 pin's on both relays together with a good amount of lead off the relay to reach the pump..
5) make sure to route a 10gauge ground wire with ur pump power wire from the relay as well to the pump to hook up ur ground to it (you will ground the other end of the ground wire somewhere to the body around the relay, i grounded mine to the 13mm bolt that holds the brake line below the bulkhead connectors on the body where u tagged the trigger wire for pump)
6)Take 10gauge wire and jumper both 30 pin's on the relay's together and route to the front of vehicle to the Altenator positive post.
7) Take the purple wire & the black w/white tracer wire and put ring terminals on the end (you should have pulled these from the factory connector on the other end of the wire where it went to the tank) you will be hooking these to the post's on the sending unit on the new tank. They are labeled S for sender and G for ground on the sender..
8) Hook your Hot & Ground wire to the post on the top of the tank labeled positive and Negative.
9) Your done! Time for tuning!

Bolt's back in factory strap's


Shot threw the vent hole of a view at the pump :dance:

Xtreme High temp insulation

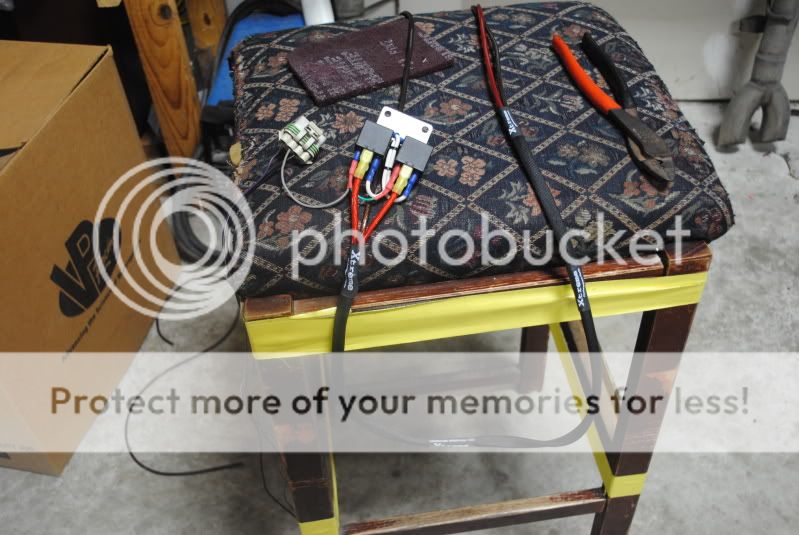
Mounting Relay follow step 3

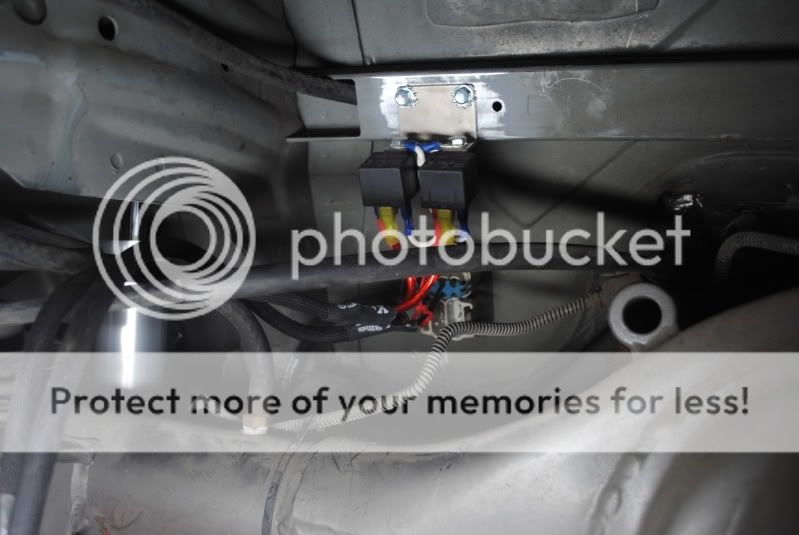
Where i Grounded the Pump as i stated above in step 3..

And here is what is left to hook up follow step 7 above for sender and step 8 for pump..
Big Bulkhead 8- pin connector above rearend on body-
Grey wire- Pump trigger wire
Purple wire- Sending unit wire
Black wire w/white tracer- Sender ground
Break down of Relay wiring..
Ok here are a few steps..
1) I pulled out any unused wiring from that connector, as in ABS/Evap etc etc. U may leave it if u want..
2) take the trigger wire from the connector (grey) and go to pin 86 on the relay and jumper it over to pin 86 on the other relay as well..
3) come off both 85 pins on the relay to a ground (i used the mounting point of the relays to Bracket, but make sure ur bracket is mounted to a good spot on the body that will make a good ground and scuff the paint before mounting!!)
4) Take 10gauge wire and jumper both 87 pin's on both relays together with a good amount of lead off the relay to reach the pump..
5) make sure to route a 10gauge ground wire with ur pump power wire from the relay as well to the pump to hook up ur ground to it (you will ground the other end of the ground wire somewhere to the body around the relay, i grounded mine to the 13mm bolt that holds the brake line below the bulkhead connectors on the body where u tagged the trigger wire for pump)
6)Take 10gauge wire and jumper both 30 pin's on the relay's together and route to the front of vehicle to the Altenator positive post.
7) Take the purple wire & the black w/white tracer wire and put ring terminals on the end (you should have pulled these from the factory connector on the other end of the wire where it went to the tank) you will be hooking these to the post's on the sending unit on the new tank. They are labeled S for sender and G for ground on the sender..
8) Hook your Hot & Ground wire to the post on the top of the tank labeled positive and Negative.
9) Your done! Time for tuning!
Bolt's back in factory strap's
Shot threw the vent hole of a view at the pump :dance:
Xtreme High temp insulation
Mounting Relay follow step 3
Where i Grounded the Pump as i stated above in step 3..
And here is what is left to hook up follow step 7 above for sender and step 8 for pump..

