2005 Grand Prix GXP Buid **Street & Strip**


 06-14-2015, 06:24 PM
#67
TECH Fanatic
iTrader: (3)
Join Date: Aug 2009
Location: Orlando, FL
Posts: 1,392
Likes: 0
Received 0 Likes
on
0 Posts
An adapter plate would be needed along with a new torque converter (4 bolt versus 3 bolt).
Electronics are done. We just need someone to fab everything up.
Axles and mounts exists due to the Impala. Fabrication would be needed for any extra stuff like shifter, starter, cooler lines, etc.

 06-19-2015, 11:56 AM
#70

Stopped down to Brandon's shop today(Furches Performance) and I was very impressed, I see good things happening for our platform with his build. He has much knowledge of these cars and judging by the cars in his shop he and his team do great custom work. Keep an eye out for sure on this one.
 06-22-2015, 07:01 AM
#72
Stopped down to Brandon's shop today(Furches Performance) and I was very impressed, I see good things happening for our platform with his build. He has much knowledge of these cars and judging by the cars in his shop he and his team do great custom work. Keep an eye out for sure on this one.
__________________________________________________ _________
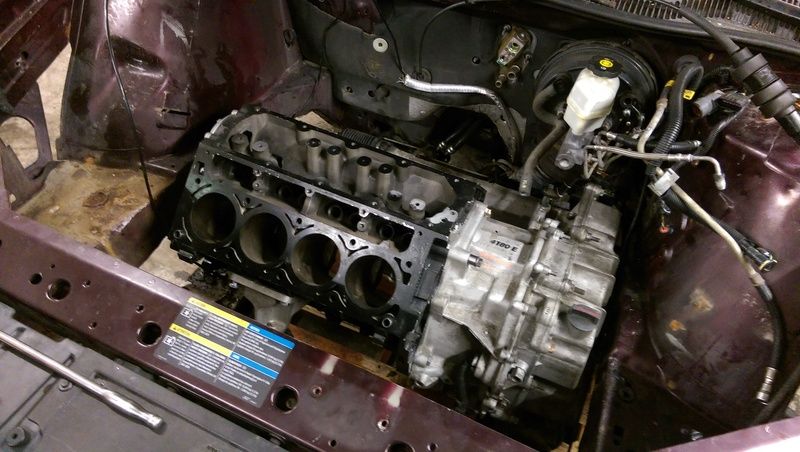
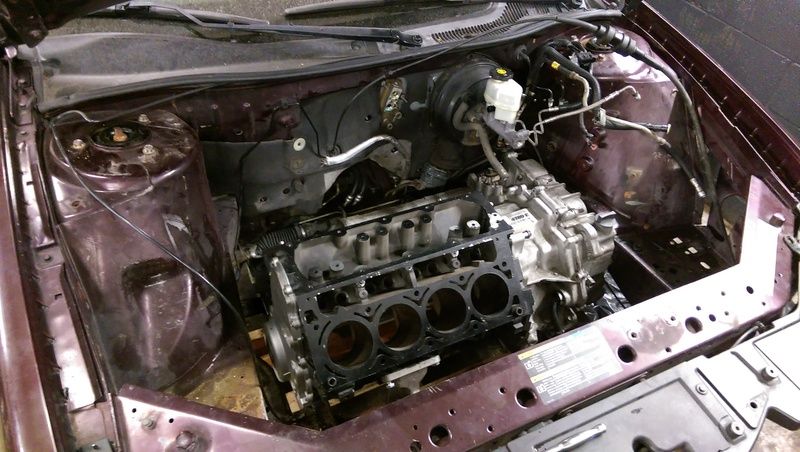
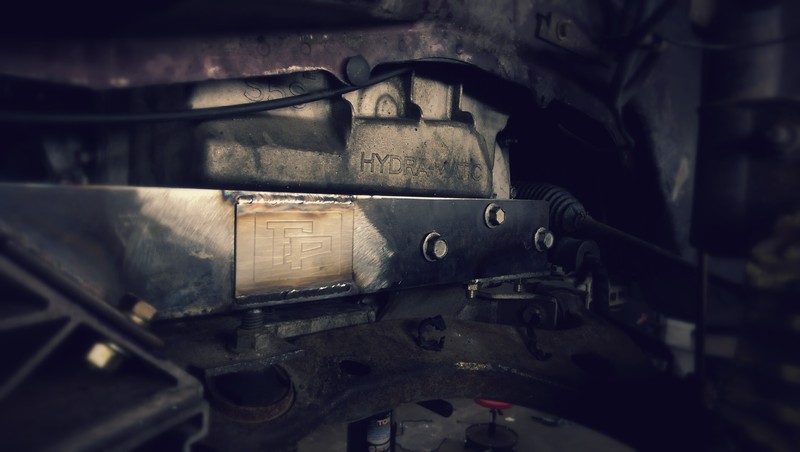
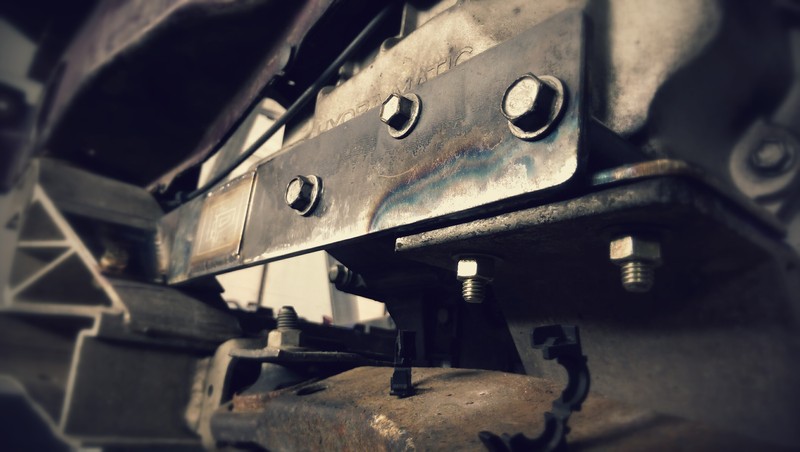
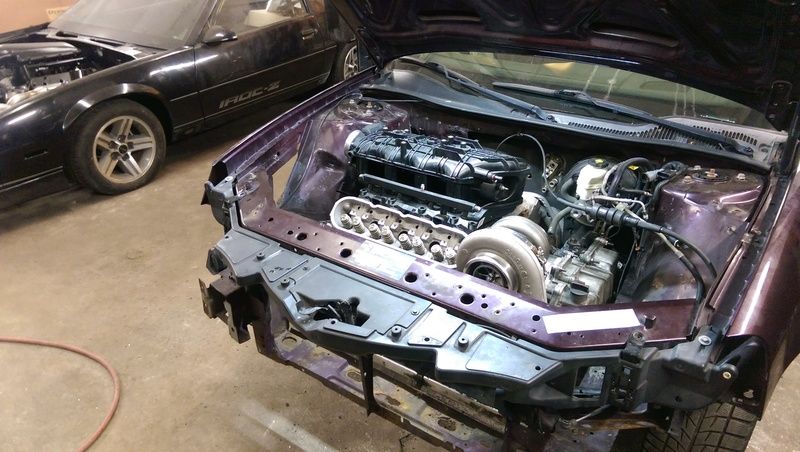
Made some progress!
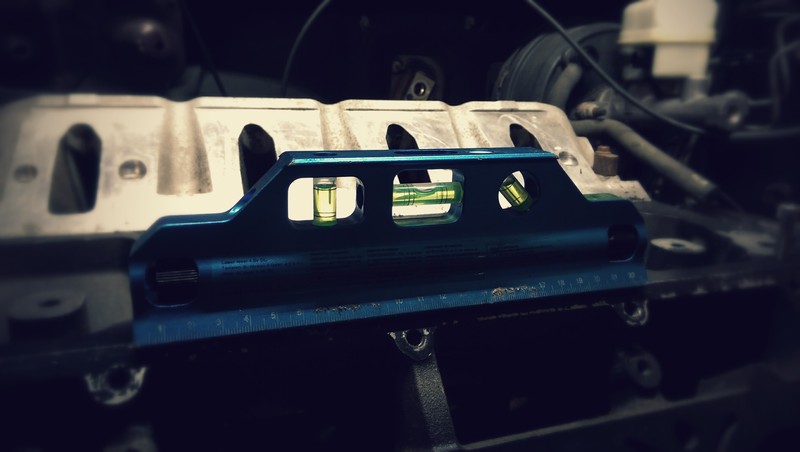
I located the motor in the chassis exactly where I wanted it and fabricated all the solid mounts. The front and rear mounts are 1-5/8 .083 wall chromoly tubing welded to 3/16 plates. The side transmission mount is fabricated from 3/16 plate and exteneds to the front of the subframe to help limit travel and distribute the additional weight. Overall I am very happy with the placement of the motor and the way the mounts came out.
 06-22-2015, 08:52 AM
#74
12 Second Club
iTrader: (3)

Join Date: Feb 2011
Location: S. FL to Philly ??
Posts: 382
Likes: 0
Received 0 Likes
on
0 Posts

That is very slick - awesome work !!
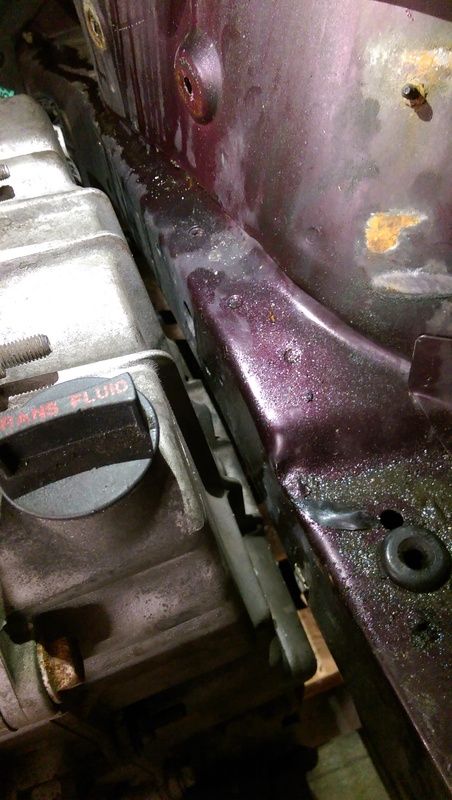
The stock rear mount bracket braces the block to the trans, is there room / do you plan to fab something like that as well? Guess you'll have to drop power train on cradle to get at it.
The stock rear mount bracket braces the block to the trans, is there room / do you plan to fab something like that as well? Guess you'll have to drop power train on cradle to get at it.
06-23-2015, 07:52 AM
#75
__________________________________________________ ____________
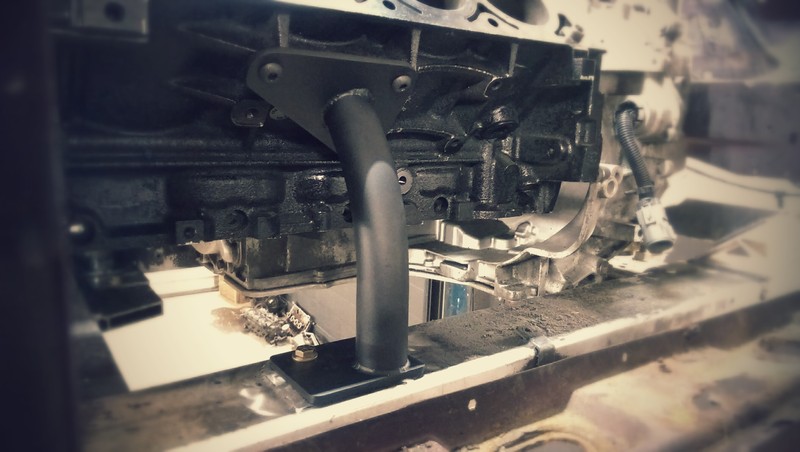
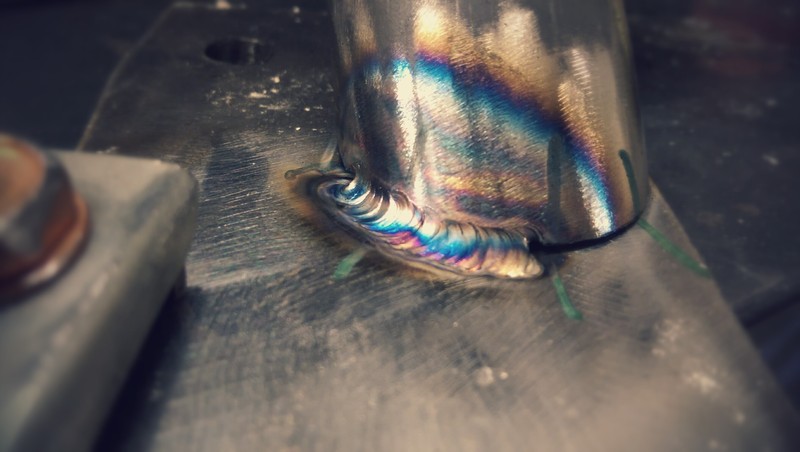
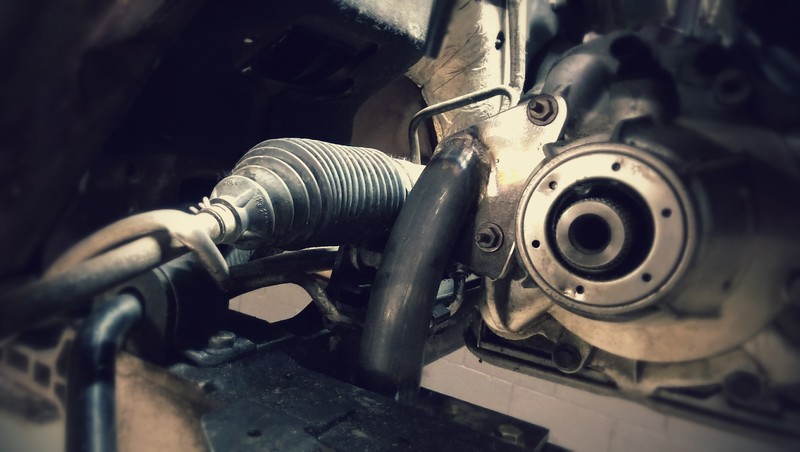
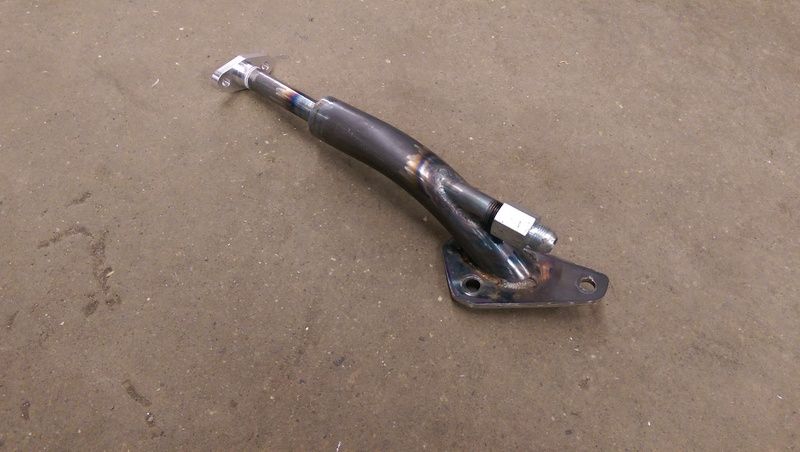
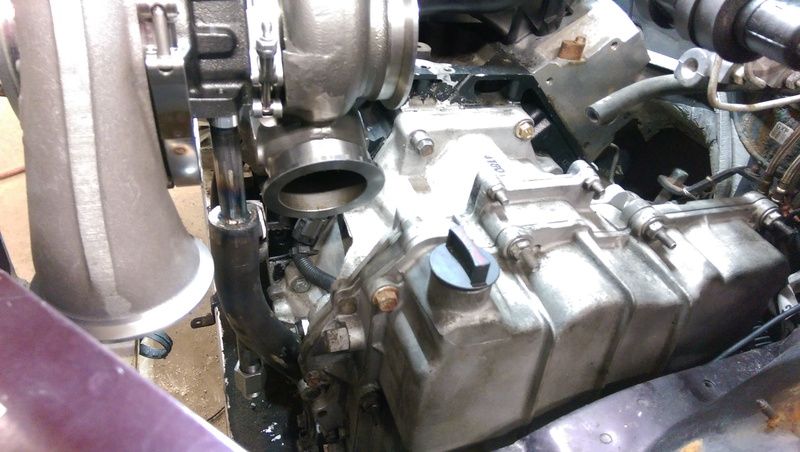
This thing just keeps getting better!
I was on a roll last night so I pushed the car in, stayed late and hammered out the turbo mount with Casey. We fabricated a drain mount for the big S475 to support the weight. Check this thing out!

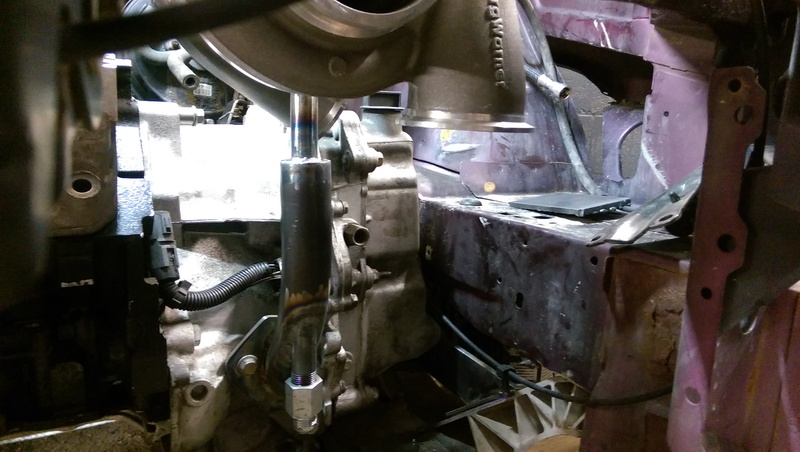


We ended up going forward facing verse my previous idea for packaging reasons. Either way, I think it looks killer. Very happy with the outcome.
06-23-2015, 08:23 AM
#76
I am going to add an adjustable link just to brace the motor to transaxle. Nothing crazy.
__________________________________________________ ____________
This thing just keeps getting better!
I was on a roll last night so I pushed the car in, stayed late and hammered out the turbo mount with Casey. We fabricated a drain mount for the big S475 to support the weight. Check this thing out!


We ended up going forward facing verse my previous idea for packaging reasons. Either way, I think it looks killer. Very happy with the outcome.
__________________________________________________ ____________
This thing just keeps getting better!
I was on a roll last night so I pushed the car in, stayed late and hammered out the turbo mount with Casey. We fabricated a drain mount for the big S475 to support the weight. Check this thing out!
We ended up going forward facing verse my previous idea for packaging reasons. Either way, I think it looks killer. Very happy with the outcome.
06-23-2015, 08:31 AM
#77
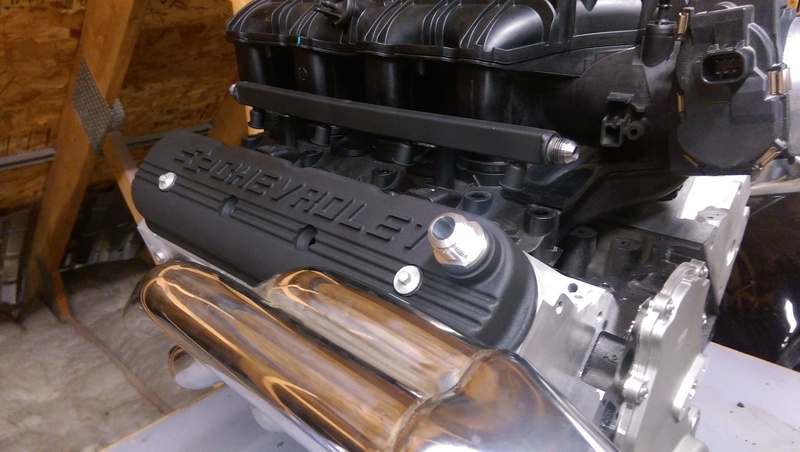
For the rails...the factory crossover/ feed was cut off and welded shut, then -8 fittingers were added to each end to make them dynamic. These were done by a friend of mine a long time ago and have just been sitting on the shelf, but I can do the same thing for you.
06-23-2015, 08:40 AM
#78
I really dont know if we are going to run v-banded cast manifolds or if I am going to build headers yet. Undecided at this point.
For the rails...the factory crossover/ feed was cut off and welded shut, then -8 fittingers were added to each end to make them dynamic. These were done by a friend of mine a long time ago and have just been sitting on the shelf, but I can do the same thing for you.
For the rails...the factory crossover/ feed was cut off and welded shut, then -8 fittingers were added to each end to make them dynamic. These were done by a friend of mine a long time ago and have just been sitting on the shelf, but I can do the same thing for you.