
Saying hi. showing my laptop mount.
 10-30-2008, 12:04 AM
#1
Banned
Thread Starter
iTrader: (2)

Join Date: Jun 2008
Location: ERAU. Daytona Beach, FL
Posts: 173
Likes: 0
Received 0 Likes
on
0 Posts
***I'm sorry if this is the wrong forum... doesnt really go anywhere. (interior mods, not the feedback i really want)
I'm just getting started on tuning my 01 T/A with STS.
HP Tuners comes in tomorrow!!! Im excited!
I know ill be asking questions. As Ive been reading through posts and none of it makes sense right now. so i hope thing become obvious after i get the program in tomorrow.
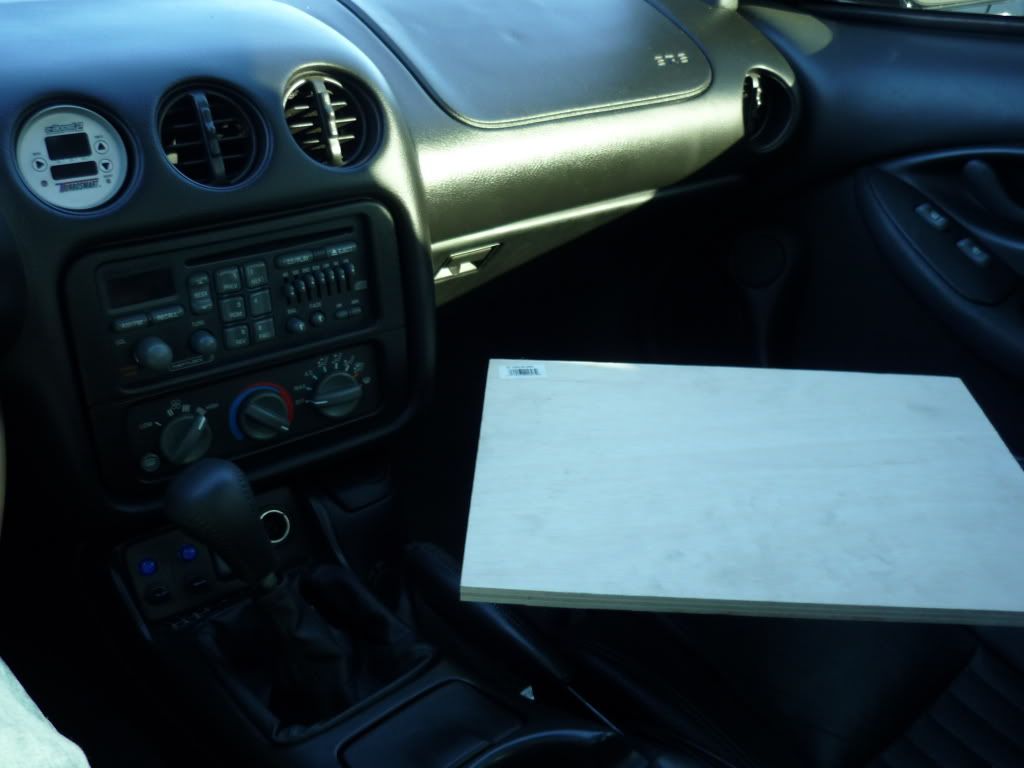
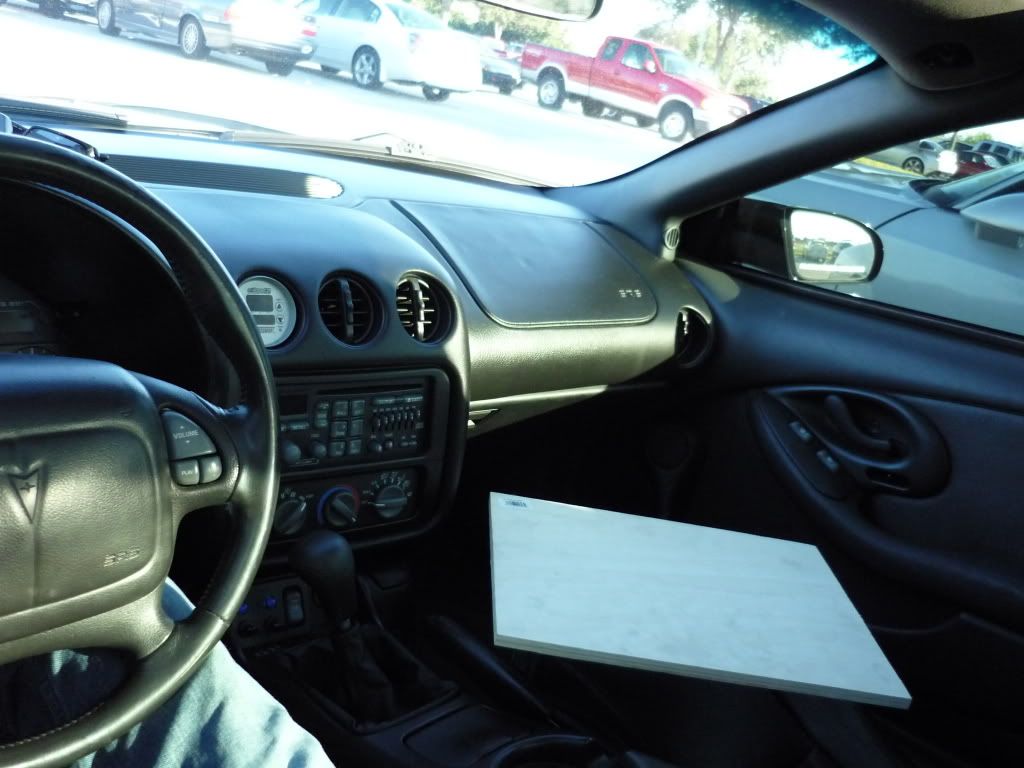
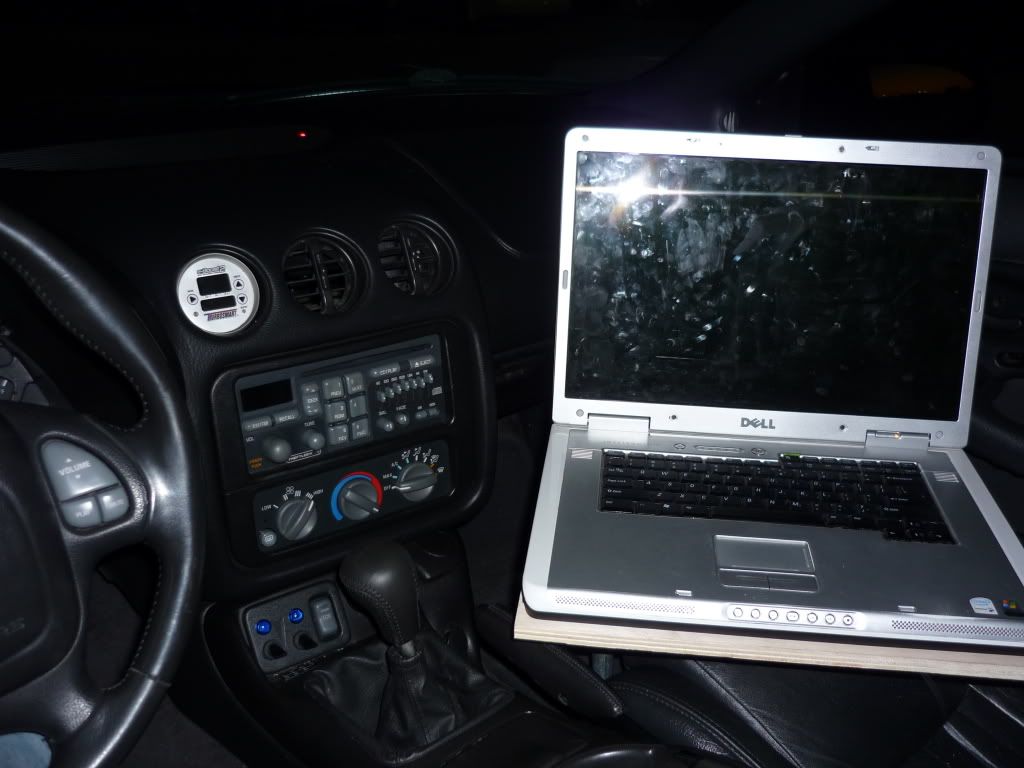
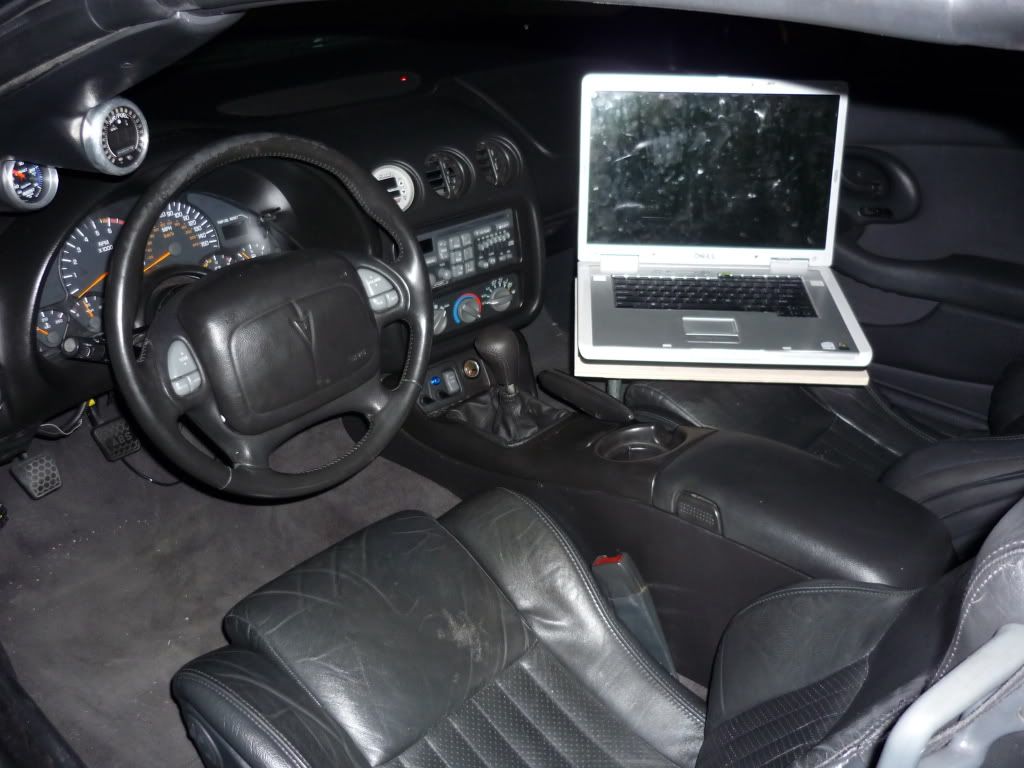
Also i made a mount so i could have my computer in front of me while i drive and tune. I think it should be sweet and effective. Let me know. I made it in 20 mins and like 20 bucks. Very simple. but should work great.
I'm just getting started on tuning my 01 T/A with STS.
HP Tuners comes in tomorrow!!! Im excited!
I know ill be asking questions. As Ive been reading through posts and none of it makes sense right now. so i hope thing become obvious after i get the program in tomorrow.
Also i made a mount so i could have my computer in front of me while i drive and tune. I think it should be sweet and effective. Let me know. I made it in 20 mins and like 20 bucks. Very simple. but should work great.
Last edited by Black_Hawk_02; 10-30-2008 at 01:07 AM.

 10-30-2008, 01:04 AM
#3
Banned
Thread Starter
iTrader: (2)
Join Date: Jun 2008
Location: ERAU. Daytona Beach, FL
Posts: 173
Likes: 0
Received 0 Likes
on
0 Posts
It was really easy. kinda ghetto. BUT it works.
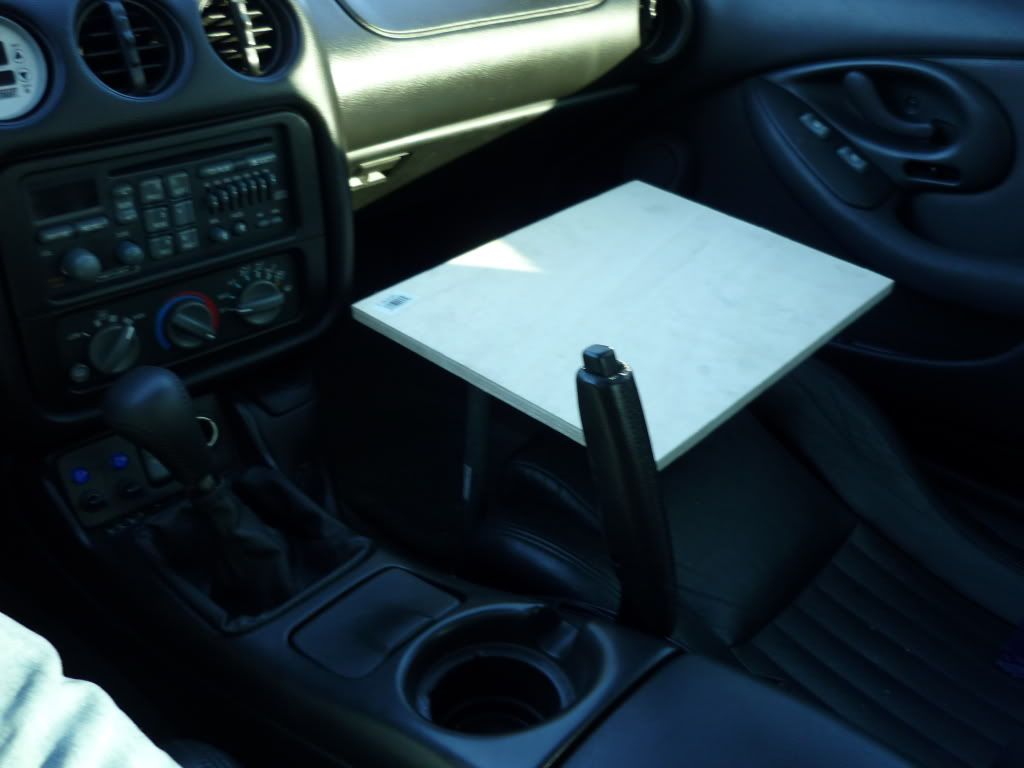
1)
I went to the plumbing section of home depot. and im not exactly what there called but it was 1/2" galvanized pipe. I got a base. a 12" pipe, threaded at both ends, and another base. and put them together. Ill take pictures of the piece.
2)
Then i drilled out one of the holes bigger in one of the bases.
youre gonna be mounting it with the stud for the seat bracket.
so un-bolt it with a 13mm socket. a bendy helps.
Its kind of difficult to get the base under the seat bracket and over/on the stud....
I used a screwdriver to pry up the bracket and slide in the base.
Now, that you have it test fitted.... pull it off
3)
I also got a "L bracket" from lumber. (had a few holes in it for a #8 x 3/4" screw)
(again, ill take pictures of this in better detail tomorrow)
I had to drill 2 holes into the L bracket.( there are 4 holes in the top piece of the post)
(there is one hole to begin..., 1 will not not got through the bracket, and so you needed to drill two holes in the metal L brakcet.
4)
I got a piece of 11.5" by 15.5" piece of wood. (I have a 17" screen)
I screwed the L-bracket to the bottom of the wood. to use as better support for the wood/computer.
Then i used #10 x 1" counter sunk wood screws to attach the top piece of the post to the wood. through the L bracktet
5) Now its all together and you can wiggle it back onto the stud, and bolt it down.
Mine is very sturdy... and i made it so that i could swing it out of my way when i park. AKA e brake up
(When i have it in place, the e-brake cant come up) but i still can shift. easily lol(i designed it to use while im driving.
MORE PICS TOMORROW, will help better explain, let me know what confusing here. It was hard to write up.
Last edited by Black_Hawk_02; 10-30-2008 at 02:15 AM.

