C4 IRS swap And LS1 swap mods
 04-08-2015, 12:48 PM
#21
Teching In
Thread Starter
Join Date: Jan 2014
Location: Just moved to SWEDEN
Posts: 48
Likes: 0
Received 0 Likes
on
0 Posts
Wow, great job. Love seeing fabwork like this. I give you credit for taking on such a monumental task.
For some extra fabbing motivation, go on youtube and search Project Binky. Two guys take the entire drivetrain out of a 96 celica GTS I believe, and make a mini turbo AWD
For some extra fabbing motivation, go on youtube and search Project Binky. Two guys take the entire drivetrain out of a 96 celica GTS I believe, and make a mini turbo AWD
Those guys are just nuts. Great fab work there. Maybe i will crank it up a bit..
 04-11-2015, 12:15 PM
#22
Teching In
Thread Starter
Join Date: Jan 2014
Location: Just moved to SWEDEN
Posts: 48
Likes: 0
Received 0 Likes
on
0 Posts
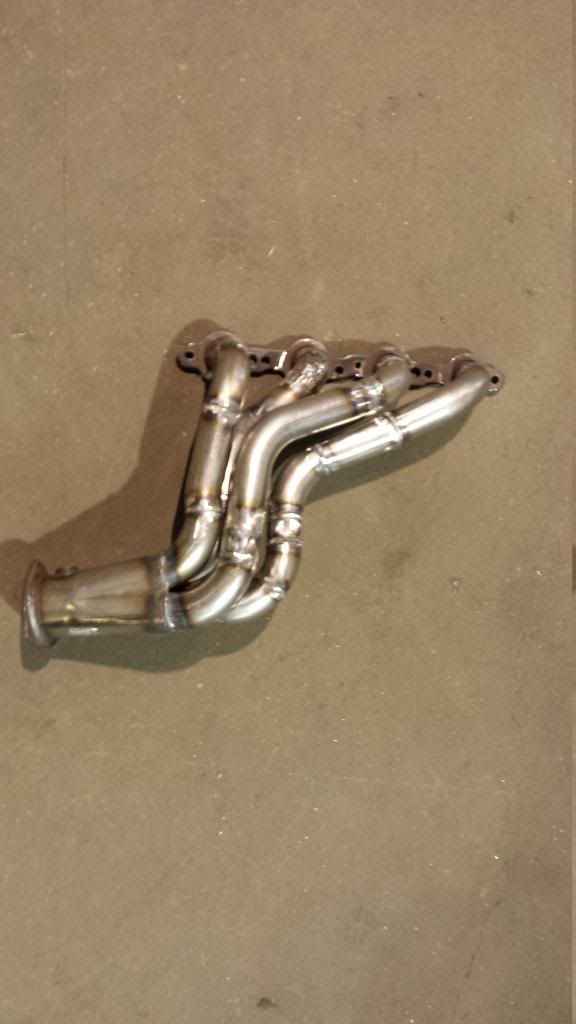
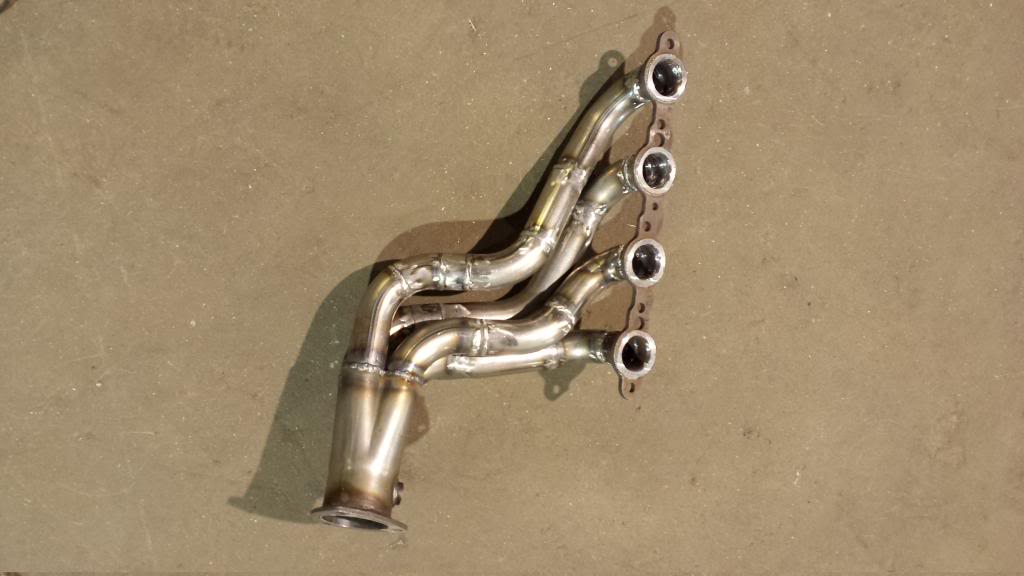
Then i started at the passenger side header.
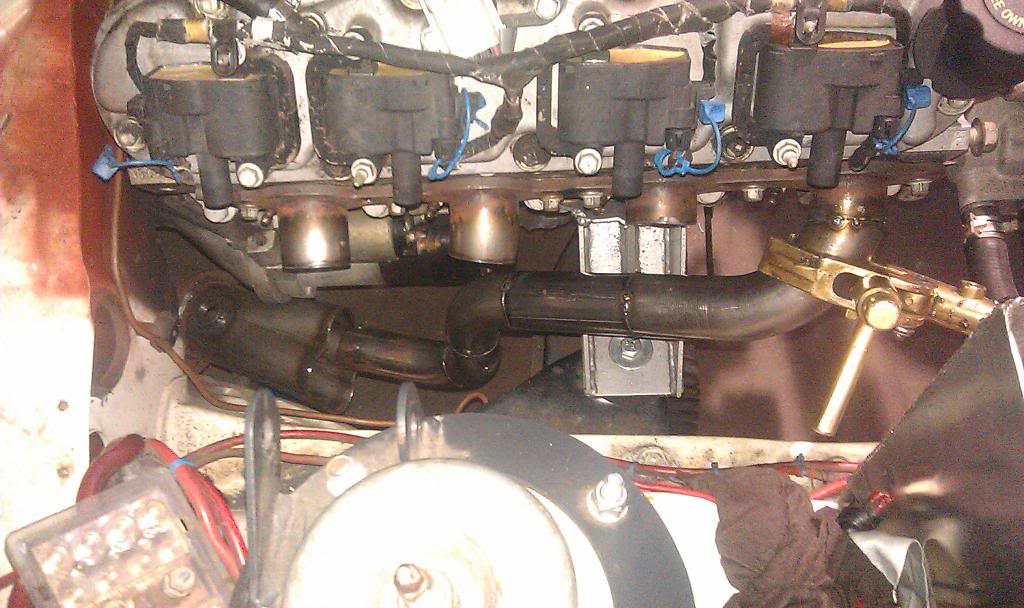
I was in working on these headers that i forgot to take pics in the right time. But bear with me.
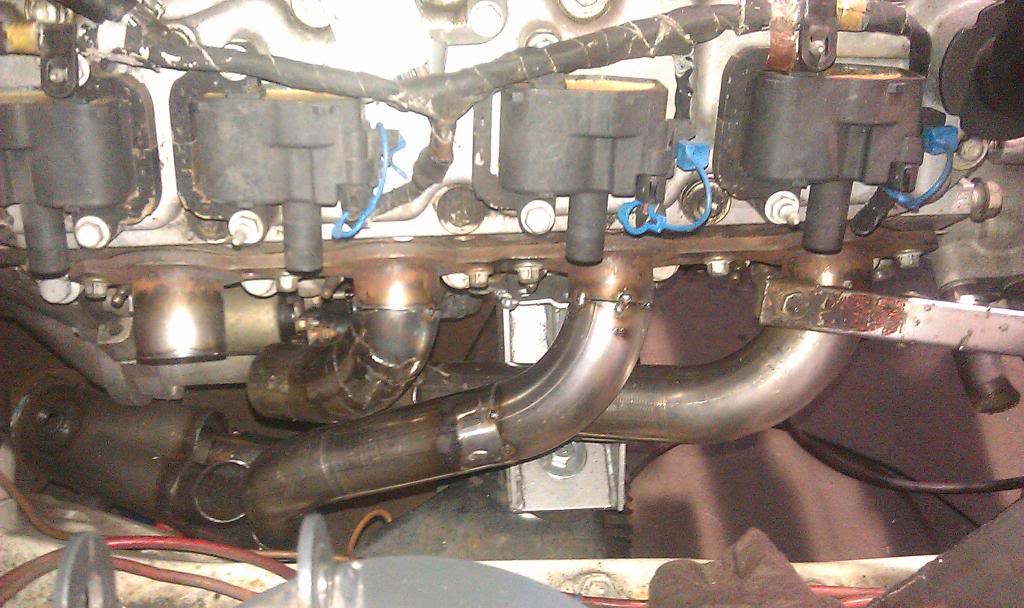
All welded up and assembled together. Finish header

I was in working on these headers that i forgot to take pics in the right time. But bear with me.


All welded up and assembled together. Finish header

 04-12-2015, 06:49 PM
#23
Teching In
Thread Starter
Join Date: Jan 2014
Location: Just moved to SWEDEN
Posts: 48
Likes: 0
Received 0 Likes
on
0 Posts
Then i have done some more work.
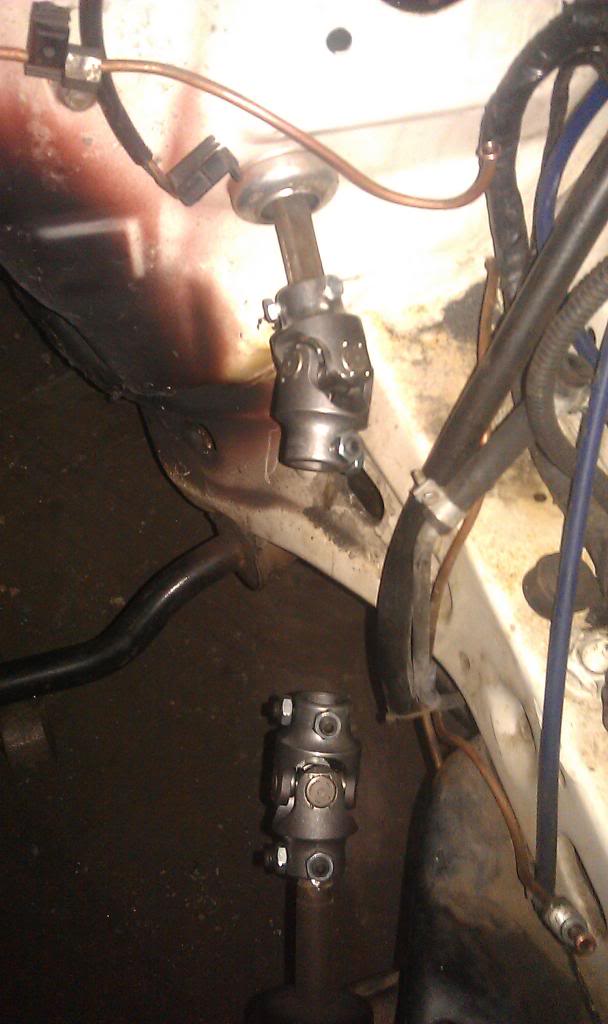
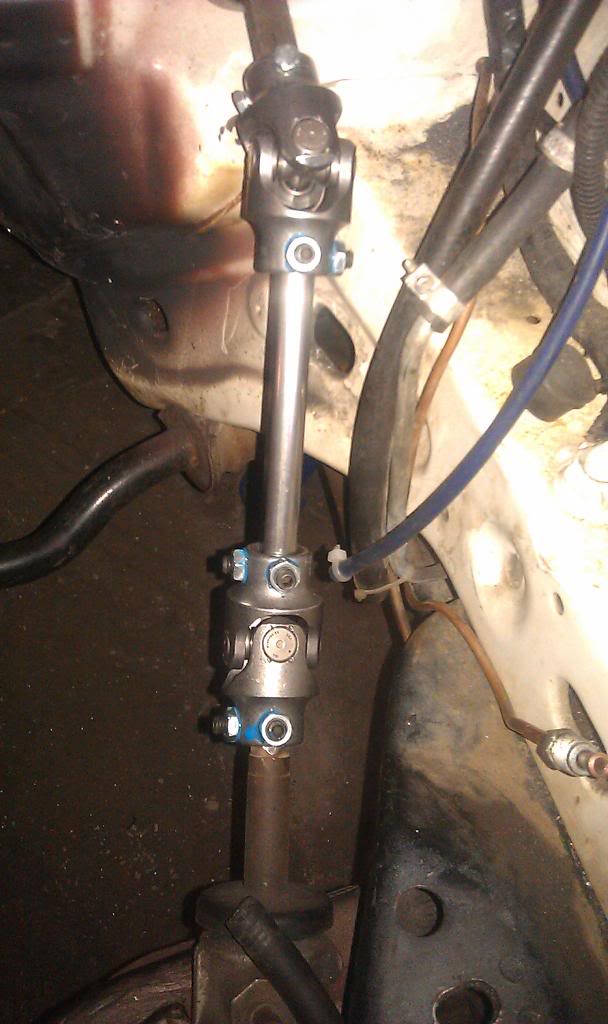
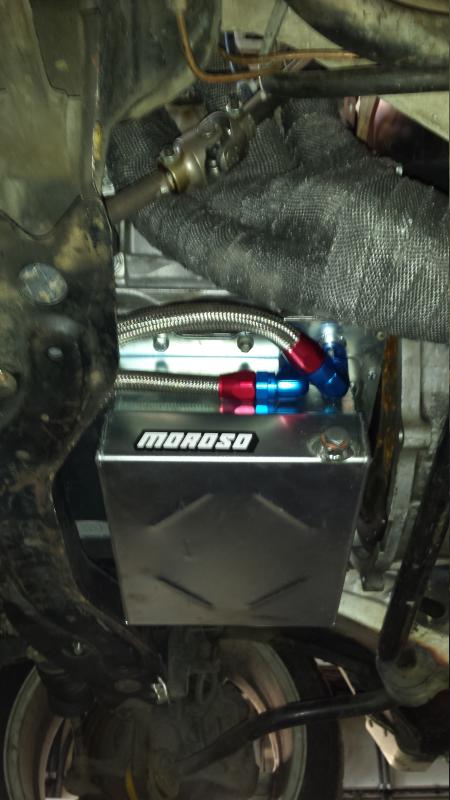
I pulled the engine out, sense i was not satisfied with the welding job on the oil sump. And at the same time, i mounted the new Borgerson joints to
my steering column.
I bough a new oil sump from Moroso, so the old one became scrap.
I test fitted the oil sump, and i had to modify the pickup line.
So i cut the pickup and welded in some pipe i had lying around.
And it was a perfect fit regarding to ID on both pipes.
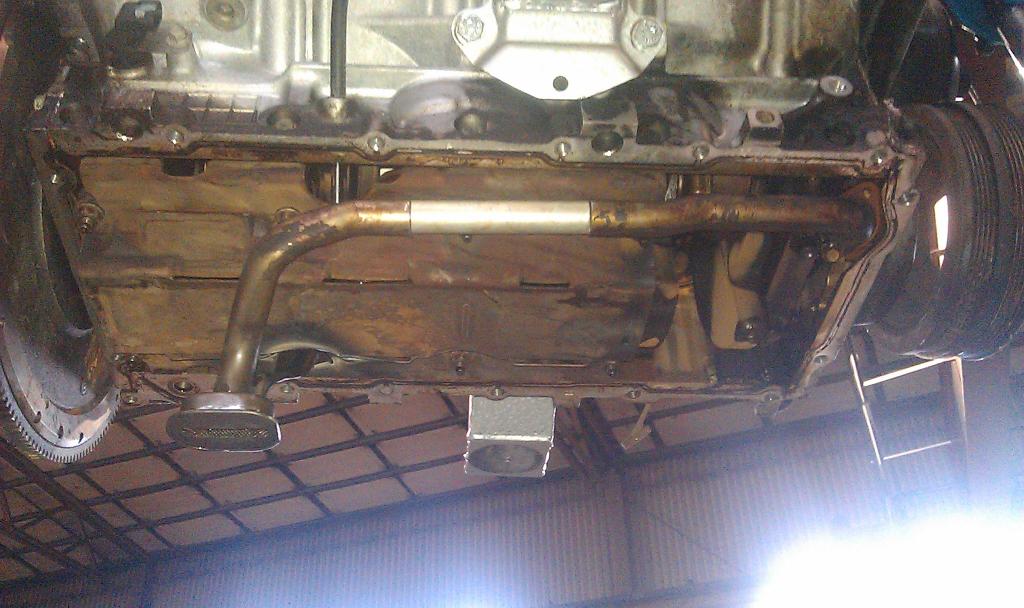
You can see where i have modified the mounting bolt to the pickup.
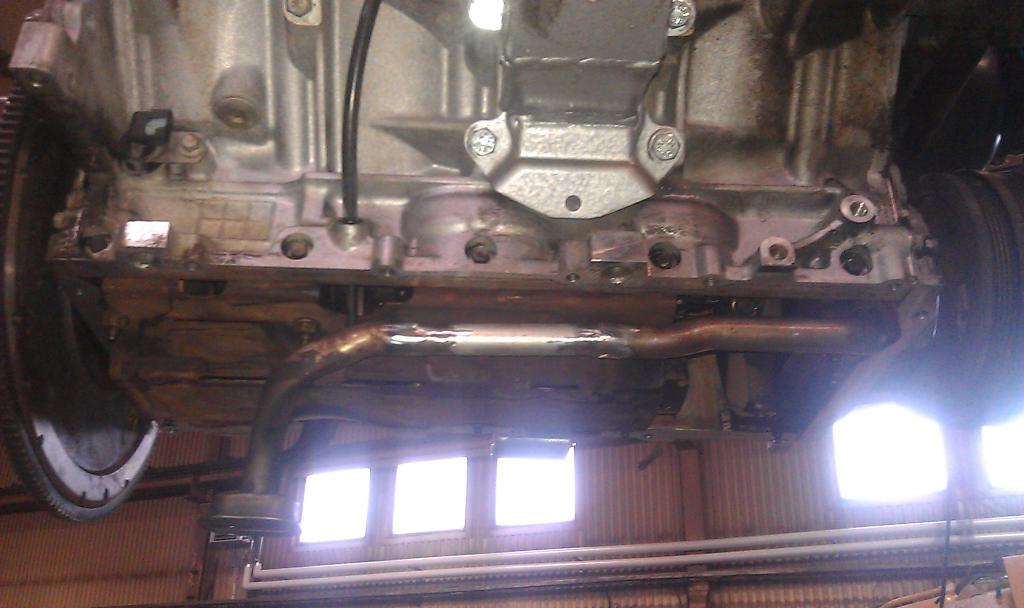
Then the new Moroso sump was mounted. Looks nice

I will put the engine back in another day soon.
I pulled the engine out, sense i was not satisfied with the welding job on the oil sump. And at the same time, i mounted the new Borgerson joints to
my steering column.


I bough a new oil sump from Moroso, so the old one became scrap.
I test fitted the oil sump, and i had to modify the pickup line.
So i cut the pickup and welded in some pipe i had lying around.
And it was a perfect fit regarding to ID on both pipes.

You can see where i have modified the mounting bolt to the pickup.

Then the new Moroso sump was mounted. Looks nice


I will put the engine back in another day soon.
04-16-2015, 02:59 AM
#24
Teching In
Thread Starter
Join Date: Jan 2014
Location: Just moved to SWEDEN
Posts: 48
Likes: 0
Received 0 Likes
on
0 Posts
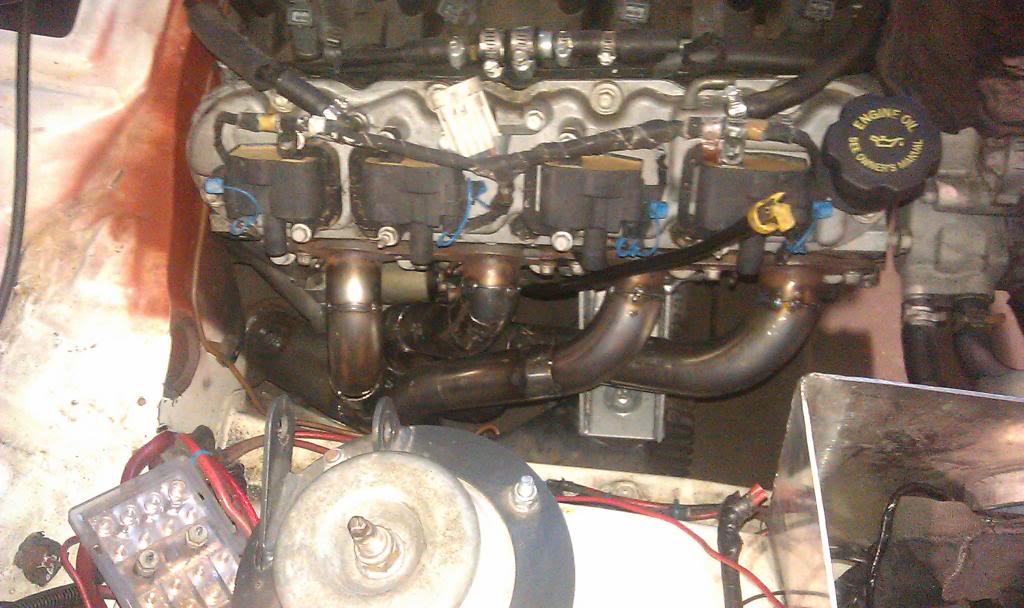
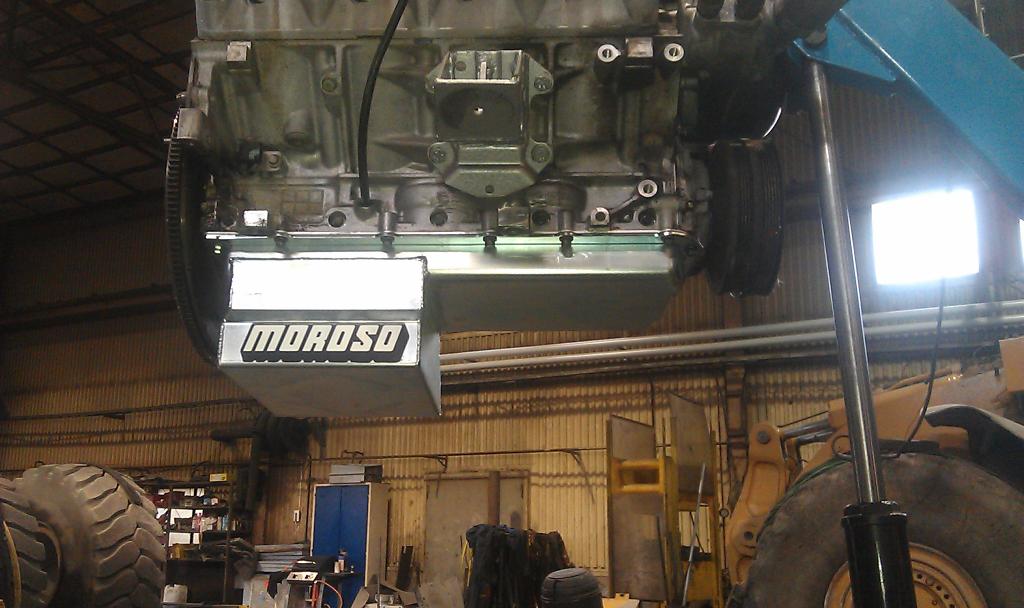
There the engine and tranny was back in. Also wrap the headers.
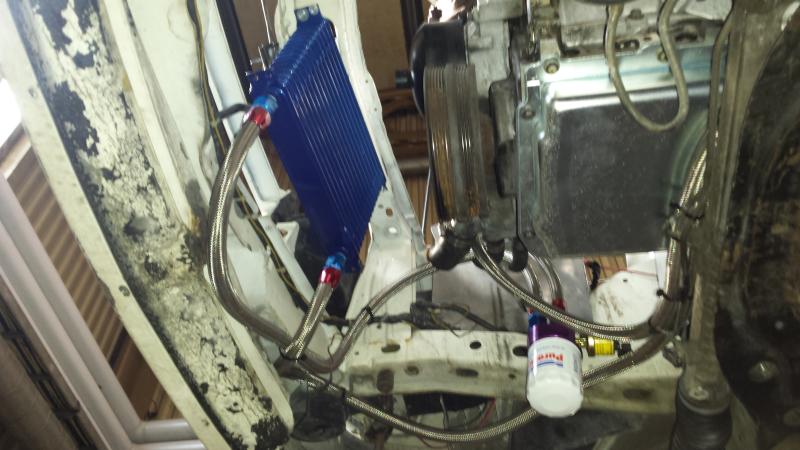
Mounted the oil cooler to see where to best fit it.
It looks good. Good clearance to the oil sump.
Mounted the oil cooler to see where to best fit it.
It looks good. Good clearance to the oil sump.

 04-17-2015, 04:41 PM
#25
Teching In
Thread Starter
Join Date: Jan 2014
Location: Just moved to SWEDEN
Posts: 48
Likes: 0
Received 0 Likes
on
0 Posts
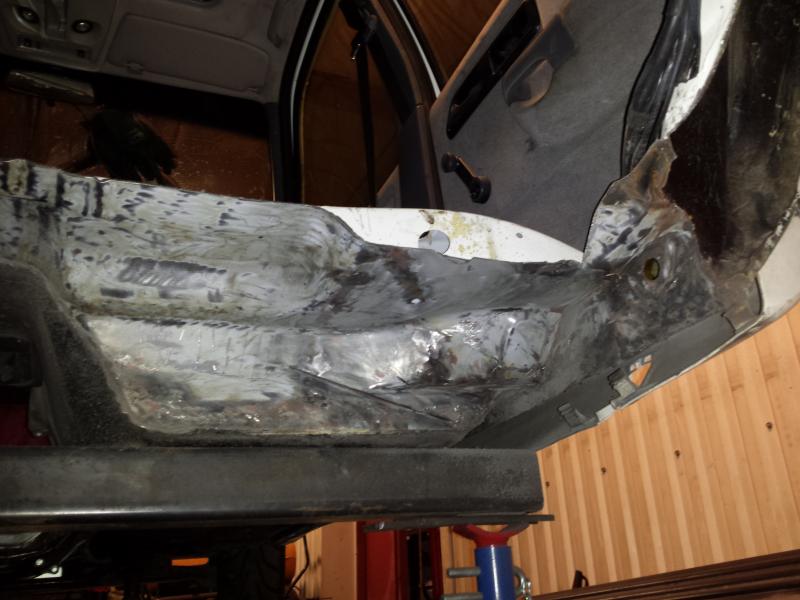
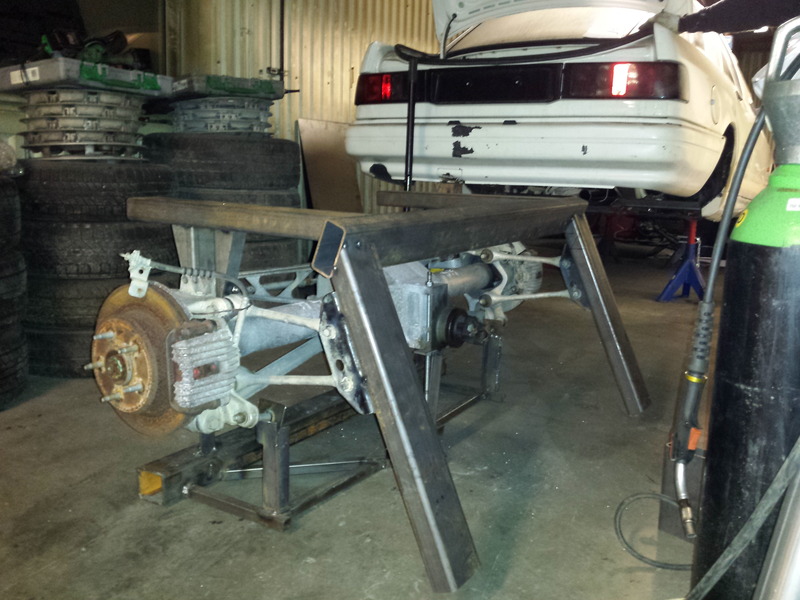
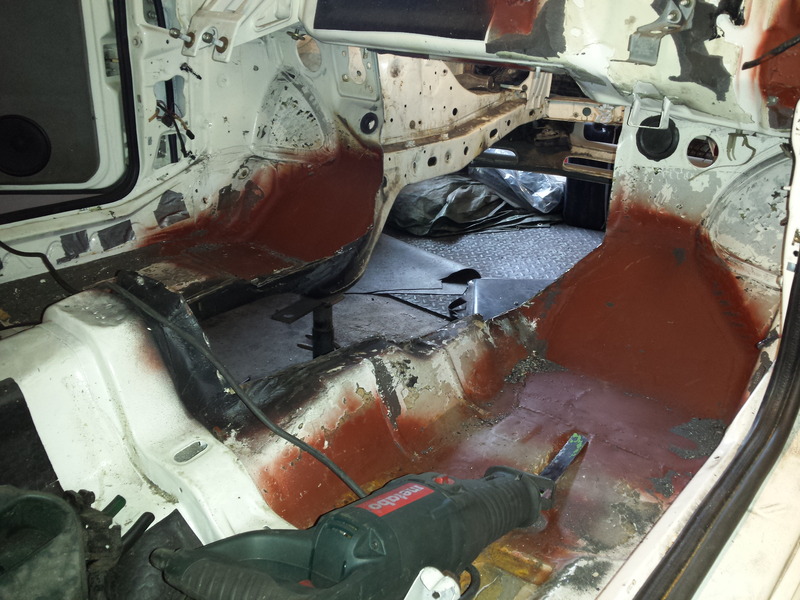
Then i have done some more work on my project. Now i have to make space for the C4 IRS suspension.
So i started by cutting the floor out.
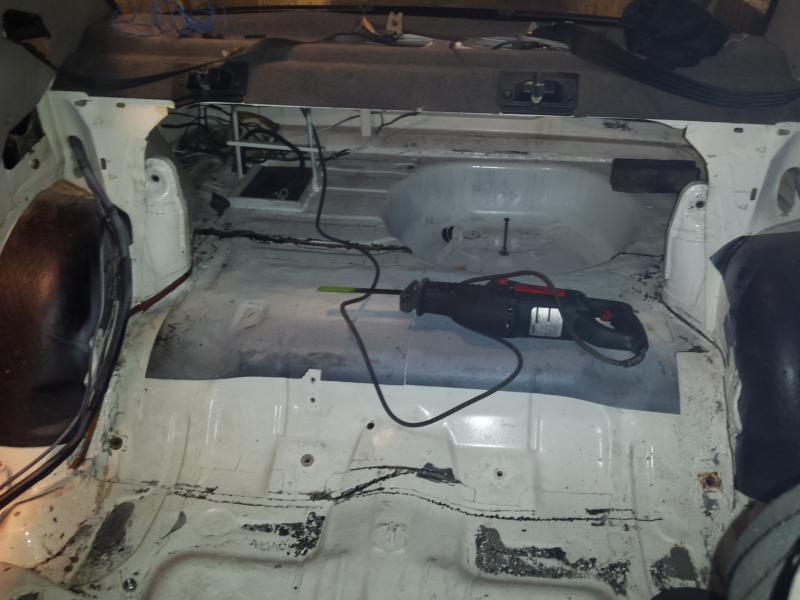

Then i have to remove the rest of the frame rails, and clean the underside
so i can see what i have to work with.
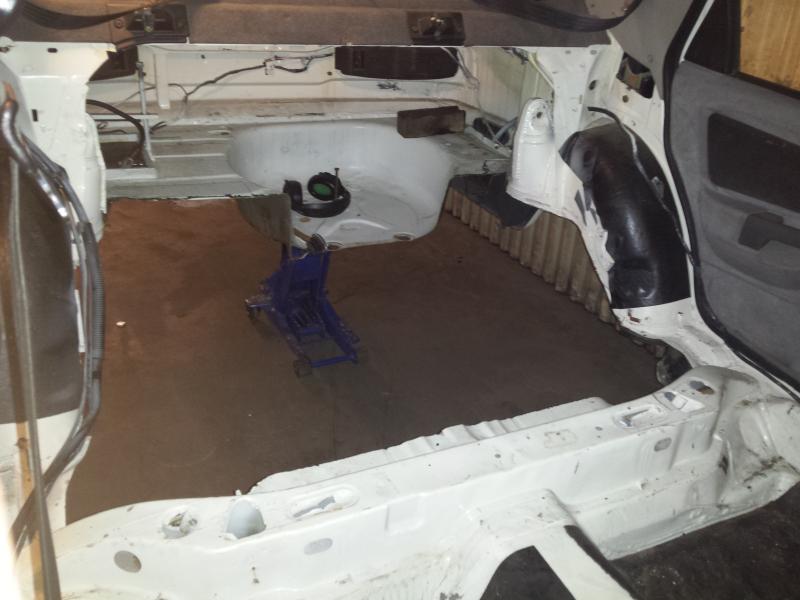
All gone and clean.
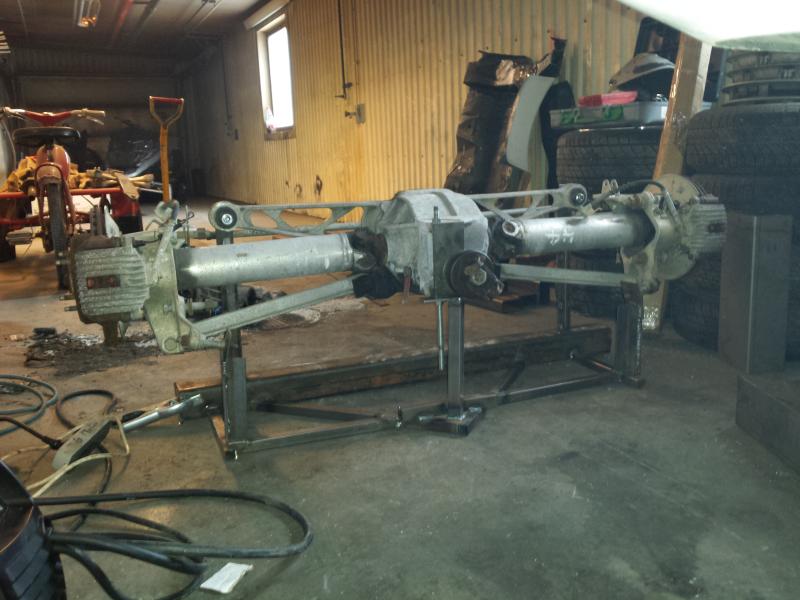
Then it is time to get this beast under the car
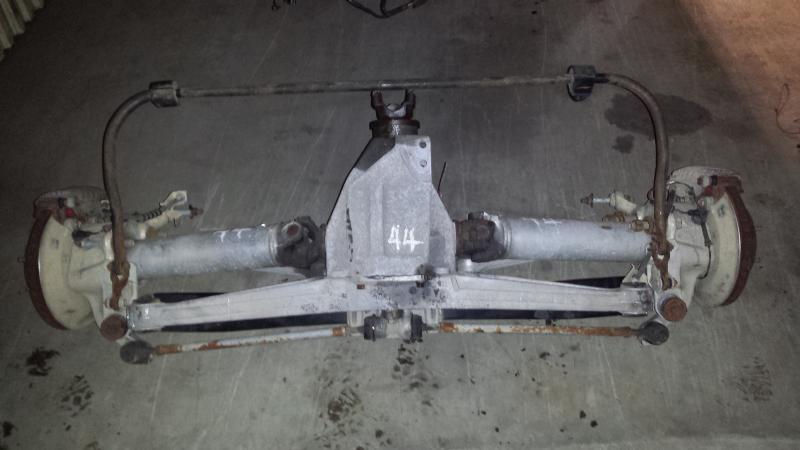
But before i can try to fit it, i have to build a jig for the suspension.
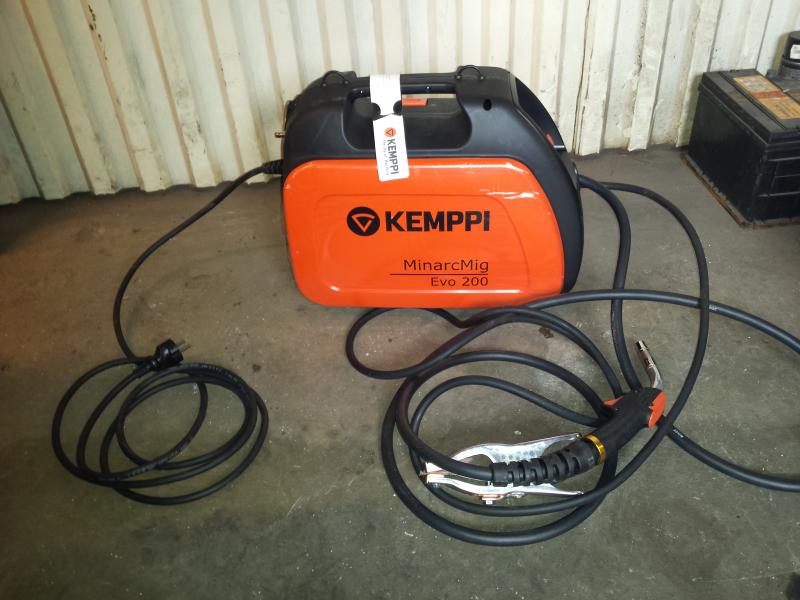
So i had to change some of my tools. I got my self a new MIG welder.

And the i got to work and builded the jig.
The new mig welder is awesome to weld with.
This is how far i got this week
So i started by cutting the floor out.


Then i have to remove the rest of the frame rails, and clean the underside
so i can see what i have to work with.

All gone and clean.


Then it is time to get this beast under the car

But before i can try to fit it, i have to build a jig for the suspension.
So i had to change some of my tools. I got my self a new MIG welder.


And the i got to work and builded the jig.

The new mig welder is awesome to weld with.
This is how far i got this week
04-21-2015, 02:34 AM
#26
Teching In
Thread Starter
Join Date: Jan 2014
Location: Just moved to SWEDEN
Posts: 48
Likes: 0
Received 0 Likes
on
0 Posts
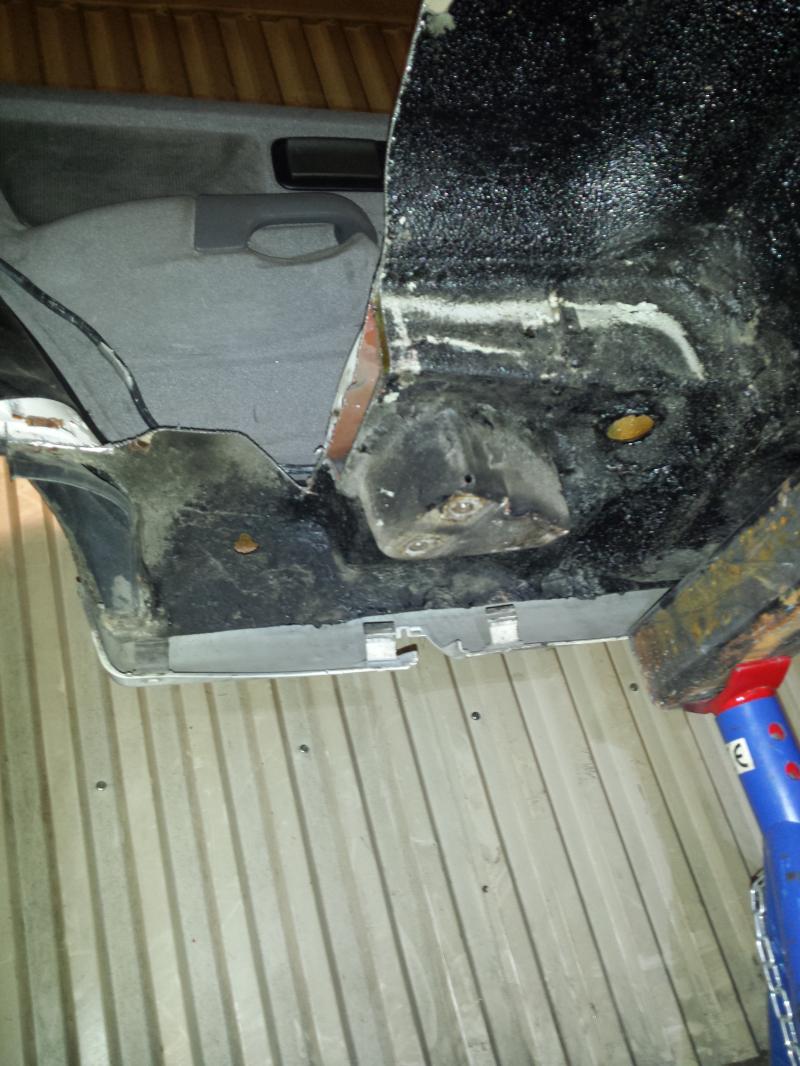
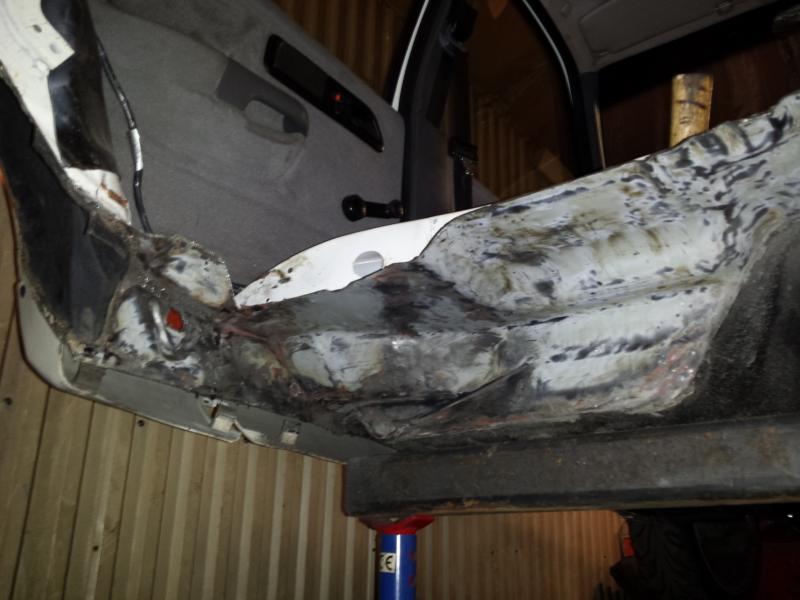
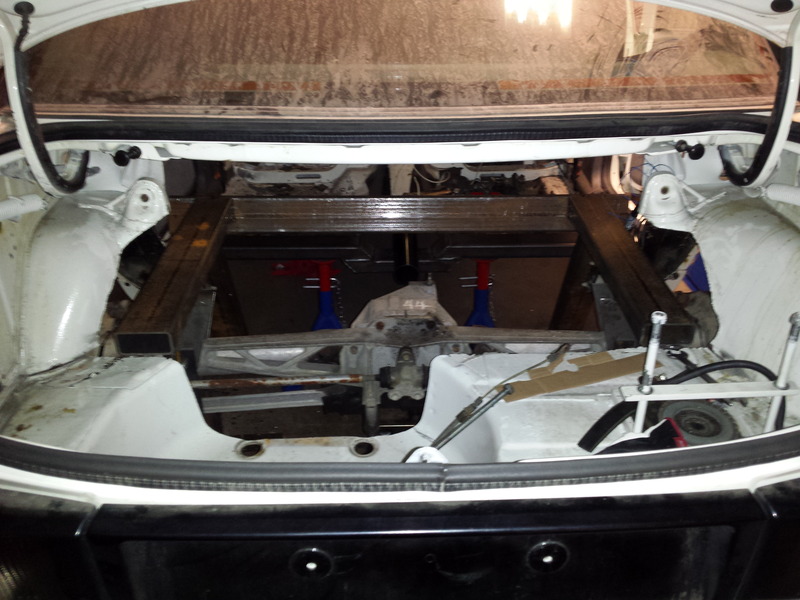
Well done some more on the car.
I had to cut out some more sheet from the chassis to make space for the reinforcement that is going in.
Then i made templates of cardboard. and transferred them to steel.

All welded in place
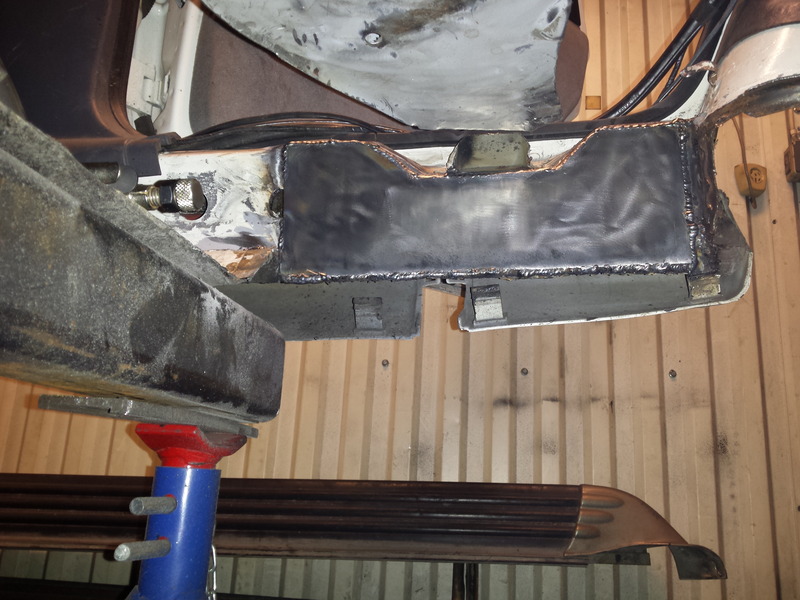
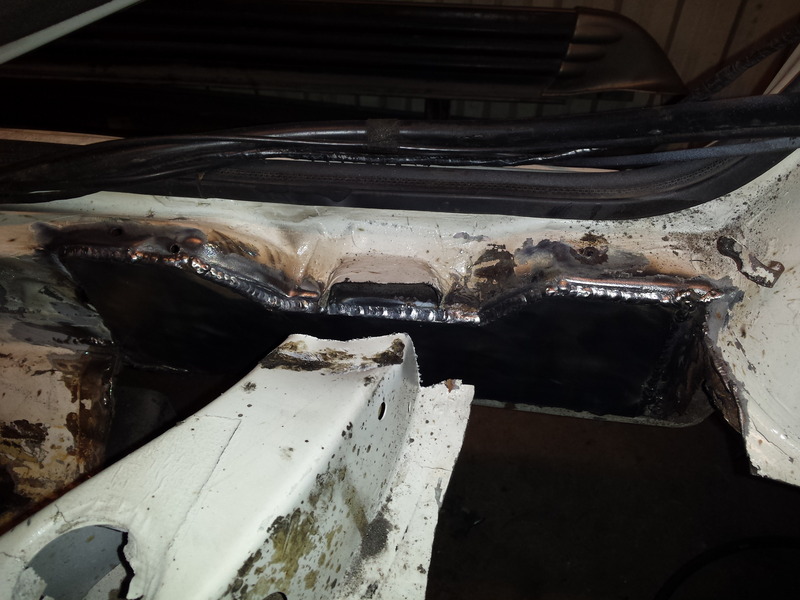
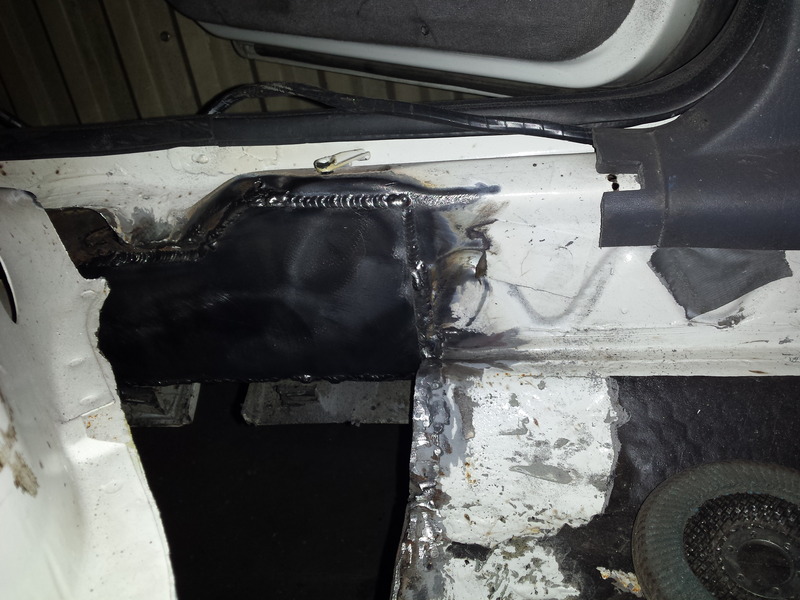
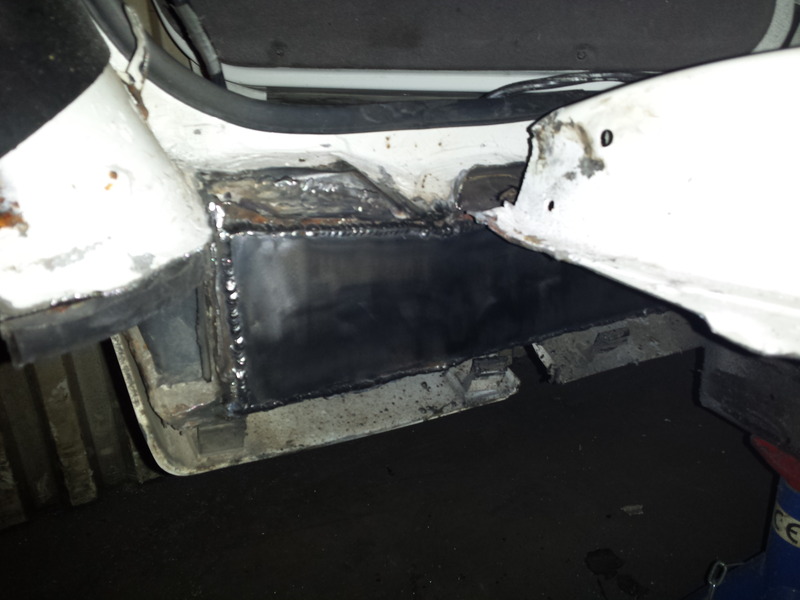
Then i cut away the rest of the reinforcement for the original back seat.
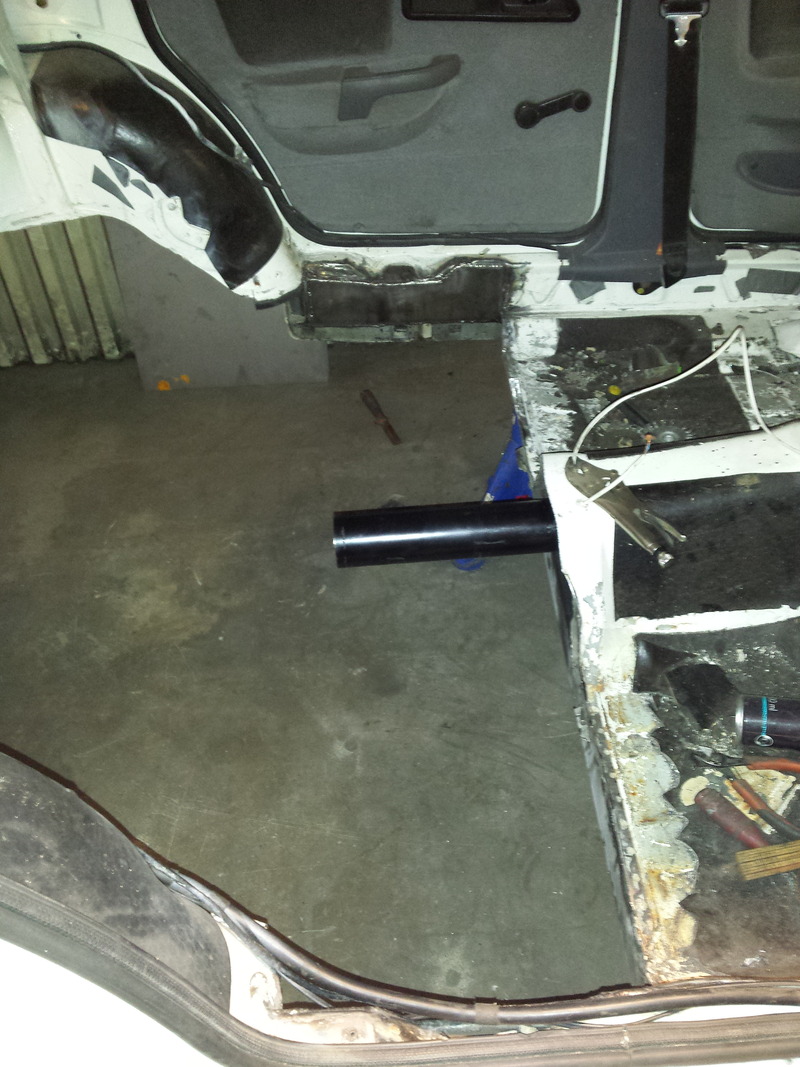
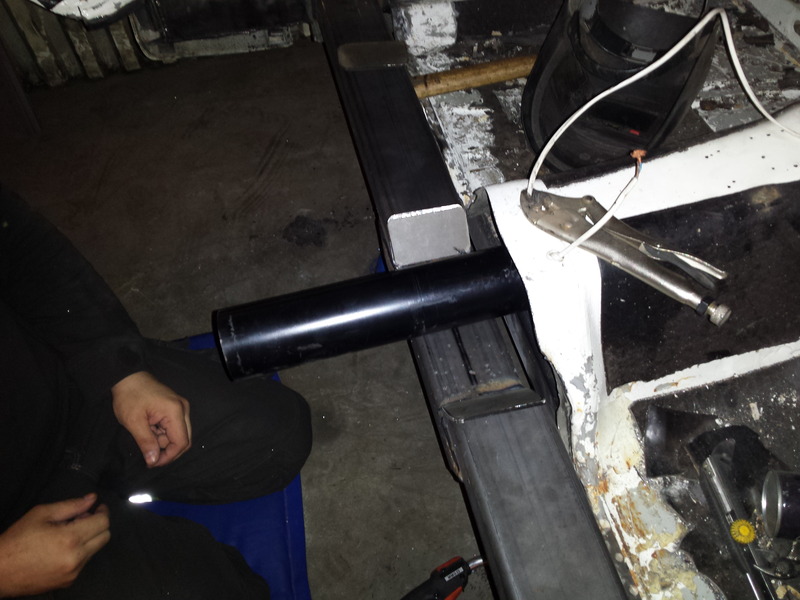
Dont need it anymore. Then i mounted the dummy driveshaft and got
it lined up with the transmission.
I had to cut out some more sheet from the chassis to make space for the reinforcement that is going in.


Then i made templates of cardboard. and transferred them to steel.


All welded in place


Then i cut away the rest of the reinforcement for the original back seat.
Dont need it anymore. Then i mounted the dummy driveshaft and got
it lined up with the transmission.
 04-22-2015, 01:24 PM
#29
Teching In
Thread Starter
Join Date: Jan 2014
Location: Just moved to SWEDEN
Posts: 48
Likes: 0
Received 0 Likes
on
0 Posts
Done a little more to the car. I had to have help from a friend with
the cross member. To get it in the right position.
The inspection guy requierd that i use 2 by 4" 8 gauge steel tubing,
for the new frame. I dont know why, but it seems overkill to me.
But they will get as they want, so that my car get`s road legal.
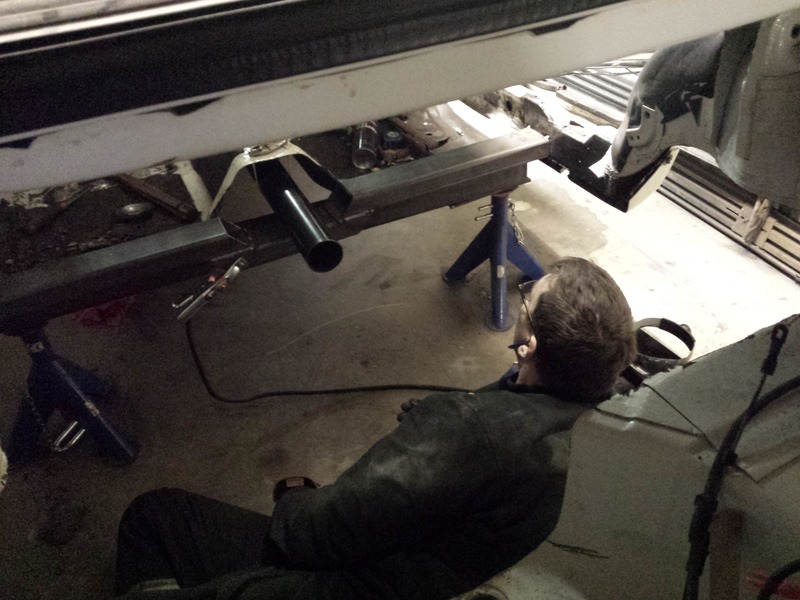
Here i have tacked in the new cross member. "me in the pic" Just checking that everything looks good before welding it into place.
We cut the cross member in to with a 45 degree angle, and the we
placed a piece under, and welded all together. Then i got the drop i wanted to clear the drive shaft
Here i am in action welding the cross member.
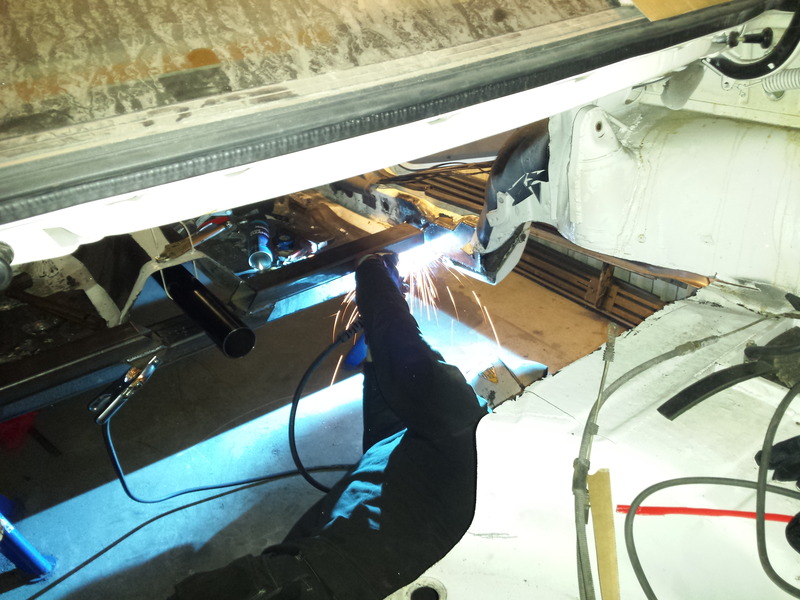

Then i boxed in the ends of the drop down.
The next step is to make the frame for the suspension.
I also need santas little helper on that one
the cross member. To get it in the right position.
The inspection guy requierd that i use 2 by 4" 8 gauge steel tubing,
for the new frame. I dont know why, but it seems overkill to me.
But they will get as they want, so that my car get`s road legal.
Here i have tacked in the new cross member. "me in the pic" Just checking that everything looks good before welding it into place.

We cut the cross member in to with a 45 degree angle, and the we
placed a piece under, and welded all together. Then i got the drop i wanted to clear the drive shaft
Here i am in action welding the cross member.


Then i boxed in the ends of the drop down.

The next step is to make the frame for the suspension.
I also need santas little helper on that one
 04-28-2015, 07:08 AM
#31
Teching In
Thread Starter
Join Date: Jan 2014
Location: Just moved to SWEDEN
Posts: 48
Likes: 0
Received 0 Likes
on
0 Posts
thanks.
I is allot of work, building a new car, when the old one is constantly in the way.
Been working, so there have been little time for the car, but i hope i will get time
to do some this week.
I is allot of work, building a new car, when the old one is constantly in the way.
Been working, so there have been little time for the car, but i hope i will get time
to do some this week.
04-28-2015, 05:06 PM
#33
12 Second Club

Join Date: Sep 2005
Location: Bucks County, Pa.
Posts: 4,273
Likes: 0
Received 0 Likes
on
0 Posts

That is TOO COOL!!! 


I take it you are NOT going to rally this thing once done, but a smooth tarmac event would be interesting, IF they have some sort of open class there locally?
What was the original gearbox, the old Euro/Brit Ford standby MTX75?
I take it you are NOT going to rally this thing once done, but a smooth tarmac event would be interesting, IF they have some sort of open class there locally?
What was the original gearbox, the old Euro/Brit Ford standby MTX75?
04-29-2015, 04:22 PM
#34
Teching In
Thread Starter
Join Date: Jan 2014
Location: Just moved to SWEDEN
Posts: 48
Likes: 0
Received 0 Likes
on
0 Posts
Nope this will not be used for rally. But i would like to do drifting and
drag race with it. Otherwise it will be a almost daily driver.
The Original gearbox was similar to the MTX75. But sense this is a
Saphire Cosworth it had a T5 gearbox. Some had the T9. Both is
BorgWarner.
04-29-2015, 04:57 PM
#35
Teching In
Thread Starter
Join Date: Jan 2014
Location: Just moved to SWEDEN
Posts: 48
Likes: 0
Received 0 Likes
on
0 Posts
Got allot more work done.
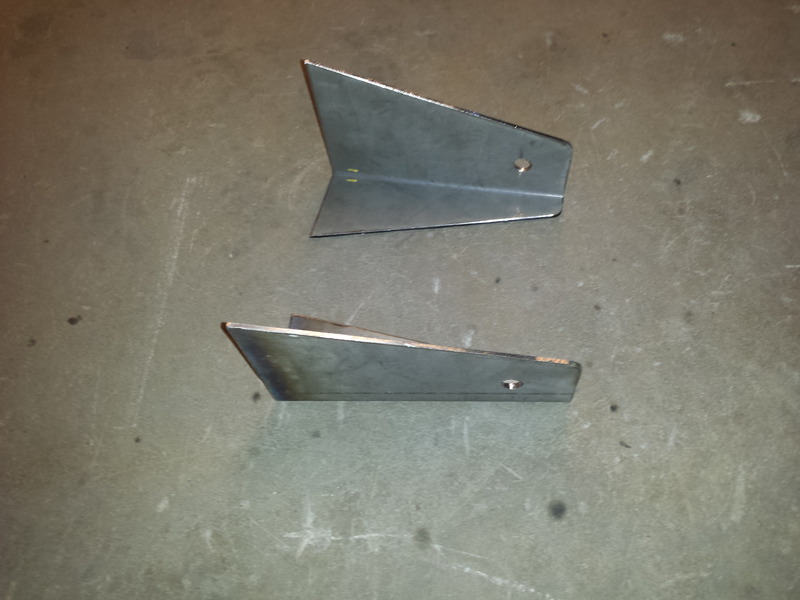
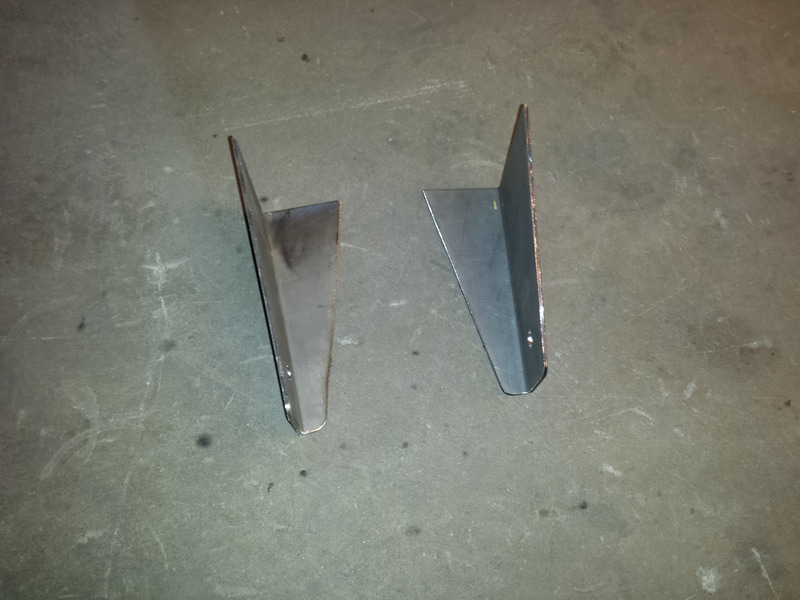
We made the brackets to the batwing. Had some 11 gauge steel bended
90 degrees and then we cut out the brackets.
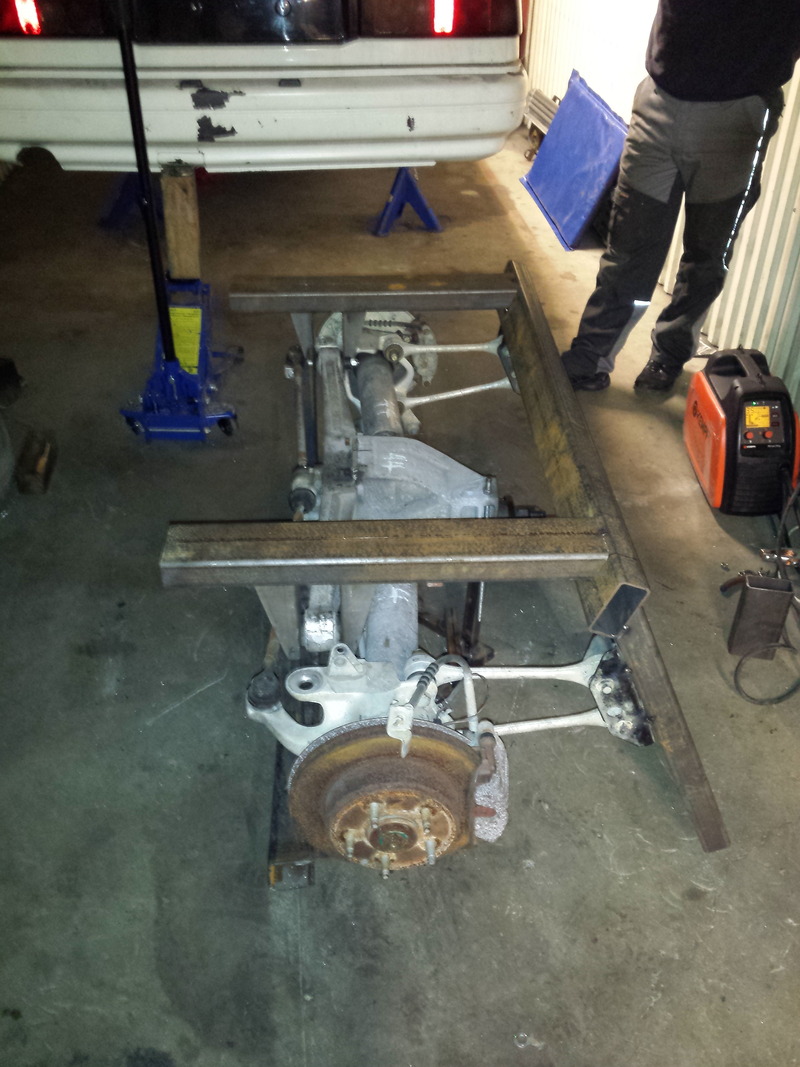
Then we cut allot of pipes, and made the rear frame.
We took allot of measurements and then tacked it all together.
This first pic show the offset of the diff in relation to the knuckles.
But the pic is not taken from the center, is it lies a bit.
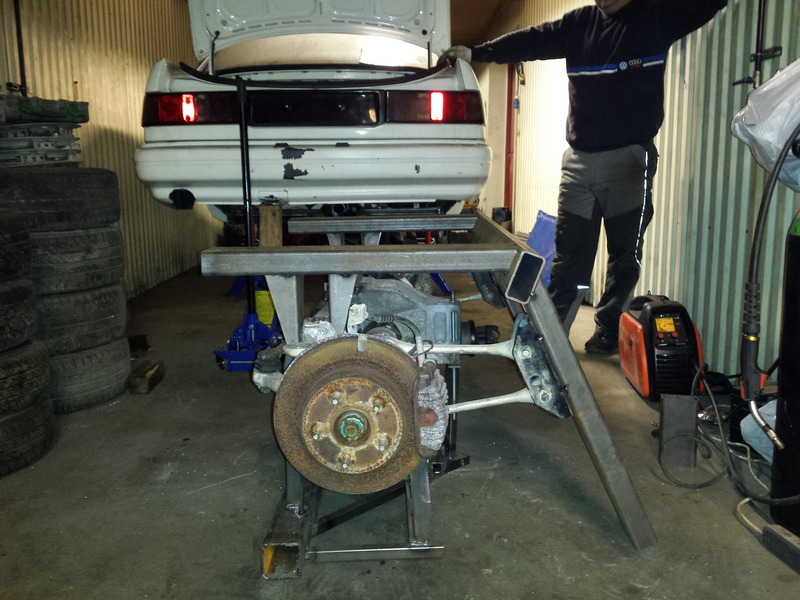
Then we got it inside the car. That was not easy and quick. But i`ve got in in there and centered.
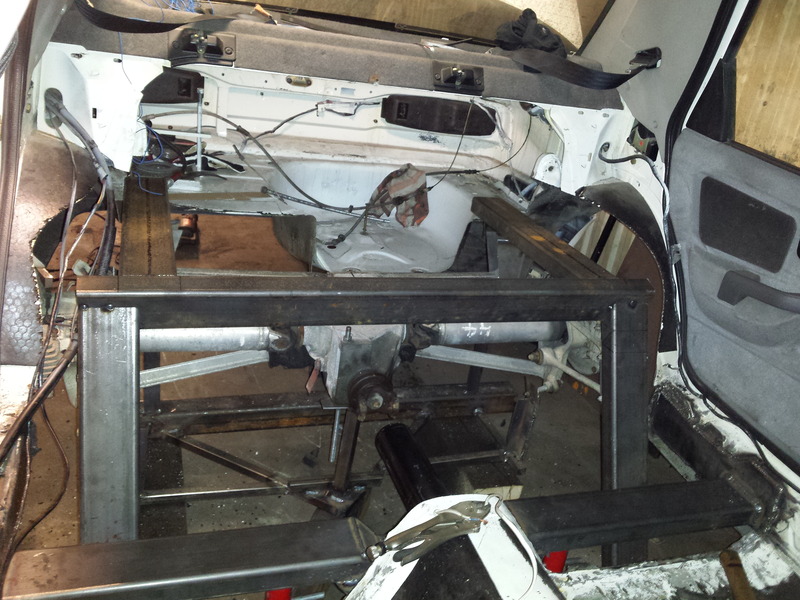
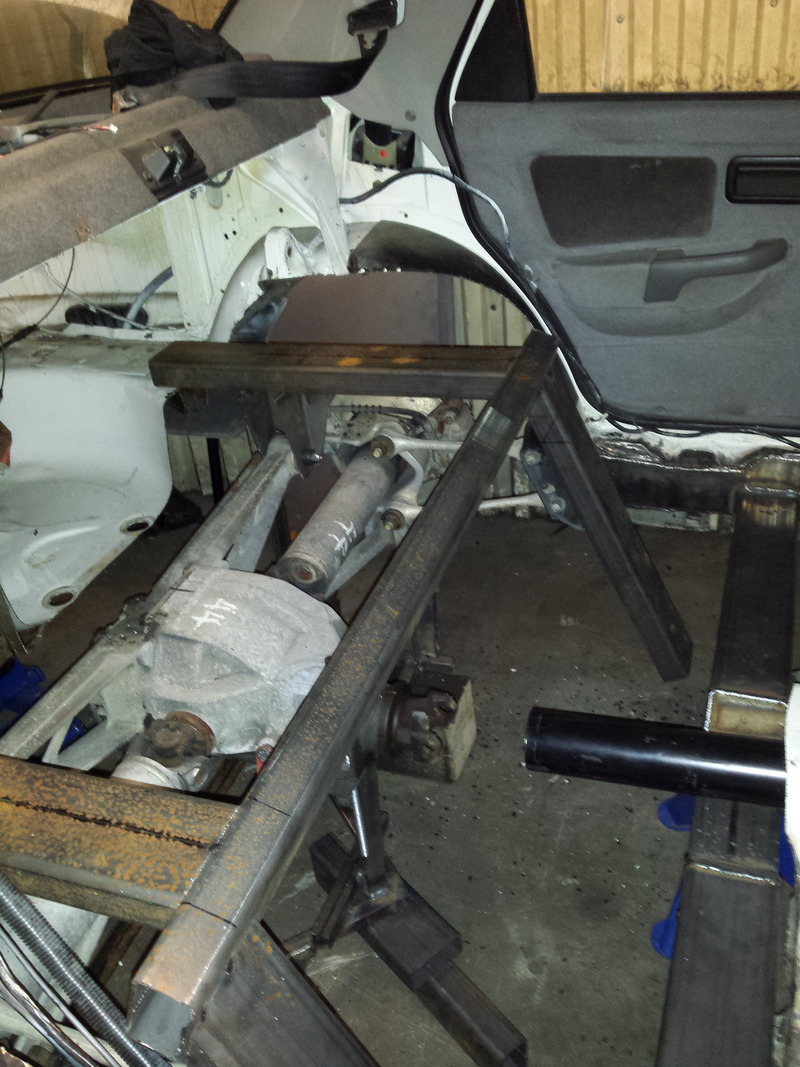
When it was in place i tacked the frame to the cross member, to hold
it in place. I used some 2 inch by 2 inch angle steel.

All finish for this time.
Then i noticed that the cross pipe had wrong angle

I have to cut it loose again and change the angle. That would make the
floor manufacturing allot easier.
I have ordered parts to do the narrowing of the rear suspension.
It is a bit wide. But now i have to give my attention to the front suspension. Suddenly hit me that maybe the front suspension also i wider.
So it will be stupid to narrow the rear, if i have to widen the front.
Hope you all like my work. More to come soon.
We made the brackets to the batwing. Had some 11 gauge steel bended
90 degrees and then we cut out the brackets.


Then we cut allot of pipes, and made the rear frame.
We took allot of measurements and then tacked it all together.
This first pic show the offset of the diff in relation to the knuckles.
But the pic is not taken from the center, is it lies a bit.


Then we got it inside the car. That was not easy and quick. But i`ve got in in there and centered.


When it was in place i tacked the frame to the cross member, to hold
it in place. I used some 2 inch by 2 inch angle steel.

All finish for this time.
Then i noticed that the cross pipe had wrong angle

I have to cut it loose again and change the angle. That would make the
floor manufacturing allot easier.
I have ordered parts to do the narrowing of the rear suspension.
It is a bit wide. But now i have to give my attention to the front suspension. Suddenly hit me that maybe the front suspension also i wider.
So it will be stupid to narrow the rear, if i have to widen the front.
Hope you all like my work. More to come soon.
04-29-2015, 05:08 PM
#36
12 Second Club
Join Date: Sep 2005
Location: Bucks County, Pa.
Posts: 4,273
Likes: 0
Received 0 Likes
on
0 Posts
I mistakenly thought that ALL of the 4 door Sierra Cossies were the latter AWD Group A homologation specials, which were the fore runners of the Escort Cossies/WRCs (one of my FAVE cars ever!).
BTW; You have some INSANE fabrication skills (I would NEVER try this conversion myself!!).
04-30-2015, 04:13 AM
#37
Teching In
Thread Starter
Join Date: Jan 2014
Location: Just moved to SWEDEN
Posts: 48
Likes: 0
Received 0 Likes
on
0 Posts
Somehow I forgot that they made RWD only versions of these, like the 2 door hatch (our Merkur XR4Ti) Sierra Cossies they first campaigned in Group A WRC (one driven by the late, great Colin McRae).
I mistakenly thought that ALL of the 4 door Sierra Cossies were the latter AWD Group A homologation specials, which were the fore runners of the Escort Cossies/WRCs (one of my FAVE cars ever!).
BTW; You have some INSANE fabrication skills (I would NEVER try this conversion myself!!).
I mistakenly thought that ALL of the 4 door Sierra Cossies were the latter AWD Group A homologation specials, which were the fore runners of the Escort Cossies/WRCs (one of my FAVE cars ever!).
BTW; You have some INSANE fabrication skills (I would NEVER try this conversion myself!!).
i think they came in 1990. Between 1987 and 1990 the 4 door saloon where
RWD. Mine is 1990 and one of the last RWD`s.
The escort cossies is also one of my favorites Always wanted on of those.
It is surprisingly fun and interesting to do this kind of work, BUT
Sometimes i think that
" if i knew that it was so much work, i would reconsider doing this"
But now there is no way back.
05-06-2015, 04:58 AM
#38
Teching In
Thread Starter
Join Date: Jan 2014
Location: Just moved to SWEDEN
Posts: 48
Likes: 0
Received 0 Likes
on
0 Posts
Hi all, Sorry for the long wait. It have been very busy at work.
I have just ordered a ton of parts to my project. Allot of engine parts, and much more.
I will post pics when they arrive....
I have just ordered a ton of parts to my project. Allot of engine parts, and much more.
I will post pics when they arrive....
05-07-2015, 12:20 PM
#39
Teching In
Thread Starter
Join Date: Jan 2014
Location: Just moved to SWEDEN
Posts: 48
Likes: 0
Received 0 Likes
on
0 Posts
Hi got some packages today
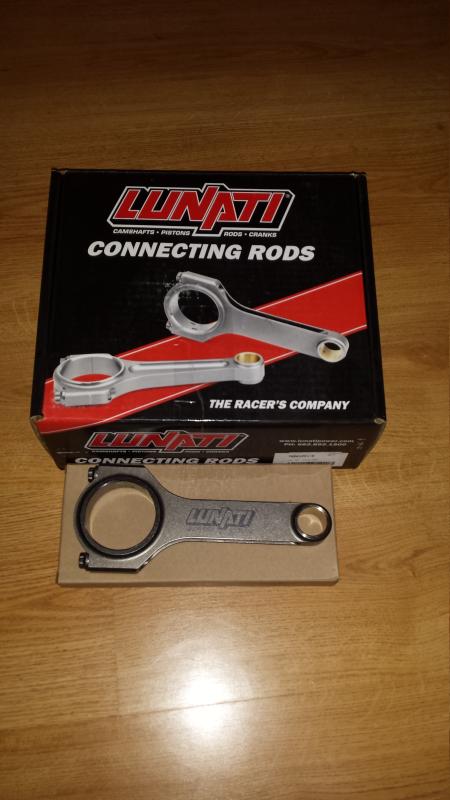
LUNAT stroker kit. 4" stroke

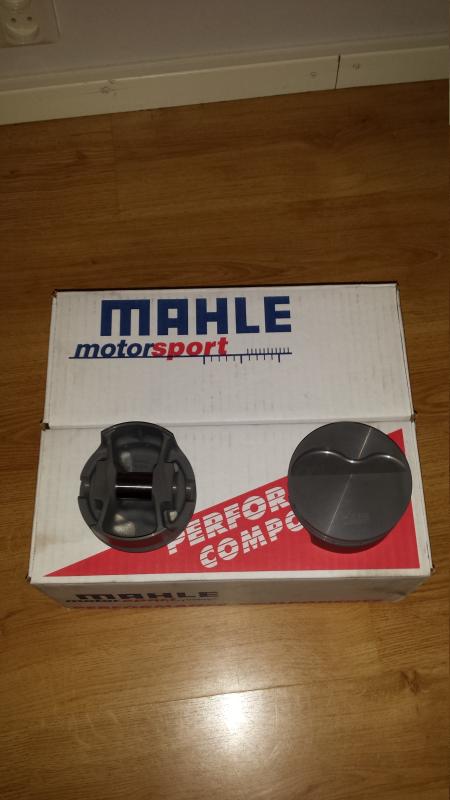
4.005" Bore

And i got the heads
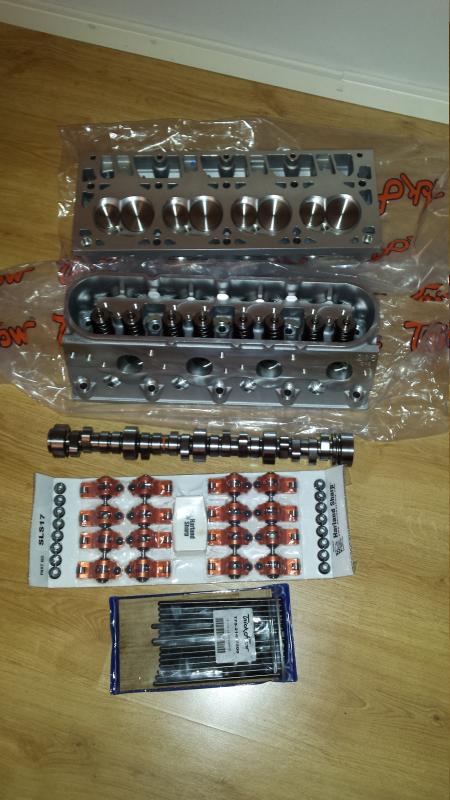

This is the Trick Flow� 515 HP GenX� Top-End Engine Kits for GM LS1
Here is the link http://www.summitracing.com/int/sear...1?autoview=SKU
I have been reading a little about this kit, and people say the heads are good, but the cam is bad.
Witch cam should i go for? Is any of these any good?
http://www.summitracing.com/int/sear...s?autoview=SKU
http://www.summitracing.com/int/sear...s?autoview=SKU
http://www.summitracing.com/int/sear...s?autoview=SKU
I plan and hope to get around 700-800HP and will rew it to 8000.
Any recomondations?
LUNAT stroker kit. 4" stroke


4.005" Bore


And i got the heads


This is the Trick Flow� 515 HP GenX� Top-End Engine Kits for GM LS1
Here is the link http://www.summitracing.com/int/sear...1?autoview=SKU
I have been reading a little about this kit, and people say the heads are good, but the cam is bad.
Witch cam should i go for? Is any of these any good?
http://www.summitracing.com/int/sear...s?autoview=SKU
http://www.summitracing.com/int/sear...s?autoview=SKU
http://www.summitracing.com/int/sear...s?autoview=SKU
I plan and hope to get around 700-800HP and will rew it to 8000.
Any recomondations?
10-29-2015, 02:40 PM
#40
Teching In
Thread Starter
Join Date: Jan 2014
Location: Just moved to SWEDEN
Posts: 48
Likes: 0
Received 0 Likes
on
0 Posts
Hi all.
Sorry for the long delay in the project. Have had too much work, and no time for my build. So finally i get to work on the COSVETTE.
But sense i have had little or no time for my build, i have had plenty of time ordering parts. Everything has now arrived, and will post pic`s later.
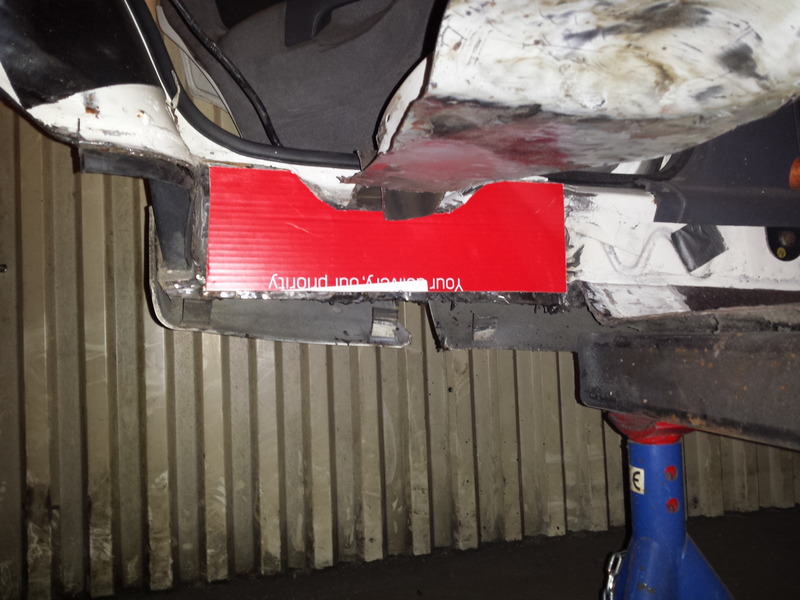
I am about to change the front crossmember, when i realized that the crossmember
was in serious conflict with the oil sump.
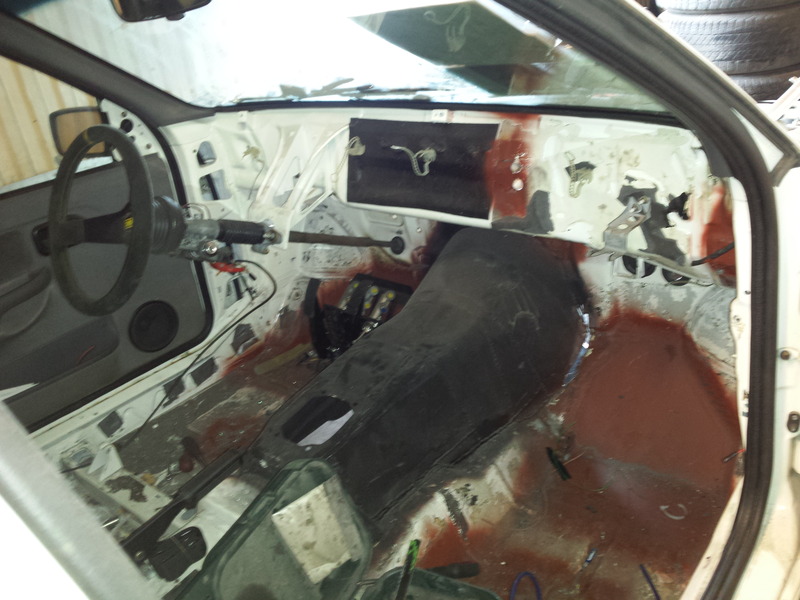
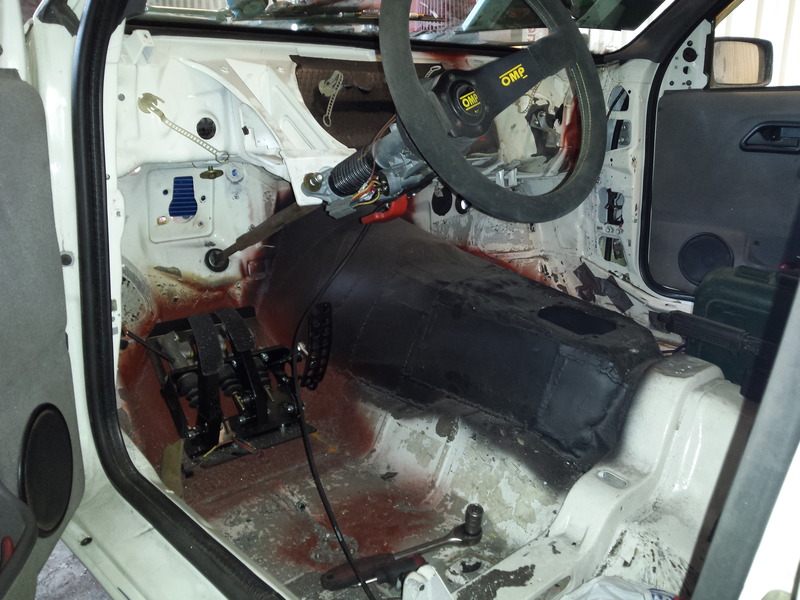
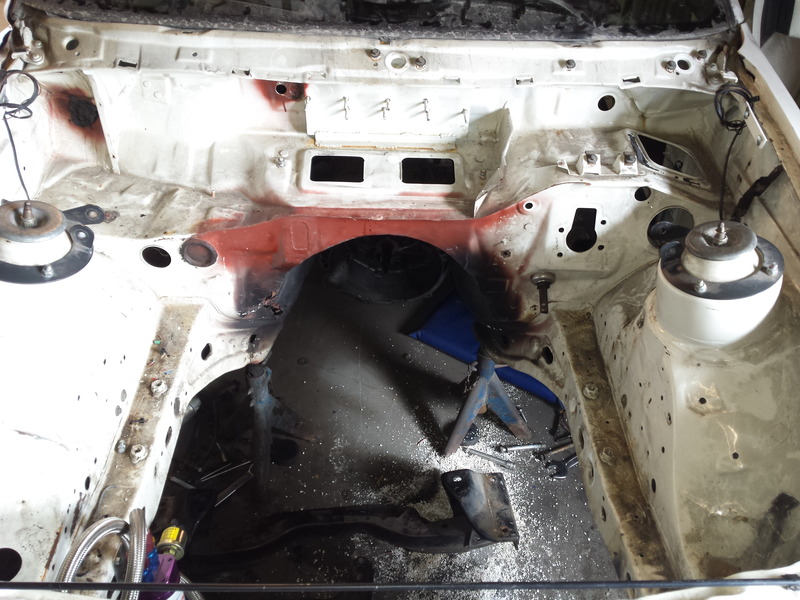
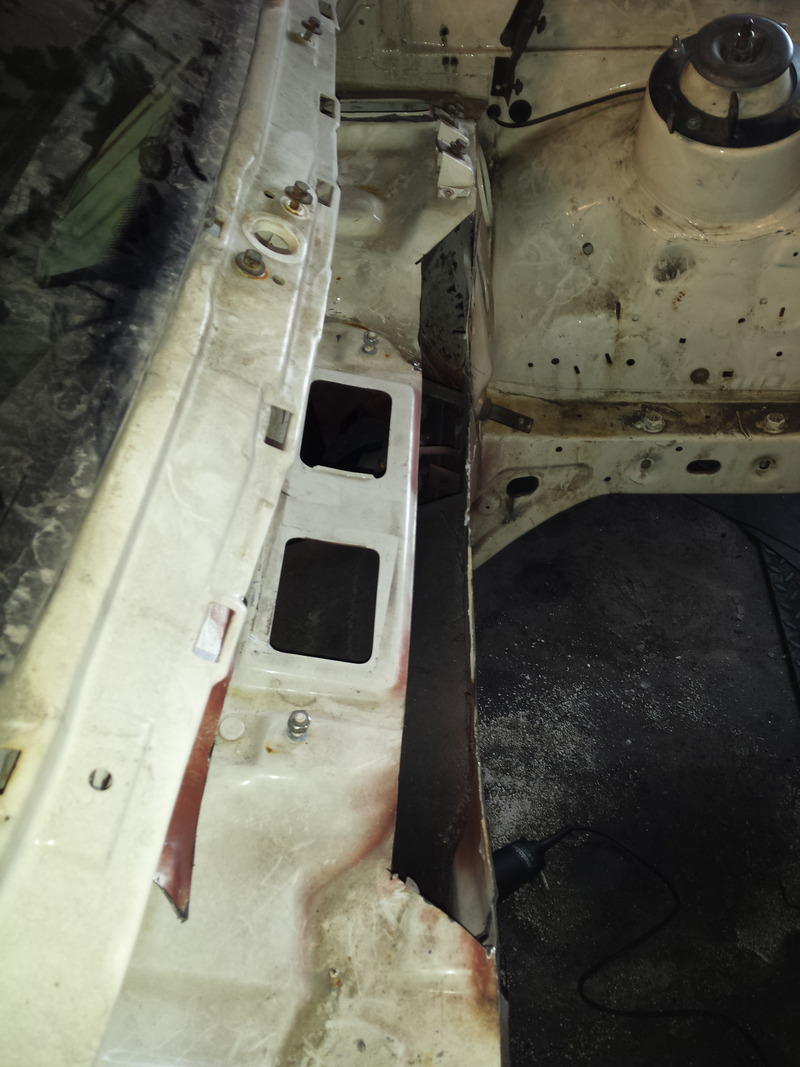
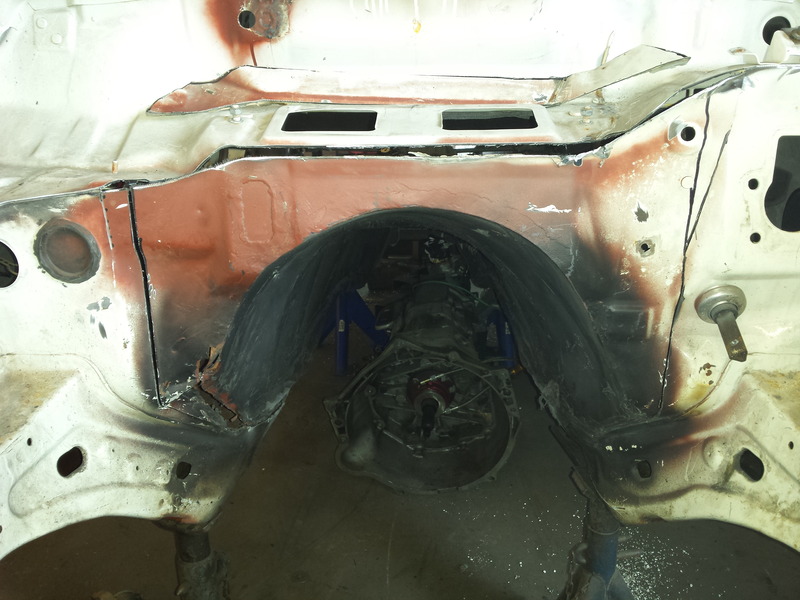
So i pull the engine and tranny out. pulled out the suspension. Took out the complete electrical system, and dash out.
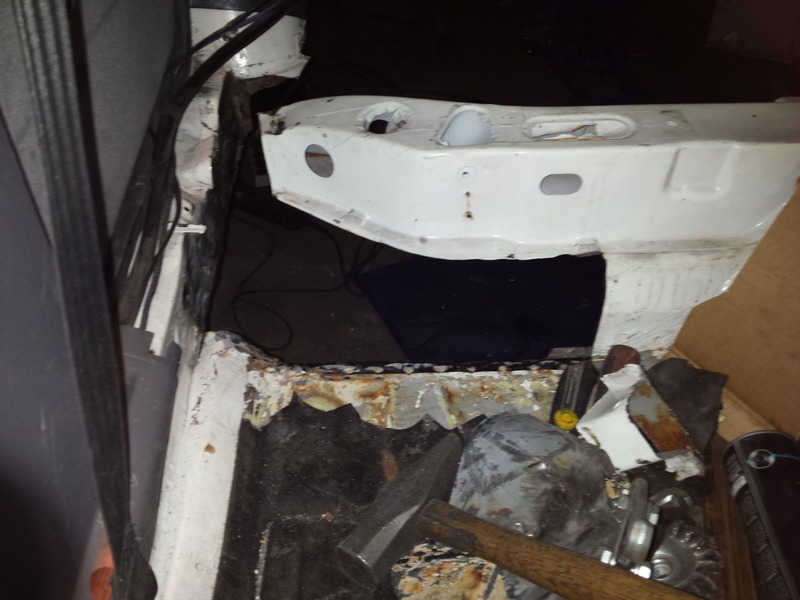
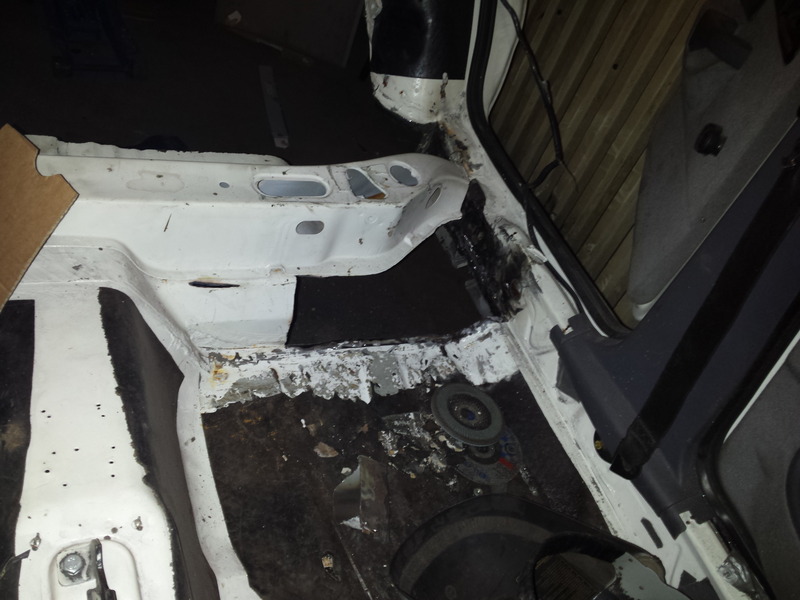
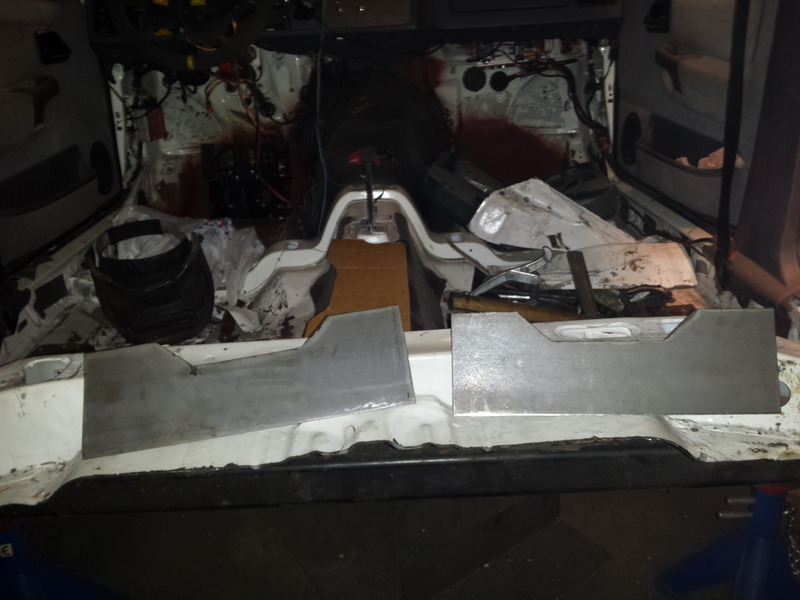
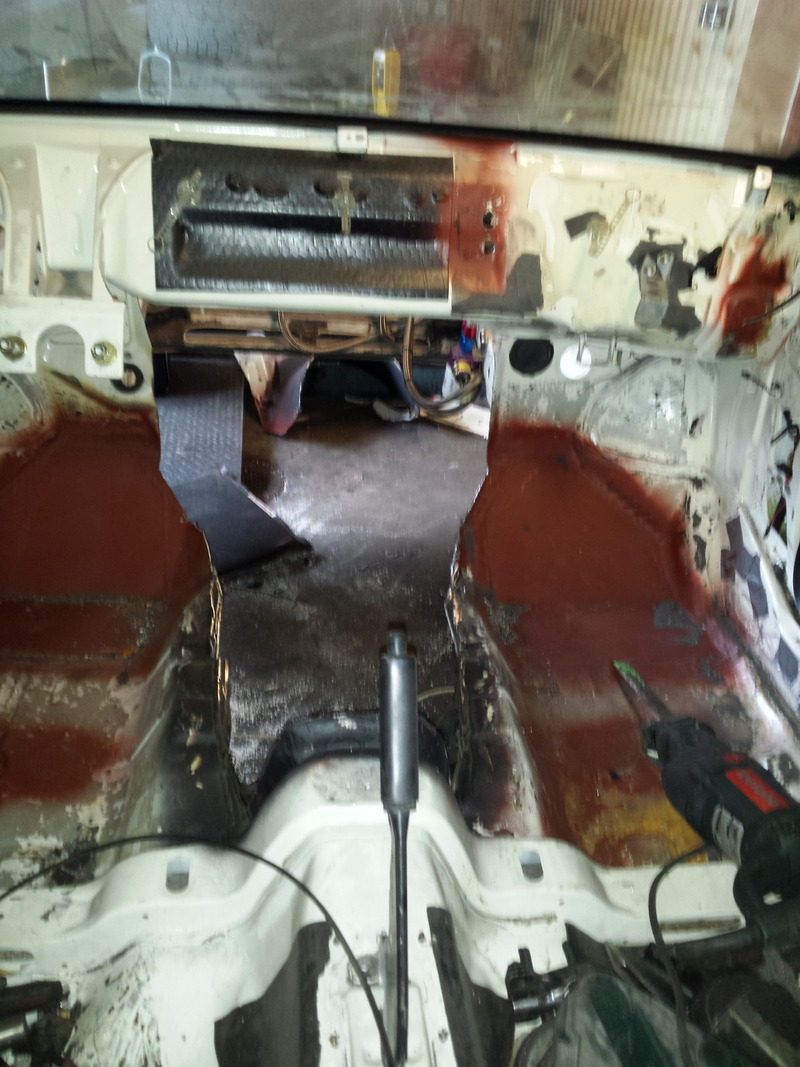
Then i cut out the transmission tunnel AGAIN. And measured, draw lines, and then cut out the center piece of the firewall.
Made new plate to the center piece, and tacked it in. Measured again and i have moved the center piece 70 mill backwards. So if i take the flange on the firewall
away,i will get 20 mill. So totally i will get 90 mill. I think that will be perfect.
And it will give me clearance between the oil sump and crossmember.
It will also give me much better weight distribution.

More to come.
Sorry for the long delay in the project. Have had too much work, and no time for my build. So finally i get to work on the COSVETTE.
But sense i have had little or no time for my build, i have had plenty of time ordering parts. Everything has now arrived, and will post pic`s later.
I am about to change the front crossmember, when i realized that the crossmember
was in serious conflict with the oil sump.
So i pull the engine and tranny out. pulled out the suspension. Took out the complete electrical system, and dash out.
Then i cut out the transmission tunnel AGAIN. And measured, draw lines, and then cut out the center piece of the firewall.
Made new plate to the center piece, and tacked it in. Measured again and i have moved the center piece 70 mill backwards. So if i take the flange on the firewall
away,i will get 20 mill. So totally i will get 90 mill. I think that will be perfect.
And it will give me clearance between the oil sump and crossmember.
It will also give me much better weight distribution.


More to come.