
**UPDATED 4/15** the ebay superhawk thread you've been waiting for
 08-23-2011, 02:38 PM
#1
TECH Enthusiast
Thread Starter
iTrader: (11)
Join Date: Jul 2005
Location: St Petersburg, FL
Posts: 703
Likes: 0
Received 0 Likes
on
0 Posts
as they say, curiosity killed the rabbit.
had to, i mean, a superhawk for $cheap? Really? shipped for another hundred, and yes, from Ebay.
these pics are in the raw state it was shipped in. the hinges on the hood on the passenger side have been adjusted and drilled out some to lower the hood, and front bumpstops are adjusted. other than that nothing else has been touched yet... (fenders, maybe front bumper, and headlights all to come)
passenger side line is ok, driver side needs help and driver front corner seems to stick up just a little higher than the rest - i am putting on hood pins to secure it (yea yea rice this) and to pull it down just a hair. front also needs some serious help.
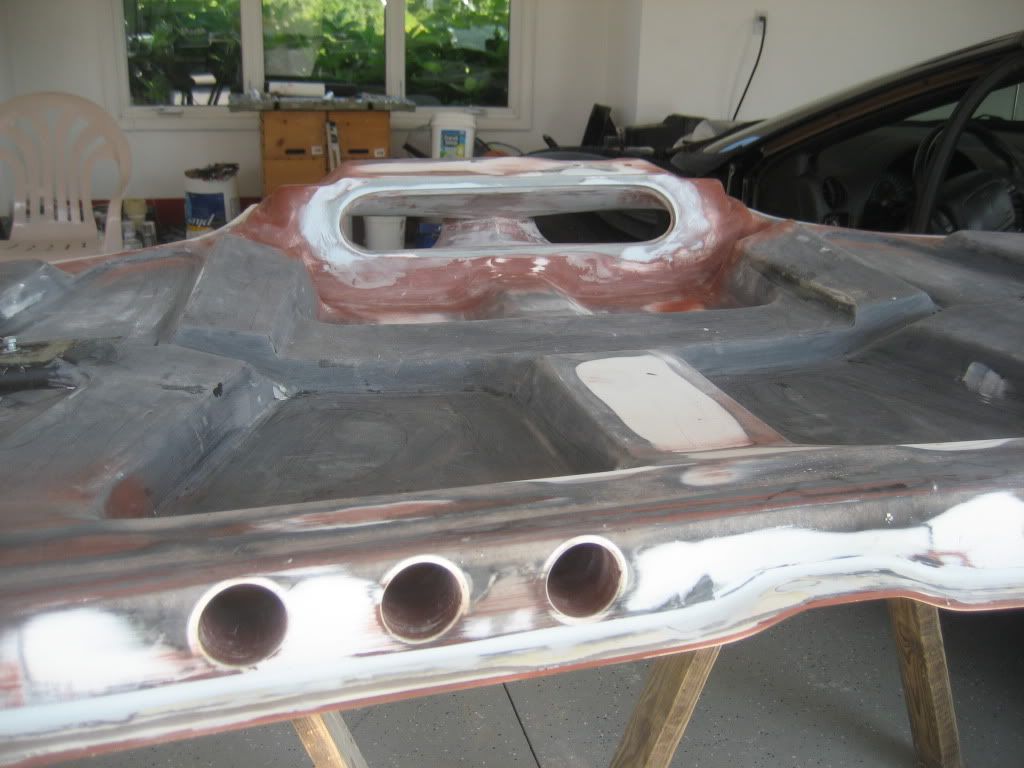
under the hood, i opened up the front holes to add my own honeycomb mesh to match the rest of the car, as it matched right up to the ws-6 airbox that i have. I still need to open up the hood extractors ontop and on the underside, just trying to figure out water drainage (will be garaged and not driven in rain, but what if...)
i will use long hair to extend the hood and fill in the gaps, then sanding, more sanding, filler, sanding, prime and paint...
had to, i mean, a superhawk for $cheap? Really? shipped for another hundred, and yes, from Ebay.
these pics are in the raw state it was shipped in. the hinges on the hood on the passenger side have been adjusted and drilled out some to lower the hood, and front bumpstops are adjusted. other than that nothing else has been touched yet... (fenders, maybe front bumper, and headlights all to come)
passenger side line is ok, driver side needs help and driver front corner seems to stick up just a little higher than the rest - i am putting on hood pins to secure it (yea yea rice this) and to pull it down just a hair. front also needs some serious help.
under the hood, i opened up the front holes to add my own honeycomb mesh to match the rest of the car, as it matched right up to the ws-6 airbox that i have. I still need to open up the hood extractors ontop and on the underside, just trying to figure out water drainage (will be garaged and not driven in rain, but what if...)
i will use long hair to extend the hood and fill in the gaps, then sanding, more sanding, filler, sanding, prime and paint...
Last edited by rabbit320; 04-15-2012 at 07:31 PM.


 08-24-2011, 12:51 AM
#7

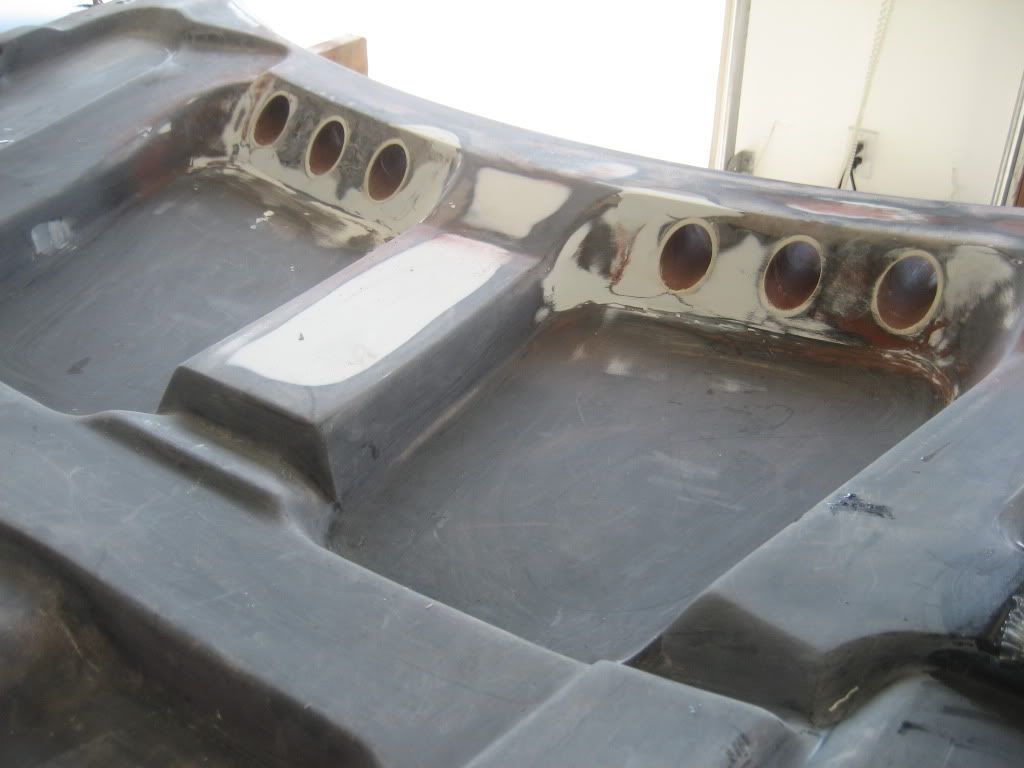
We bought a ws6 hood from them. The nostrils are straight through and we cut out heat extractors at the back of the hood (not through to the top of the hood. I'll get some pics of it, it's going to be primed soon.
Last edited by Conrad; 08-24-2011 at 01:00 AM.
Trending Topics
08-24-2011, 09:48 AM
#8
Yea, what he said above.
We purchased a hood from them also and it did need work. But as was mentioned, if you can do a little body work it is an awesome deal.
We had cut out the inlet and layed-up f/g through the backside where the air box inlet is located. I had also made a snap-in close-out that drains in case the weatherman is wrong!
Next, a little filler primer more flat sanding and then off to paint!
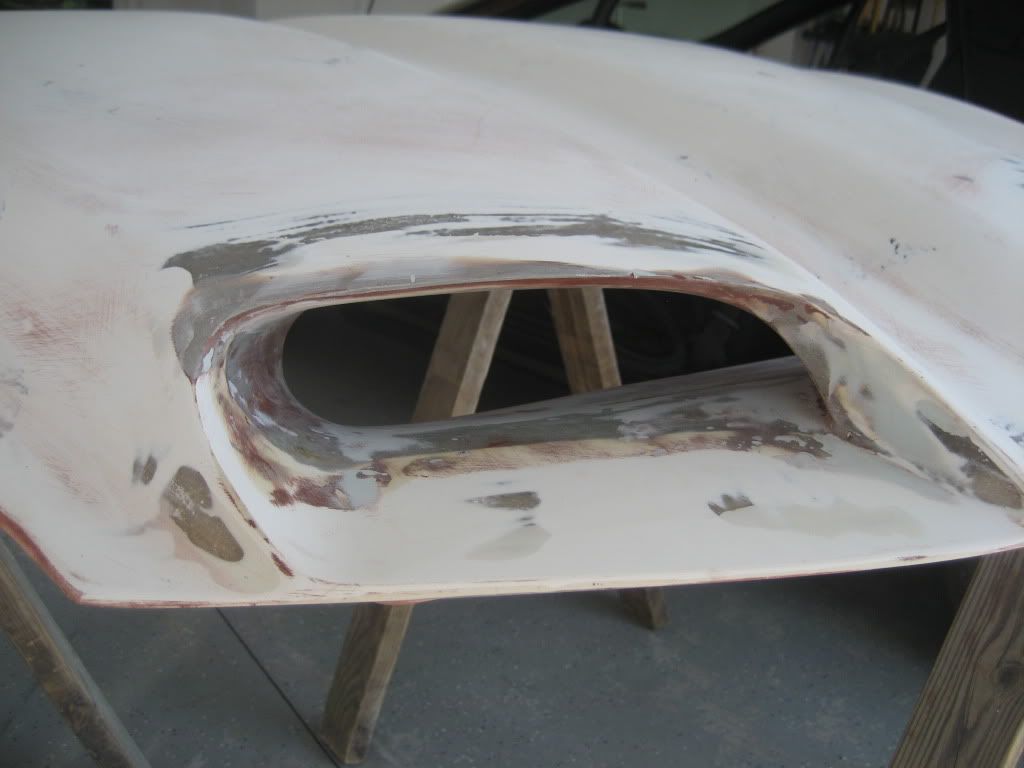
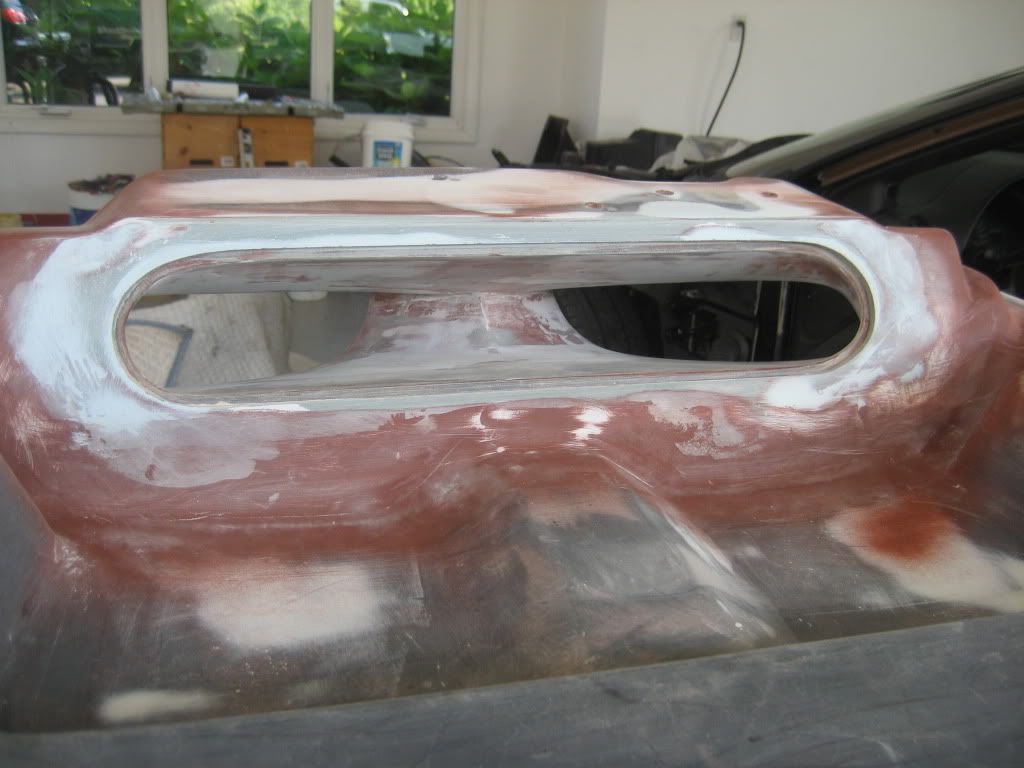
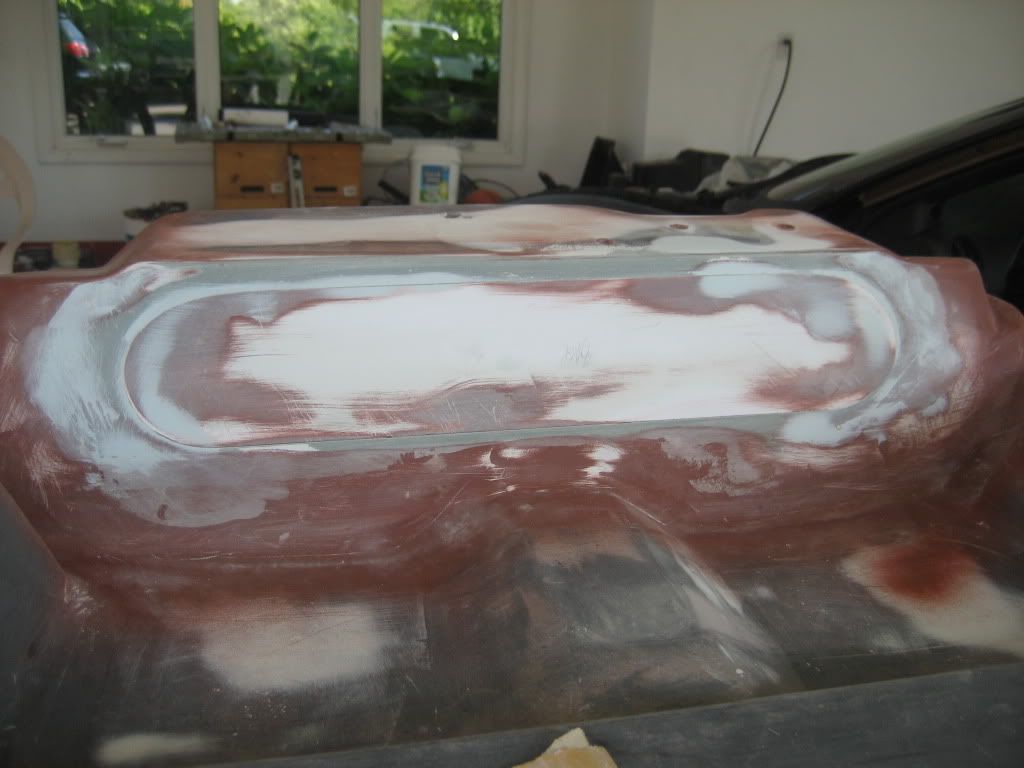
Heat extractors were also fabbed into the back of the hood.
We purchased a hood from them also and it did need work. But as was mentioned, if you can do a little body work it is an awesome deal.
We had cut out the inlet and layed-up f/g through the backside where the air box inlet is located. I had also made a snap-in close-out that drains in case the weatherman is wrong!
Next, a little filler primer more flat sanding and then off to paint!
Heat extractors were also fabbed into the back of the hood.
 08-24-2011, 04:53 PM
#13
We picked our hood up and saw one with the hole cut out. Cut your own hole is all I gotta say 
Thanks guys, BlackBirdDaddy has been working his butt off on that hood for a few weeks now, it should be a 1 off custom work of art when finished, like other parts of the car.
Thanks guys, BlackBirdDaddy has been working his butt off on that hood for a few weeks now, it should be a 1 off custom work of art when finished, like other parts of the car.
08-24-2011, 05:00 PM
#14
Code:
The Alchemist Very interesting.
Code:
black_sheep454 Lookin good, nice work on the underside
Code:
LilJayV10 Damn that's some nice looking work there
 That's right, when we picked-up our hood, the guy said it would take $30 and 5 minutes for him to cut out the ports!! We respectively declined his offer.
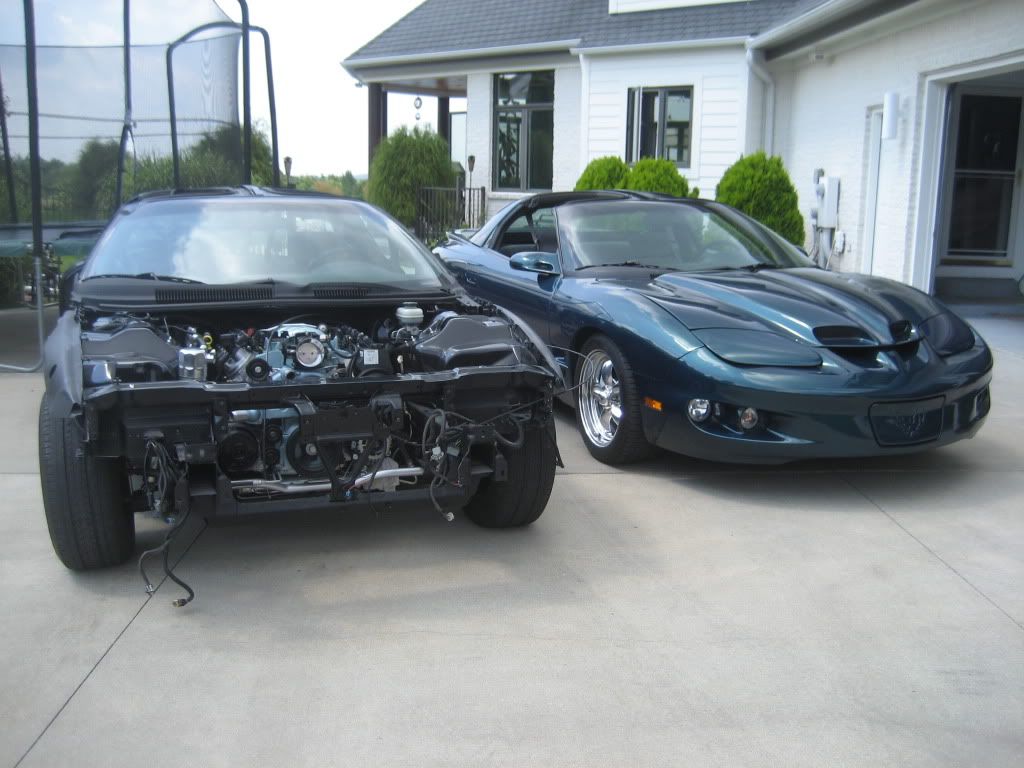
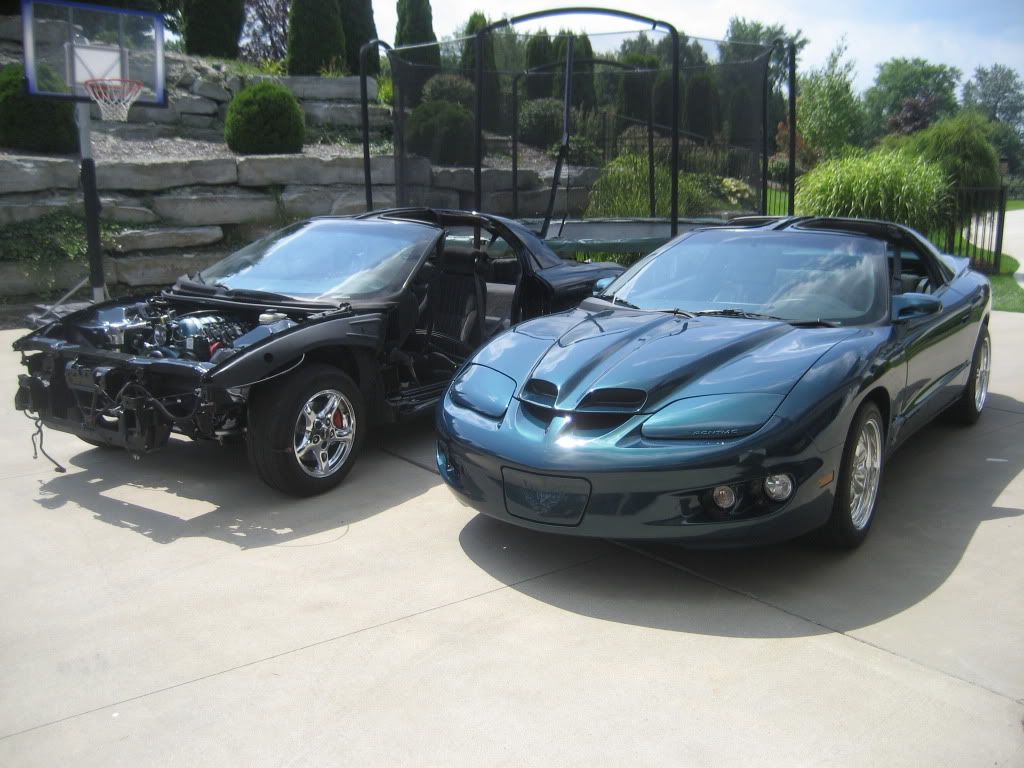
 Note: The Bird' on the right has the hood from the same manufacturer, although we did not make the scoops functional (3.8 so, why?). That installation was basically a paint and bolt on. It fits decent considering that the right front was smacked.

Last edited by BlackBirdDaddy; 08-24-2011 at 09:55 PM.
08-24-2011, 11:21 PM
#17
On The Tree
Join Date: May 2011
Location: Northern Indiana
Posts: 167
Likes: 0
Received 0 Likes
on
0 Posts
I personally was not happy with my hood I bought from him. The bottom side was horrible!! there was gobs of resin all over, bare fiberglass spots, and grinding marks on most of the underside (I dont know about y'all but when I have my hood up I want the bottom side to look good too). the top side had an unbelievable amount of of little holes that needed filled (I know some holes are normal with fiberglass hoods,) the edges of the hole hood where not very "clean," plus on the sides I could see the separate layers, plus on my ss hood he made the scoop a 3/4"-1" to low plus he cut the opening to wide (by like 2") so the OEM grill would not fit so i had to fab up a grill. it fits alright but not perfect. I would only buy a hood from him if I had low cash and need a hood bad, but IMO save and buy a high quality hood.
 08-25-2011, 04:37 PM
#19
TECH Enthusiast
Thread Starter
iTrader: (11)
Join Date: Jul 2005
Location: St Petersburg, FL
Posts: 703
Likes: 0
Received 0 Likes
on
0 Posts
looks good... come finish mine, yr making me look bad! did you also alter the middle ridge of the underside of the hood? how do you form the front for the curved intake gap, tin foil?
ya i would cut out your own holes, because if the supplier cuts them he puts in a diamond weave mesh - i wanted mine to match the honeycomb on the rest of the car.
05MBMLS2 - probly not 3 days worth, but definitely one or two.
i will keep pictures posted
and sorry mods - thought i could name names just no link
08-25-2011, 04:42 PM
#20
TECH Enthusiast
Thread Starter
iTrader: (11)
Join Date: Jul 2005
Location: St Petersburg, FL
Posts: 703
Likes: 0
Received 0 Likes
on
0 Posts
i was impressed with how it was shipped, with a 2x4 screwed to each back corner @ the hinge mounting points, and foam placed around the front corners for protection; all in a big box