
**UPDATED 4/15** the ebay superhawk thread you've been waiting for
 08-25-2011, 06:41 PM
#21
Launching!
iTrader: (34)

Join Date: Apr 2008
Location: Holmes, NY
Posts: 255
Likes: 0
Received 0 Likes
on
0 Posts

OK i just bought one......Ill update your thread with how it looks when i get it.
looks good... come finish mine, yr making me look bad! did you also alter the middle ridge of the underside of the hood? how do you form the front for the curved intake gap, tin foil?
ya i would cut out your own holes, because if the supplier cuts them he puts in a diamond weave mesh - i wanted mine to match the honeycomb on the rest of the car.
05MBMLS2 - probly not 3 days worth, but definitely one or two.
i will keep pictures posted
and sorry mods - thought i could name names just no link
 08-25-2011, 08:17 PM
#22
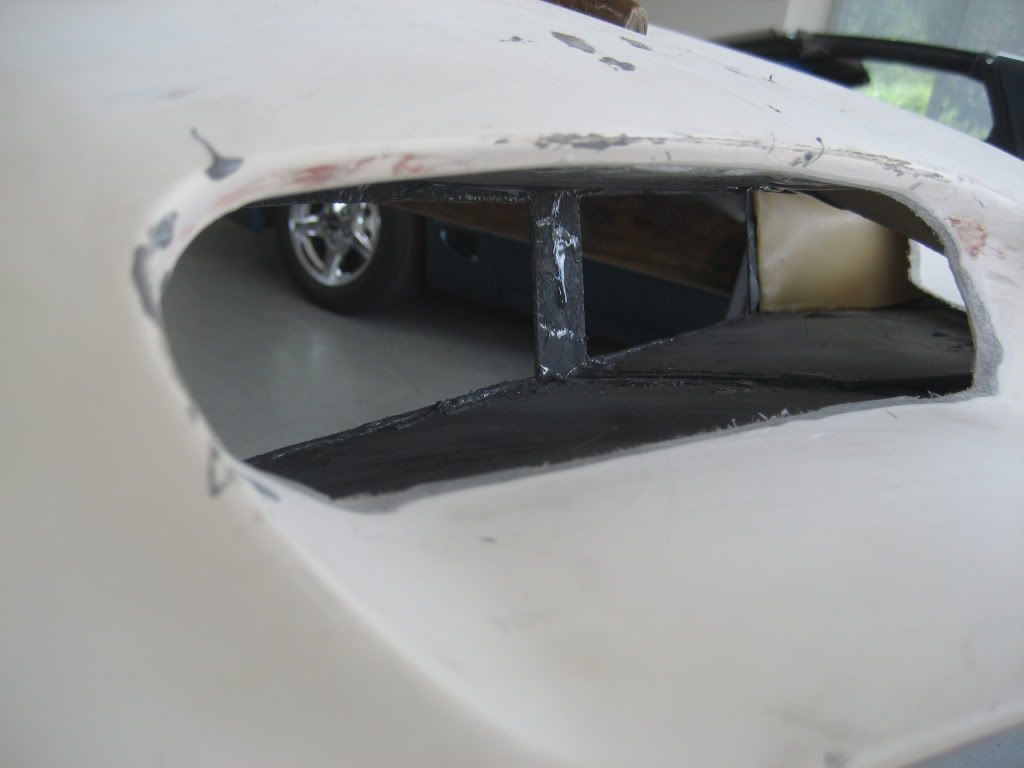
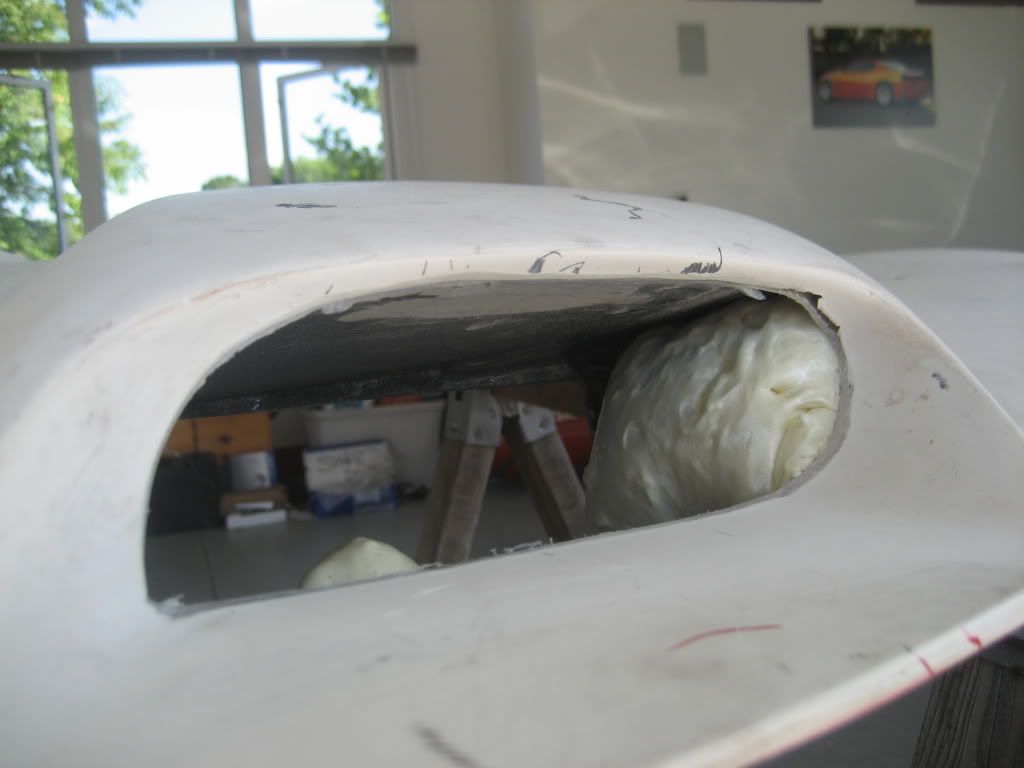
Tin foil? I bonded-in sheet fiberglass for the top and bottom of the opening and then sprayed foam filler in the curved side areas and shaped to fit. Then I layed-up 3 layers of heavy f/g cloth on the foam to form the shape. Topped it off with f/g reinforced filler to smooth out the surface.
 08-26-2011, 03:50 PM
#23
TECH Enthusiast
Thread Starter
iTrader: (11)
Join Date: Jul 2005
Location: St Petersburg, FL
Posts: 703
Likes: 0
Received 0 Likes
on
0 Posts
Ahhhh... ok cool. not sure if i will do this @ the front end or not.
pics of hood pins i just got, had'nt seen this plate style before. black pins with aluminum hardware, debating about blacking the scuff plates too. 3/8" x 2.75" long, i should have gotten the 3"
lookin for opinions - last two pics are different orientations, i like the diamond position instead of the box (looking @ the large inner 4 holes, not the screw holes) but im not sold, might line it up w/ the angle of the headlight... any ideas gents? thanks!
Last edited by rabbit320; 08-28-2011 at 02:06 PM.

 10-16-2011, 07:05 PM
#28
TECH Enthusiast
Thread Starter
iTrader: (11)
Join Date: Jul 2005
Location: St Petersburg, FL
Posts: 703
Likes: 0
Received 0 Likes
on
0 Posts
some yes, worked a little on it today, will get pics up tomoro. any further requests for pics while its still un painted? specific areas in question? ive been trying to clean up the underside, and trying to figure out how to add the 1/2" i need on the driver side fender line...
this is the first time ive used bondo, etc, and practiced a little by smoothing out the underside of the hatch, threads in this section and the paint & bodywork section; gives it a nice stamped steel look of older muscle cars... but i think i will use the short strand to extend it, as it seems to fill in better with less chances for air bubbles than the long strand glass.
this is the first time ive used bondo, etc, and practiced a little by smoothing out the underside of the hatch, threads in this section and the paint & bodywork section; gives it a nice stamped steel look of older muscle cars... but i think i will use the short strand to extend it, as it seems to fill in better with less chances for air bubbles than the long strand glass.
10-16-2011, 07:09 PM
#30
TECH Enthusiast
Thread Starter
iTrader: (11)
Join Date: Jul 2005
Location: St Petersburg, FL
Posts: 703
Likes: 0
Received 0 Likes
on
0 Posts
and bstuby - you get what you pay for 4 sure... its gonna take a lot of work to get it where i want it, but i wanted to learn that stuff for future mods to the body of the car, so its a learning experience, but i wouldnt say its a bolt on and go quality
04-15-2012, 07:27 PM
#31
TECH Enthusiast
Thread Starter
iTrader: (11)
Join Date: Jul 2005
Location: St Petersburg, FL
Posts: 703
Likes: 0
Received 0 Likes
on
0 Posts
Finally got time to work on it, and my gf helped... win!
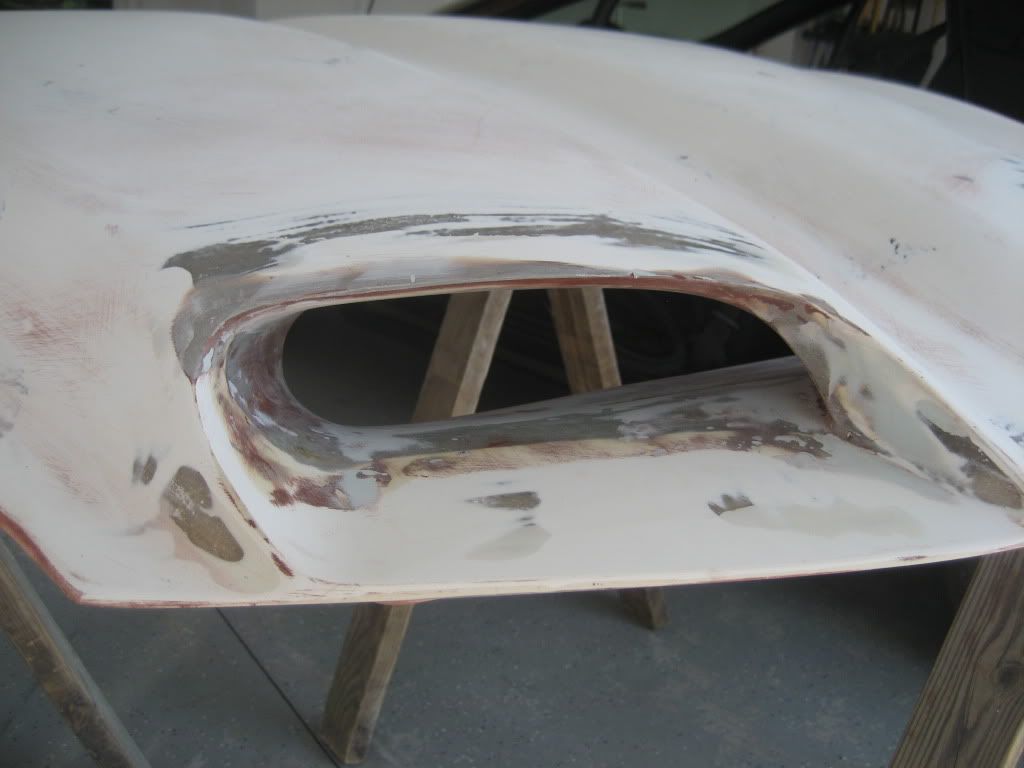
one side done with long hair filler. cardboard was added as a spacer, then tape was put over any surface areas the fiberglass would touch, then waxed with standard liquid (paste also works) car wax, area was deeply grooved with a metal brush then prepped with surface cleaner/wax remover. dont let it dry for very long! within five minutes i had to cut into it, and i should have done so sooner, then sanded with a cheese-grater type sander for drywall... worked great, now more sanding then short hair....
sanded pix were with hood open - gap is literally non existent see last pix, curve makes it appear big but i can barely get a dime in between