When you click on links to various merchants on this site and make a purchase, this can result in this site earning a commission. Affiliate programs and affiliations include, but are not limited to, the eBay Partner Network.
Your experience may be different, but here's what I had to do to get this shifter installed in my 2000 Camaro SS with the 4L60E. The following is specifically for use with the 4L60E. 4L80E, TH400, glide etc are going to be different than what this covers, so please be mindful of this being only for the 4L60E. That being said, a ratchet shifter really doesn't do much for a standard 4L60E other than look good, but I will be upgrading to a different trans soon and my stock shifter was acting up so I went ahead with the swap.
Here is what I purchased:
B&M Pro Ratchet shifter part number 80842
B&M billet shift **** 80534 Custom plate from JustAFool see here: https://ls1tech.com/forums/parts-cla...y-console.html
Ebay shift boot
8M bolts slightly longer than the stock trans pan bolts qty=2
1/4x20 allen head bolts qty=2
You do NOT need to purchase the 75498 lever kit for the 4L60E. That part is only needed for GM trans with a PRNDL switch on the trans.
The first thing you need to do is shave down the shifter where it makes contact with JustAFool's plate so that when shifting, the lever moves smoothly and doesn't grind up against the plate surface. If you try to use washers on the bolts to get the clearance, the shifter winds up sitting to high when mounted and causes a clearance issue with the shift plate. Simply take a few millimeters off using a cutoff wheel:
Next is to remove the pin/s that the instructions specify since you are using it with the 4L60E and it is 4 speed. Remove the three speed limiter blocker pin as seen in the B&M manual here: https://static.summitracing.com/glob...9500663-05.pdf
After that comes mounting the shifter to the shift plate using 1/4x20 bolts. The plate comes pre-drilled and threaded with 4 holes. Only the 2 outer ones are used. Essentially the 2 holes that are on the left side when installing the shifter furthest away from each other are going to be the holes you want to use.
Install the reverse switch and neutral safety switch onto the B&M shifter as seen in the manual linked above.
The reverse/backup switch is the one on top and the neutral safety switch is the one on the bottom.
Prior to installing the shifter into the car with the mounting plate now attached, you are going to want to drill a new hole for the shift cable. The existing hole is not going to work. I drilled a hole that was approx 3 inches to the right, and one inch up from the existing hole. I suggest putting the shifter in but not bolting it down and getting an idea of exactly where the hole should be. I used a 1" hole saw and a 1" grommet.
Once the hole is drilled, you'll want to feed the cable through the hole from the top using the routing as seen in the instructions that come with the shifter. Bolt the shifter to the car and install the shift cable onto the shifter.
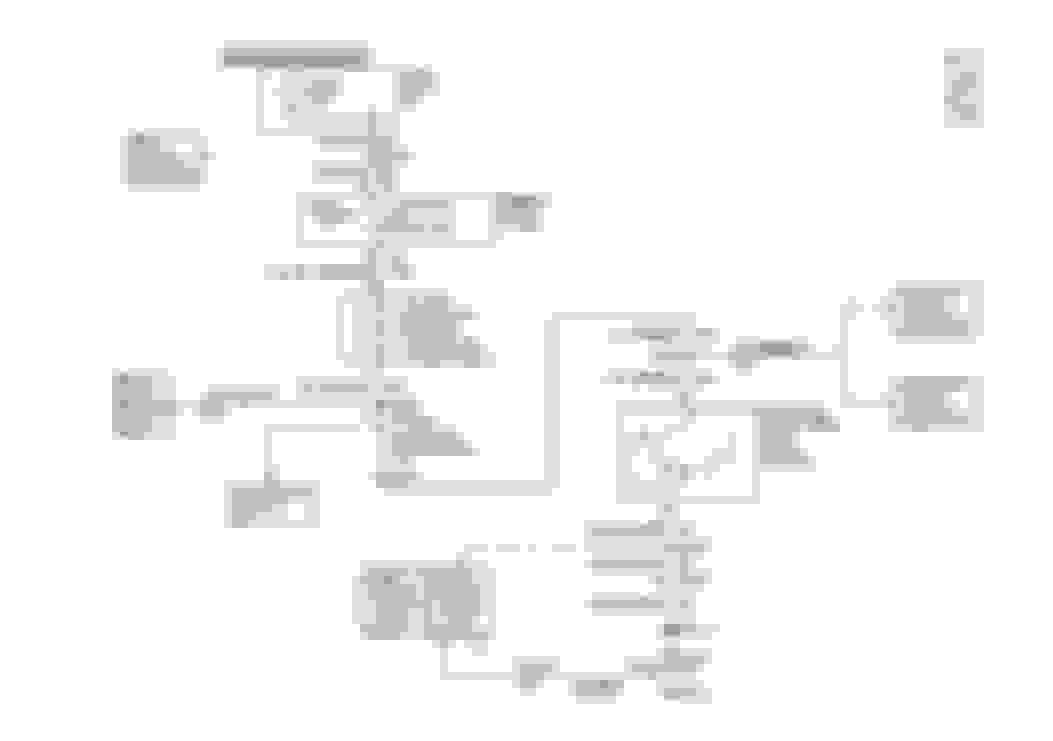
Now comes the electrical. You'll want to make 4 wires about 10 inches long. 18awg is fine. Use female terminals on one end and male spade terminals on the other. Using tin snips, cut approx 3/4 of the spade terminal off 2 of the wires, and 1/2 worth of spade terminal on the other 2 wires. This is so you can feed the wires into the factory harness. The factory harness has the following wires on it:
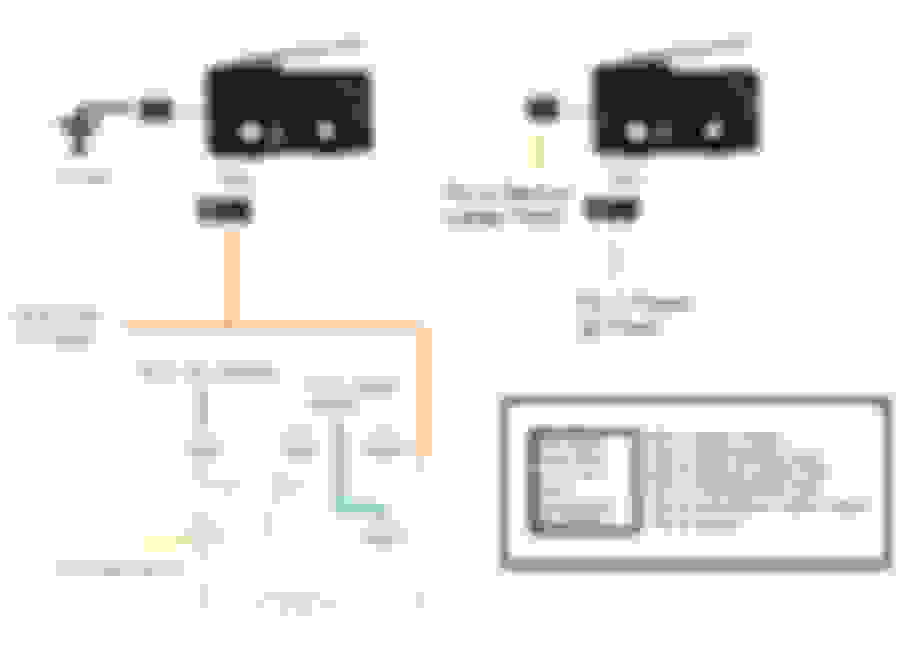
On the B&M shifter, the top toggle switch is your reverse lights, and the bottom one is your neutral safety switch. A common incorrect method is to put a jumper on pins A and B to get the trunk release to work since the aftermarket shifter doesn't allow for 2 microswitches that are activated in the P/N position. Unfortunately doing this results in the PCM receiving a signal that the car is always in the P/N position regardless of what gear it's in. To resolve this issue, one solution is to use a relay to wire both A and B into the NSS along with E and F. Run the wires from the factory 6 plug NSS to the aftermarket shifter using the following diagram. Special thanks to bbond105 for assisting me on the wiring.
Here are the factory diagrams for reference:
Now it's time to go under the car and hook the other end of the cable to the trans.
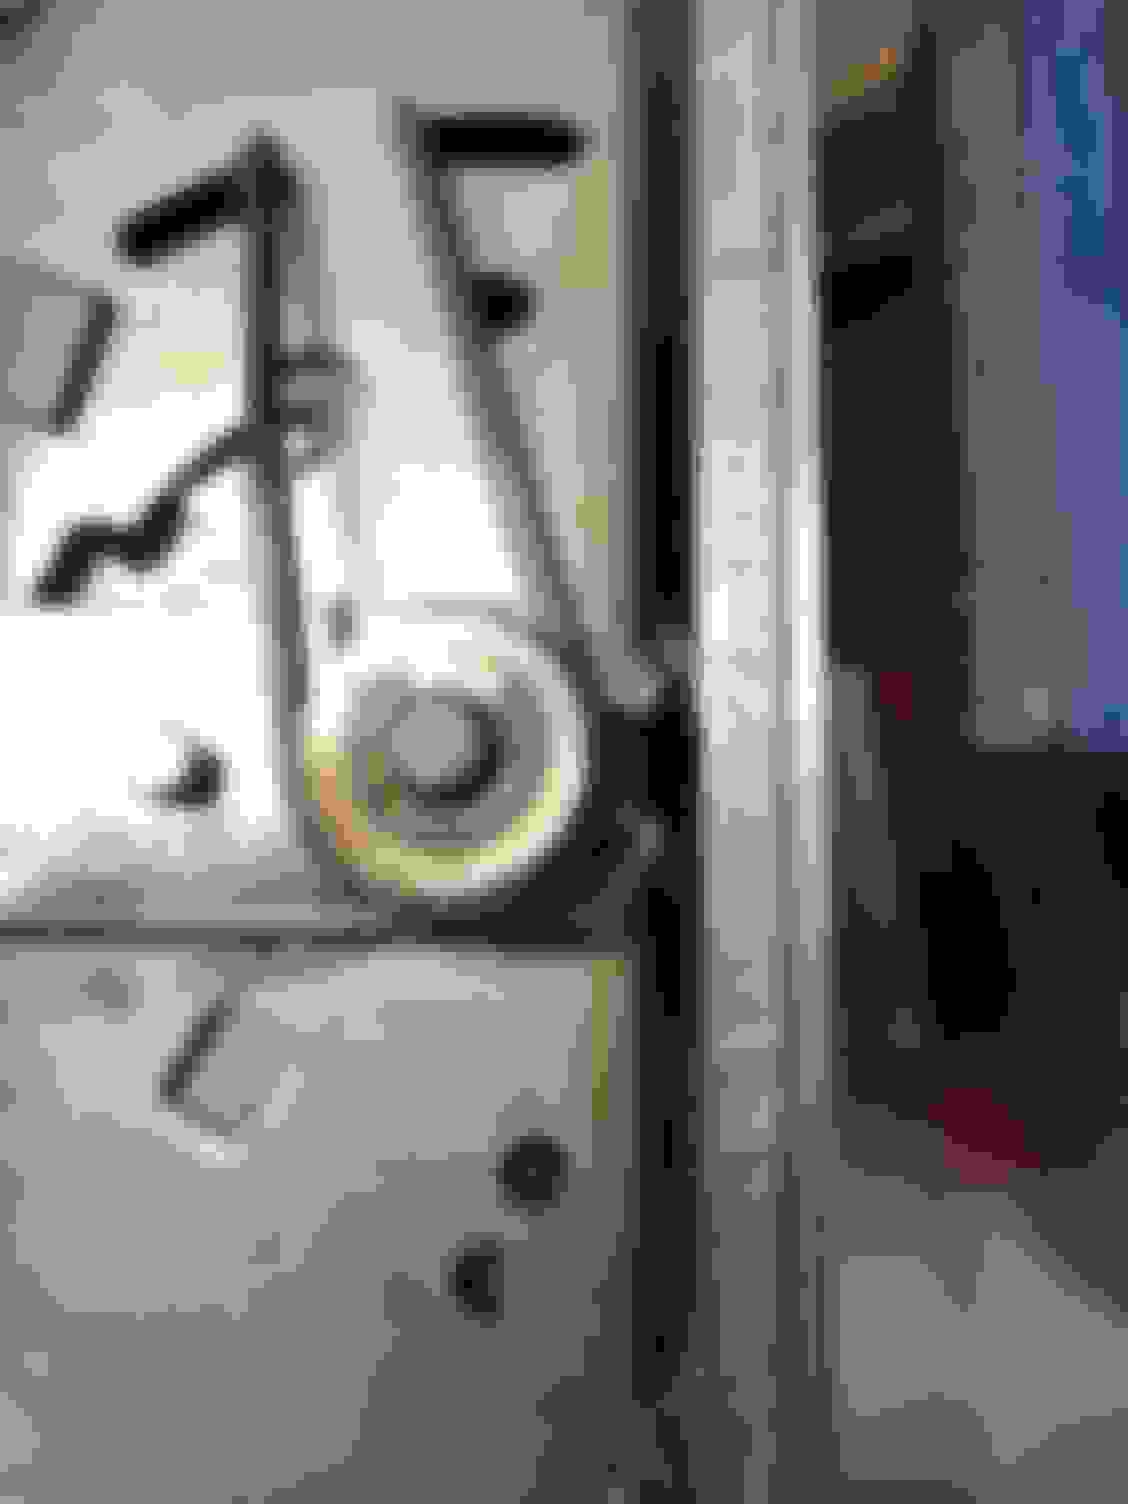
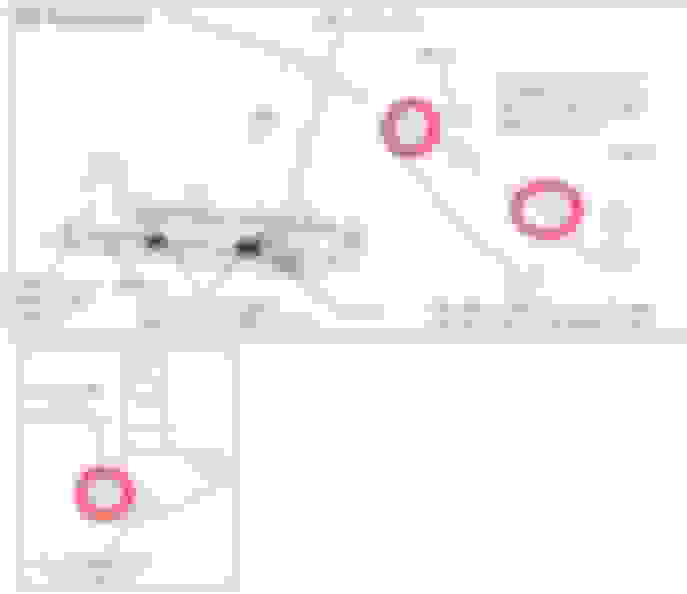
You will want to use the proper GM shift lever as indicated in the B&M instructions and the GM cable bracket. The instructions say to use spacers but B&M doesn't provide longer trans pan bolts to account for the spacers. I purchased 2 longer bolts that were M8. Use the holes circled in red to mount to the trans pan. For the shift lever, you will use the hole circled in red to mount the B&M cable to.
Follow the instructions in the B&M manual for proper cable adjustment. Park position on the trans is the lever moved all the way to the direction of the front of the car. The lowest gear position is moving it all the way to the back of the car. Do not install the cable into the shift lever "F" position until you have ensured that the cable will slide freely and work in all gears. Here's what the install looks like when completed:
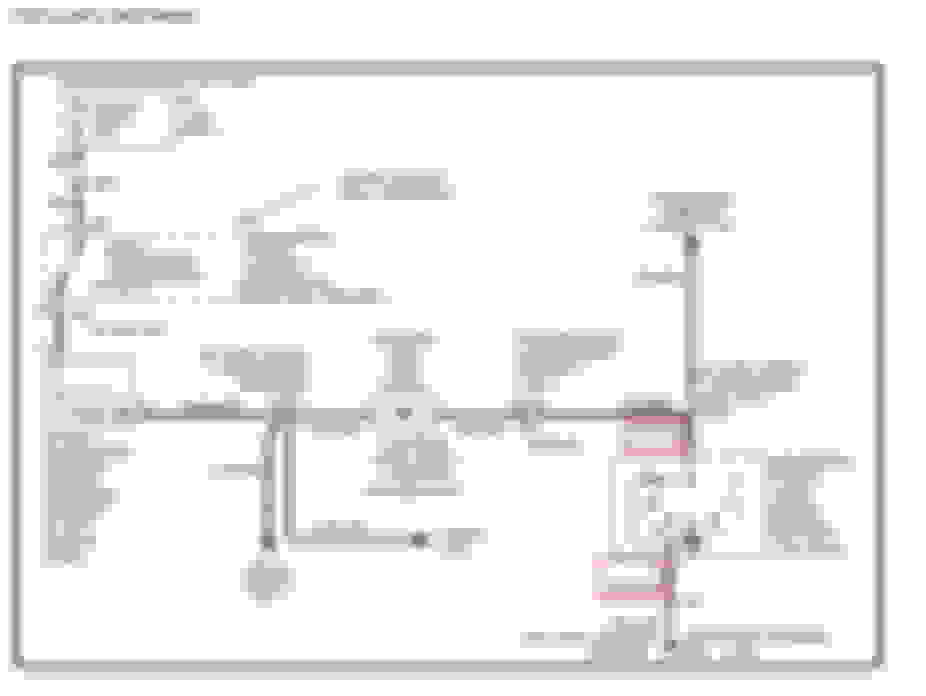
If installing the shift cable onto a 4L80E instead of a 4L60E, suggest purchasing b&m 70499 bracket to make the install easier. The routing will look like the picture below. The other item connected to the shift lever is for a Dakota Digital Gear Indicator.
Ensure proper operation of the shifter and that the car doesn't start when in gear. Double check to make sure the reverse lights come on only when the shifter is in reverse.
Now comes the installing of the shift cover. I recommend that you purchase an manual shift cover. Clearancing the auto shift cover is a time consuming process. I had to take a good bit out of it to get it to fit properly and not have any rubbing issues with the lock out switch. Here's how mine looked after taking the dremel to it:
Here it is installed, just waiting on the leather boot to arrive. I was not able to keep the factory look on the right side due to the plastic making contact with the top of the shifter, but others have had success. They may have used their own bracket which sits the B&M lower in the car.
Auto Plate
Manual Plate (some trimming needed for clearance)
95cam86roc setup:
Overall this install wasn't too bad. Hope this helps anyone looking to do this.
Last edited by 5.7stroker; May 12, 2023 at 11:45 AM.
I�m having heck figuring out how to route my shifter cable where it�s at now it has to make two 180*s and I�d rather not have that. Doesn�t look like I have much of a choice tho
It's much easier to route it on a lift. Also make sure the hole you drill for the cable near the shifter results in a nice straight direct line to the shifter. Always use a grommet.
I like the functionality of the pro ratchet and they look good in the factory console. Here's mine in the 93-97 console..
(car is right hand drive, pic isn't flipped)
If you already have this configuration installed (4l60e/b&m80842) and are converting to a late model 4l80e that has the long shift shaft and not the short shift shaft, one option is to remove the prndl switch off the long shift shaft and use b&m 70499 which spaces the cable out so it lines up with the end of the long shaft. Another option is to covert to a short shaft, which is more time consuming and involves removing the valve body.
Retro Modern Bandit Pontiac Trans AM Comes With Burt Reynolds' Autograph
Slideshow: A modern Camaro transformed into a retro icon, this limited-run "Bandit" build blends nostalgia with brute force in a way few revivals manage.
Top 10 Greatest Cadillac V Series Performance Models Ever, Ranked
Slideshow: Cadillac didn't just crash the high-performance luxury vehicle party, it showed up loud, supercharged, and occasionally a little unhinged...
Coachbuilt N2A Anteros Is an LS2-Powered C6 Corvette In Italian Clothes
Slideshow: A one-off sports car that looks like a vintage Italian exotic-but hides a C6 Corvette underneath-just sold for the price of a new mid-engine Corvette.