2nd Generation F-body owners with Completed LS1 swaps post in here!
 05-24-2012, 09:47 PM
#61
TECH Resident
iTrader: (148)
Join Date: Dec 2006
Location: Crete, NE & Berthoud, CO
Posts: 848
Likes: 0
Received 0 Likes
on
0 Posts

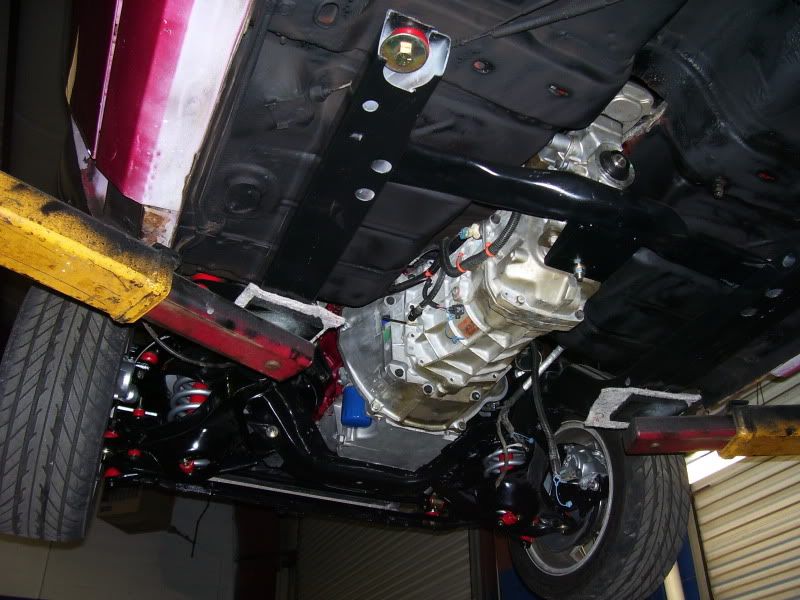
im running an LS2 with all the GTO accessories (F-body pan) and I've great pan clearance to the subframe and no interference with the steering and the accessory drive. I used the transdapt swap plates (non 1" setback)
 06-03-2012, 03:06 PM
#64
TECH Enthusiast
iTrader: (6)

Join Date: Apr 2005
Location: Socal
Posts: 730
Likes: 0
Received 0 Likes
on
0 Posts
Hey guys glad to see this is still going! I havent seen my car in years I am in the mist of getting it back dont know if I am going to part out or sell the roller etc...If I do keep it has to have this conversion done...
06-24-2012, 03:45 PM
#65
Teching In

Join Date: Jun 2012
Posts: 8
Likes: 0
Received 0 Likes
on
0 Posts
I'm getting close to starting my lq4 swap on my 73 rs can't wait. I have my stock 6.0 and installing a ls6 intake with my stock Muncie M20. So I plan on posting the entire build for others cause it is a pita looking around finding all you need for this build. Haven't figured on what motor mounts to use any help I would appreciate. Im looking towards the LS1 +1 -1 setback mounts.
10-12-2012, 12:54 PM
#66
TECH Enthusiast
Thread Starter
iTrader: (8)

Join Date: Dec 2009
Location: N. E. Arkansas
Posts: 639
Likes: 0
Received 0 Likes
on
0 Posts
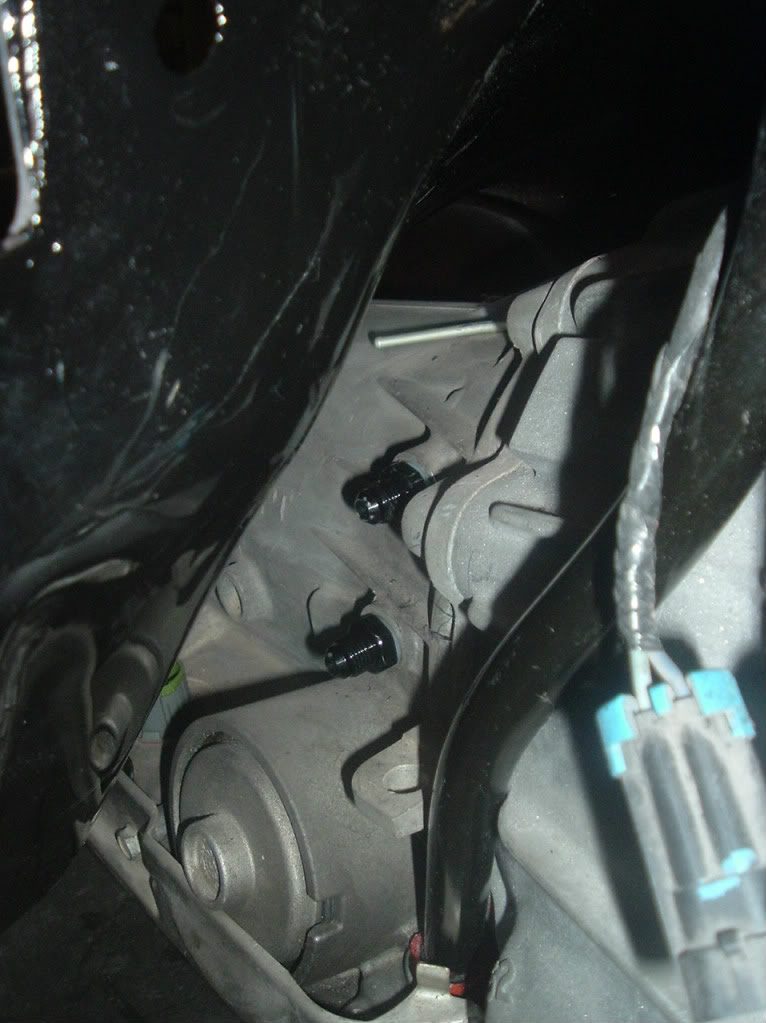
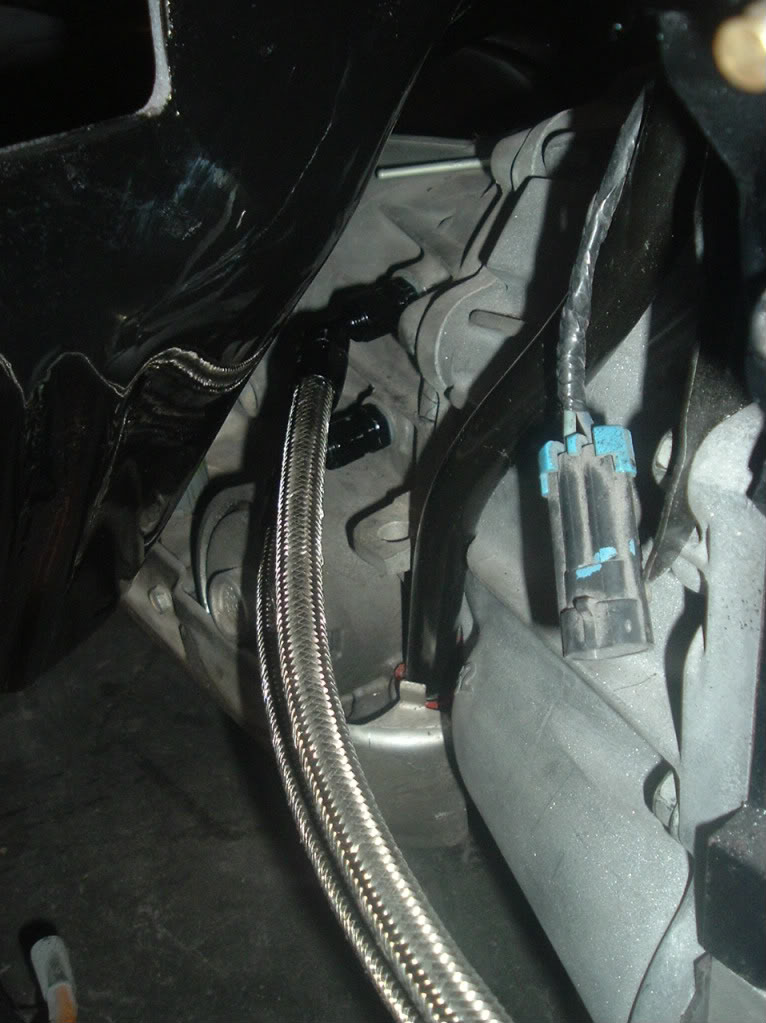
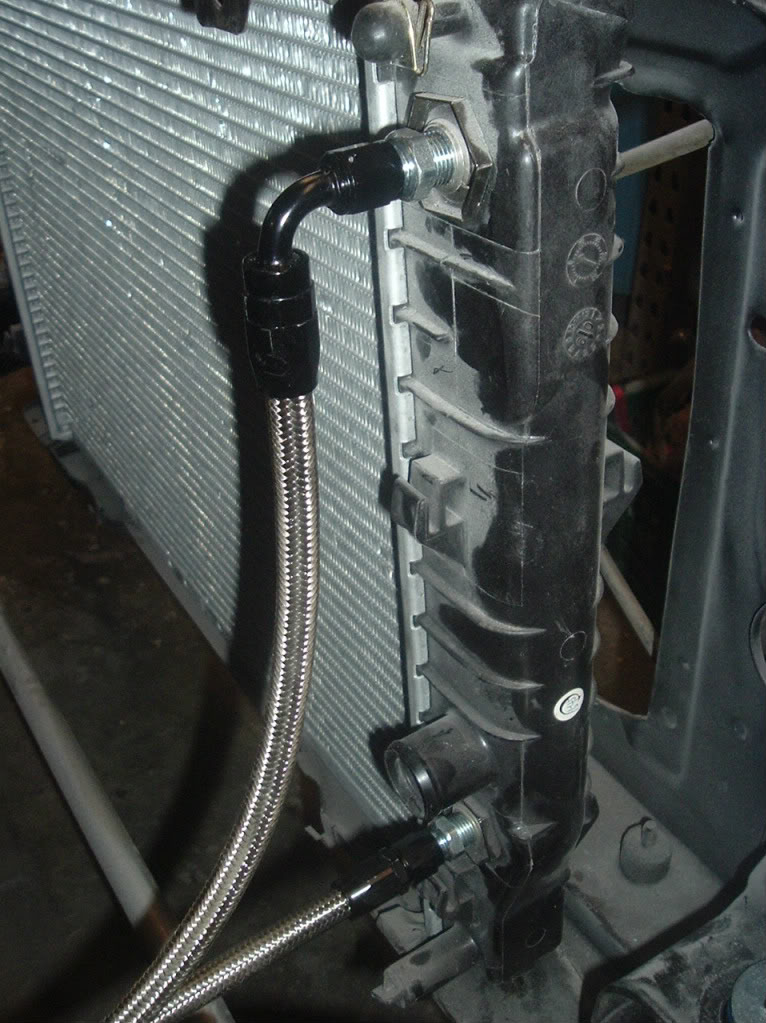
Here's what I ended up doing for the transmission cooler lines. I am using a 2000 Camaro LS1 radiator and it had quick connect fittings on it. I couldn't find steel lines that would work...tried S10 but they suck.
I ended up getting special 6 an fittings for the transmission and radiator and ran steel braided line...worked great
I ended up getting special 6 an fittings for the transmission and radiator and ran steel braided line...worked great
10-12-2012, 12:58 PM
#67
TECH Enthusiast
Thread Starter
iTrader: (8)
Join Date: Dec 2009
Location: N. E. Arkansas
Posts: 639
Likes: 0
Received 0 Likes
on
0 Posts
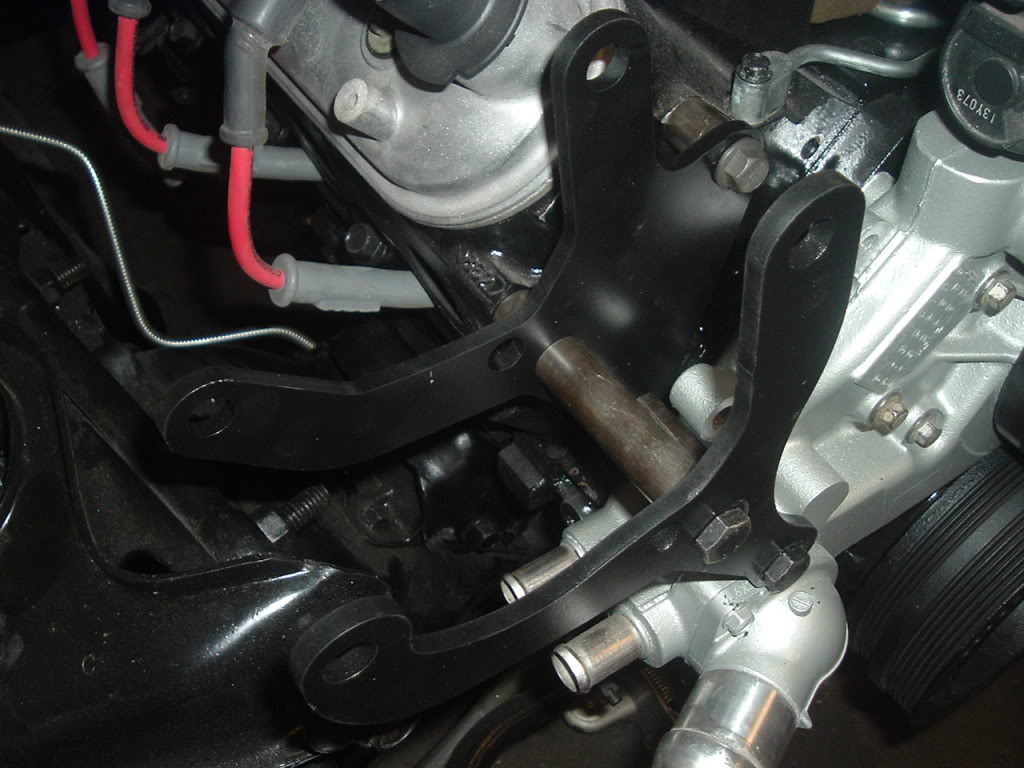
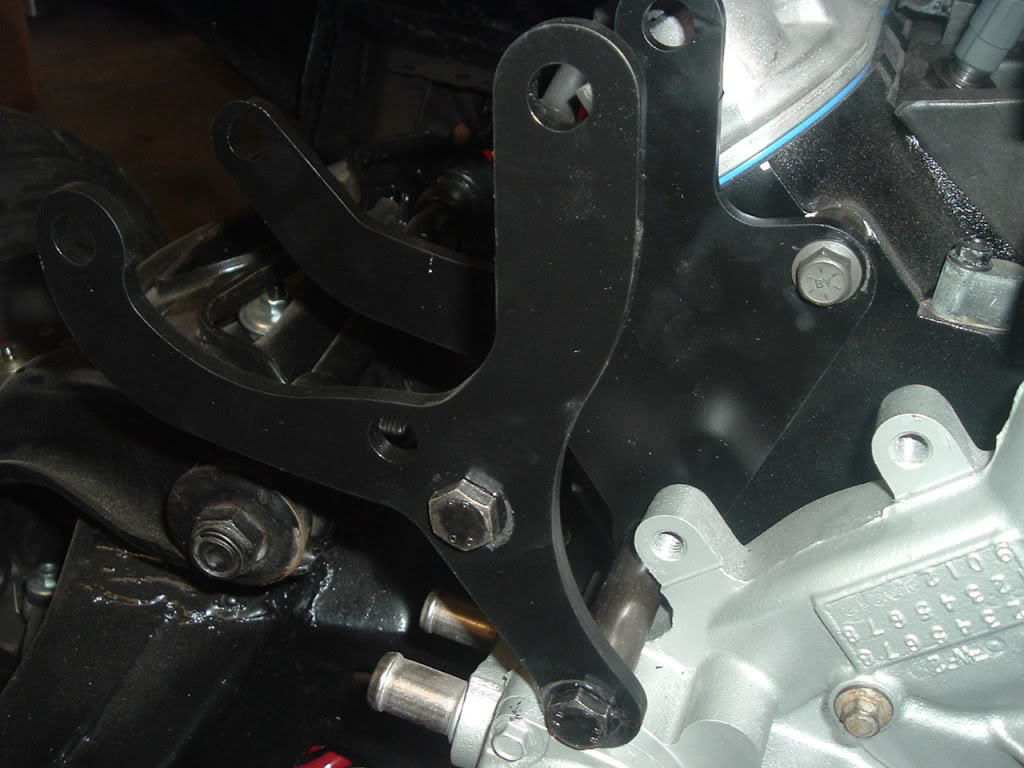
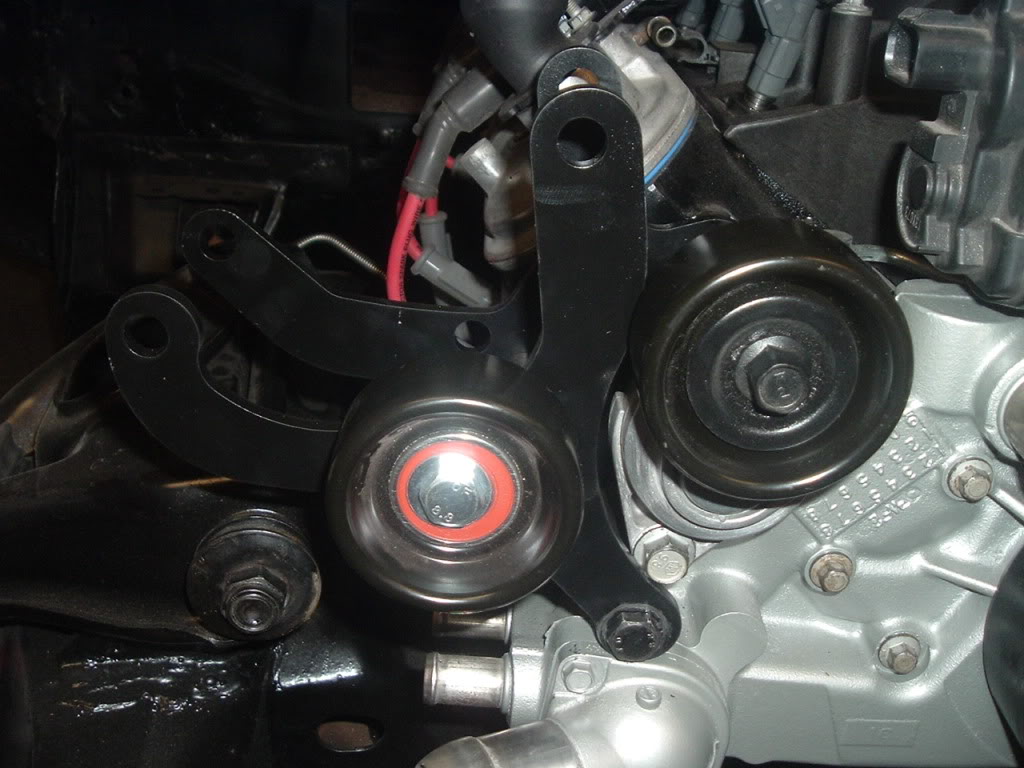
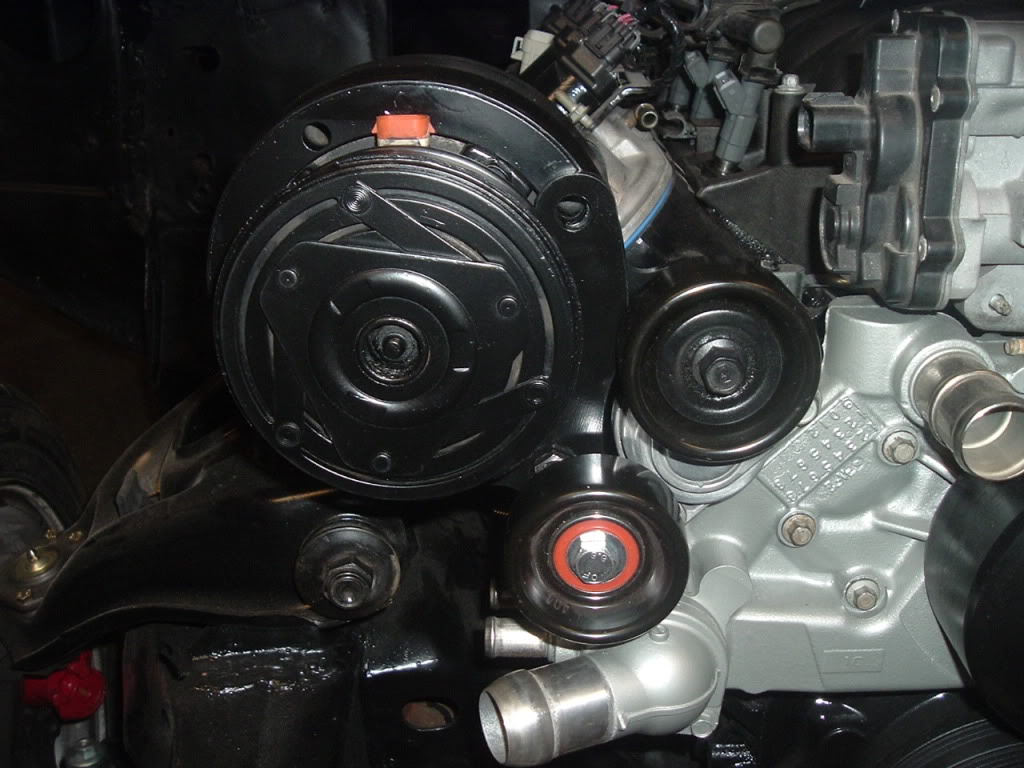
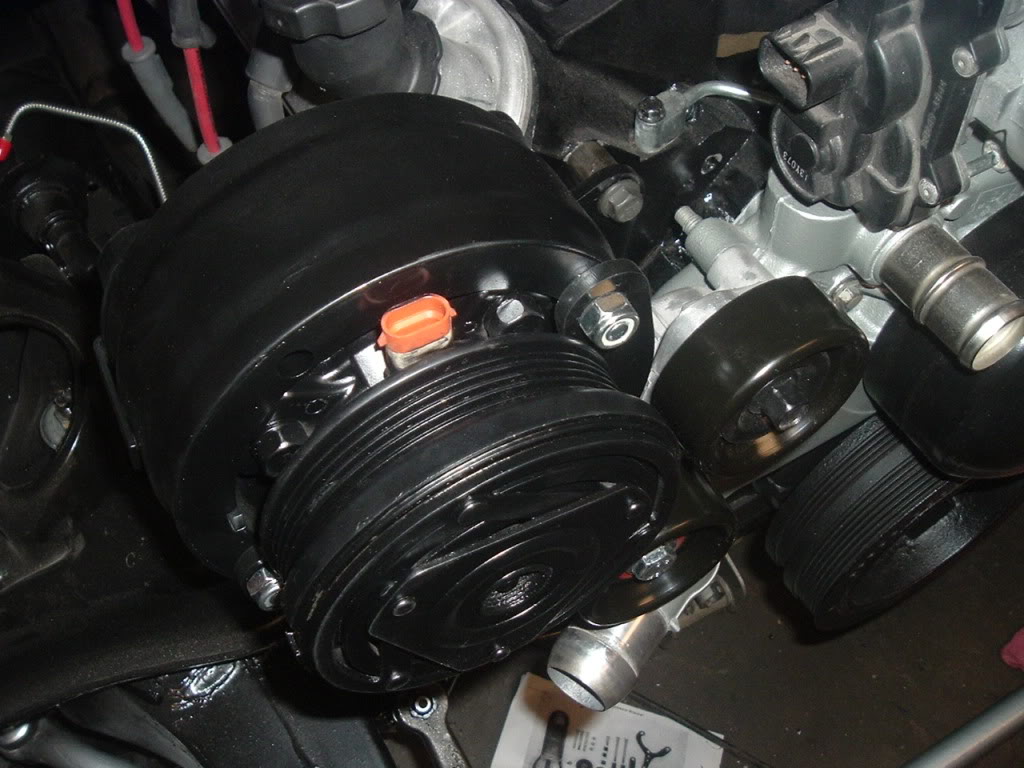
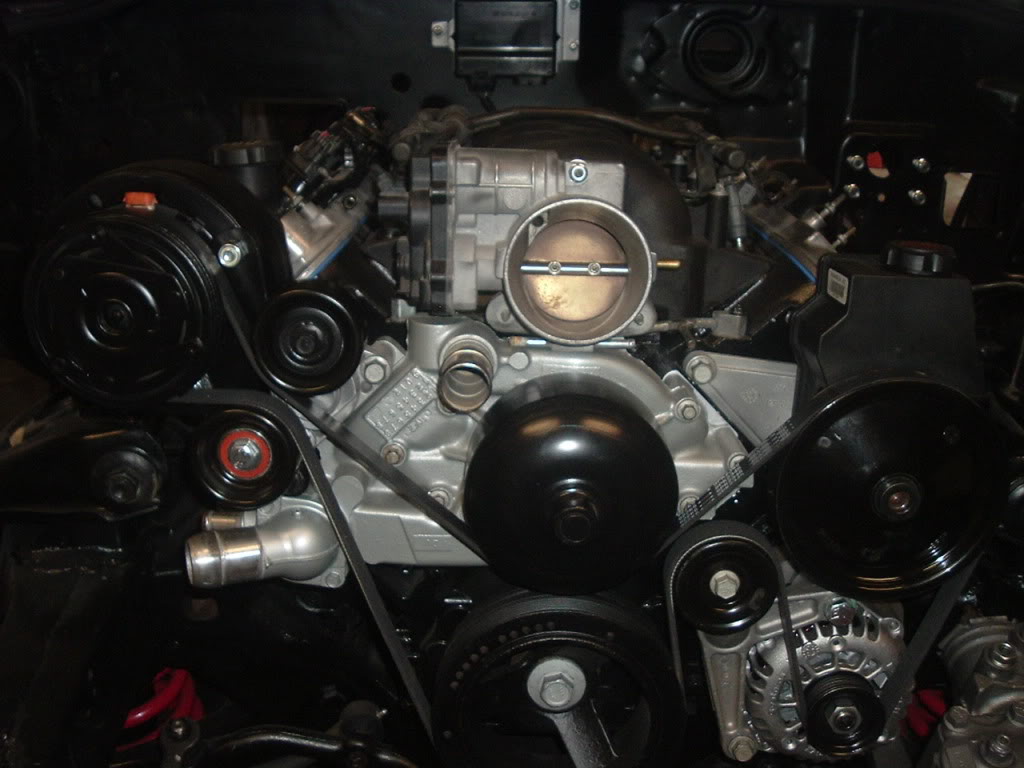
For my AC compressor, I picked up a NIB Fbody motorsports compressor brackety for 3rd gen Camaro and LS1 swap.
I'm using a 3rd gen Camaro compressor with my 2nd gen AC system.
Here are some pics
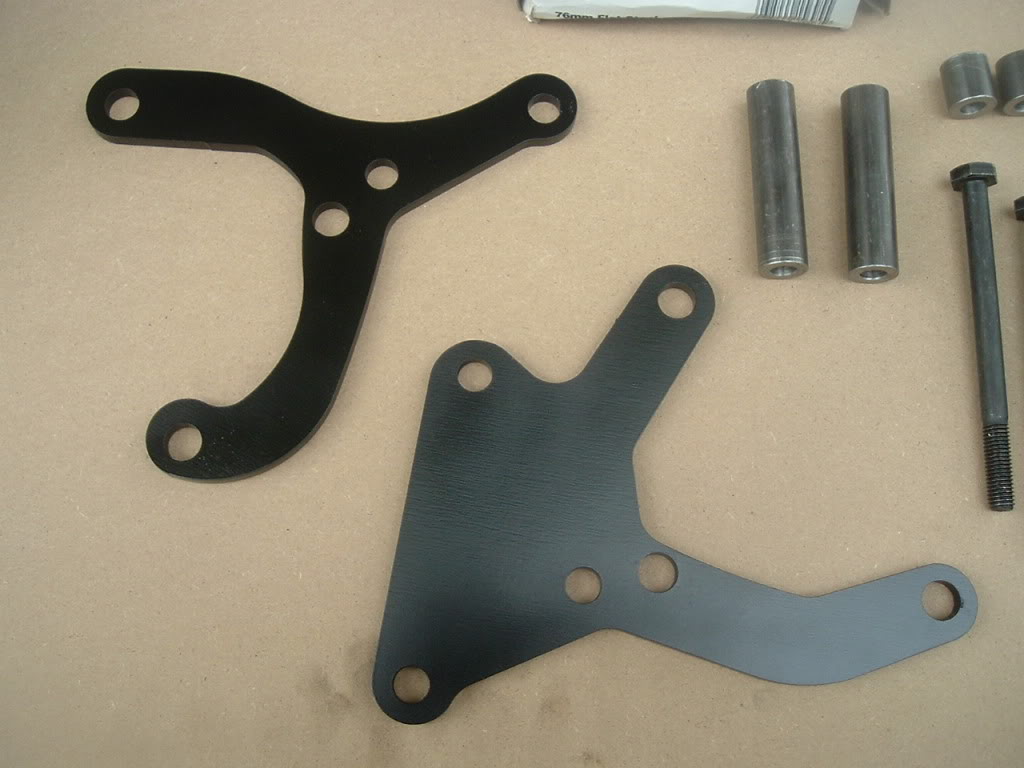
old
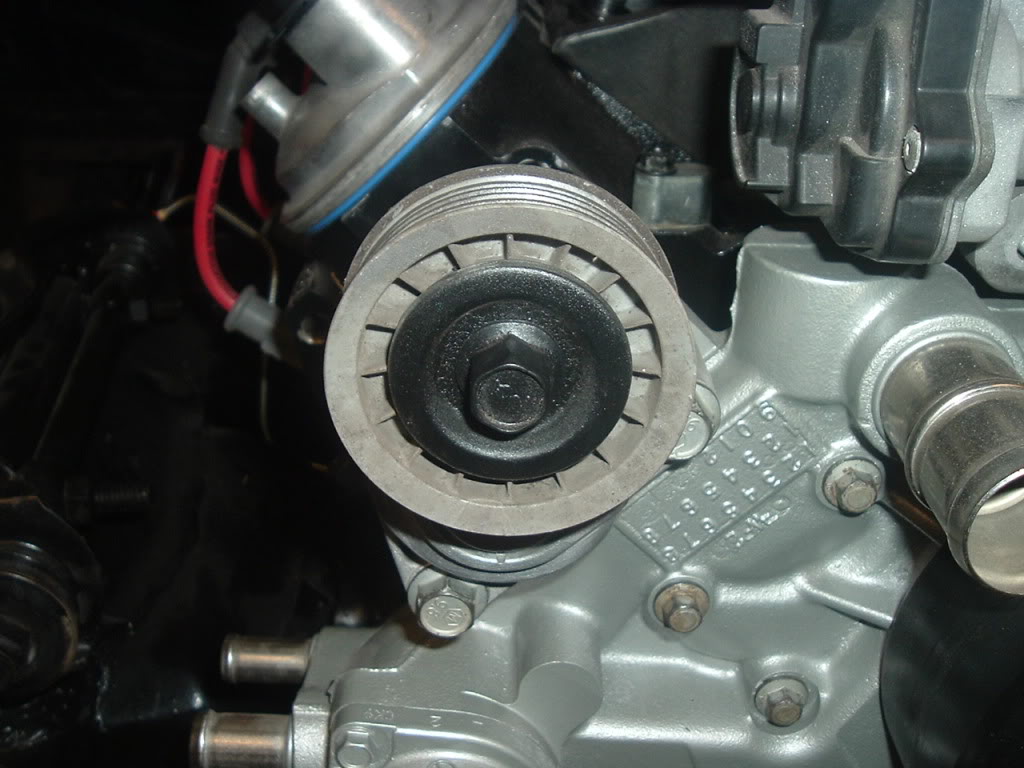
new

I'm using a 3rd gen Camaro compressor with my 2nd gen AC system.
Here are some pics
old
new

 10-12-2012, 02:06 PM
#70
TECH Enthusiast
Thread Starter
iTrader: (8)
Join Date: Dec 2009
Location: N. E. Arkansas
Posts: 639
Likes: 0
Received 0 Likes
on
0 Posts
If you have a 70-80 Camaro or firebird and want something a little more "factory" way to mount the data connector plug....the 1981 Camaros had a computer controlled engine...you could get the bracket that clips under the dash to mount the plug on
Some just screw the plug straight into the plastic under the dash, I got the bracket pretty cheap
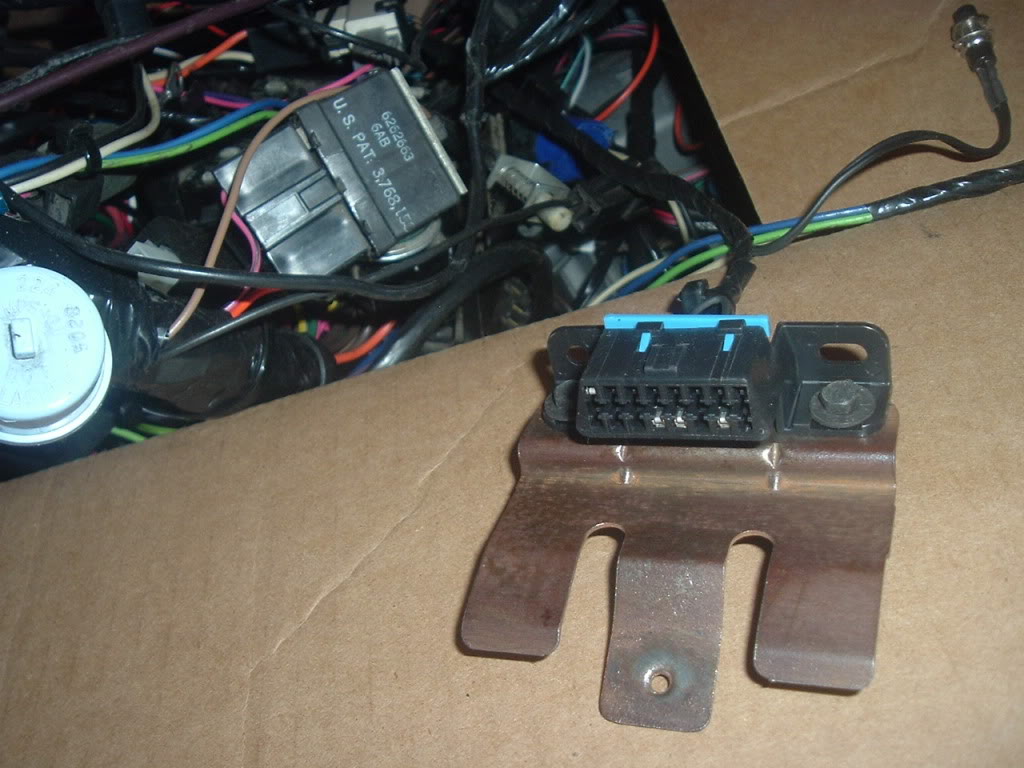
Some just screw the plug straight into the plastic under the dash, I got the bracket pretty cheap
10-12-2012, 02:11 PM
#71
TECH Enthusiast
Thread Starter
iTrader: (8)
Join Date: Dec 2009
Location: N. E. Arkansas
Posts: 639
Likes: 0
Received 0 Likes
on
0 Posts
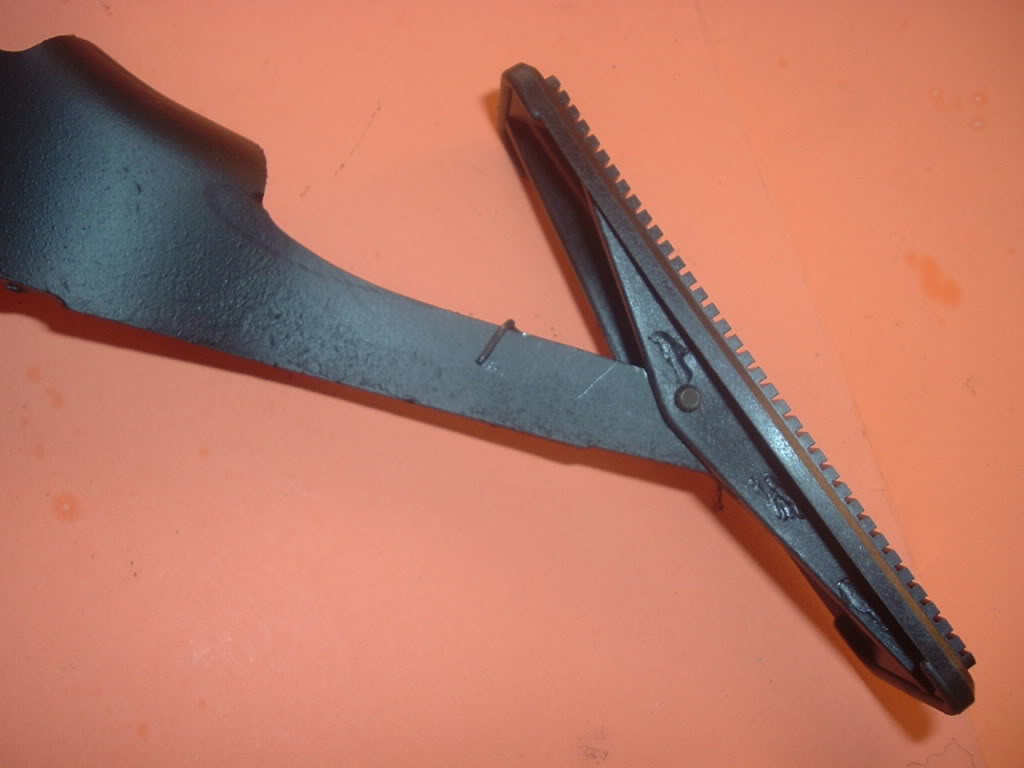
Here's what I did to the stock Silverado DBW pedal initially. I cut it down and used the factory pedal. It seemed like it was going to work ok...but not a lot of room under dash for the switch part of it. But would still work.
I ended up switching TB and using a pcm from a 2004 cable driven gto and switching to a DBW set-up.
But this info would help someone wanting to keep the stock silverado pedal
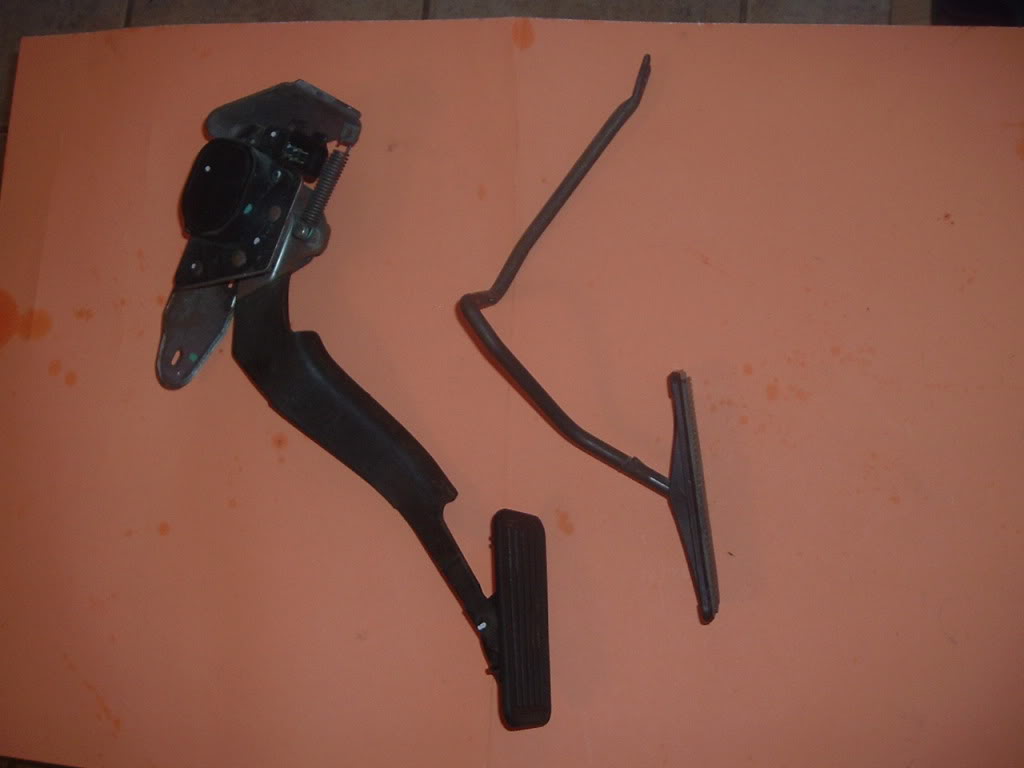
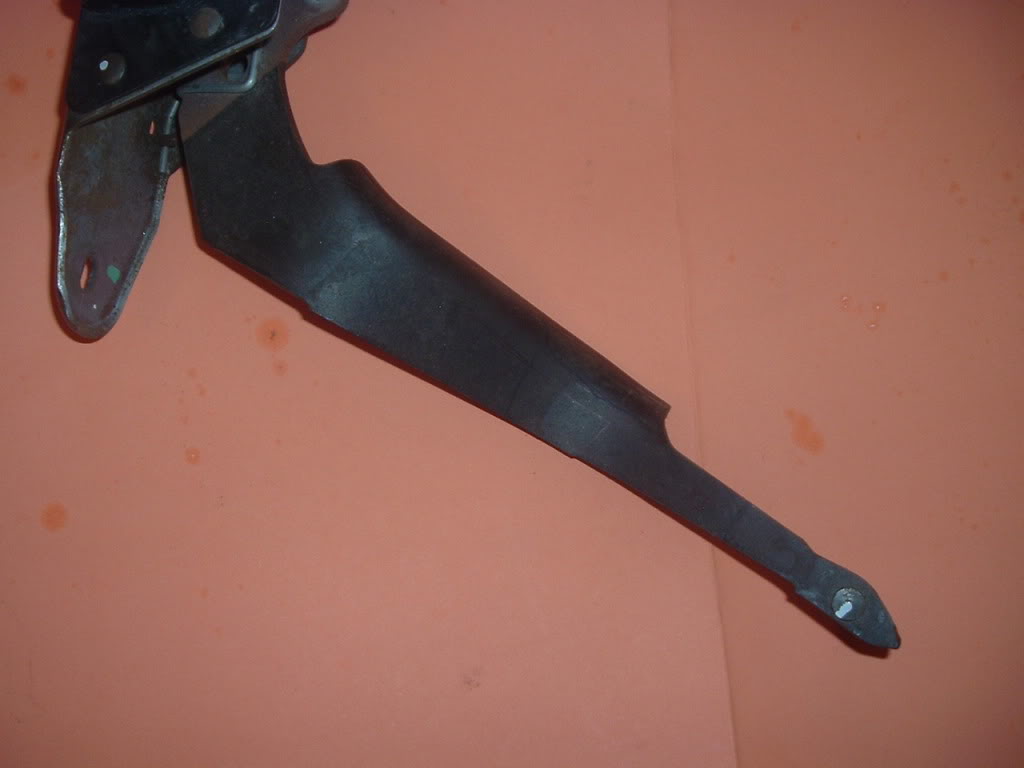
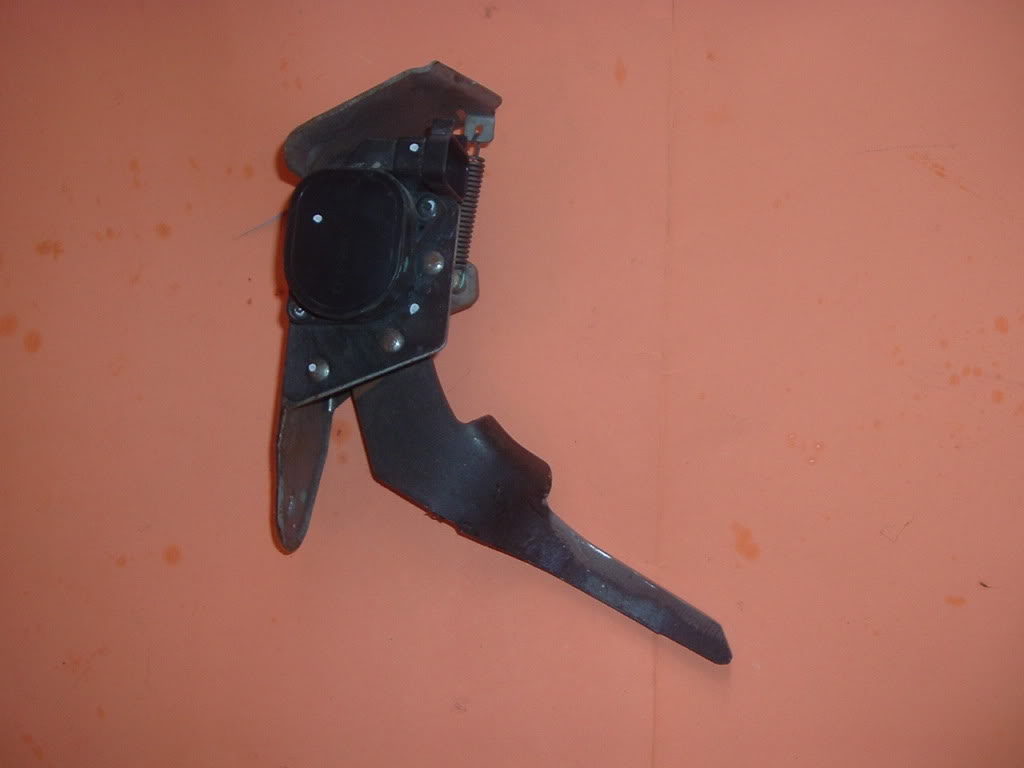
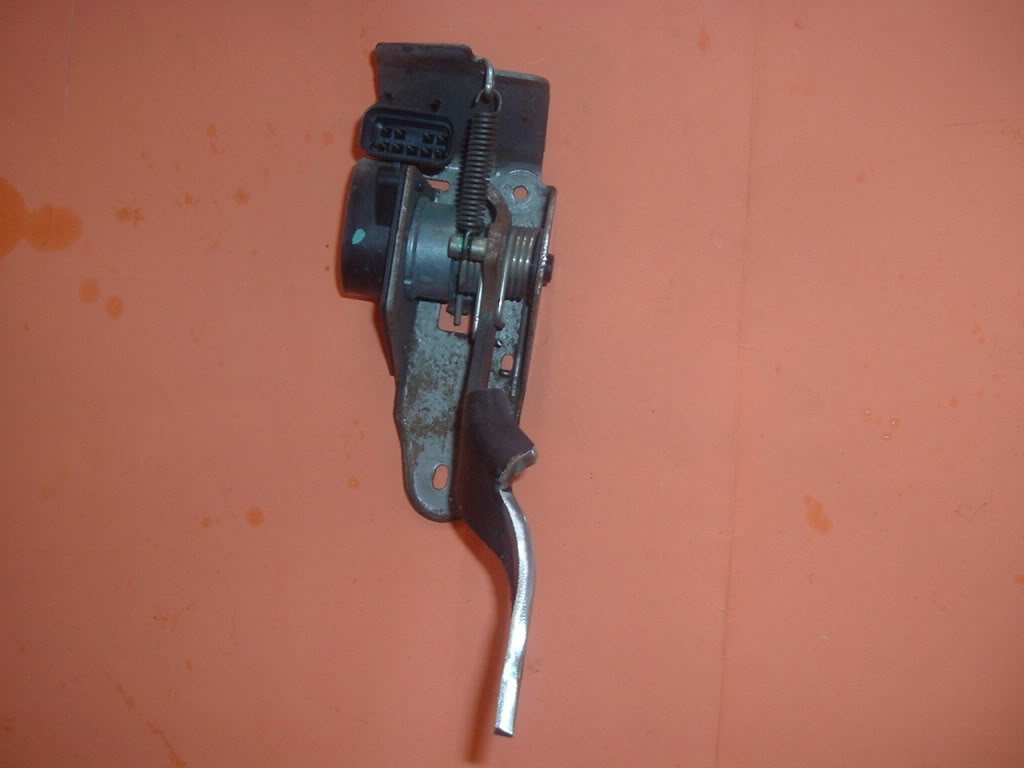
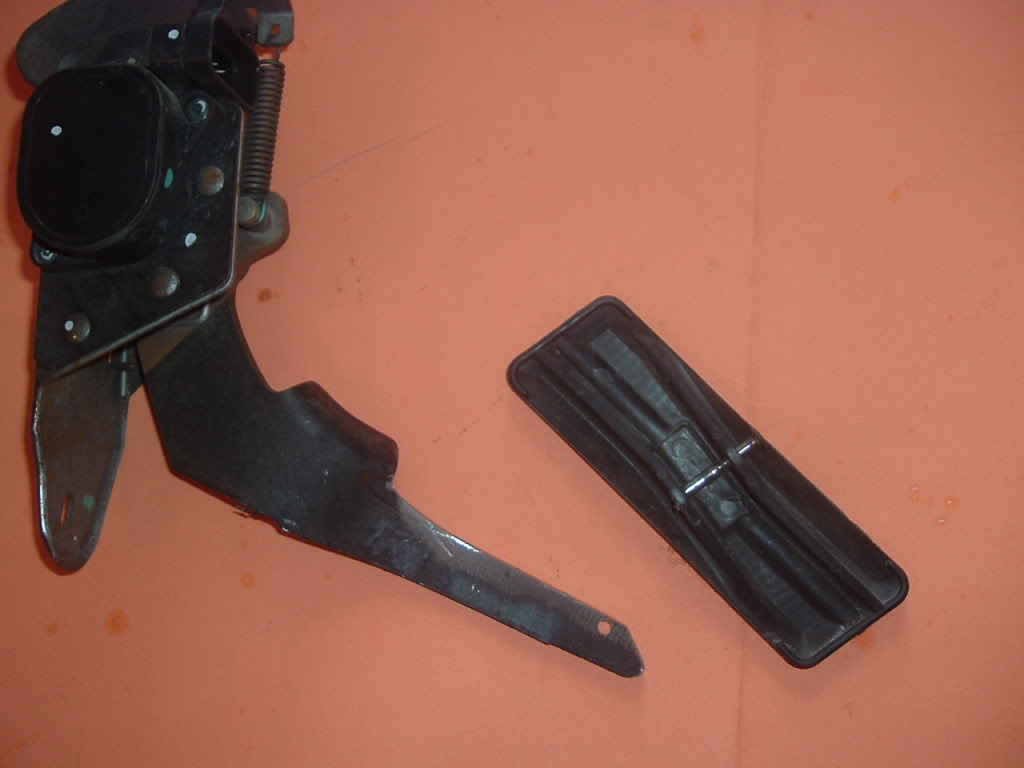
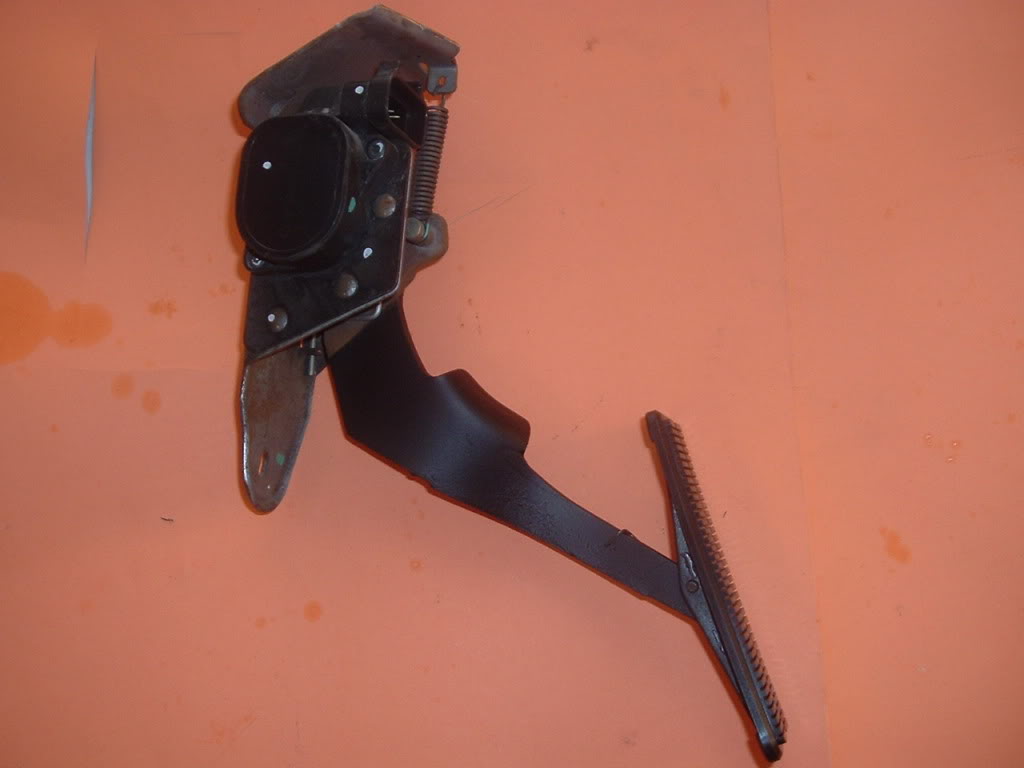
Finished product
I ended up switching TB and using a pcm from a 2004 cable driven gto and switching to a DBW set-up.
But this info would help someone wanting to keep the stock silverado pedal
Finished product
10-12-2012, 02:15 PM
#72
TECH Enthusiast
Thread Starter
iTrader: (8)
Join Date: Dec 2009
Location: N. E. Arkansas
Posts: 639
Likes: 0
Received 0 Likes
on
0 Posts
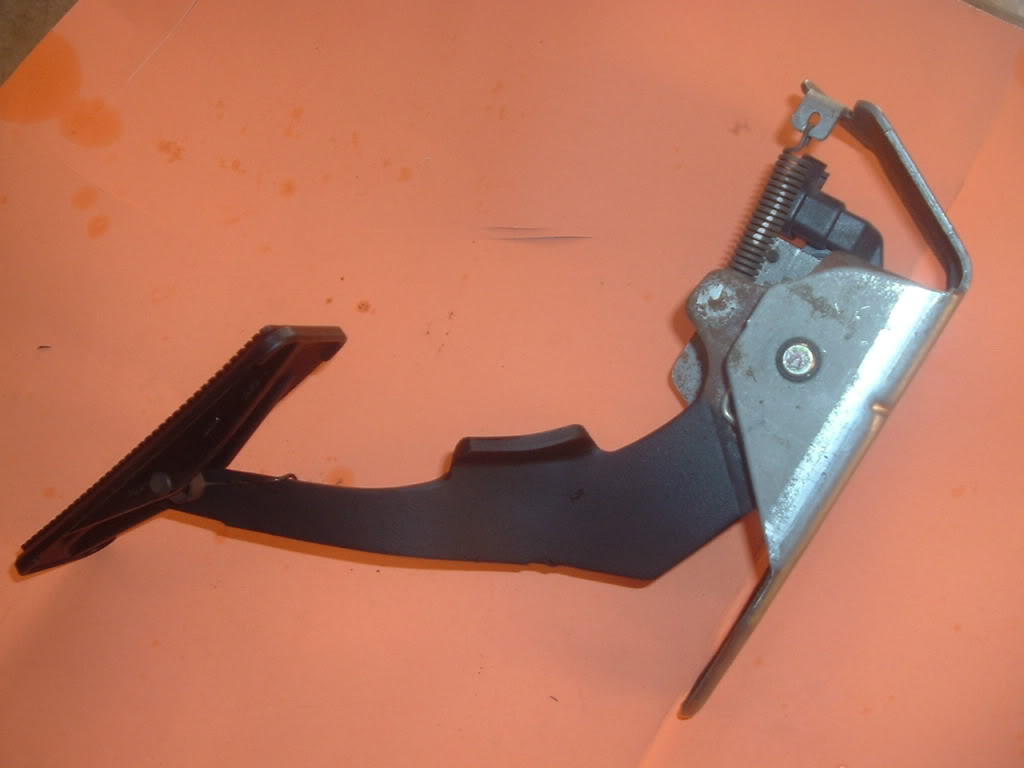
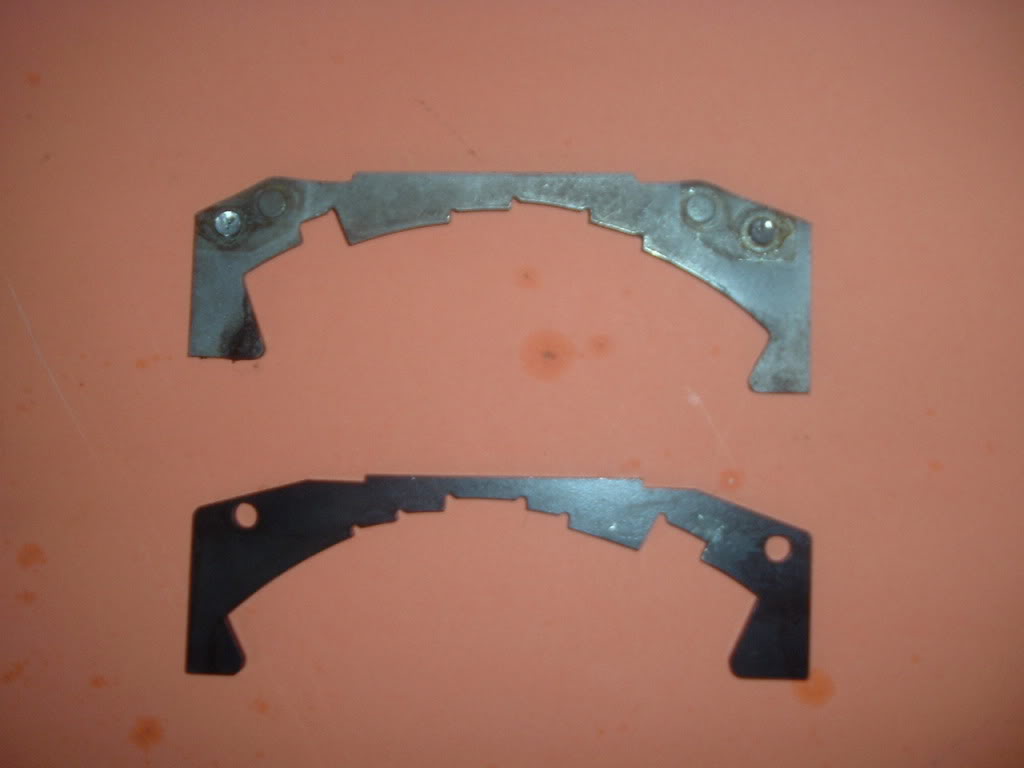
If your going with overdrive, here's what the 1973-1981 Camaro and 1970-1981 Firebird Shiftworks kit looks like
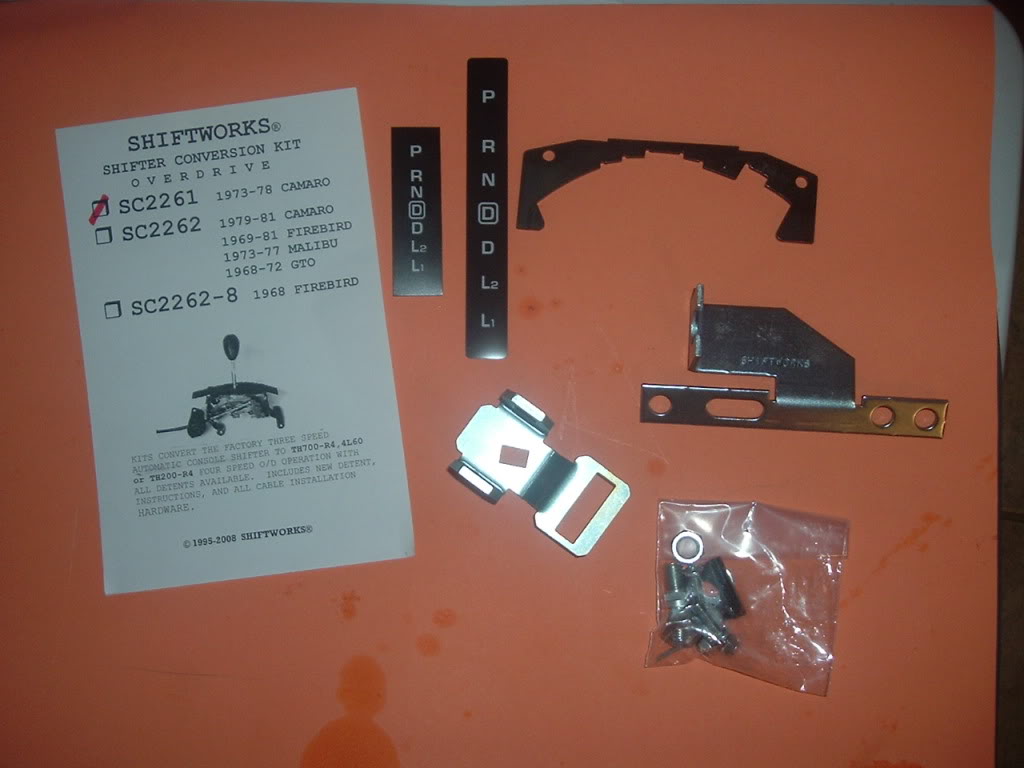
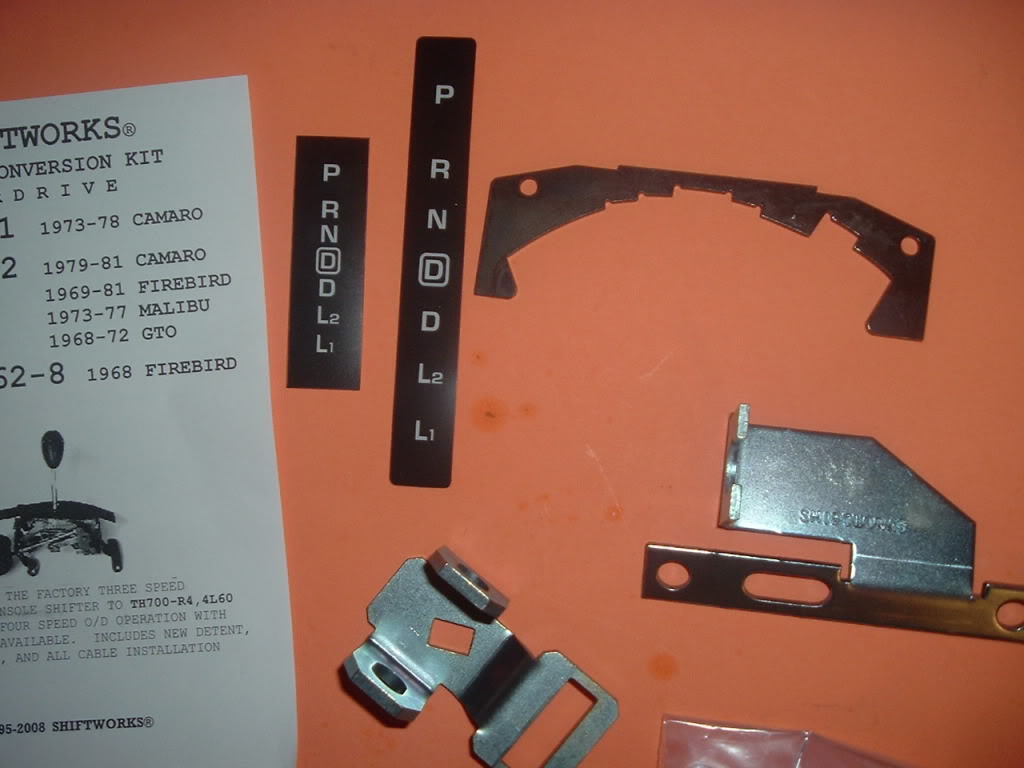
Replacement sticker with "overdrive" included in the legend for the dash indicator
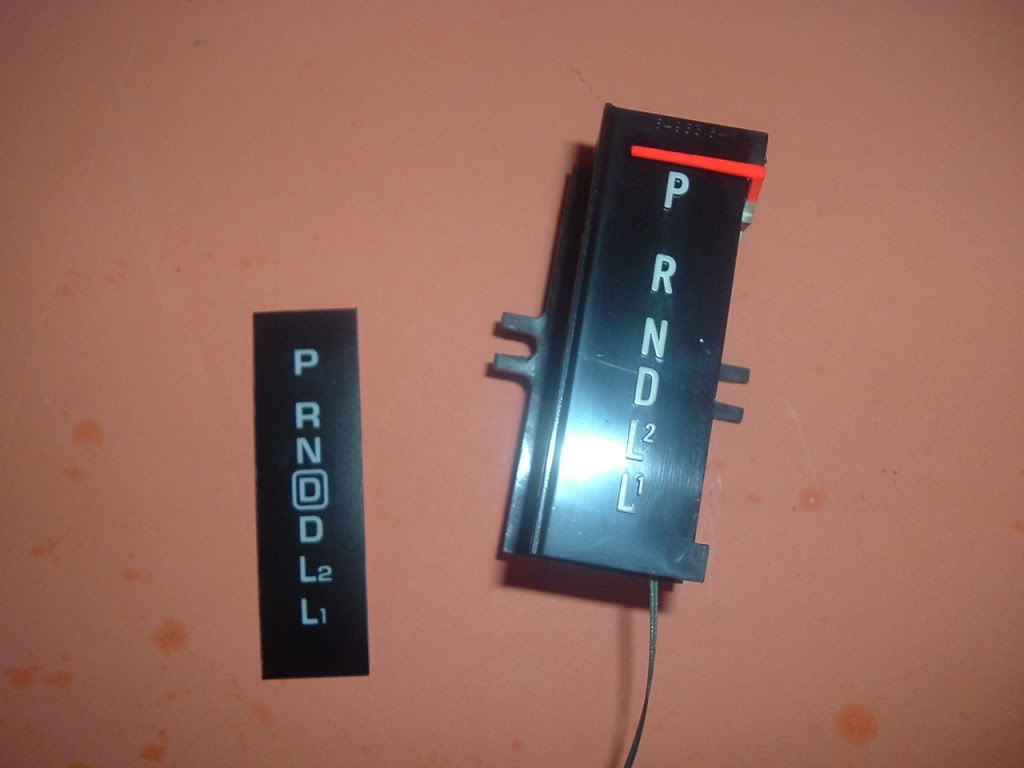
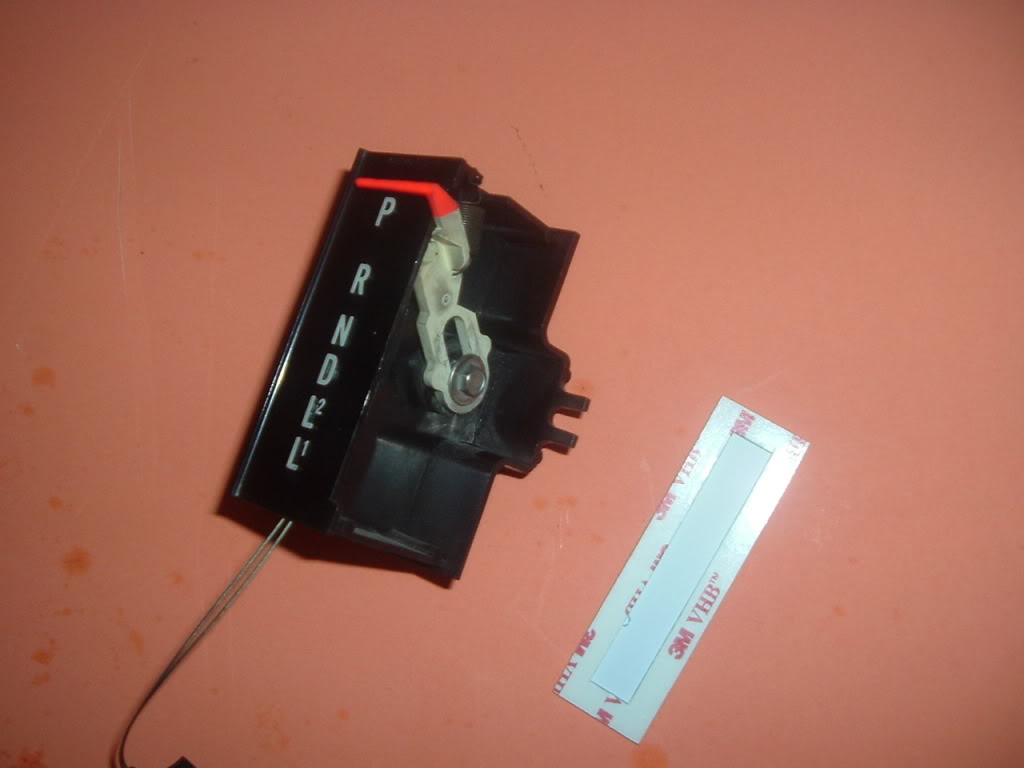
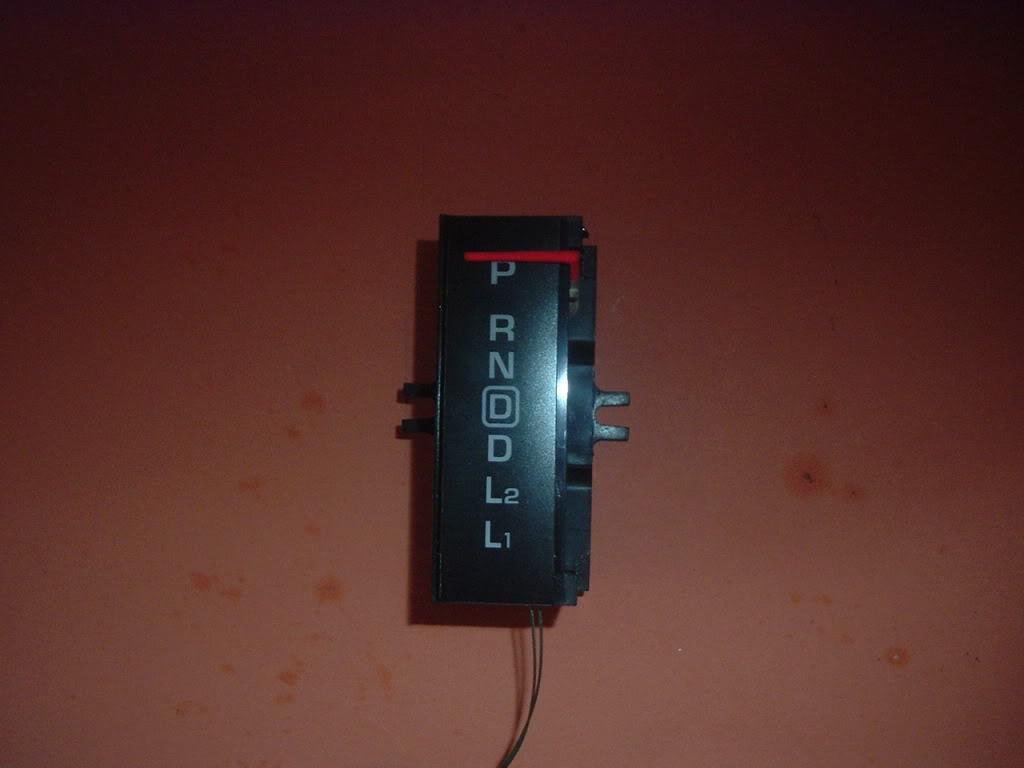
Installed in the cluster
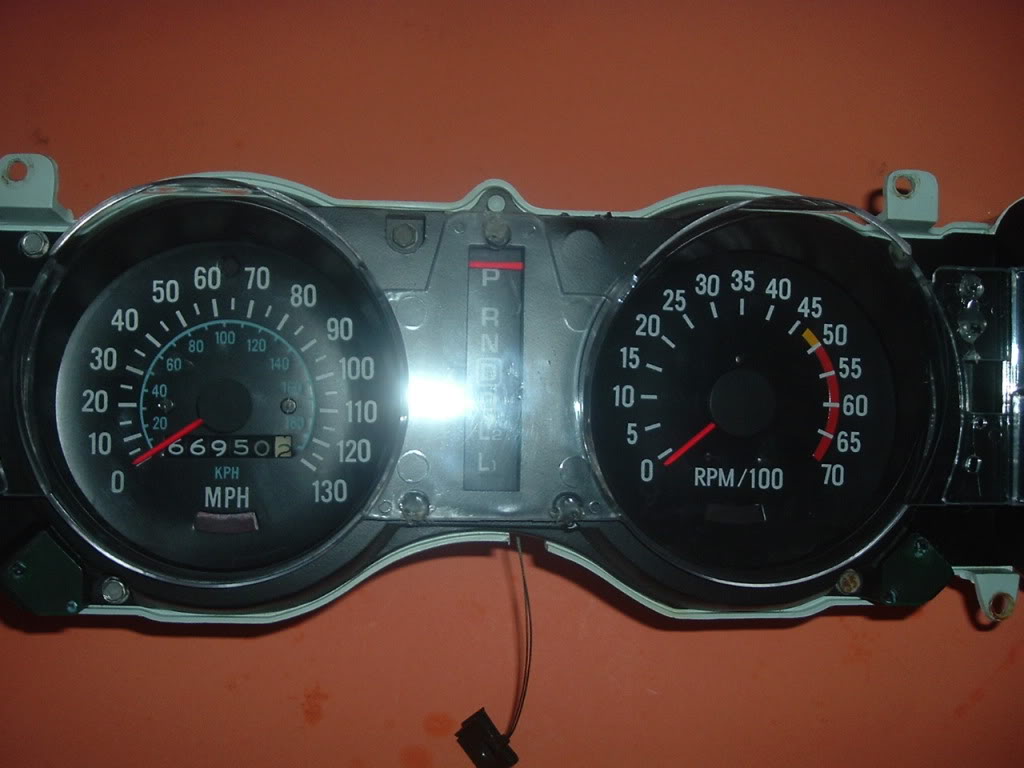
You have to drill out the shifter gate out of the stock shifter and replace it with the new one supplied in the kit
Installed
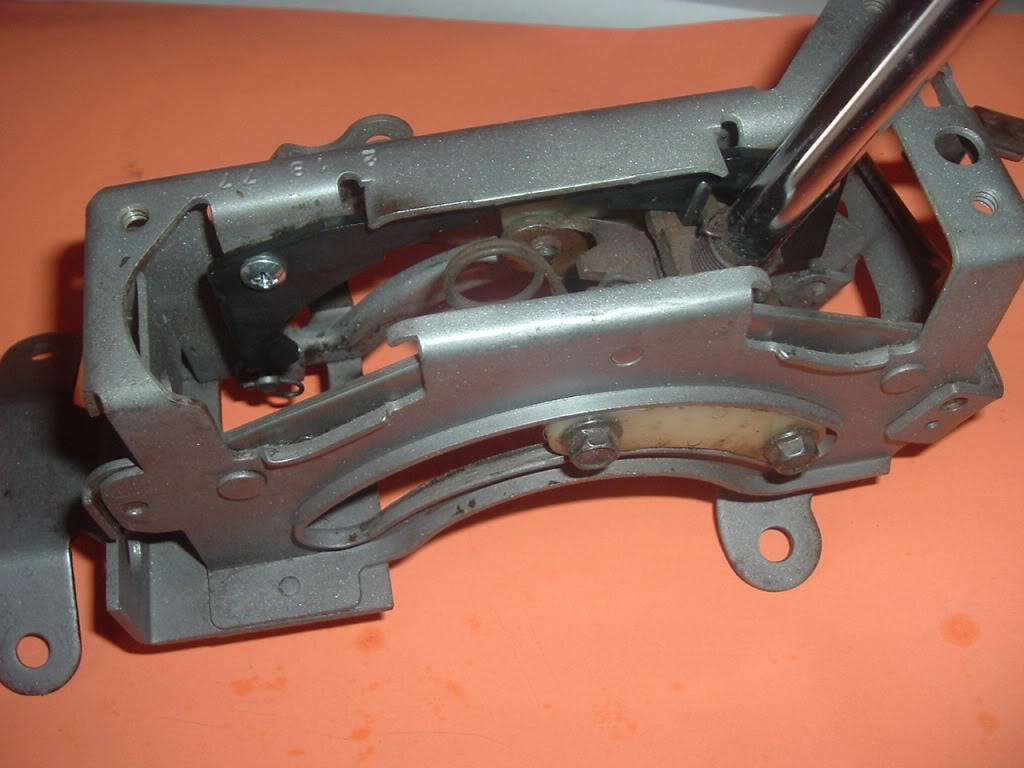
Kit also comes with the brackets for the transmission side too (not shown installed)
Replacement sticker with "overdrive" included in the legend for the dash indicator
Installed in the cluster
You have to drill out the shifter gate out of the stock shifter and replace it with the new one supplied in the kit
Installed
Kit also comes with the brackets for the transmission side too (not shown installed)
10-12-2012, 02:21 PM
#73
TECH Enthusiast
Thread Starter
iTrader: (8)
Join Date: Dec 2009
Location: N. E. Arkansas
Posts: 639
Likes: 0
Received 0 Likes
on
0 Posts
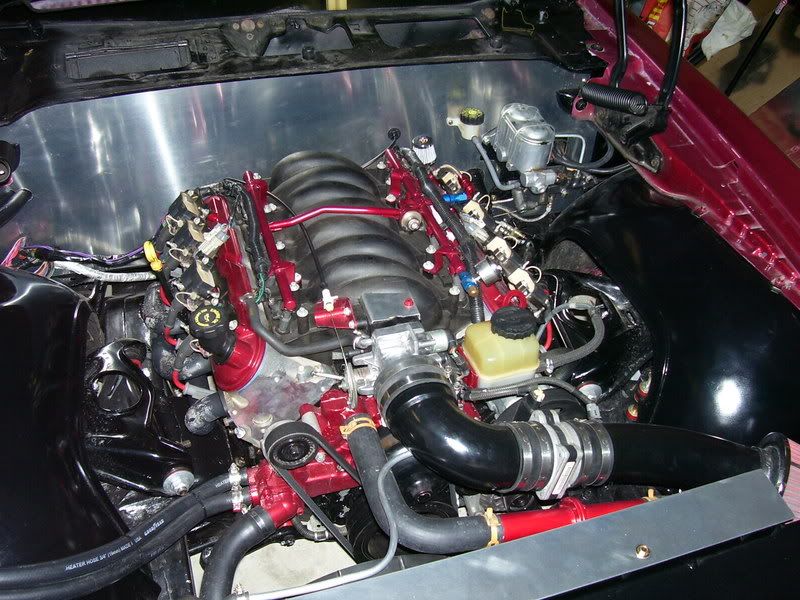
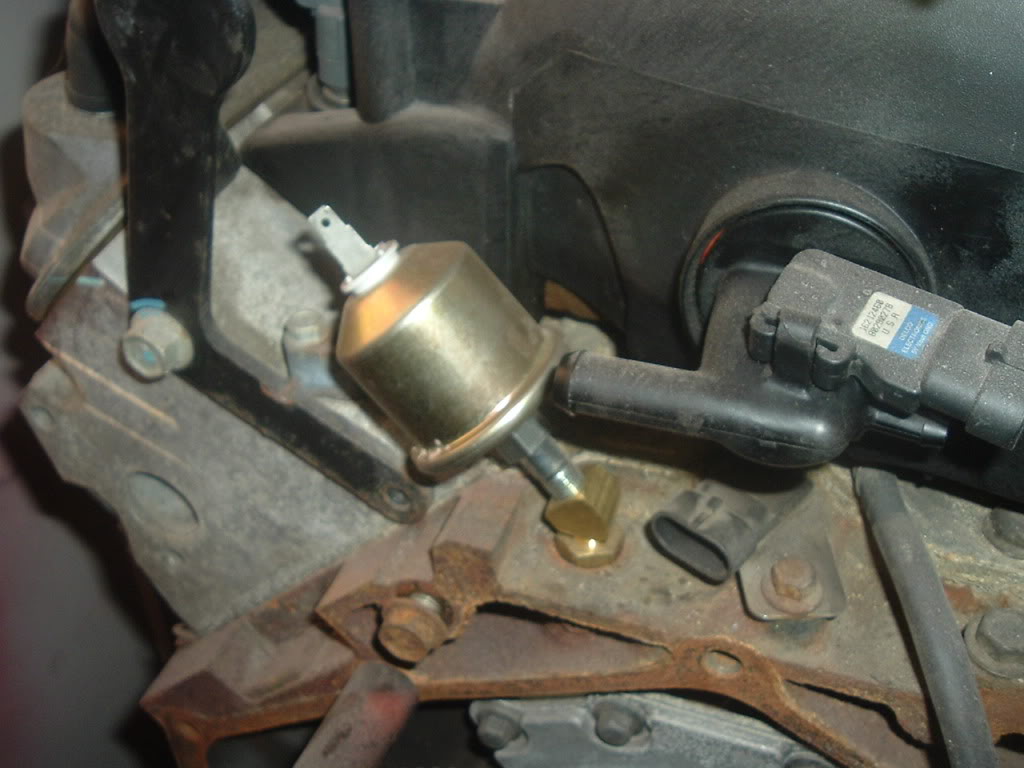
Here's my oil pressure switch installed behind the intake using threaded metric to npt adapters
Water temp switch, installed on passenger side of engine at back of the head. Drilled and tapped for oem water temp switch
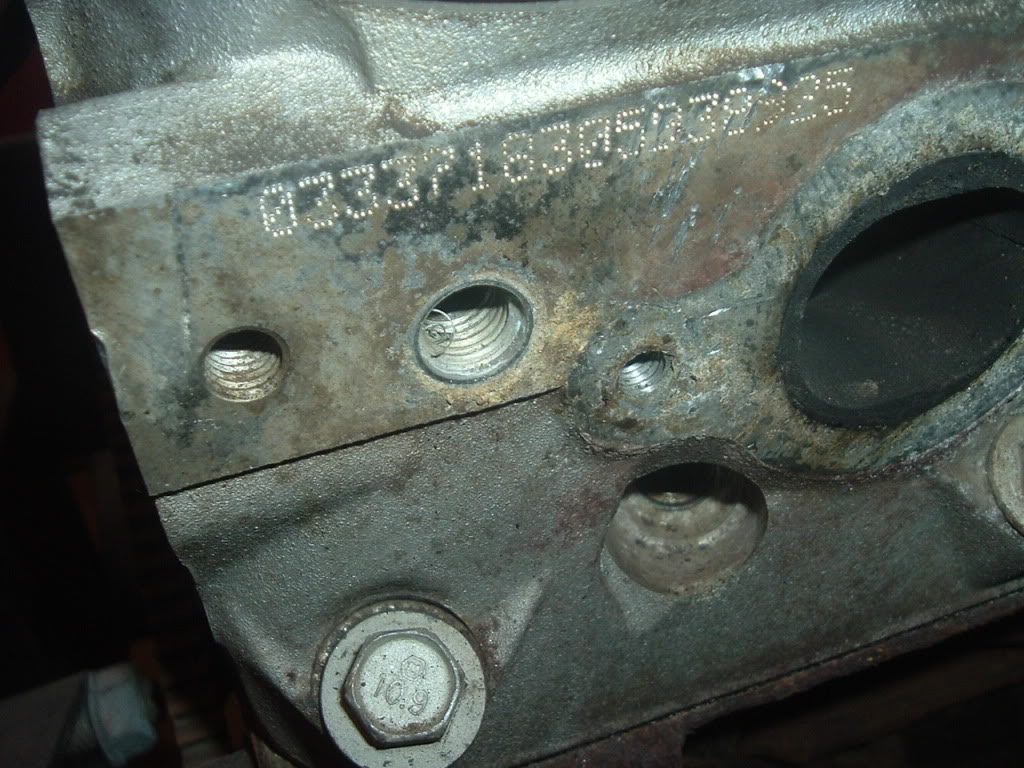
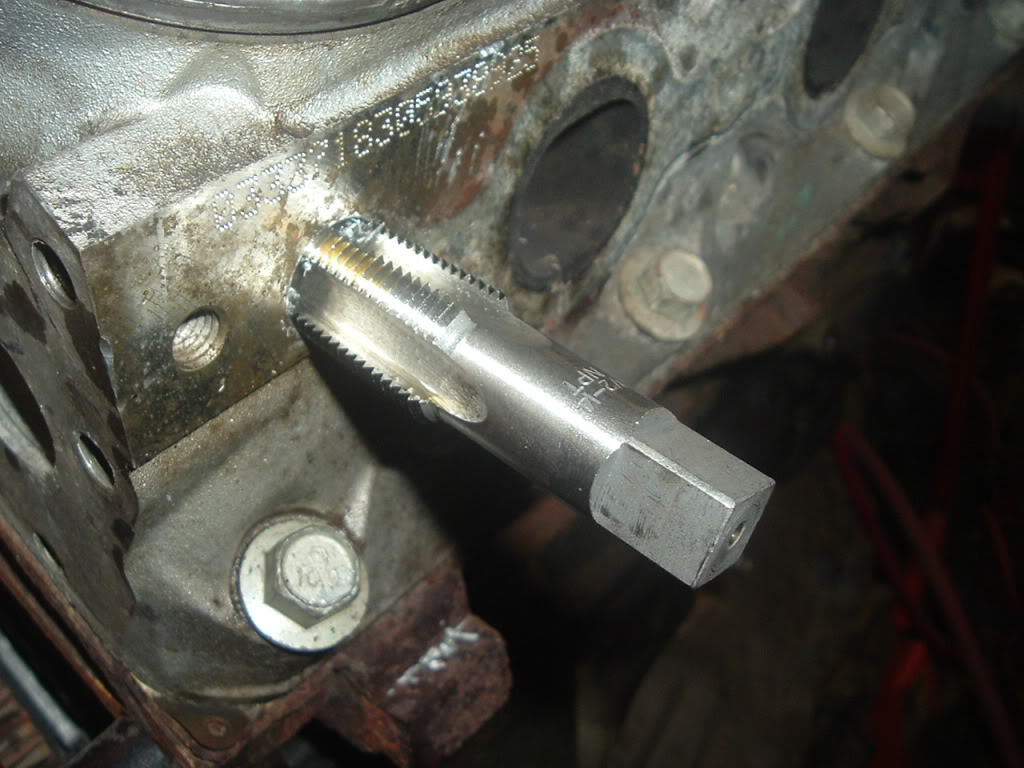
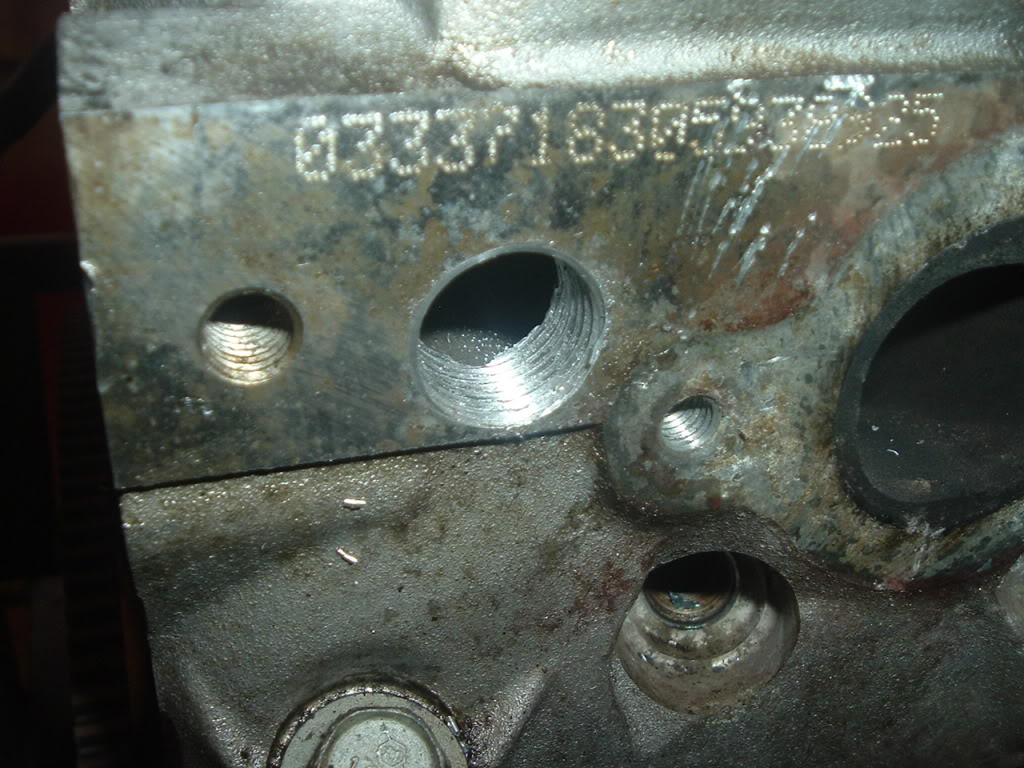
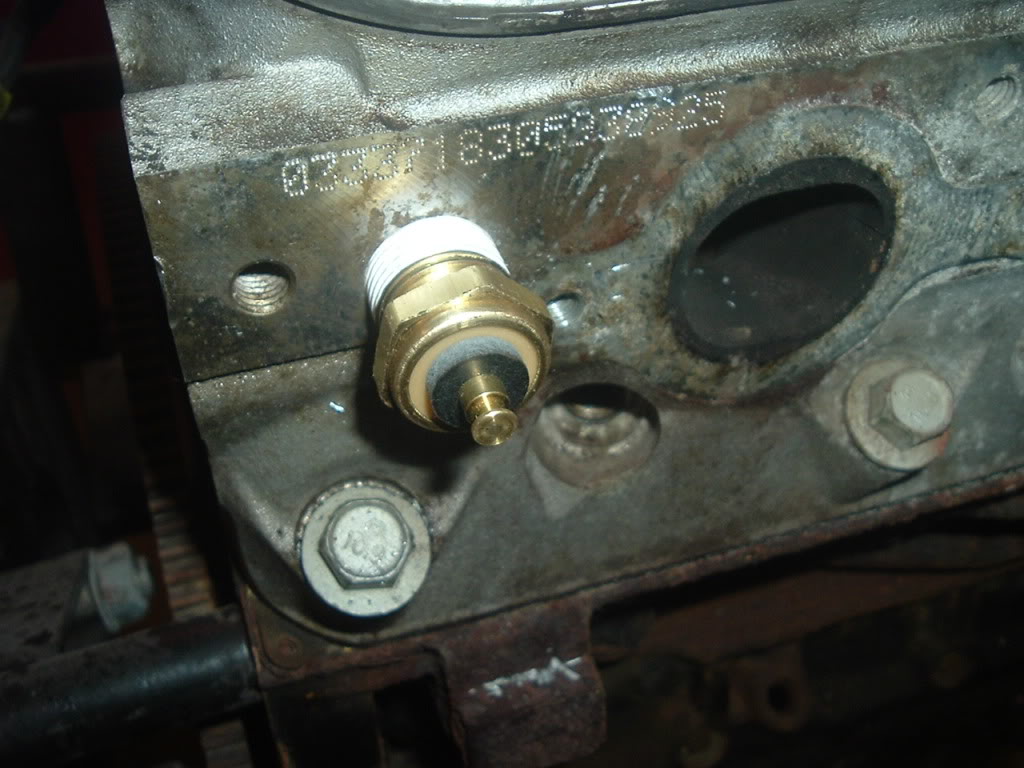
Water temp switch, installed on passenger side of engine at back of the head. Drilled and tapped for oem water temp switch
 10-13-2012, 11:35 AM
#78
TECH Enthusiast
Thread Starter
iTrader: (8)
Join Date: Dec 2009
Location: N. E. Arkansas
Posts: 639
Likes: 0
Received 0 Likes
on
0 Posts
http://www.ebay.com/itm/6-x-16-1-5mm...30357919801%26
I do know it was a pain trying to find the correct fitting, I looked for a few weeks, but I'm 99% sure thats the correct size. Just take your stock fitting out and measure it against the 16mm x 1.5 metric size.
10-17-2012, 03:14 AM
#79
On The Tree