When you click on links to various merchants on this site and make a purchase, this can result in this site earning a commission. Affiliate programs and affiliations include, but are not limited to, the eBay Partner Network.
Yeah it's been pretty spotty. I just found out today that I'm moving to Spring Hill Florida in June so I need to dig through things and get rid of more stuff I won't need. Pretty sure there is a bellhousing and painless wiring kit somewhere, will check later in the week.
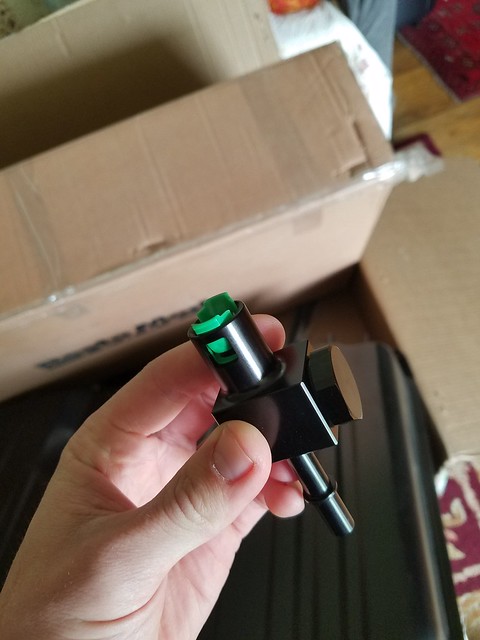
That aside, I do think I know what I'm going to do for fuel. A PWM controller isn't mandatory for my setup at this point, so for now I'm going to use the vaporworx pressure regulator then add PWM later. I'll still need between 1 and 3 places to mount fuel pressure sensors, so I found this thing from aeromotive. The benefit of this piece is that it means I'll only need two fuel fittings throughout my entire fuel line as opposed to the multitude I have now. One goes up front for the gauge and pcm (if it needs it, I don't recall) and one on the pump like this for the PWM.
One side of the fitting is tapped for a sensor, the other has some random huge hole in it that I can plug or fill with a sensor adapter as needed.
Not the most earth-shattering stuff but this was the best solution for minimizing fuel fittings that I've come across so far. Sometimes simpler is better.
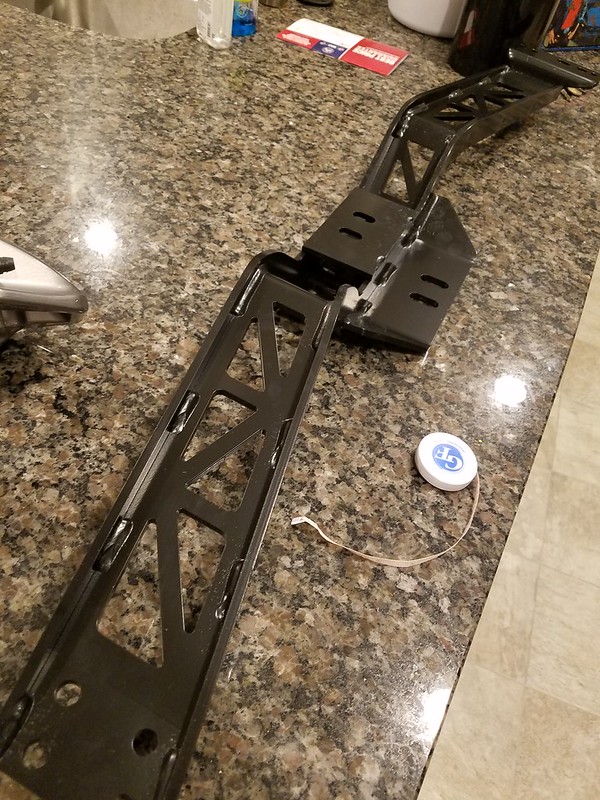
After what seems like an eternity of waiting the Hooker convertible/ el camino transmission mount finally came out and I picked one up on ebay for $265 or so. My drive line angles are great now so I hesitate to mess with things, but this one does look a lot better than my homebrew stuff. I was going to post some pictures with heights of different places measured, but if everyone using this crossmember has the rest of the holley stuff it probably doesn't matter. When I get to go back to TN next I'll compare it to the Gforce cross member and post pics.
This Holley piece is pretty solid but the Gforce is built like a tank and looks to offer more exhaust clearance; if they could be used interchangeably then some people might appreciate the extra heft of the G. We'll see.
What I'm trying to do now is decide whether or not I want to try to use these Z06 brakes or just sell them and get some Wilwoods. Per a post of Tobin's I came across these will not fit inside my wheels so I'm not sure what to do. Might just keep what I have for now and sit on these until I come across some better wheels. Corvette wheels pop up cheap on CL all the time so that might be worth a shot.
Just as a side note for anyone that hasn't seen these brakes (and I had forgotten how large they were) - they are enormous. It's almost ridiculous how big they are, like something out of a comic book. This is them next to a lunch box and beer for scale
They got kind of dinged up in storage but I'm going to recoat them anyway if I use them.
Wow, that is a ton of progress you have made on this car! I just put a similar radio in my DD Silverado, but it was a Pumpkin with the 7.1 and I love it. I am also using the Vaporworx converted 5th gen pump and it works great.
I haven't more than a day's use out of it but it seems as good as anything else, especially for my purposes. Also ordered the dash cam for it just in case.
Once I can figure out when my next trip home is I'm going to go ahead and order that Rick's tank and etc. The aeromotive is fine, but if I have to drop it to change the gasket and redo the lines anyway I might as well go with the bigger pump and nylon lines.
My tilt steering column should be here shortly so once I get a vacation I'm going to have several things to address.
Now that I'm home for a few months I'm hoping to get things wrapped up and the car basically completed.
Got the RestoMod tank in, the Vaporworx regulator modifications done and the corner pickups and ZL1 pump in the tank. I forgot to order the pigtail for it but I bought the pieces to assemble one from eficonnection and am just waiting for them to show up. For now my Aeromotive stuff is up for sale.
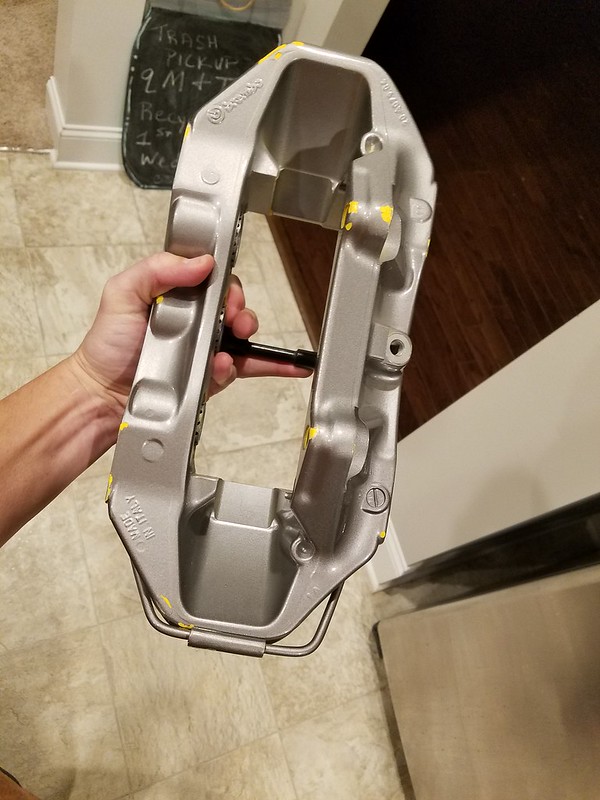
Corner pickup holder
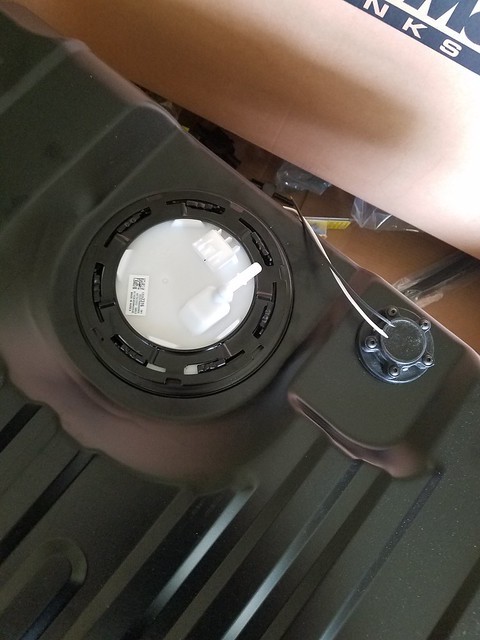
Tank with pump installed. The cylindrical fuel level sender was already installed which was nice. The tank itself is black, either thin powder or paint, I'm not certain; either way it is nowhere near as nicely finished as the Aeromotive/ Tank Inc tank I'm currently running. The Tanks Inc tank is a nicer-looking and better-feeling tank, but that's subjective and not really very important.
[
One of the simpler projects (I hope) will be getting this tilt column in. Should be pretty straightforward.
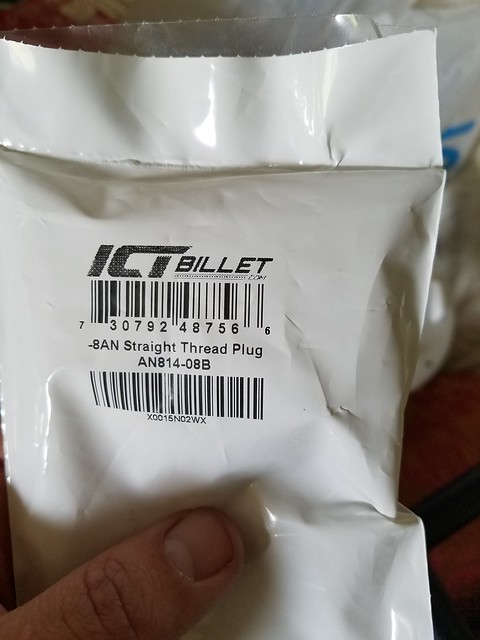
This ICT Billet piece fills the larger hole in that Aeromotive fuel pressure quick-connect piece that will go on the fuel rail.
As soon as I can get this tank in I'll be able to lower the car and get it down to Atlanta for a final tune. From there I'm debating whether to leave well enough alone and use the trans and motor mounts I have or to go ahead and use the Hooker stuff since I have it sitting on the shelf.
This kids is why you don't drink and internet. Right after I made that last post I had to go back to NC so I didn't get anything done, but I just got back to TN today to find some more goodies had arrived.
These I probably won't be able to use as they are about 2-3 inches wider than described to me. The rears are 12 inches wide and I don't see getting them under the car. They look cool though so I'll see what the options are. Fronts are 10 inches wide, both front and rear are 20 diameter.
This next stuff I'm not sold on either way. It looks like it could be cool but I guess I was expecting something more substantial. I wouldn't call them flimsy but I guess given the price I just anticipated...more. The plan was to wrap these in leather myself but after seeing them it might be better to leave it to a pro.
And here is where the rear gets trimmed if you put them in a convertible.
If the weather holds I should have the gas tanks swapped out and a rough fitting of the door panels by dinner tomorrow. Wheels will most likely end up on Craigslist.
Yeah there is zero chance, I was thinking about minitub since my rear is narrowed, but even then I dunno. Guess I'll stick with what I have for now, tires are new anyway. About to put the Rick's tank in now, not sure what to do with all these vents. Does a tank designed for an LS swap really need 4 vent lines in it? Seems like overkill and inelegant to say the least.
I'm not sure why I thought I'd be able to get around to the door panels today; nothing ever goes quite that smoothly. Taking the old fuel tank out was pretty straightforward, but there were several other things to address while under the car (suspension things, wiring, etc) and so all told I spent about 11 hours doing and redoing things.
For the new fuel line I used a combination of pre-bent nylon pieces pulled from a salvage car and a roll of 3/8 Dorman line. This worked out really well, and I used these to join the sections. https://www.dormanproducts.com/p-12453-800-011.aspx
To get ends and things on I used the flare tool/ caulking gun +/- bench vise and had no issues with it other than breaking one of my caulk guns.
This is from the ground looking up, it's a combination of the Racetronix fuel pump relay and the ZL1 pigtail I made from the parts I bought from eficonnection. If you don't have the right crimper I just saw that they sell them premade for $20, which is half the next lowest place I could fine. I think I paid that much for the pieces with shipping. https://www.ebay.com/itm/Fuel-Pump-a...9f6a%7Ciid%3A1
Seems like a lot of extra wires, but relays are your friend.
Fortunately, after rolling around on the floor all day the pump primed on the very attempt. Tomorrow I'll see if everything is connected well enough to hold pressure (I really don't see why it wouldn't) then head over to the upholstery shop to see about getting that leather put on. The center sections I will try to do myself, most likely in this silver carbon fiber pattern, which I think will add a nice contrast and match the silver trim elsewhere. The white balance in the pics is terrible but you get the idea
Lots of things are for sure, and since nothing catastrophic has happened lately I'm feeling pretty good about it. Today I got the tilt in, redid some wiring and brake/clutch pedal stuff and tried to find a good place to mount the Estopp. I also did some trans tunnel surgery to get the MGW to fit and did a variety of other cleanup type things.
I had a Pro-5.0 in car before and I had no issues with it, but I kept reading so much good stuff about the MGW I thought I'd give it a shot. It comes with gasket stuff, an allen wrench and bolts/washers, basically everything you need, and it appears to be very well made. Worth the cost from that perspective I'd say. Compared to the P 5.0 it centers better but feels just as notchy (which is likely due to my trans build) and is a bit harder to get into reverse. All things considered I don't know that I prefer one to the other. The stick offset of the MGW might or might not be an issue in some swaps, and I had to cut a chunk out of my tunnel for it to clear.
The tilt wheel is nice, wish I would've done this a while ago. With the car this low the stock fixed column could make it hard to get in and out.
Ever since I did the Jeep steering box swap I've thought there had been some slop in my steering, and the play in the wheel on the interstate was something less than reassuring. I was afraid I was going to have to buy a new box somewhere (and I still might eventually) but for now I was able to take the slack out with the turn of a bolt. Super easy and definitely worth a shot if you think your Grand Cherokee box might be loose feeling.
Lastly, this Rick's tank with the Vaporworx stuff is great. I put a gallon of gas in the tank just to see if it would start, then in my excitement drove 6 miles to the parts shop and back home without remembering that I needed to get gas. I drove pretty aggressively and took some sharp turns but the car never sputtered or stalled or gave any indication it wasn't getting gas. Only after I got home and parked did I realized I needed to go to the gas station. Needless to say I'm pretty impressed with the Vaporworx low-fuel performance.
There isn't a ton of info out there about the Fesler door panels, at least as they relate to convertibles, so maybe this will help someone decide if they want to mess with it.
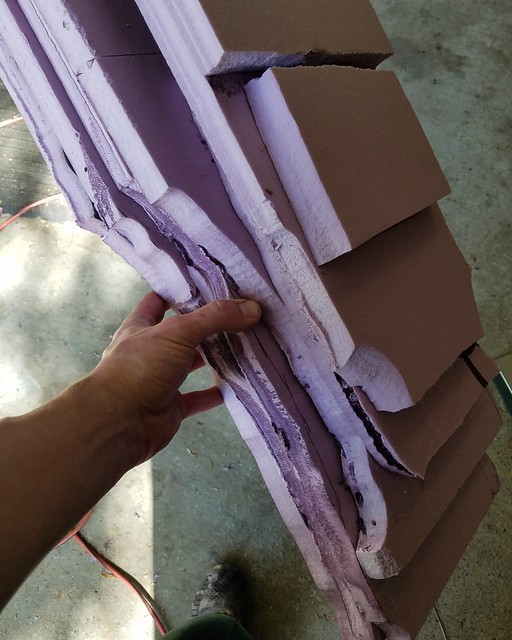
The first step is to accept the fact that you have to cut up and potentially ruin some expensive pieces of thin fiberglass. The second step is to actually do it, which was actually really easy with a Dremel roto-zip type bit and the flexible attachment.
This is where you start, with a complete rear panel-
This is what you end up with after trimming it to fit.
From here you have two choices if you are going to use the stock armrest/ cylinder covers:
1) Trim the wooden insert down before covering it or
2) Trim the metal armrest and recover it
Something that sucks is that after trimming the panel down you are left with a gap going through to the metal.
Rather than mess with cutting any more than I have to at this point I opted to try to simply make new panels. Using the originals as a template I have laid down a couple layers of fiberglass which I will either build on or throw away tomorrow morning depending on how it's looking. You can't tell from the pic but I have made is so the gap above will be covered, and if this seems like it is going to work I will add in pods for a component system as well when I add additional layers. Other than that garbage gauge panel I made years ago I have no real fiberglass experience so this could turn out awesome or terrible. This is a very rough trial for idea viability, more layers will be added then trimmed/bondoed/sanded as needed.
Something else worth mentioning, these things are fragile as ****, it's like they covered a thin layer of fiberglass with eggshells. In my mind I had imagined these would be at least somewhat sturdy, but this is sadly not the case. This is how they were when I unpacked them. Hopefully wrapping them with the leather will help keep them from disintegrating when a door gets slammed but for now I'll just bondo/sand and keep moving.
I haven't seen the Modern Classic door panels in person so I can't say if they would be any different, but I did see in a forum or on FB where the guy who makes them says they weigh about what stock door panels do, which isn't much. I'm thinking I'll give the backs a good coat or two of spray sound deadener to add some heft before final install.
My impression so far is that these are going to look cool, but it's clear the convertible application is a complete afterthought (but I suppose that is better than no thought). If I weren't looking for an excuse to learn something new (or if I weren't willing to install anything myself) I think having a shop make something truly custom would be a far better way to go. For a hard top these would be ideal, but for a convertible I wouldn't recommend them to anyone else at this time. Maybe wait and see if they come up with something, well, better.
I thought about it, but not sure what they could do at this point so I'm just going to bondo and sand. A couple of the billet pieces for door latch mechanism got lost (not their fault) and when I called them everyone I talked to was really nice and the parts were (surprisingly) reasonably priced so I'm not going to make it a big deal.
My own fiberglass project is turning out to be fairly decent for a first attempt I think, though I am a bit biased.
To make this I put wax paper over the original and then just fiberglassed on top of it; this worked well and the new part just sort of popped off.
Obviously this meant the new one was going to be a bit bigger than the original, but with some trial and error and some trimming I think I have a solid version 1.0
What I've used so far was just light fiberglass from Lowe's, mainly to get the general shape figured out in a material somewhat easy to trim and cut. Now that I know what I need to make I'm going to reinforce this with thicker cloth and add a spot for a tweeter. There are some minor tweaks to make to this but for now I'm waiting on both more resin and cloth to be delivered.
With that on hold I moved on to the driver's door panel. Since I'm not willing to cut up the new door panels to mount the mirror controls I figured I would go ahead and take them out.
This is the offending control **** in question
After that was pulled I decided to take a whack at using that Camaro mirror I bought previously. I started by cutting the mounting points and bolt holes off, then sanding the bottom smooth.
This is the chunk that was cut off.
Then I used the old holes as a template and drilled matching holes in the bottom of the new mirror.
The angle of the mirror fits the top of the door panel perfectly, and while I was not originally going to leave them black I think it ties in nicely with the rest of the car. It's hard to tell in these close ups but from a few feet back with bumpers and wheels in view it looks pretty cool IMO. Side note - this was a power mirror but I accidentally cut the wires off. I'll repair them later when I feel like installing the rest of the wiring but for now it's fine.
Once the passenger mirror gets here I'll see if I can duplicate this process on that side. It started raining so I only had a chance to try it briefly but this new mirror is way more useful than the old tiny one.
The passenger mirror is supposed to be here tomorrow so I'll try to get a couple shots.
For today though I spent some time messing around with this stuff that came after lunch-
Some Wilwood 140-12629s
And a Lee 12.7:1 steering box.
The brakes are cool but as I feared my wheels won't clear them without a 1/4 inch spacer (which would mean longer studs, which I might or might not be too lazy to mess with). This is them with the base Corvette sized rotor, I was going to use the larger 13.39 one. I bought these new and only opened half of it so I'm thinking I might just sell them and move on to something else for now.
Just for ***** and grins the brakes behind the Forgelines
After this and messing with my catch can routing I was in no mood to start the steering box project so instead I moved on to the door panels.
These things look cool but I cannot stress enough how fragile they are. They shatter if you look at them wrong; the back of one just broke off as I was setting it on the door rubber. I'm not out here throwing **** around like an animal or forcing things into place so I hate to think how short-lived these will be once I actually start using the car. Would absolutely not recommend these for anything other than a show car and am seriously considering using them as a mold to remake them with something heavier and adding speaker pods for 3-way components. Will revisit that idea tomorrow, but for now here we are...
It looks like they will clear this power window kit, but of course the door lever mechanism had to come out. You get this paper template showing you where you'll need to cut (I'd laminate it but I'm afraid doing so would make it stronger than the door panels) and this lower window bump stop apparently gets cut out. My window is down in the picture and it is still a decent distance away so it likely doesn't matter.
This is when I started getting hungry so called it quits for the day
It's been a busy few days lately but made a decent amount of progress. The Wilwoods were sold and someone is buying the wheels so that particular part of the build will have to be addressed later, but I did manage to get the Estopp temporarily installed and my parking brakes themselves properly adjusted. Unexciting stuff, but makes finding a level place to park less important.
On a more exciting front I'm about 70% or so finished with the door panels. Since the doors have big chunks cut out of them I had to whip up some sheet steel brackets to hold the other brackets. This is the rough fitting to get the placement right but I'm going to paint and then tack weld them in once the rain stops. I also got some of the leather applied and I'm feeling better about the panels overall but I'm still not certain I'd recommend these to anyone.
I'm missing a couple of the door latch pieces and called Fesler early last week to get replacements, with the plan being for me to have them by Friday or Saturday. Eventually on Wed of the next week I get a package from them, but instead of my parts I get some crap hood stoppers meant to go to some guy in Hawaii. Again I'm supposed to get my stuff "ASAP", but here we are again on a Saturday and my things are nowhere to be found. The people I have dealt with there are nice enough but expediency is not their strong point. Pretty frustrating being delayed like this over something stupid.
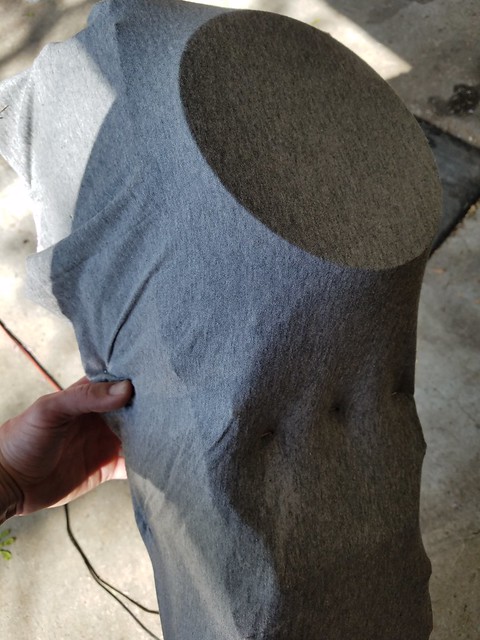
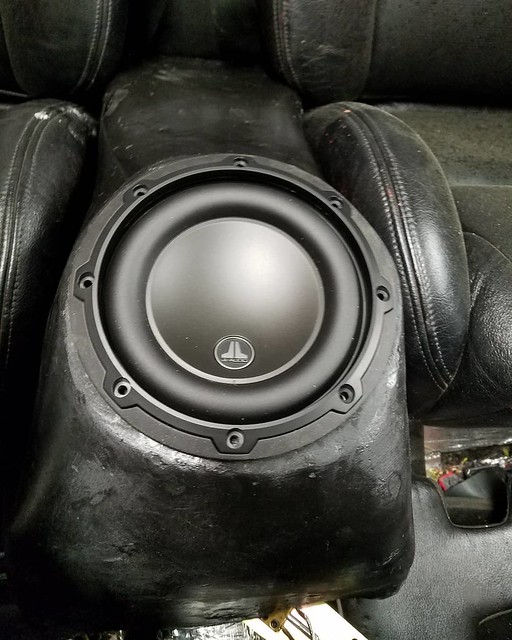
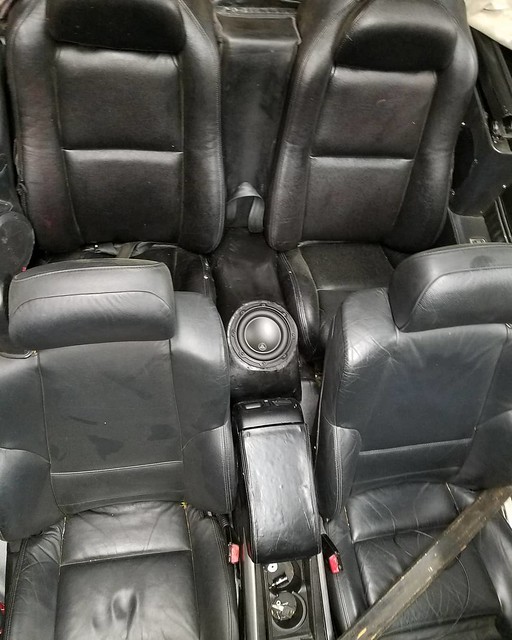
With the doors on hold pending parts delivery I tried my hand at making a rear center console. A few days ago I saw that JL Audio made a 6 inch sub so I figured I'd incorporate one into the console to round out the new audio setup.
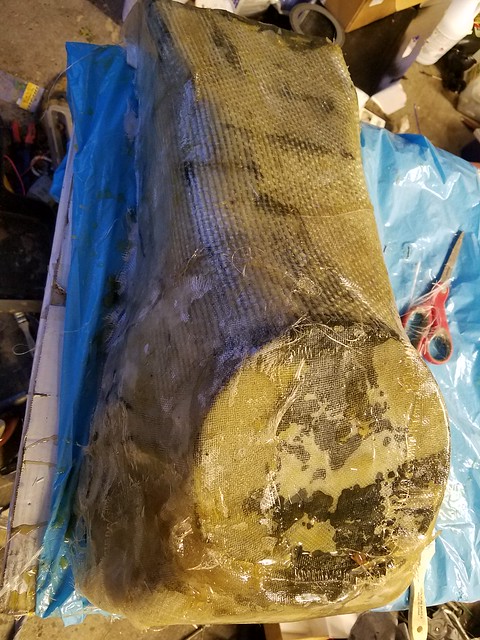
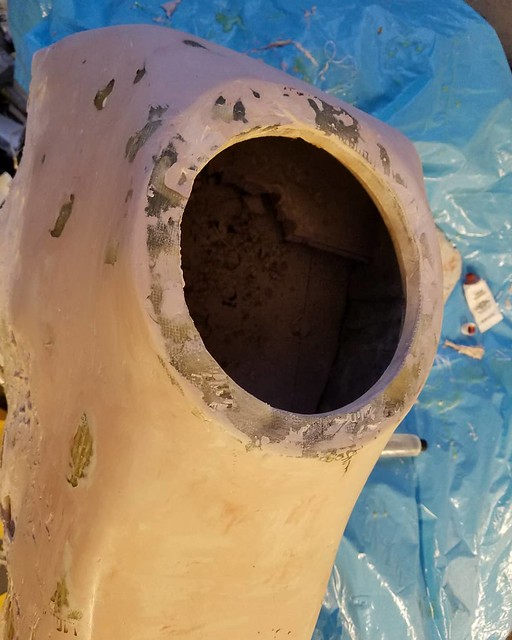
Using some Pink Panther foam from Home Depot I made the basic shape I wanted, glued it all together then covered it with some fleece from Hobby Lobby. I coated it in resin, put the speaker ring in place and stapled some thin fiberglass to it before again using resin on it. Once it hardened I put a layer of thicker boat making fiberglass on it for strength. When dry, I started the bondo/sanding process and eventually got the visible parts pretty smooth. It's got some black paint on it now to highlight flaws and it looks like one more round of bondo will do the trick. The shape isn't perfect but it's good enough for a rookie effort.
I also cut down that center back seat piece that had been sticking up then cut foam out of the seats to match. Tomorrow I'll see about reworking the leather.
That's pretty much it for now, at least until I get the door pieces and the Ron Francis black box relay thing in the mail (which I'm hoping will help me clean up my wiring).

 02-05-2018, 08:05 PM


 [
[