
1963 Chevy Nova LS6 Swap


 01-01-2012, 05:03 PM
#64
On The Tree
Thread Starter
Join Date: Sep 2010
Location: San Luis Obispo CA
Posts: 155
Likes: 0
Received 0 Likes
on
0 Posts
Thanks guys. Just added a bunch of updated photos to the fuel system thread. Finished the fan setup yesterday so I'll be posting all those pics soon.
01-01-2012, 07:29 PM
#65
Teching In

Join Date: Oct 2010
Posts: 21
Likes: 0
Received 0 Likes
on
0 Posts
 01-01-2012, 07:36 PM
#66
On The Tree
Thread Starter
Join Date: Sep 2010
Location: San Luis Obispo CA
Posts: 155
Likes: 0
Received 0 Likes
on
0 Posts
01-01-2012, 08:31 PM
#67
On The Tree
Thread Starter
Join Date: Sep 2010
Location: San Luis Obispo CA
Posts: 155
Likes: 0
Received 0 Likes
on
0 Posts
December 31, 2011
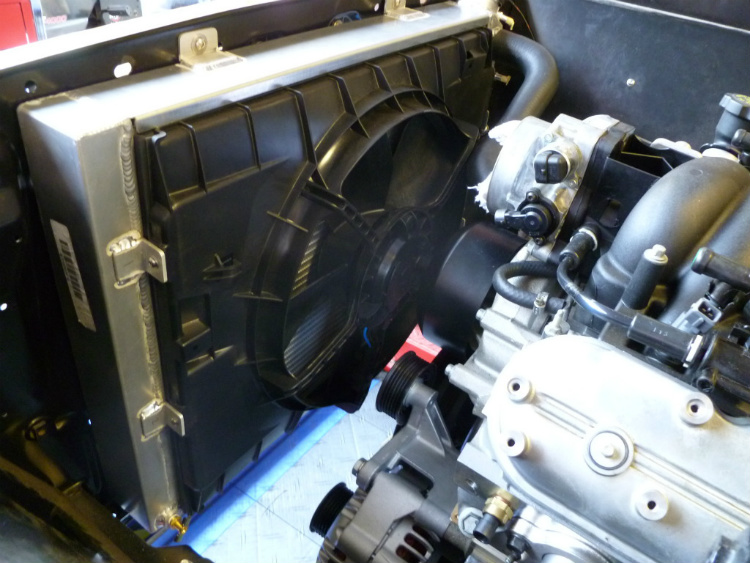
It seems like there is never enough room in the front of these little Novas for a radiator and fan assembly without something getting in the way. After taking measurements and researching until I was blue in the face, I came up with something that works great!
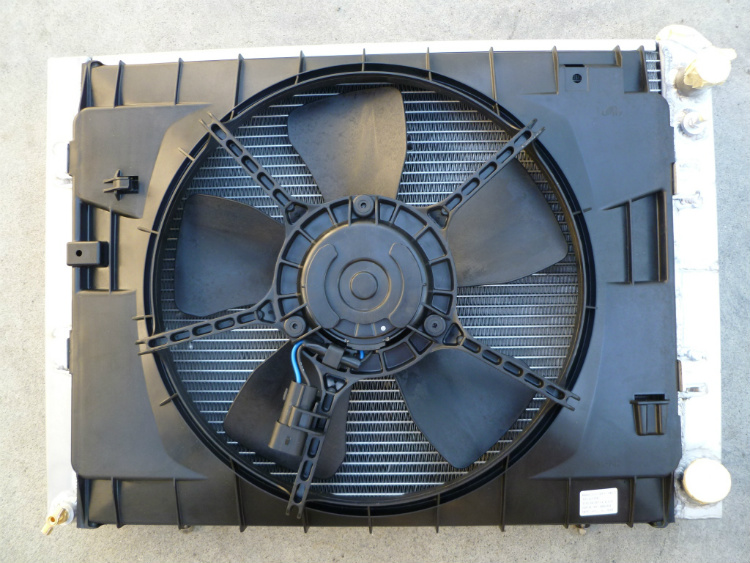
For starters, I used a Griffin Radiator (8-00009-LS) and cut the attached brackets off to replace them with some of my own.
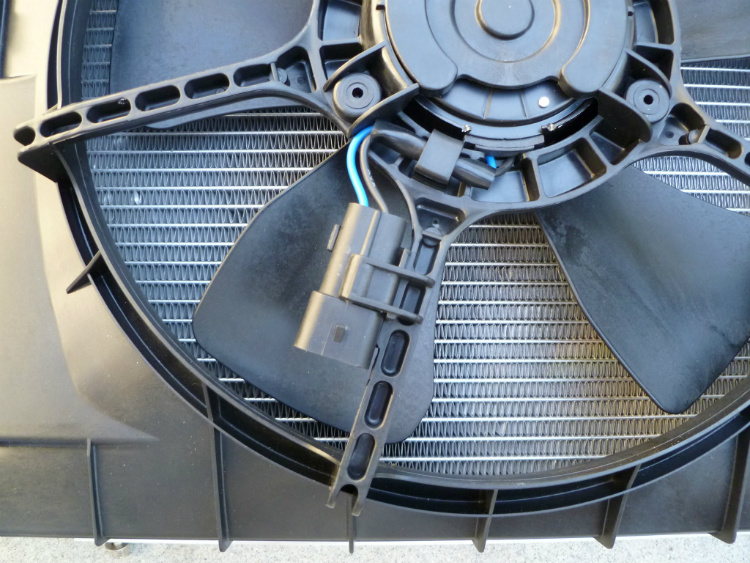
As for the fan, this was the fun part. I looked into fan assemblies from Taurus', Windstars, Camaros, ... well, pretty much everything until I came across a single fan assembly from a 2007 Chevy HHR. It's almost like it was made for this radiator (with a few minor modifications). The best part: It was cheap, flows great, and uses a standard GM fan connector! Paid $63, brand new, shipped.
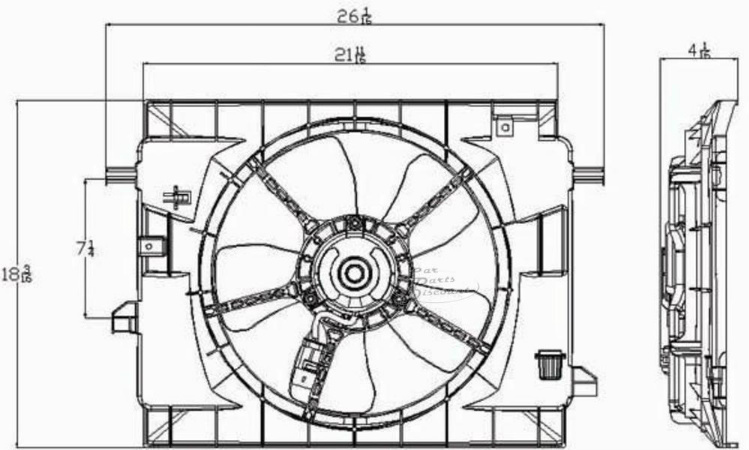
I cut off the 2 plastic brackets on each side, and attached it with my own brackets.
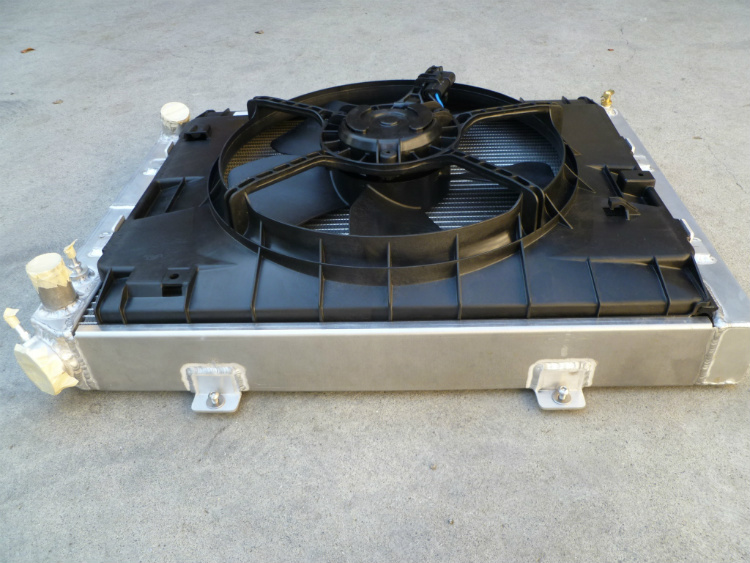
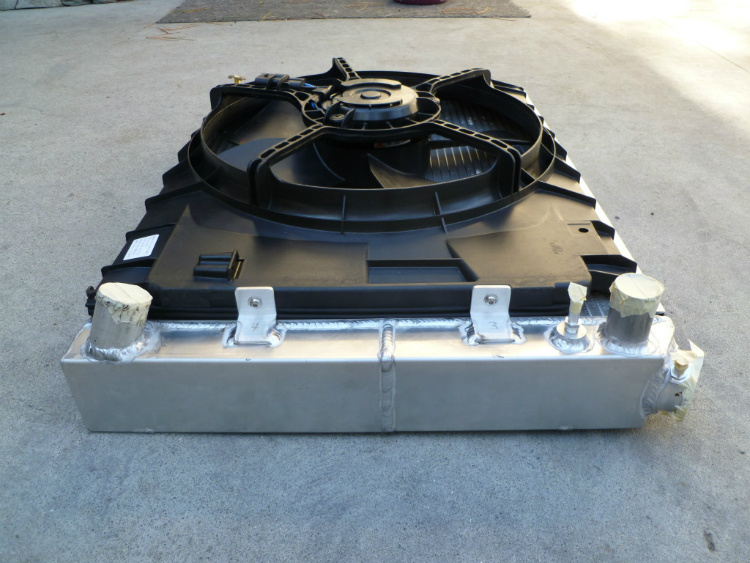
Side view: I used some weather stripping between the fan and the radiator fins because there's a 1/2 inch gap on each side. The top and bottom of the fan cannot be trimmed down to account for this gap because the fan motor would hit the radiator fins.
Before someone mentions it, I peeled off that hideous sticker on the side.

Installed:
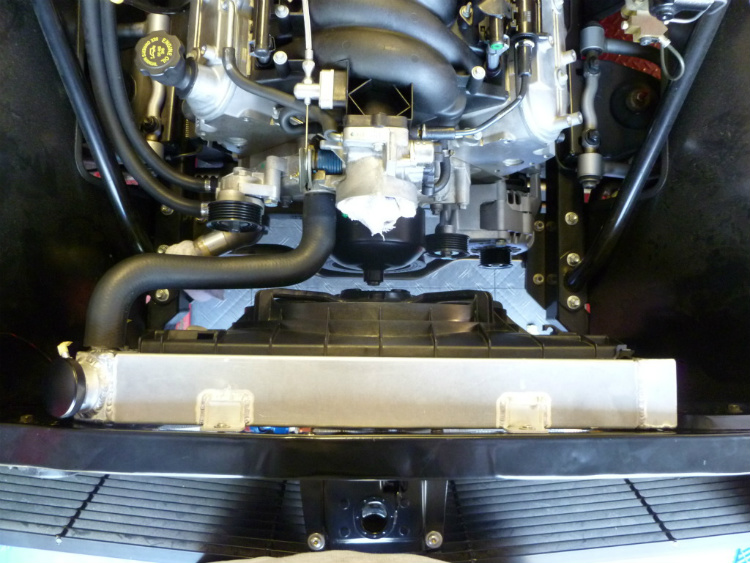
By the way, that upper radiator hose is a 1992-1993 Lexus ES300 lower radiator hose. Yeah, I spent about half an hour in the back of Autozone. Now I'm on the hunt for a lower radiator hose that will fit.
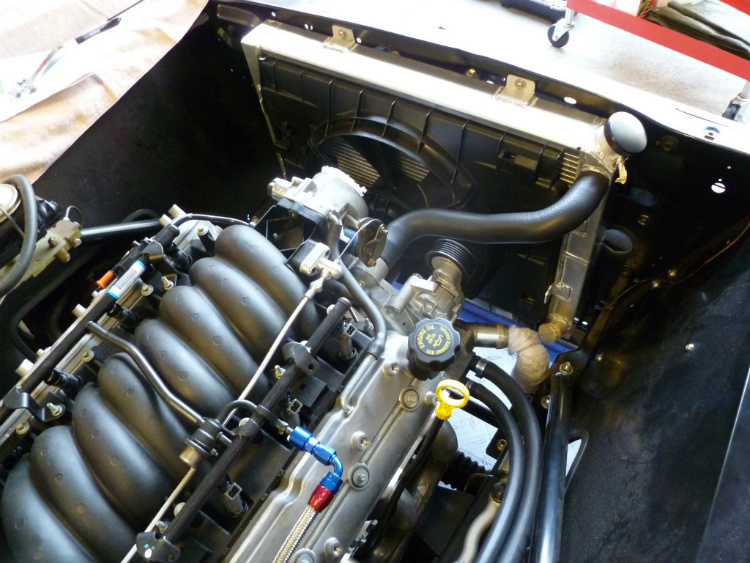
Overall, I think it turned out pretty decent.
Started on the intake...

It seems like there is never enough room in the front of these little Novas for a radiator and fan assembly without something getting in the way. After taking measurements and researching until I was blue in the face, I came up with something that works great!
For starters, I used a Griffin Radiator (8-00009-LS) and cut the attached brackets off to replace them with some of my own.
As for the fan, this was the fun part.
I looked into fan assemblies from Taurus', Windstars, Camaros, ... well, pretty much everything until I came across a single fan assembly from a 2007 Chevy HHR. It's almost like it was made for this radiator (with a few minor modifications). The best part: It was cheap, flows great, and uses a standard GM fan connector! Paid $63, brand new, shipped.I cut off the 2 plastic brackets on each side, and attached it with my own brackets.
Side view: I used some weather stripping between the fan and the radiator fins because there's a 1/2 inch gap on each side. The top and bottom of the fan cannot be trimmed down to account for this gap because the fan motor would hit the radiator fins.
Before someone mentions it, I peeled off that hideous sticker on the side.
Installed:
By the way, that upper radiator hose is a 1992-1993 Lexus ES300 lower radiator hose. Yeah, I spent about half an hour in the back of Autozone. Now I'm on the hunt for a lower radiator hose that will fit.
Overall, I think it turned out pretty decent.
Started on the intake...

 01-03-2012, 03:03 PM
#71
On The Tree
Thread Starter
Join Date: Sep 2010
Location: San Luis Obispo CA
Posts: 155
Likes: 0
Received 0 Likes
on
0 Posts
Thanks for the complements guys. It's always great to see other nova conversions on here so when you get your projects going, let everyone know.
I know 99ssleeper (above) has a great thread going too. I snoop around his thread every once in a while to catch the updates.
By the way Chuck, I had a problem installing your headers... it was too easy. Thanks again
I know 99ssleeper (above) has a great thread going too. I snoop around his thread every once in a while to catch the updates.
By the way Chuck, I had a problem installing your headers... it was too easy. Thanks again
Last edited by NovaKid; 01-03-2012 at 03:16 PM.
02-20-2012, 01:55 PM
#72
On The Tree
Thread Starter
Join Date: Sep 2010
Location: San Luis Obispo CA
Posts: 155
Likes: 0
Received 0 Likes
on
0 Posts
February 18, 2012
This build has taken me longer than I expected, but I'm making progress...little by little. Hopefully I'll have it completed by the end of summer.
Anyway, here's the belt that worked for my application. Just the crank, alternator, water pump, idler pulley and tensioner. I got the idea from this link: Accessory Belt Setup Link

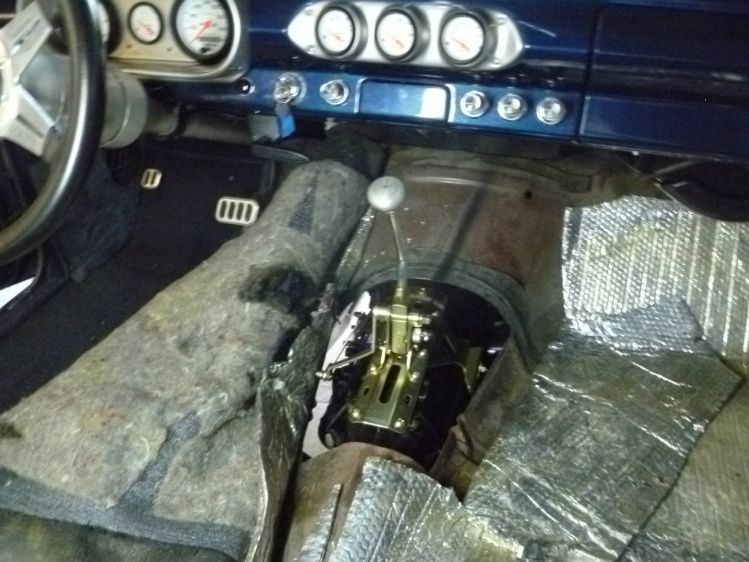
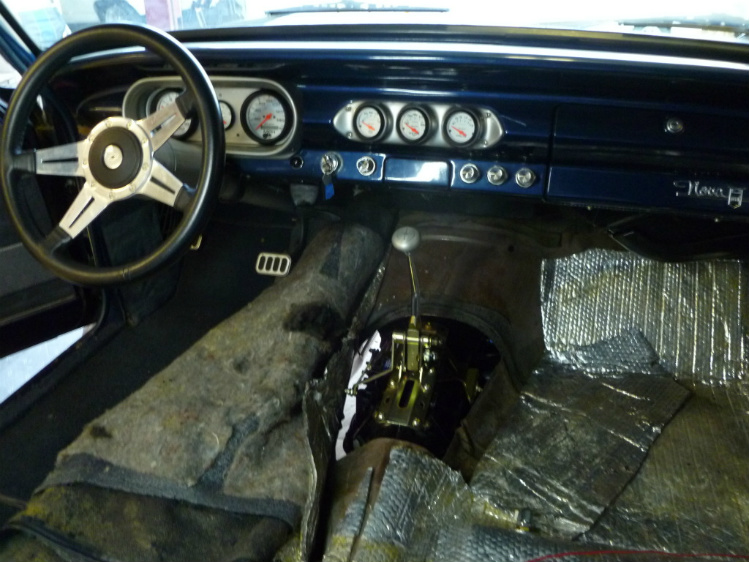
Next up on the list was to tackle the trans shifter. My trans tunnel looks like swiss cheese from a few prior shifter installations from the previous owner (maybe 10 years ago?). I was looking for a nice/different 4L60E shifter. I'm not a fan of the T handle, rectangular plastic base models offered by several companies. I started with the Lokar trans tunnel mount 8" shifter, but I quickly realized I didn't have enough clearance and was going to have to cut up the trans tunnel anyway. I swapped that one out for the same shifter, except the new one mounted to the transmission itself. I'll add to these pics once I get the sheet metal and LED P,R,N,D,3,2,1 brackets and boot installed. Here are some pics:
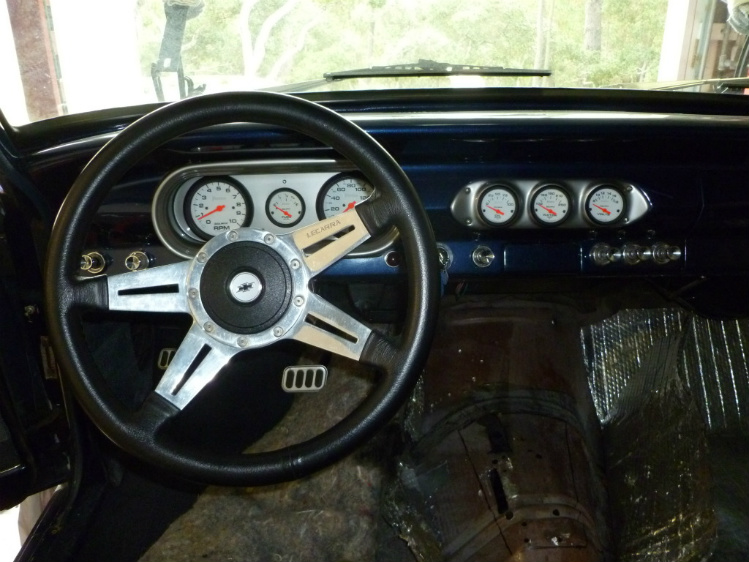
If I remember, I'll have to replace these pics with some better ones.
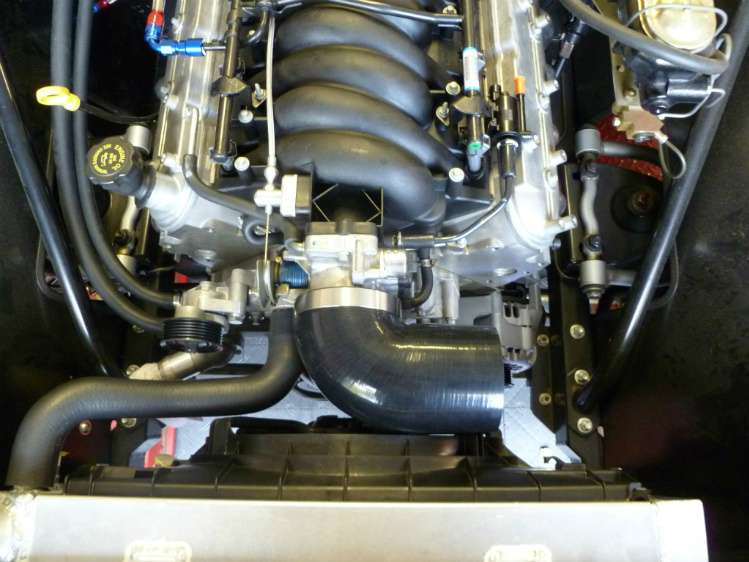
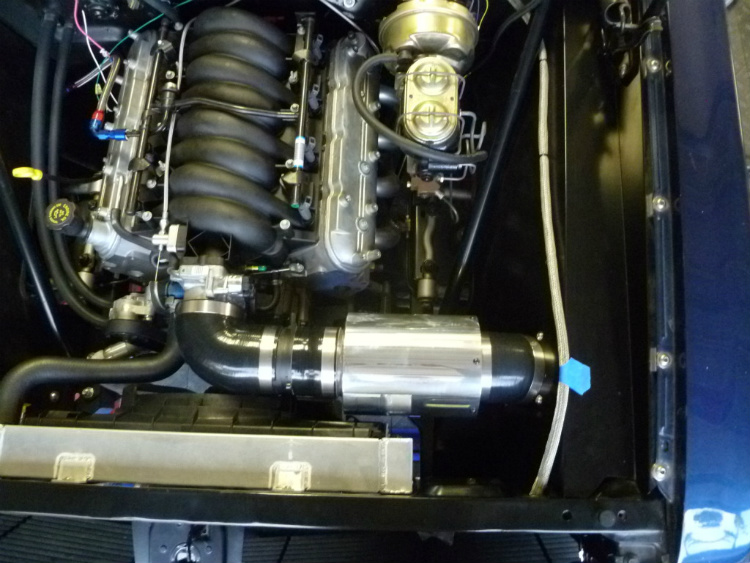
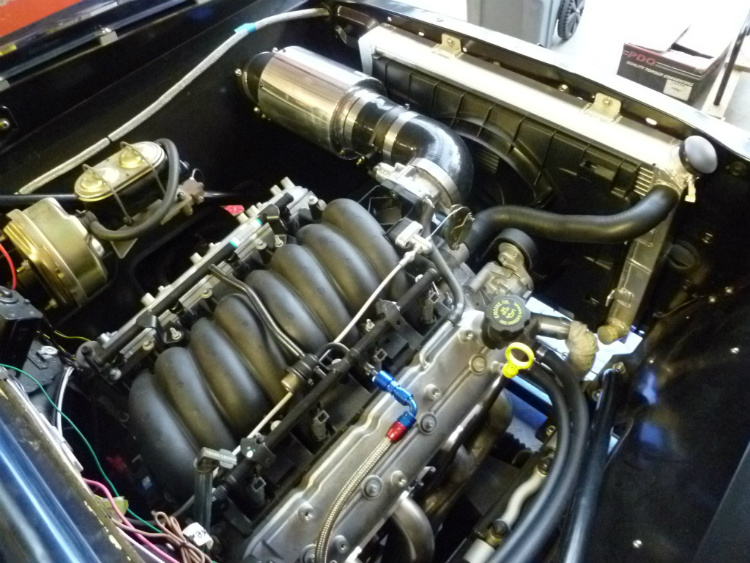
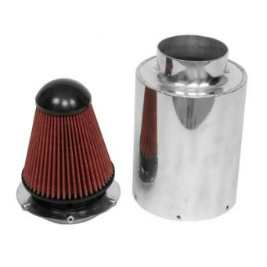
I received most of my parts for my intake so I decided to take care of that in the meantime. I played around with a few ideas, but this is what I decided to do in the end.
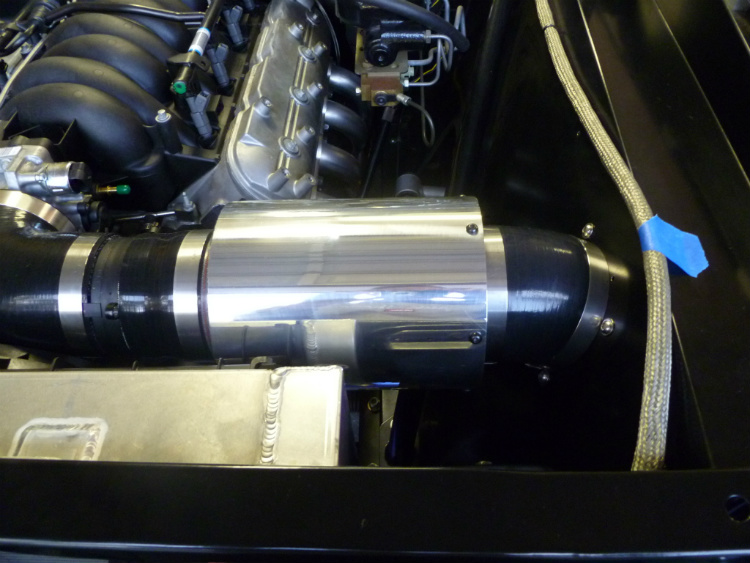
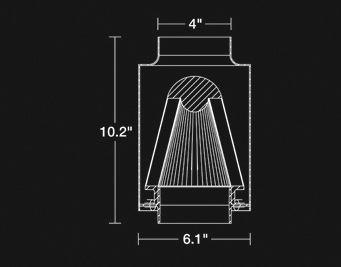
At first I was concerned the inline airbox was going to be too restrictive, but I spoke with Guy Smith, an engineer at Spectre, and he sent me some numbers assuring me that it would work without a problem. I was originally going with a 5" diameter airbox for a different configuration, but I decided to go with the bigger, 6" diameter airbox with this setup for better flow. In the email below, he is referring to the smaller, 5" diameter airbox. V.E. is volumetric efficiency. The 3456 conversion factor he used comes from (1728 in^3/ft^3) Multiplied by 2 since it's a 4 stroke engine.
"Okay, Your engine needs (cid � rpm)=then �3456=100% V.E. most engine run at 80-85% V.E., so (100% V.E. � .85% = cfm needed at desired rpm) so, at 6500 rpm your engine will consume 560 cfm. I went back in the flow data file for the 9832 and it actually flows 675 cfm backwards, and with a funnel you could be over 700 cfm maybe more depending on the intake design. Keep in mind that GM wants the maf sensor 6-8” away from the throttle body to minimize reversion when the throttle blade is closed. So if you design the intake system to get cold (ambient) air this will work with one 9832 inline air box."
^^ Thanks to Guy Smith at Spectre ^^
Lot's of cutting and trimming and this was the result.
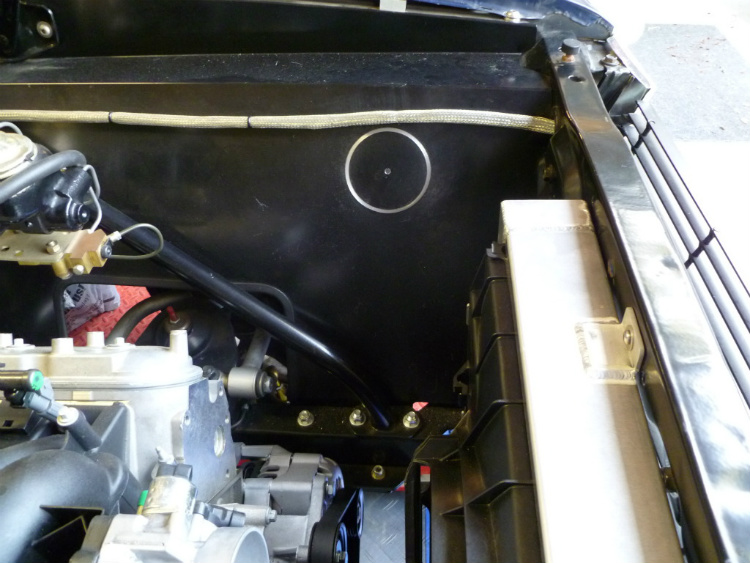
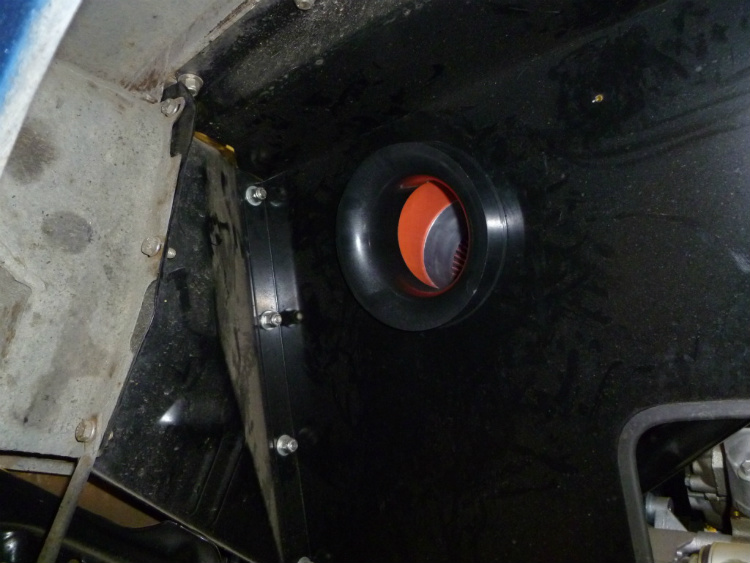
Driver's side inner fender panel where the intake passes through. I attached a velocity funnel to improve the airflow. Also, I'm planning on making a sheet metal enclosure for this to keep some unwanted debris out.
I was flattered that Otto liked my handiwork...
This build has taken me longer than I expected, but I'm making progress...little by little. Hopefully I'll have it completed by the end of summer.
Anyway, here's the belt that worked for my application. Just the crank, alternator, water pump, idler pulley and tensioner. I got the idea from this link: Accessory Belt Setup Link
Next up on the list was to tackle the trans shifter. My trans tunnel looks like swiss cheese from a few prior shifter installations from the previous owner (maybe 10 years ago?). I was looking for a nice/different 4L60E shifter. I'm not a fan of the T handle, rectangular plastic base models offered by several companies. I started with the Lokar trans tunnel mount 8" shifter, but I quickly realized I didn't have enough clearance and was going to have to cut up the trans tunnel anyway. I swapped that one out for the same shifter, except the new one mounted to the transmission itself. I'll add to these pics once I get the sheet metal and LED P,R,N,D,3,2,1 brackets and boot installed. Here are some pics:
If I remember, I'll have to replace these pics with some better ones.
I received most of my parts for my intake so I decided to take care of that in the meantime. I played around with a few ideas, but this is what I decided to do in the end.
At first I was concerned the inline airbox was going to be too restrictive, but I spoke with Guy Smith, an engineer at Spectre, and he sent me some numbers assuring me that it would work without a problem. I was originally going with a 5" diameter airbox for a different configuration, but I decided to go with the bigger, 6" diameter airbox with this setup for better flow. In the email below, he is referring to the smaller, 5" diameter airbox. V.E. is volumetric efficiency. The 3456 conversion factor he used comes from (1728 in^3/ft^3) Multiplied by 2 since it's a 4 stroke engine.
"Okay, Your engine needs (cid � rpm)=then �3456=100% V.E. most engine run at 80-85% V.E., so (100% V.E. � .85% = cfm needed at desired rpm) so, at 6500 rpm your engine will consume 560 cfm. I went back in the flow data file for the 9832 and it actually flows 675 cfm backwards, and with a funnel you could be over 700 cfm maybe more depending on the intake design. Keep in mind that GM wants the maf sensor 6-8” away from the throttle body to minimize reversion when the throttle blade is closed. So if you design the intake system to get cold (ambient) air this will work with one 9832 inline air box."
^^ Thanks to Guy Smith at Spectre ^^
Lot's of cutting and trimming and this was the result.
Driver's side inner fender panel where the intake passes through. I attached a velocity funnel to improve the airflow. Also, I'm planning on making a sheet metal enclosure for this to keep some unwanted debris out.
I was flattered that Otto liked my handiwork...
Last edited by NovaKid; 02-22-2012 at 02:07 PM.
 02-22-2012, 02:06 PM
#74
On The Tree
Thread Starter
Join Date: Sep 2010
Location: San Luis Obispo CA
Posts: 155
Likes: 0
Received 0 Likes
on
0 Posts
Initially, I was thinking the same thing about the size of the filter, but I emailed spectre and they assured me that it would work with the smaller 5" diameter unit, but I ended up changing my design and installed the 6" diameter inline filter just to make sure (see above post).
 02-28-2012, 01:02 AM
#77
On The Tree
Thread Starter
Join Date: Sep 2010
Location: San Luis Obispo CA
Posts: 155
Likes: 0
Received 0 Likes
on
0 Posts
Thanks Tom, glad you stopped by. Between finishing up school and work, I don't find as much time as I would like to... I'm shootin' for the end of summer.
Maybe my next project will be a 64 falcon sprint with an LS7? I'm dreamin' right now
Maybe my next project will be a 64 falcon sprint with an LS7? I'm dreamin' right now
03-09-2012, 10:41 AM
#78
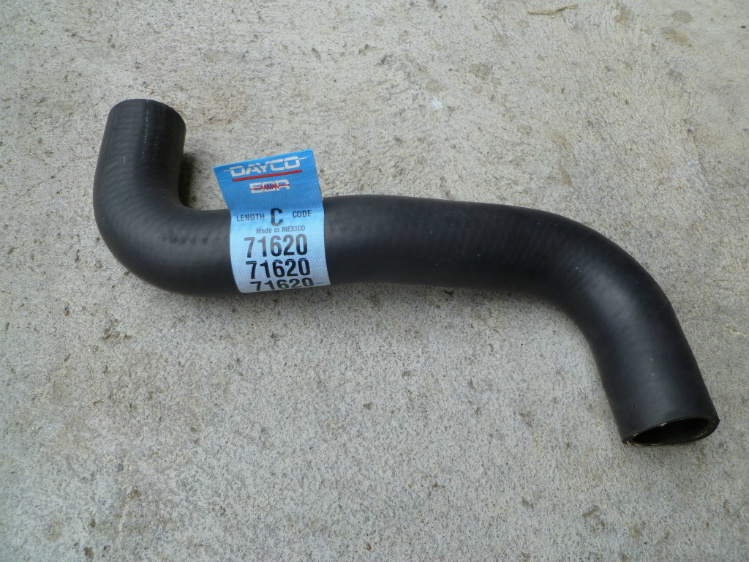
Here's a lead on a lower hose, part number at the top in writing, third picture shows what it looks like...
http://www.stevesnovasite.com/forums...=190506&page=4
T,
http://www.stevesnovasite.com/forums...=190506&page=4
T,
03-10-2012, 12:06 AM
#79
On The Tree
Thread Starter
Join Date: Sep 2010
Location: San Luis Obispo CA
Posts: 155
Likes: 0
Received 0 Likes
on
0 Posts
Thank you for keeping my build in mind! I really think that hose will fit. After seeing your post, I found the hose at rock auto on clearance for 5 bucks (last one too)... just bought it. It's worth a shot for that kind of price. 
