

1973 Nova LS BUDGET swap


 01-22-2013, 08:50 PM
#102
Thanks for the compliments. It is coming along nicely. If I had the bank roll AND A HEATED GARAGE! I could have it done in a week. As is my goal is late April or May.
Bob you are totally right. I like the SEM trim quite a bit. I am also considering trying Eastwood's Chassis flat in semi-gloss on a buddy's recommendation. From here on out I'll save the POR for brush on in-feild applications where appearance is not the #1 priority.
Bob you are totally right. I like the SEM trim quite a bit. I am also considering trying Eastwood's Chassis flat in semi-gloss on a buddy's recommendation. From here on out I'll save the POR for brush on in-feild applications where appearance is not the #1 priority.
 01-22-2013, 11:54 PM
#104
Congrats on getting it back on all four! You've been very meticulous. It's going to be a very sanitary engine bay when you get done. Bravo! That is s real shame about the sub frame. I wonder if it was prep or the POR15 that caused it.
Great work. You'll be on the road in no time.
Great work. You'll be on the road in no time.
01-23-2013, 07:36 AM
#105
Thanks Slim, I may be giving you a call soon to help with some of the big muscle jobs like dropping the motor. Or at least have you come over and help me on a six'r!
Bandit. Thank you as well. I'm aiming for April-May early cruising! Ya, all the POR issues are frustrating. But I think the issue is that I did not follow the POr method. I extensively cleaned and prepped, but did not use the chemicals they recommend. Also, I have only experienced peeling on my spray applications of POR. All my brushed parts are great! Oh well, live and learn and improve.
Bandit. Thank you as well. I'm aiming for April-May early cruising! Ya, all the POR issues are frustrating. But I think the issue is that I did not follow the POr method. I extensively cleaned and prepped, but did not use the chemicals they recommend. Also, I have only experienced peeling on my spray applications of POR. All my brushed parts are great! Oh well, live and learn and improve.
01-30-2013, 07:31 PM
#106
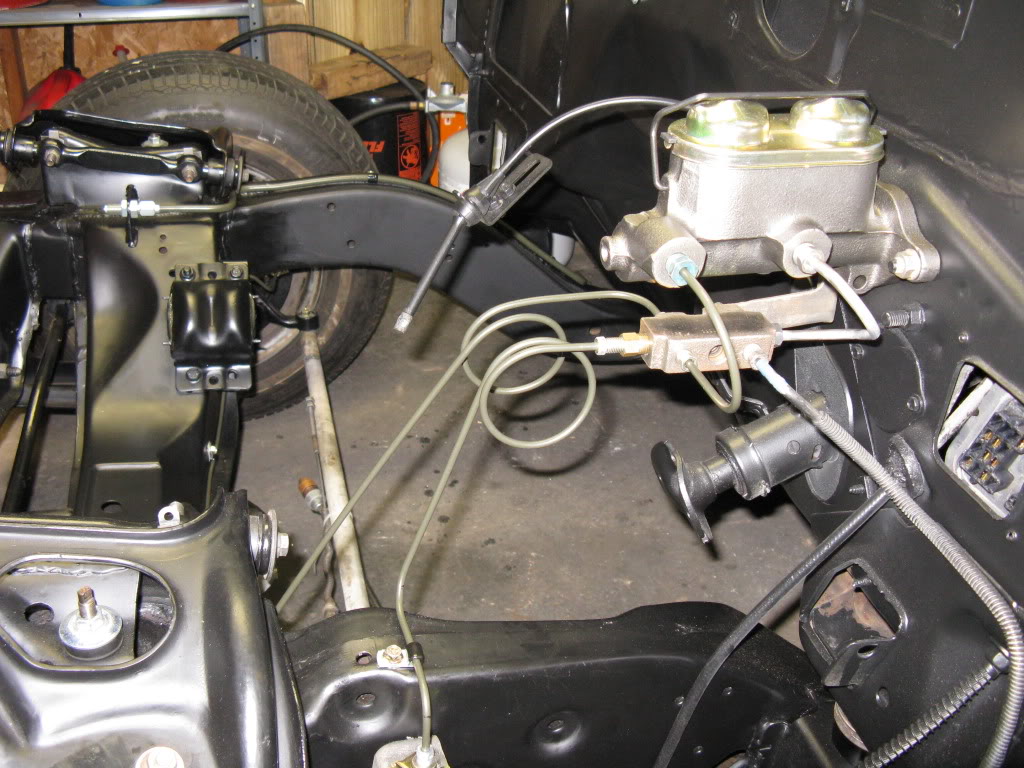
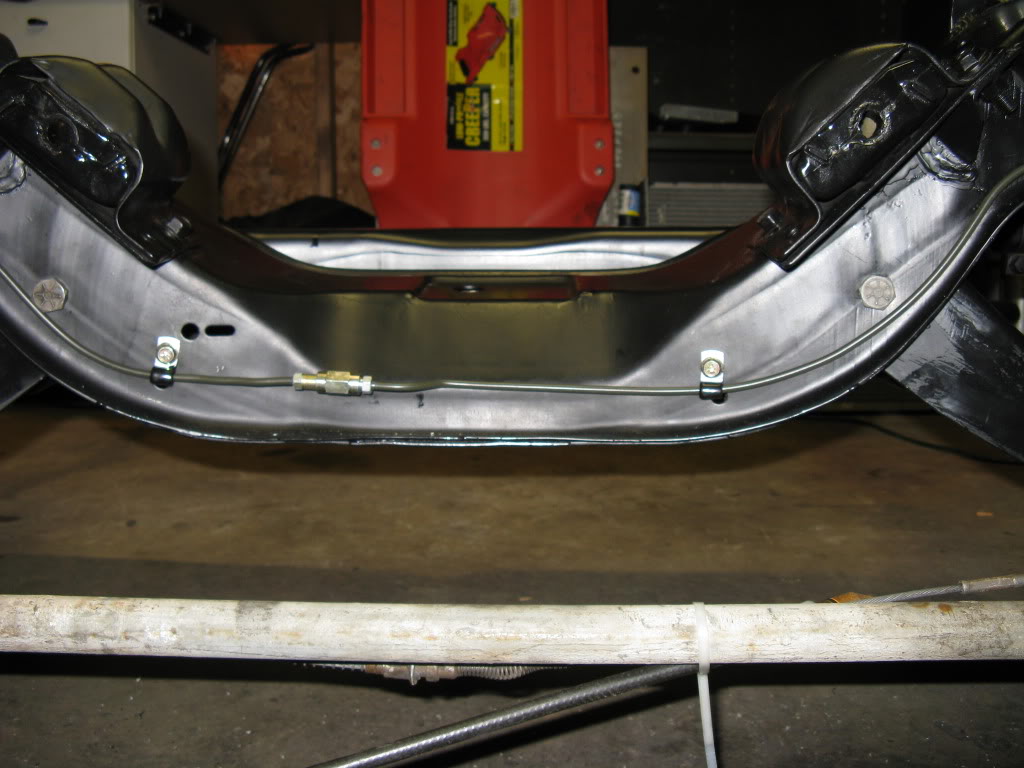
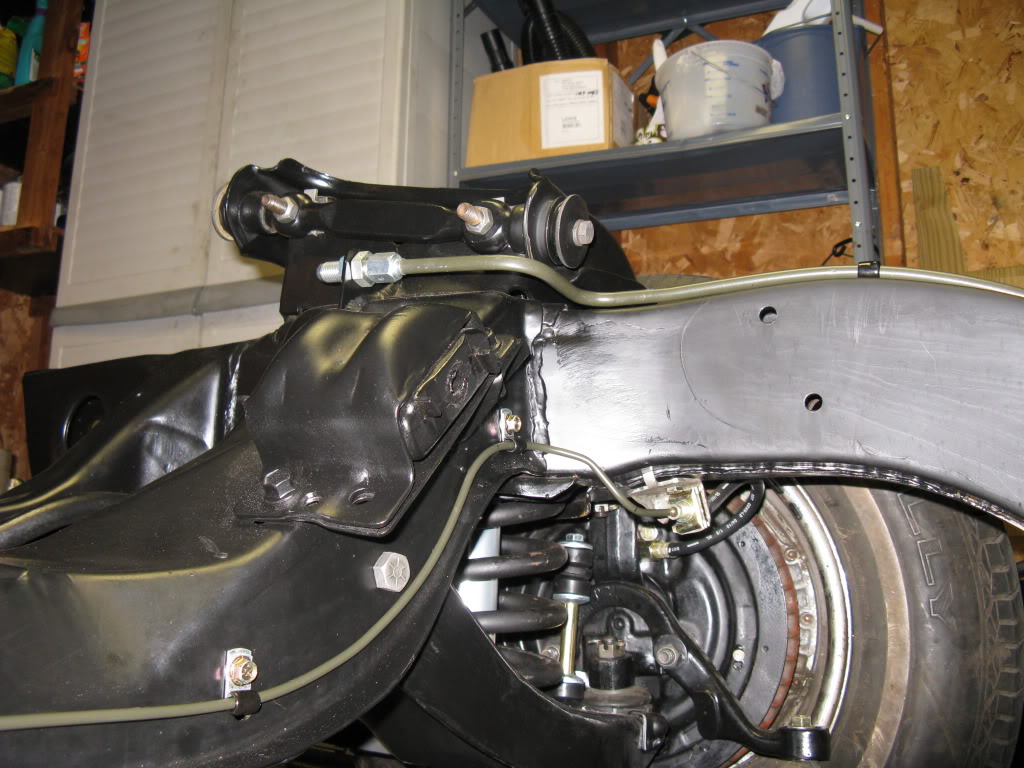
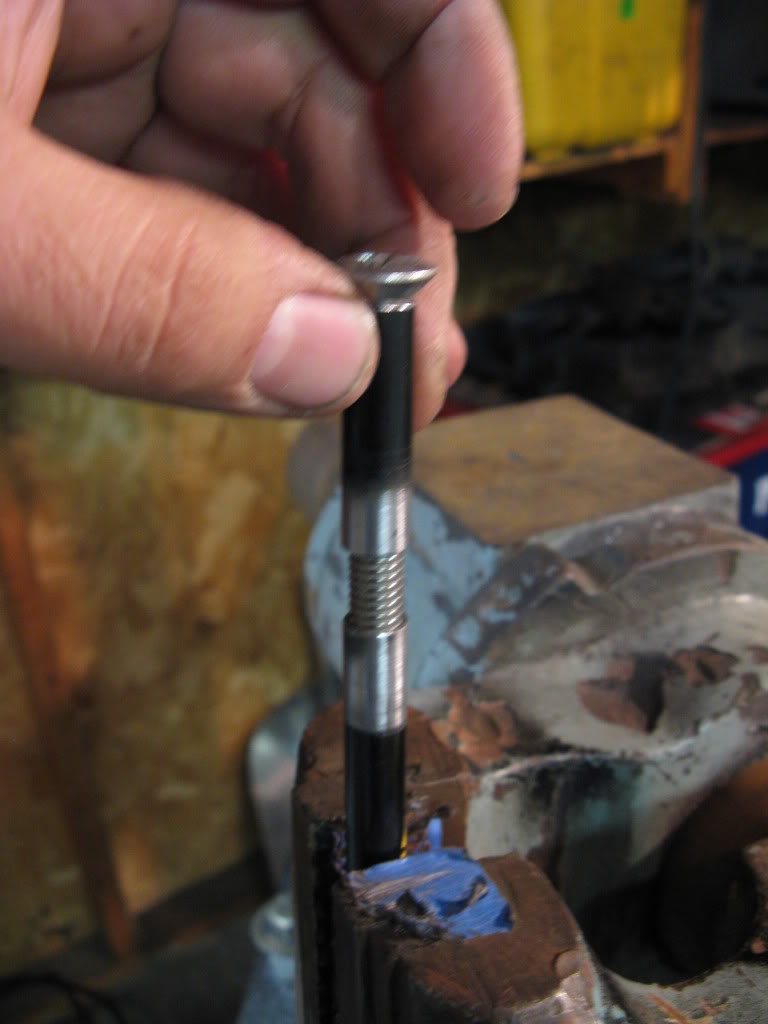
OK, lots of time on the car this week. First up is the front brakes. I dug up the old front brakes lines and well...they were dirty and ugly and as I am a retentive tight *** on routings so I re-designed them. I am very happy with the results. utilized coated 3/16" steel line. I couldn't get SS locally and I understand they are a bitch to bend and flare!

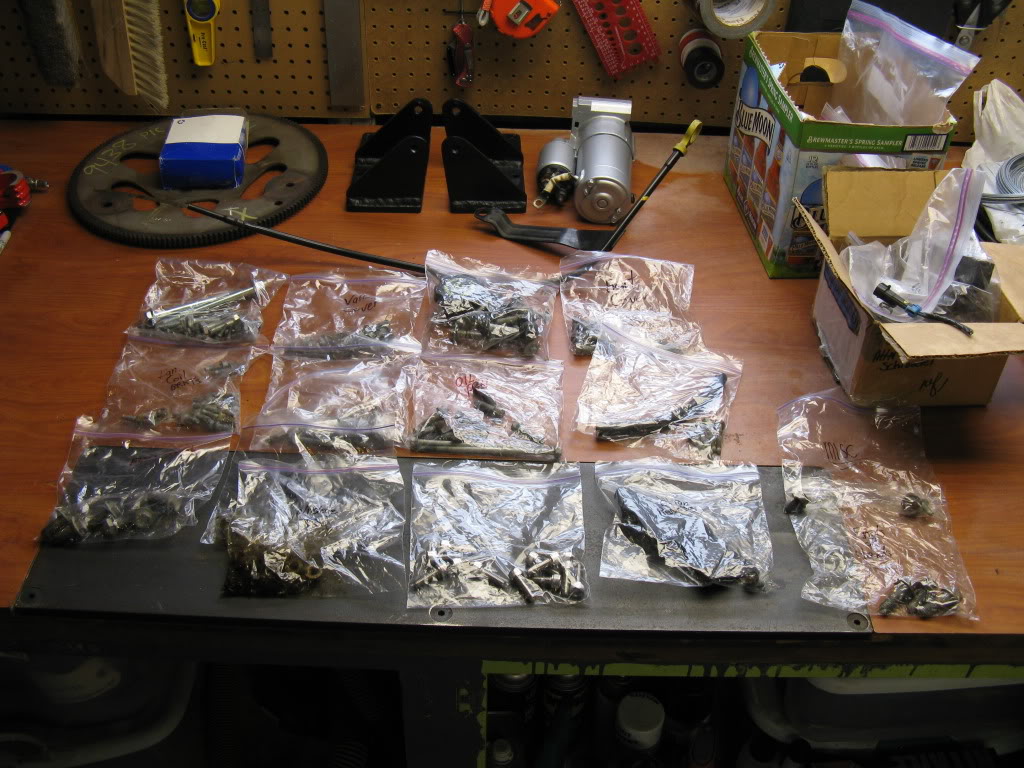
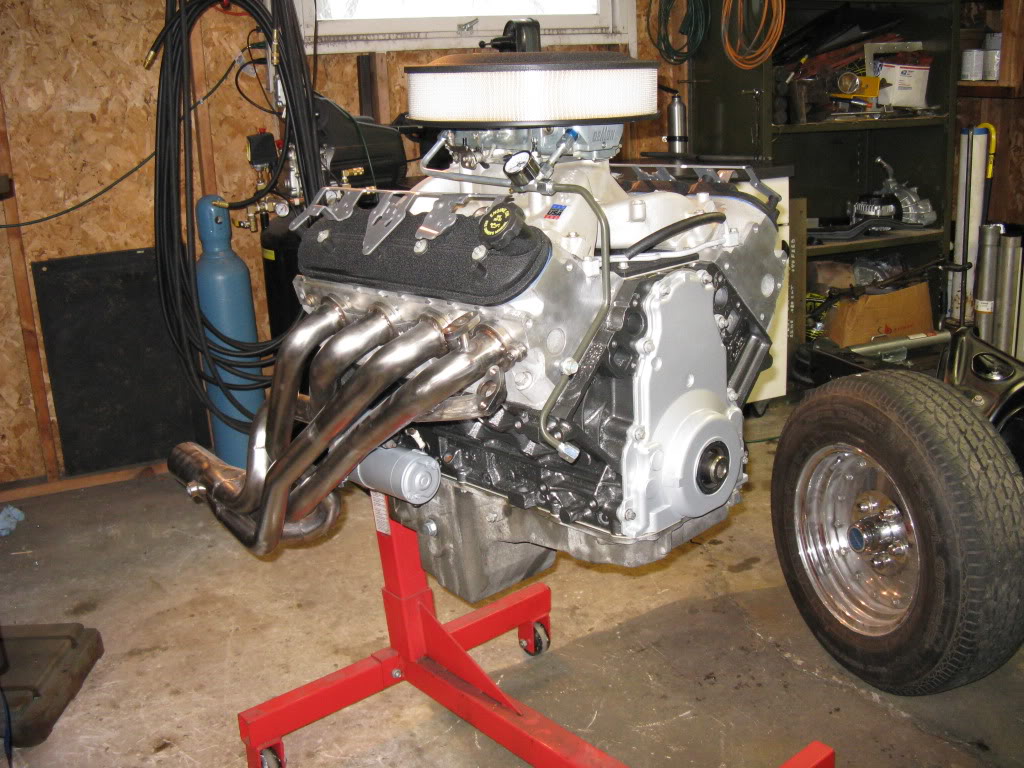
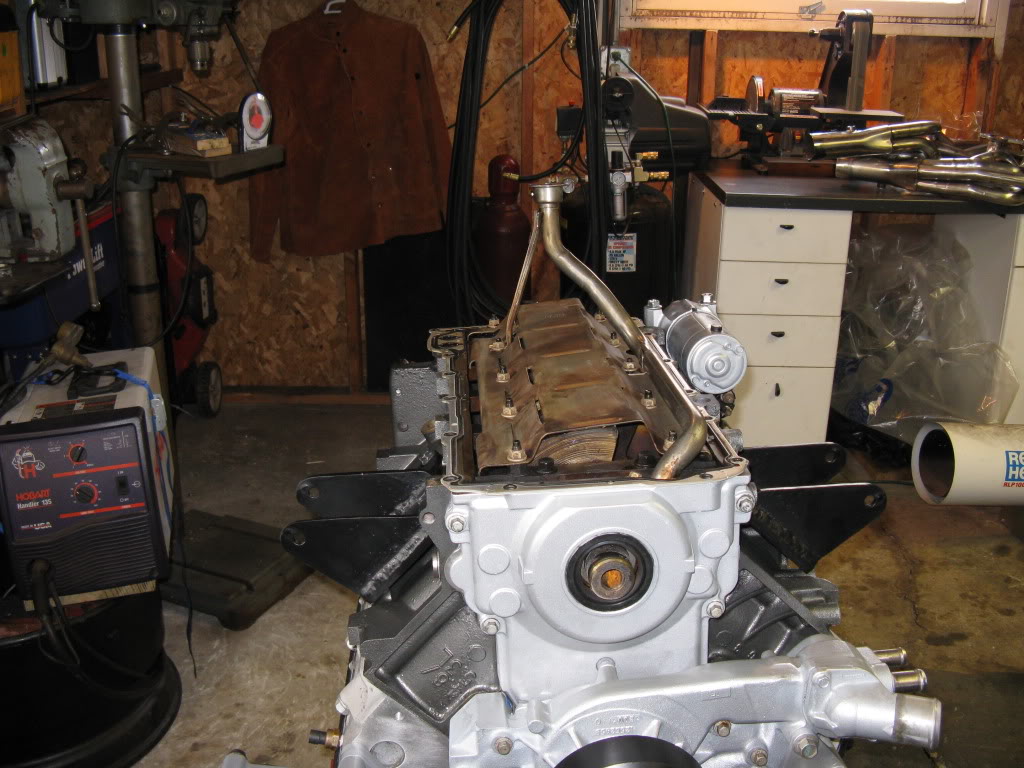
Next up is the engine progress. I am VERY glad I cleaned, organized and marked each bolt, it totally paid off and the engine went back together in just a few minutes. This is the first time it has been together since I brought it home and I love the results!!
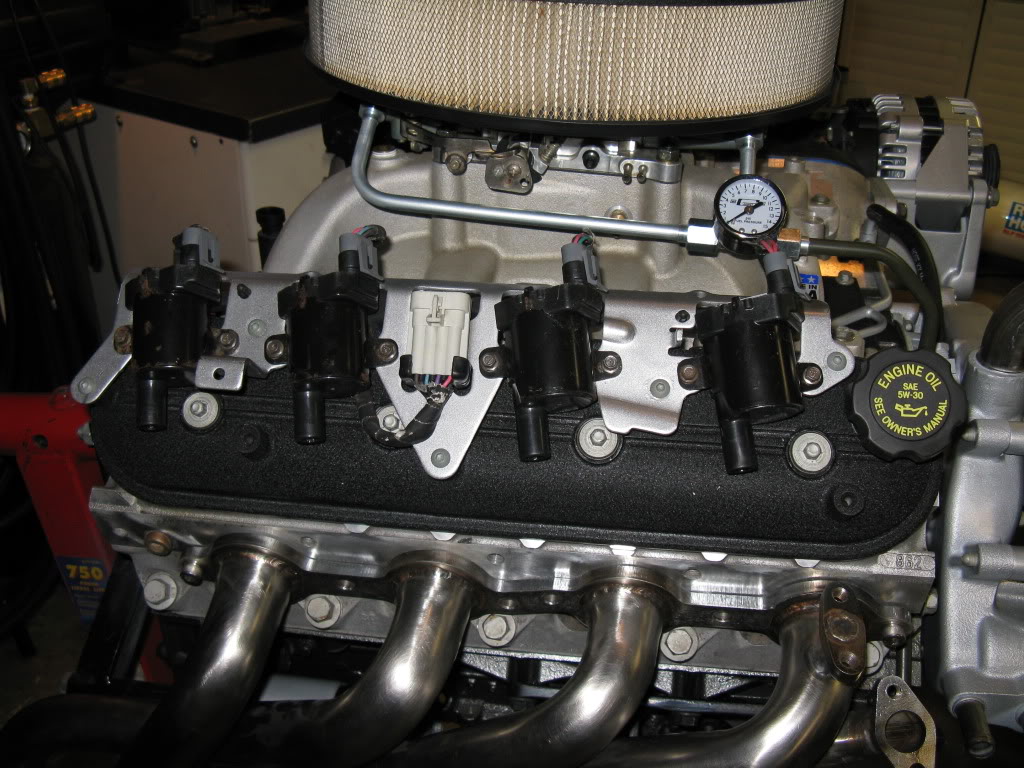
The coils and brackets were my favorite. The silver brackets show off the coils nicely.

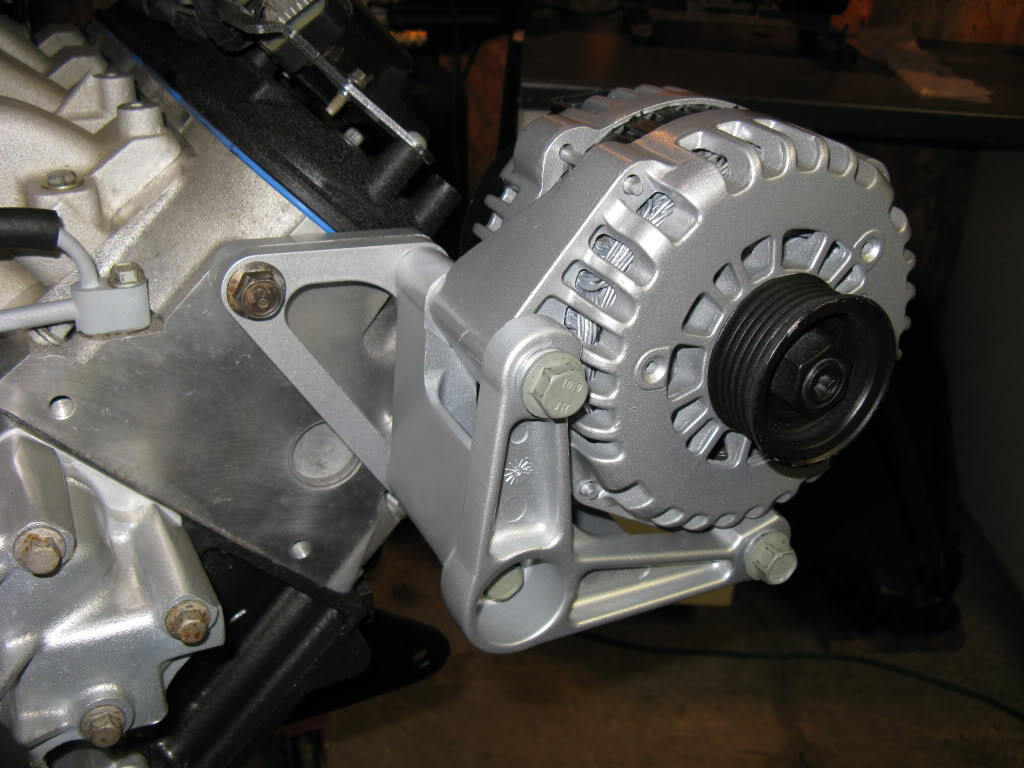
The alt and bracket came out awesome!
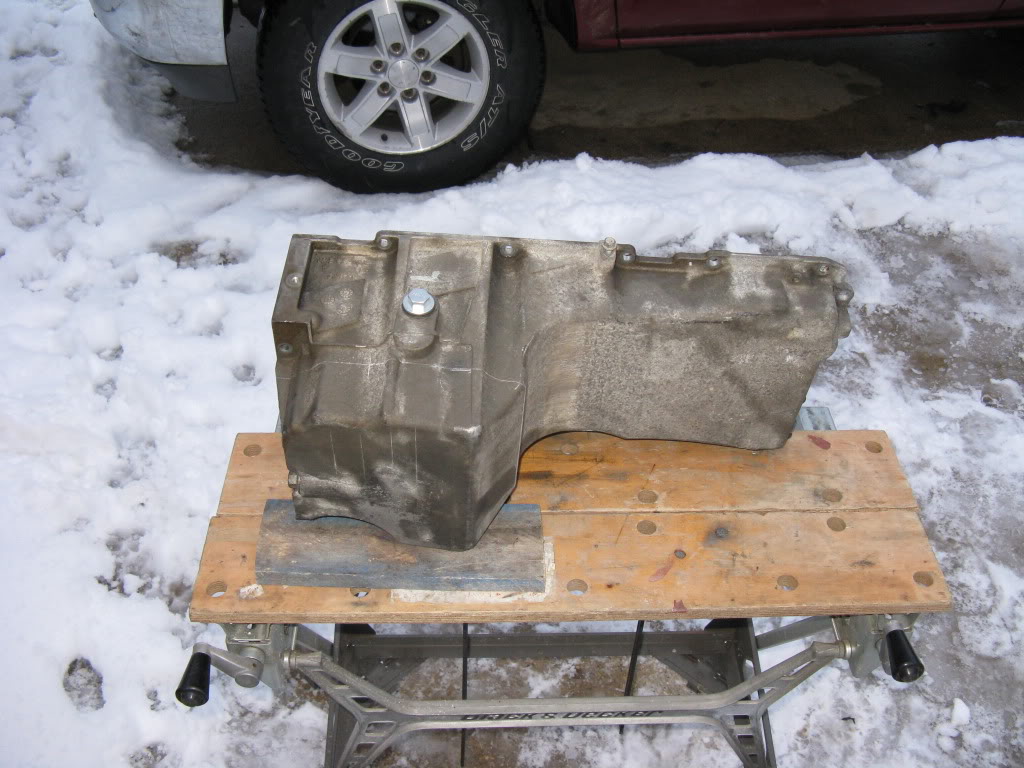
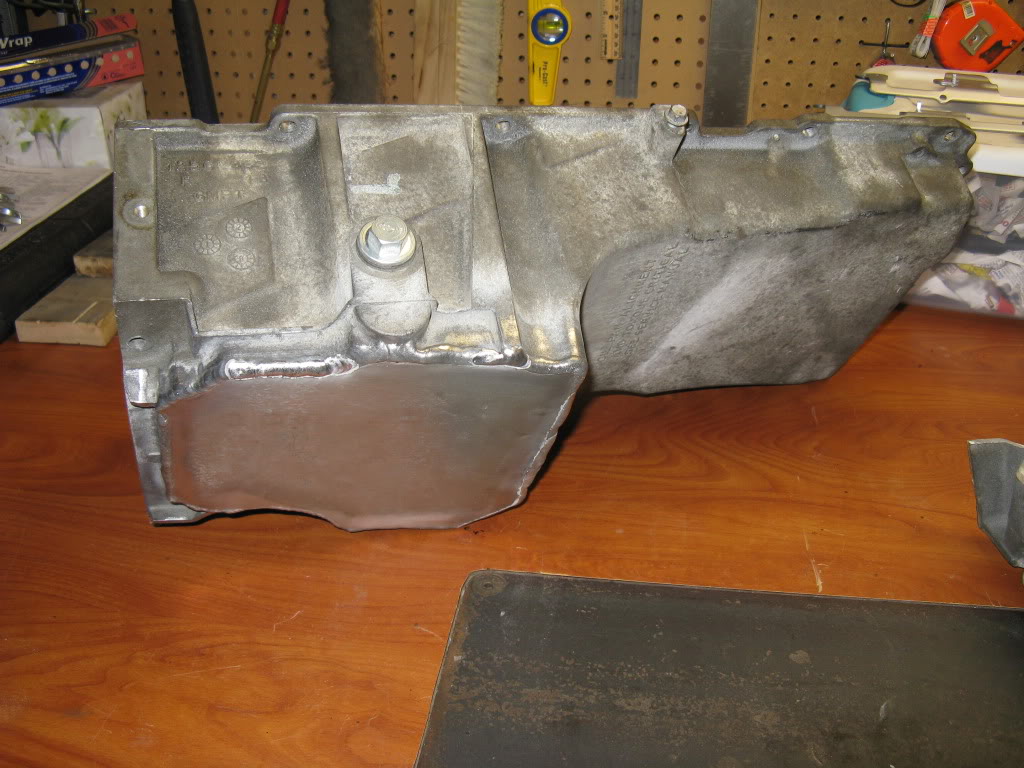
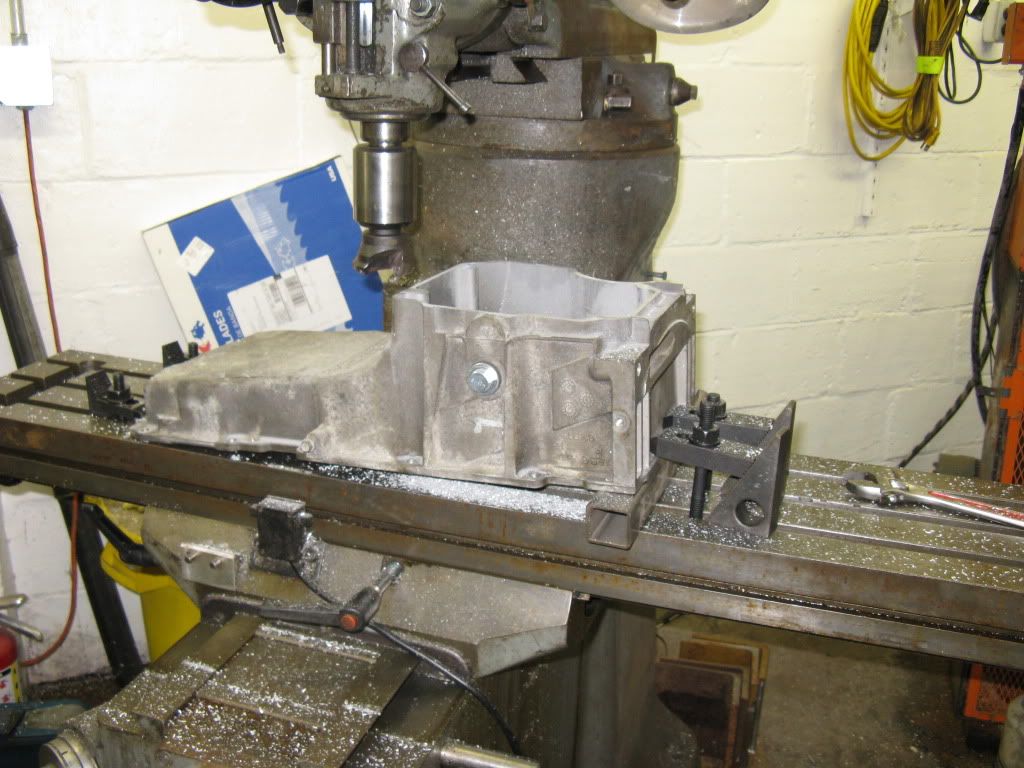
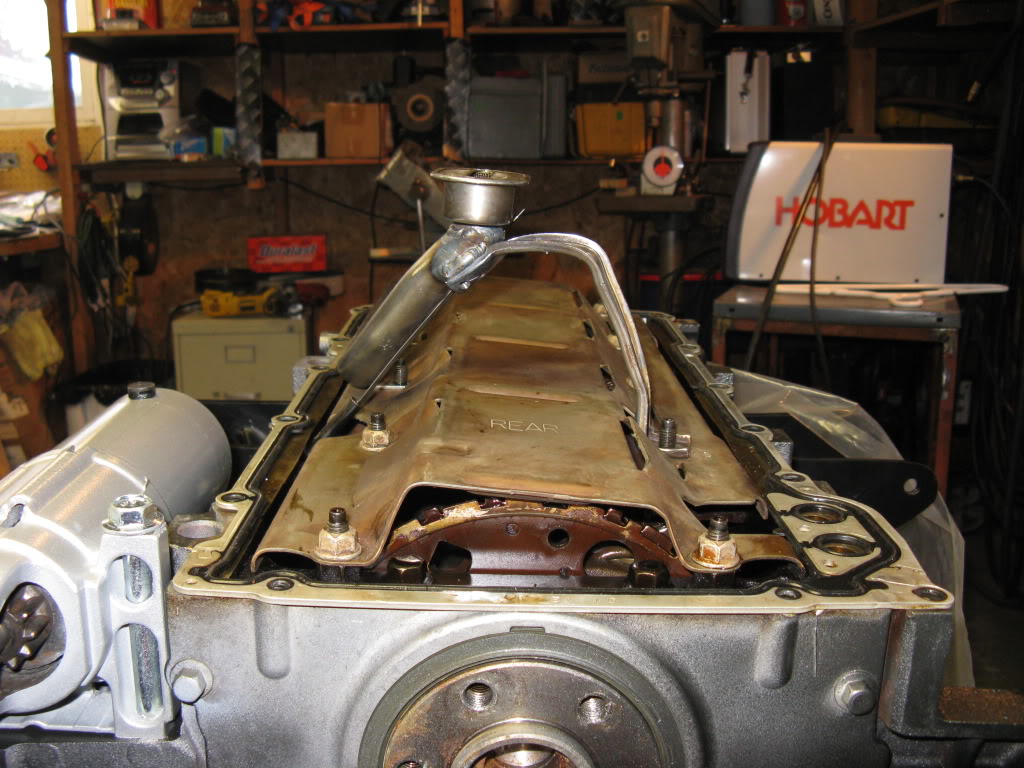
Here is another big step. My friend with a very nice shop was able to spare some time to help me out with my oil pan! To save a little time on the mill I cut the bottom off the pan myself...in the driveway...in the snow! I was afraid to throw aluminum all over the shop with the open engine and trans. good thing it was a toasty 28F out there!

I think I might have a small leak...yyyaaaa


I little time on the Bridgeport and that flange was as flat as Wisconsin.

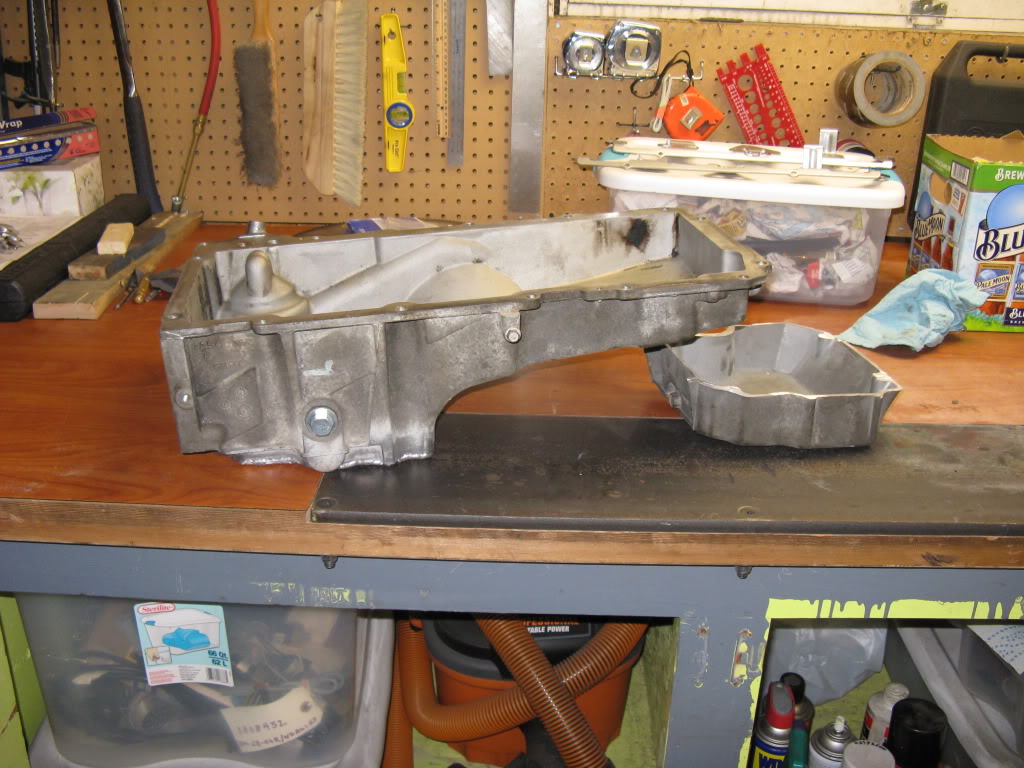
TADA! TIG welding and fab work later and I have a pan FINALLY suitable for the Nova.
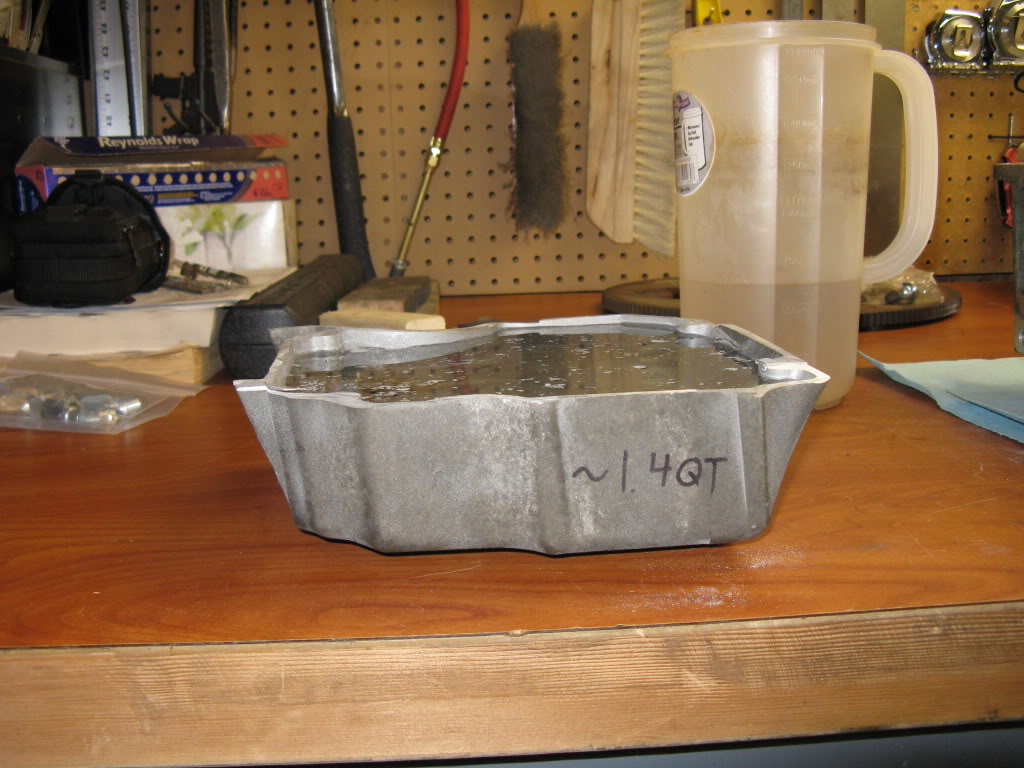
Looks like I lost about 1.5Qt of capacity. that should leave about 4.5Qt. A little short but with frequent changes I should be OK. Not like its a high dollar engine right??
Leak check found a couple small leaks. Im going to meet up with my buddy soon to get them patched up

That all for now. Next step is to make the tranny cooler hardlines and drop the engine in place!
Next up is the engine progress. I am VERY glad I cleaned, organized and marked each bolt, it totally paid off and the engine went back together in just a few minutes. This is the first time it has been together since I brought it home and I love the results!!
The coils and brackets were my favorite. The silver brackets show off the coils nicely.
The alt and bracket came out awesome!
Here is another big step. My friend with a very nice shop was able to spare some time to help me out with my oil pan! To save a little time on the mill I cut the bottom off the pan myself...in the driveway...in the snow! I was afraid to throw aluminum all over the shop with the open engine and trans. good thing it was a toasty 28F out there!
I think I might have a small leak...yyyaaaa
I little time on the Bridgeport and that flange was as flat as Wisconsin.
TADA! TIG welding and fab work later and I have a pan FINALLY suitable for the Nova.
Looks like I lost about 1.5Qt of capacity. that should leave about 4.5Qt. A little short but with frequent changes I should be OK. Not like its a high dollar engine right??
Leak check found a couple small leaks. Im going to meet up with my buddy soon to get them patched up
That all for now. Next step is to make the tranny cooler hardlines and drop the engine in place!
Last edited by cruisin'73; 01-31-2013 at 08:04 AM.
01-31-2013, 08:25 AM
#110
Thank you CPRMN and Kirk.
I was a little up in the air about hardline, but I am using a 12" rubber section to come off the engine to the frame rail. ThoughI think I am going to have to come up with some sort of heat protection for that section of green hardline going down the front of the head to avoid heat soaking the fuel. And yes, in my college engineering program I got to spend a lot of time on manual and CNC mills and lathes. It felt really good to be at the helm of a Bridgeport again! Man I need one of those things in my shop. someday for sure.
I was a little up in the air about hardline, but I am using a 12" rubber section to come off the engine to the frame rail. ThoughI think I am going to have to come up with some sort of heat protection for that section of green hardline going down the front of the head to avoid heat soaking the fuel. And yes, in my college engineering program I got to spend a lot of time on manual and CNC mills and lathes. It felt really good to be at the helm of a Bridgeport again! Man I need one of those things in my shop. someday for sure.
01-31-2013, 08:35 AM
#111
OK so I do have a little more work to perform on the pan. Namely adding a drain plug. I had planned to simply drill and tap the pan in the thick casting right below the port for the oil level sensor. But a buddy pointed out that the stock drain plug is Heli-coiled to prevent stripping AL threads. So I started researching and found that it is still common for the heli-coil threads to pull out! This concern led me to consider installing a valve to avoid constant pug removal. Internet searching found this:
http://www.fumotousa.com/
Pretty slick product, and the locking handle feature is nice. To bad the price sucks! $30-$40 for a ball valve is Not happening! I'll be investing a little research into a similar, but more cost effective solution! Ideas are welcome
http://www.fumotousa.com/
Pretty slick product, and the locking handle feature is nice. To bad the price sucks! $30-$40 for a ball valve is
Not happening! I'll be investing a little research into a similar, but more cost effective solution! Ideas are welcome
01-31-2013, 11:22 AM
#112
TECH Apprentice
iTrader: (1)
Join Date: Mar 2011
Location: waverly, ohio
Posts: 315
Likes: 0
Received 0 Likes
on
0 Posts
Thank you CPRMN and Kirk.
I was a little up in the air about hardline, but I am using a 12" rubber section to come off the engine to the frame rail. ThoughI think I am going to have to come up with some sort of heat protection for that section of green hardline going down the front of the head to avoid heat soaking the fuel. And yes, in my college engineering program I got to spend a lot of time on manual and CNC mills and lathes. It felt really good to be at the helm of a Bridgeport again! Man I need one of those things in my shop. someday for sure.
I was a little up in the air about hardline, but I am using a 12" rubber section to come off the engine to the frame rail. ThoughI think I am going to have to come up with some sort of heat protection for that section of green hardline going down the front of the head to avoid heat soaking the fuel. And yes, in my college engineering program I got to spend a lot of time on manual and CNC mills and lathes. It felt really good to be at the helm of a Bridgeport again! Man I need one of those things in my shop. someday for sure.
 01-31-2013, 03:19 PM
#114
Thanks Frojoe, glad you like it, your build was one of the major influences for the crinkle and several other aspects of my build. Imitation is the sincerest form of flattery.
Though I have to say the fiance` was not a fan the oven curing...
Though I have to say the fiance` was not a fan the oven curing...
02-09-2013, 09:23 AM
#116
First off I'm sorry about the huge picture format...My garage camera is getting a bit old and decided to reformat itself to take huge pictures! I'll be changing the settings back to a smaller format. Now onto progress.
OK, the oil pan is chopped down, time to make the pick up and dipstick match! Here is the stock pick up. In need of about 2.75" chop.

I forgot to take any during pictures, but here is the finished pickup. It took quite a bit of work. If I had it to do over I could save myself quite a bit of frustration! But in the end the results were satisfactory.

Here is a neat little trick. I taped a small 150 lumen tactical flashlight inside the pan and installed it on the engine. I was able to check pick up to pan clearance and dipstick height. I also used clay to ensure proper height. Pick up is a little over 3/8 from the bottom of the pan.
With the pan and pickup done, onto the dipstick. As you can see the handle end of the dipstick is far too long and ugly. So it will have to be shortened along with the pan end.

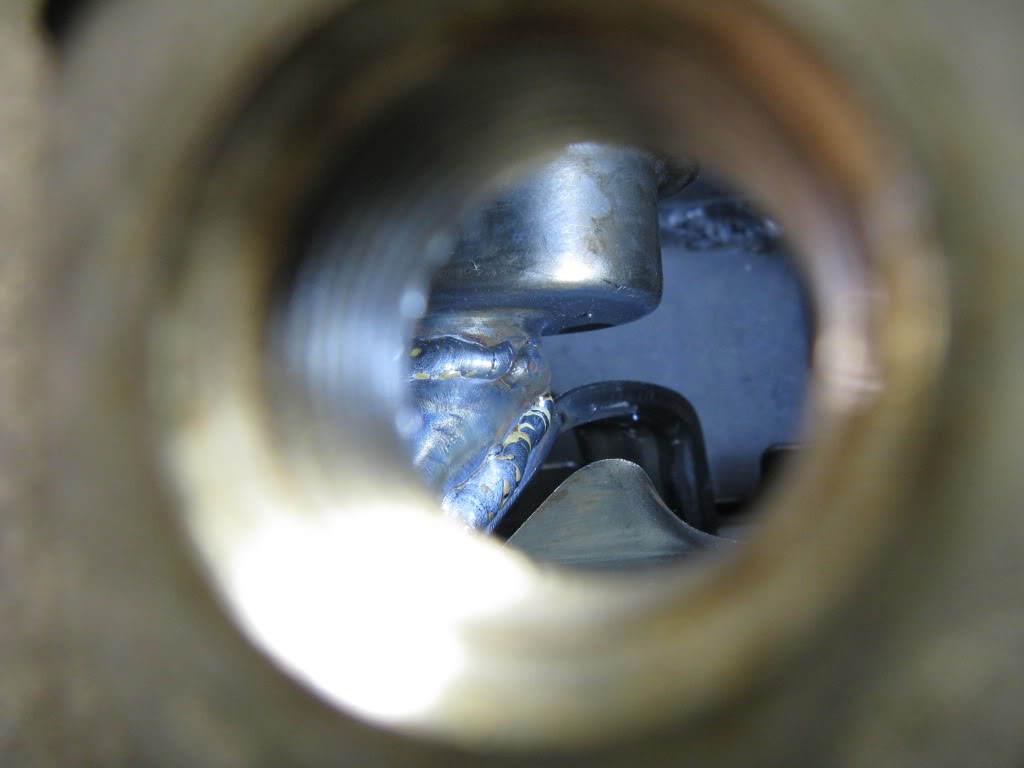
The welding pictures are from my practice dipstick welds. It is easy to get excited and forget to take pictures! With the tube ends cut and prepped I used a 5/16th bolt to align the halves for welding. This trick worked well, but I made the mistake of leaving the bolt in for the entire welding process and had to "unthread" the bolt out. That is why we practice.
The tube actually welded pretty well. I had to be careful not to p]penetrate to far into the tube.

Here is the shortened dipstick in the pan. I marked the LOW about 1qt above the pick up, and I will be marking the FULL at the height of the bottom of the windage tray. I expect that to be about a 1.5qt difference.


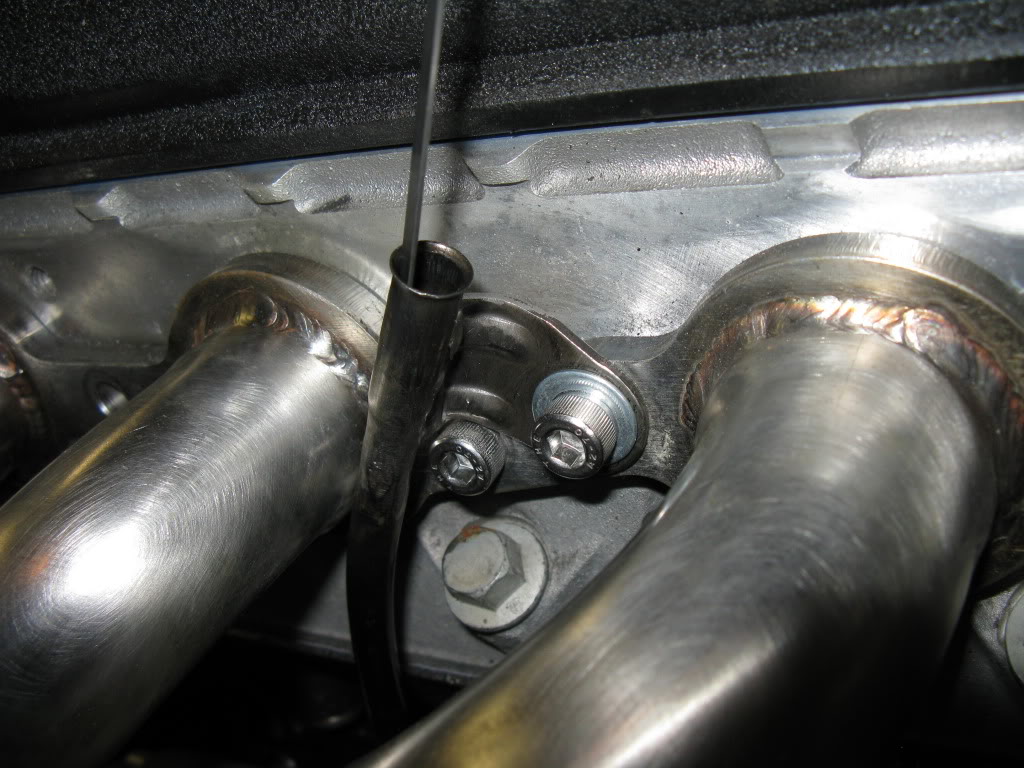
Here is the chopped dipstick from the outside view. I kept it nice and short. The dipstick tube is as far from the header as possible, about 1/2" from the #6 primary. I was able to cut down the original dipstick support bracket and weld it to the tube. I had to clearance it a little to clear the other header mounting bolt.

The fiance` is working tonight so I will have some time to finish the oil drain valve and maybe even get the engine and trans bolted together! Thanks for checking up on my progress!
OK, the oil pan is chopped down, time to make the pick up and dipstick match! Here is the stock pick up. In need of about 2.75" chop.
I forgot to take any during pictures, but here is the finished pickup. It took quite a bit of work. If I had it to do over I could save myself quite a bit of frustration! But in the end the results were satisfactory.
Here is a neat little trick. I taped a small 150 lumen tactical flashlight inside the pan and installed it on the engine. I was able to check pick up to pan clearance and dipstick height. I also used clay to ensure proper height. Pick up is a little over 3/8 from the bottom of the pan.
With the pan and pickup done, onto the dipstick. As you can see the handle end of the dipstick is far too long and ugly. So it will have to be shortened along with the pan end.
The welding pictures are from my practice dipstick welds. It is easy to get excited and forget to take pictures! With the tube ends cut and prepped I used a 5/16th bolt to align the halves for welding. This trick worked well, but I made the mistake of leaving the bolt in for the entire welding process and had to "unthread" the bolt out. That is why we practice.
The tube actually welded pretty well. I had to be careful not to p]penetrate to far into the tube.
Here is the shortened dipstick in the pan. I marked the LOW about 1qt above the pick up, and I will be marking the FULL at the height of the bottom of the windage tray. I expect that to be about a 1.5qt difference.
Here is the chopped dipstick from the outside view. I kept it nice and short. The dipstick tube is as far from the header as possible, about 1/2" from the #6 primary. I was able to cut down the original dipstick support bracket and weld it to the tube. I had to clearance it a little to clear the other header mounting bolt.
The fiance` is working tonight so I will have some time to finish the oil drain valve and maybe even get the engine and trans bolted together! Thanks for checking up on my progress!
Last edited by cruisin'73; 02-09-2013 at 10:11 AM.
 02-09-2013, 10:14 PM
#119
Thanks Bandit! Means a lot coming from you as your build is bookmarked as one of my build influences.
Thank you LSx! In the future I plan to perform a cam/pushrod/spring and head upgrade in the footsteps of a Carcraft 5.3 cam test. Aiming for around 350HP at the wheels. However instead of $2100 CNC ported heads I would go for self-ported 243s. I would sacrifice power but save my wallet!
http://www.carcraft.com/techarticles...e/viewall.html
However I have promised the fiance` I would upgrade to front disc brakes before I make the Nova any quicker. Future upgrades also include subframe connectors welded into the flood boards, posi rear end, possible rear end gear change and perhaps someday...a budget turbo! time will tell.
03-19-2013, 07:23 PM
#120
OK, update time. Taking pics has been tough because my old camera does not function well in the cold, and it EATS batteries. So I have been working with 2 sets of batteries in my pocket to keep them warm, which helps to get more than 20 pics out of a pair of AAs! First pic is the engine up on my work bench. I was tired of bending over working on the cold floor so I gingerly dropped the engine on my workbench and it didn't even creak! Biggest project while on the bench was the trans cooler lines.

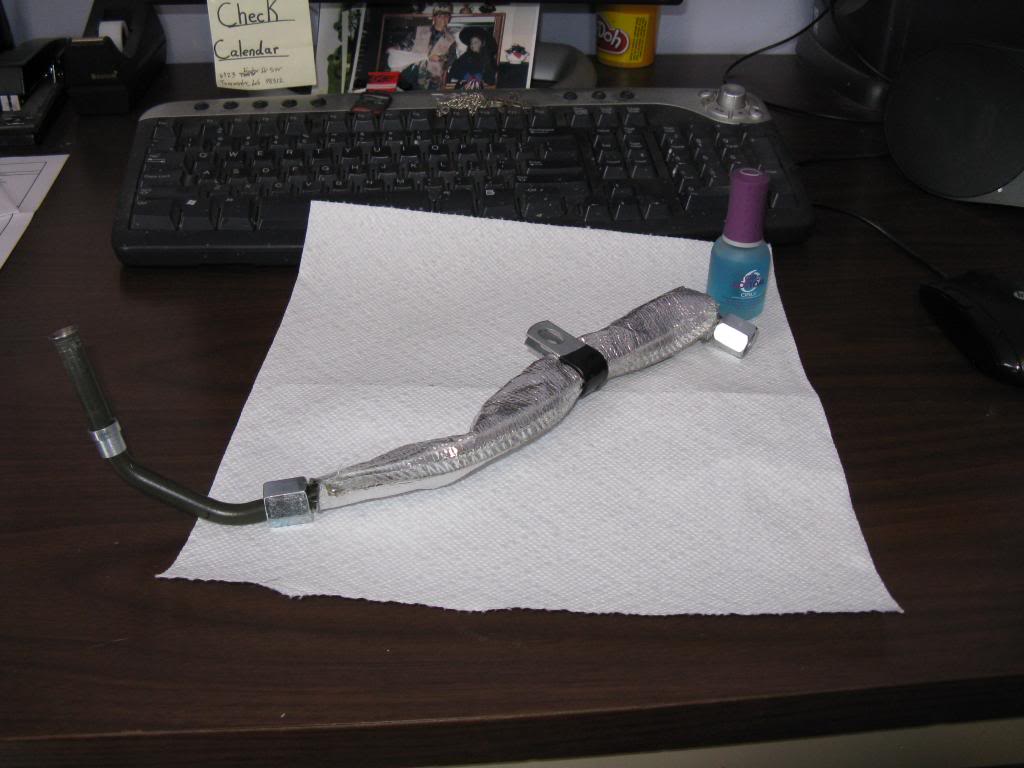
I made a bulkhead style fitting at the front of the engine to allow me to transition to soft lines to the core support.

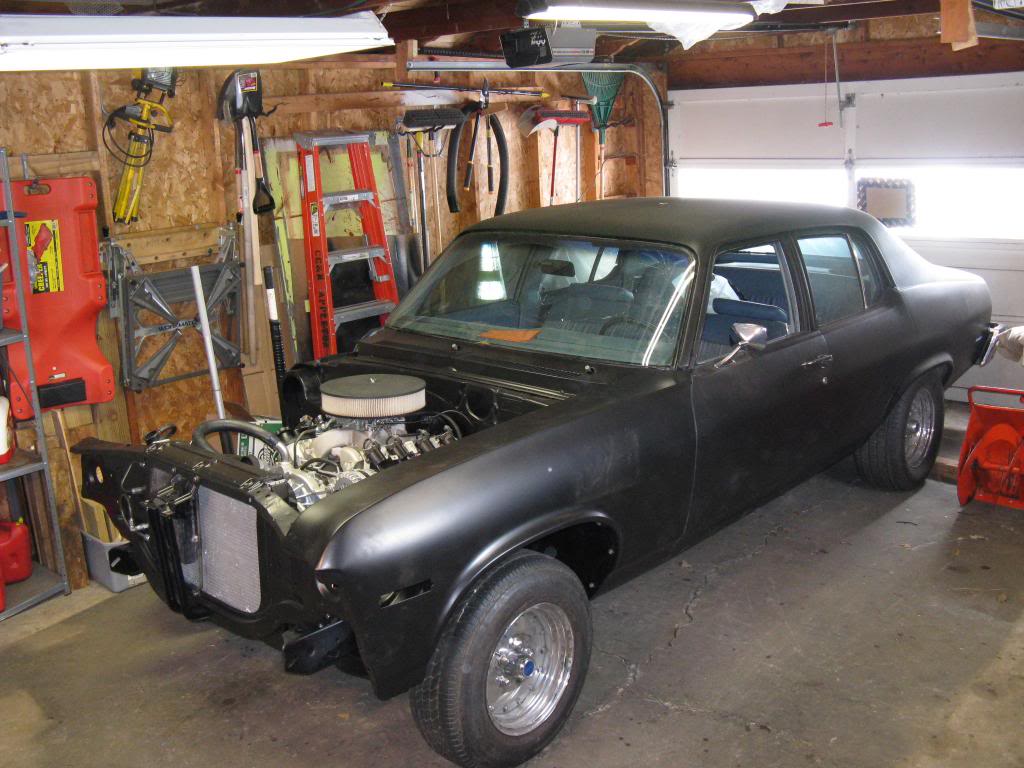
With the trans line finished it was time to drop the engine in with my buddy's help. Where I found 1 small issue, I had installed the engine mount brackets ON THE WRONG SIDES! So...flipped them over and of course they were right in the way of the new trans lines...more scrap for the recycling bin. Had to remake them, awesome! regardless, the engine looks pretty great in its new home!

Also finished mounting the trans cooler and core support hardlines. I even made a mount bracket out of some leftover 3/8" fuel line and 1/8" plate. I think I will be painting the cooler and bracket.
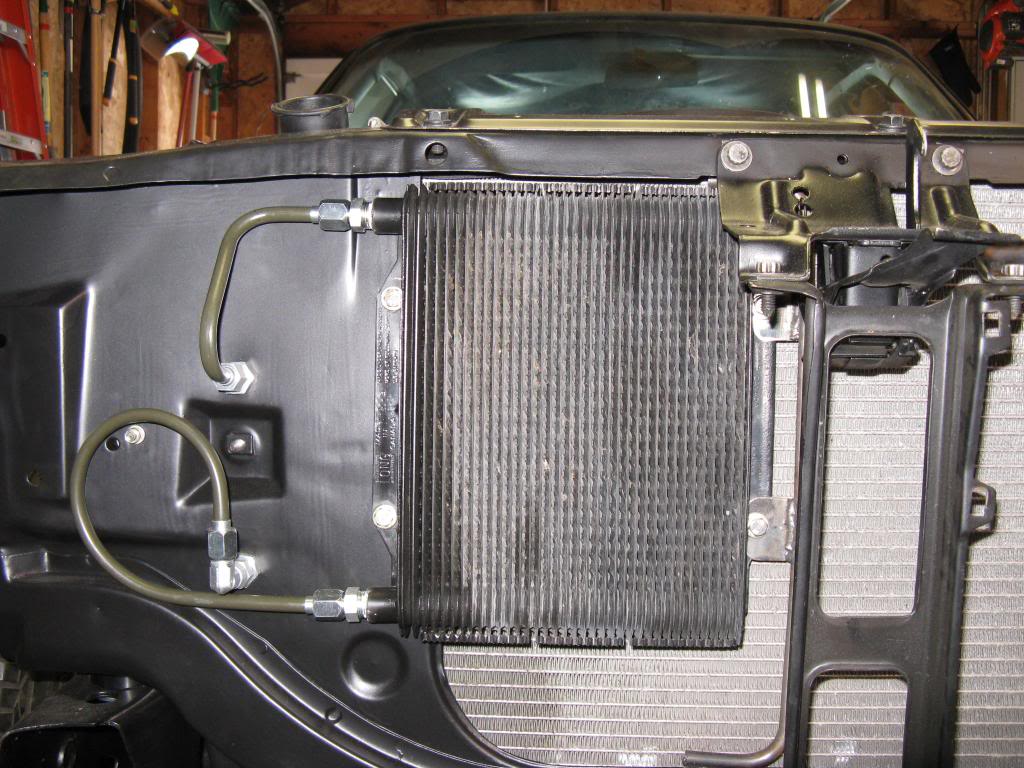
Now for a lot of the other small projects nearing completion. The design of the upper rad hose is almost finished. I just need to get a hose union to connect the engine and rad hoses. Lower rad hose fits like a glove!


Also found a local guy tearing his 69' apart to turn it into a drag machine! Scored a manual steering gear and complete steering linkage. Though I did run into a typical steering gear issue, header interference...I had to create a small clearance dent. Not too happy about it but you gotta do what you gotta do.


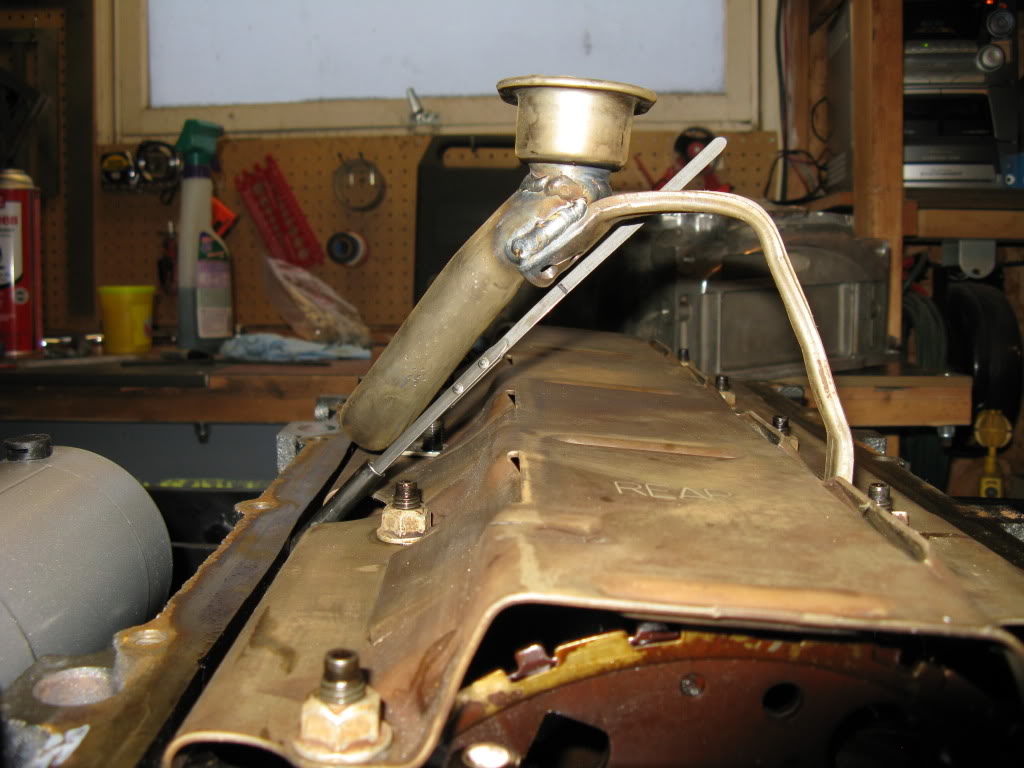
Here is what I came up for to drain the oil. I drilled and tapped the pan, installed an NPT 90 and quarter turn valve. As a safety against accidental drainage I welded 1/2 washer to the plug for the level sensor. Right now I have a plastic ziptie, but after paint I will use either safety wire or a SS ziptie.

Next little project, heat barrier for the fuel line on the front of the engine. I hope this will help to limit overheating the fuel. I used a nice little trick I learned from my grandma, a little clear nail polish will stop the cut fiberglass threads from fraying. Thanks Grandma!

Next: PCV breather. I ran a PCV valve from the driver side valve cover to the back of the carb. For the filter I removed the 90 degree fitting and epoxied in a straight section of 3/8" fuel line. Onto which I mounted a small SS breather filter. Attention to detail really pays off on this little stuff!

Carb linkage, trans kickdown and secondary throttle spring all finished.


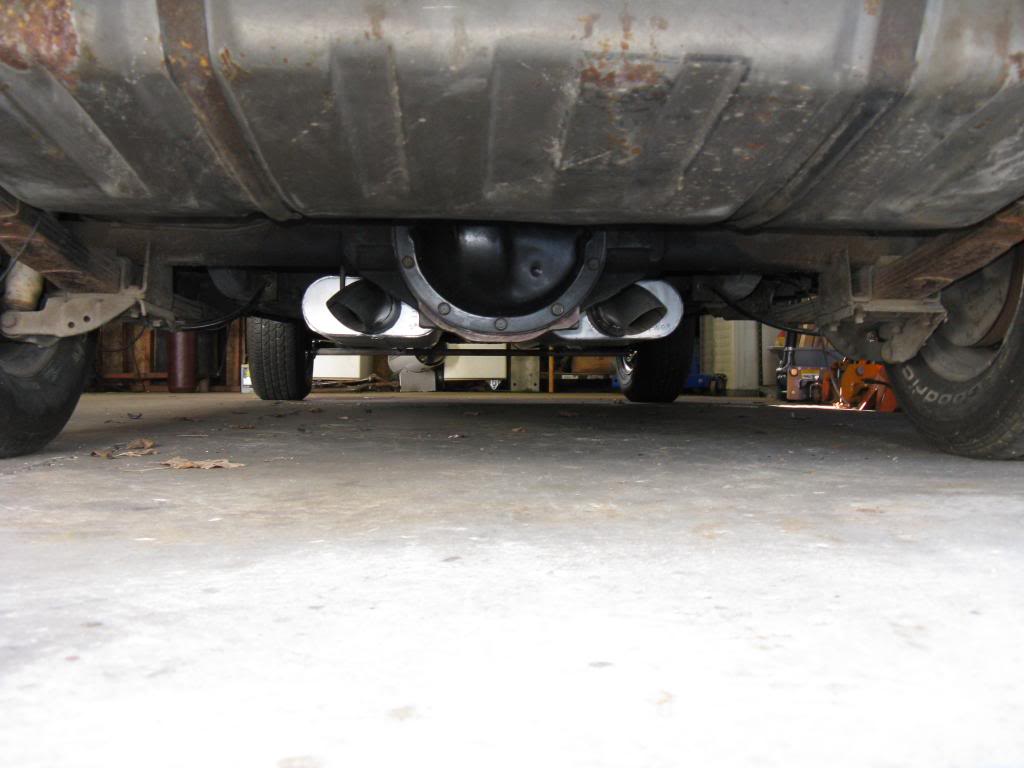
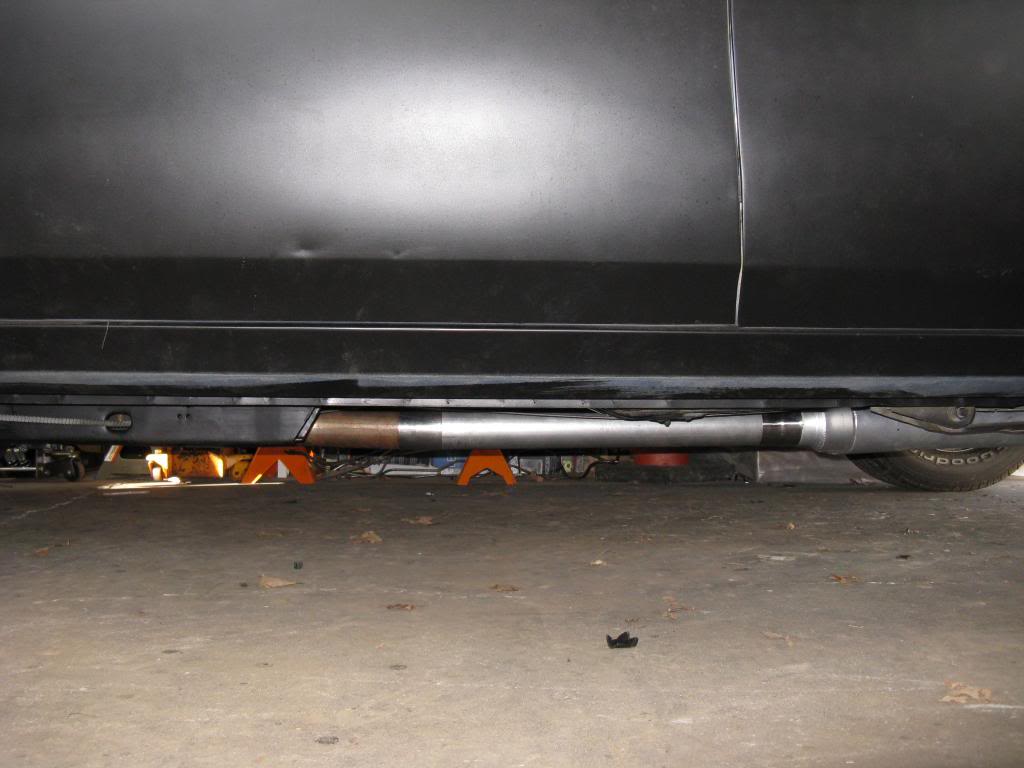
I also finished a few loose ends on the exhaust system. Headers line up perfect, and the exhaust tucks in very tight to the floorboards. I also tack welded turndowns to the muffler exhausts to limit the "bass box" effect that caused some heavy droning in the passenger compartment.


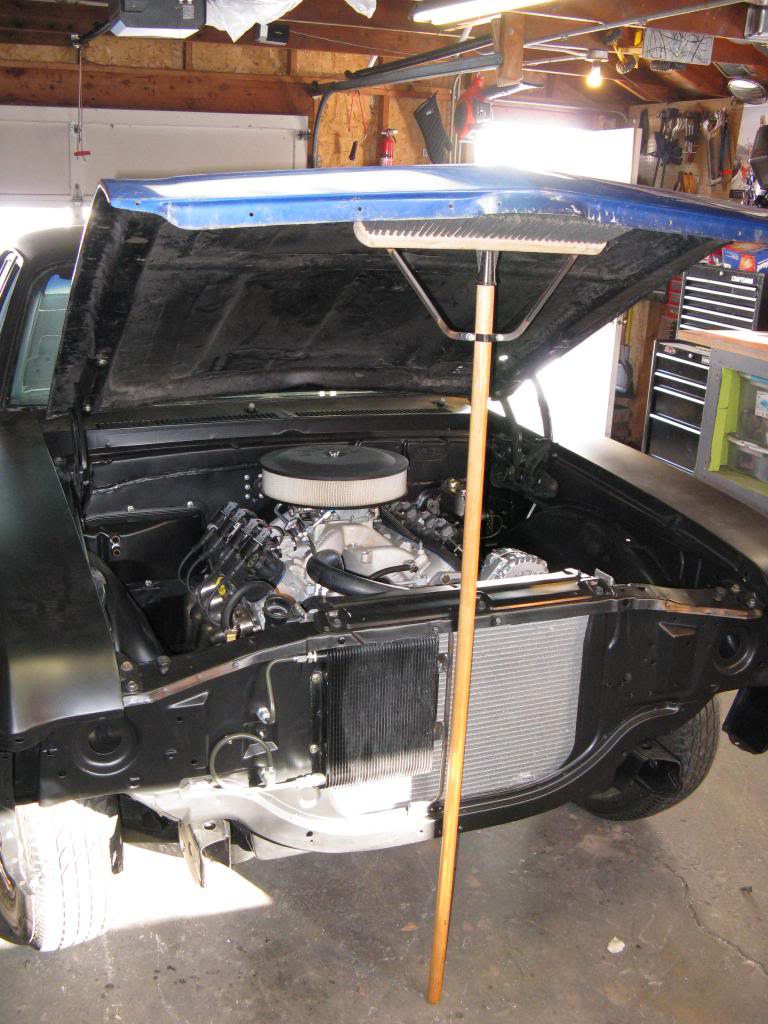
Finally, some very exciting news. The same guy that I got the steering parts from was also selling a fiberglass hood, it needs a little TLC, but I got it for a song! It provides tons of clearance and looks killer!! It is a bolt on, and the fit is... pretty good. Good enough for the Nova at this point. Oh, I also got the core support and both LH and RH fenders on


So thats it for now. A buddy is coming over to help tomorrow to pull the engine so I can properly align the pan and covers. AND I really want to paint the pan. So out the engine comes! It will also give me the chance to clean the engine bay, bleed the brakes...etc etc. So more updates to come soon! Thanks for looking.
I made a bulkhead style fitting at the front of the engine to allow me to transition to soft lines to the core support.
With the trans line finished it was time to drop the engine in with my buddy's help. Where I found 1 small issue, I had installed the engine mount brackets ON THE WRONG SIDES! So...flipped them over and of course they were right in the way of the new trans lines...more scrap for the recycling bin. Had to remake them, awesome! regardless, the engine looks pretty great in its new home!
Also finished mounting the trans cooler and core support hardlines. I even made a mount bracket out of some leftover 3/8" fuel line and 1/8" plate. I think I will be painting the cooler and bracket.
Now for a lot of the other small projects nearing completion. The design of the upper rad hose is almost finished. I just need to get a hose union to connect the engine and rad hoses. Lower rad hose fits like a glove!
Also found a local guy tearing his 69' apart to turn it into a drag machine! Scored a manual steering gear and complete steering linkage. Though I did run into a typical steering gear issue, header interference...I had to create a small clearance dent. Not too happy about it but you gotta do what you gotta do.
Here is what I came up for to drain the oil. I drilled and tapped the pan, installed an NPT 90 and quarter turn valve. As a safety against accidental drainage I welded 1/2 washer to the plug for the level sensor. Right now I have a plastic ziptie, but after paint I will use either safety wire or a SS ziptie.
Next little project, heat barrier for the fuel line on the front of the engine. I hope this will help to limit overheating the fuel. I used a nice little trick I learned from my grandma, a little clear nail polish will stop the cut fiberglass threads from fraying. Thanks Grandma!
Next: PCV breather. I ran a PCV valve from the driver side valve cover to the back of the carb. For the filter I removed the 90 degree fitting and epoxied in a straight section of 3/8" fuel line. Onto which I mounted a small SS breather filter. Attention to detail really pays off on this little stuff!
Carb linkage, trans kickdown and secondary throttle spring all finished.
I also finished a few loose ends on the exhaust system. Headers line up perfect, and the exhaust tucks in very tight to the floorboards. I also tack welded turndowns to the muffler exhausts to limit the "bass box" effect that caused some heavy droning in the passenger compartment.
Finally, some very exciting news. The same guy that I got the steering parts from was also selling a fiberglass hood, it needs a little TLC, but I got it for a song! It provides tons of clearance and looks killer!! It is a bolt on, and the fit is... pretty good. Good enough for the Nova at this point. Oh, I also got the core support and both LH and RH fenders on
So thats it for now. A buddy is coming over to help tomorrow to pull the engine so I can properly align the pan and covers. AND I really want to paint the pan. So out the engine comes! It will also give me the chance to clean the engine bay, bleed the brakes...etc etc. So more updates to come soon! Thanks for looking.
Last edited by cruisin'73; 03-19-2013 at 08:18 PM.