

1970 GTO LS1/4L60e Swap Check List - Do I Have Everything Covered??
 12-20-2011, 05:53 AM
#21
Staging Lane
Join Date: Jun 2010
Location: Weaverville, N.C.
Posts: 50
Likes: 0
Received 0 Likes
on
0 Posts

nice car man, and i am all for making things newer and better but i personnaly wouldnt do that to a true Judge, if it was just a straight up GTO then yea, but not a real Judge, just my .02 good luck with it!
P.S. you wanna sell it? lol.
P.S. you wanna sell it? lol.
 12-20-2011, 02:56 PM
#22
TECH Apprentice
iTrader: (21)
Join Date: Dec 2005
Location: Mackinaw, IL
Posts: 314
Likes: 0
Received 0 Likes
on
0 Posts
Cool project....is that Kenny Rogers driving it in the first pic?? 
Who cares if it's a real Judge? You must not have seen the part about the original number matching engine being junk? The numbers matching crowd kills me...
I think a sweet long-term goal would be a 455" LSx under the hood...painted blue
I think a sweet long-term goal would be a 455" LSx under the hood...painted blue
12-20-2011, 03:13 PM
#23
TECH Apprentice
Thread Starter
iTrader: (10)
Join Date: Dec 2005
Location: Peoria IL
Posts: 340
Likes: 0
Received 0 Likes
on
0 Posts
Thanks, I'm really looking forward to having it back on the road. As far as upgrading to an LSx in an original Judge... I think it makes it that much better. I'm just making a car meant to go fast, faster. And the true value of the car to me, my dad, and my brother is being able to use the car and have fun with it the way we want... not what a car just like it sells for at Barrett Jackson.
12-20-2011, 06:27 PM
#24
Staging Lane
Join Date: Jun 2010
Location: Weaverville, N.C.
Posts: 50
Likes: 0
Received 0 Likes
on
0 Posts
Yea man, I understand, I wasn't bashing you I just got a sweet spot for judges I think they're bad ***, man I wish you a succesful project and if I ever bought a barret jackson car the enthusiasts would stone me cause I would drive the wheels off of it, I look forward to the build and will follow the thread to the end, brings back memories of the 72 gto I had in high school, good luck bro.
12-20-2011, 06:33 PM
#25
LS1 Judges are played out  JK... Mines a clone but that's ok
I just skimmed your original post but one thing I did see is where you said you have to notch the cross member... I didn't, I did however use the tall solid mounts on the motor and the pads from a chevy A-body
check out my build thread and I'm happy to help in any way I can (I have a spread sheet with 90% of what I used with part numbers)
I'm looking forward to seeing this when you are done.
edit:
Default 1970 GTO LS1/4L60e Swap Check List - Do I Have Everything Covered??
In the next month my brother and I will be tearing my dad's 1970 GTO Judge apart to swap the non #'s matching 400/TH400 for an LS1/4L60e out of a '99 Z28. I want to have as much of the swap planned out and ready before turning the first wrench, so any help, suggestions, or recommendations from all the guys that have been there & done that with the A-body swaps would be a huge help.
Background:
I talked my parents into buying the Judge in 1998 when I was 13 yrs old as a weekend toy... my dad has always been a gear head, so it wasn't a hard sell. Long story short, we enjoyed it for a lot of years, but hated to poor street manners of the very healthy 400, no choke, and 4.11 gears behind a TH400. The bottom end let go 4 years ago and it has been sitting ever since.
Goals:
The car is going to be a "Muscle Touring" build... we want to keep the tough aspect of the stripped down muscle car, but with street manners that would make it driveable every day.
- Be able to bump the key once in the morning and it settles to a nice lopey idle.
- Drive down the interstate at 70 mph turning less than 3100 rpm
- Drive nice in town but have power to match the look when its needed.
Parts already sourced:
- Full Eddelbrock swap kit before they were discontinued: Engine mount adapter plates, coated LT headers, full X-pipe exhaust.
- Rick's stainless steel fuel injection tank
- Affco aluminum radiator
- LS1/4L60e from '99 Z28. I bought the whole car, so I'll be using the F-body oil pan, accessories, PCM, harness, and cable TB.
- Comp 222/224 .566/.568 112 cam, 918 springs, and Trick Flow PR's
- I'll modify the stock harness with the help of a couple friends with LSx swap experience and the info I've gathered off Tech.
- '99-04 Vette FPR/Filter mounted in front of the tank with Russells twist-lok line and fittings for the rest.
Parts I NEED to source:
*This is where I need the help and recommendations. I have the major variables locked it (eng, trans, mounts, oil pan, etc.) I konw I'll have to notch the K-member to fit the f-body pan, which is fine with me in order to keep the ground clearance
- Will be buying a Yank SS3600 to match the cam, but still have good street manners GOOD CHOICE
- Throttle cable: is the f-body cable ok? I know a lot of guys use the cable out of an Express van. I WENT WITH A LOKAR CABLE FOR $58
- Jeep Steering Box: 92-98 Jeep Grand Cherokee steering box and will bolt right up with a metric rag joint from mid 80s full size truck I KEPT THE GTO STEERING BOX
- Gauges: I would like to use the OEM rally pak gauges... is there any other way for the speed to be used other than with a convertor box? YOU CAN GET A TAIL HOUSING WITH A CABLE DRIVEN SPEED SENSOR BUT THEN YOU HAVE TO GET SOMETHING TO CONVERT THAT TO ELECTRONIC TO TELL THE COMPUTER WHAT YOU ARE RUNNING DOWN THE ROAD.. I WENT WITH THE CABLE X BOX
- Shift linkage: I haven't read much on this part... I'll be going to a factory column 3 spd shifter. NOT SURE ON THIS ONE... MINE IS AUTO FLOOR SHIFT AND I FOUND A CONVERSION KIT THAT LOOKS 100% STOCK AND USES FACTORY SHIFTER BUT ADDS A DIFFERENT "GATE" IN THE SHIFTER SO IT WORKS AS A 4 SPEED INSTEAD OF 3 SPEED
- Engine mounts: Based on recommendations below, I'll use the Energy Suspension tall/narrow (non 307) mounts and matching stock frame stands. CORRECT, BUT I'LL TRY TO FIND THE EXACT SOLID MOUNT I USED
- Possibly oil port cover (12551595) for the oil pressure sending unit. NOT SURE WHY YOU WOULD REMOVE IT ON YOUR SET UP. I USED THE STOCK LOCATION TO USE FOR MY TURBO FEED LINE AND THEN I PUT A SENDING UNIT ON THE DRIVERS SIDE BY THE FILTER TO RUN STOCK GAUGE
- Driveshaft: Probably just have a local shop shorten the stock DS until a beefier unit is needed. IF YOU HAVE IT IN YOUR BUDGET... GET A NEW BEEFIER ONE... DON'T ASK ME HOW I KNOW LOL YOU WILL SEE IT IN MY BUILD THREAD
- Anything else I missed? I know things like radiator hoses and intake ducting will come up, but I'm open to any guidance I can get. LOTS MORE I'M SURE BUT LIKE I SAID, JUST ASK ME I CAN TELL YOU HOW I DID THINGS TO HELP YOU OUT
JK... Mines a clone but that's ok I just skimmed your original post but one thing I did see is where you said you have to notch the cross member... I didn't, I did however use the tall solid mounts on the motor and the pads from a chevy A-body
check out my build thread and I'm happy to help in any way I can (I have a spread sheet with 90% of what I used with part numbers)
I'm looking forward to seeing this when you are done.
edit:
Default 1970 GTO LS1/4L60e Swap Check List - Do I Have Everything Covered??
In the next month my brother and I will be tearing my dad's 1970 GTO Judge apart to swap the non #'s matching 400/TH400 for an LS1/4L60e out of a '99 Z28. I want to have as much of the swap planned out and ready before turning the first wrench, so any help, suggestions, or recommendations from all the guys that have been there & done that with the A-body swaps would be a huge help.
Background:
I talked my parents into buying the Judge in 1998 when I was 13 yrs old as a weekend toy... my dad has always been a gear head, so it wasn't a hard sell. Long story short, we enjoyed it for a lot of years, but hated to poor street manners of the very healthy 400, no choke, and 4.11 gears behind a TH400. The bottom end let go 4 years ago and it has been sitting ever since.
Goals:
The car is going to be a "Muscle Touring" build... we want to keep the tough aspect of the stripped down muscle car, but with street manners that would make it driveable every day.
- Be able to bump the key once in the morning and it settles to a nice lopey idle.
- Drive down the interstate at 70 mph turning less than 3100 rpm
- Drive nice in town but have power to match the look when its needed.
Parts already sourced:
- Full Eddelbrock swap kit before they were discontinued: Engine mount adapter plates, coated LT headers, full X-pipe exhaust.
- Rick's stainless steel fuel injection tank
- Affco aluminum radiator
- LS1/4L60e from '99 Z28. I bought the whole car, so I'll be using the F-body oil pan, accessories, PCM, harness, and cable TB.
- Comp 222/224 .566/.568 112 cam, 918 springs, and Trick Flow PR's
- I'll modify the stock harness with the help of a couple friends with LSx swap experience and the info I've gathered off Tech.
- '99-04 Vette FPR/Filter mounted in front of the tank with Russells twist-lok line and fittings for the rest.
Parts I NEED to source:
*This is where I need the help and recommendations. I have the major variables locked it (eng, trans, mounts, oil pan, etc.) I konw I'll have to notch the K-member to fit the f-body pan, which is fine with me in order to keep the ground clearance
- Will be buying a Yank SS3600 to match the cam, but still have good street manners GOOD CHOICE
- Throttle cable: is the f-body cable ok? I know a lot of guys use the cable out of an Express van. I WENT WITH A LOKAR CABLE FOR $58
- Jeep Steering Box: 92-98 Jeep Grand Cherokee steering box and will bolt right up with a metric rag joint from mid 80s full size truck I KEPT THE GTO STEERING BOX
- Gauges: I would like to use the OEM rally pak gauges... is there any other way for the speed to be used other than with a convertor box? YOU CAN GET A TAIL HOUSING WITH A CABLE DRIVEN SPEED SENSOR BUT THEN YOU HAVE TO GET SOMETHING TO CONVERT THAT TO ELECTRONIC TO TELL THE COMPUTER WHAT YOU ARE RUNNING DOWN THE ROAD.. I WENT WITH THE CABLE X BOX
- Shift linkage: I haven't read much on this part... I'll be going to a factory column 3 spd shifter. NOT SURE ON THIS ONE... MINE IS AUTO FLOOR SHIFT AND I FOUND A CONVERSION KIT THAT LOOKS 100% STOCK AND USES FACTORY SHIFTER BUT ADDS A DIFFERENT "GATE" IN THE SHIFTER SO IT WORKS AS A 4 SPEED INSTEAD OF 3 SPEED
- Engine mounts: Based on recommendations below, I'll use the Energy Suspension tall/narrow (non 307) mounts and matching stock frame stands. CORRECT, BUT I'LL TRY TO FIND THE EXACT SOLID MOUNT I USED
- Possibly oil port cover (12551595) for the oil pressure sending unit. NOT SURE WHY YOU WOULD REMOVE IT ON YOUR SET UP. I USED THE STOCK LOCATION TO USE FOR MY TURBO FEED LINE AND THEN I PUT A SENDING UNIT ON THE DRIVERS SIDE BY THE FILTER TO RUN STOCK GAUGE
- Driveshaft: Probably just have a local shop shorten the stock DS until a beefier unit is needed. IF YOU HAVE IT IN YOUR BUDGET... GET A NEW BEEFIER ONE... DON'T ASK ME HOW I KNOW LOL YOU WILL SEE IT IN MY BUILD THREAD
- Anything else I missed? I know things like radiator hoses and intake ducting will come up, but I'm open to any guidance I can get. LOTS MORE I'M SURE BUT LIKE I SAID, JUST ASK ME I CAN TELL YOU HOW I DID THINGS TO HELP YOU OUT
Last edited by 2165 Turbo Rail; 12-20-2011 at 06:48 PM.
12-21-2011, 04:43 AM
#26
Registered User

Join Date: Dec 2011
Posts: 3
Likes: 0
Received 0 Likes
on
0 Posts
I have a '70 Lemans T37 (GTO clone) with the exact same conversion you are trying to achieve except my LS1 came from an '04 GTO. It was a fresh rebuild now with 3k miles. I did not do this conversion but will assist you any way I can. The attached pics are a little outdated as I recently installed Vintage Air so compressor mounts were fabricated and the compressor installed onto the engine. I'll send updated pics in a day or two. In addition I changed out the interior to the front and rear seats from an '05 GTO and added a custom built center console. Worked out beautifully and a possible future consideration for you? Wilwood disc brakes front/rear were also completed and are a huge welcome addition.
12-21-2011, 06:34 AM
#27
TECH Apprentice
Thread Starter
iTrader: (10)
Join Date: Dec 2005
Location: Peoria IL
Posts: 340
Likes: 0
Received 0 Likes
on
0 Posts
Yea man, I understand, I wasn't bashing you I just got a sweet spot for judges I think they're bad ***, man I wish you a succesful project and if I ever bought a barret jackson car the enthusiasts would stone me cause I would drive the wheels off of it, I look forward to the build and will follow the thread to the end, brings back memories of the 72 gto I had in high school, good luck bro.
I have a '70 Lemans T37 (GTO clone) with the exact same conversion you are trying to achieve except my LS1 came from an '04 GTO. It was a fresh rebuild now with 3k miles. I did not do this conversion but will assist you any way I can. The attached pics are a little outdated as I recently installed Vintage Air so compressor mounts were fabricated and the compressor installed onto the engine. I'll send updated pics in a day or two. In addition I changed out the interior to the front and rear seats from an '05 GTO and added a custom built center console. Worked out beautifully and a possible future consideration for you? Wilwood disc brakes front/rear were also completed and are a huge welcome addition.
LS1 Judges are played out JK... Mines a clone but that's ok
I just skimmed your original post but one thing I did see is where you said you have to notch the cross member... I didn't, I did however use the tall solid mounts on the motor and the pads from a chevy A-body
check out my build thread and I'm happy to help in any way I can (I have a spread sheet with 90% of what I used with part numbers)
JK... Mines a clone but that's ok I just skimmed your original post but one thing I did see is where you said you have to notch the cross member... I didn't, I did however use the tall solid mounts on the motor and the pads from a chevy A-body
check out my build thread and I'm happy to help in any way I can (I have a spread sheet with 90% of what I used with part numbers)
- Gauges: I would like to use the OEM rally pak gauges... is there any other way for the speed to be used other than with a convertor box? YOU CAN GET A TAIL HOUSING WITH A CABLE DRIVEN SPEED SENSOR BUT THEN YOU HAVE TO GET SOMETHING TO CONVERT THAT TO ELECTRONIC TO TELL THE COMPUTER WHAT YOU ARE RUNNING DOWN THE ROAD.. I WENT WITH THE CABLE X BOX
- Shift linkage: I haven't read much on this part... I'll be going to a factory column 3 spd shifter. NOT SURE ON THIS ONE... MINE IS AUTO FLOOR SHIFT AND I FOUND A CONVERSION KIT THAT LOOKS 100% STOCK AND USES FACTORY SHIFTER BUT ADDS A DIFFERENT "GATE" IN THE SHIFTER SO IT WORKS AS A 4 SPEED INSTEAD OF 3 SPEED
Last edited by krwyellowZ28; 12-21-2011 at 06:42 AM.
12-21-2011, 10:21 AM
#28
*no PM's here???? try again*
the cable X box isn't funtioning right now because I hooked it up to the computers out signal (because it comes out of the computer at something like 4k pulse per mile PPM so it is easier to calibrate since youd on't have to do any math.) to the factory gauge pod. come to find out that signal isn't strong enough so I have to go back and tap into the VSS signal and then recalibrate the box after figuring out which switches to use
the ABBOTT company is VERY helpful so I highly recommend getting the cable x over any other solution you might find if you want to keep the stock cluster.
yes I have surely had my fair share of mishaps along the way haha.. the rear end and tranny broke at the same time and it was due to the rear end breaking and broke the sprage in the tranny... the majority of the frustration with that cluster F* was the rebuilding of the tranny. I should have just taken it to a shop to start with but I was pretty much out of money and was trying to have my buddy do it to save me some cash.... didn't work.. but thats ok, we tried.
throttle cable was the 36" lokar http://www.summitracing.com/parts/LOK-TC-1000LS1/
if you do go with a floor shifter here is the link to the conversion kit to make it look and work like it was an original OD car. http://www.shiftworks.com/gto-68-75.htm
 12-22-2011, 02:41 PM
#32
TECH Apprentice
Thread Starter
iTrader: (10)
Join Date: Dec 2005
Location: Peoria IL
Posts: 340
Likes: 0
Received 0 Likes
on
0 Posts
I like that a lot. We're going to restore my dad's first car - 1964 Malibu 2 dr hard top - as a full pro-touring car some day with a similar interior.
04-20-2012, 03:35 PM
#33
Registered User

Join Date: Apr 2012
Posts: 1
Likes: 0
Received 0 Likes
on
0 Posts
Any ideas on swapping a ls1 for a 400 pontiac?...i found a cheap block i want to disect and rebuild to raw power expectations to fit in my dads 2000 ls1 trans am...it makes 340 hp now and we need to cheaply make 500 on another motor so it can be dropped in. Any ideas would be greatly appreciated!
THIS IS A 1967 PONTIAC GTO 400 SHORT BLOCK, IT IS .030 AND CRANK IS 10/10 THE CASTING IS 86133 THE CODE IS WW, THE DATE IS B-22-7.....
THIS IS A 1967 PONTIAC GTO 400 SHORT BLOCK, IT IS .030 AND CRANK IS 10/10 THE CASTING IS 86133 THE CODE IS WW, THE DATE IS B-22-7.....
12-03-2012, 01:05 PM
#34
TECH Apprentice
Thread Starter
iTrader: (10)
Join Date: Dec 2005
Location: Peoria IL
Posts: 340
Likes: 0
Received 0 Likes
on
0 Posts
Well, after a year of not touching this project, I am finally able to start turning wrenches and throwing sparks... but so far I've only turned wrenches.
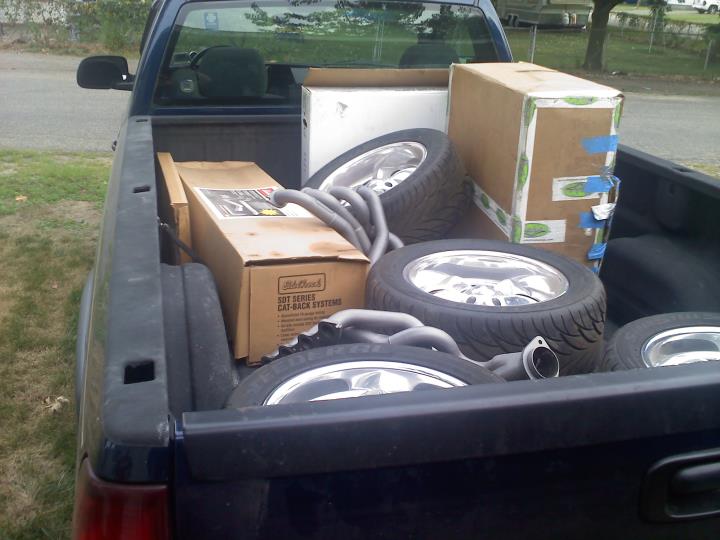
I picked up a truck bed worth of parts a while back from a friend that never completed his A-body LS swap.
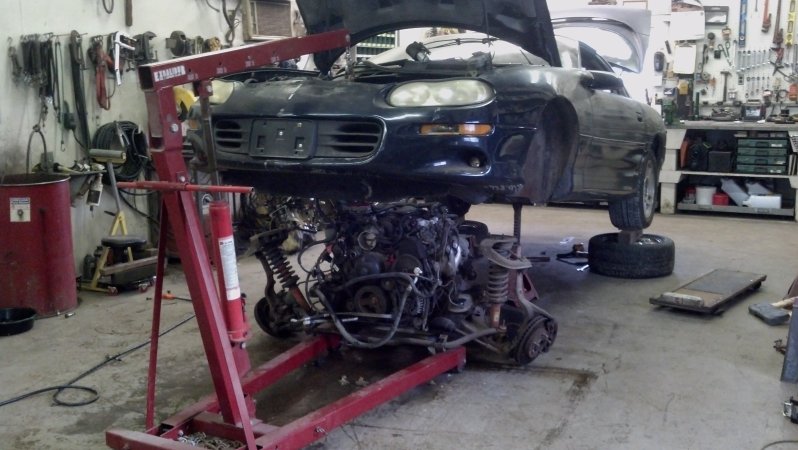
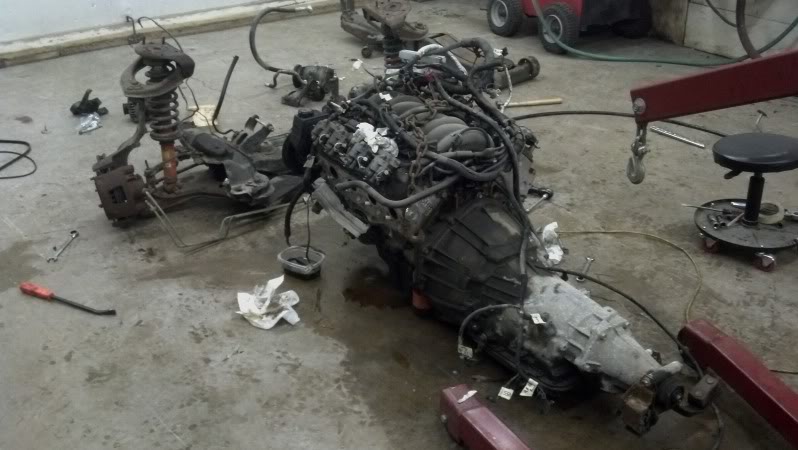
I got the 1999 Z28 donor car in the shop and did the standard engine/trans/K-member removal out the bottom of the car.
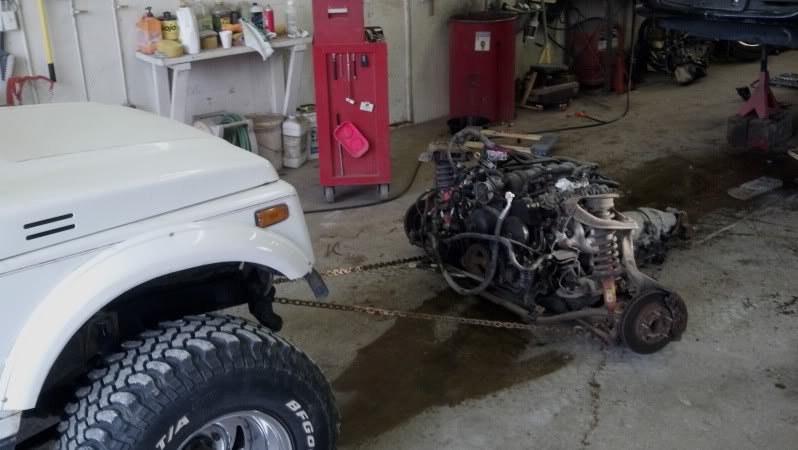
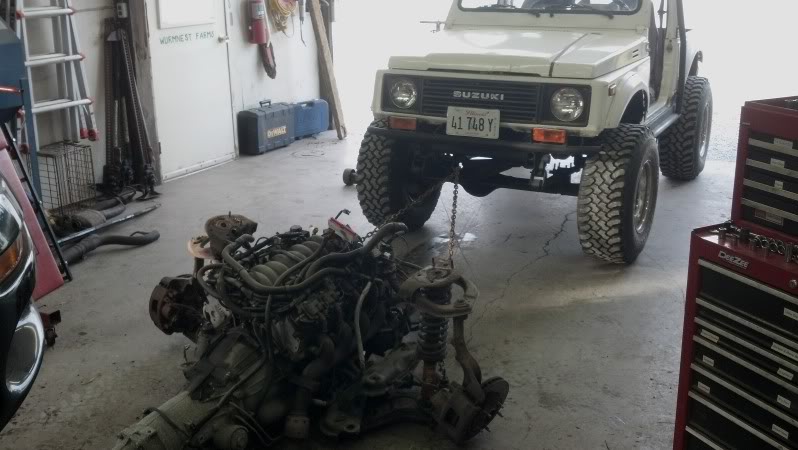
Used the '88 Samurai to "reposition" the drivetrain.
Separated the parts I want from the parts I don't (for now).
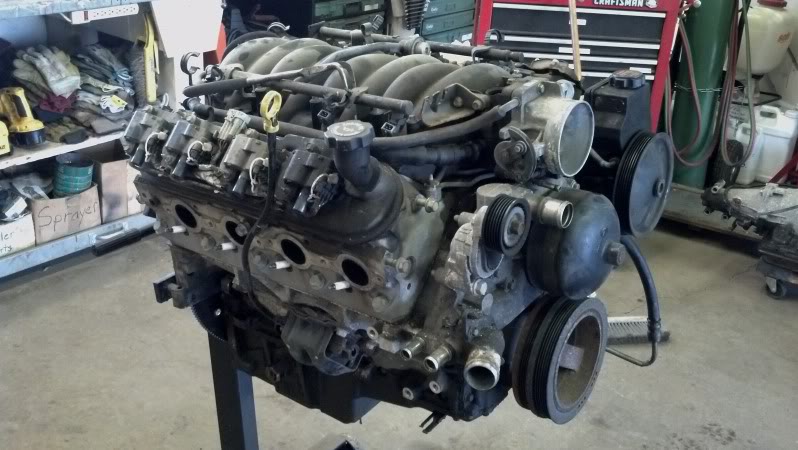
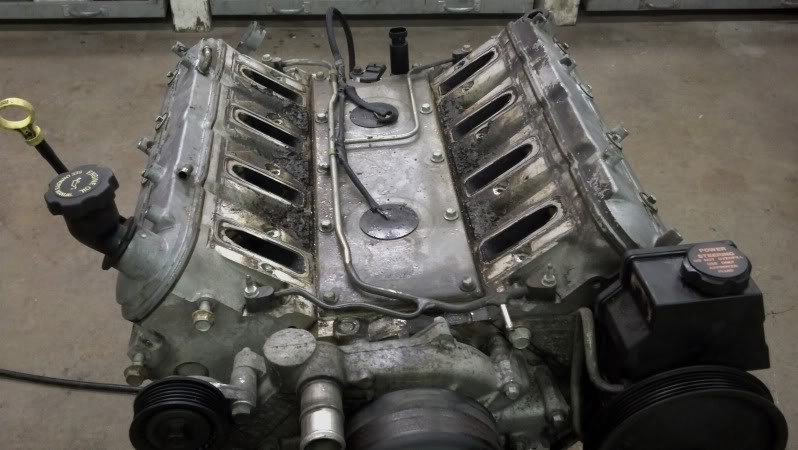
New heart for The Judge, ready for a good cleaning and some goodies
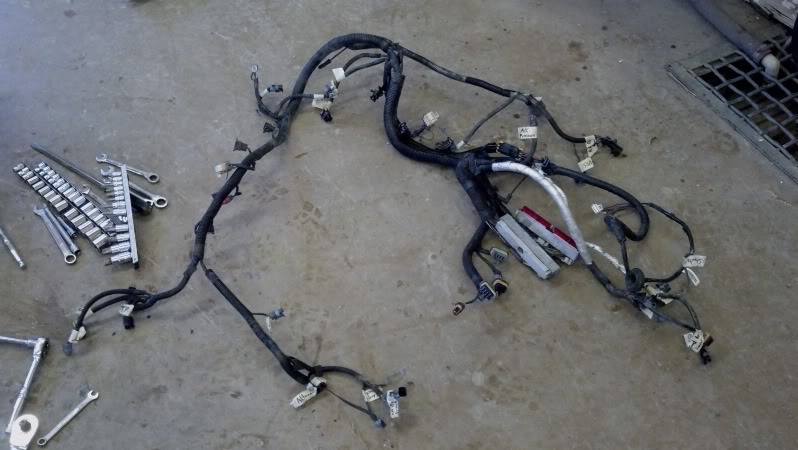
Seems like everyone includes a pic of the intimidating wiring harness that will be reworked, so why should I be any different?
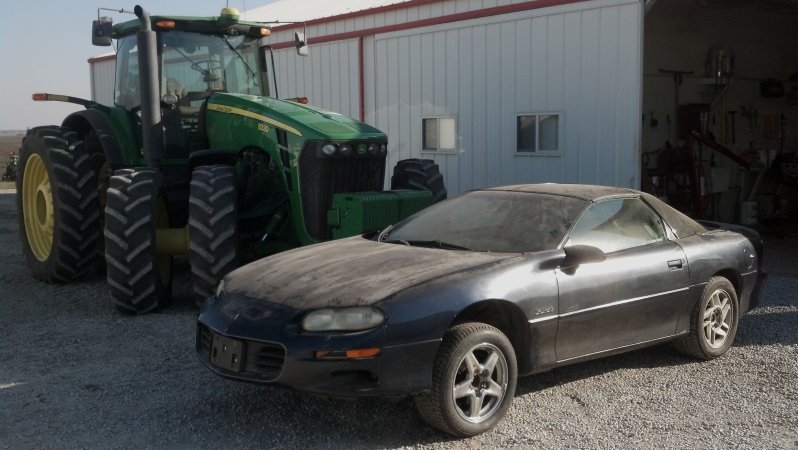
Here the donor car is ready to be tucked back in the barn until I can pull the brakes and other necessary parts:
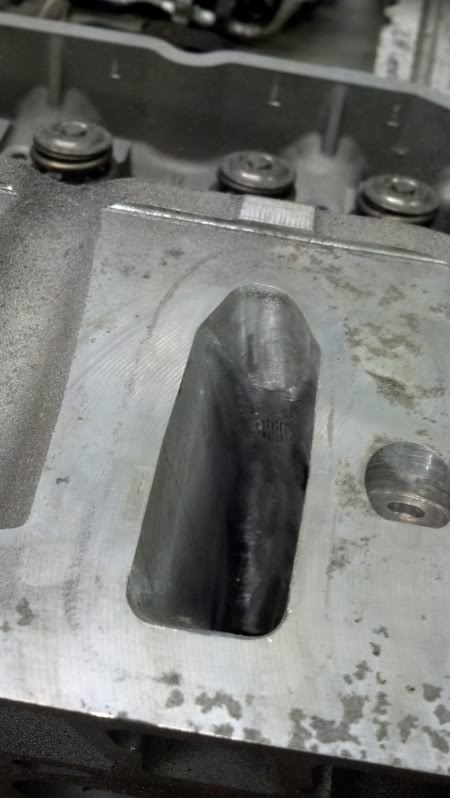
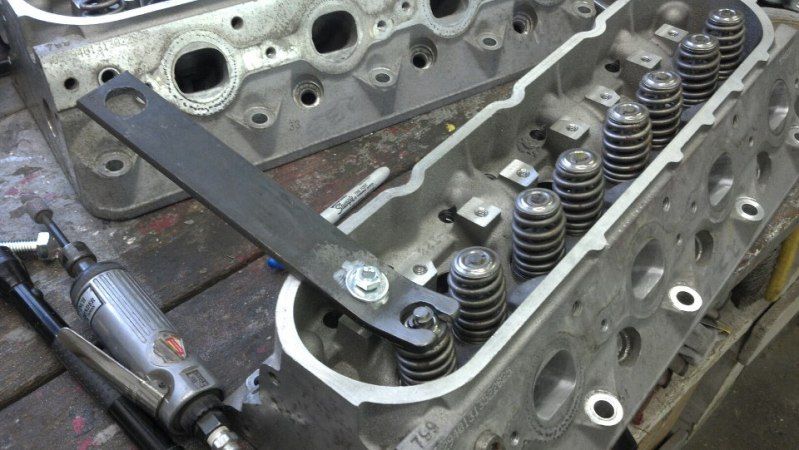
I picked up as set of low mile 799 heads for $350 shipped a while back. I didn't feel like spending the $120 for a professional valve spring compressor or wait 5 days for it to get to me, so some steel I had on hand and 20 min later I was in business!

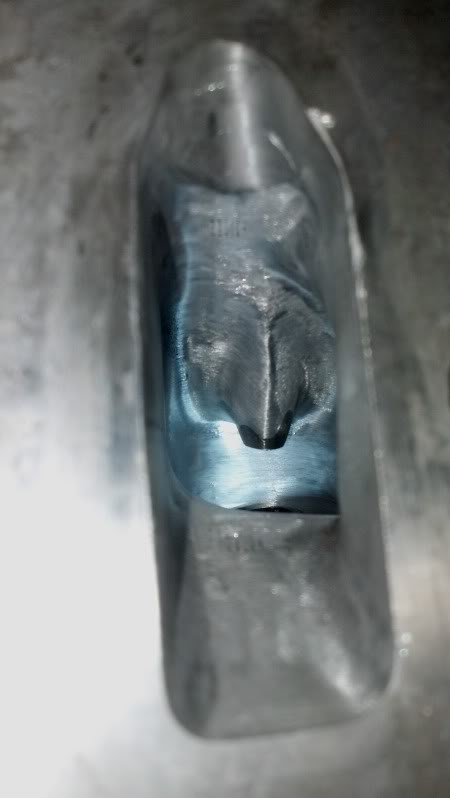
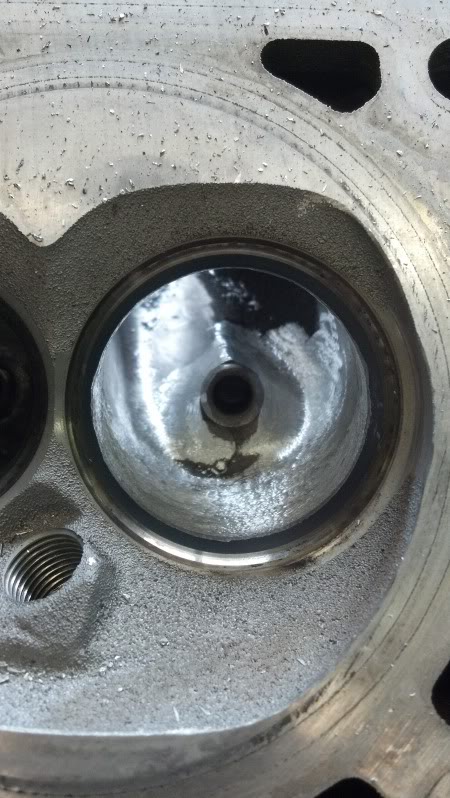
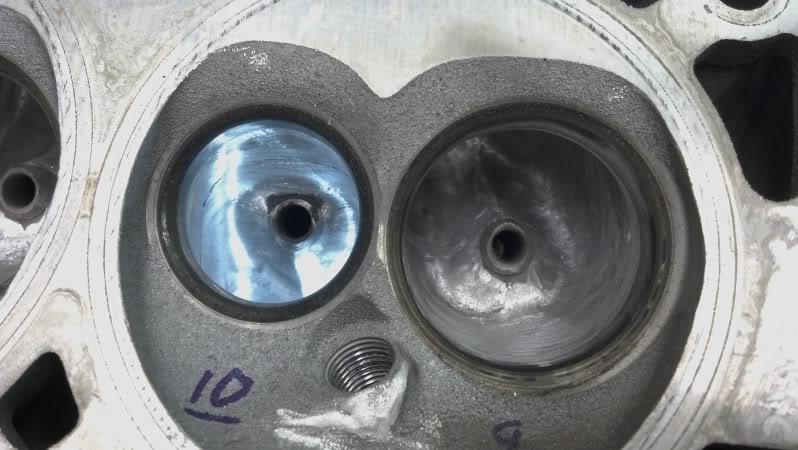
Since the heads were just sitting on the bench, I couldn't resist cleaning them up a little before they get .005 milled off (I'm running .040 Cometic head gaskets) and the valves re-ground. Go easy on me about the port job... it was my first set and these aren't the finished pictures.
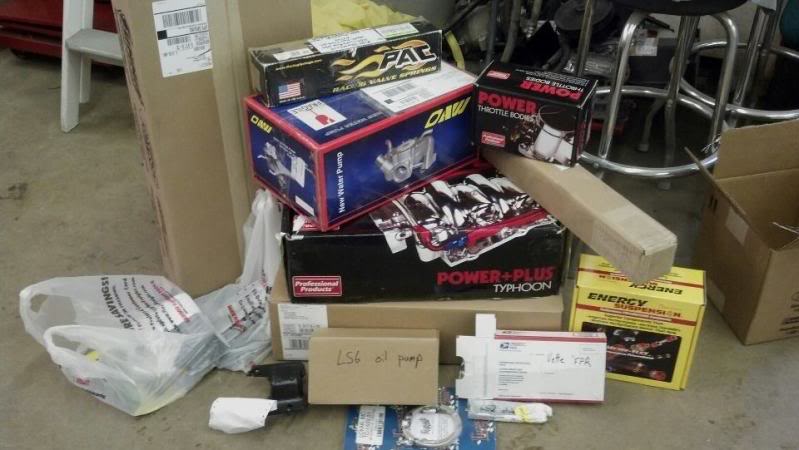
I also ordered a bunch of parts needed to get the engine together and start wrenching on the GTO:
- LS6 oil pump
- LS2 timing chain
- Complete gasket and head bolt kit. I went with stock head bolts since this engine will never see boost and I would have to pull the heads 2 more times to break even on the ARP hardware.
- Lokar 36" throttle cable (thanks for the recommendation)
- Performance Products Typhoon LS1 85mm intake and matching throttle body with fuel rails
- New water pump
- Energy Suspension motor/trans mounts
I have some pretty good motivation (other than to get the GTO back on the road after almost 9 years of sitting)... I've got a bet going with a skeptical group of guys at work saying the car won't be driveable by April 1, 2013. With the help of a couple good friends on this board that shouldn't be a problem.
Hopefully the updates will keep coming... this project is my #1 priority right now.
I picked up a truck bed worth of parts a while back from a friend that never completed his A-body LS swap.
I got the 1999 Z28 donor car in the shop and did the standard engine/trans/K-member removal out the bottom of the car.
Used the '88 Samurai to "reposition" the drivetrain.
Separated the parts I want from the parts I don't (for now).
New heart for The Judge, ready for a good cleaning and some goodies
Seems like everyone includes a pic of the intimidating wiring harness that will be reworked, so why should I be any different?
Here the donor car is ready to be tucked back in the barn until I can pull the brakes and other necessary parts:
I picked up as set of low mile 799 heads for $350 shipped a while back. I didn't feel like spending the $120 for a professional valve spring compressor or wait 5 days for it to get to me, so some steel I had on hand and 20 min later I was in business!
Since the heads were just sitting on the bench, I couldn't resist cleaning them up a little before they get .005 milled off (I'm running .040 Cometic head gaskets) and the valves re-ground. Go easy on me about the port job... it was my first set and these aren't the finished pictures.
I also ordered a bunch of parts needed to get the engine together and start wrenching on the GTO:
- LS6 oil pump
- LS2 timing chain
- Complete gasket and head bolt kit. I went with stock head bolts since this engine will never see boost and I would have to pull the heads 2 more times to break even on the ARP hardware.
- Lokar 36" throttle cable (thanks for the recommendation)
- Performance Products Typhoon LS1 85mm intake and matching throttle body with fuel rails
- New water pump
- Energy Suspension motor/trans mounts
I have some pretty good motivation (other than to get the GTO back on the road after almost 9 years of sitting)... I've got a bet going with a skeptical group of guys at work saying the car won't be driveable by April 1, 2013. With the help of a couple good friends on this board that shouldn't be a problem.
Hopefully the updates will keep coming... this project is my #1 priority right now.
12-07-2012, 03:14 PM
#35
TECH Apprentice
Join Date: Oct 2007
Posts: 307
Likes: 0
Received 0 Likes
on
0 Posts
Great project! Subscribing. Would share more pics of that tool you made for the valve springs?
 12-07-2012, 03:49 PM
#36
TECH Apprentice
Thread Starter
iTrader: (10)
Join Date: Dec 2005
Location: Peoria IL
Posts: 340
Likes: 0
Received 0 Likes
on
0 Posts
The valve spring compressor is pretty much what you see is what you get. I used a piece of flat steel that was something like 1.5"x 1/8" or 3/16" thick. Drilled a 5/8" hole close to the end and slotted it with the grinder. I heated and bent it so the fully compressed position was fairly close to perpendicular to the valve stem. Then a slotted 3/8" hole and an 8mm bolt/washer.
Project update: So far this week I've only been able to (attempt to) clean parts and finish the P&P job on the heads. The heads went to the machine shop today to have .005 shaved off and do a valve job with new seals. I'll assemble them with 918 springs (the newer version) and stock retainers. **A tip for anyone doing their own heads and doing the rough cut with carbide bits: Fill a small cup with WD-40 to dip the cutting bit in every once in a while... works great to keep the aluminum from building up!
Here's my bench after I finished with the P&P
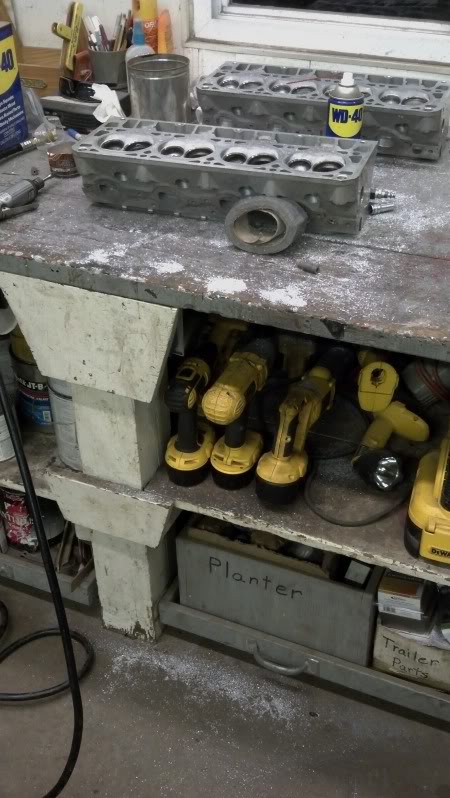
Finished:
I pulled the stock intake off the LS1... this car and engine are disgusting, but it ran strong, so I should be ok:
I'll be pulling the GTO out of its 9 year hibernation spot hopefully this weekend.
Project update: So far this week I've only been able to (attempt to) clean parts and finish the P&P job on the heads. The heads went to the machine shop today to have .005 shaved off and do a valve job with new seals. I'll assemble them with 918 springs (the newer version) and stock retainers. **A tip for anyone doing their own heads and doing the rough cut with carbide bits: Fill a small cup with WD-40 to dip the cutting bit in every once in a while... works great to keep the aluminum from building up!
Here's my bench after I finished with the P&P
Finished:
I pulled the stock intake off the LS1... this car and engine are disgusting, but it ran strong, so I should be ok:
I'll be pulling the GTO out of its 9 year hibernation spot hopefully this weekend.
12-17-2012, 12:11 PM
#37
TECH Apprentice
Thread Starter
iTrader: (10)
Join Date: Dec 2005
Location: Peoria IL
Posts: 340
Likes: 0
Received 0 Likes
on
0 Posts
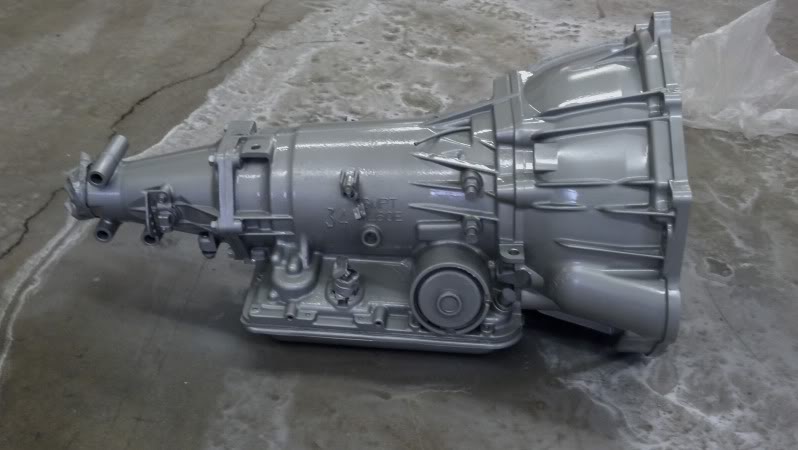
I don't have a lot of progress worth taking pictures of for the past week... I've mainly just been cleaning parts. I had the 4L60e built by a local guy. I soda blasted it to clean it up and then gave it a couple coats of high temp cast aluminum paint.
Before:
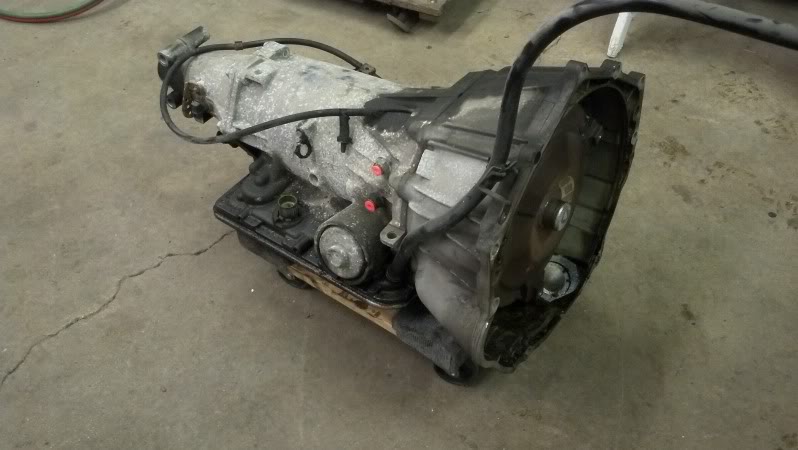
After:
The pile of new parts is getting larger:
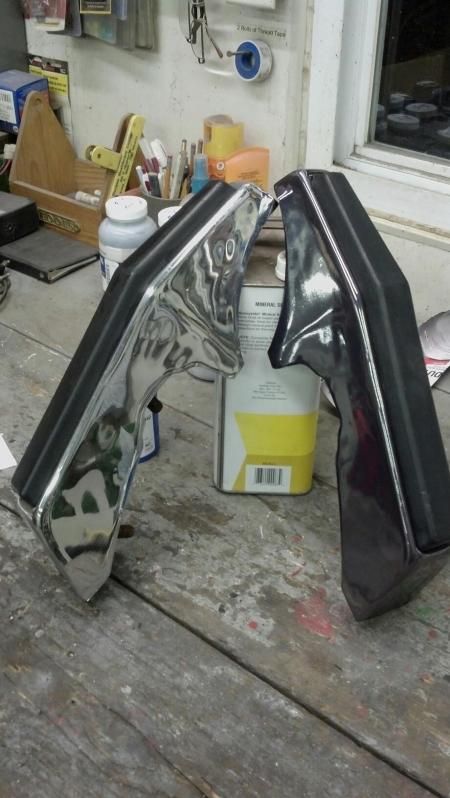
I've also been playing around with my new Eastwood powdercoating system so I know what I'm doing on the GTO parts. Here's a couple examples:
Translucent "Black Chrome" over an '80's Silverado bumper guard compared to a stock guard... it looks a lot better in person:
This is a 6 color trial run of Mirror Blk, Gloss Blk, and Semi-gloss Blk on top, then Blk Chrome, Rally Wheel Gray, and Wagon Red on bottom. The red is actually very fire engine red, but I had to overexpose the picture for the blacks to show up:
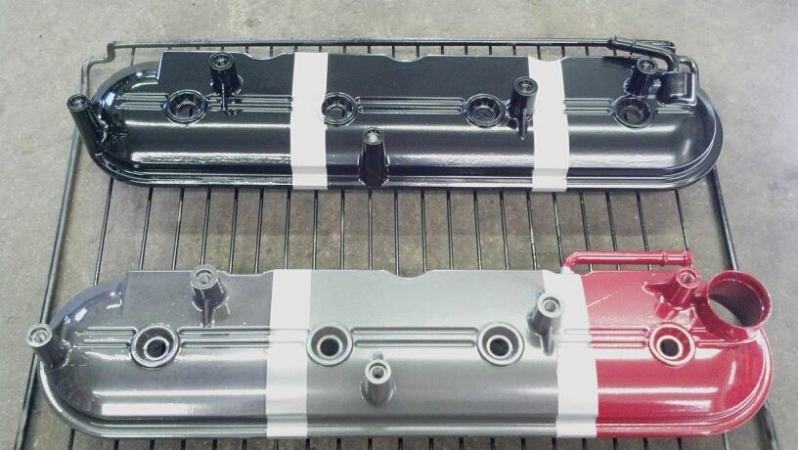
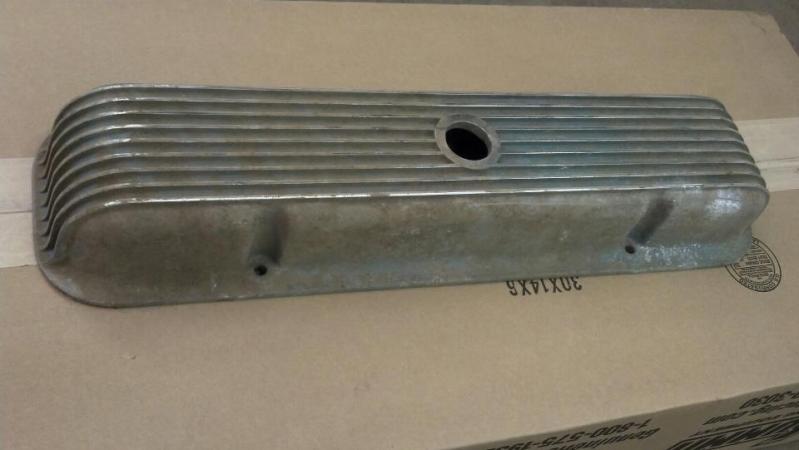
Before/After of a cast alum Pontiac valve cover coated with single stage "Chrome". It looks more like polished aluminum, but will have almost zero maintenance to keep the shine.

After staring at the LS1 for about 45 min, my dad and I decided to do the "chrome" PC on the Typhoon intake (its currently satin), valve covers, timing cover, valley cover, coolant crossover, and oil pan. The billet fuel rails, coil brackets and front accessory brackets will be graphite to add some contrast, and the rest will be left natural aluminum (block, heads, alternator, water pump, etc). Before anyone comments on that plan being gaudy, remember this is still an old muscle car that is being built with my dad's 1970's taste... red with lots of chrome.
Before:
After:
The pile of new parts is getting larger:
I've also been playing around with my new Eastwood powdercoating system so I know what I'm doing on the GTO parts. Here's a couple examples:
Translucent "Black Chrome" over an '80's Silverado bumper guard compared to a stock guard... it looks a lot better in person:
This is a 6 color trial run of Mirror Blk, Gloss Blk, and Semi-gloss Blk on top, then Blk Chrome, Rally Wheel Gray, and Wagon Red on bottom. The red is actually very fire engine red, but I had to overexpose the picture for the blacks to show up:
Before/After of a cast alum Pontiac valve cover coated with single stage "Chrome". It looks more like polished aluminum, but will have almost zero maintenance to keep the shine.
After staring at the LS1 for about 45 min, my dad and I decided to do the "chrome" PC on the Typhoon intake (its currently satin), valve covers, timing cover, valley cover, coolant crossover, and oil pan. The billet fuel rails, coil brackets and front accessory brackets will be graphite to add some contrast, and the rest will be left natural aluminum (block, heads, alternator, water pump, etc). Before anyone comments on that plan being gaudy, remember this is still an old muscle car that is being built with my dad's 1970's taste... red with lots of chrome.
12-18-2012, 06:24 AM
#38
TECH Fanatic
I like the "chrome" idea. Plus it will be tons easier to keep clean. I went a bit different route with the metallic blue on the block and lots of wrinkle black for an understated look.
12-18-2012, 09:21 AM
#40
TECH Apprentice
Thread Starter
iTrader: (10)
Join Date: Dec 2005
Location: Peoria IL
Posts: 340
Likes: 0
Received 0 Likes
on
0 Posts
I figure the "chrome" PC is a win win... my dad gets the look he likes, and its easy for me to keep the engine bay looking nice. I'll be doing the understated black wrinkle look with some blue accents when I swap my blue/white '79 Firebird.
Oh yea, the MP112 on your car helps, too. Haha
Oh yea, the MP112 on your car helps, too. Haha