
Project daily driver LS1 Sonoma

 07-09-2012, 02:38 AM
#22
On The Tree
Thread Starter
iTrader: (1)

Join Date: Jun 2012
Posts: 141
Likes: 0
Received 0 Likes
on
0 Posts

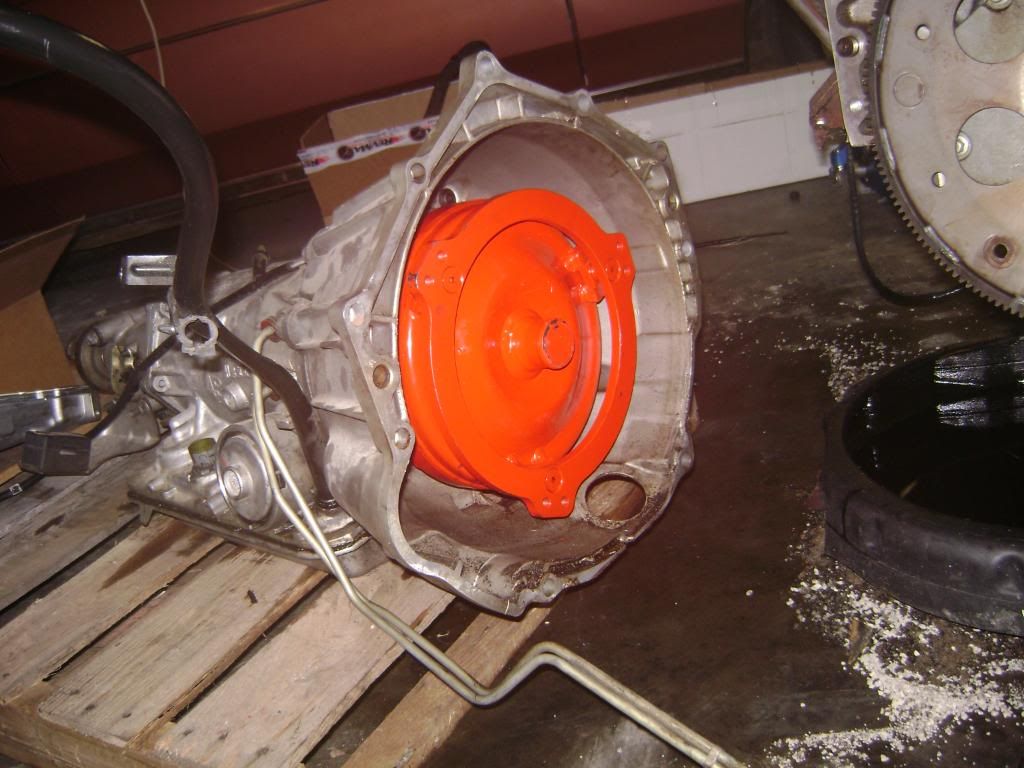
Today was interesting to say the least. Started off the day by pulling the transmission and installing my new torque converter. Converter went on smoothly, measured the distance from the bell housing to the converter mounting pads and it came out to be 1.125" which from what I read is spot on.
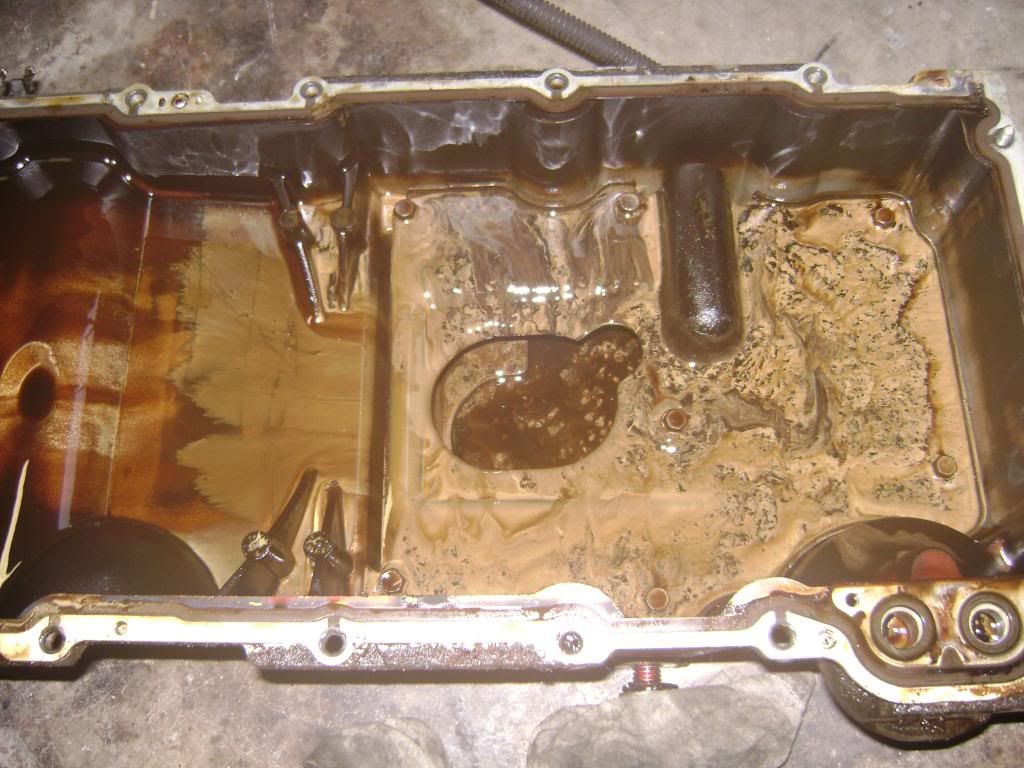
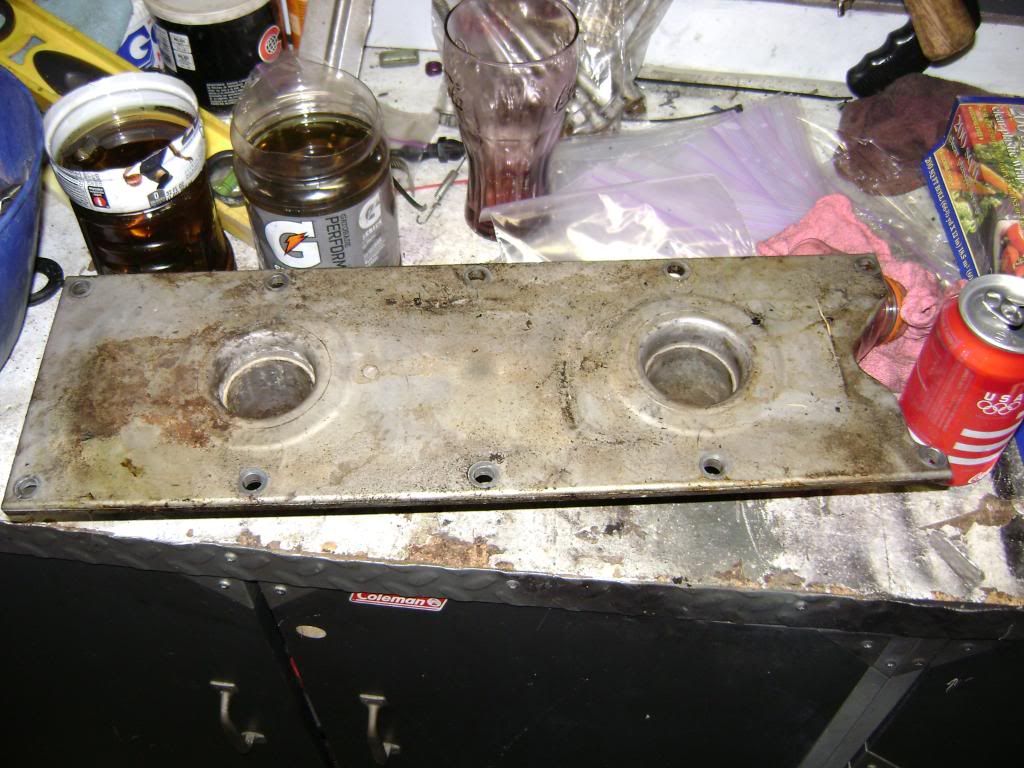
After the converter install I moved to removing the oil pan to install the h3 pan kit I got from Summit. I pulled the drain plug and milky oil came out almost in clumps. The pan came off and I was shocked to see this
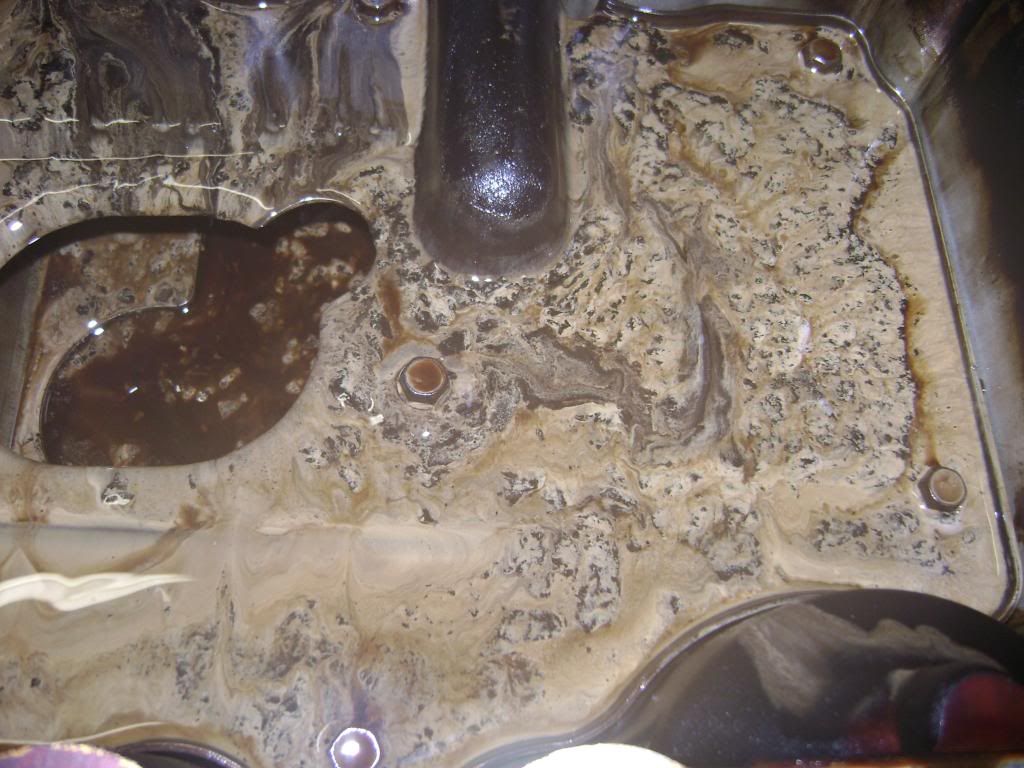
Started tearing down everything, got the valve covers off and this is what the rockers pushrods and valve springs look like.
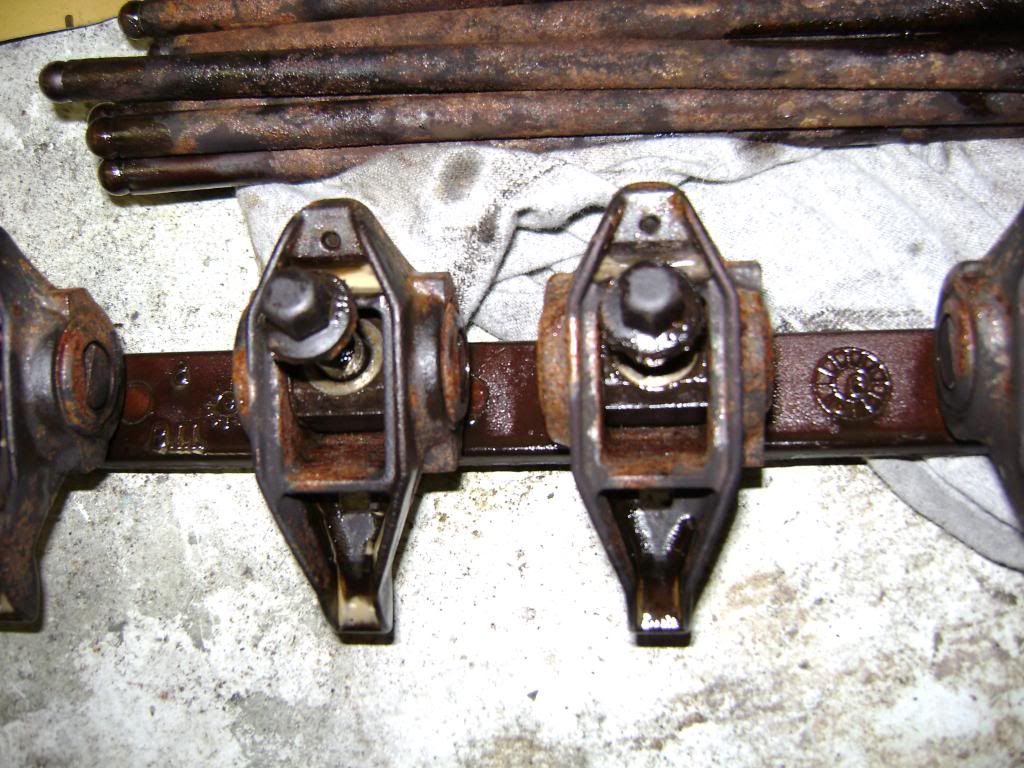
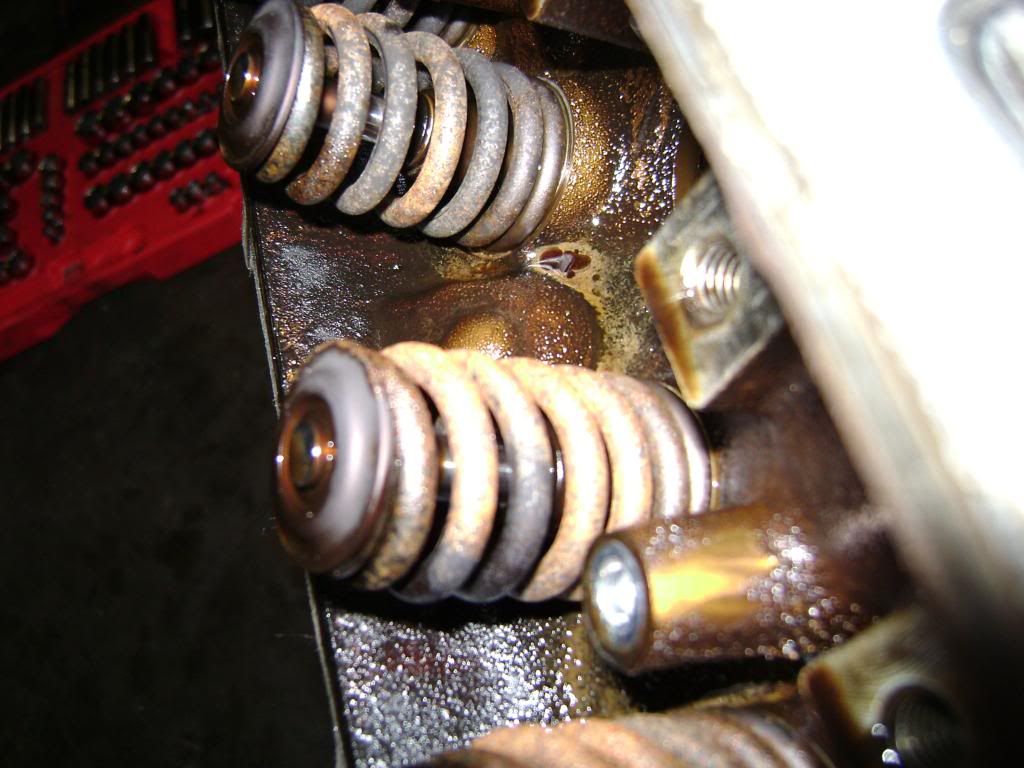
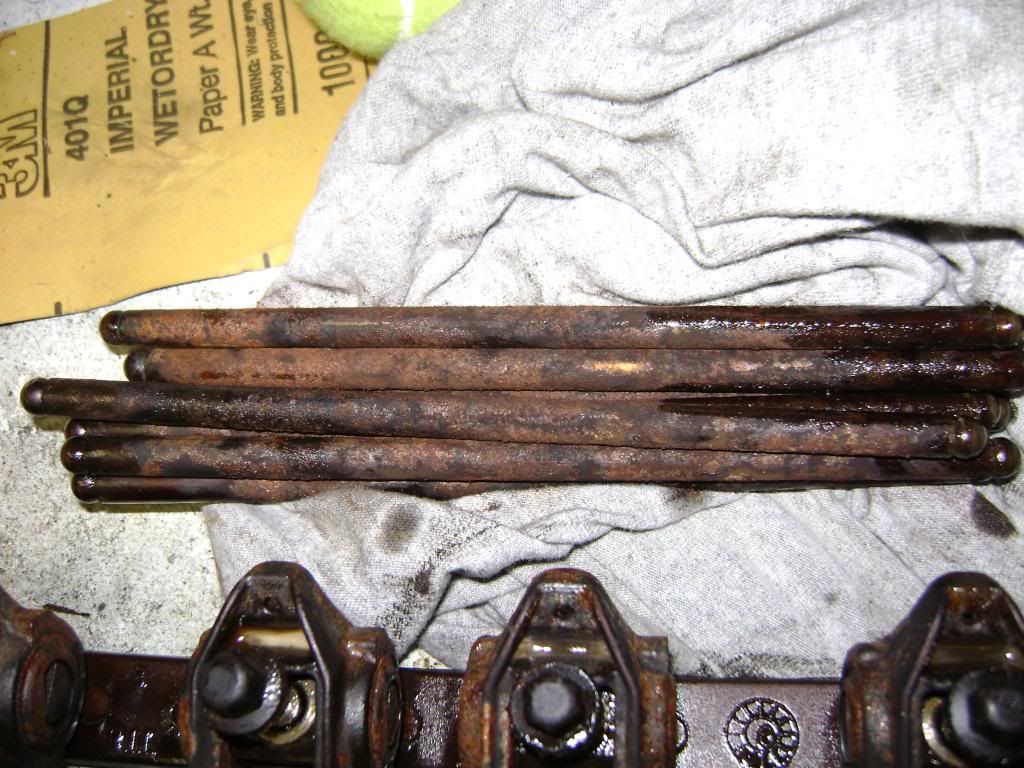
Everything has a nasty layer of crud on it. Looks like it has had water in it for a while. I'm pretty sure the head gaskets are to blame. It looks pretty bad for only having 83k on it.
When I pulled the valley cover off and removed the two 1 wire connectors this is what the two plugs? (not really sure what they are called) looked like.
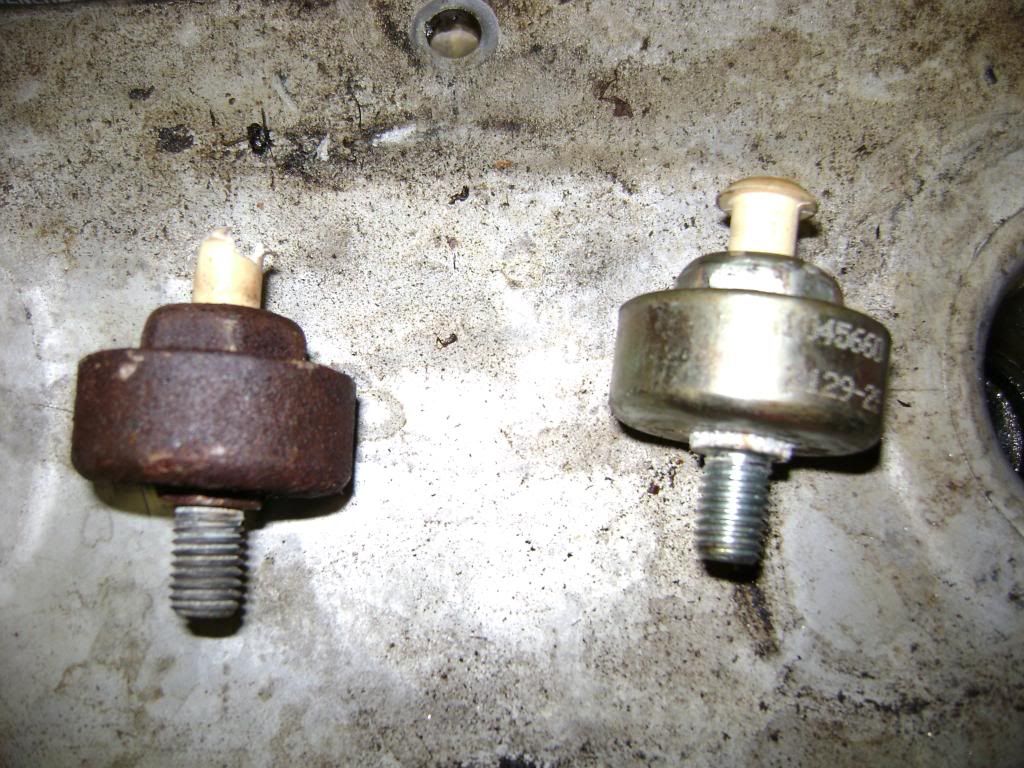
The front hole is filled with all kinds of **** and rust and the rear one looks just fine. Anybody know what is going on here? Is this typical of a head gasket failure? Should I be worried about the rotating assembly? The engine last ran the end of January but like I said it ran ok before I pulled it. What would you do if you were in my shoes?
After the converter install I moved to removing the oil pan to install the h3 pan kit I got from Summit. I pulled the drain plug and milky oil came out almost in clumps. The pan came off and I was shocked to see this
Started tearing down everything, got the valve covers off and this is what the rockers pushrods and valve springs look like.
Everything has a nasty layer of crud on it. Looks like it has had water in it for a while. I'm pretty sure the head gaskets are to blame. It looks pretty bad for only having 83k on it.
When I pulled the valley cover off and removed the two 1 wire connectors this is what the two plugs? (not really sure what they are called) looked like.
The front hole is filled with all kinds of **** and rust and the rear one looks just fine. Anybody know what is going on here? Is this typical of a head gasket failure? Should I be worried about the rotating assembly? The engine last ran the end of January but like I said it ran ok before I pulled it. What would you do if you were in my shoes?
07-09-2012, 12:03 PM
#26
On The Tree
Thread Starter
iTrader: (1)
Join Date: Jun 2012
Posts: 141
Likes: 0
Received 0 Likes
on
0 Posts
It has never been left outside while I have had it. The rotating assembly didn't look bad from underneath but all the rods and pistons are still in. Since I have it pretty much tore down I think I should pull the rods and pistons and see how the bearings look. Are the rod bolts and head bolts reusable on these engines or will I need to buy a new set of everything?
 07-09-2012, 01:29 PM
#28
theres a company on ebay that sells cheap head stud kits, like 89 dollars compared to arp's 250ish that id recommend for a natural asp build, i have them in both of my builds and havent had a problem yet. real test will b when the nitrous comes into play
07-09-2012, 06:35 PM
#29
On The Tree
Thread Starter
iTrader: (1)
Join Date: Jun 2012
Posts: 141
Likes: 0
Received 0 Likes
on
0 Posts
Just got done cleaning the heads up and getting all the old gasket material off. I put a straight edge on the heads and used a feeler gauge to see how bad they were and I could fit .005" in a few spots. The rods and pistons are still in but I think at this point my best option is to take everything to the machine shop and do a complete rebuild.
07-11-2012, 08:21 AM
#30
On The Tree

Join Date: Apr 2011
Location: Vancouver, WA
Posts: 129
Likes: 0
Received 0 Likes
on
0 Posts
Just got done cleaning the heads up and getting all the old gasket material off. I put a straight edge on the heads and used a feeler gauge to see how bad they were and I could fit .005" in a few spots. The rods and pistons are still in but I think at this point my best option is to take everything to the machine shop and do a complete rebuild.
 and you will be happy.
I would like to drop a LSx in my Sonoma but don't think they will fit in a 4x4.
07-30-2012, 06:31 PM
#33
On The Tree
Thread Starter
iTrader: (1)
Join Date: Jun 2012
Posts: 141
Likes: 0
Received 0 Likes
on
0 Posts
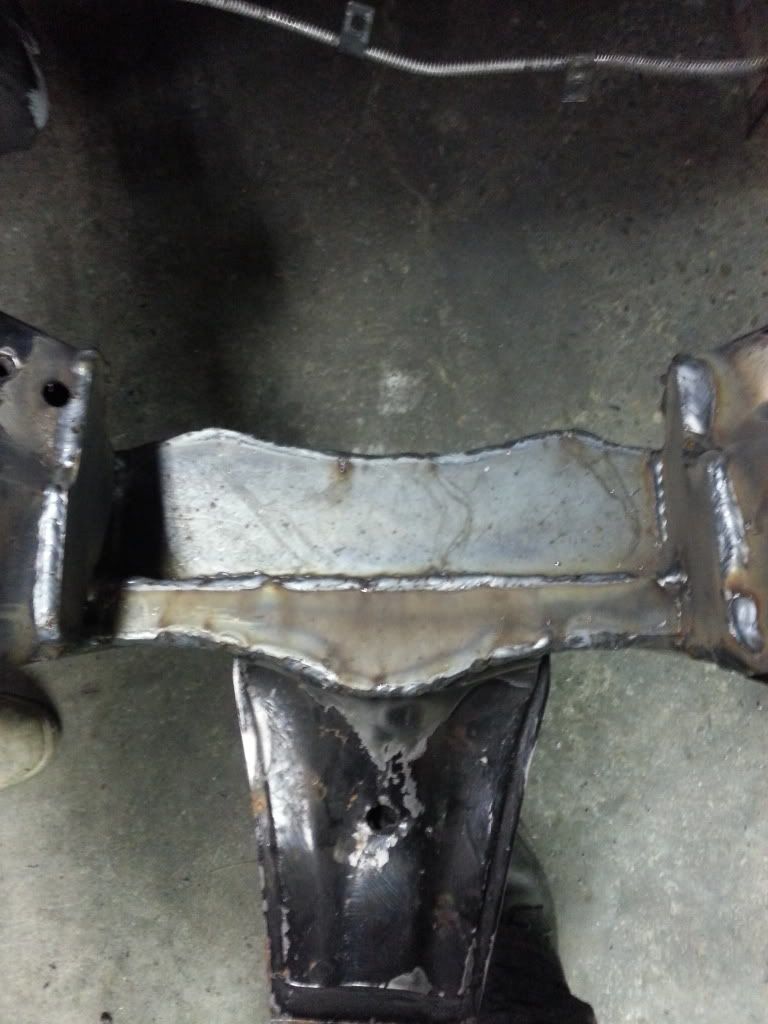
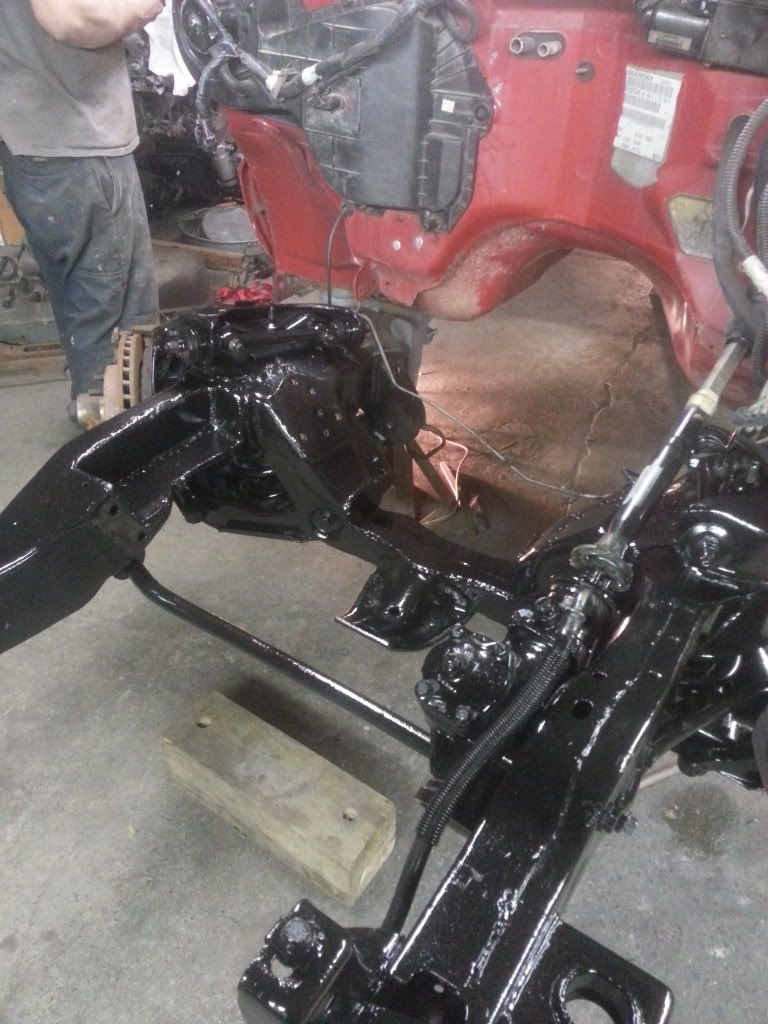
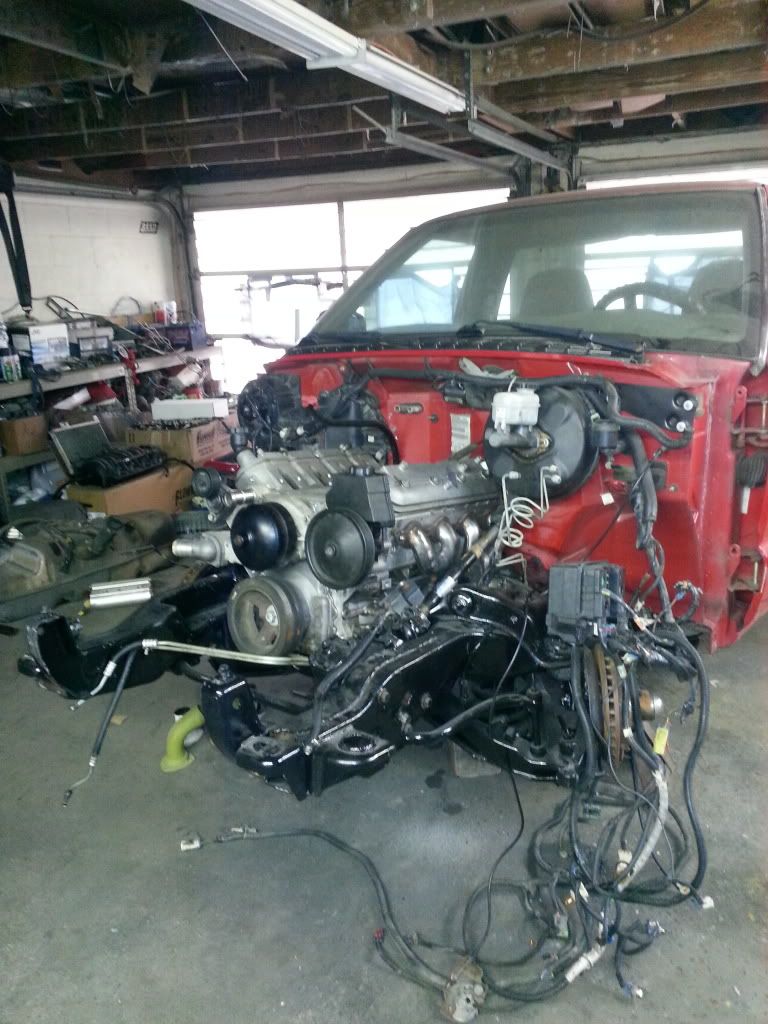
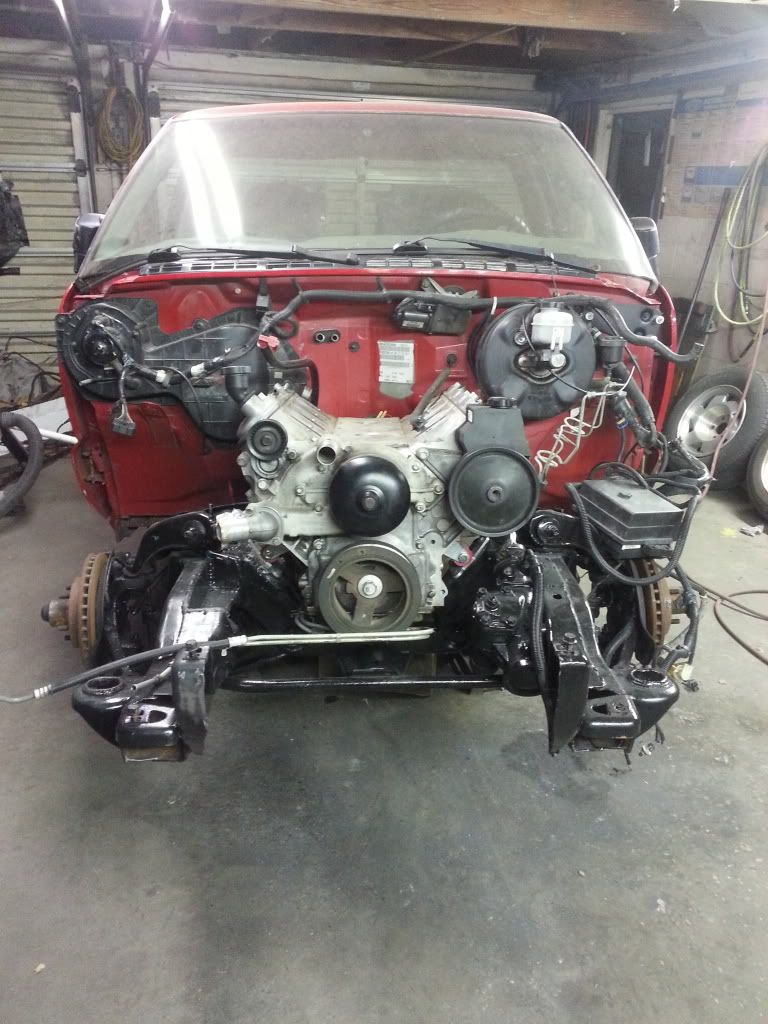
Its been a while so its time for an update. Everything motor wise checked out fine and is back together minus a knock sensor. While the motor was apart I decided I was going to notch the frame to run the ac and if I was going to notch for the ac I might as well keep the ls1 pan (instead of having the h3 pan hang down) and notch the crossmember. The notches went smoothly and the engine fits nicely with the brp mounts. It is only in for mock up and has to come back out to weld up the crossmember and ac notch.
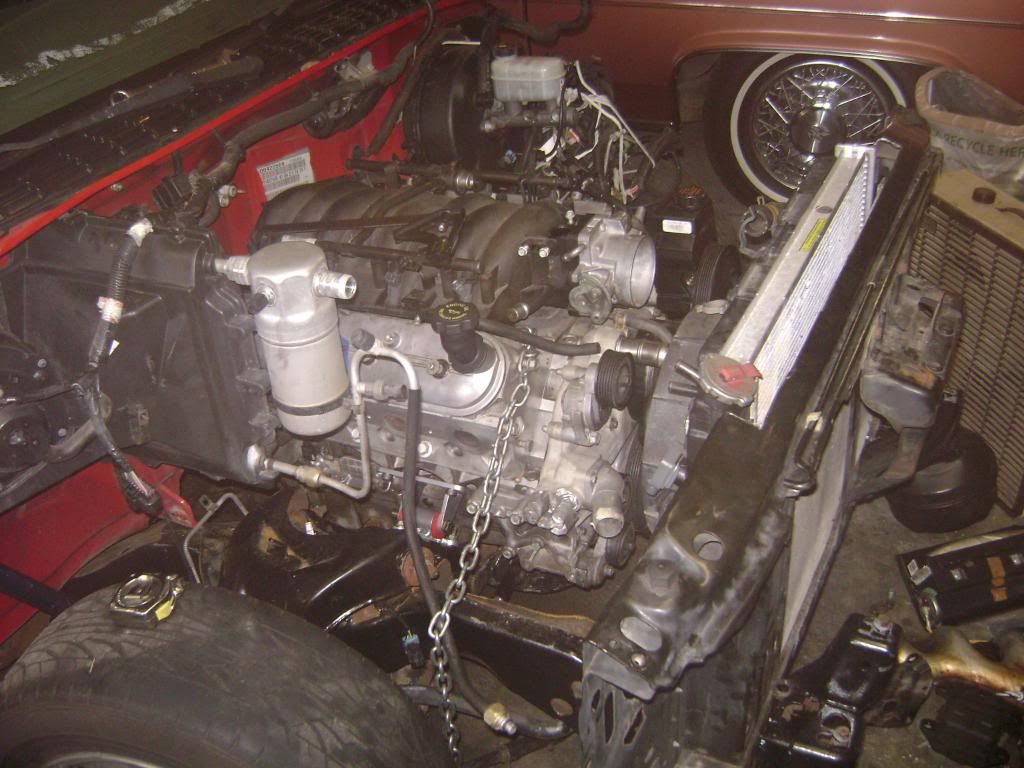
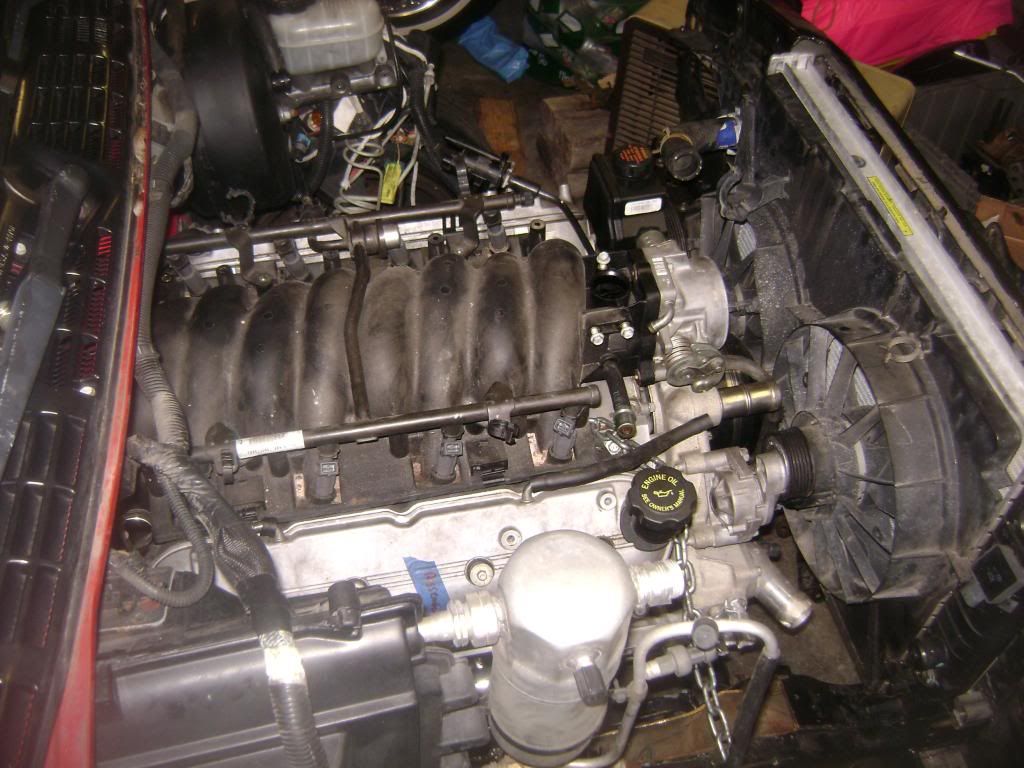
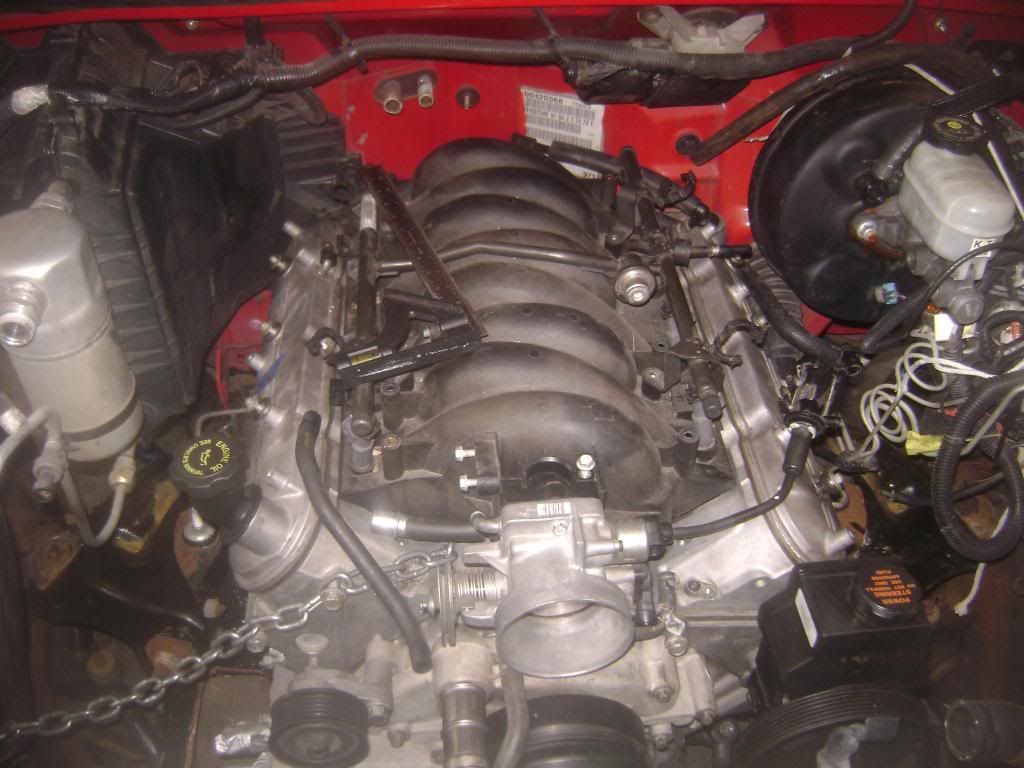
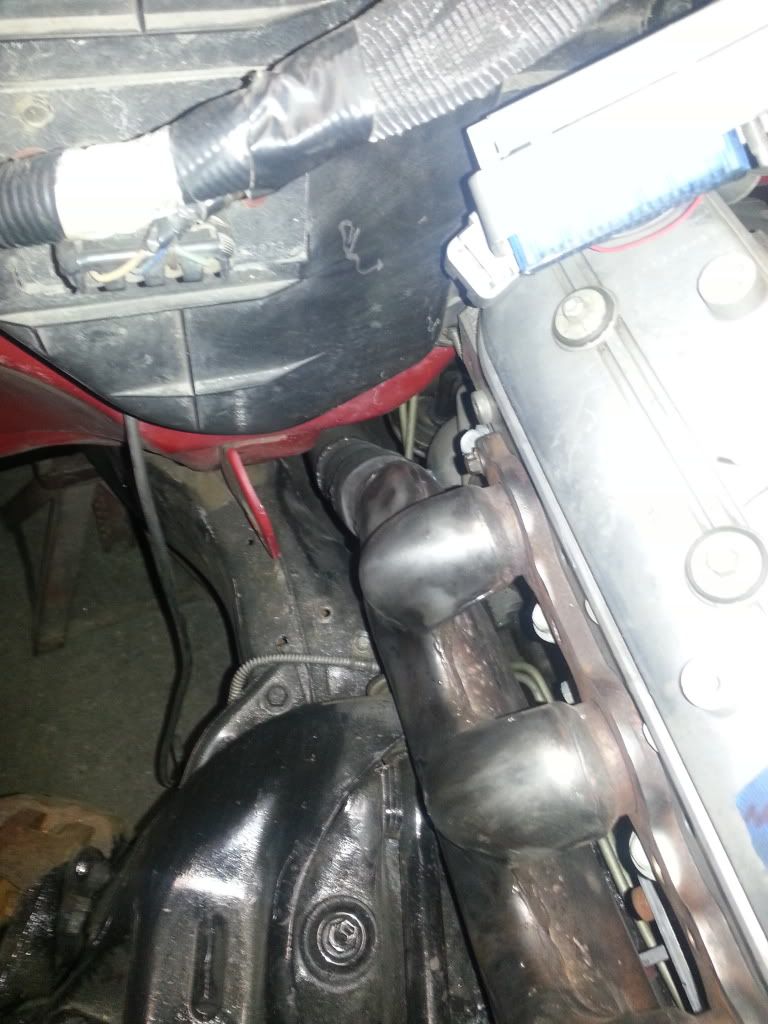
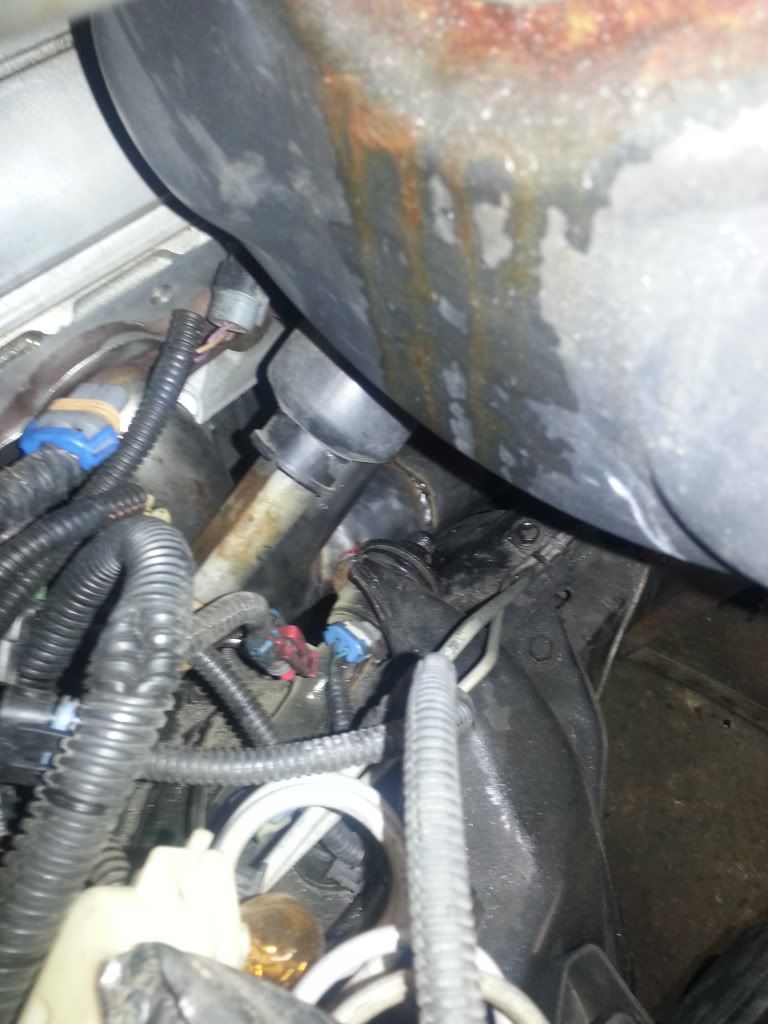
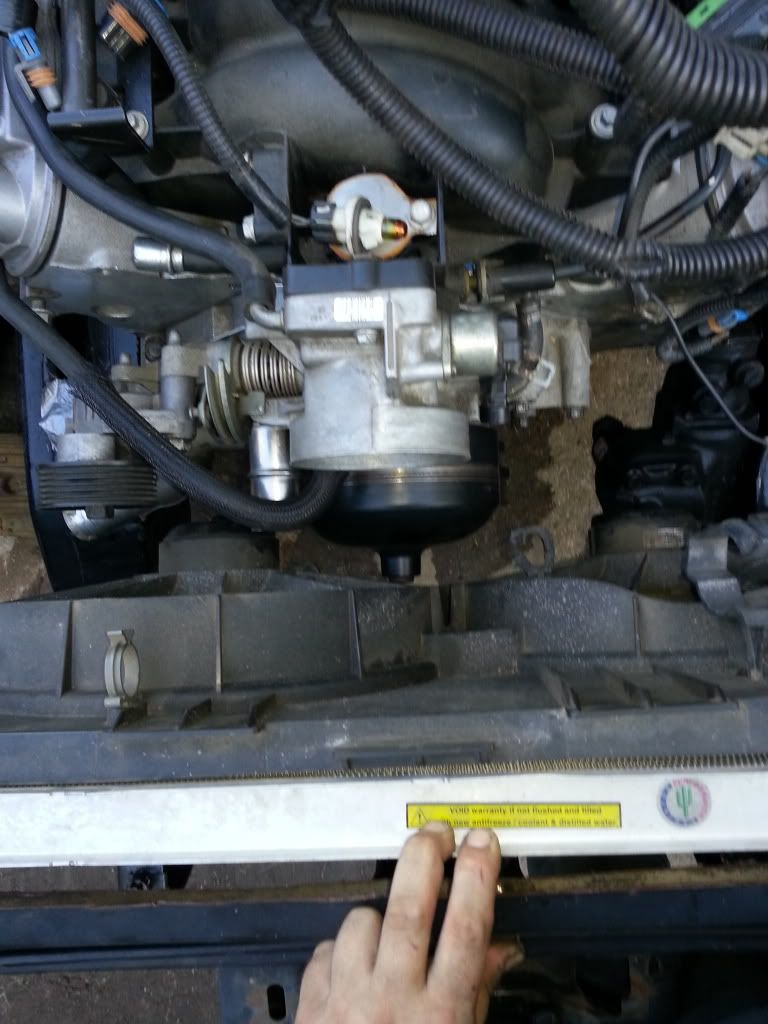
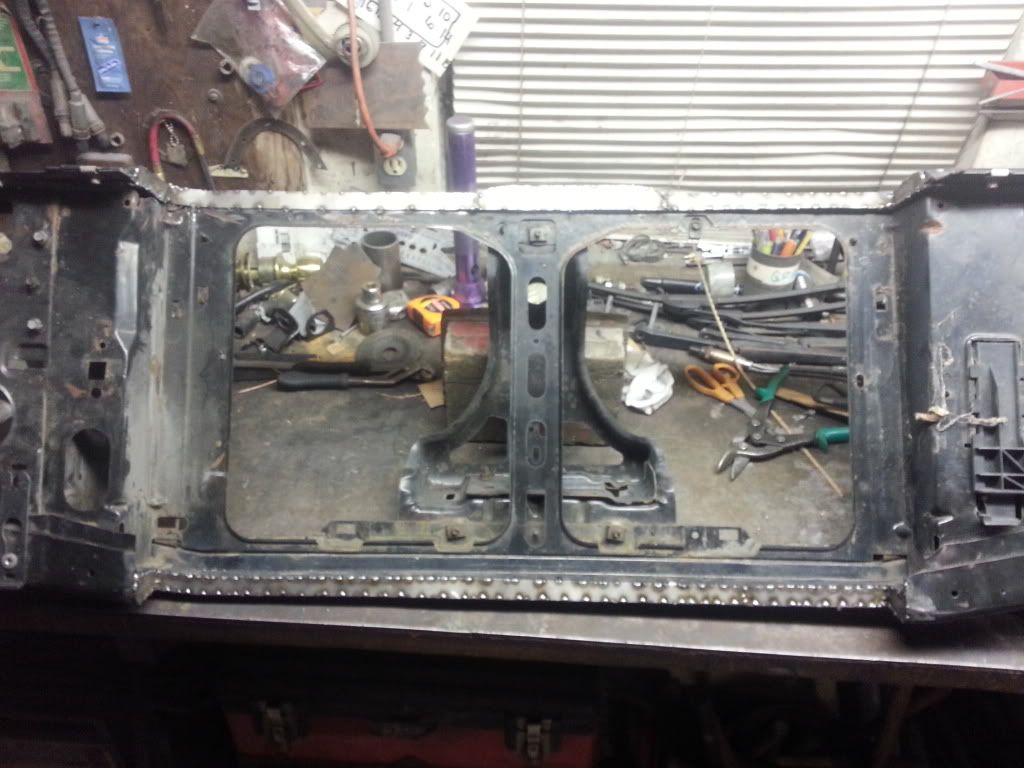
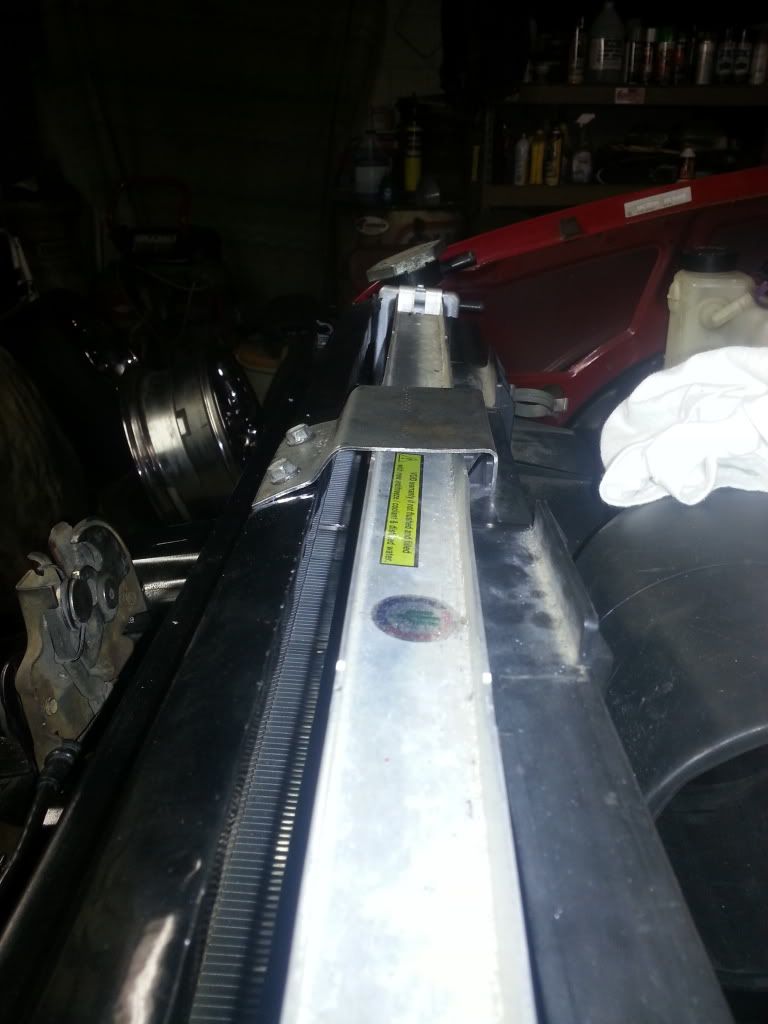
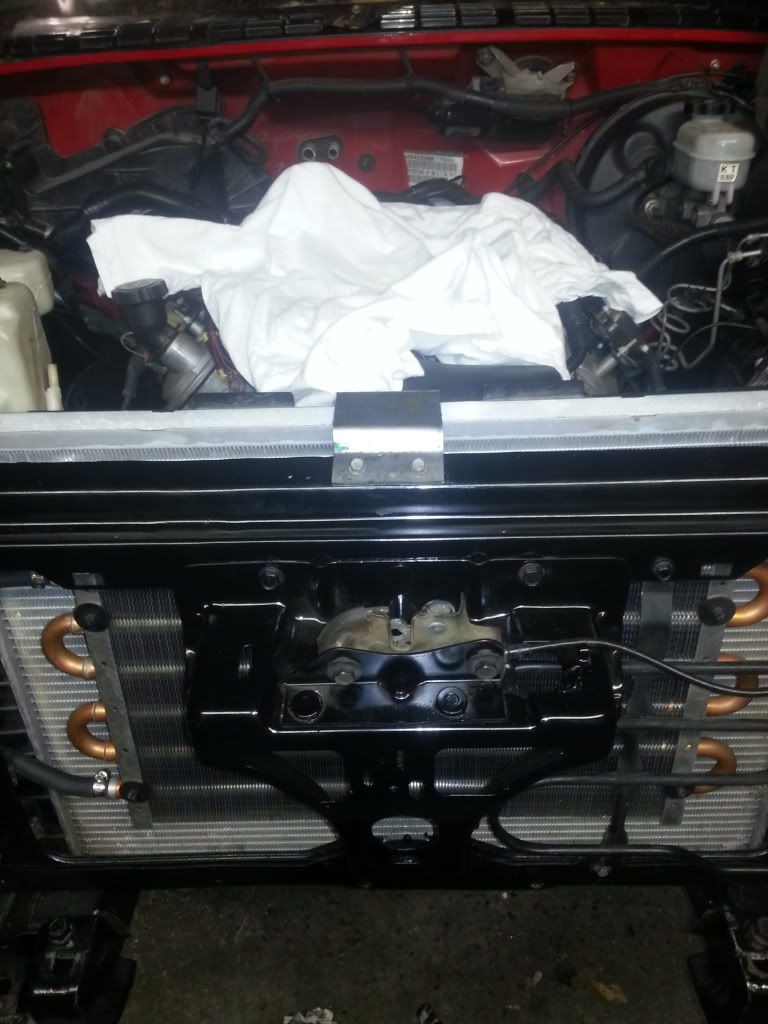
I also started fitting the fbody radiator and fans. I cut the bottom out of the core support and trimmed the top enough to recess everything in as far as it would go without hacking everything out of it. As you can see it is a tight fit. I could cut some more and get it maybe another inch forward or buy a set of slim fans and call it done.
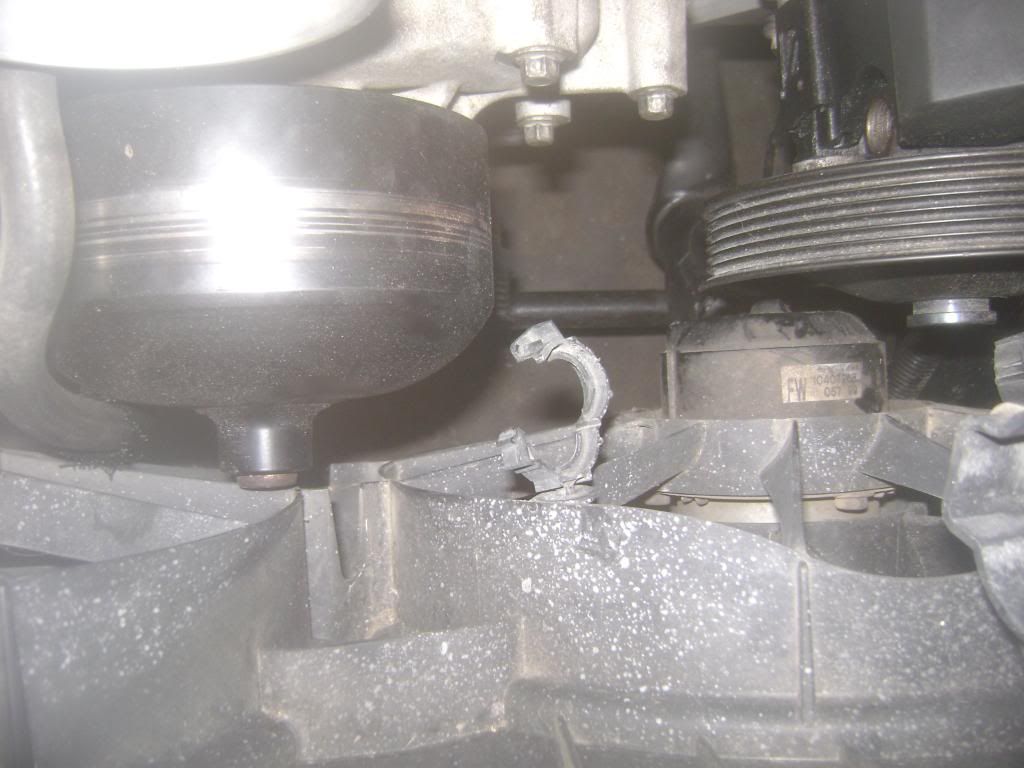
I'm working on sourcing a welder capable of welding the plate on the notches (only have a 110v welder) and once that is done the motor can go in for good.
I also started fitting the fbody radiator and fans. I cut the bottom out of the core support and trimmed the top enough to recess everything in as far as it would go without hacking everything out of it. As you can see it is a tight fit. I could cut some more and get it maybe another inch forward or buy a set of slim fans and call it done.
I'm working on sourcing a welder capable of welding the plate on the notches (only have a 110v welder) and once that is done the motor can go in for good.
04-09-2013, 11:20 PM
#34
On The Tree
Thread Starter
iTrader: (1)
Join Date: Jun 2012
Posts: 141
Likes: 0
Received 0 Likes
on
0 Posts
Finally bringing this thread back from the dead, its been way too long without an update. I got the truck over to a friends garage last week to start on the fabrication. First thing we started on was welding the notch for the oil pan and ac compressor (even though i decided to ditch the ac idea). I had previously cut all the pieces already so all that was needed was to fit them all up. I think they both turned out nice.

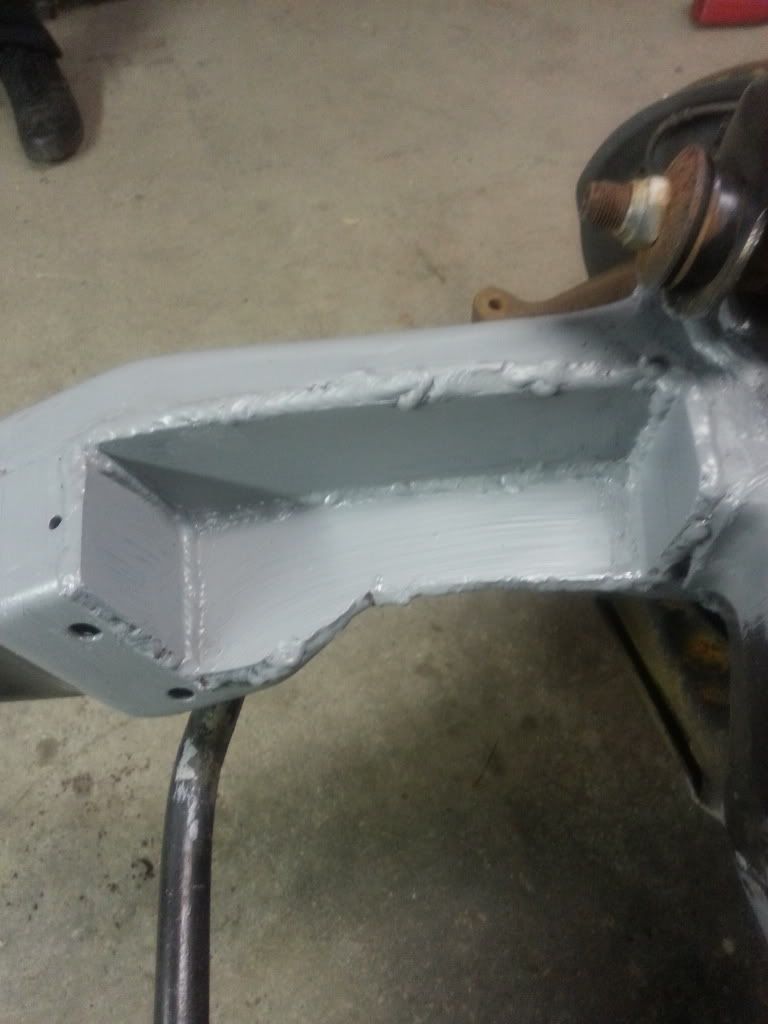
When I went to install the engine to check for fitment there was more than enough room to install the engine and transmission together as one unit without lifting the cab. I did have to beat the lip on the transmission tunnel flat though. My guess is the step i built into my crossmember notch is what gave me enough clearance. I'm sure swapping to a non ac heater box didn't hurt either.
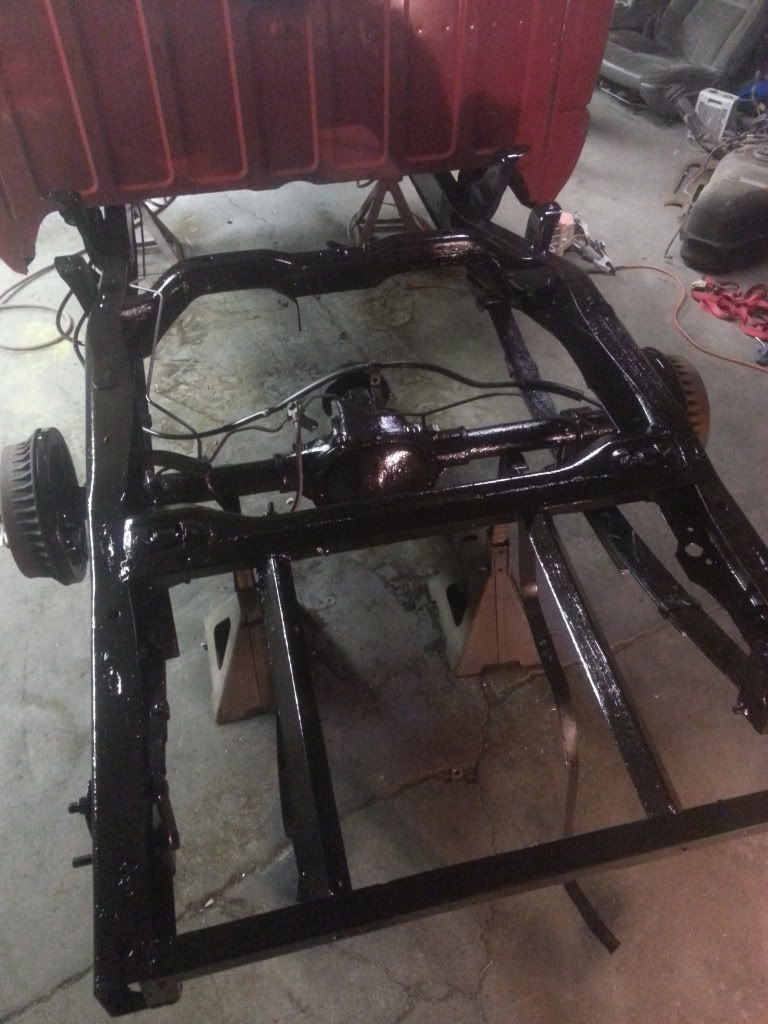
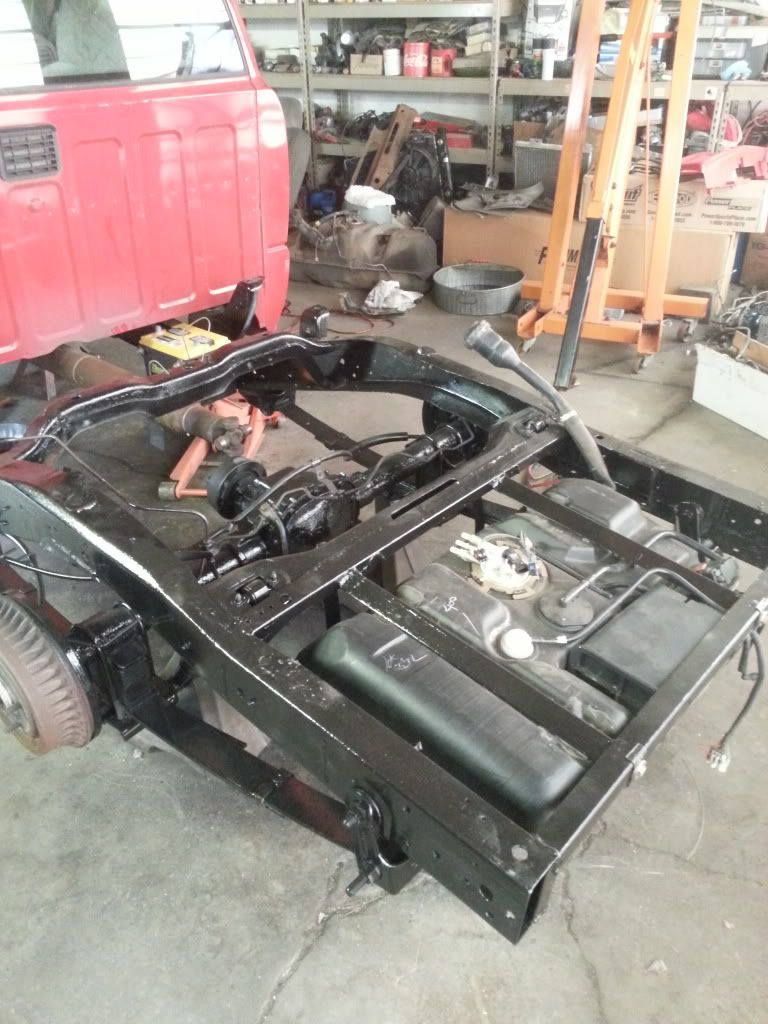
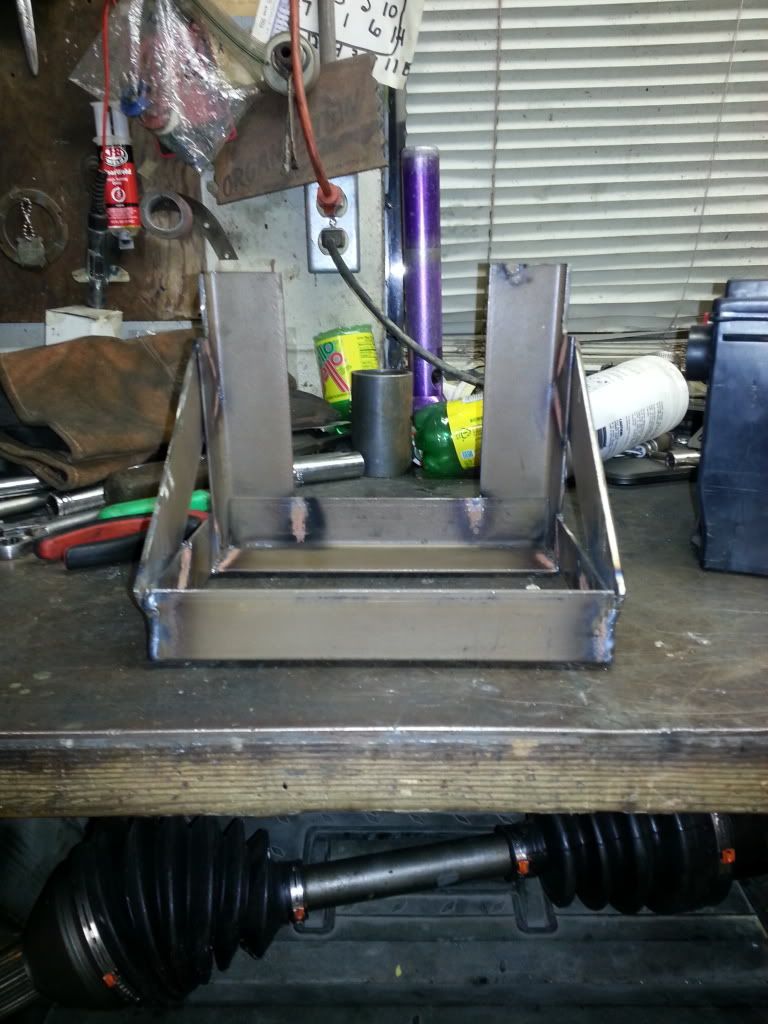
Next up was mounting the f body tank. I didn't get too crazy with the mount just a few scrap pieces of angle iron and some sheet metal tank straps. I haven't mounted the filler neck yet but the plan is to put a 90 degree out of the tank and mount it flush with the bed floor. While the bed was off I also finished painting the frame and made a battery box to relocate it under the bed.
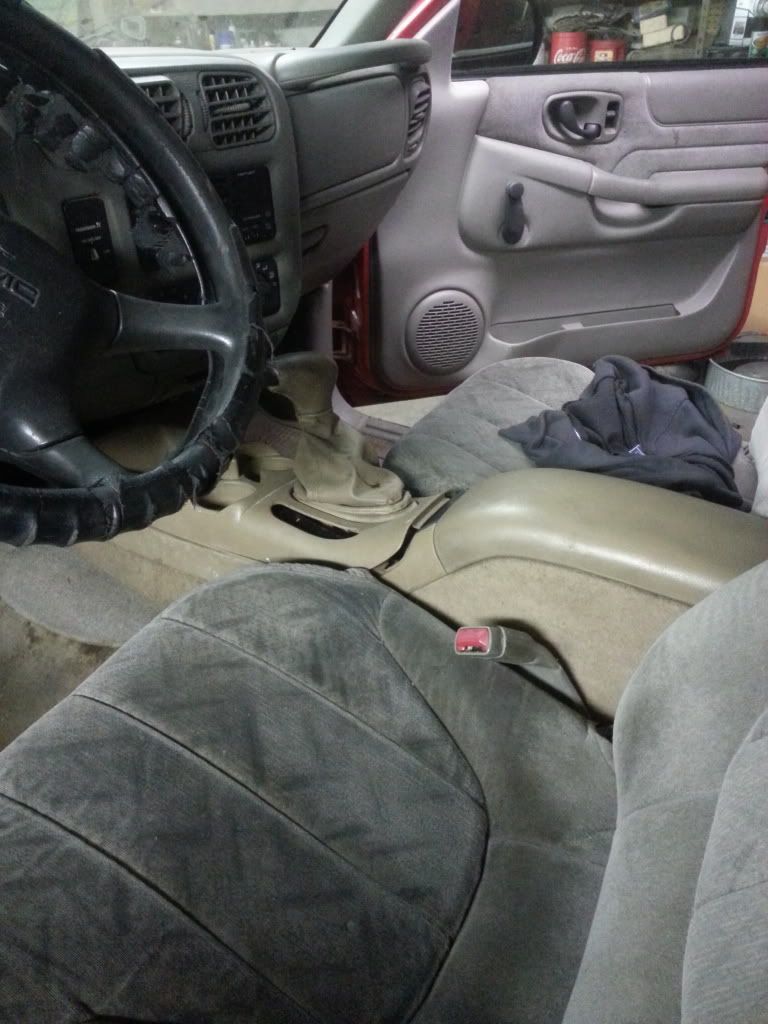
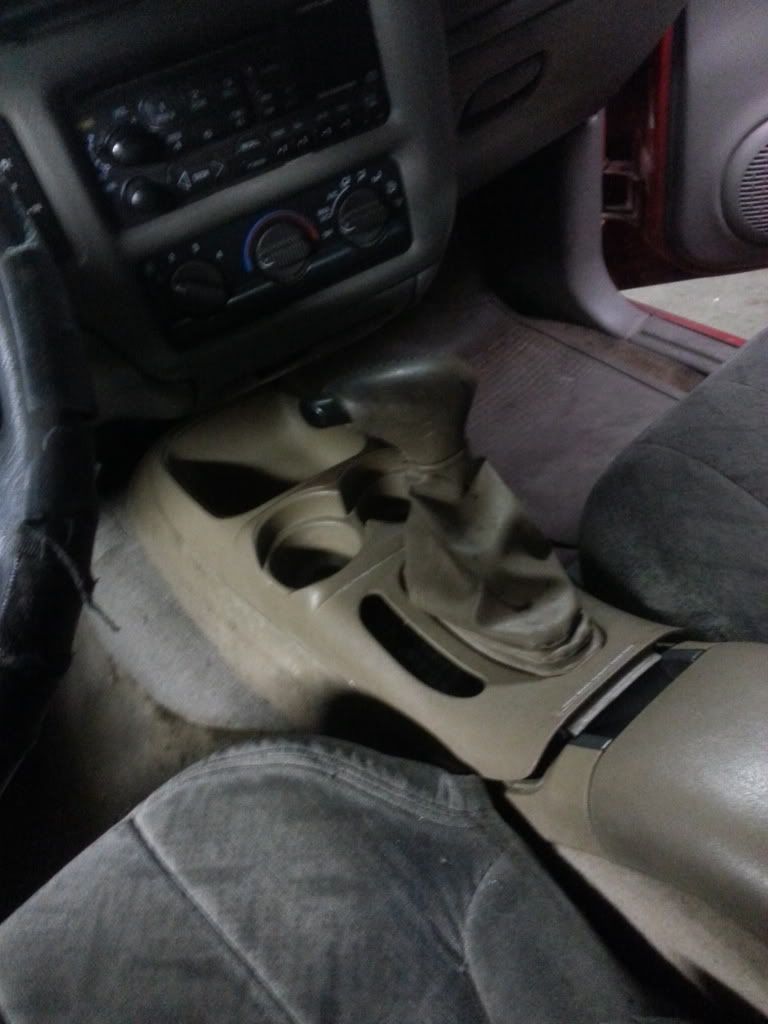
I got lucky and scored a blazer center console at the junk yard that was in pretty good shape. To mount it I took out the driver seat and cut the useless center seat section off. Looks way better without it.
When I went to install the engine to check for fitment there was more than enough room to install the engine and transmission together as one unit without lifting the cab. I did have to beat the lip on the transmission tunnel flat though. My guess is the step i built into my crossmember notch is what gave me enough clearance. I'm sure swapping to a non ac heater box didn't hurt either.
Next up was mounting the f body tank. I didn't get too crazy with the mount just a few scrap pieces of angle iron and some sheet metal tank straps. I haven't mounted the filler neck yet but the plan is to put a 90 degree out of the tank and mount it flush with the bed floor. While the bed was off I also finished painting the frame and made a battery box to relocate it under the bed.
I got lucky and scored a blazer center console at the junk yard that was in pretty good shape. To mount it I took out the driver seat and cut the useless center seat section off. Looks way better without it.
04-09-2013, 11:22 PM
#35
On The Tree
Thread Starter
iTrader: (1)
Join Date: Jun 2012
Posts: 141
Likes: 0
Received 0 Likes
on
0 Posts
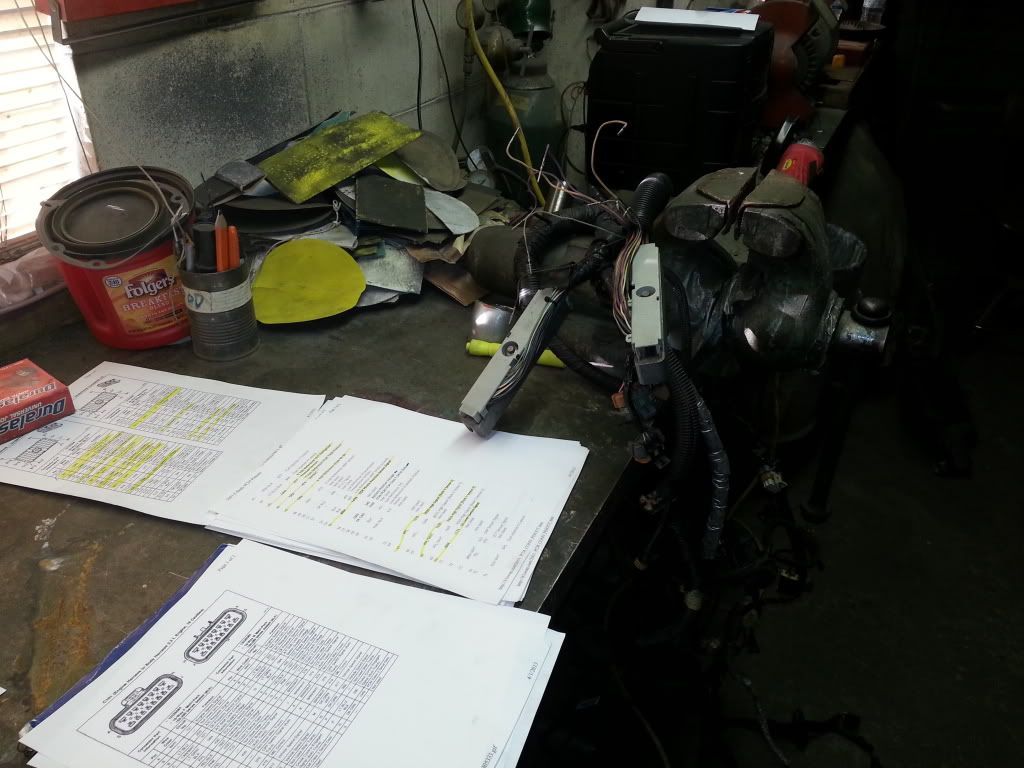
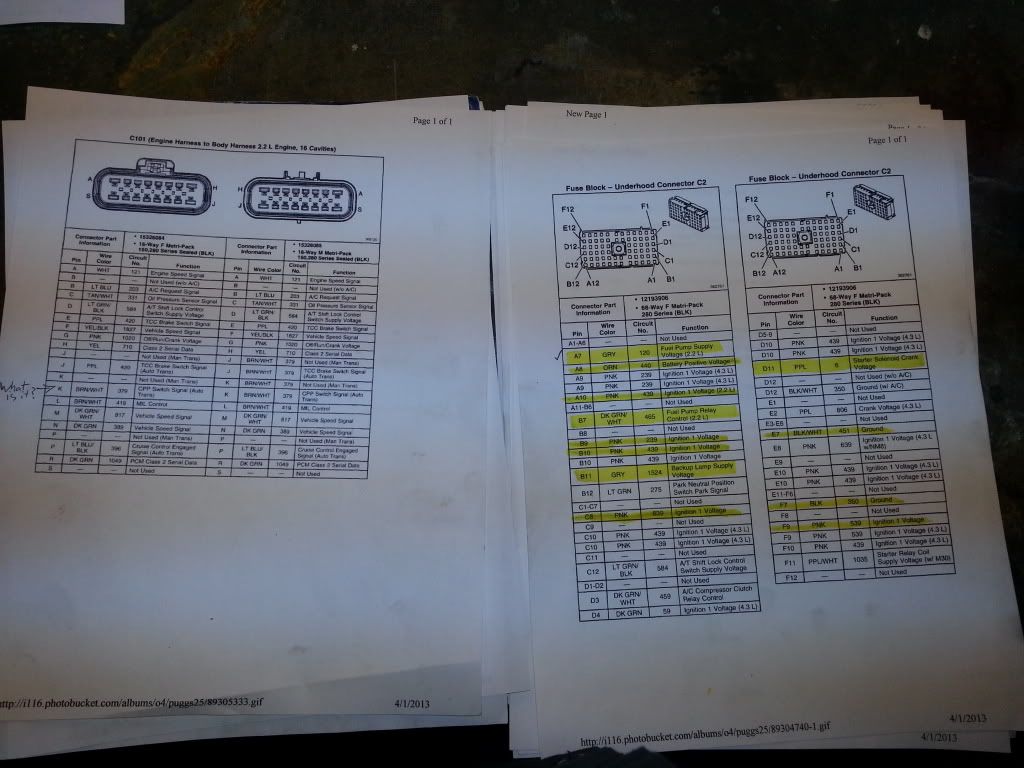
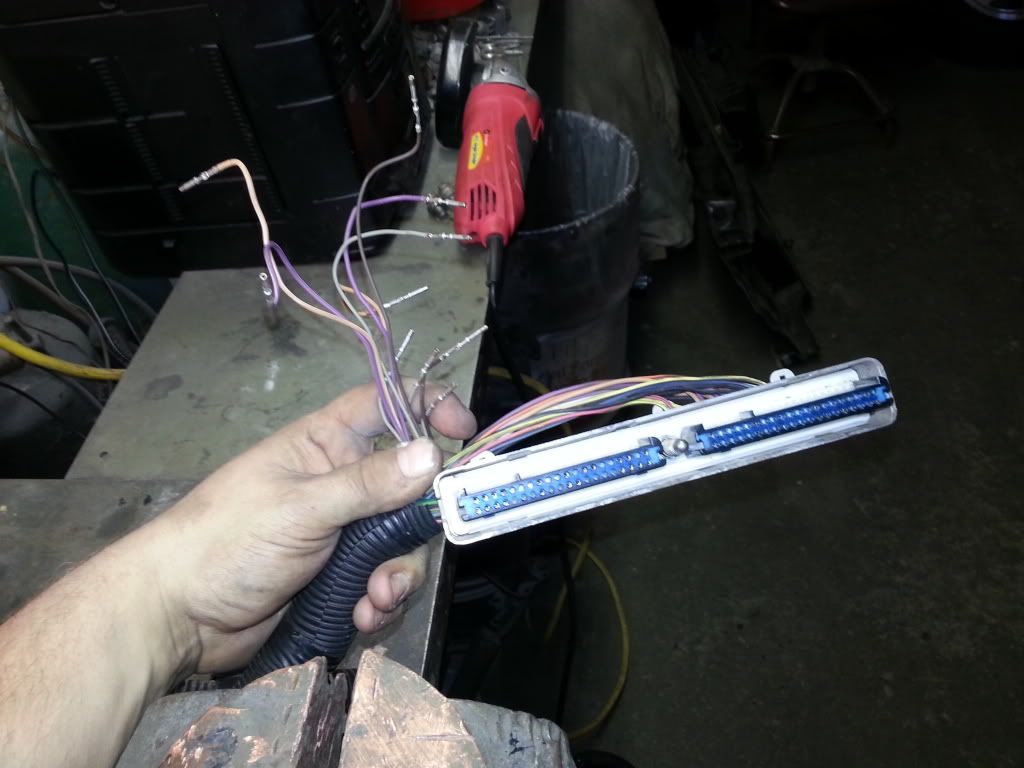
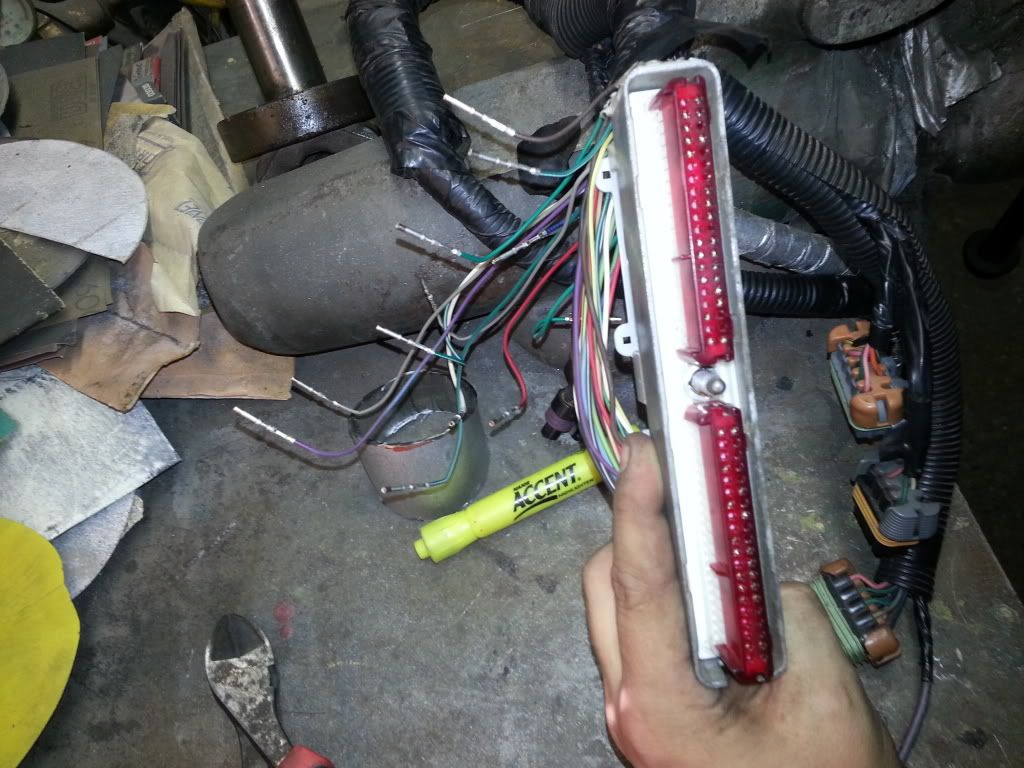
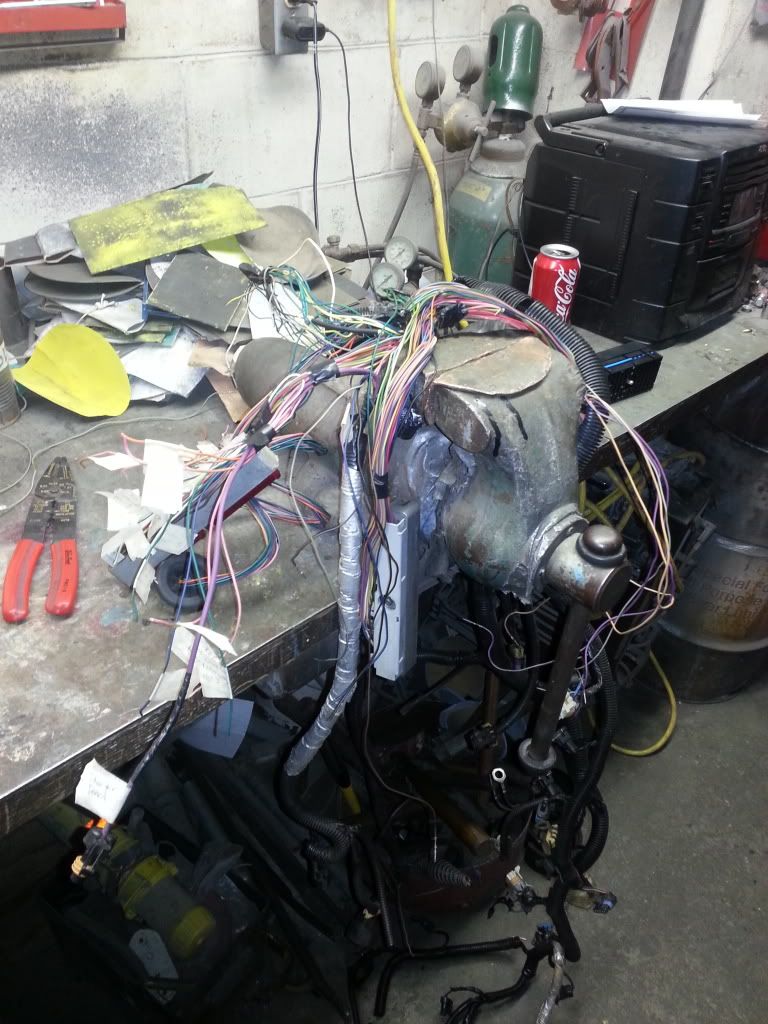
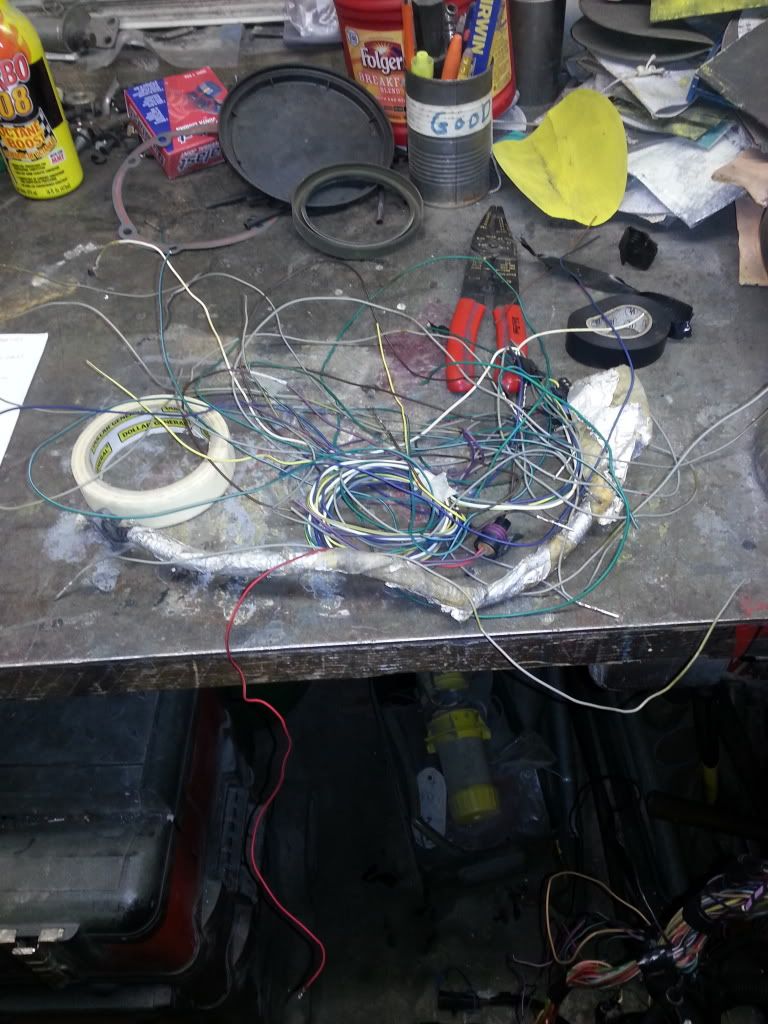
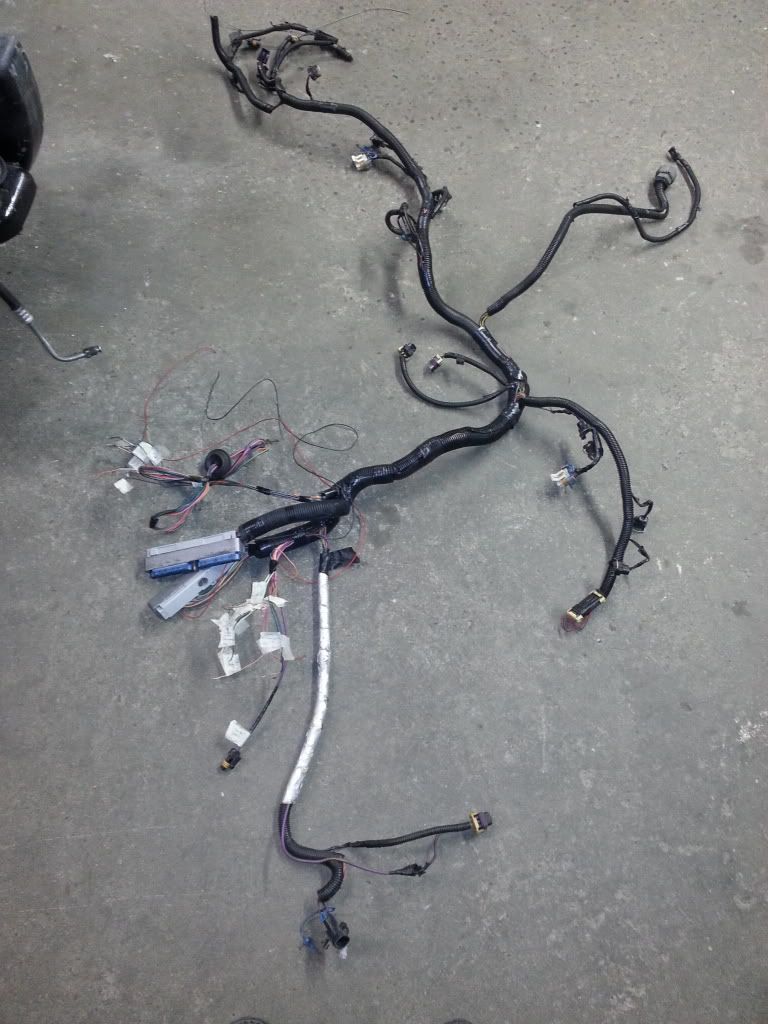
Got started on the wiring some the past few days. All my pinouts I got from lt1swap.com, this site, and s10forum. Everything not being used has been de-pinned and completely removed from the harness, and everything that needs to be connected to the truck harness has been labeled and its position noted.
 [/QUOTE]
[/QUOTE]
04-09-2013, 11:24 PM
#36
On The Tree
Thread Starter
iTrader: (1)
Join Date: Jun 2012
Posts: 141
Likes: 0
Received 0 Likes
on
0 Posts
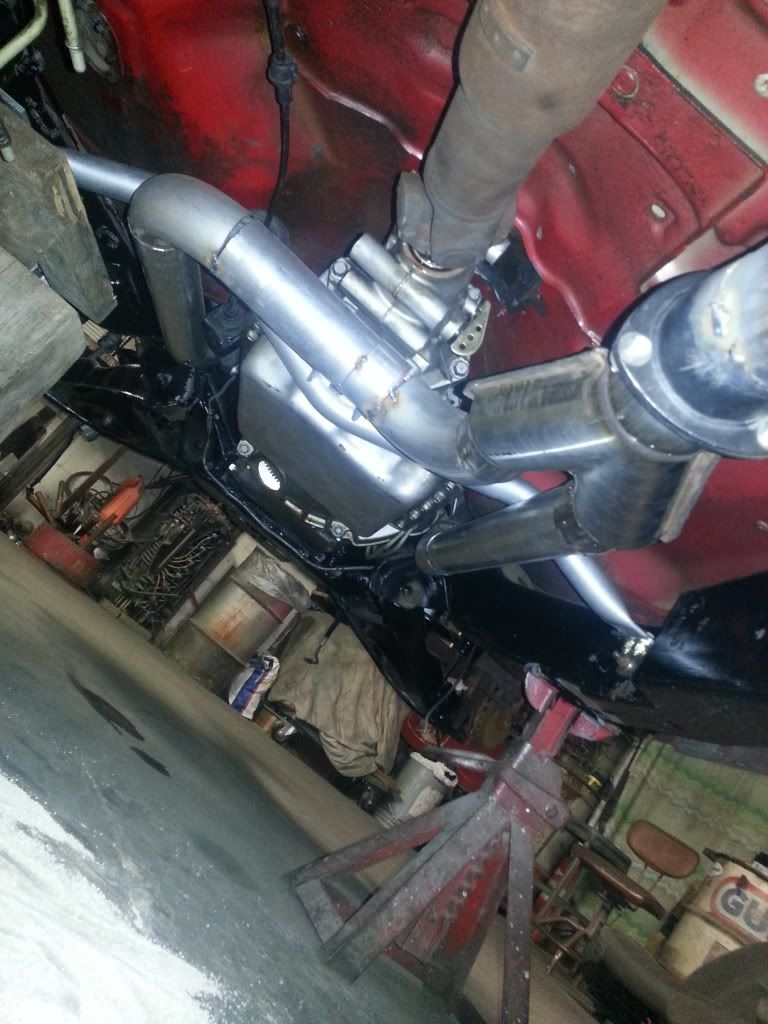
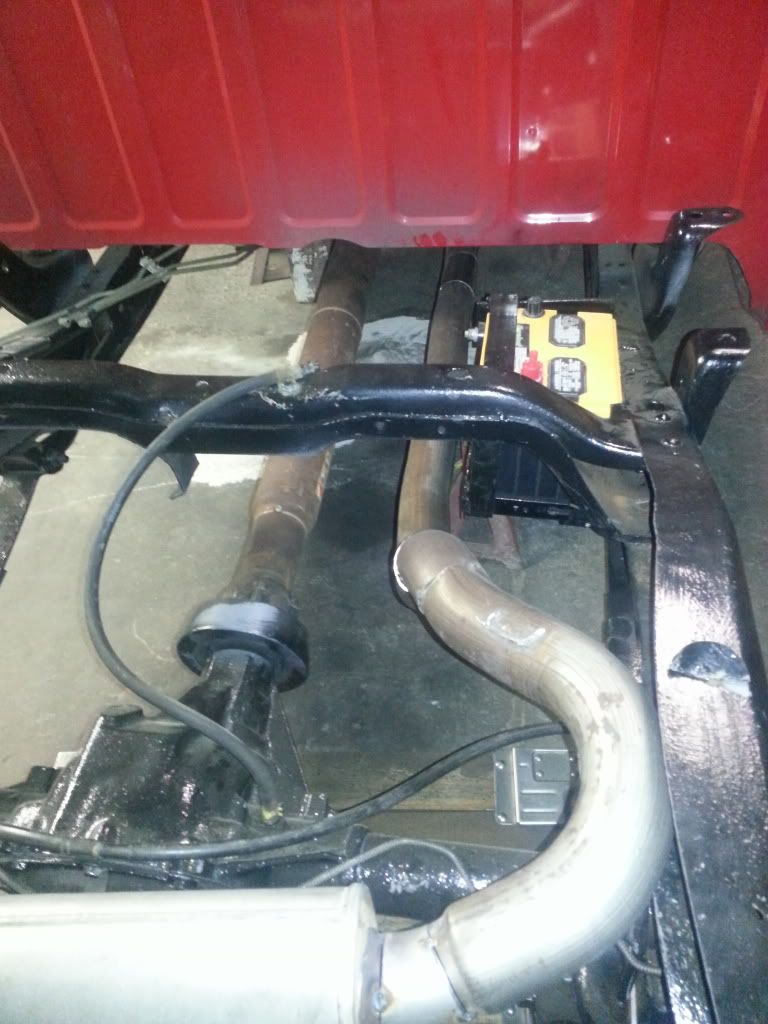
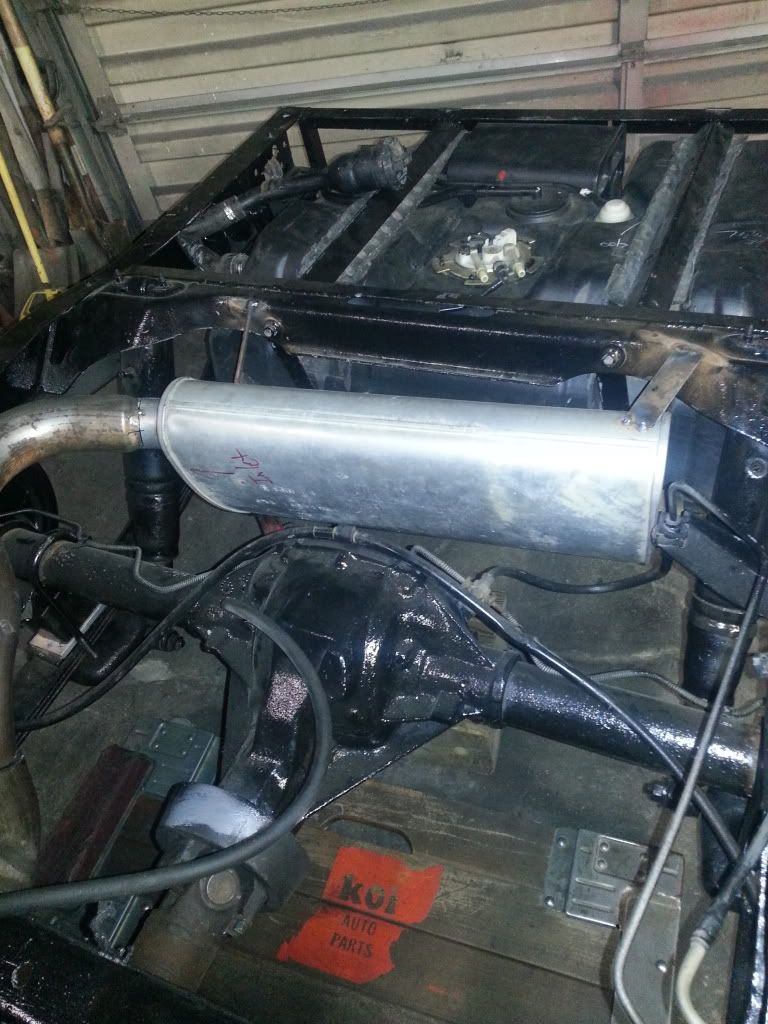
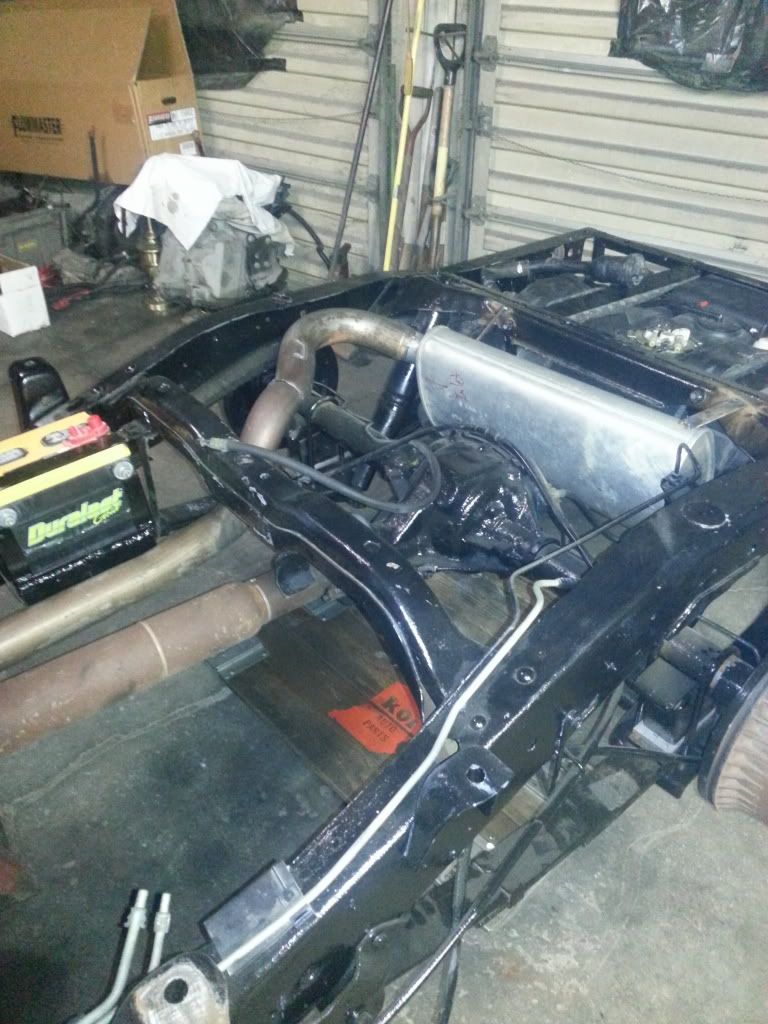
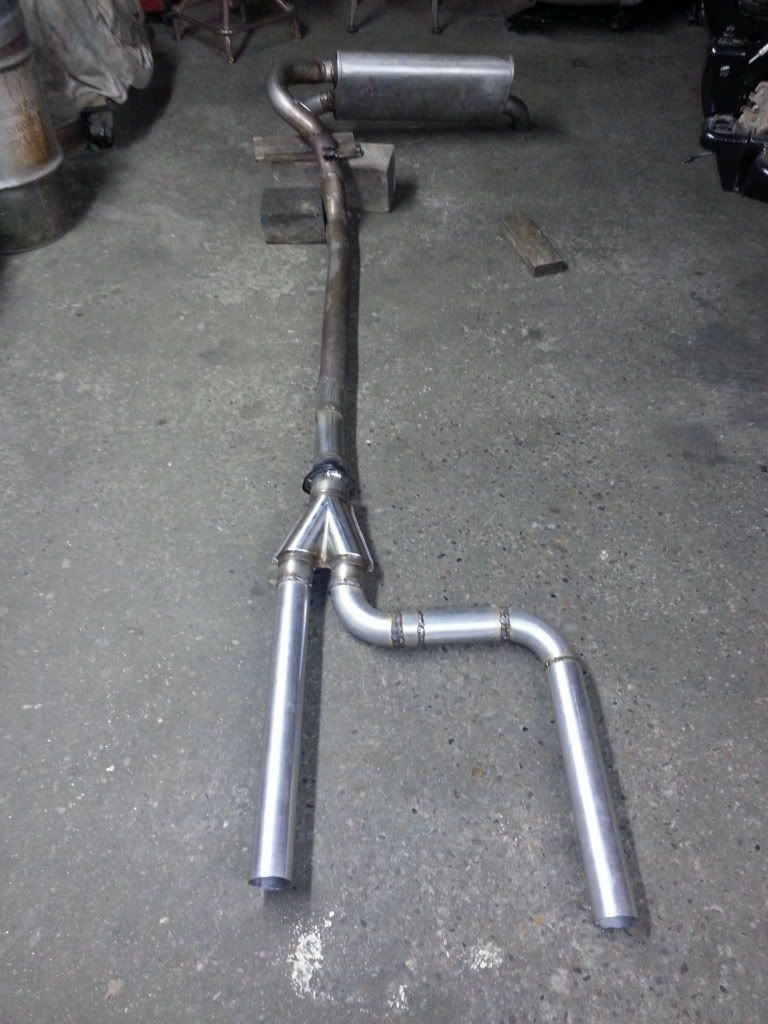
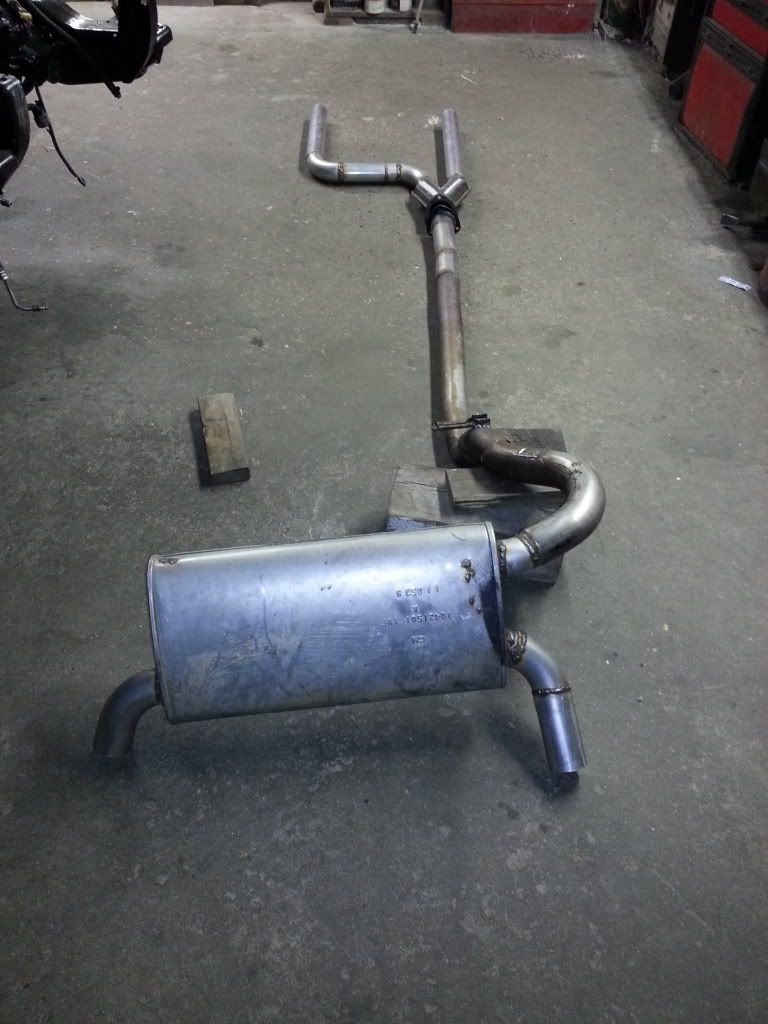
Exhaust is finished. I think it fits well and should sound good. I"m using modified f body manifolds, 2.5" down pipes to a magnaflow y pipe, 2 3/4 out to the stock f body muffler.
04-10-2013, 12:35 AM
#37
Teching In

Join Date: Feb 2013
Location: Memphis TN
Posts: 14
Likes: 0
Received 0 Likes
on
0 Posts
Nice build. Are you wiring so you run factory gauges? How hard is the wiring? I've started my build frame up restoration but haven't made my mind up about the wiring yet.
02-08-2014, 03:29 PM
#39
On The Tree
Thread Starter
iTrader: (1)
Join Date: Jun 2012
Posts: 141
Likes: 0
Received 0 Likes
on
0 Posts
I've neglected this thread long enough so its time for updates. After running out of money half way through and getting burnt out because of it the truck sat for a few months while I decided what my plan of attack was going to be. Going into the swap I like a lot of people underestimated how much I was going to spend. I had the option to either throw the truck back together with as little money as possible to get it on the road, or take my time to save up some money and do everything right the first time while it was all still apart. I chose option number two and decided to wait it out. Not long after that I was on my motorcycle one day and a kid in a jeep pulled out in front of me and totaled my bike. After settling with the insurance company I came out really well on the bike and knew it was time to finish the truck right. I wasn't as diligent this time around on taking pictures of everything but I'll give you guys a run down of everything.
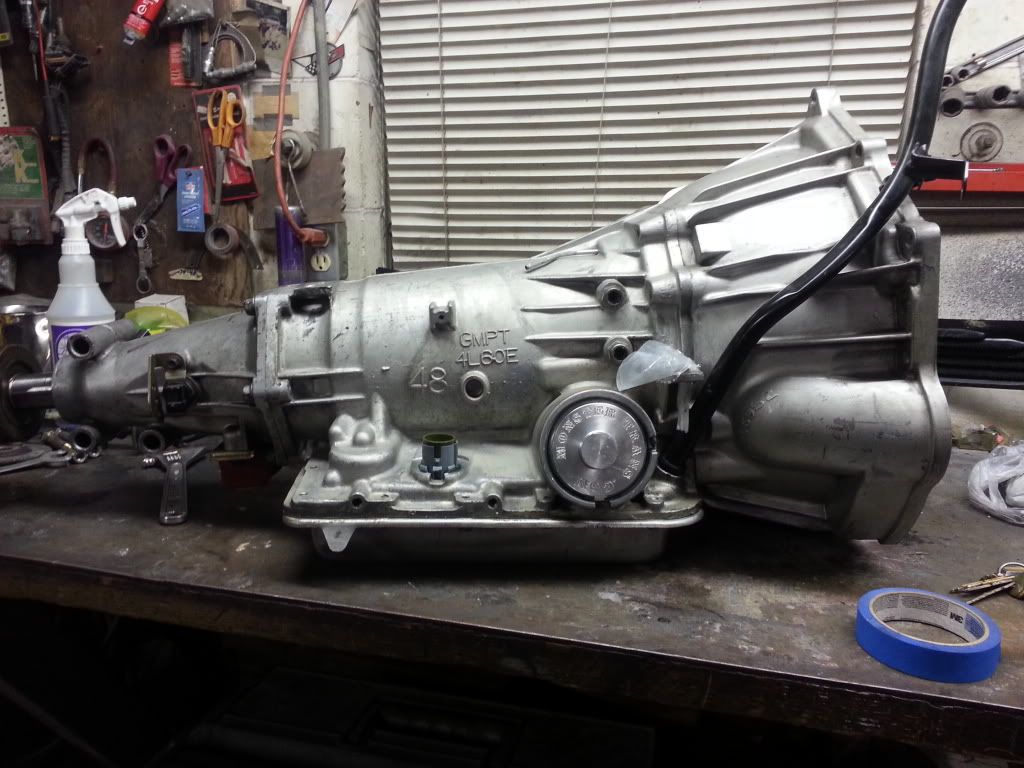
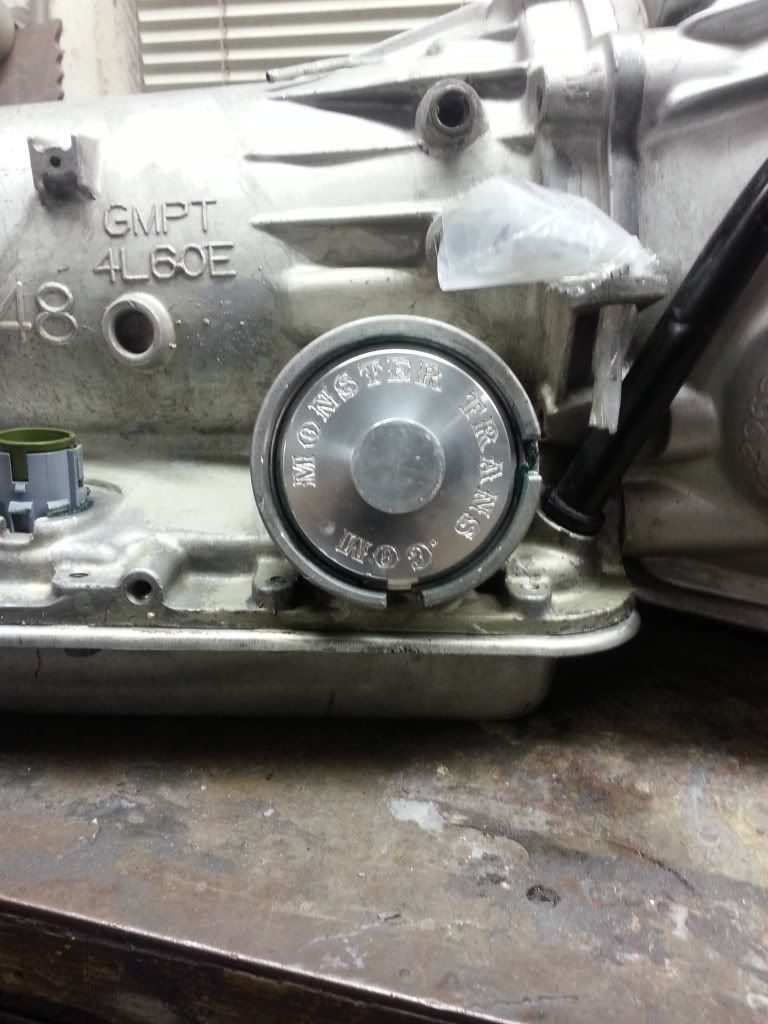
My stock trans was a good low mileage unit, but I knew with the future plans of more power that it wasn't going to make it for very long. I put in an order to monster transmission and got the mega monster in a box kit that they rate for 600hp. I pulled the engine one last time and had a local guy assemble the trans. While everything was all apart I pulled the rear end as well and had it rebuilt with the posi and 3.23 gears from the WS6.
 [/URL]
 [/URL]
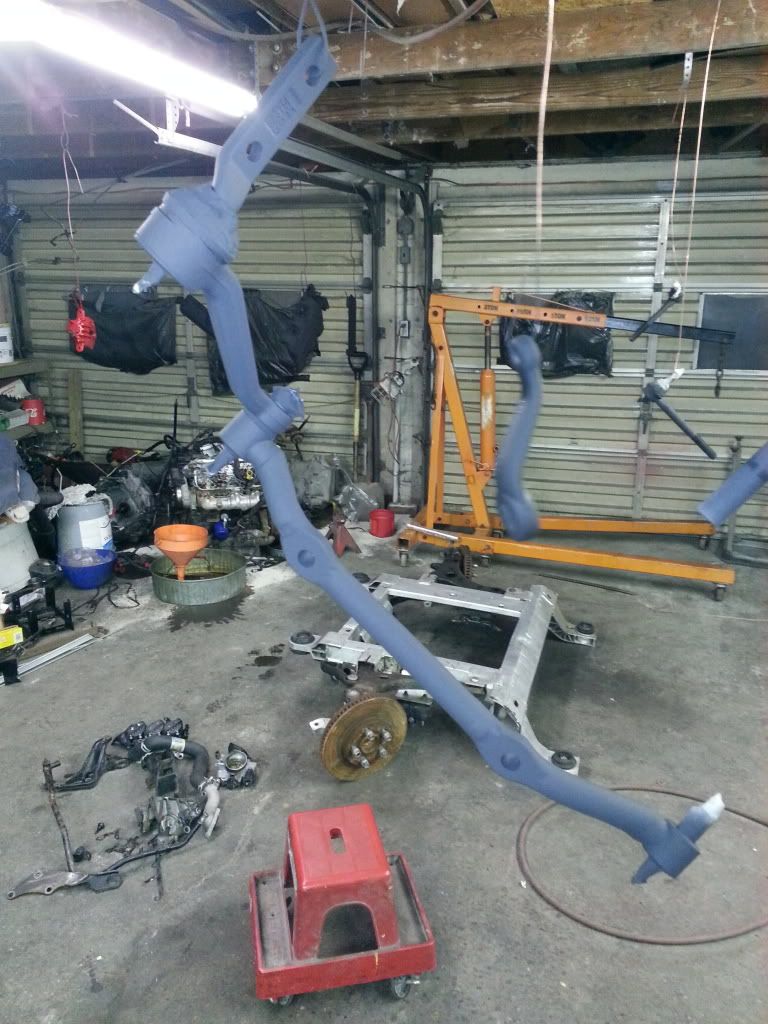
Next up was tackling the steering and suspension. My truck was slammed with the 4 cyl prior to the swap and instead of chancing it sitting too low with too little a spring rate up front I went ahead and replaced the springs with 3" v6 drop springs from DJM with a set of belltech nitro 2 drop shocks and a belltech "chevy lean" coil spacer. To cure my clearance problem with the exhaust manifolds I ordered up a set of tubular upper control arms from speedway, new upper and lower moog ball joints, and new bushings for the lowers.
The steering components were on their last leg as well so I upgraded everything to new moog parts, put in a new zq8 quick ratio steering box, and a blazer front sway bar with new end links.
 [/URL]
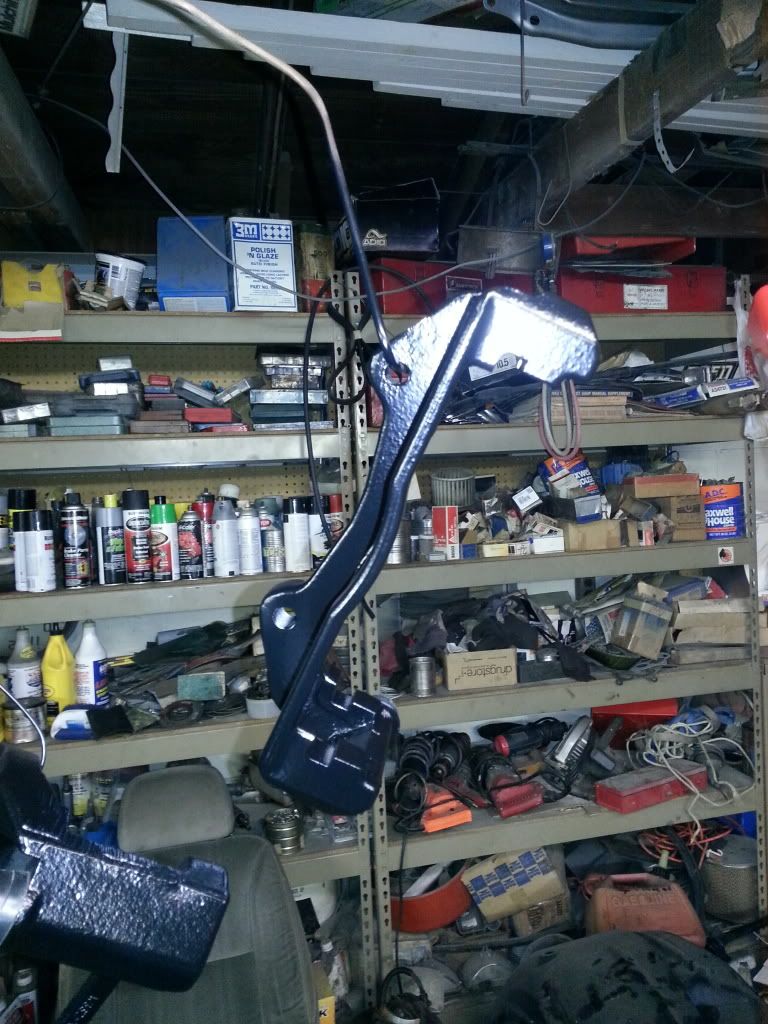
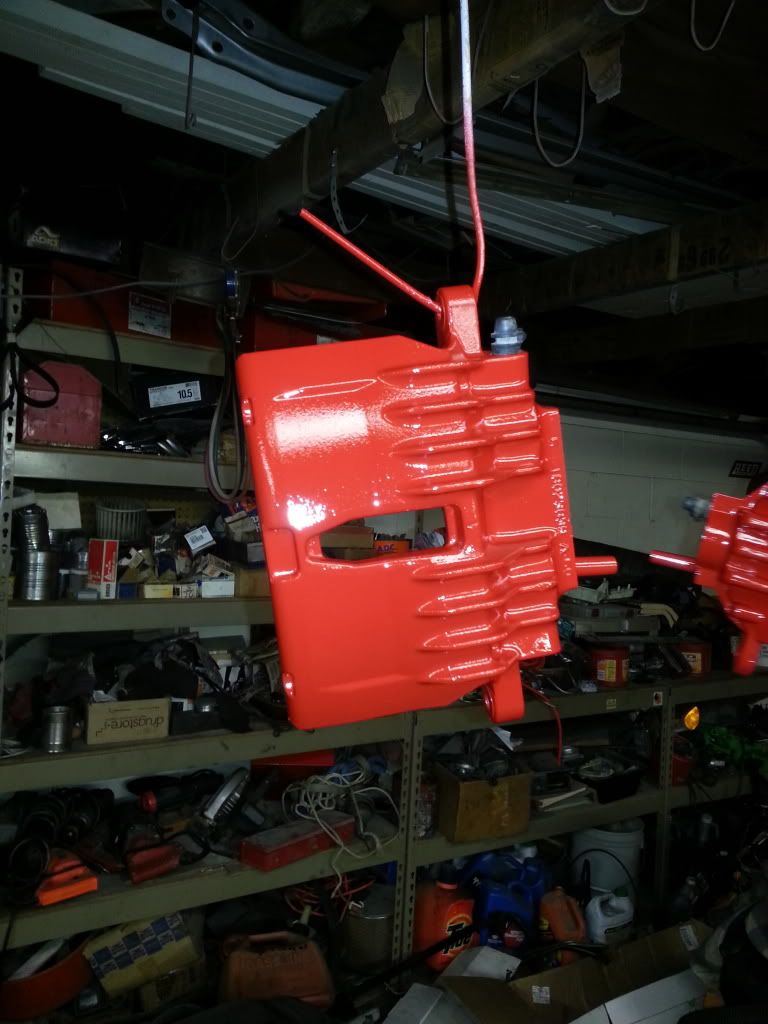
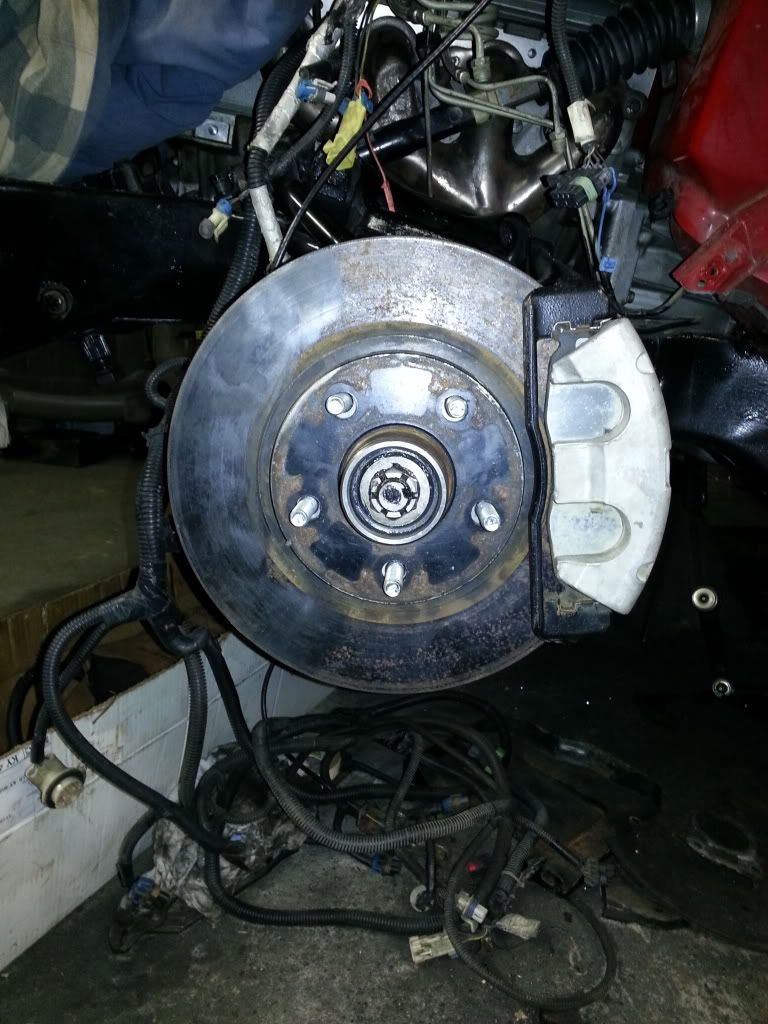
I was in the painting zone and went ahead and painted all my ls1 fbody calipers and brackets. I installed the fbody brakes both front and rear with an adjustable prop valve from summitt racing. I can't remember his name off the top of my head but I got the brackets from a guy on the forum.
 [/URL]
 [/URL]
 [/URL]
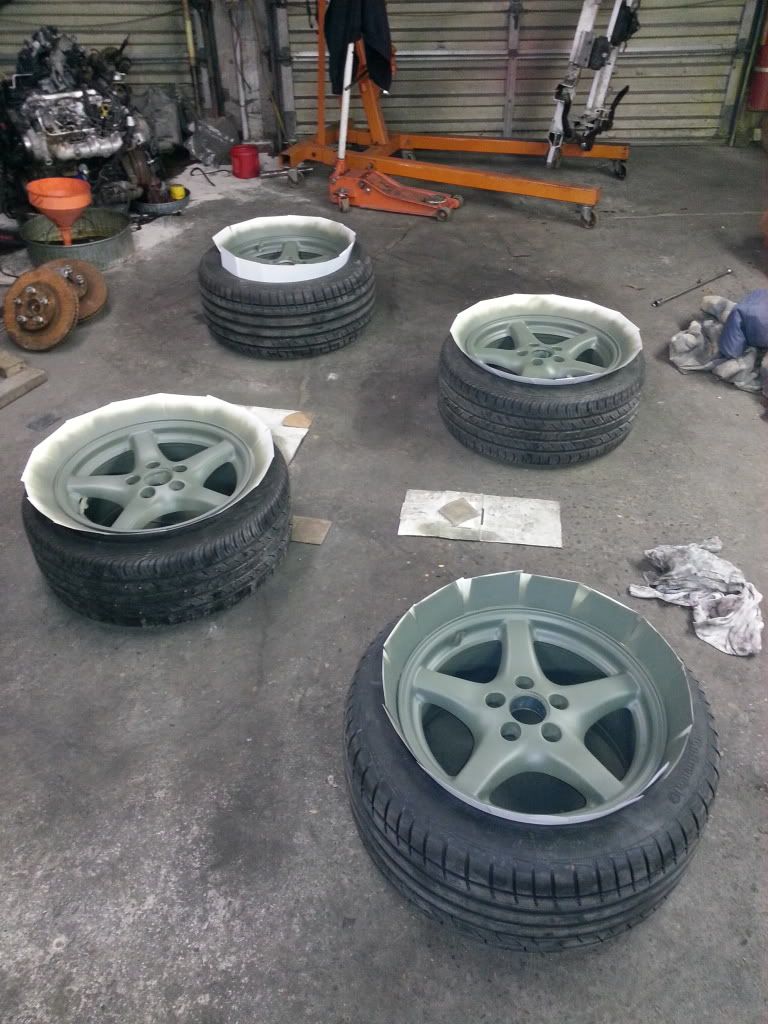
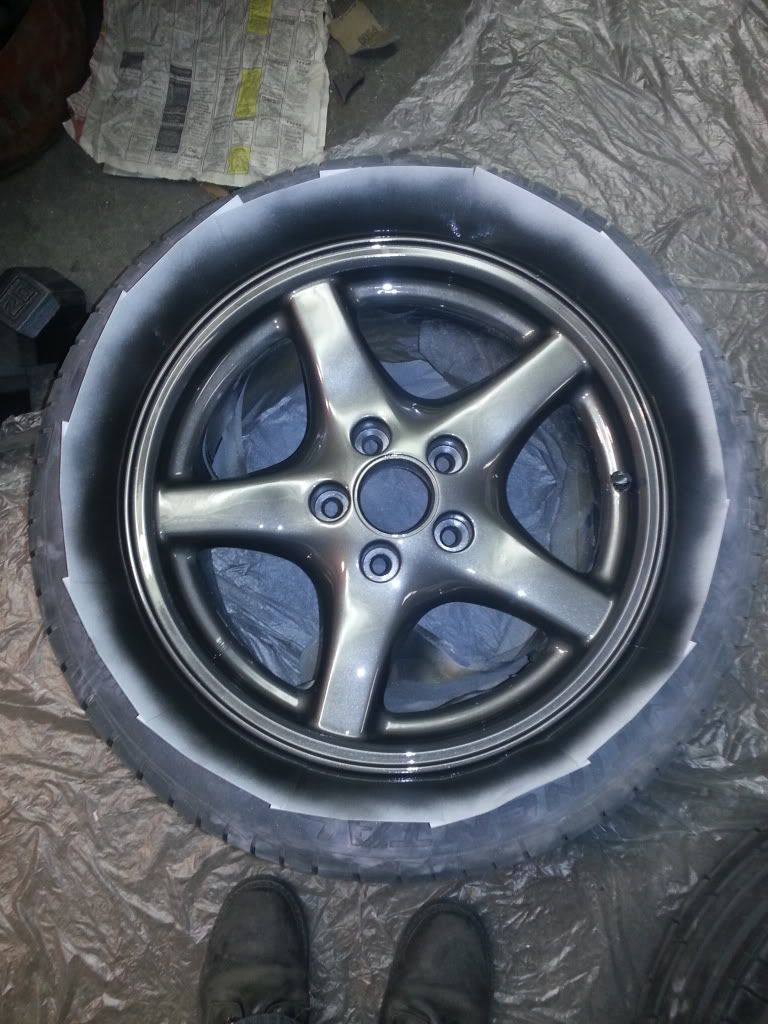
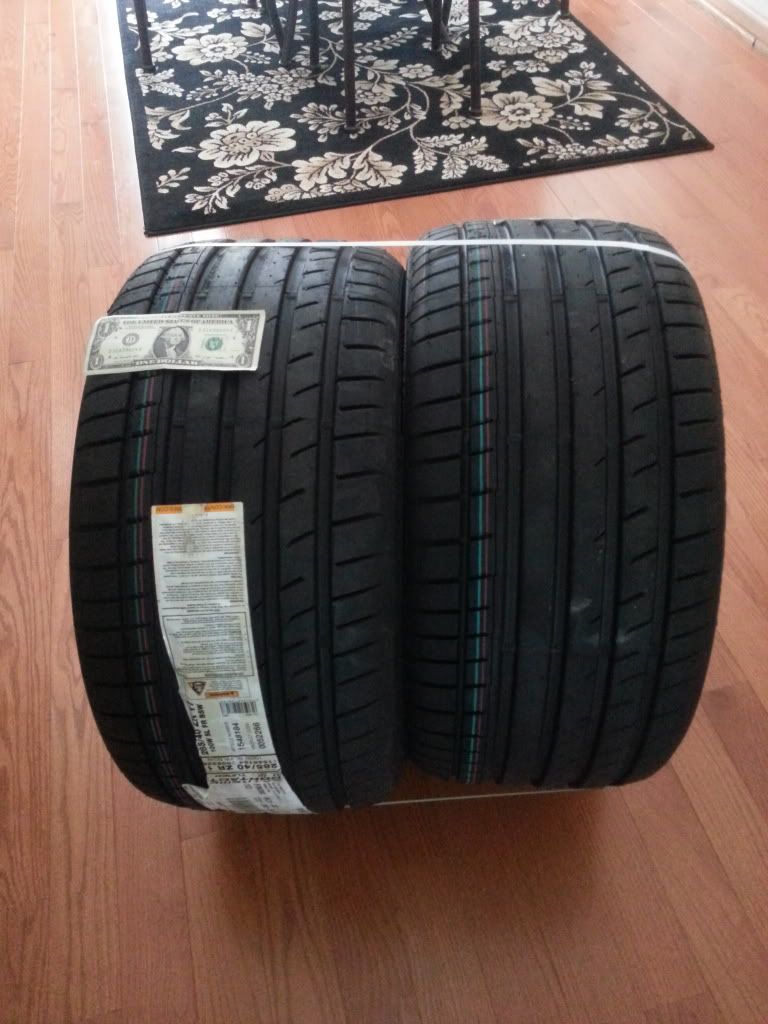
And painted the wheels. I originally intended to polish all the wheels out but after stripping them they were a rough cast finish. I sanded with cartridge rolls and polished the first one, but after having 12 hours in that one I decided to abort that mission. The wheels were stripped to bare aluminum, etch primed, filler primed, sanded and painted with color and clear with duplicolor's graphite wheel paint. I'm very happy with how they turned out and love the color combo on the truck. It doesn't show up that well in the pictures but there is alot of metallic pearl in the sunlight. Also put a set of continental 285/40/17 on the back. The wheels are installed with a 2.25" spacer up front and a 2.5" spacer out back.
 [/URL]
 [/URL]
 [/URL]
The radiator was test fit in the core support and it fit with just enough room for me to be happy, so I boxed everything in and welded it up. I also made my radiator hold down bracket.
 [/URL]
 [/URL]
 [/URL]
Installed the transmission cooler and trimmed everything to fit. Its just a tube and fin style cooler but I'm hoping since its so big that it won't have any problems keeping everything cool. Its really cold here now but we'll see once summer time hits.
 [/URL]
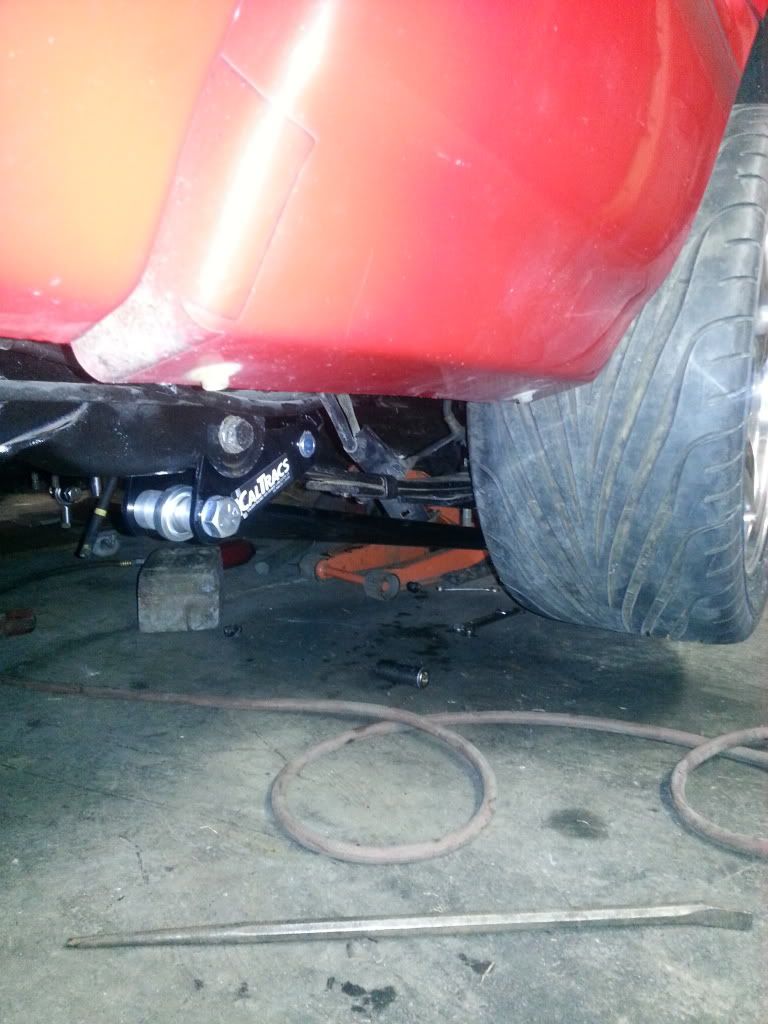
When i ordered the new front suspension components I also replaced my 3" blocks with 2" aluminum blocks from DJM and a pair of set back plates from JTR. Also called up calvert racing and picked up a pair of their low profile caltrac bars. Man these things are sweet.
 [/URL]
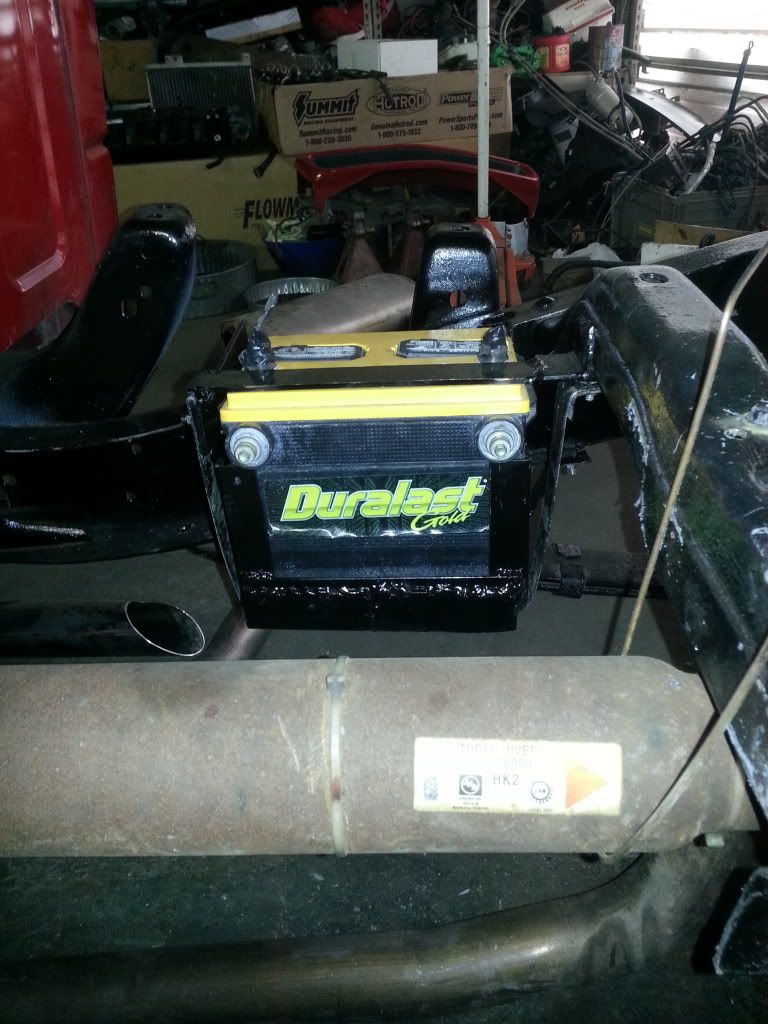
I had the bed off running my new fuel lines and extending the fuel tank wiring and remade my battery tray. I never did like the way the first one ended up, and the second one is much much better.
 [/URL]
A lot of other odd and end finishg work was done like finishing the engine harness I made, running new lines and hoses, wiring and cut off switch for the battery, etc I didn't get pictures of. If anyone has something in particular you want to see just ask and I'll try to get a picture.
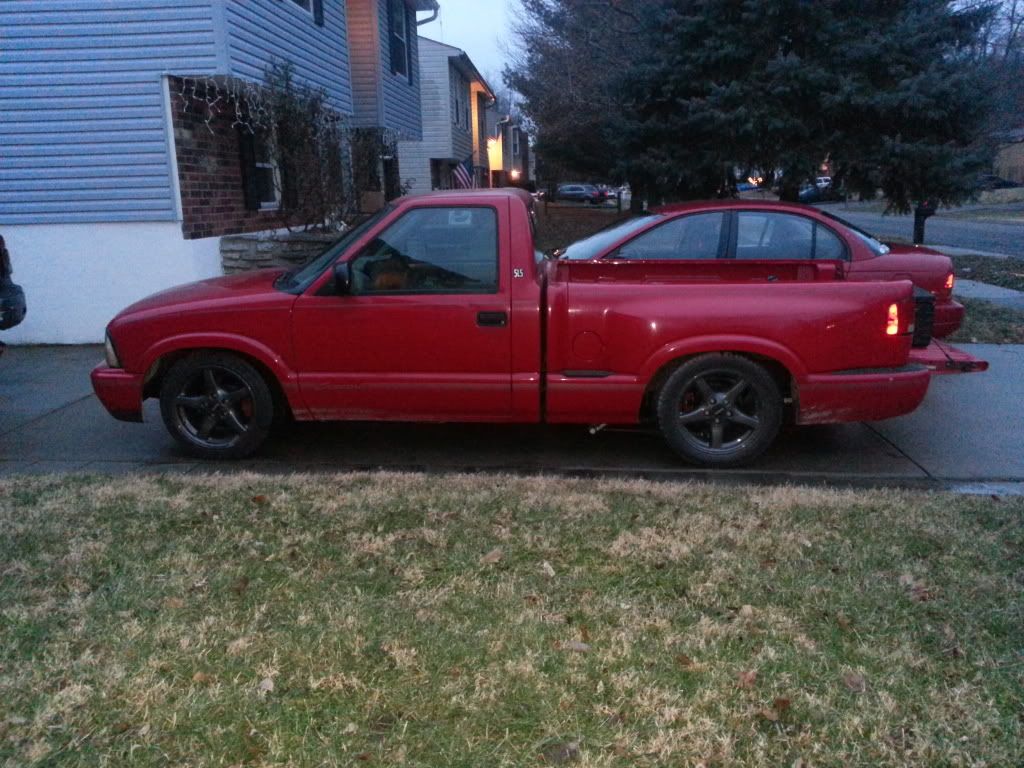
After spending a small fortune on all the new parts and getting all the finishing details lined out I finally got the truck running and driving about a month ago. It actually fired right up first try once everything was hooked up correctly lol. I'm really happy with how nice it ended up turning out. It was worth the extra 6 month wait and additional investment to make everything nice and new. Its pretty much a new truck at this point and its a blast to drive. There are still a few small details that need to be finished like the sheet metal for the fuel filler neck and making an air box, but I'm going to finish all that stuff over the next few months as I drive it. After that I'm sure its not going to be long before the performance parts start making their way in the plans. It already needs more power lol.
Well this post turned out way too long but I guess thats what happens when I don't update for 8 months lol. More updates to come once this crap weather is over. I want to get some more pictures and a good quality video up soon. This is the only decent picture I have of the truck back together so it'll have to do for now. The front springs were still breaking in when I took this picture, they have since settled and the truck is nice and level. Enjoy!
My stock trans was a good low mileage unit, but I knew with the future plans of more power that it wasn't going to make it for very long. I put in an order to monster transmission and got the mega monster in a box kit that they rate for 600hp. I pulled the engine one last time and had a local guy assemble the trans. While everything was all apart I pulled the rear end as well and had it rebuilt with the posi and 3.23 gears from the WS6.
[/URL][/URL]Next up was tackling the steering and suspension. My truck was slammed with the 4 cyl prior to the swap and instead of chancing it sitting too low with too little a spring rate up front I went ahead and replaced the springs with 3" v6 drop springs from DJM with a set of belltech nitro 2 drop shocks and a belltech "chevy lean" coil spacer. To cure my clearance problem with the exhaust manifolds I ordered up a set of tubular upper control arms from speedway, new upper and lower moog ball joints, and new bushings for the lowers.
The steering components were on their last leg as well so I upgraded everything to new moog parts, put in a new zq8 quick ratio steering box, and a blazer front sway bar with new end links.
[/URL]I was in the painting zone and went ahead and painted all my ls1 fbody calipers and brackets. I installed the fbody brakes both front and rear with an adjustable prop valve from summitt racing. I can't remember his name off the top of my head but I got the brackets from a guy on the forum.
[/URL][/URL][/URL]And painted the wheels. I originally intended to polish all the wheels out but after stripping them they were a rough cast finish. I sanded with cartridge rolls and polished the first one, but after having 12 hours in that one I decided to abort that mission. The wheels were stripped to bare aluminum, etch primed, filler primed, sanded and painted with color and clear with duplicolor's graphite wheel paint. I'm very happy with how they turned out and love the color combo on the truck. It doesn't show up that well in the pictures but there is alot of metallic pearl in the sunlight. Also put a set of continental 285/40/17 on the back. The wheels are installed with a 2.25" spacer up front and a 2.5" spacer out back.
[/URL] [/URL][/URL]The radiator was test fit in the core support and it fit with just enough room for me to be happy, so I boxed everything in and welded it up. I also made my radiator hold down bracket.
[/URL][/URL][/URL]Installed the transmission cooler and trimmed everything to fit. Its just a tube and fin style cooler but I'm hoping since its so big that it won't have any problems keeping everything cool. Its really cold here now but we'll see once summer time hits.
[/URL]When i ordered the new front suspension components I also replaced my 3" blocks with 2" aluminum blocks from DJM and a pair of set back plates from JTR. Also called up calvert racing and picked up a pair of their low profile caltrac bars. Man these things are sweet.
[/URL]I had the bed off running my new fuel lines and extending the fuel tank wiring and remade my battery tray. I never did like the way the first one ended up, and the second one is much much better.
[/URL]A lot of other odd and end finishg work was done like finishing the engine harness I made, running new lines and hoses, wiring and cut off switch for the battery, etc I didn't get pictures of. If anyone has something in particular you want to see just ask and I'll try to get a picture.
After spending a small fortune on all the new parts and getting all the finishing details lined out I finally got the truck running and driving about a month ago. It actually fired right up first try once everything was hooked up correctly lol. I'm really happy with how nice it ended up turning out. It was worth the extra 6 month wait and additional investment to make everything nice and new. Its pretty much a new truck at this point and its a blast to drive. There are still a few small details that need to be finished like the sheet metal for the fuel filler neck and making an air box, but I'm going to finish all that stuff over the next few months as I drive it. After that I'm sure its not going to be long before the performance parts start making their way in the plans. It already needs more power lol.
Well this post turned out way too long but I guess thats what happens when I don't update for 8 months lol. More updates to come once this crap weather is over. I want to get some more pictures and a good quality video up soon. This is the only decent picture I have of the truck back together so it'll have to do for now. The front springs were still breaking in when I took this picture, they have since settled and the truck is nice and level. Enjoy!
04-17-2014, 12:18 AM
#40
On The Tree
Thread Starter
iTrader: (1)
Join Date: Jun 2012
Posts: 141
Likes: 0
Received 0 Likes
on
0 Posts
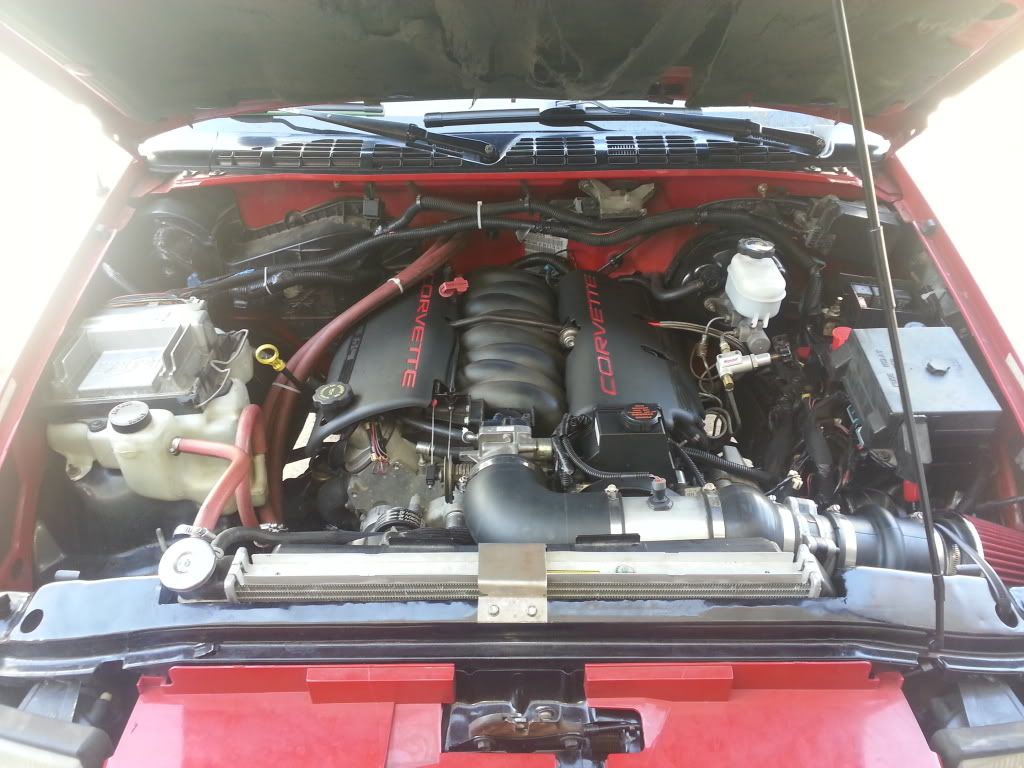
I've got a few new updates. We finally got some nice weather and I made it out to the local 1/8 mile track. Also found some corvette engine covers on craigslist. I think they look bad ***.
The track prep was so so and there were not many slick tire cars making passes, but I made do and laid down a couple decent runs. Here was the best pass of the night.

The street tires just can't hold how hard the converter hits so I had to leave off idle all night. With some et streets it will 60' in the 1.5's no problem. The mph is down a few from where it should be. It needs a fresh set of plugs, these plugs were in for the first start up with nasty 2 year old gas. But with all that said its not too bad for the first time out on street tires and exactly how I drive it everyday. Check out the video.
http://s232.photobucket.com/user/jrh...ovx3y.mp4.html
The track prep was so so and there were not many slick tire cars making passes, but I made do and laid down a couple decent runs. Here was the best pass of the night.
The street tires just can't hold how hard the converter hits so I had to leave off idle all night. With some et streets it will 60' in the 1.5's no problem. The mph is down a few from where it should be. It needs a fresh set of plugs, these plugs were in for the first start up with nasty 2 year old gas. But with all that said its not too bad for the first time out on street tires and exactly how I drive it everyday. Check out the video.
http://s232.photobucket.com/user/jrh...ovx3y.mp4.html