
67 Camaro swap, project "belly button"
 03-06-2013, 06:42 AM
#21

You mentioned the DSE mini-tubs, and I'm not sure that anyone responded to it. It's my understanding that you have to use their offset shackles and move the spring perches (probably replace with DSE perches) to allow the springs to clear the mini-tubs.
The other option is to go with a 4-link like DSE quad system to get the clearance. With either option, you also have to use a narrowed gas tank. So, with all of that and the fact that you purchase a tank that may or may not be narrowed already, there are some other things that you'd have to think about before going to the mini-tubs. First, would be the gas tank, and then the suspension mods, all of which means more money.
I love the idea of the mini-tubs as well as the 4 link system, but it depends on where you are money-wise and what you are willing to do. You'd probably have to sell or modify the tank that you purchased, if it's not narrowed. I guess you could go with what you already have for now, and then maybe come back to the whole rear suspension/mini-tub thing later. Just some more stuff to think about.
Hope that helps!
Bill B.
P.S. I like the thread and the project. Keep up the good work.
Last edited by BillB; 03-06-2013 at 06:48 AM.

 03-06-2013, 03:28 PM
#23
TECH Apprentice
Thread Starter
Thanks guys, I appreciate it. Bill, you raise some great points regarding the mini tub option. I was actually thinking about fixing a little rust in the trunk where the shocks bolt and that got me thinking that the mini tub will take care of that problem and I would have the tubs done. I was not considering moving the leafs. I did order the vaporworx with the clipped corners so in the future IF I go quadralink or similar, I can shorten the rear end and fit a larger tire. My main problem now is budget to get this this running and is it really worth all the cutting and welding for mini tubs now even though I am going with stock width rear end and leafs. I am kind of leaning towards waiting for now and just attack the rear suspension all at once as you mentioned. It is so hard to resist the temptation of "while you're there...might as well..." Lol. I hope to get back on the project in a couple weeks, pics and updates coming so stay tuned!
04-25-2013, 07:17 PM
#25
TECH Fanatic
iTrader: (26)

Join Date: Mar 2010
Location: Milledgeville, GA
Posts: 1,909
Likes: 0
Received 0 Likes
on
0 Posts
Looks great so far. I'm 39 and NEVER had a chance to buy a 67-69 camaro or even firebird for $500. Does it remind anyone else of the "Better Off Dead" camaro?
05-06-2013, 06:28 PM
#26
TECH Apprentice
Thread Starter
Thanks for the kind words! I agree even in 1992 this was a great deal for a 67 Camaro, interior was perfect and body looked good. The rust on the floorboards actually happened when my dad had the car stored at a buddies shop outside, in the rain for 1-2 years. This car has been around! Even survived my dad's divorce from wife #2! THAT is determination:-) So I feel like treating the Camaro with the utmost appreciation after all these years. I have to watch that movie but I've seen pics of that Camaro and I can see the resemblance. I hope to get the car fired up this summer, we'll see though...
05-06-2013, 06:36 PM
#27
TECH Fanatic
iTrader: (26)
Join Date: Mar 2010
Location: Milledgeville, GA
Posts: 1,909
Likes: 0
Received 0 Likes
on
0 Posts
Oh it is a must see. Don't watch all the youtube vids of it first or it'll ruin the best parts. You'll see there is more than just a visual resemblance. It sits under a tarp for years after being bought for $200 because his girlfriend said it was "tasty". LOL
05-06-2013, 06:44 PM
#28
TECH Apprentice
Thread Starter
So far I have not had time to turn a wrench on the car. I have been coaching daughters baseball and working a TON of overtime. I am hoping to earmark some of the OT funds for the Camaro. Here are pics of a few goodies I was able to purchase and set aside for when I hit the project hard this summer...
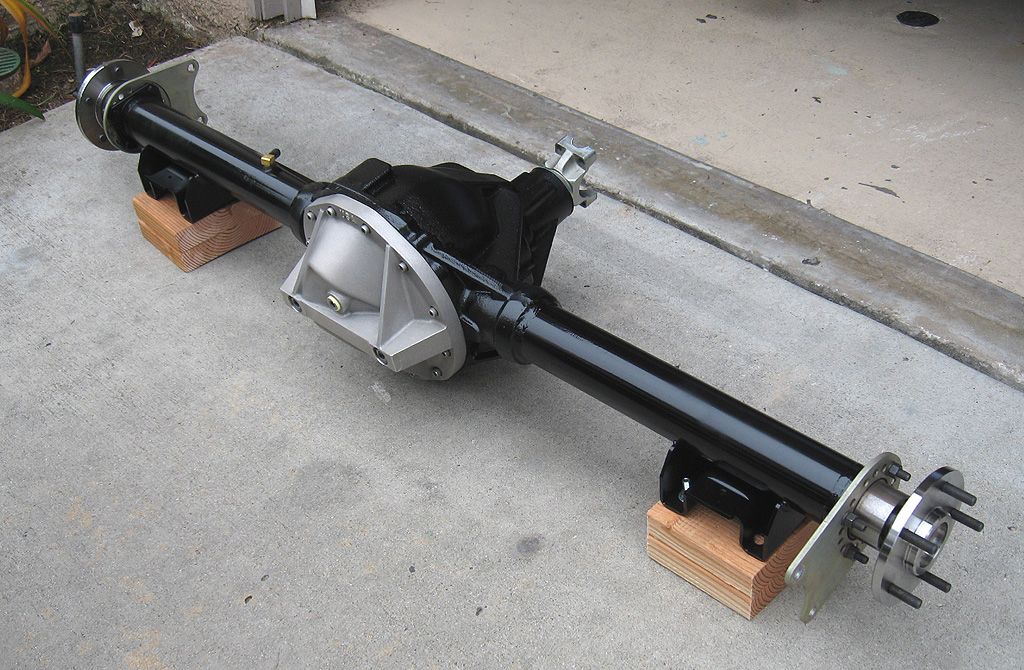
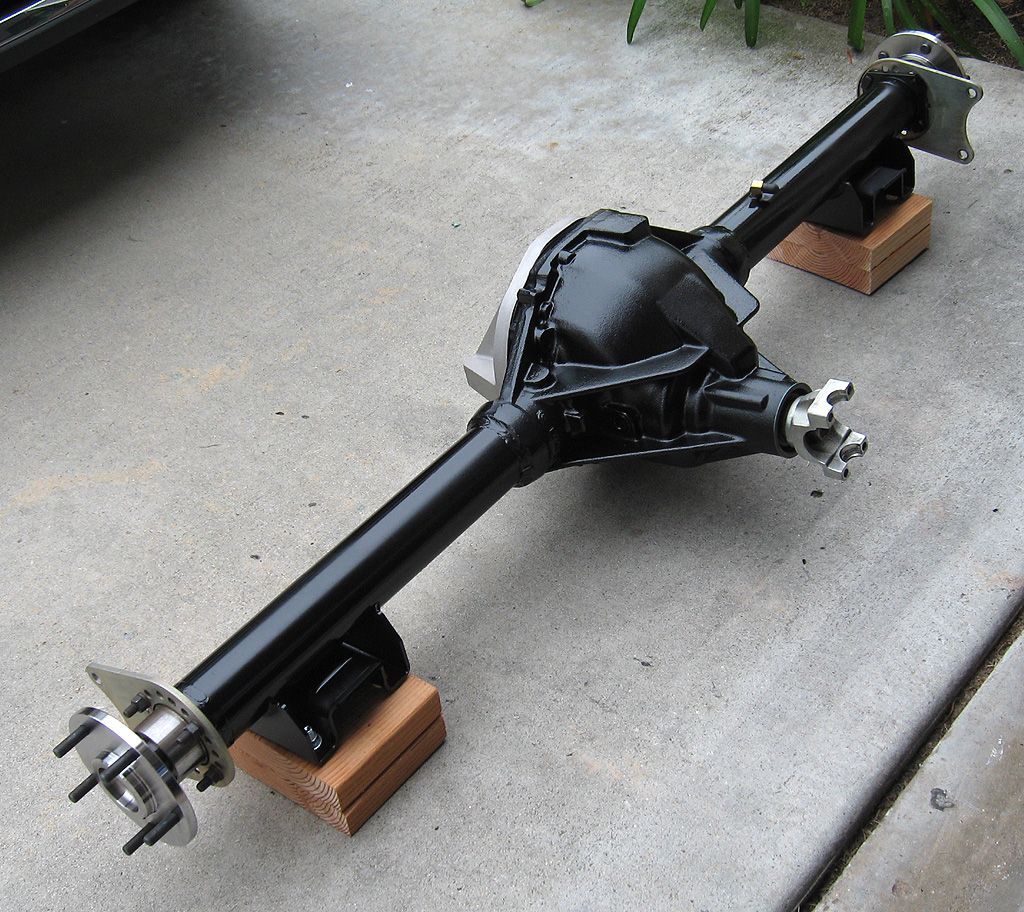
Moser 12 Bolt:
Vaporworx Tank (Expensive but QUALITY piece):
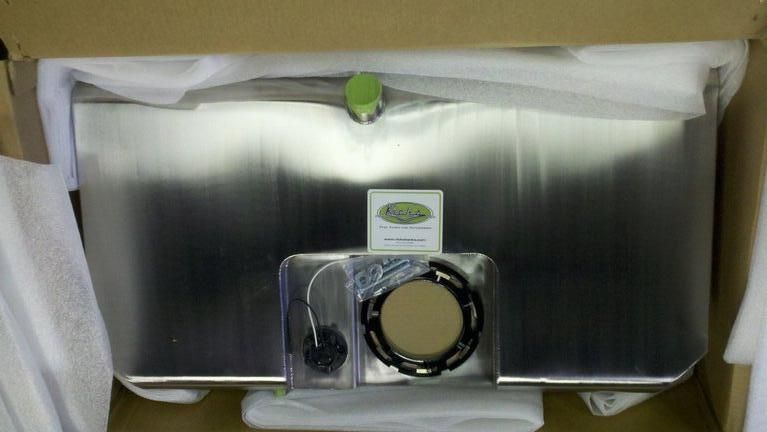
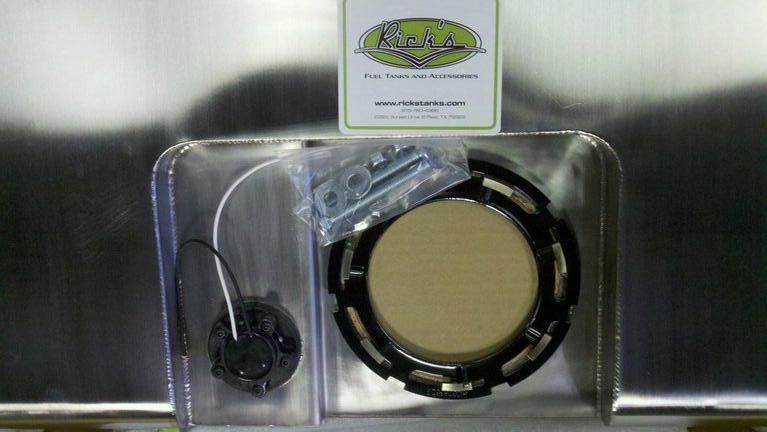
I seriously did not want to spend so much on a tank/fuel pump for this project. I also wanted the stock look. However, after tons of research and speaking with Carl Cassanova over the phone, I decided that I go ahead and splurge on the Ricks tank with Vaporworx set up. I love the idea of using factory GM LS3 fuel pump, baffled tank, and corner pick ups on this project. Plus, this tank was used on One Lap of America Camaro and ran down to one gallon with no problems. That is what I'm looking forward to. And if I get the itch to supercharge, I know I'm set with this tank. BIG decision but one I am happy with at the end.
I am currently thinking about picking up a MAST pan for the project (any advice on this?), Howell, Speartech, or PSI Wiring Harness/ECM (decided not to go Holley), Clutch/Throwout Bearing/Oil pump, and misc. fittings for fuel lines. I still have not decided if I want to go stainless or stock material but I know I want to run hardline as far as I can get away with. Also, I still don't have the Doug Thorley Headers. I sent an e-mail to Jaime and Nick but they just said they are waiting for approval to go forward with selling the product then I will get mine. I am REALLY looking forward to getting those and doing a little review of installation, fitment, etc. They look like great stainless headers. I will keep you all posted. Should be a fun summer!!!
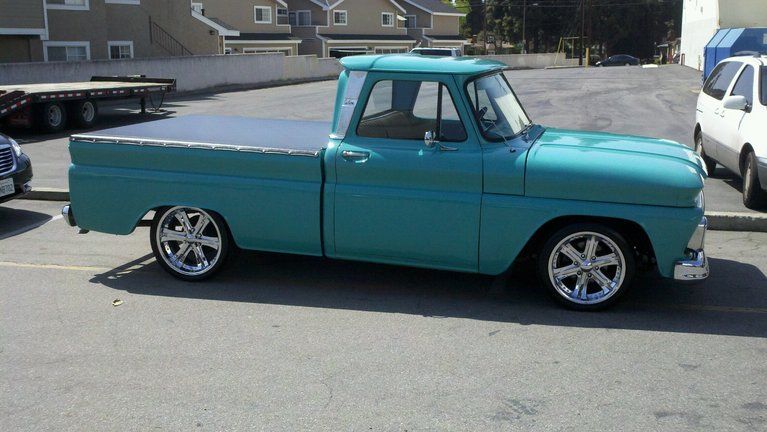
I'll leave you with a shot of the family truck, 65 C-10 big window, after a much needed cut/buff/polish before the wife and I renewed our wedding vows. Good times:-)
Moser 12 Bolt:


Vaporworx Tank (Expensive but QUALITY piece):


I seriously did not want to spend so much on a tank/fuel pump for this project. I also wanted the stock look. However, after tons of research and speaking with Carl Cassanova over the phone, I decided that I go ahead and splurge on the Ricks tank with Vaporworx set up. I love the idea of using factory GM LS3 fuel pump, baffled tank, and corner pick ups on this project. Plus, this tank was used on One Lap of America Camaro and ran down to one gallon with no problems. That is what I'm looking forward to. And if I get the itch to supercharge, I know I'm set with this tank. BIG decision but one I am happy with at the end.
I am currently thinking about picking up a MAST pan for the project (any advice on this?), Howell, Speartech, or PSI Wiring Harness/ECM (decided not to go Holley), Clutch/Throwout Bearing/Oil pump, and misc. fittings for fuel lines. I still have not decided if I want to go stainless or stock material but I know I want to run hardline as far as I can get away with. Also, I still don't have the Doug Thorley Headers. I sent an e-mail to Jaime and Nick but they just said they are waiting for approval to go forward with selling the product then I will get mine. I am REALLY looking forward to getting those and doing a little review of installation, fitment, etc. They look like great stainless headers. I will keep you all posted. Should be a fun summer!!!
I'll leave you with a shot of the family truck, 65 C-10 big window, after a much needed cut/buff/polish before the wife and I renewed our wedding vows. Good times:-)

Last edited by MisterD; 05-06-2013 at 06:49 PM.
05-06-2013, 06:50 PM
#30
TECH Apprentice
Thread Starter
SWEET! I may have to re-name the project!!! I'm hoping netflix has it...
05-06-2013, 06:51 PM
#31
TECH Apprentice
Thread Starter
Those brackets are for use with Wilwood brakes. I bought the rear end with them installed. I can get you more information about the brake kit if you are interested.... Shoot me a PM
05-09-2013, 10:32 PM
#35

Great work, Daniel! You're so fortunate to have your dad assist.
Your detailed work on the frame & firewall looks like a professional job.
Wow, a $500 Camaro! Your patience is paying off, and you'll have a terrific piece of art when finished.
Wait till you get out on the road. Folks will be tailing you, honking horns, giving "thumbs up"!
Best Regards, Glenn
Your detailed work on the frame & firewall looks like a professional job.
Wow, a $500 Camaro! Your patience is paying off, and you'll have a terrific piece of art when finished.
Wait till you get out on the road. Folks will be tailing you, honking horns, giving "thumbs up"!
Best Regards, Glenn

 . So you in the clear on that one. Good job so far though.
05-10-2013, 01:52 PM
. So you in the clear on that one. Good job so far though.
05-10-2013, 01:52 PM
#37
TECH Apprentice
Thread Starter
Great work, Daniel! You're so fortunate to have your dad assist.
Your detailed work on the frame & firewall looks like a professional job.
Wow, a $500 Camaro! Your patience is paying off, and you'll have a terrific piece of art when finished.
Wait till you get out on the road. Folks will be tailing you, honking horns, giving "thumbs up"!
Best Regards, Glenn
Your detailed work on the frame & firewall looks like a professional job.
Wow, a $500 Camaro! Your patience is paying off, and you'll have a terrific piece of art when finished.
Wait till you get out on the road. Folks will be tailing you, honking horns, giving "thumbs up"!
Best Regards, Glenn
05-10-2013, 01:52 PM
#38
TECH Apprentice
Thread Starter
06-06-2013, 12:47 PM
#39
TECH Apprentice
Thread Starter
Hey Guys, no real updates yet, still working overtime and stockpiling funds for the project. I will be ordering parts soon so that I can make some serious progress this summer. On that note, I was wondering what your thoughts are on this new McLeod hydraulic conversion kit for our cars? (http://www.mcleodracing.com/info/?id=5514). I am going to install an LS7 clutch before dropping the engine back in the car. I was going to re-use the donor car hydraulics but I figured there is no sense in that since I'm putting in the new clutch. So, I was going to just buy a new stock 2002 Camaro master but then saw this kit. Any thoughts? Will this hydraulic set up work well with the Stock GM LS7 Clutch/slave/TO bearing etc.? Also any thoughts on where to purchase the LS7 clutch kit for this swap? Thanks for any input to this new McLeod kit and the LS7 clutch kit.
07-08-2013, 11:34 PM
#40
TECH Apprentice
Thread Starter
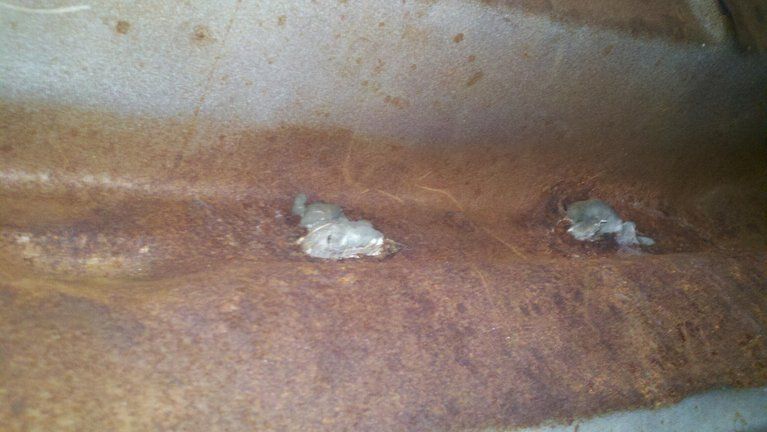
Well a lot of time has passed since my last post and since I last worked on the car. This weekend I was very excited to get my new rear end installed and the new tank in the car. Unfortunately I found hidden rust in the trunk near the rear shock towers. It was a HUGE disappointment to say the least. I decided to wait on installing everything, which I have been looking forward to for an entire semester of teaching, so that I can address the rust in the trunk. Here are a few pictures of the rusted areas.
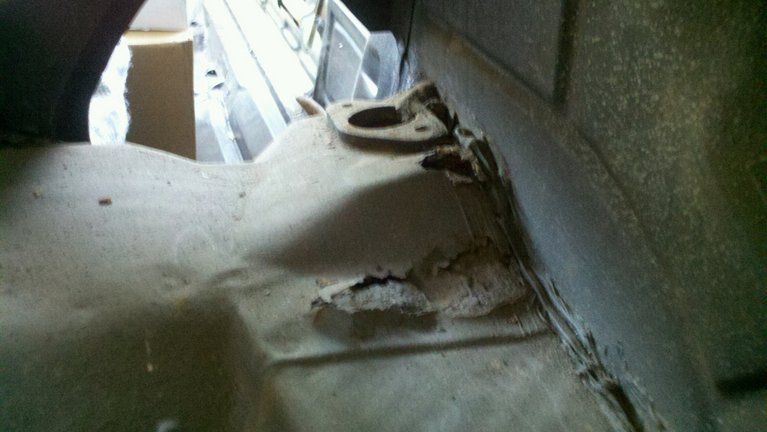
Right Rear:
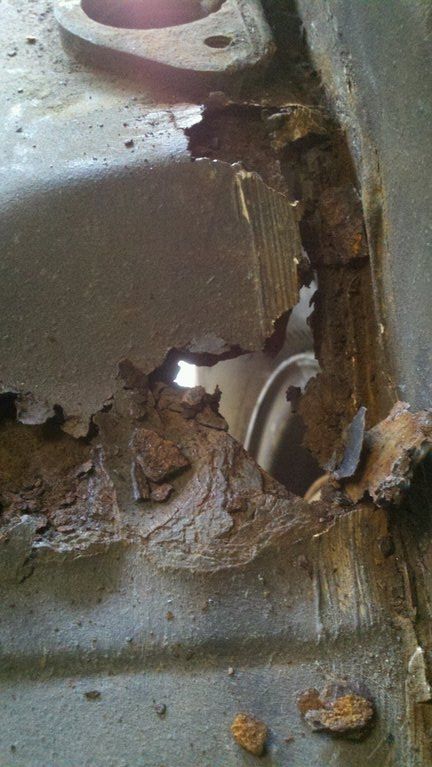
Right Rear after poking softly with a screw driver:
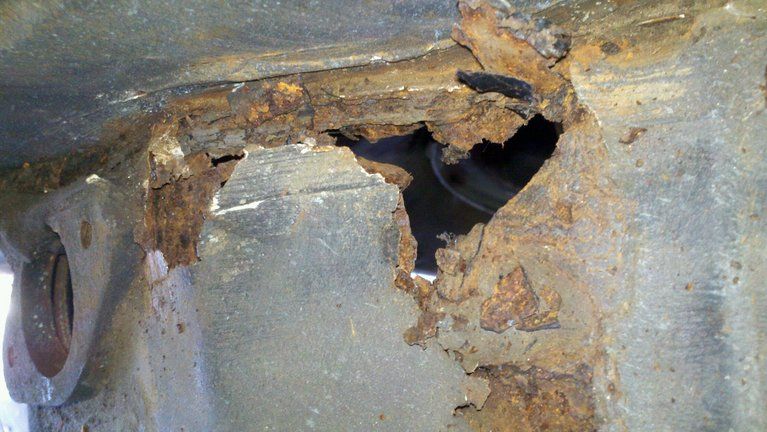
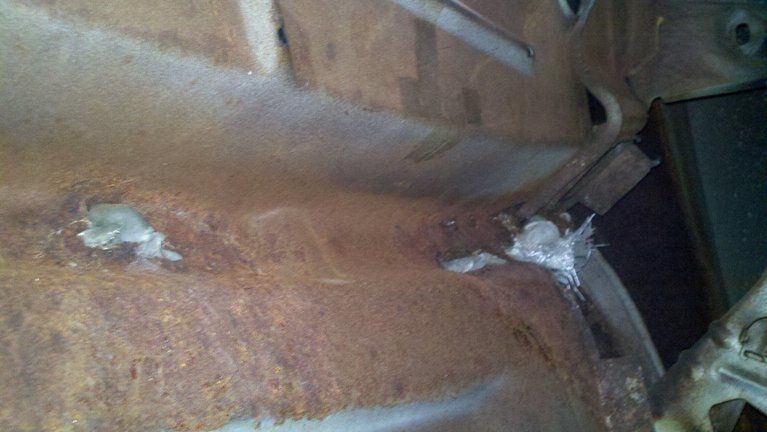
Left Rear:


Laying in trunk looking up at rear window channel gave me the history of where the water entered the trunk. The previous body person used fiberglass to "repair" the rotted rear window channel/speaker shelf.

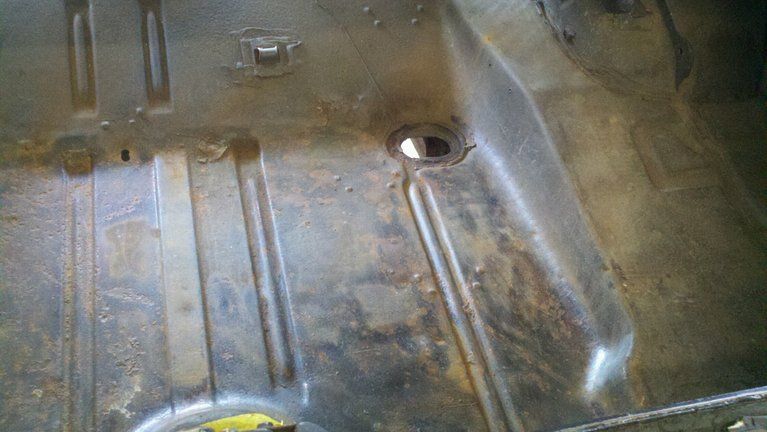
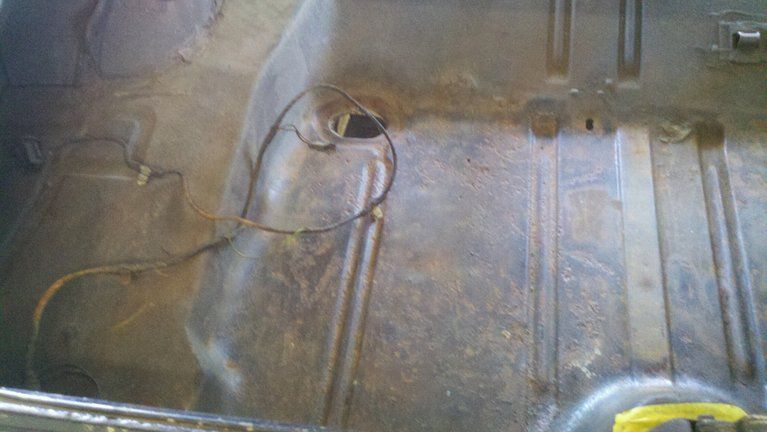
Full shot of the trunk:
SO...
Now I have to make a big decision. I know I will have to replace the full trunk pan because I don't want a rear shock poking through the floor and I'm kind of OCD with keeping things clean/tidy. I have two scenarios that could pan out, 1. I can buy a welder, learn to weld (my father in law and cousin are both expert welders) and tackle the job on my "spare" time. OR 2. pay a body shop to replace the pan and upper speaker shelf.
I am a bit skeptical about cutting and replacing the speaker shelf because of all the intricate detail related to the rear window channel/deck lid. It looks very daunting. Problem with sending this to a shop is that I will be VERY tempted to say F it and get the body media blasted and fix all the gremlins/repaint the entire car. With a family and new home I am not sure I have the budget for that. One quote I recall was near 20-30K for that kind of job, OUCH! Anyway, you can see I have a lot of decisions to make and not a lot of progress to report to date. I will keep this page updates as decisions are made. Any and all suggestions/opinions are greatly appreciated. THANKS!
Right Rear:

Right Rear after poking softly with a screw driver:


Left Rear:


Laying in trunk looking up at rear window channel gave me the history of where the water entered the trunk. The previous body person used fiberglass to "repair" the rotted rear window channel/speaker shelf.


Full shot of the trunk:


SO...
Now I have to make a big decision. I know I will have to replace the full trunk pan because I don't want a rear shock poking through the floor and I'm kind of OCD with keeping things clean/tidy. I have two scenarios that could pan out, 1. I can buy a welder, learn to weld (my father in law and cousin are both expert welders) and tackle the job on my "spare" time. OR 2. pay a body shop to replace the pan and upper speaker shelf.
I am a bit skeptical about cutting and replacing the speaker shelf because of all the intricate detail related to the rear window channel/deck lid. It looks very daunting. Problem with sending this to a shop is that I will be VERY tempted to say F it and get the body media blasted and fix all the gremlins/repaint the entire car. With a family and new home I am not sure I have the budget for that. One quote I recall was near 20-30K for that kind of job, OUCH! Anyway, you can see I have a lot of decisions to make and not a lot of progress to report to date. I will keep this page updates as decisions are made. Any and all suggestions/opinions are greatly appreciated. THANKS!