
LS3 – 525HP / Legend LGT-700 Conversion in a 66 Pontiac GTO Convertible
 10-30-2015, 09:47 PM
#61


Had some health issues which slowed me down and after I got that ironed out, I started working out some tuning issues. Getting closer though. I have some PS pump noise issues, LM-2 dual wide band issues, 2-3 shift issues, and some other misc issues.
On tap for this winter:
1. Order up a PSC remote PS reservoir and order up the Kwik PS/ALT bracket so I can clock the PS pump 180 degrees out from the factory location. The Kwik bracket will allow the reservoir to be mounted lower and make the pressure port easier to access.
2. send the trans back to Legend to have them look at the shift issue. These guys are awesome...excellent customer service. Needless to say, pulling a trans sucks.
3. re-wire the battery charge lead from control panel to battery with a #4 to help with voltage regulation in the dash circuit
4. Create a relay panel for the rear tail/stop/turn and back up lights. This gets a large amp draw through the dash circuit wiring using relays.
5. install kick panel speakers
6. pull headers to check the gaskets to make sure I don't have exhaust leaks.
7. re-configure the left gauge pod from a dual gauge to a quad to include fuel level, fuel pressure, L&R wide band O2
8. run a larger power feed wire for the wide band controller.
Will give updates when possible. Looking to sell the car at some point so I am weighing my options verses $$$ spent.
 11-09-2015, 09:01 PM
#62
Teching In

Join Date: Jun 2013
Location: Dublin, Georgia
Posts: 40
Likes: 0
Received 0 Likes
on
0 Posts
Sorry to hear of your health issues. We ain't getting any younger. Better do it while you can! I've got my LS3 in with the T56. Went with a 9 inch rear from 9 inch factory with 3.89 gears. Used the Holley oil pan with their motor mount plates. all seems to be fitting well. Kind of bummed out by having to cut the trans tunnel to get the T56 in. Got the T56 and hydraulic clutch from American Powertrain. Also used a Hydroboost brake master cylinder. used stock trans cross member with some slight modifications.
11-11-2015, 01:25 PM
#63
Yea...still kicking around selling the car. We'll see how things progress. Maybe just needed a break.
I would love a t56 but that tunnel cutting thing keeps me from doing it. Is this documented in your build?
I would love a t56 but that tunnel cutting thing keeps me from doing it. Is this documented in your build?
02-02-2016, 06:54 PM
#65
Teching In
Join Date: Jun 2013
Location: Dublin, Georgia
Posts: 40
Likes: 0
Received 0 Likes
on
0 Posts
tried the long tube headers from Headman and Hooker. Disappointed in both sets. The Headman units hit the floor pans and the Hooker units were in three pieces each side. Looked like a leak waiting to happen. Also came too close to the oil filter for comfort. have now ordered the mid-length headers from Jegs and hope for better luck. Jegs has been great to work with as far as returns and exchanges.
02-24-2016, 09:25 PM
#68
Teching In
Join Date: Jun 2013
Location: Dublin, Georgia
Posts: 40
Likes: 0
Received 0 Likes
on
0 Posts
Got the mid length Hedman headers. I am using a Quick Time bell housing with a T56 six speed trans. We used the stock trans cross member, but had to re-located the mounting tabs on the frame. Got the correct mounting angle and feel OK about that. The Quick Time has a flange that extends beyond the mounting surface of the block. looks like we are going to have to trim this flange to get the mid length to fit. This the third set of headers we have tried. Getting tired of the swapping out. May try the Doug's if these can't be worked in. Got to figure out how to post pictures of this from my Apple computer! Problem is with me and lack of familiarity with the Apple computer
02-26-2016, 06:54 PM
#70

tried the long tube headers from Headman and Hooker. Disappointed in both sets. The Headman units hit the floor pans and the Hooker units were in three pieces each side. Looked like a leak waiting to happen. Also came too close to the oil filter for comfort. have now ordered the mid-length headers from Jegs and hope for better luck. Jegs has been great to work with as far as returns and exchanges.
03-16-2016, 05:01 PM
#71
Teching In
Join Date: Jun 2013
Location: Dublin, Georgia
Posts: 40
Likes: 0
Received 0 Likes
on
0 Posts
Sorry, got the Hedman and Hooker headers mixed up. Been through too many choices. Hedman long tube headers were in 3 pieces. Sent them back to Jegs and got the Hedman mid length headers. Passenger side fits. Using the motor mounting plates from Holley with Small Block motor mounts. We trimmed the Quick Time bell housing for clearance. Now the driver's side hits the cross-member. Kind of frustrated.
03-16-2016, 05:30 PM
#72
Launching!
Bummer man. Have you thought about waiting for the Hooker / Holley kit coming in the next couple months? https://ls1tech.com/forums/conversio...ew-thread.html You might be going backwards a bit, but all the stuff from one vendor should mean everything fits, right?
03-16-2016, 05:33 PM
#73
Launching!
Bummer man. Have you thought about waiting for the Hooker / Holley kit coming in the next couple months? https://ls1tech.com/forums/conversio...ew-thread.html You might be going backwards a bit, but all the stuff from one vendor should mean everything fits, right?
04-06-2016, 09:46 PM
#74
Busy winter so far…Here are some updates.
Tired of boring audio, I decided to give my tunes an upgrade. I currently have the Retrosound Model 2 radio…and while it is OK in the audio department, it is not anything to write home about. They made this thing with detent style rotary controls and they are a little noisy and quirky sometimes. However, it works, fills the hole in the dash and looks OK. Just wish someone made a better product for these older cars without having to carve up a nice dash.
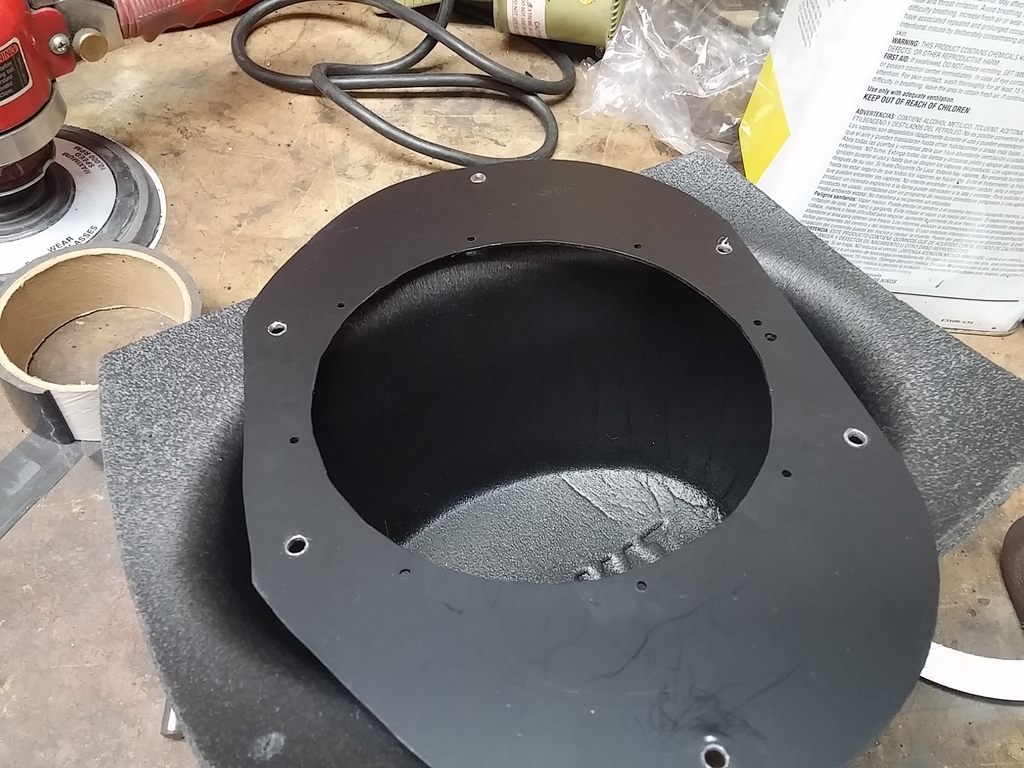
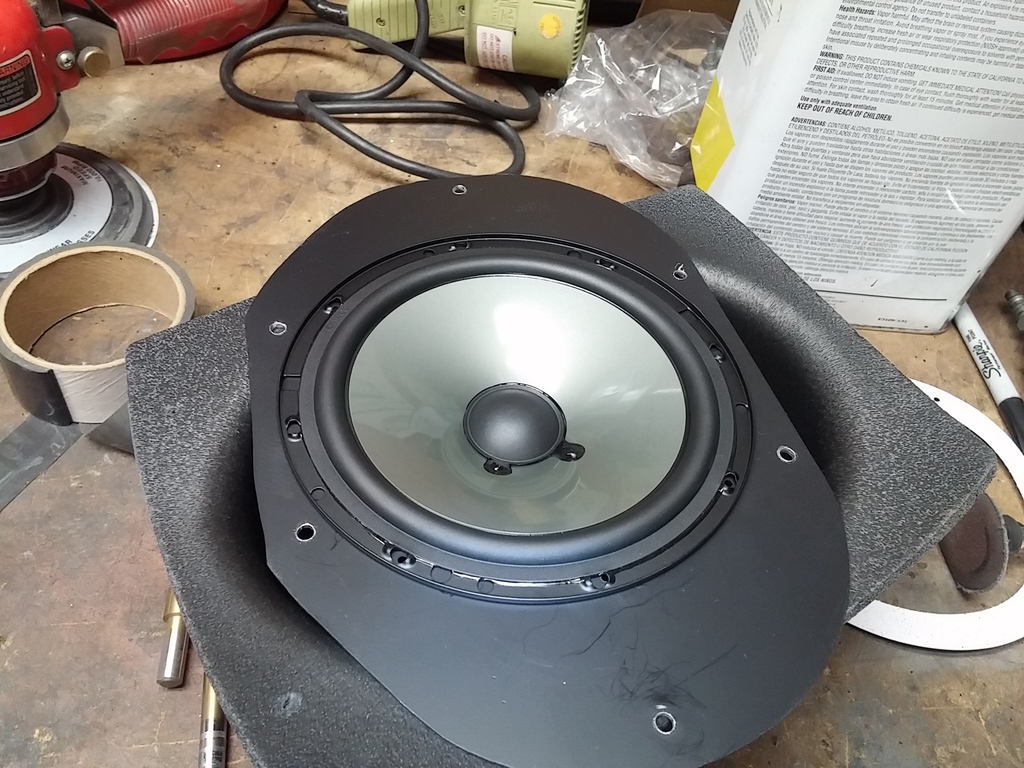
Being a convertible, it came with a single 4 X 10 center mounted dash speaker. I replaced that several years back with a pair of Rockford Fosgate 2-way 4.5” drivers and they sound pretty good. Being small drivers, the bass is lacking and have limited power handling capability. I recently decided to can the kick panel vents and fit the openings with new speakers. I bought a pair of JL Audio C2-650 component speakers from Amazon and set out on coming up with a way to mount them.
I made a bracket for the bass drivers out of a piece of 16 gauge steel and bought a boom mat speaker pod to protect the back side from getting wet.
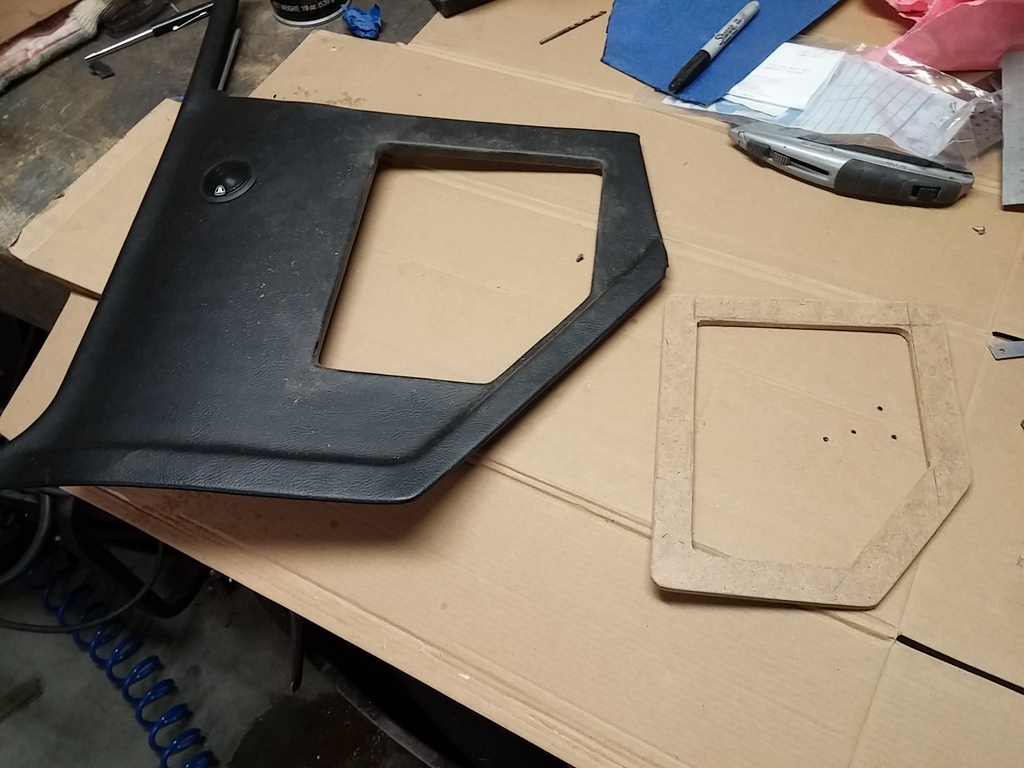
Given that the factory kick panel covers are geared to vents and not speakers, I decided to modify the kick panels to make them functional and attractive.
Using a piece of MDF, I made a template for cutting out the vent louvers in the kick panels. The template will ensure both sides are identical.
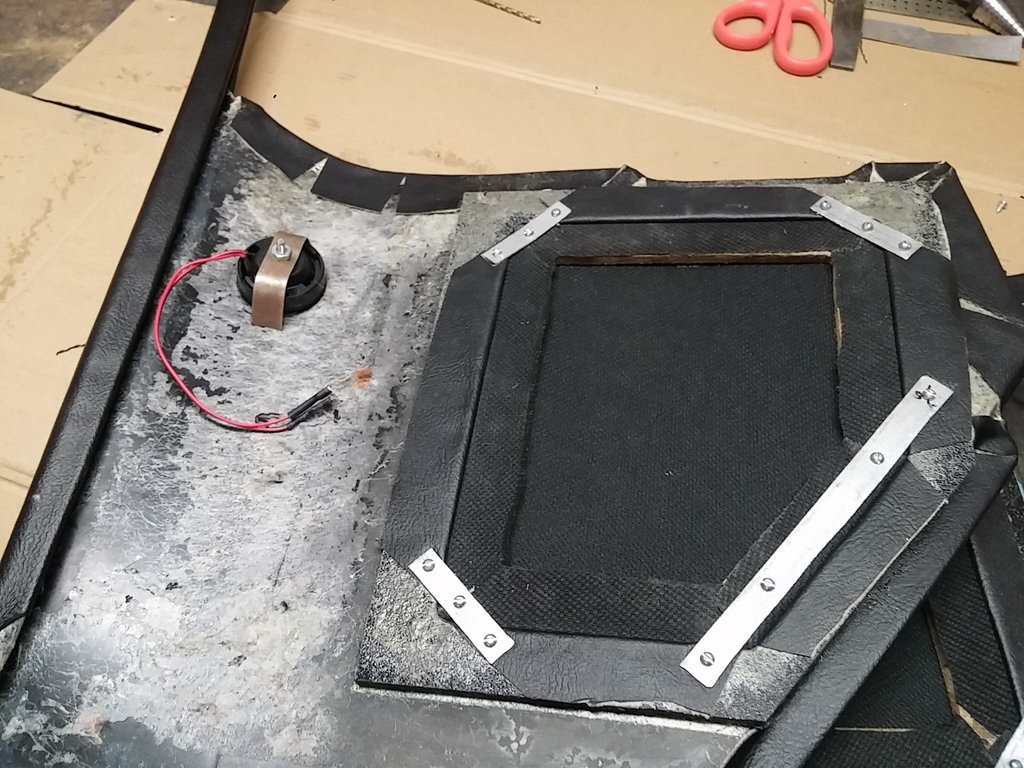
I measured and clamped the template to the plastic and used my router with a guide bushing to cut the holes in the kick panels. Given that the kick panels are not very thick, I wanted to stiffen them up to accept a speaker grill. I bought a piece of Ľ” ABS from Grainger and used the template to cut out the hole in the ABS to match the kick panel. Using 3M super trim adhesive, I roughened up both pieces of plastic and bonded the ABS to the back side of the kick panel.
With the 2-way system, I needed a spot to put the tweeter where there is at least ľ” of clearance on the back side. The 66 GTO has a very convenient indentation in the sheet metal structure kick panel that made the placement of the tweeter a no brainer.
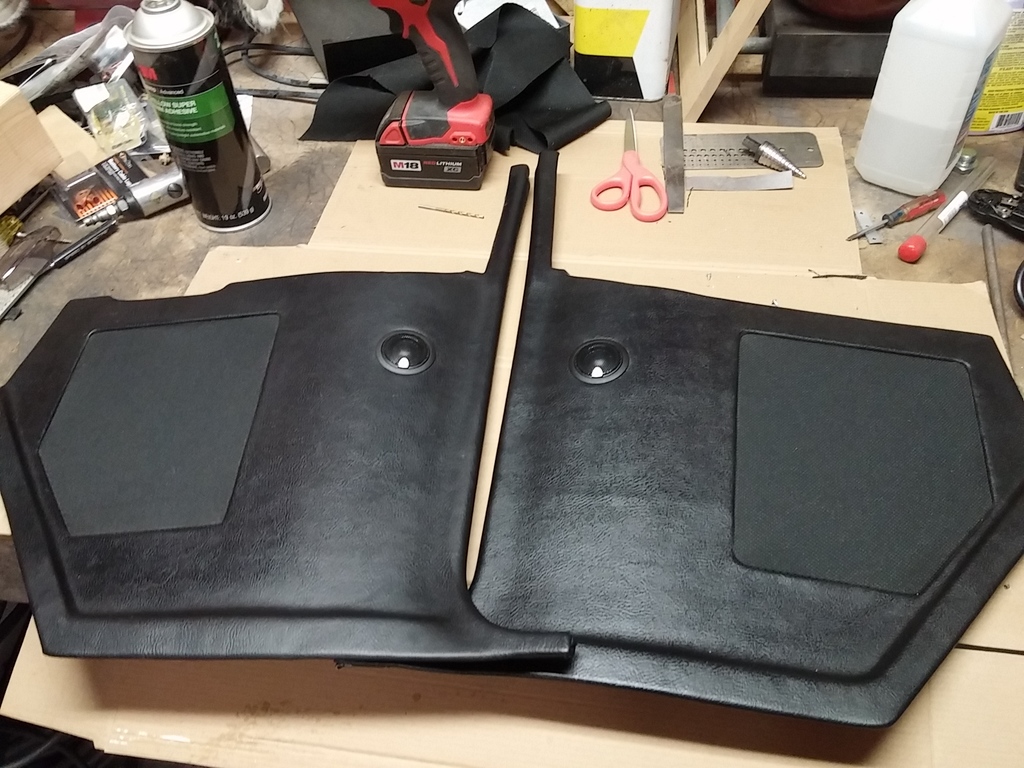
With the cut outs completed in the kick panels for the tweeters and the woofers, I needed to dress them up so it looked somewhat professional. My go to guy for interior work is United Auto Trim in Fond du Lac WI. I have been going to them for years and had them re-cover the panels in madrid black vinyl. They did an awesome job…
I made a set of grills out of Ľ” MDF and covered them in cloth that I got from United. I cut the grills to be a press fit and secured them to the kick panels from the back with 20 gauge steel brackets and some small screws
Turned out very nice IMO and sounds pretty good with a 60/40 bias - kick panels/dash speakers. The JL tweeters are a bit harsh, but better than what I had before. Mounted the cross over under the dash.

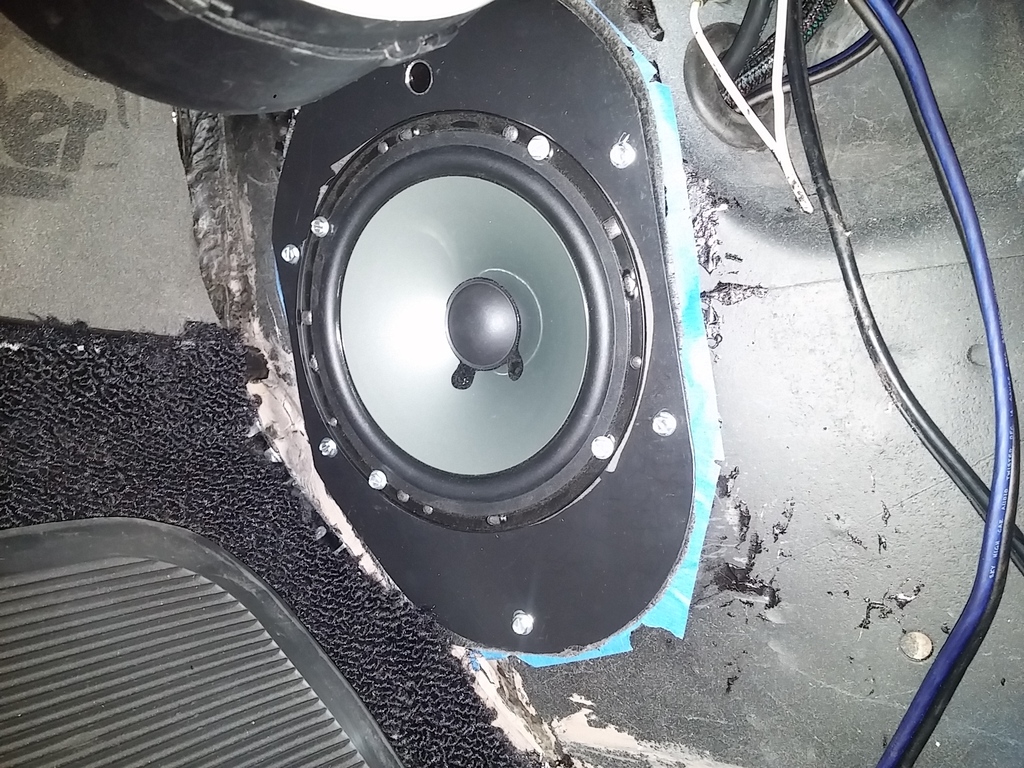
Here is the final product installed.
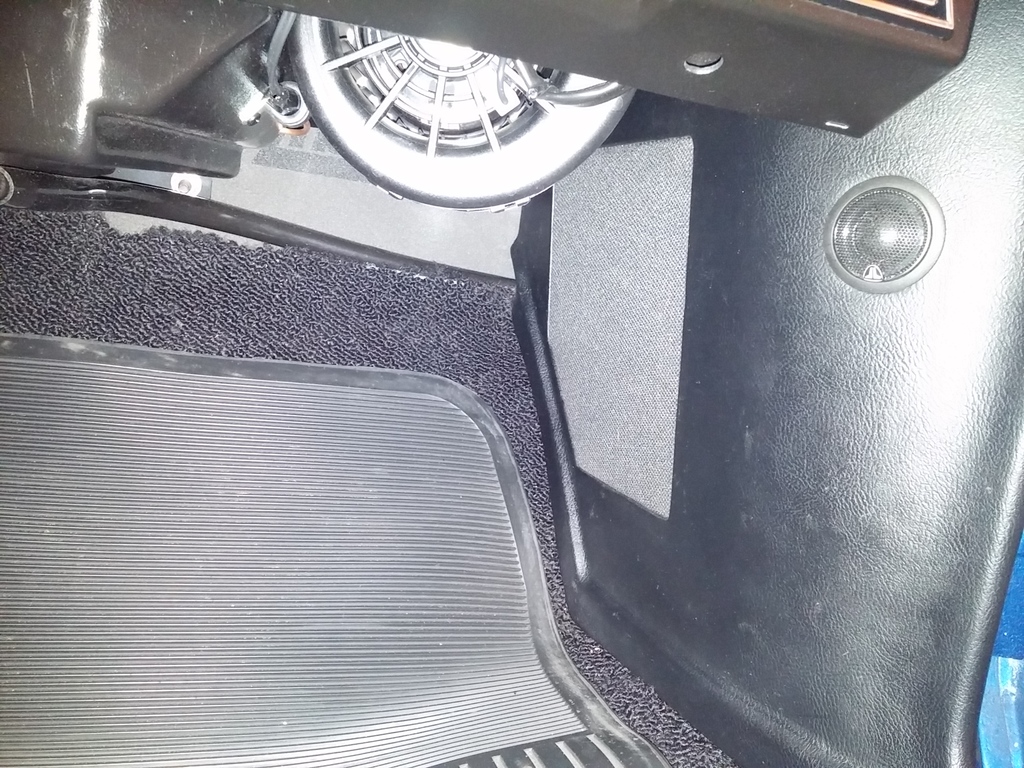
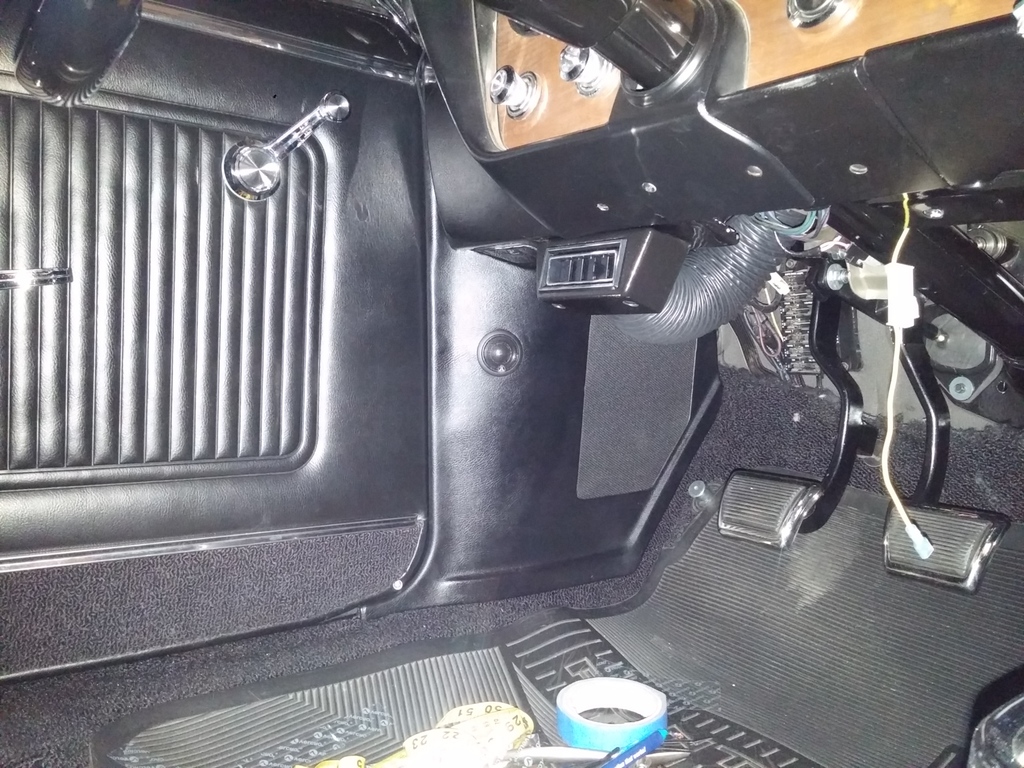
Bought an older Rockford Fosgate 45W X 4 amp from a friend of mine for $25. Threw it in the trunk next to the top pump and it sounds pretty decent with the added power.
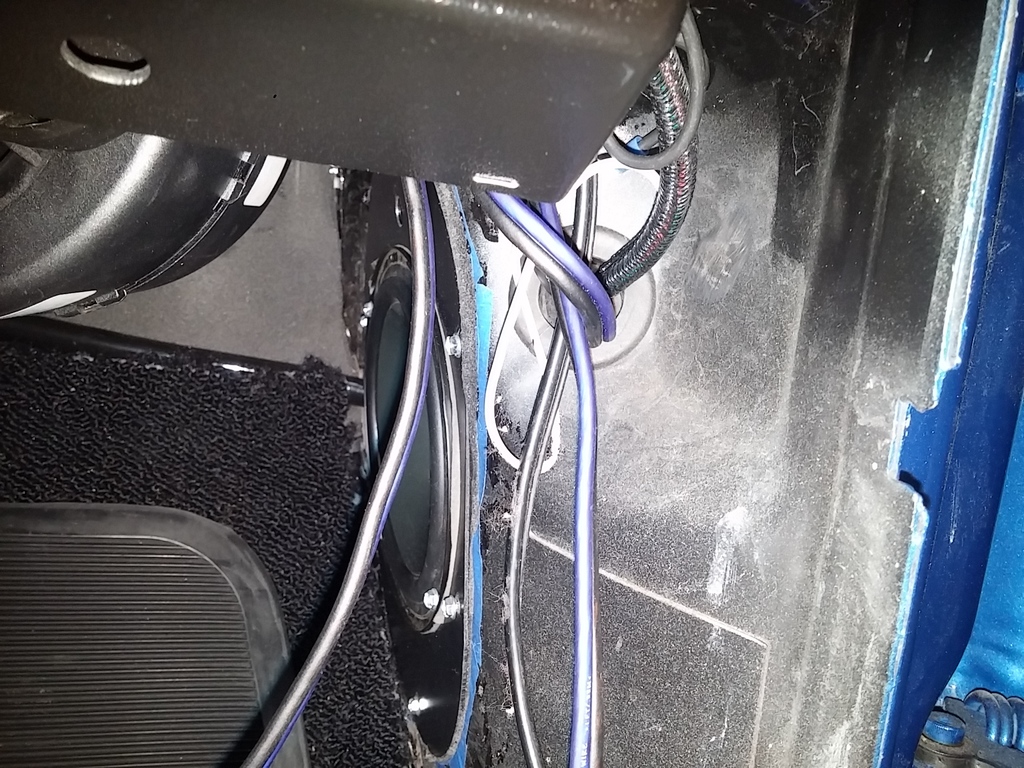
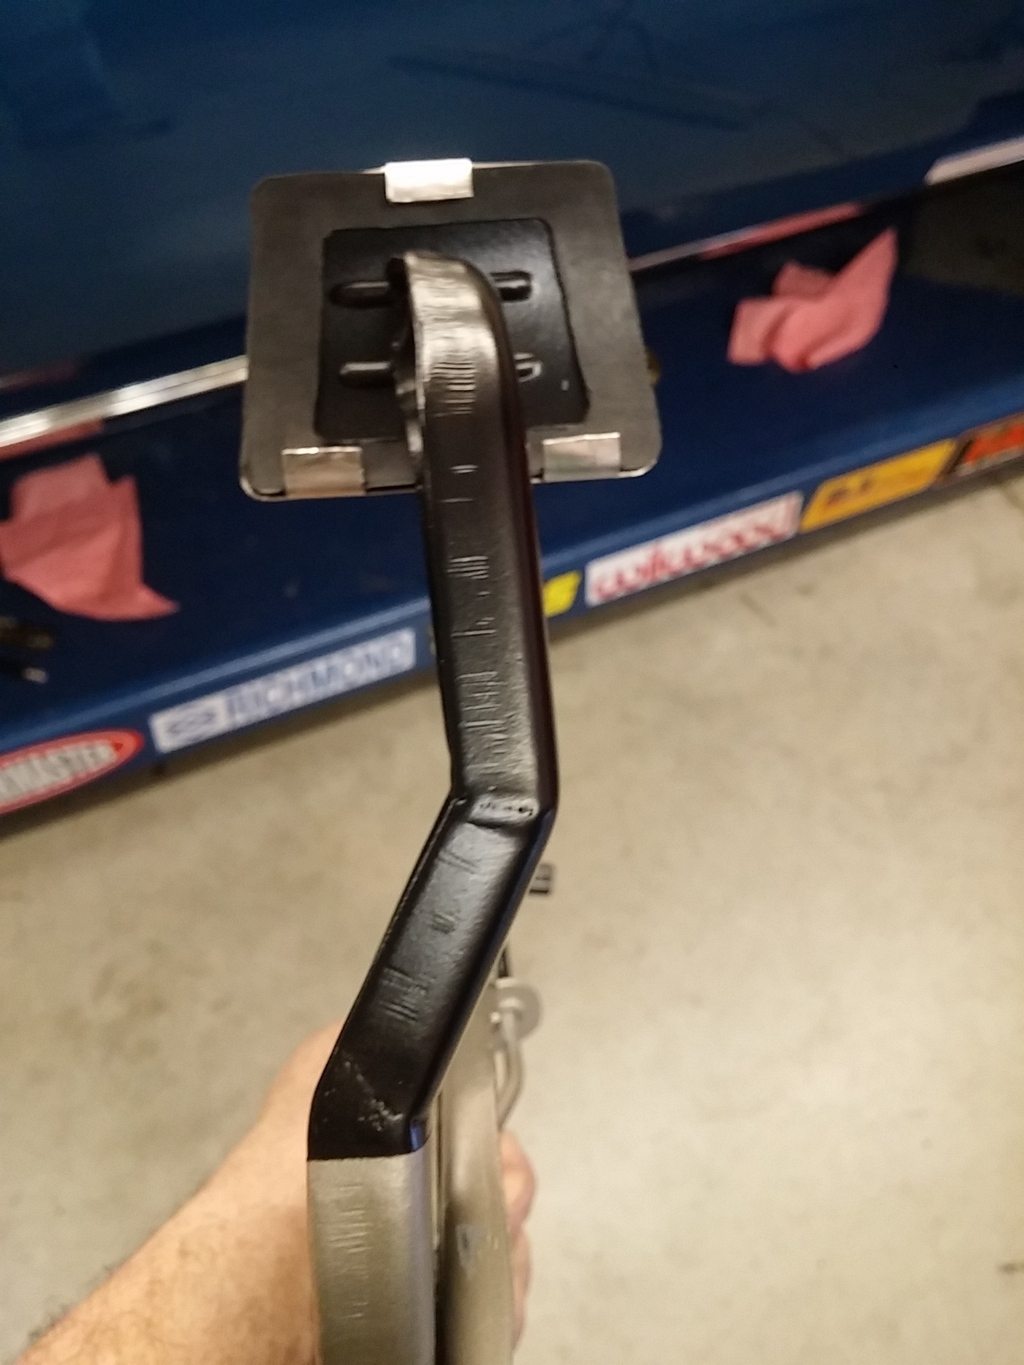
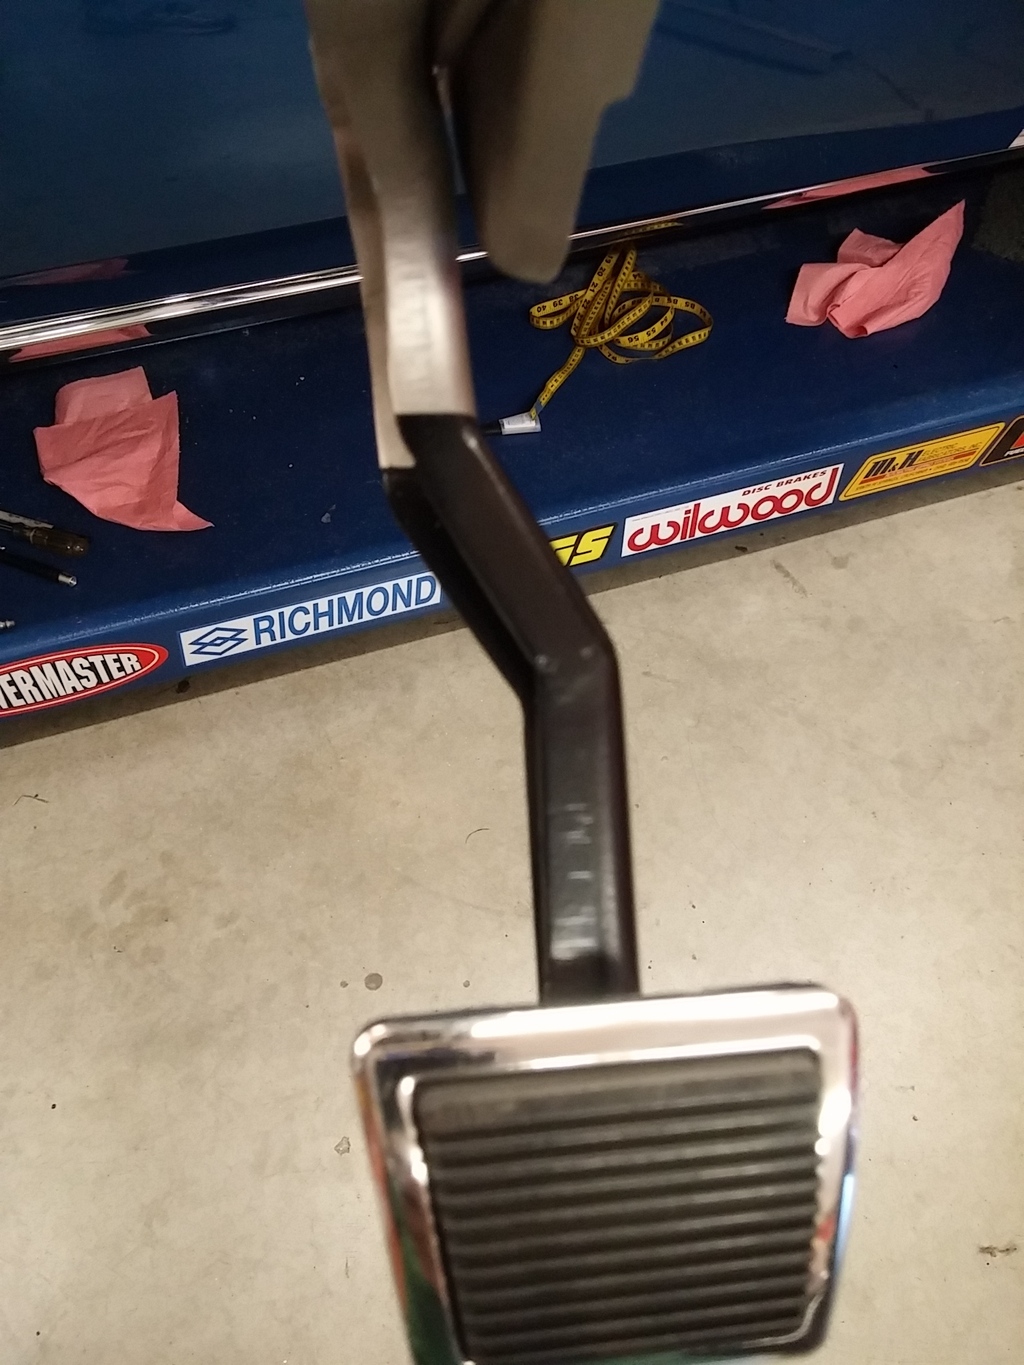
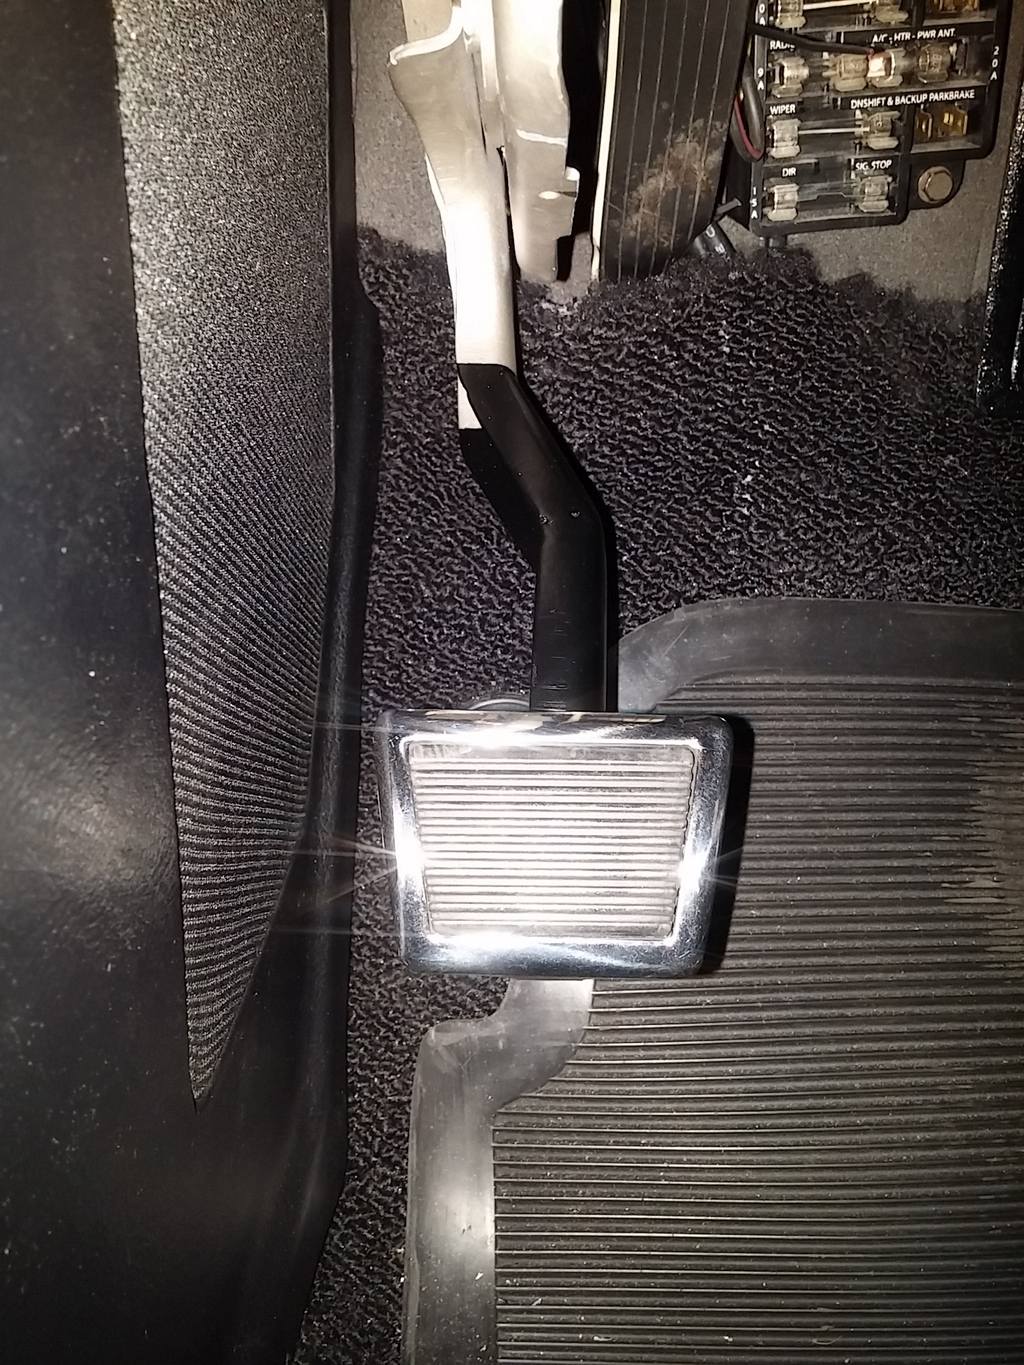
The parking brake pedal was too close to the new speaker panel so I decided to modify to give it some more room. A few cuts, bend here, bend there and some welding and viola…not too bad.
Tired of boring audio, I decided to give my tunes an upgrade. I currently have the Retrosound Model 2 radio…and while it is OK in the audio department, it is not anything to write home about. They made this thing with detent style rotary controls and they are a little noisy and quirky sometimes. However, it works, fills the hole in the dash and looks OK. Just wish someone made a better product for these older cars without having to carve up a nice dash.
Being a convertible, it came with a single 4 X 10 center mounted dash speaker. I replaced that several years back with a pair of Rockford Fosgate 2-way 4.5” drivers and they sound pretty good. Being small drivers, the bass is lacking and have limited power handling capability. I recently decided to can the kick panel vents and fit the openings with new speakers. I bought a pair of JL Audio C2-650 component speakers from Amazon and set out on coming up with a way to mount them.
I made a bracket for the bass drivers out of a piece of 16 gauge steel and bought a boom mat speaker pod to protect the back side from getting wet.


Given that the factory kick panel covers are geared to vents and not speakers, I decided to modify the kick panels to make them functional and attractive.
Using a piece of MDF, I made a template for cutting out the vent louvers in the kick panels. The template will ensure both sides are identical.
I measured and clamped the template to the plastic and used my router with a guide bushing to cut the holes in the kick panels. Given that the kick panels are not very thick, I wanted to stiffen them up to accept a speaker grill. I bought a piece of Ľ” ABS from Grainger and used the template to cut out the hole in the ABS to match the kick panel. Using 3M super trim adhesive, I roughened up both pieces of plastic and bonded the ABS to the back side of the kick panel.
With the 2-way system, I needed a spot to put the tweeter where there is at least ľ” of clearance on the back side. The 66 GTO has a very convenient indentation in the sheet metal structure kick panel that made the placement of the tweeter a no brainer.

With the cut outs completed in the kick panels for the tweeters and the woofers, I needed to dress them up so it looked somewhat professional. My go to guy for interior work is United Auto Trim in Fond du Lac WI. I have been going to them for years and had them re-cover the panels in madrid black vinyl. They did an awesome job…

I made a set of grills out of Ľ” MDF and covered them in cloth that I got from United. I cut the grills to be a press fit and secured them to the kick panels from the back with 20 gauge steel brackets and some small screws

Turned out very nice IMO and sounds pretty good with a 60/40 bias - kick panels/dash speakers. The JL tweeters are a bit harsh, but better than what I had before. Mounted the cross over under the dash.


Here is the final product installed.


Bought an older Rockford Fosgate 45W X 4 amp from a friend of mine for $25. Threw it in the trunk next to the top pump and it sounds pretty decent with the added power.
The parking brake pedal was too close to the new speaker panel so I decided to modify to give it some more room. A few cuts, bend here, bend there and some welding and viola…not too bad.


 04-06-2016, 11:33 PM
#75
Staging Lane

Very nice project and some great information! Last week I got my Connect and Cruise LS3 376/525 6 sp package! This is replacing a SBC 388 and 700R-4 in a Classic Roadsters Cobra Kit Car! I'm going to try and keep it as simple as possible! Of course we all know how that works, project CREEP and all! Thanks for sharing!
Al
Al
04-09-2016, 09:02 PM
#76
Teching In
Join Date: Jun 2013
Location: Dublin, Georgia
Posts: 40
Likes: 0
Received 0 Likes
on
0 Posts
Hey Old Tiger, What did you do about gauges? Did you try to use the old tach? If so, how did you get it to work? What did you do for a water temp sender and gauge? Thanks, Dublingto
04-10-2016, 09:12 AM
#77

Beautiful........................Creative.......
Ken
Ken
04-10-2016, 10:06 AM
#78

Great idea
04-12-2016, 10:02 AM
#79
All Speedhut gauges including a GPS Speedo. I have a thread on how I made the custom brackets for the dash. I have been considering removing the wideband from the dash since I am data logging with HP tuners and am running a LM2. Also considering removing oil temp and going to a simpler arrangement
That will be next winter.
I was going to go Dakota Digital but I did not like the gauge paring and did not like the lettering or the carbon fiber look. DD was willing to do custom lettering and get rid of the carbon fiber but I still liked the speed but gauges better. Speed but came with their own senders. The Speedo was a no brainer with the GPS module.
04-12-2016, 10:04 AM
#80