When you click on links to various merchants on this site and make a purchase, this can result in this site earning a commission. Affiliate programs and affiliations include, but are not limited to, the eBay Partner Network.
Ok here we go... Had my 65 Cutlass for 15 years... started with a 455 Olds in it and back in 2013 added a Holley Terminator and 2004R OD...
Last long drive before the swap
Nasty mess... thinking what have I gotten myself into
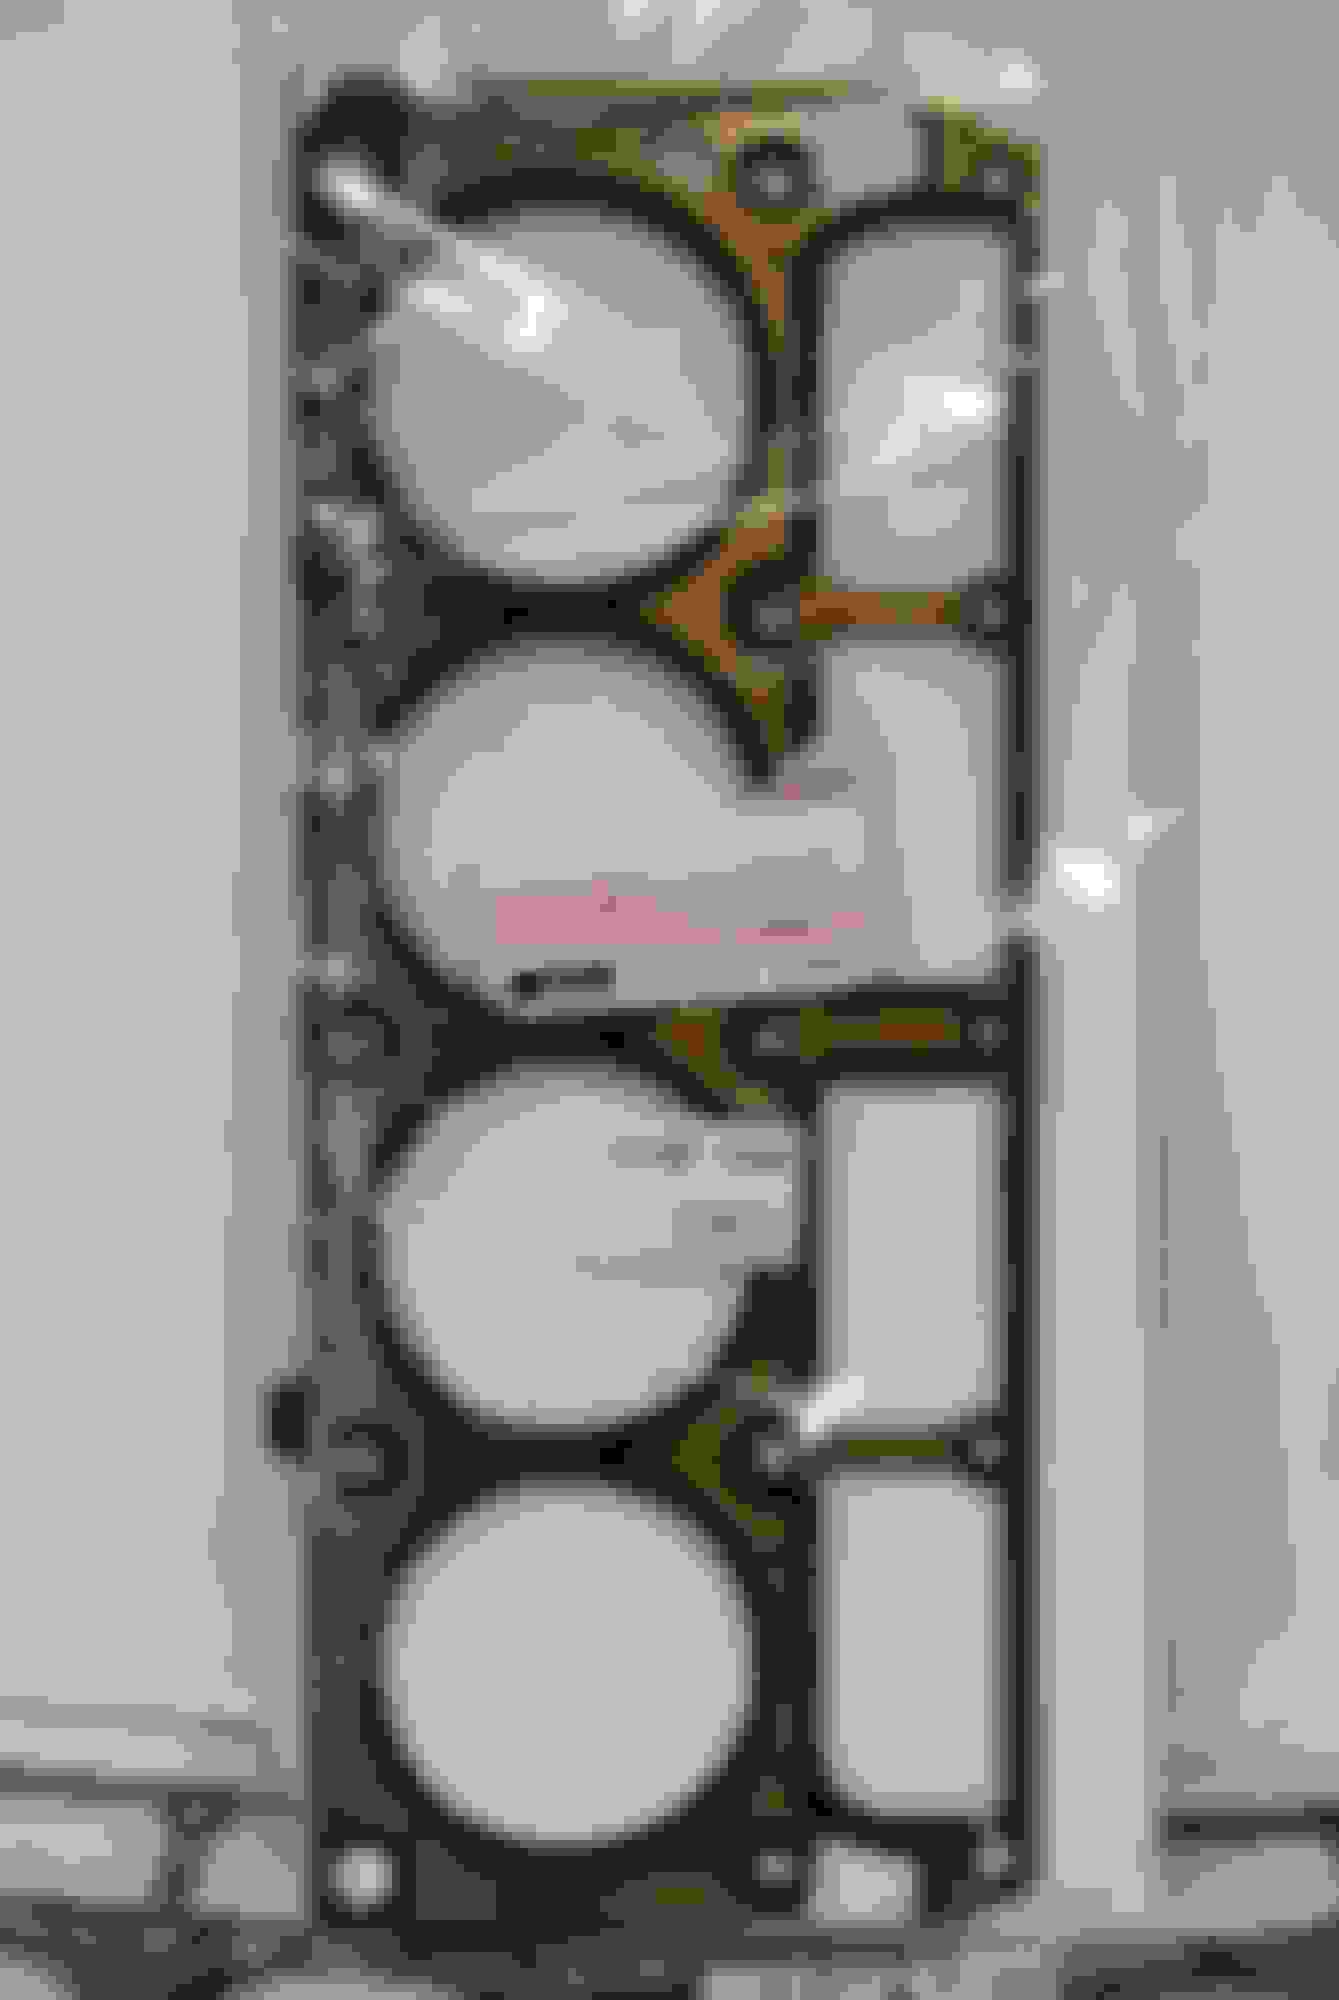
I guy had a brand new GM LS327 crate engine that he purchased but never used... Sat for several years covered up. A few small insects crawled in through the intake and exhaust ports so I pulled off the heads to make sure I got all the bugs out, so to speak. then changed the head gaskets from the factory graphite to newer MLS GM.
Hated having to pull the heads off but it was worth it to get the few insects out and to make sure there were no issues after the engine sat for about 5-7 years! (first in a dealer showroom then in a guys garage)
I try not to use aftermarket anything so I went with GM head gaskets but I did use ARP head bolts. $$ yikes!! I had several sets of new GM bolts but went with the ARP in case I had to remove/install a few times down the road. Also the ARP thread chaser is a MUST! Do not use a tap.. you will be sorry. Patience here is required... I used a flashlight to make sure the holes were perfect for the new bolts.
Installed a 302-2 Holley pan... pay close attention to the instructions
used the Holley template to cut out the required notch for the tube. When Holley says to rotate the crank all the way around to check for clearance make sure you do it... I didn't.. forgot and think I had a minor rub which went away after I turned the engine over later.. I re-used the original pan gasket because it was brand new
I removed the Oldsmobile engine frame mounts and installed a set of small block chevy frame mounts from a 66 Chevelle
I used set back engine adapters because I wanted to keep the Trans in the same spot and didn't want to lengthen the driveshaft...
Installed an adapter to mate my 2004R with the LS engine. The kit came with a new flywheel with the correct bolt patterns, longer bolts and a crank insert for the tourque converter
Jacked the tranny up as high as it would go and I used a Trans Dapt engine lift plate with extra long bolts.. this worked really well and the engine went in quite smoothly. I quickly found out that one of the downsides of having the engine set back was bolting up the transmission as the higher bolts were too long and I had dent my firewall on the drivers side to get one of the bolts in
dual Spal fans from BeCool. I had to fabricate some brackets to mount them even though they were supposed to be ready to go..
The fan kit included all the wiring, relays and pretty good instructions. I mounted the relays onto the new bracket I fabricated. Didn't plan it this way but it worked out
I installed a water pump from a newer (2007) 5.3 GM truck engine to move the water neck for future planned MPFI installation
It was nice that I didn't have to change my heater hoses as the ones in the Cutlass were the correct size. Got the lower rad hose info off this forum and it went on with minor trimming.. whew. The upper rad hose was a factory 02 GMC 5.3 hose that I mated to a jags that run adapter and my original upper rad hose
I went with new a new Holley A/C compressor because of the cheap price
And a new PS pump from them as well
I went with a Corvette Aluminum pump. The return line to the pump was easy... the pressure hose was a little harder.. I ordered a Corvette hose and had to cut the end off that goes into the steering box then have a hose show add an inverted flare fitting that I cut off of my old 65 pressure hose.
Prior to installing the Holley Dual plane with Terminator TBI I swapped out the centre engine cover for an LS6 cover with the update internal PCV setup. This forced me to change the head vent tubes from the one piece vent setup to the individual front a rear vent tubes style which I tied into a T fitting then routed it to another fitting at my Jags that run adapter on the upper rad hose
When I'm done loading all the pics I am going to make a list of all the part numbers and products (if allowed) that I used in the build which goes a long way to give more meaning to the pics and assist anyone wanting to follow similar build thoughts
My Holley Terminator was a generation 1 model and to use it on my LS engine I had to order a Main harness from the Holley LS Terminator kit that they usually sell complete. The ECU was mounted in the glove box and the wiring fed through the side of the A/C fan box
The Holley setup was pretty easy when it came down to cable hookups
I needed to relocate the rear passenger coil and picked up a relocation bracket that came with all bolts and a longer spark plug wire. It was still a tight fit..
Because I didn't buy the complete Holley LS TBI kit I had to go into the Holley Global file software and was lucky enough to find a base 5.3 truck 24X tune in the custom log file. I uploaded the tune to my ECU then added in the factory knock sensors.
The car fired right up and with 60 miles on it so far its running great...
It seemed easy to do but looking back there was a lot of research and parts accumulation involved... not to mention being a lot more expensive that I thought..
The little %$#@ is a killer $$
I will be putting together a list of parts used and if anyone has questions or wants pics that are not shown, ask away... Thanks again to so many people on this forum who replied to my many questions and special thanks to Rockytopper whose own 65 Cutlass build gave me the courage to try this...
Its been a while getting this done... 5 years ago I wasn't ready but should have done it then... would have saved a lot of $$ wasted that I spent on my Olds engine...Geez time flies!
Just a quick update. I switched the motor mounts to the Holley 64-67 swap system forward set up. Had to lengthen the driveshaft by an inch but at least the tie rods don't bump up against the oil pan anymore . Wish the Holley mounts had been available sooner ��
With the Holley terminator finally dialled in the car gets 30 mpg on the highway at 70-75 mph most of the time. The terminator runs the timing as well and uses the factory knock sensors which are active a bit when the A/C is running . Love this engine ��
Ya I'm pretty happy with the mileage, imperial gallons though (I don't know why we can't use the same standard of measurement as the USA ... I really hated it when we went to metric ...
Just a quick update. I switched the motor mounts to the Holley 64-67 swap system forward set up. Had to lengthen the driveshaft by an inch but at least the tie rods don't bump up against the oil pan anymore . Wish the Holley mounts had been available sooner ��
With the Holley terminator finally dialled in the car gets 30 mpg on the highway at 70-75 mph most of the time. The terminator runs the timing as well and uses the factory knock sensors which are active a bit when the A/C is running . Love this engine ��
If you're getting false knock readings you can tune that out in the software. Nice job!


 07-12-2016, 03:35 PM


 ...
... 


 love that '65. really miss my '64
