
'67 Impala. Factory right-hand drive. 6.0L swap.
 10-18-2016, 04:23 AM
#21

Engine and transmission are in.
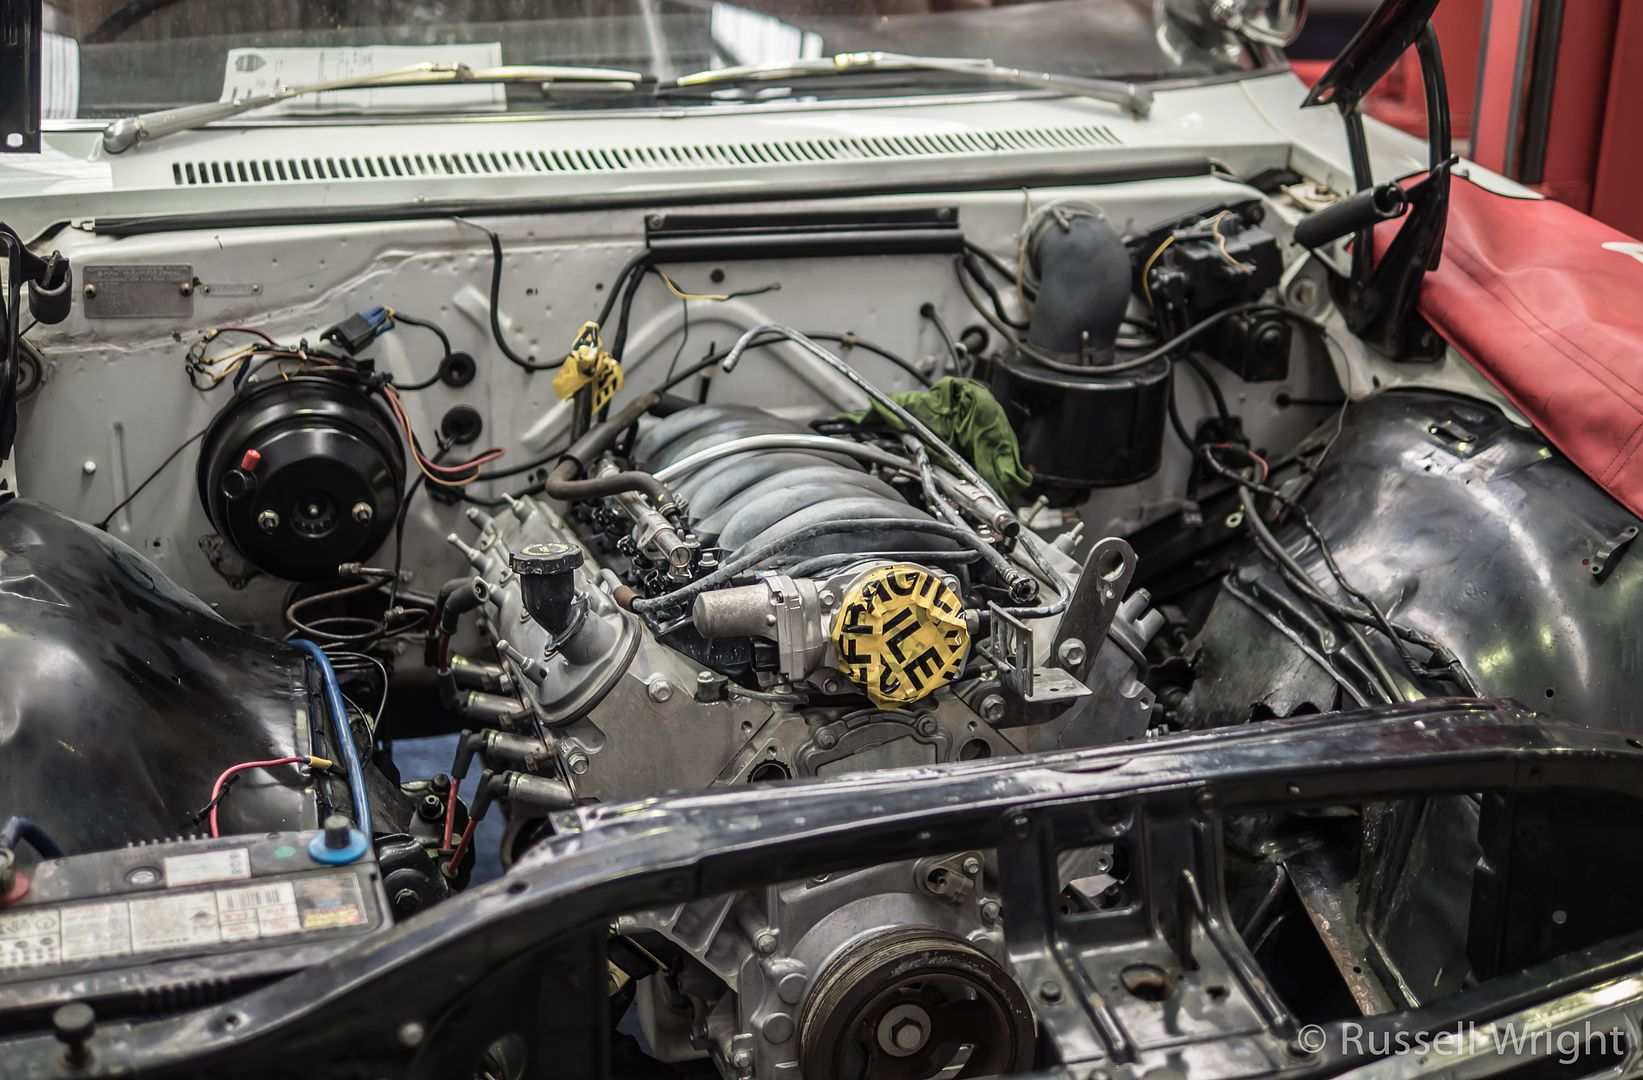
Pretty straight forward. Used Ken's (kwhizz) adapter plates, with Energy Suspension mounts. Slipped in with little hassle.
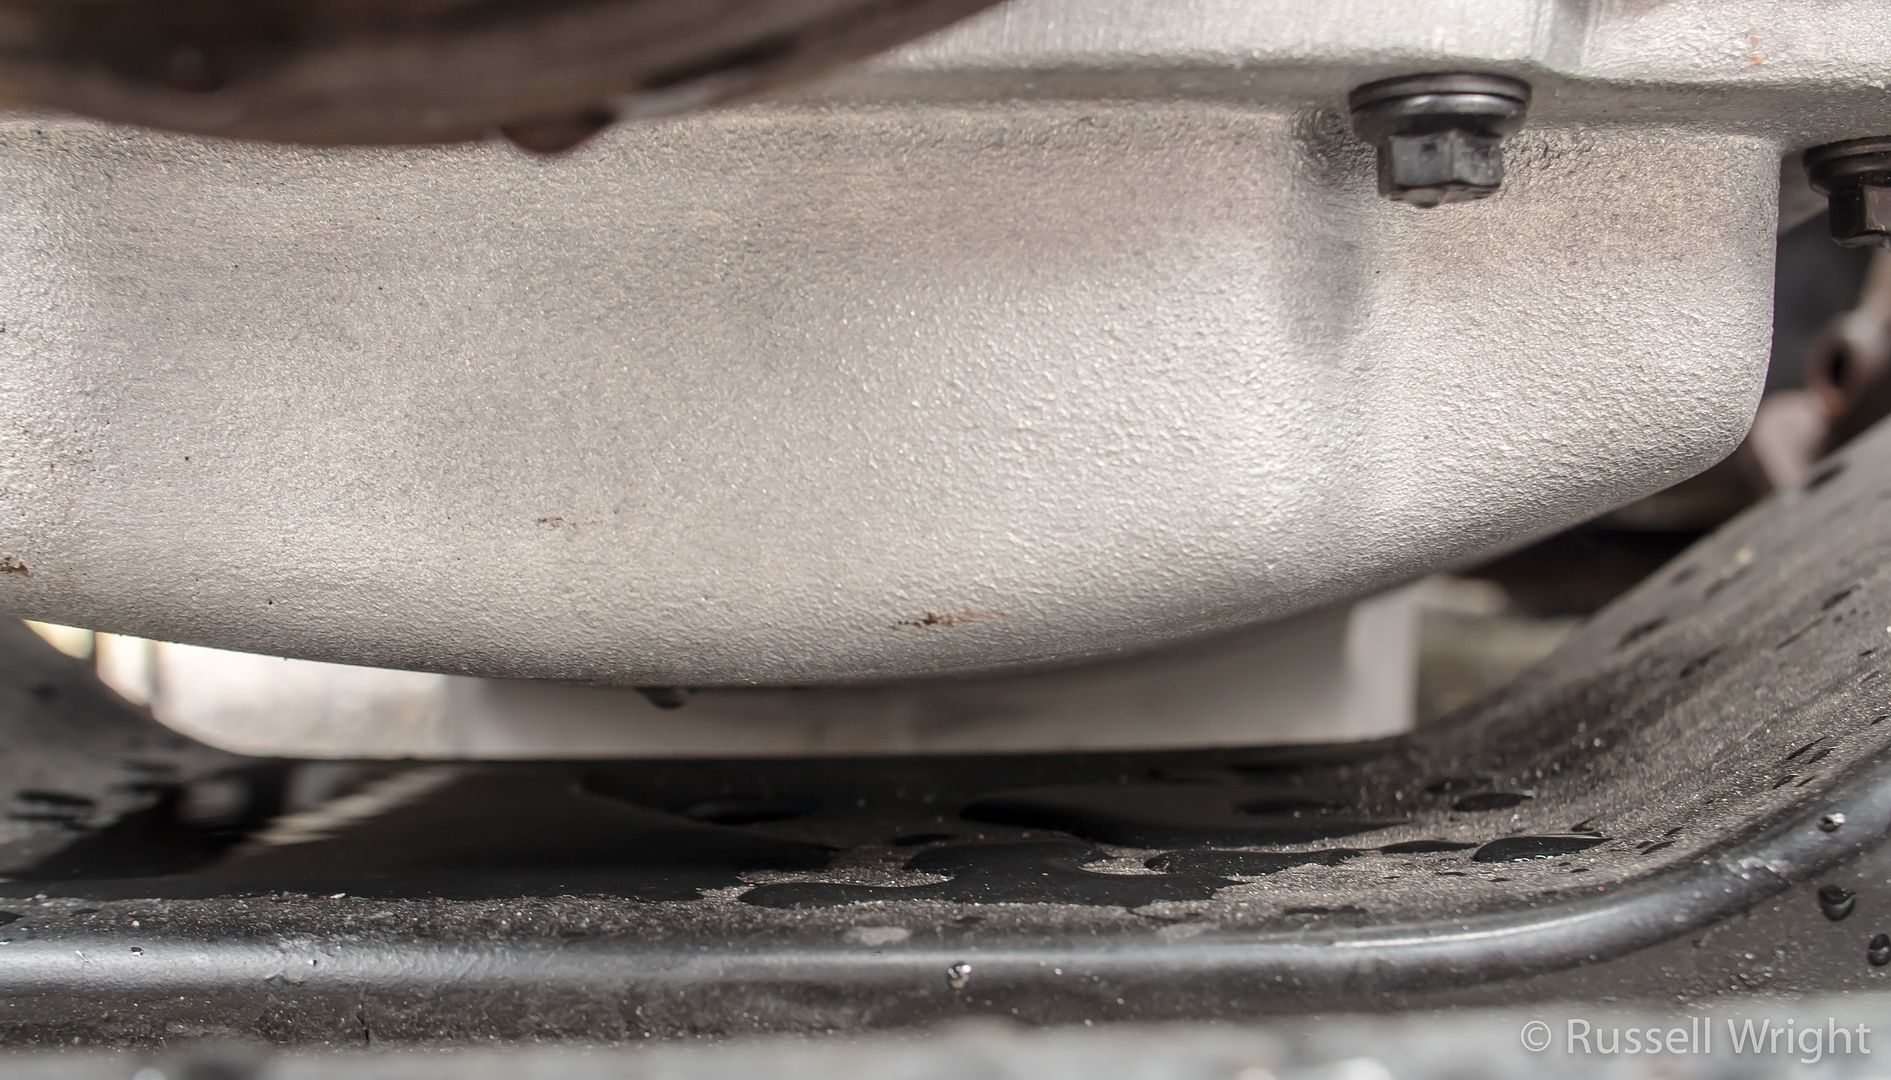
Also plenty of clearance under the Holley oil pan:
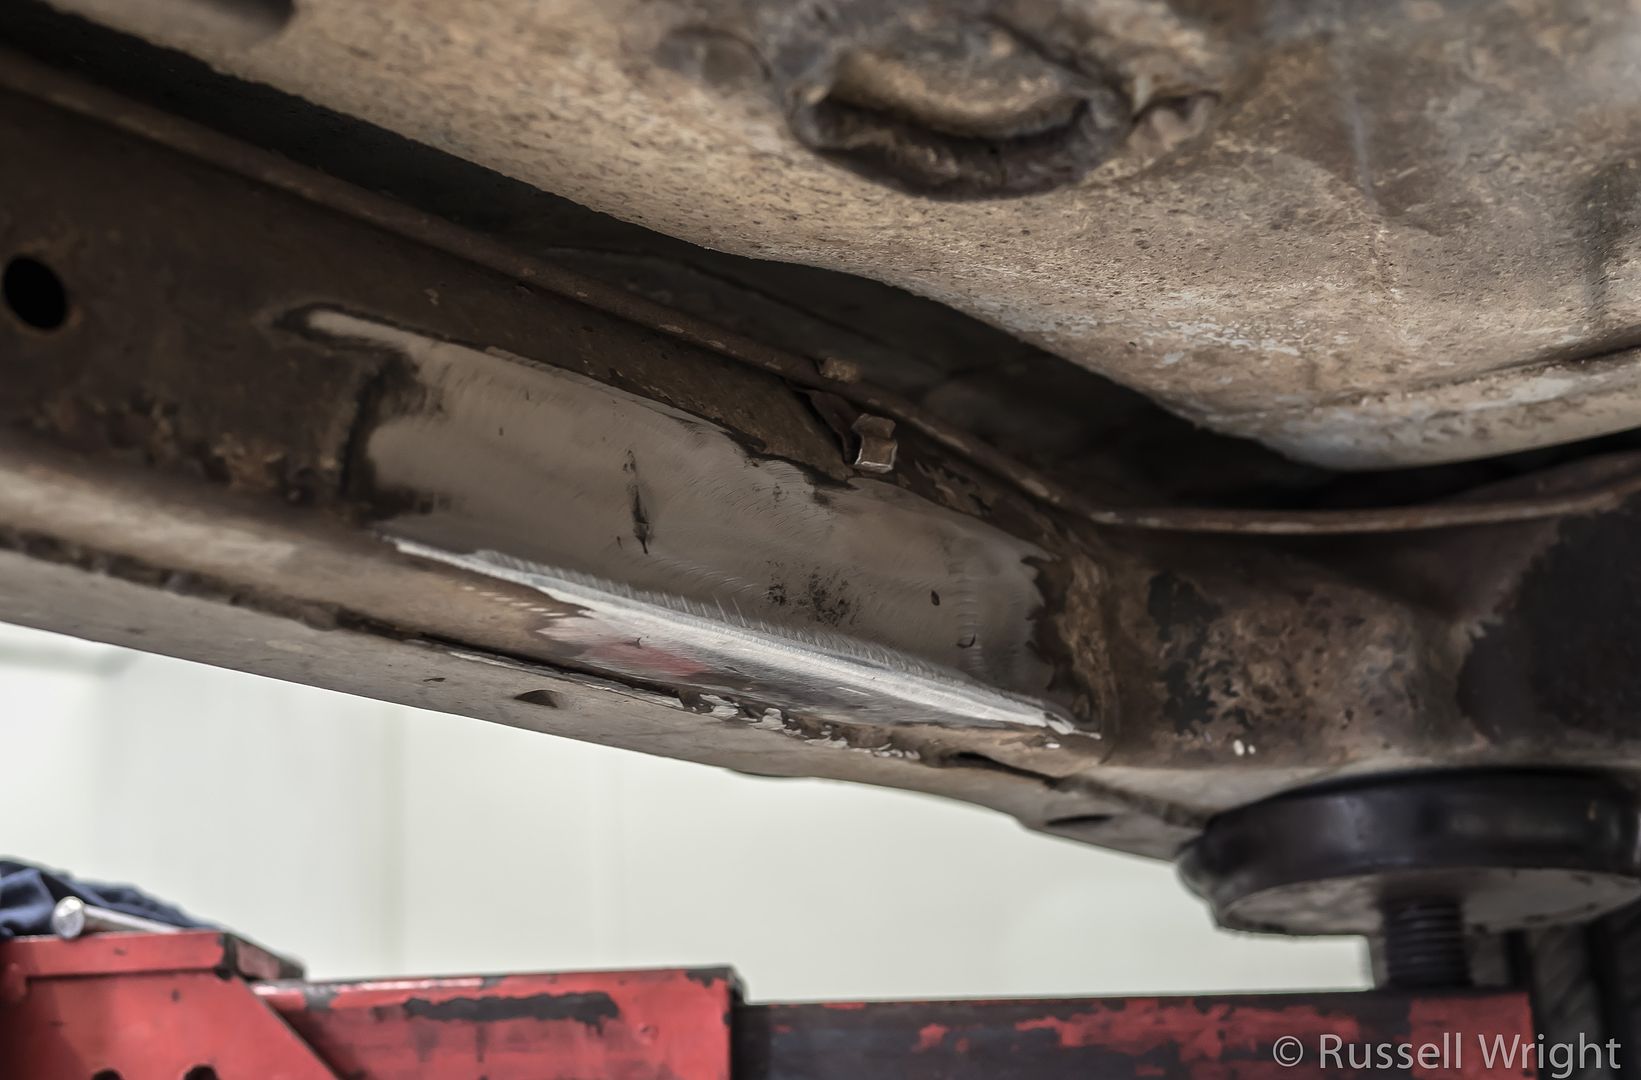
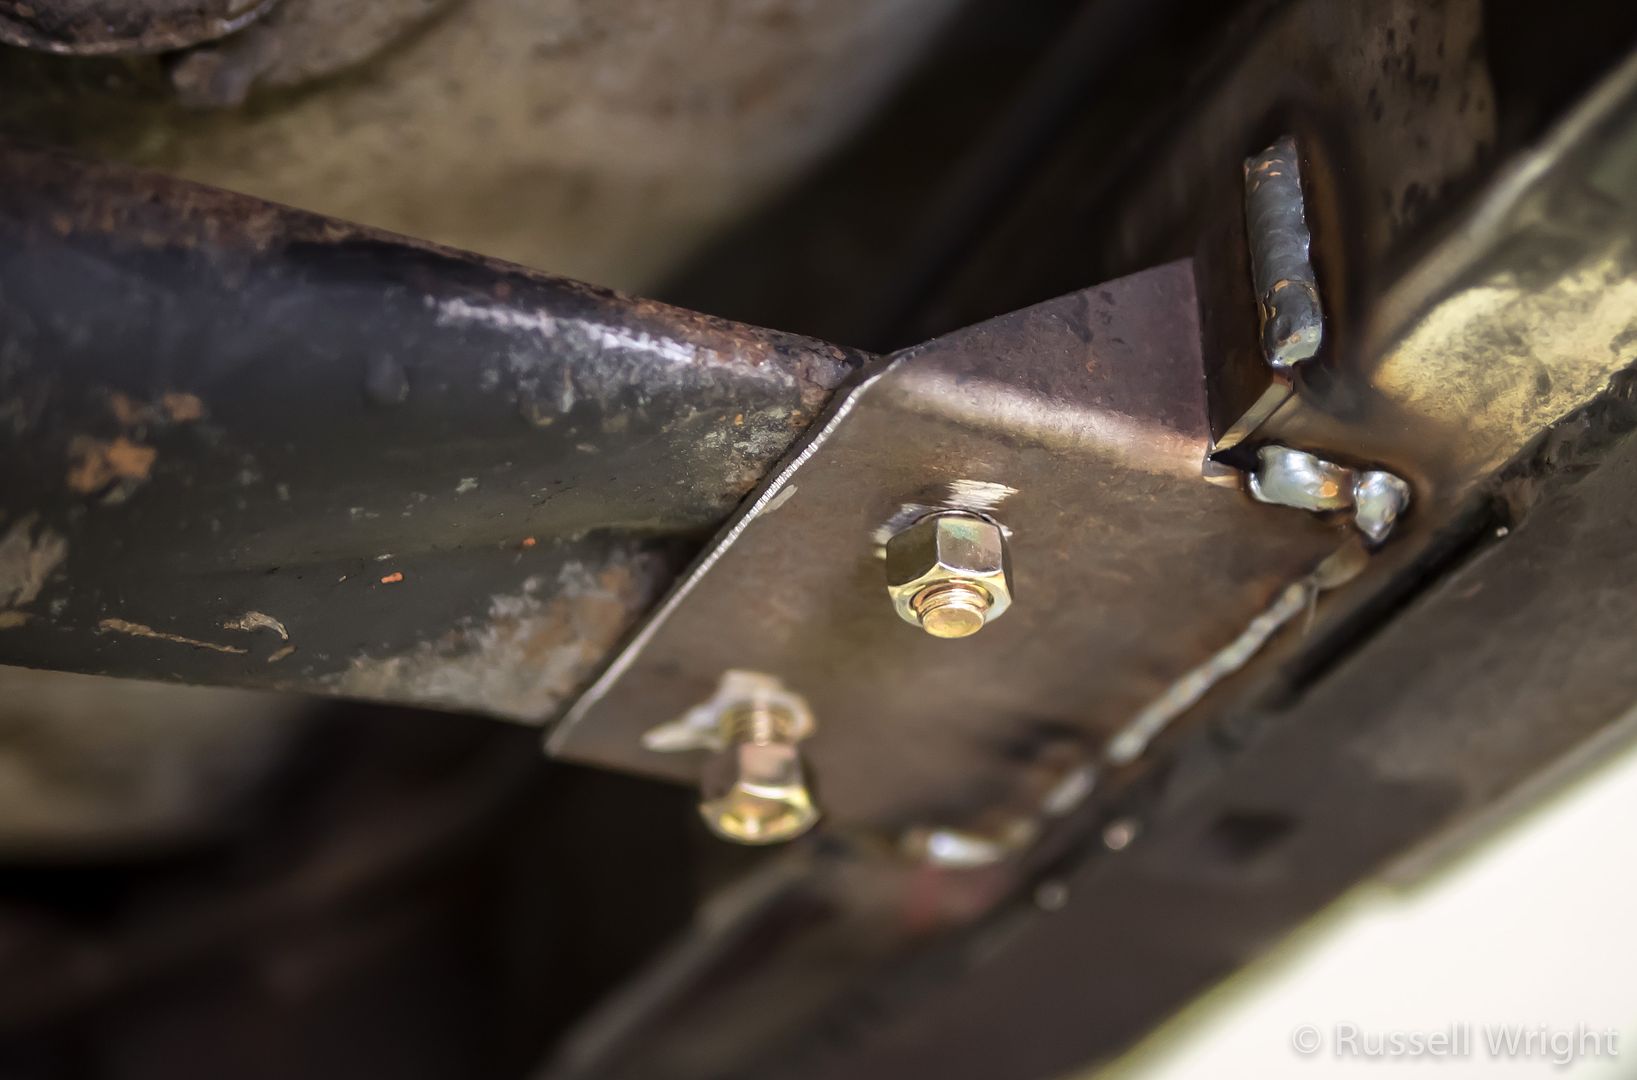
Had to move the trans crossmember rearward, which was easy enough. Simply chopped off the old mounts, and fab some new ones.
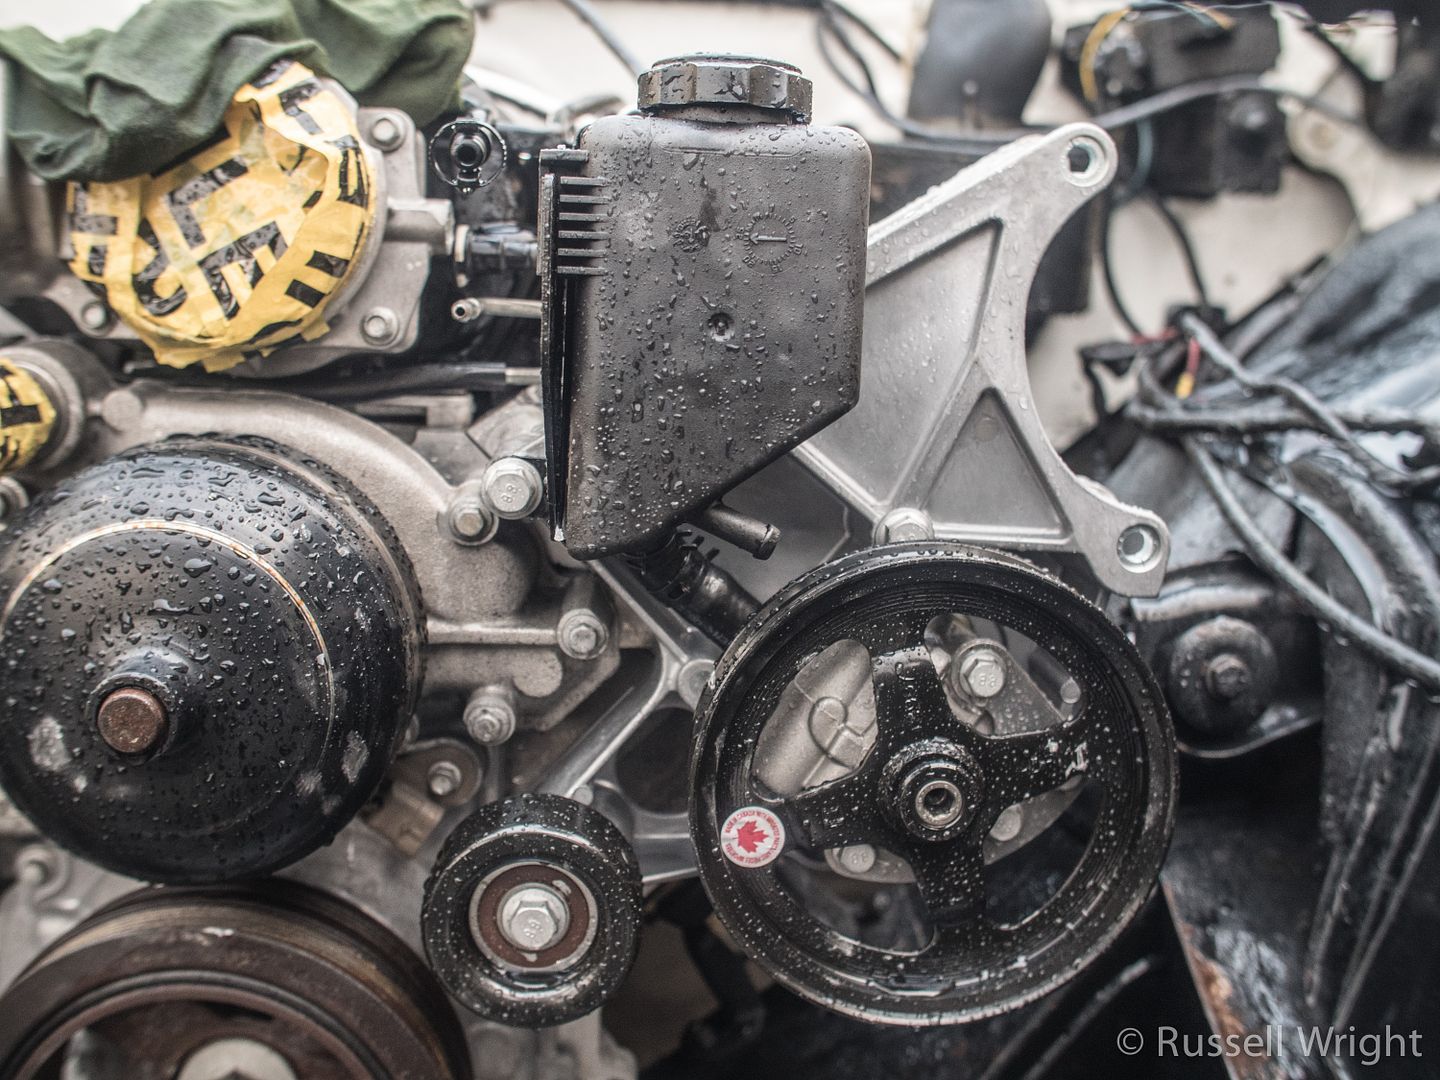
For the front accessory drives, I went with the Holley kit. Got the alternator/steering pump bracket and pulleys installed. Car is not an AC car (yet).
More to come ...
Pretty straight forward. Used Ken's (kwhizz) adapter plates, with Energy Suspension mounts. Slipped in with little hassle.
Also plenty of clearance under the Holley oil pan:
Had to move the trans crossmember rearward, which was easy enough. Simply chopped off the old mounts, and fab some new ones.
For the front accessory drives, I went with the Holley kit. Got the alternator/steering pump bracket and pulleys installed. Car is not an AC car (yet).
More to come ...
 10-18-2016, 10:12 PM
#22
Finally made a decision on fuel delivery. I'd considered running an external pump as the simpler option, but after considering the costs of all the extra AN fittings from pre filter, to pump, to post filter - then I still had to modify the tank for a return line.
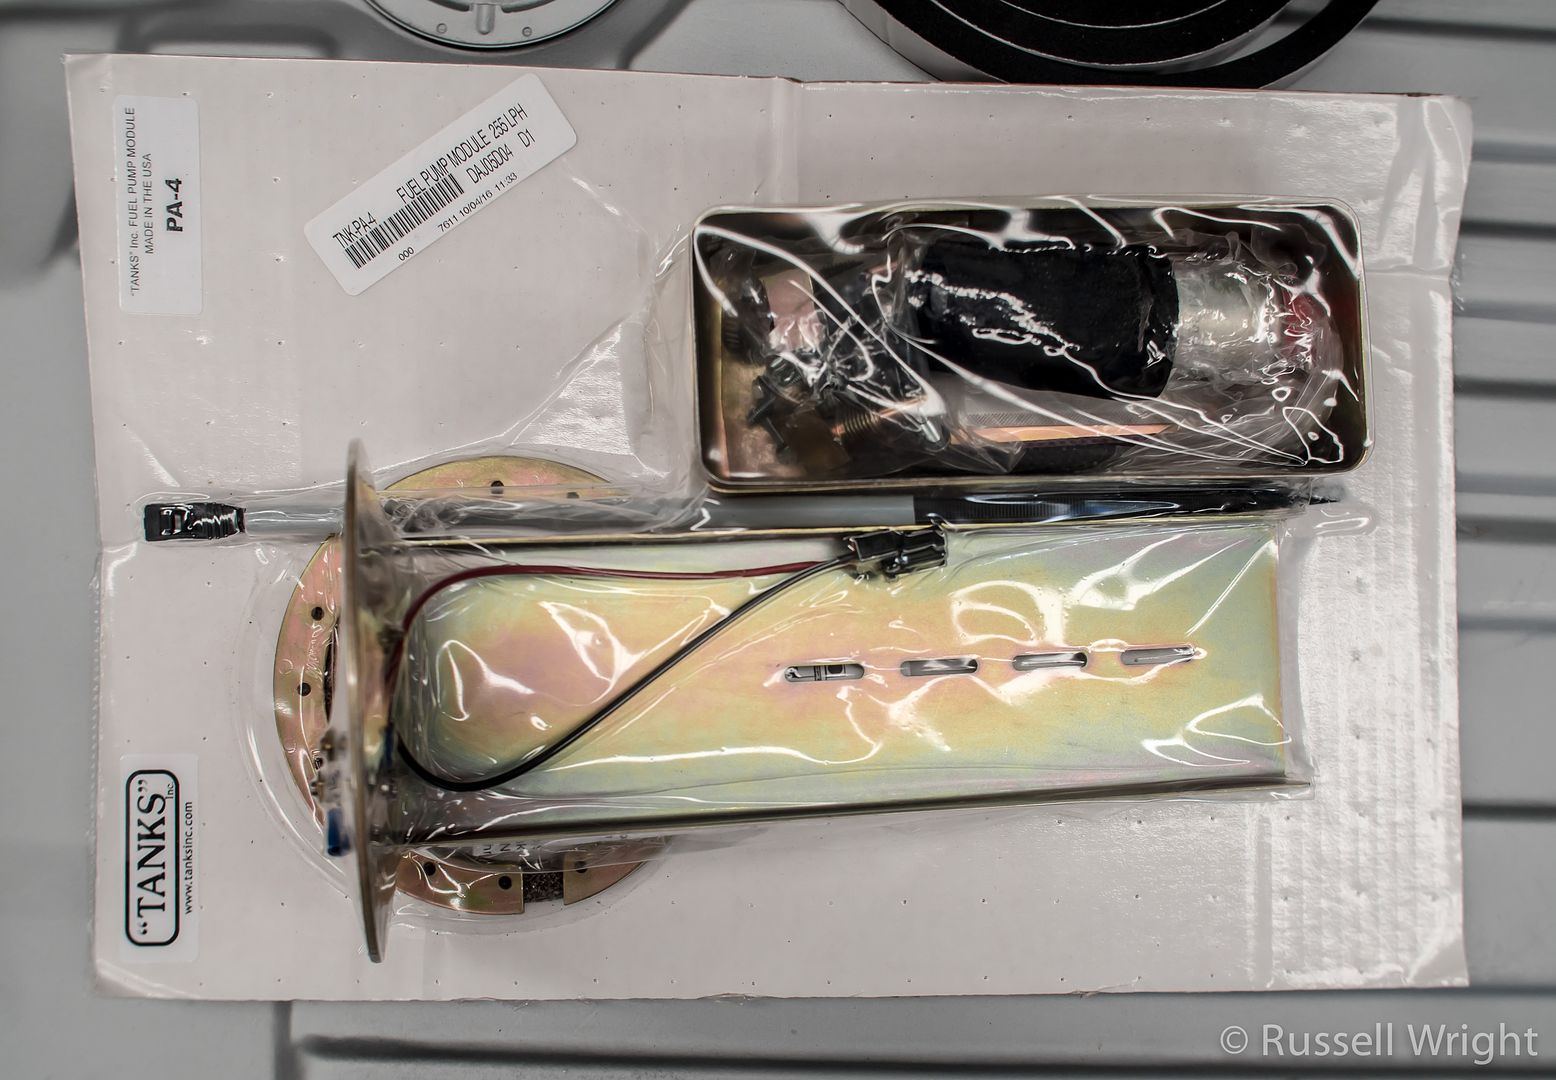
I looked at the cost of the Tank Inc PA-4 in-tank system, and considering I had to remove the old tank to do a repair, it became the wiser choice.
Got it installed yesterday with no issues.
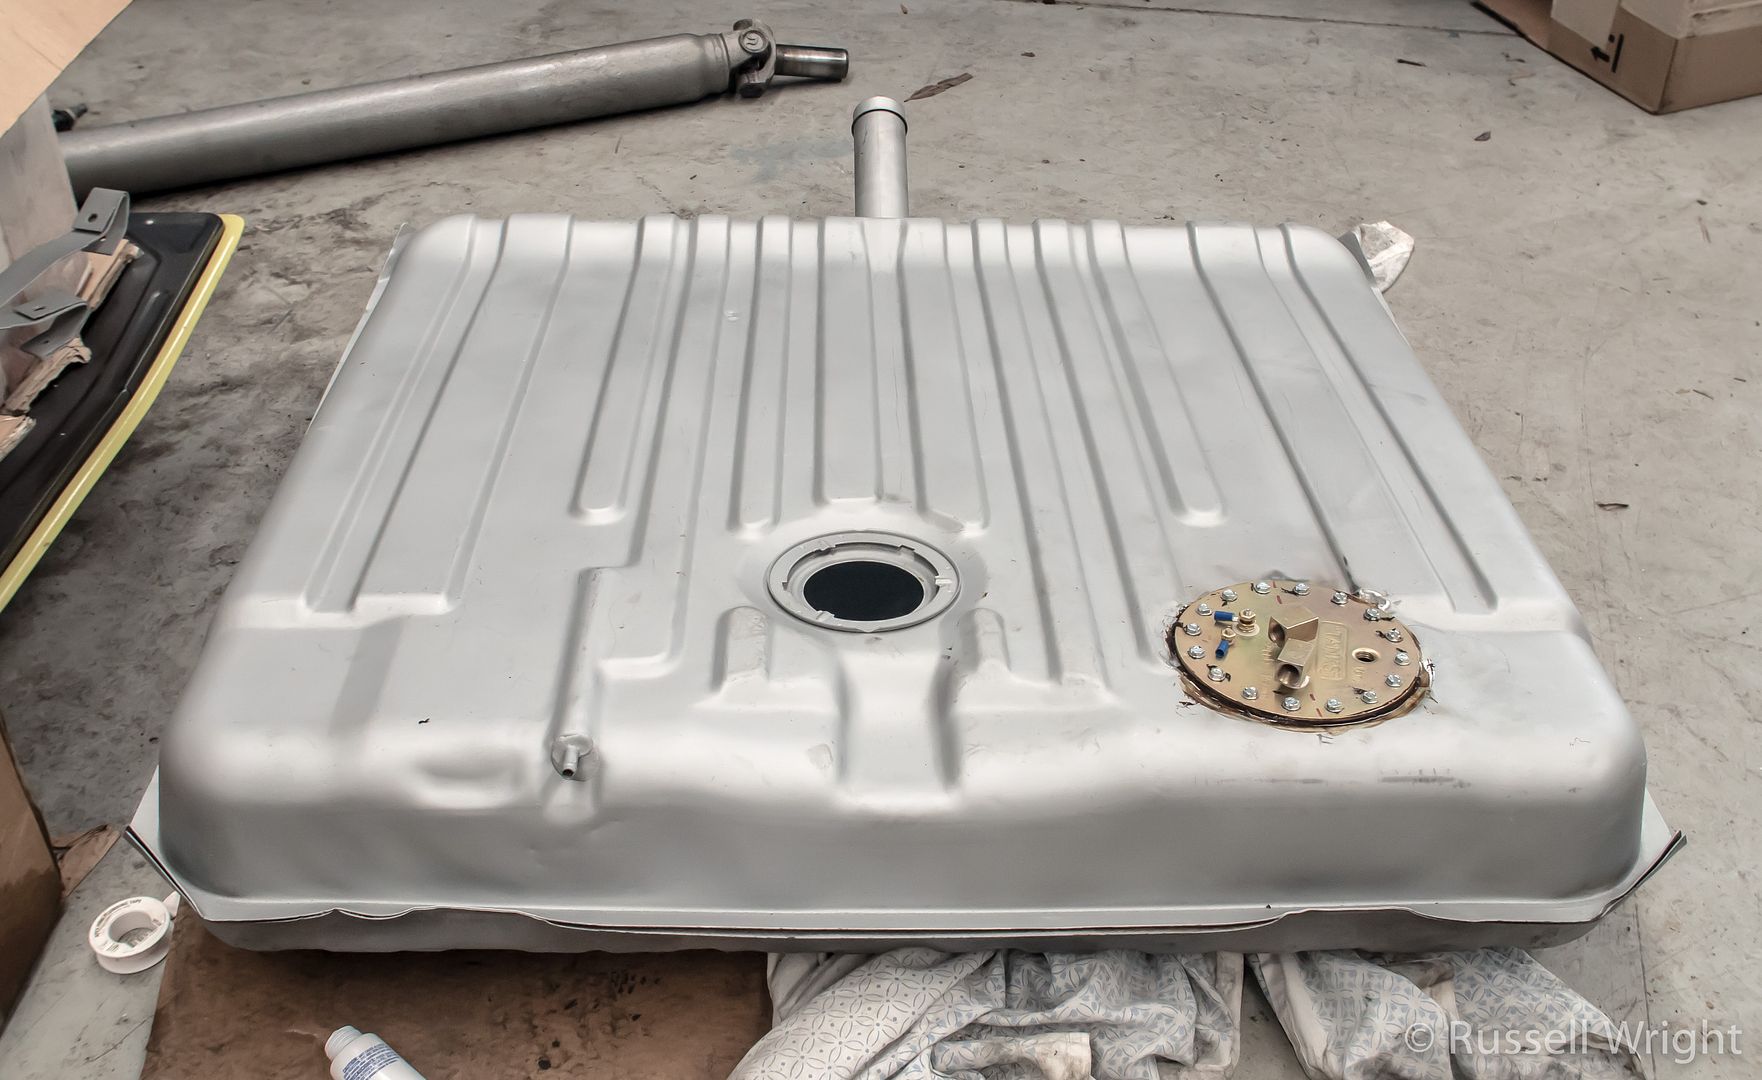
Removed the old paint from the tank so I could get it repaired.

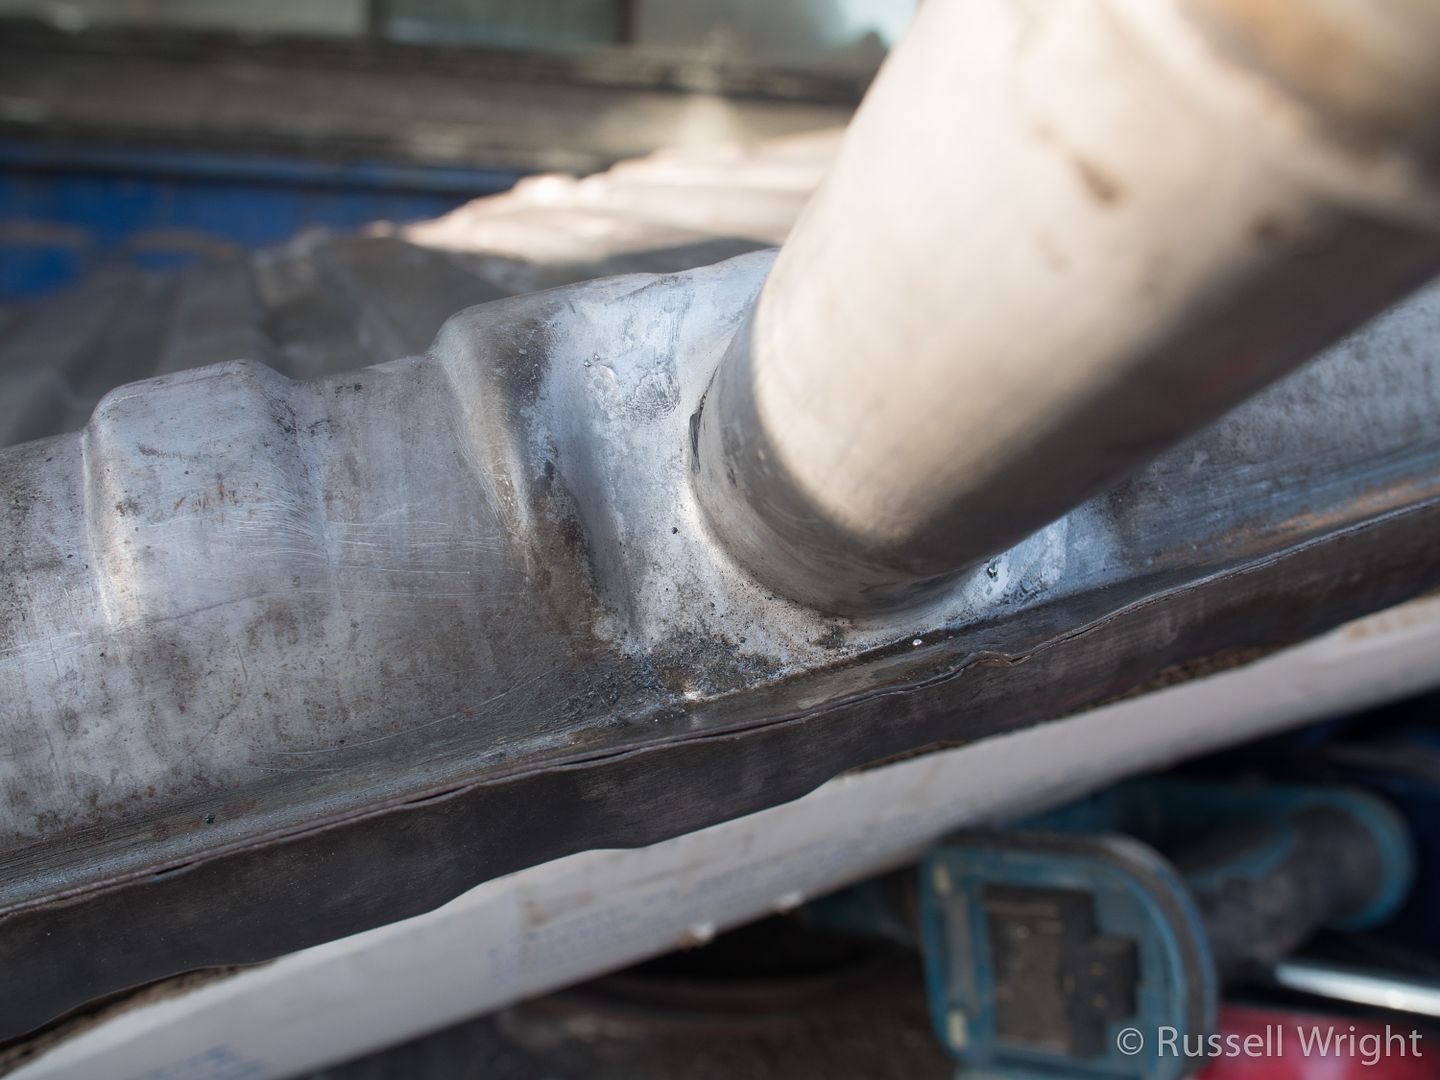
There was a slight weeping leak from the base of the filler neck, so I had that soldered, and the tank dipped to clean the inside.
I then hit it with some Eastwood Tank Tone. The stuff looks good. Also did the tank straps.


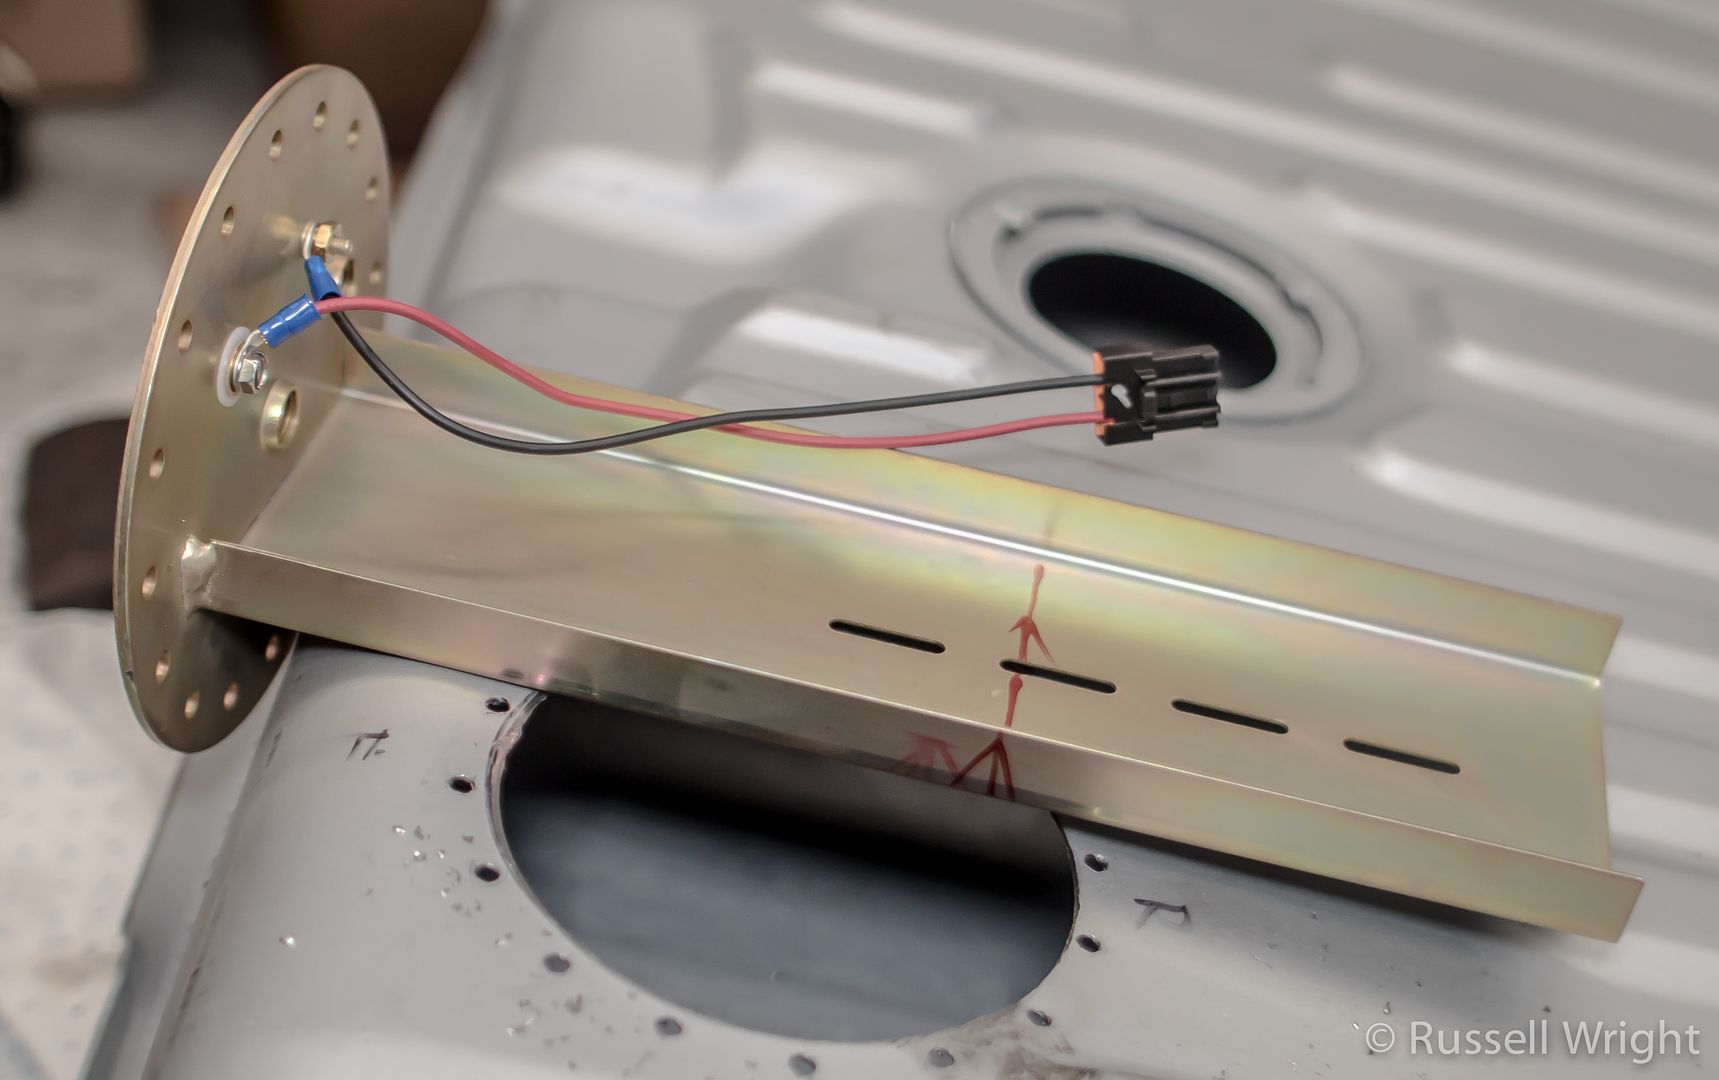
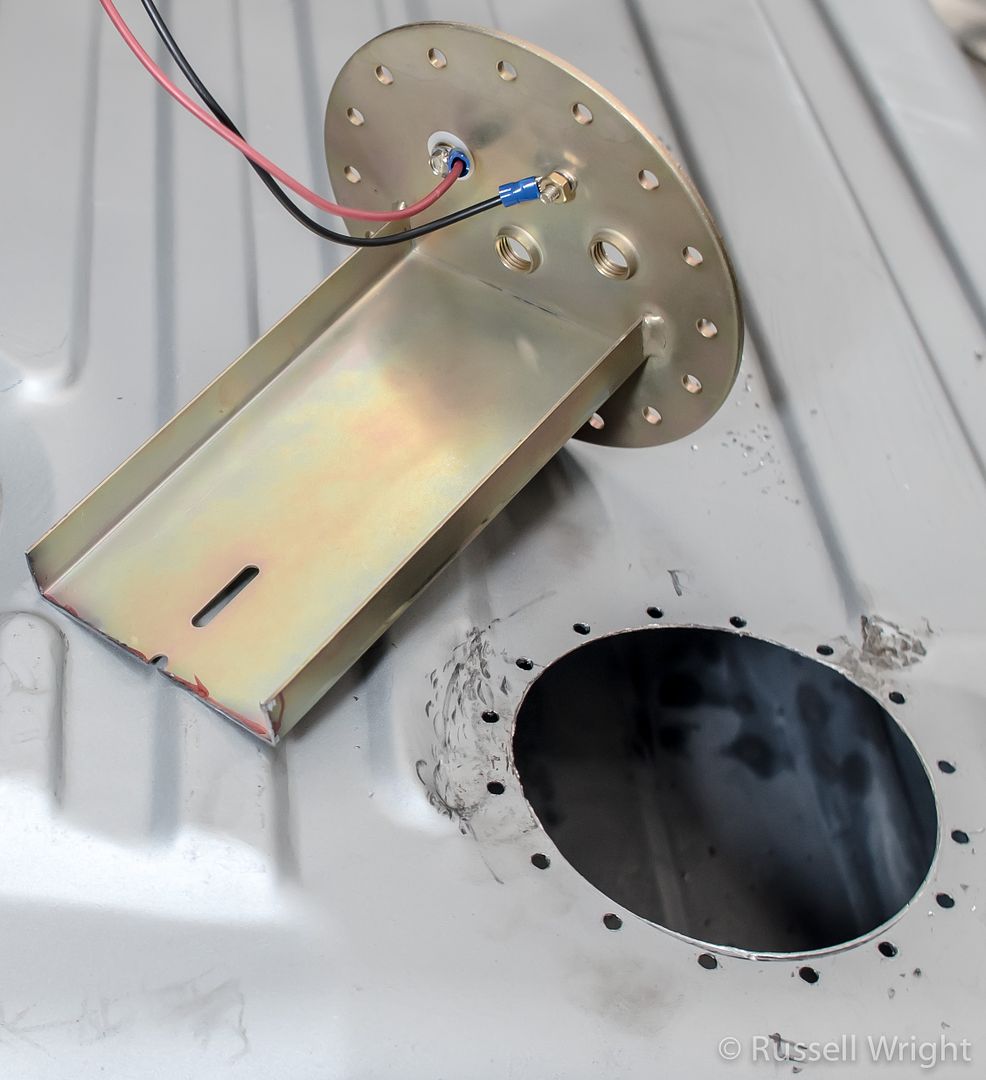
I chose the front left corner. Deepest part of the pan, with the biggest flat spot. Required only the slightest of hammer and dolly part of a rib either side.
FYI for any 67 B-Body owner. The minimal tank depth for this kit is 6". The Impala tank in this spot is right at 6.5". Just enough
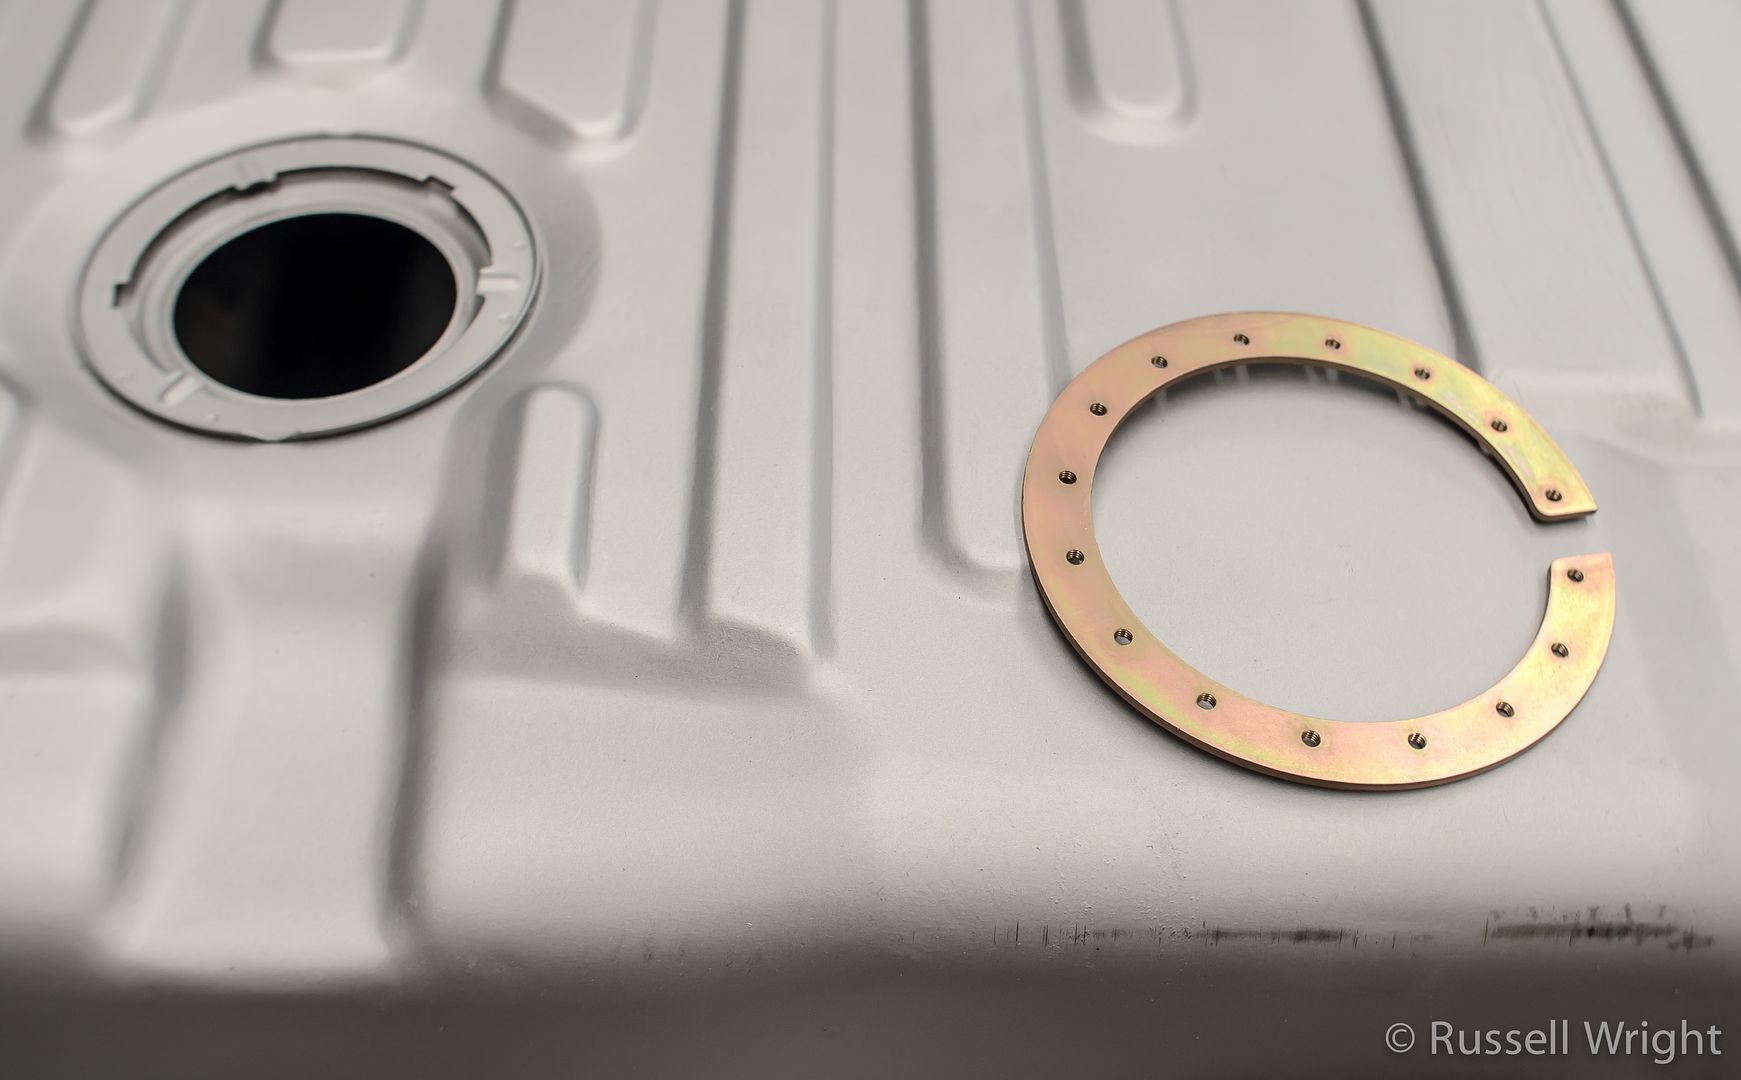
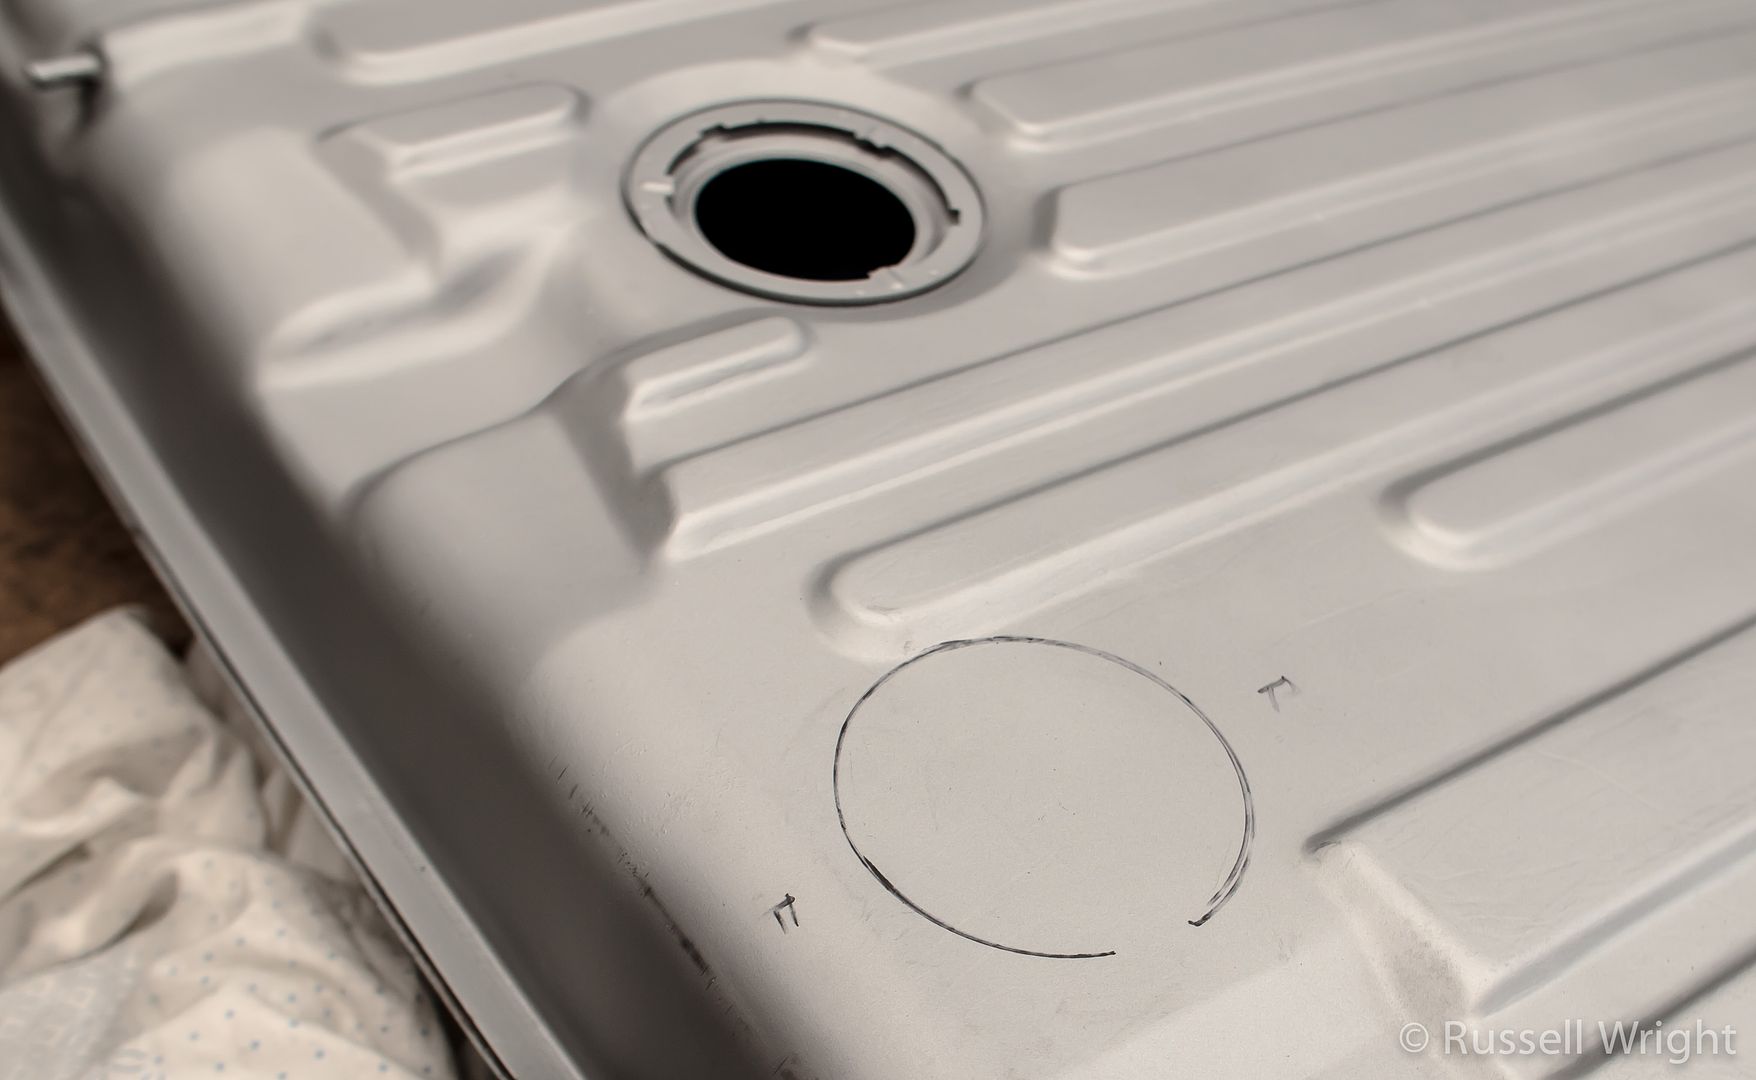

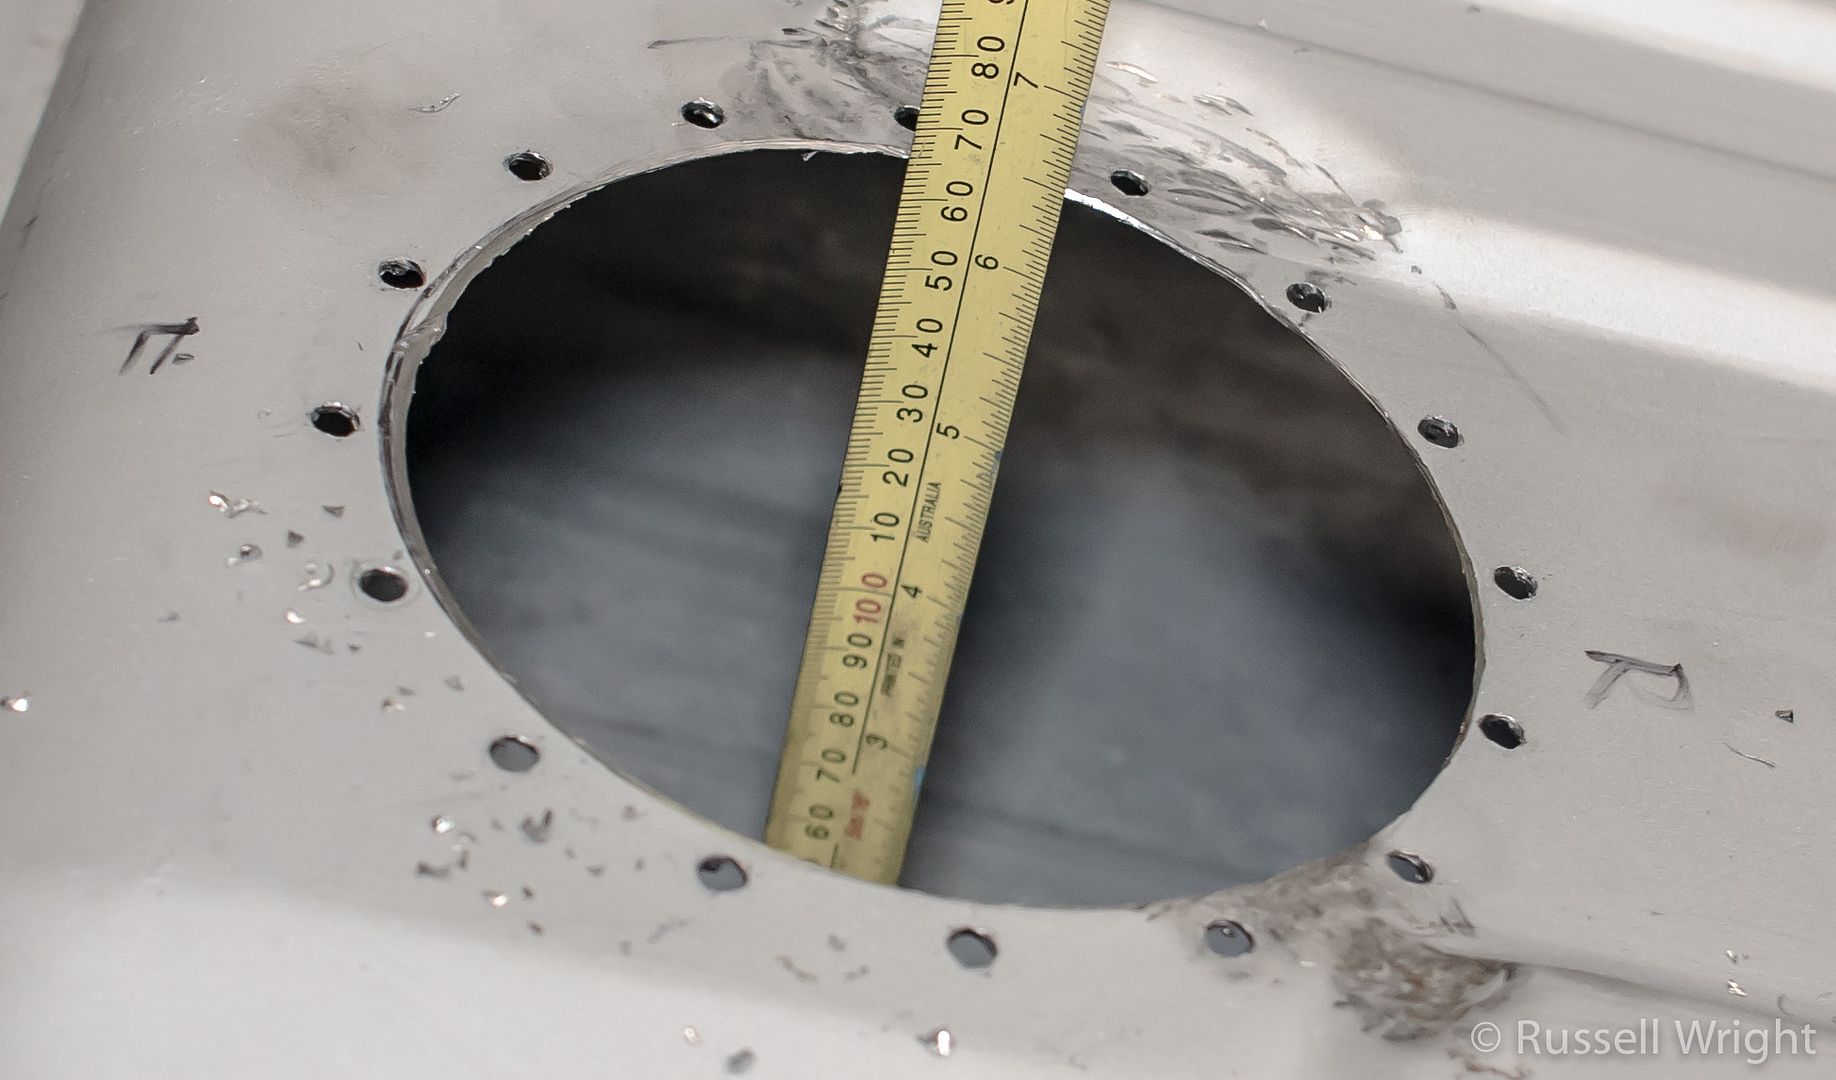
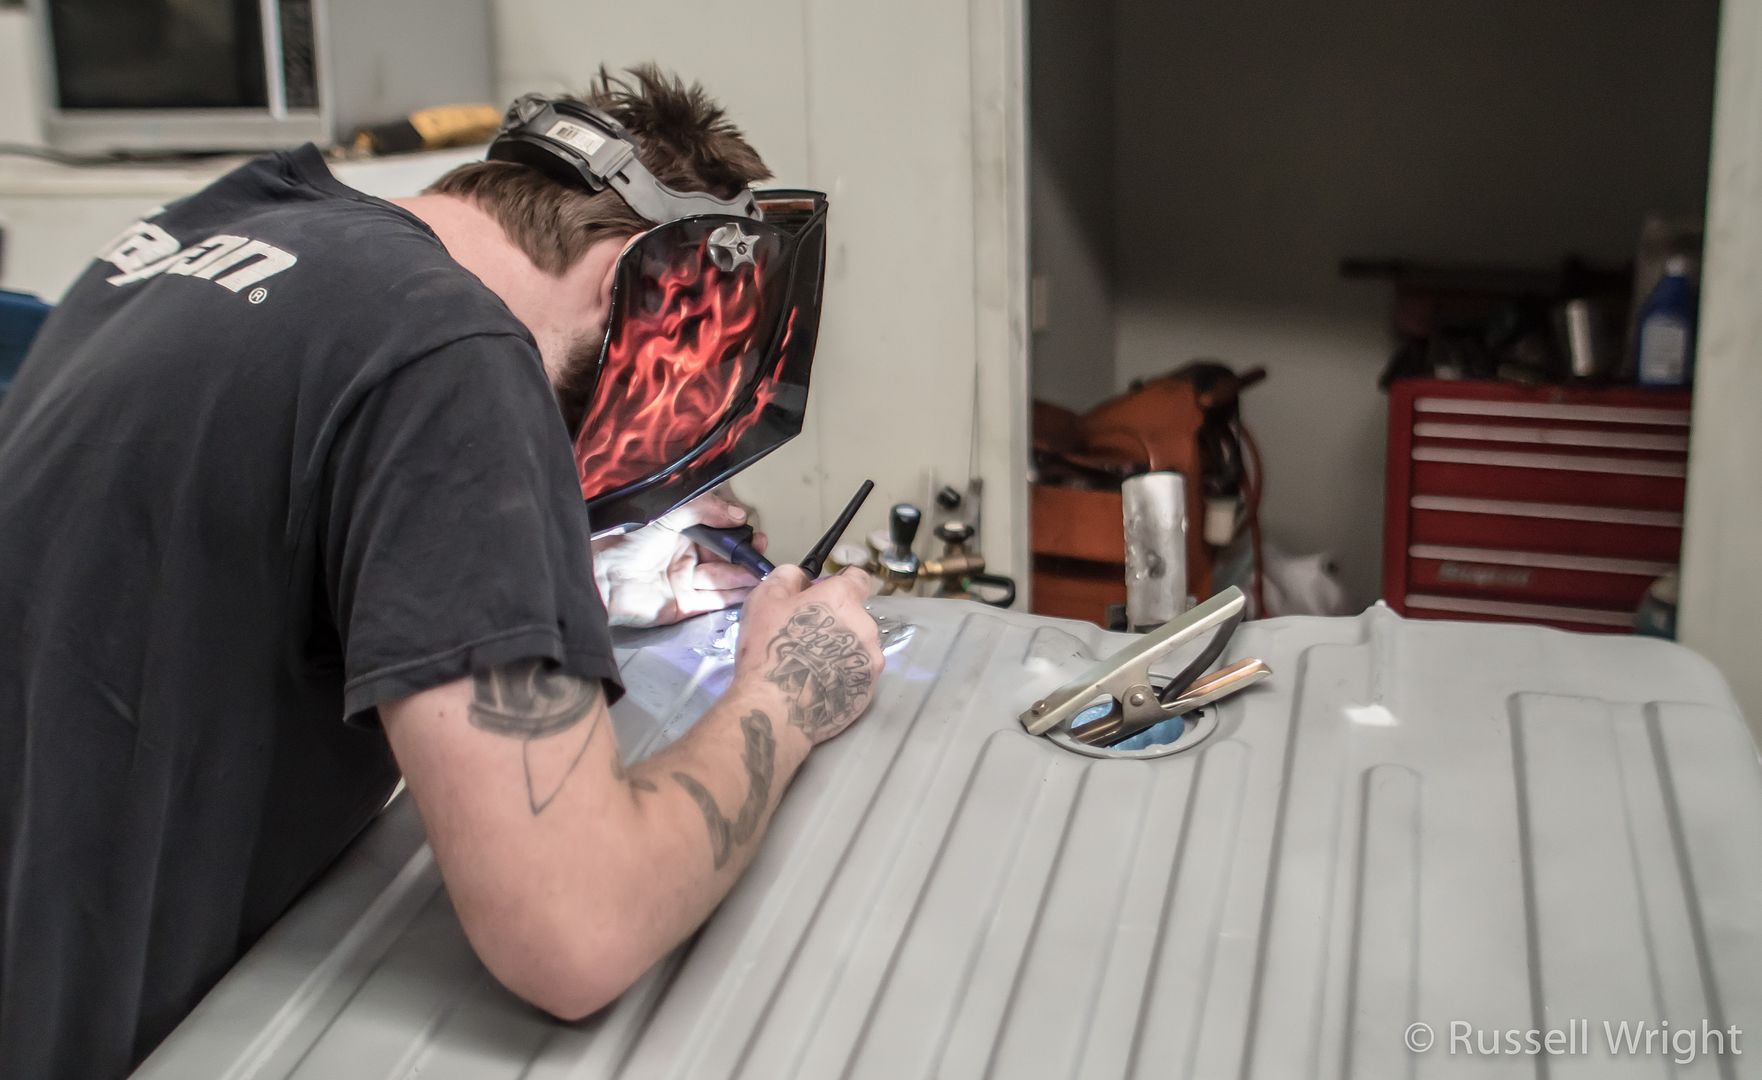
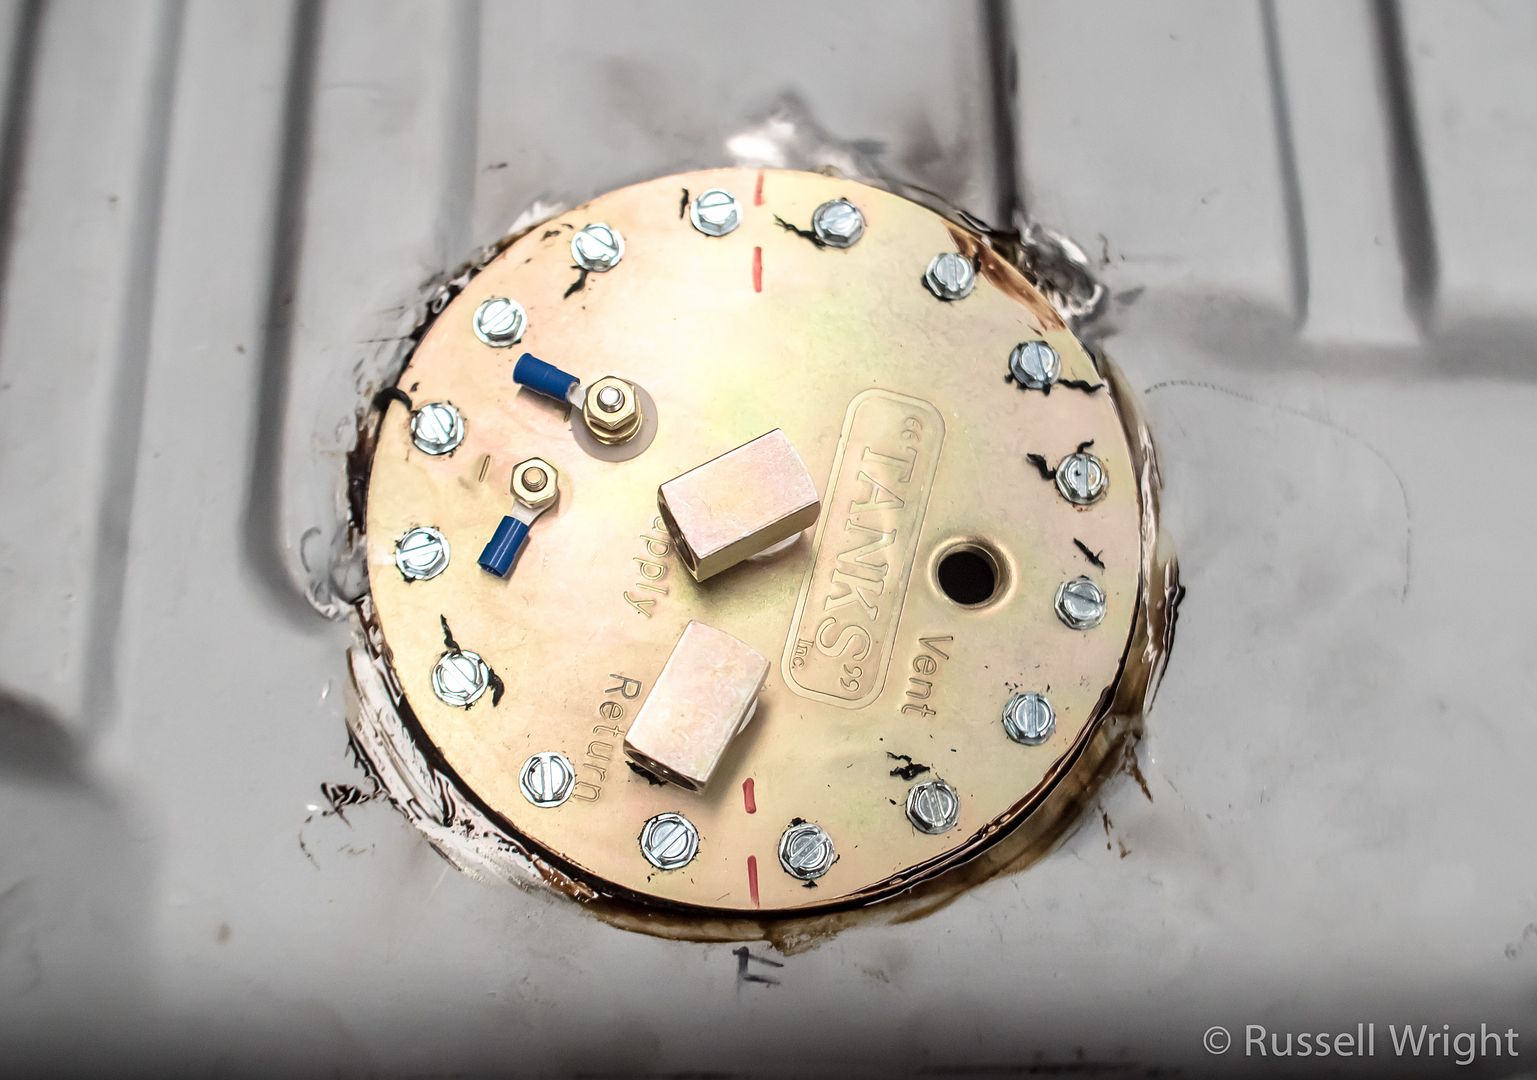
Marked and drilled the mounting holes, then had the ring tack-welded in place.
Action shot!
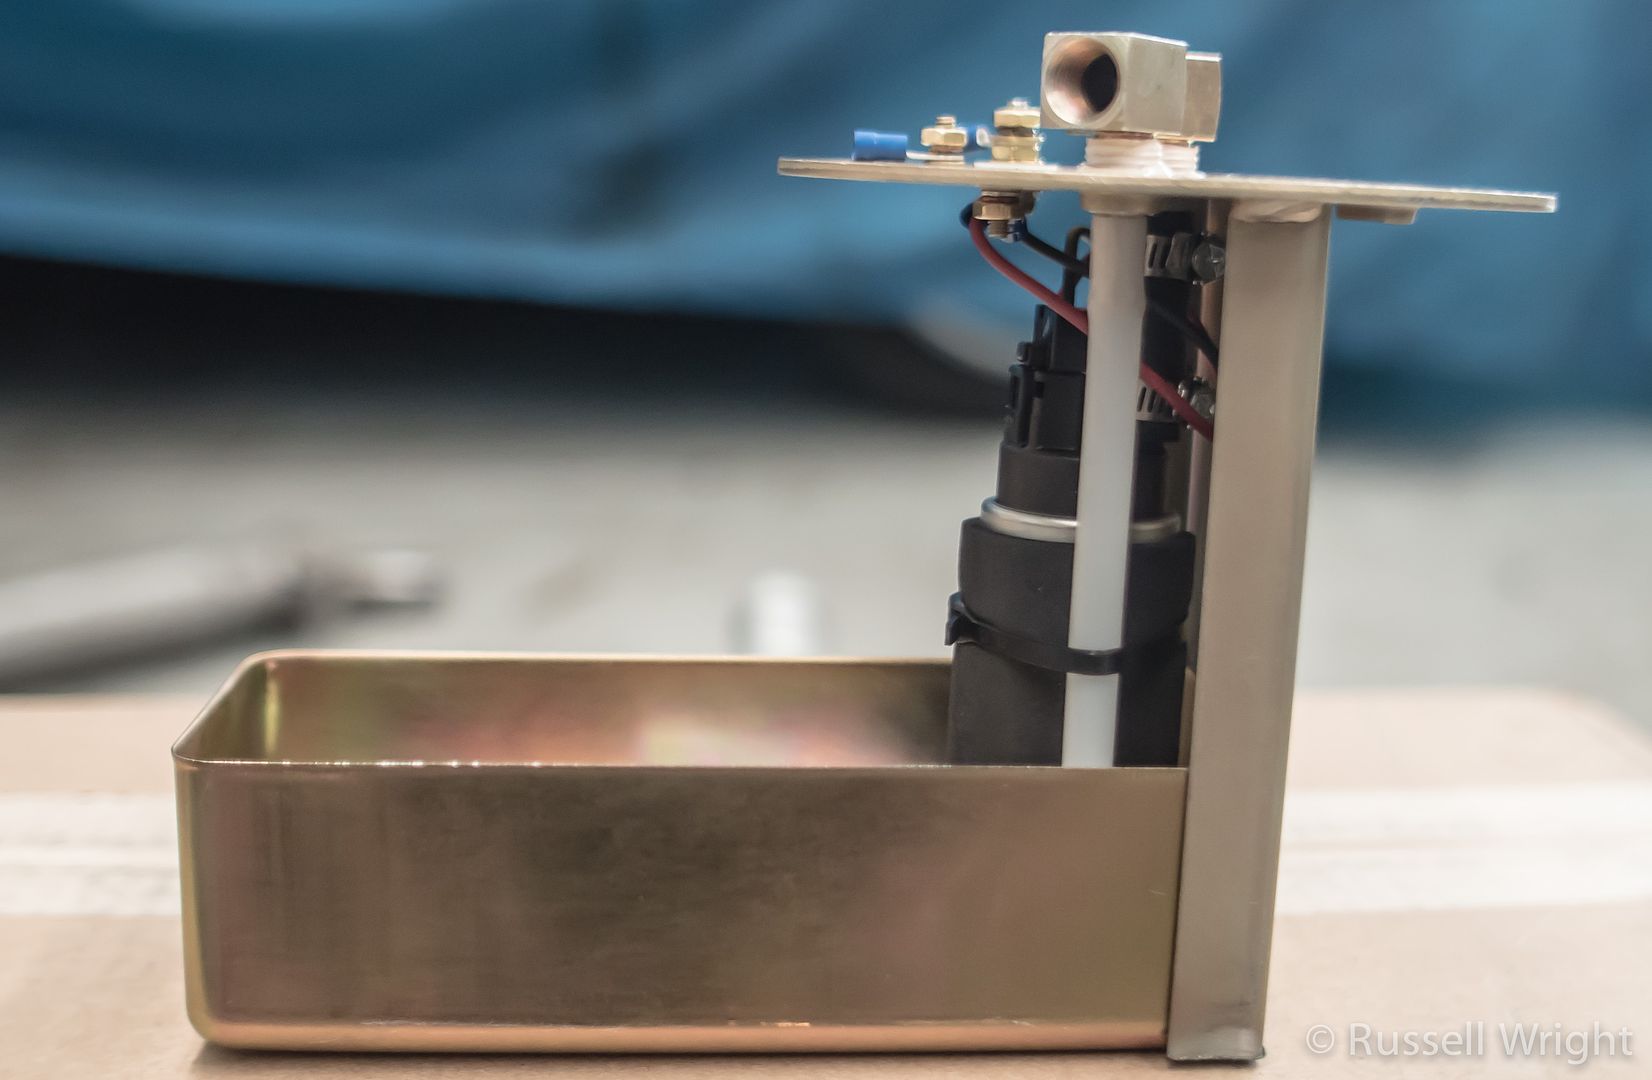
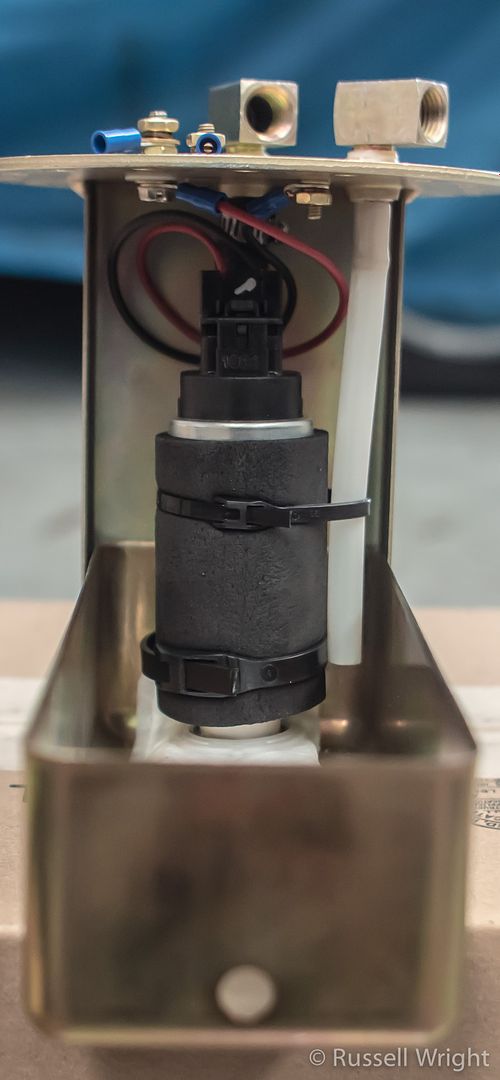
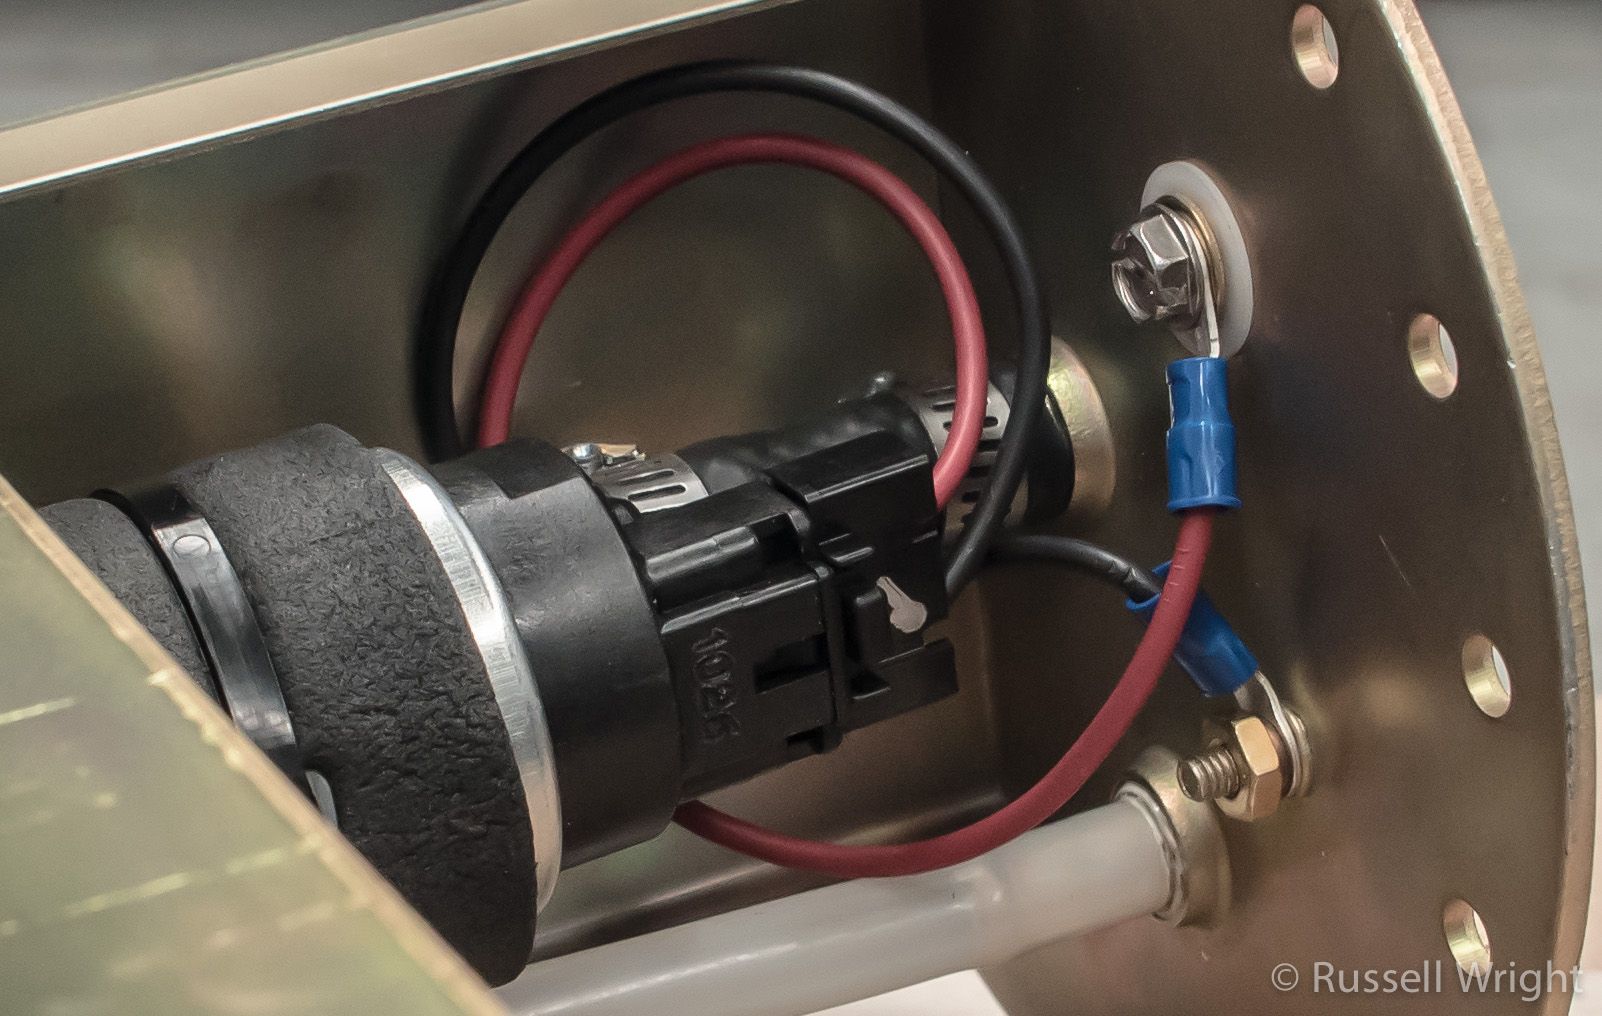
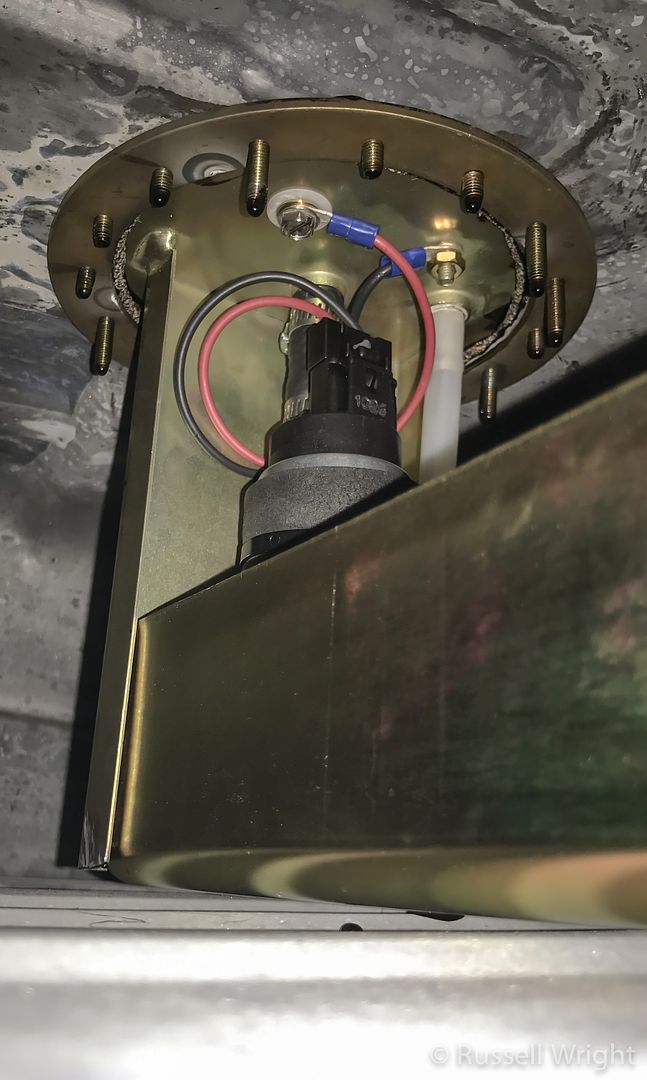
Got the pump and baffle kit cut to length and put together. Pretty straight forward.
As you can see, not a lot of room between the pump outlet and barbed fitting. This is why there' a 6" minimum tank depth.
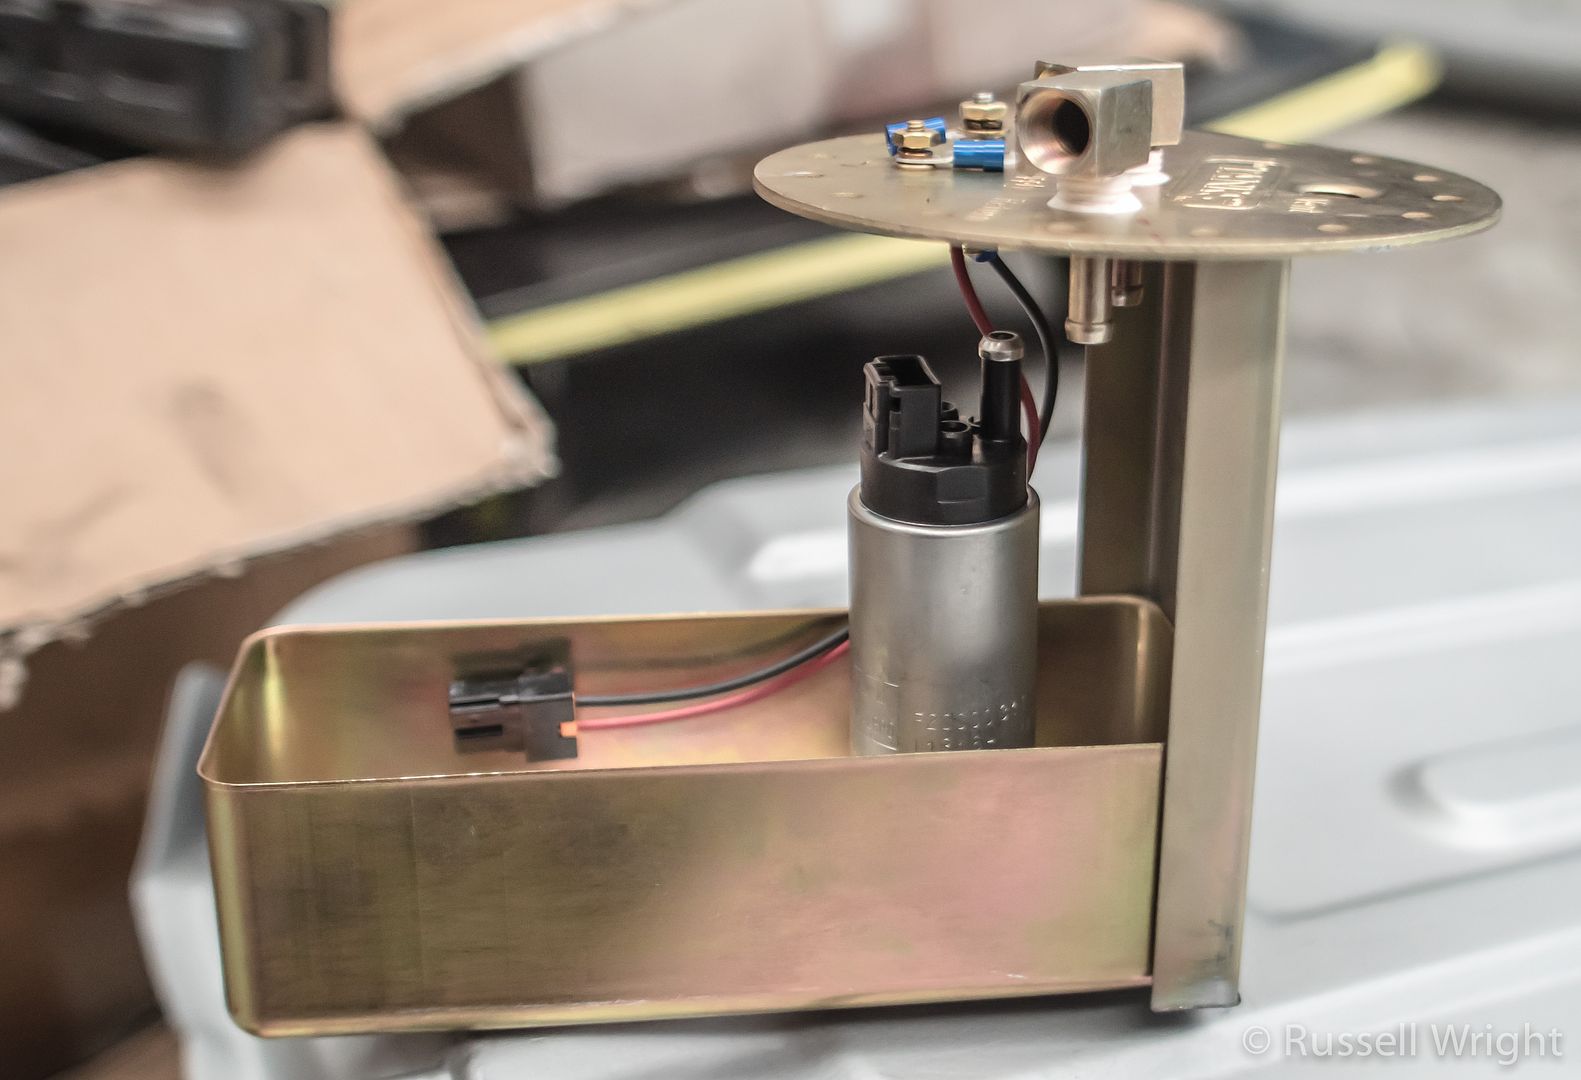
Everything is in, buttoned up, and ready to install.
Top of tank prepped for fitment. Used some Permatex Aviation Form-a-Gasket to seal the gasket to both the base of the pump housing, and the top of the tank.

Outlets sit 20mm above the highest point of the tank. I purchased some 3M adhesive back rubber strips to help keep this part from contacting the floor of the vehicle.
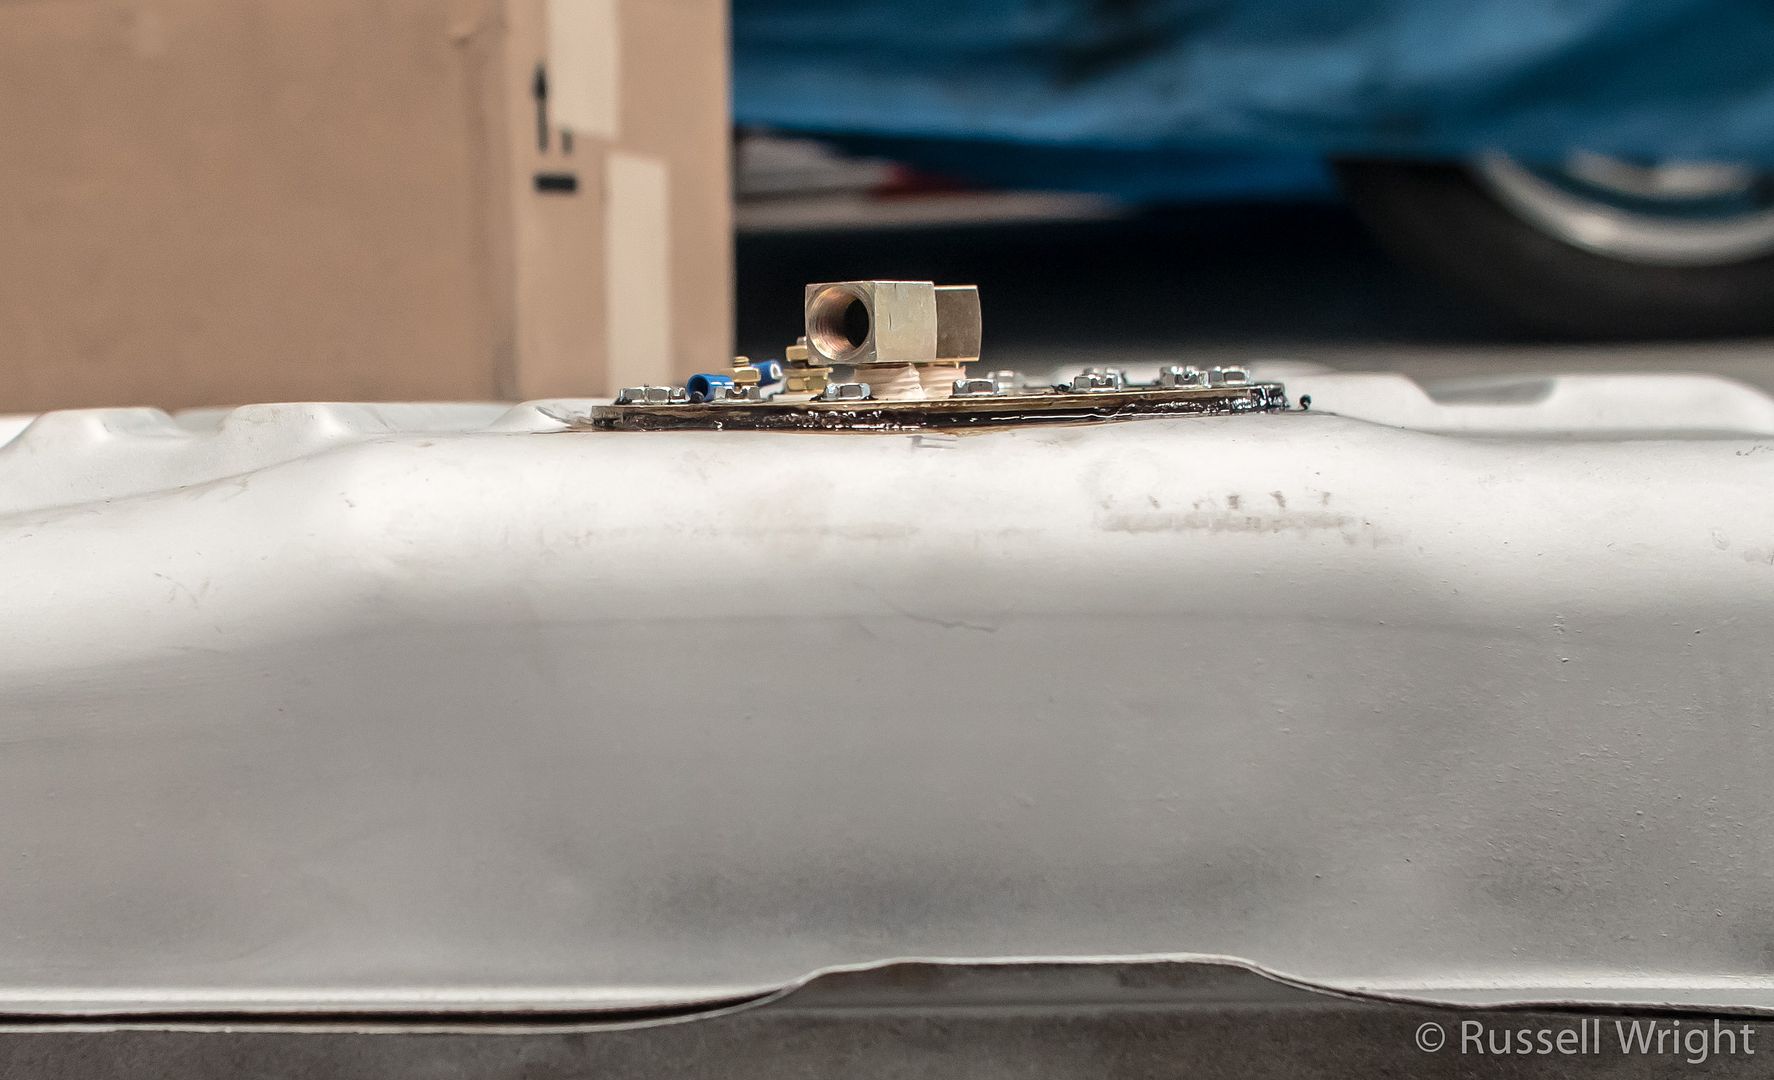
All complete!
Here's a shot of the inside. It sits about 2mm off the floor. When I measured and cut, I didn't allow for the thickness of the gasket. Shouldn't be an issue.
I looked at the cost of the Tank Inc PA-4 in-tank system, and considering I had to remove the old tank to do a repair, it became the wiser choice.
Got it installed yesterday with no issues.
Removed the old paint from the tank so I could get it repaired.
There was a slight weeping leak from the base of the filler neck, so I had that soldered, and the tank dipped to clean the inside.
I then hit it with some Eastwood Tank Tone. The stuff looks good. Also did the tank straps.
I chose the front left corner. Deepest part of the pan, with the biggest flat spot. Required only the slightest of hammer and dolly part of a rib either side.
FYI for any 67 B-Body owner. The minimal tank depth for this kit is 6". The Impala tank in this spot is right at 6.5". Just enough
Marked and drilled the mounting holes, then had the ring tack-welded in place.
Action shot!
Got the pump and baffle kit cut to length and put together. Pretty straight forward.
As you can see, not a lot of room between the pump outlet and barbed fitting. This is why there' a 6" minimum tank depth.
Everything is in, buttoned up, and ready to install.
Top of tank prepped for fitment. Used some Permatex Aviation Form-a-Gasket to seal the gasket to both the base of the pump housing, and the top of the tank.
Outlets sit 20mm above the highest point of the tank. I purchased some 3M adhesive back rubber strips to help keep this part from contacting the floor of the vehicle.
All complete!
Here's a shot of the inside. It sits about 2mm off the floor. When I measured and cut, I didn't allow for the thickness of the gasket. Shouldn't be an issue.
The following users liked this post:
rsz288 (02-18-2023)

 10-19-2016, 06:43 PM
#25

Great Job !!!!!!..........Attention to Detail !!!!!

The following users liked this post:
rsz288 (02-18-2023)
11-05-2016, 02:51 AM
#27
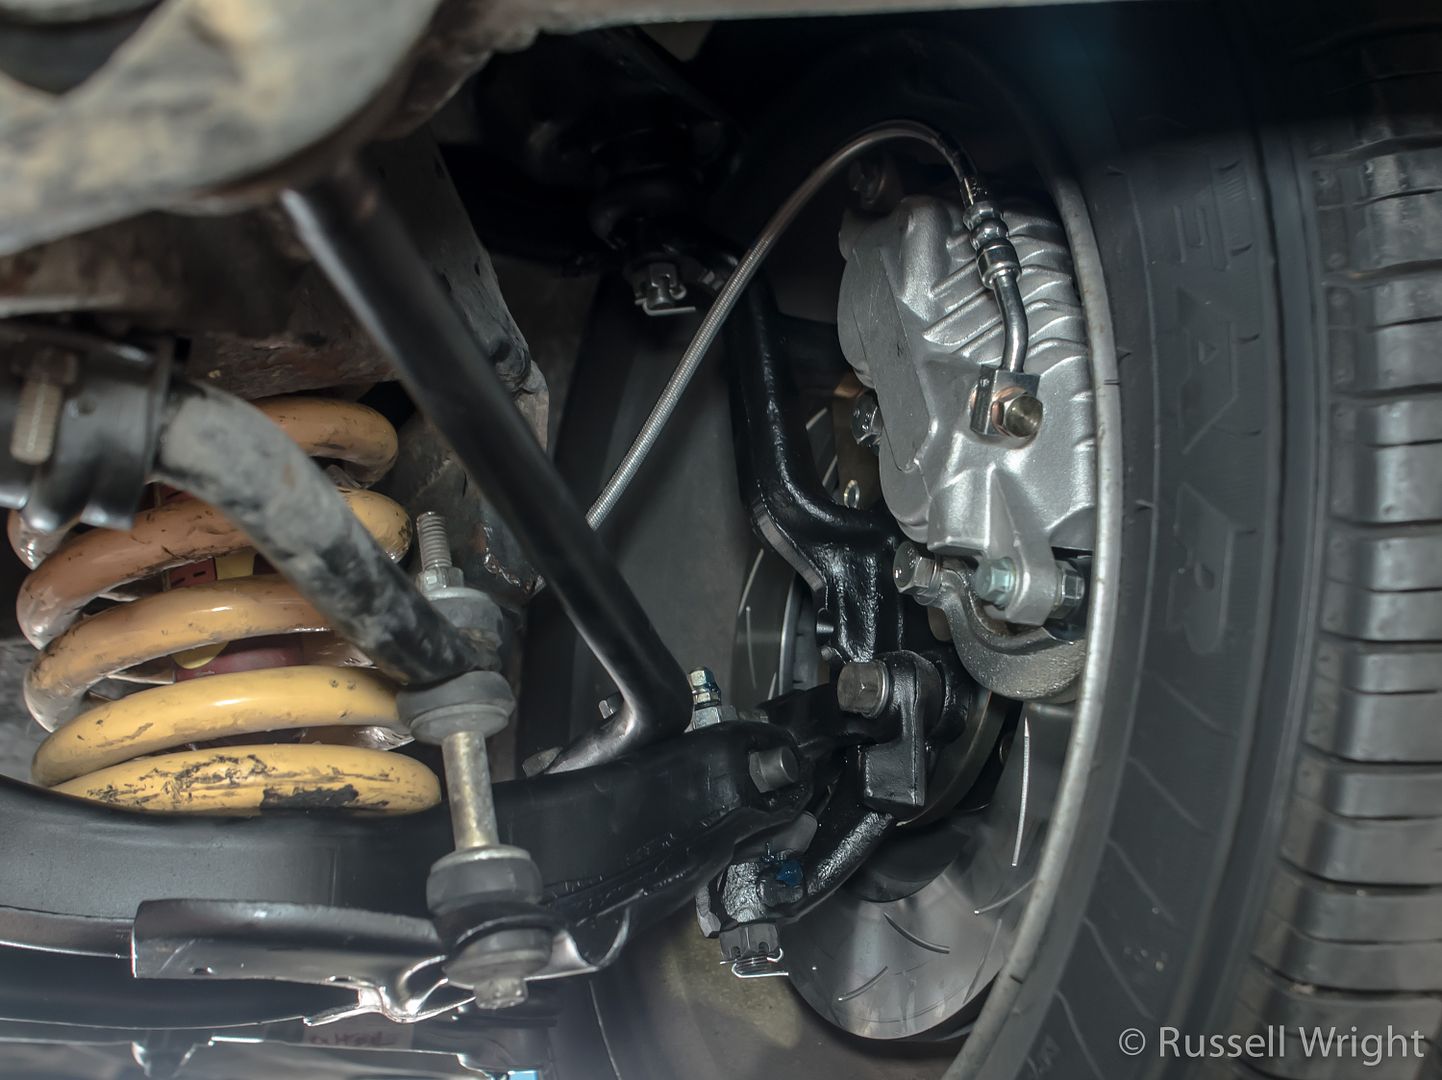
Got the front disc setup installed, and most of the front suspension bushings swapped out to Energy Suspension poly bits.
Tried to clean and repaint as much as I could, but there was a lot of crap to clean. The control arms, spindle, etc, had been coated with a thick black undercoating. media-blaster barely scratched it. Had to wire-wheel it all first. Took an entire day just to get things half decent for painting.
Brackets installed:

Hub and bearings on:
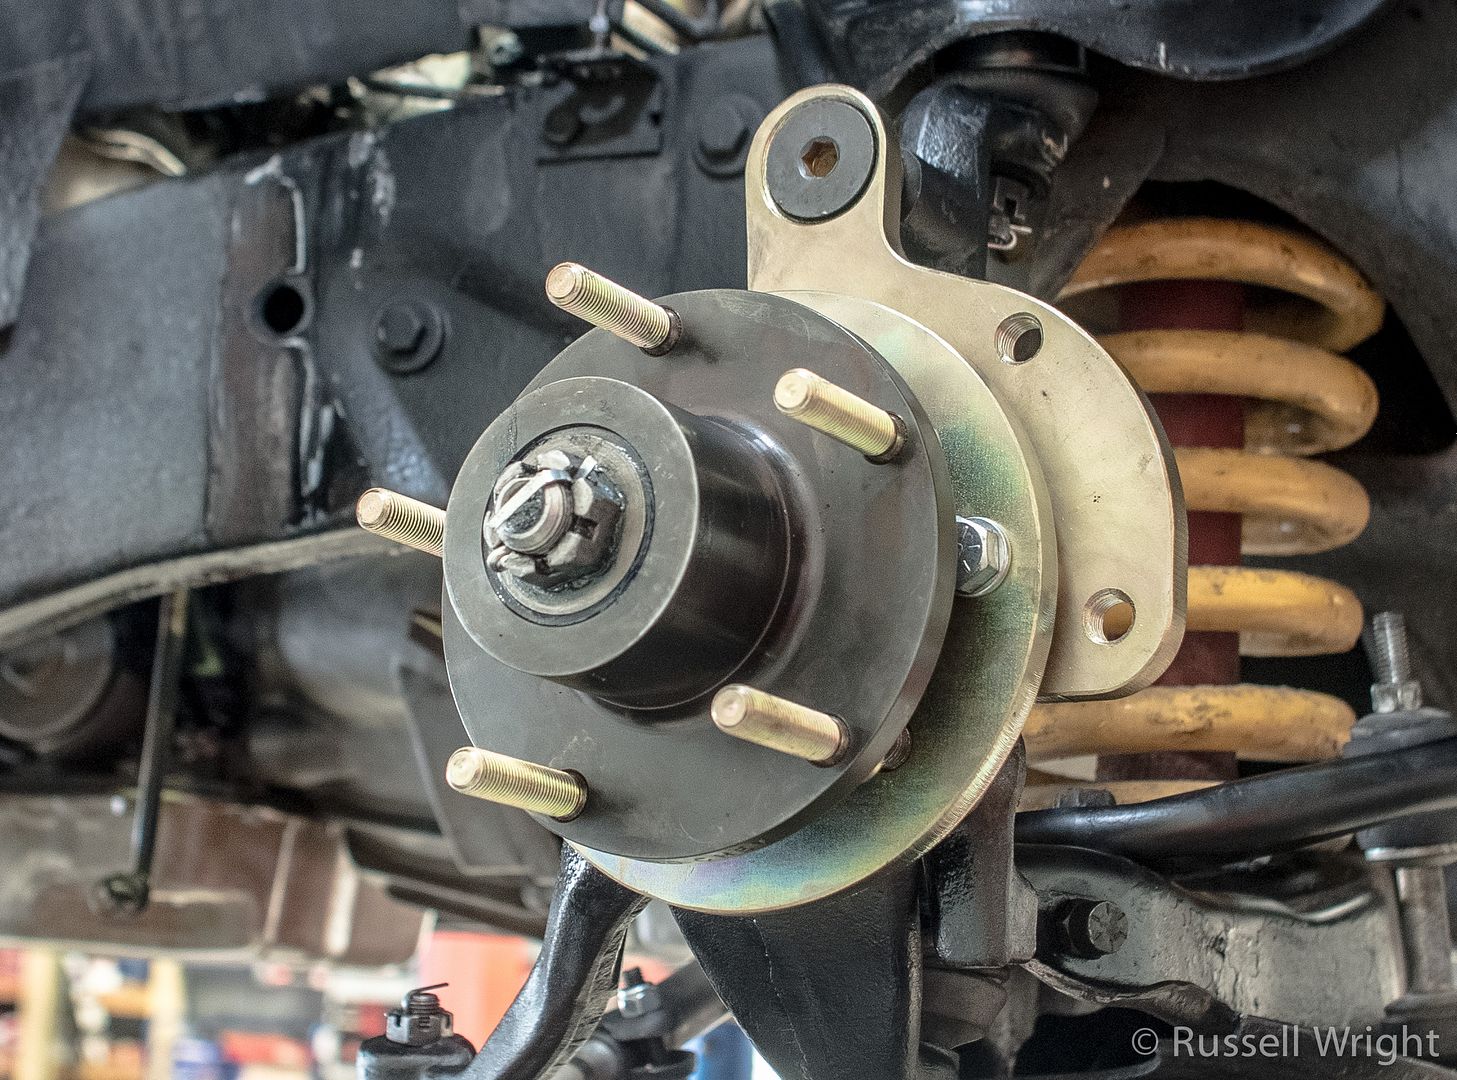
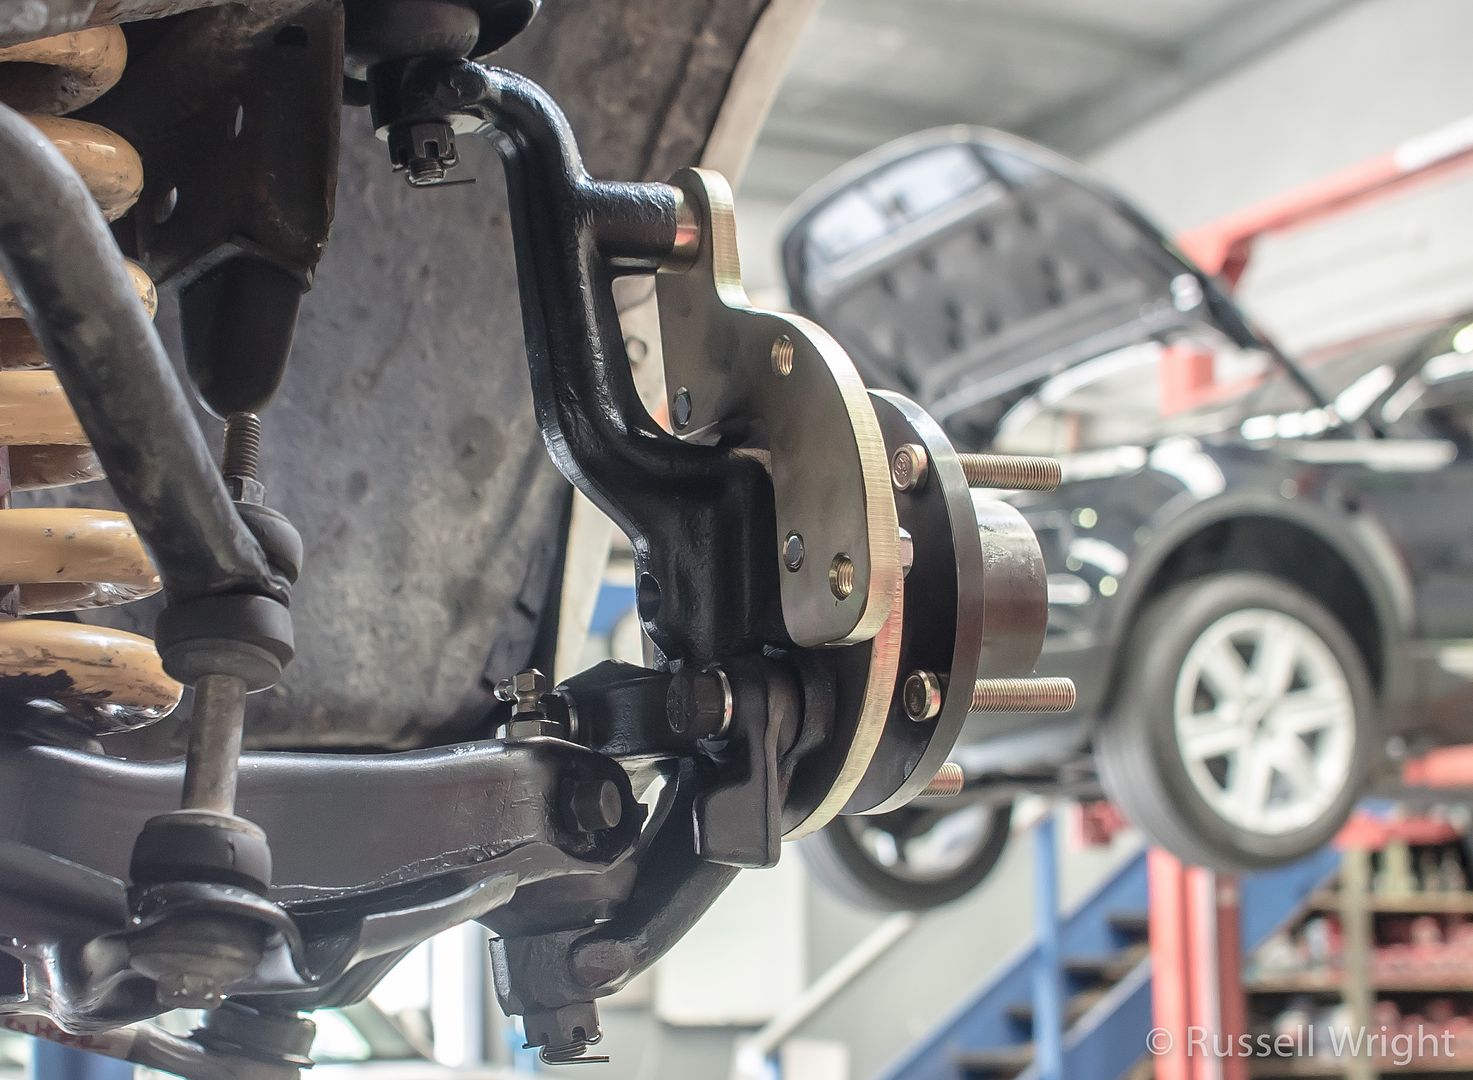
Calipers and rotors are on. Calipers are twin piston, and the rotors are 330mm (13").
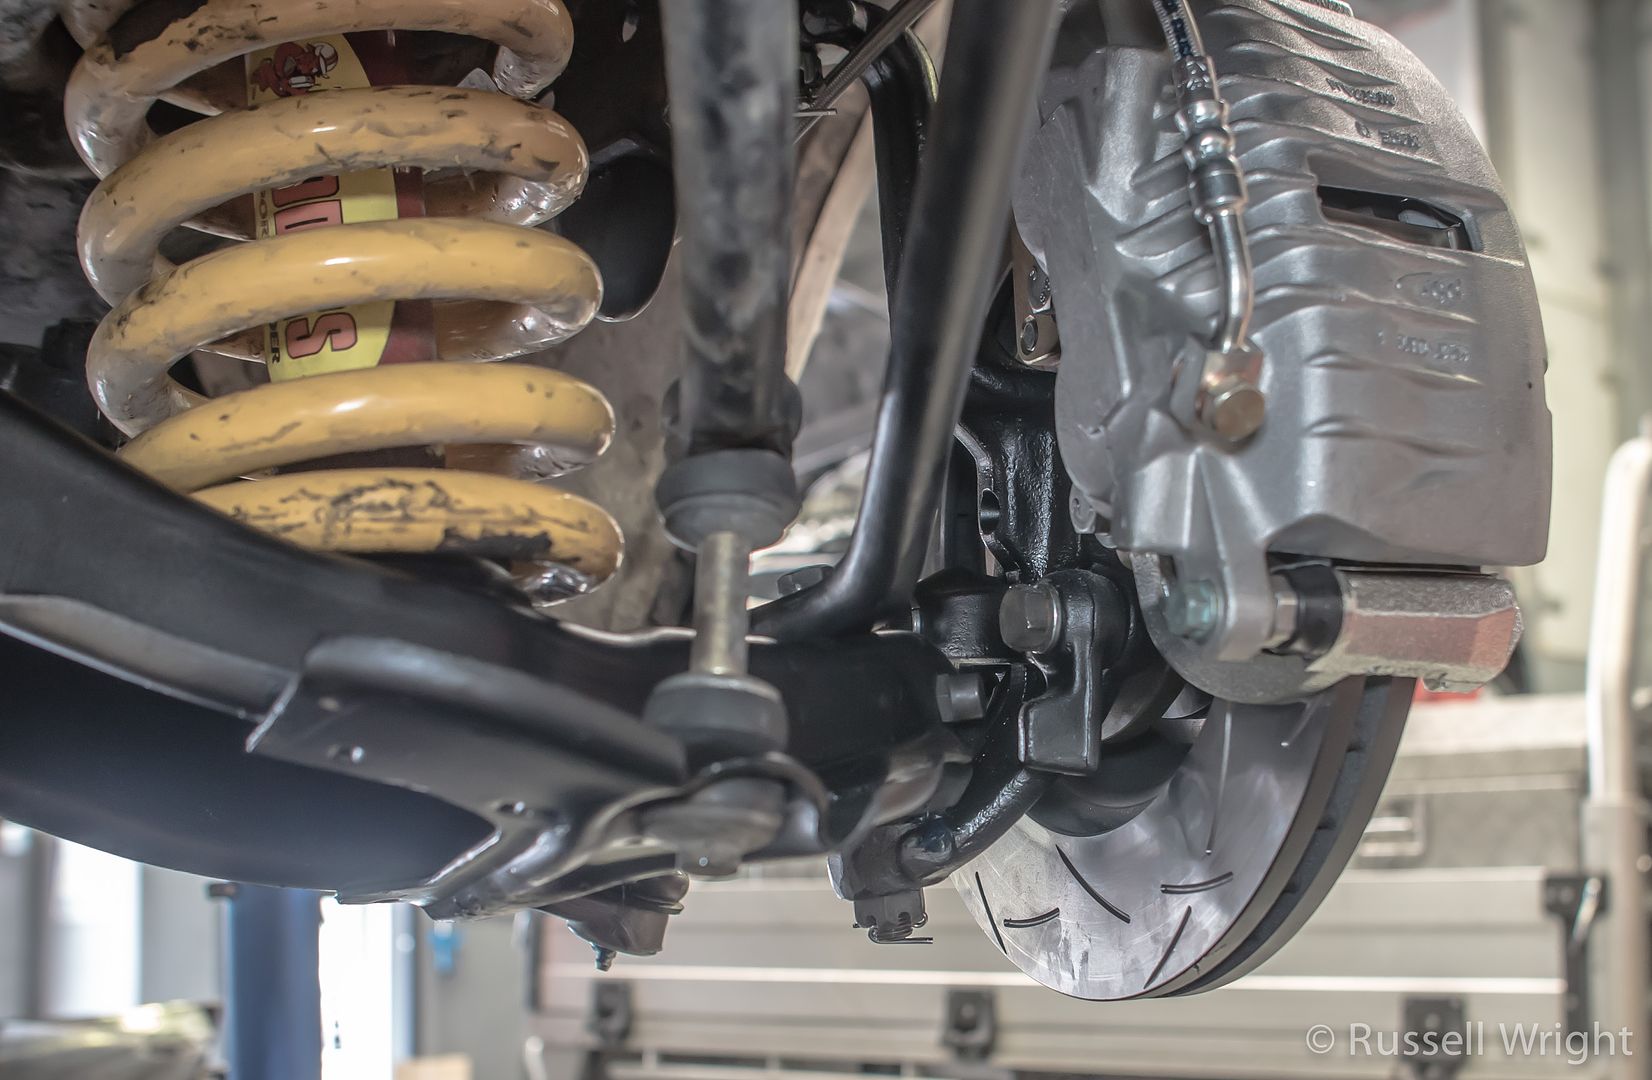

Have just enough clearance with my 17" Rallye's.
Tried to clean and repaint as much as I could, but there was a lot of crap to clean. The control arms, spindle, etc, had been coated with a thick black undercoating. media-blaster barely scratched it. Had to wire-wheel it all first. Took an entire day just to get things half decent for painting.
Brackets installed:
Hub and bearings on:
Calipers and rotors are on. Calipers are twin piston, and the rotors are 330mm (13").
Have just enough clearance with my 17" Rallye's.
The following users liked this post:
rsz288 (02-18-2023)
 11-05-2016, 06:26 AM
#29
The rotors are DBA. The calipers are PBR.
I'm not sure if Hopper Stoppers make the brackets and hubs, or if they're sourced from elsewhere.
I believe, being an aftermarket kit, the front mount calipers are because of clearance issues ... but that's only my assumption. From what I've been able to gather, when it comes to front or rear facing calipers with aftermarket kits - specifically those with larger than factory rotors - clearance seems to be the determining factor.
02-15-2017, 09:29 PM
#31
Teching In

Join Date: Feb 2017
Posts: 2
Likes: 0
Received 0 Likes
on
0 Posts
Checked their site. Product numbers indicate they're just a re-seller for TanksInc tanks.
Pretty sure I'll go with the Aeromotive Phantom route.
---
Not much else has happened lately. Just been waiting on parts, however a few days ago most arrived on the same day. Felt like Christmas.
Firstly, all my engine mount options showed up.
Knowing that the engine had to be raised slightly to accommodate the Holley 302-1 pan, I purchased the Hooker stock location adapter plates (12611HKR), but also grabbed the CCP LS Swap pedestals (6570MP-LS), which are taller than the stock frame mounts for this very purpose, on 65-70 Chev B-Body's.
Not long after that purchase, I noticed on this very forum, member Ken (kwhizz), and his custom made adapter plates which negate the necessity for replacing or modifying frame mounts. That sounded like a better idea, so I bought a set from him. When I got them, after a small amount of time fingering them in admiration of how simple and sexy they looked, I noticed they were shorter than the Holley adapter plates, and appeared to move the engine forward an inch or so. I dropped Ken a PM, and he said this took care of trans fitment issues.
I already have a 4L60 in my Impala, so I was expecting the change to the 4L65E being a straight swap, ie: use my current trans cross-member and driveshaft - what I didn't account for, however, is with the need to slightly raise the engine, it may create clearance issues in the trans tunnel.
****. This means I'll have to modify the trans cross-member (again), and change the length of my driveshaft (again). That was one place I was hoping I didn't have to spend money.
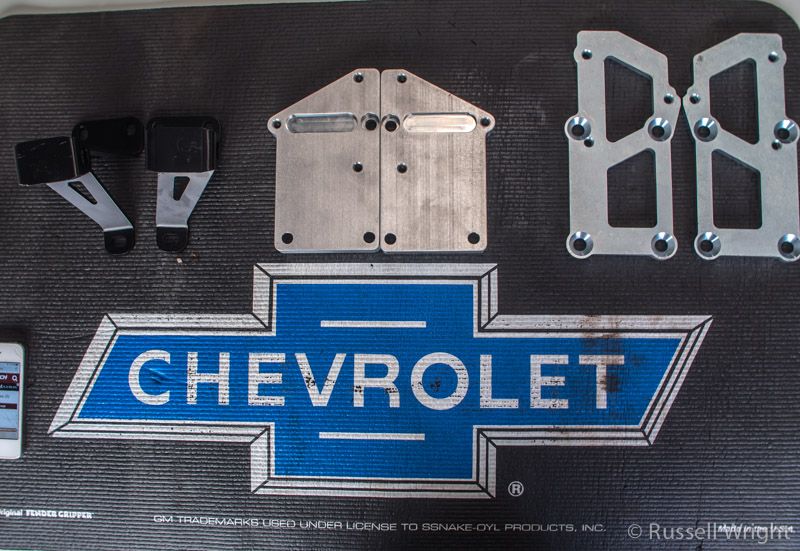
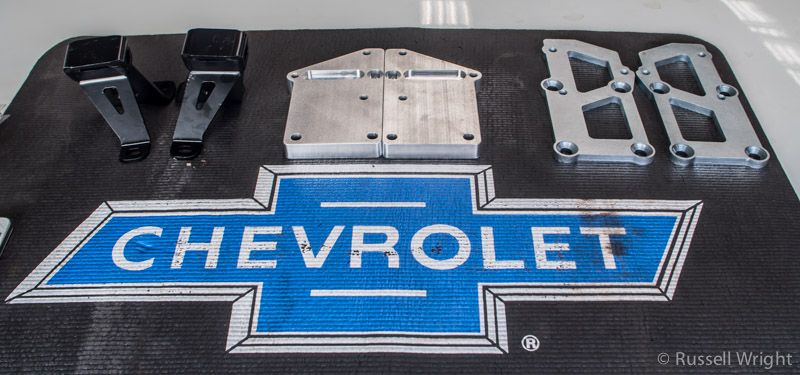
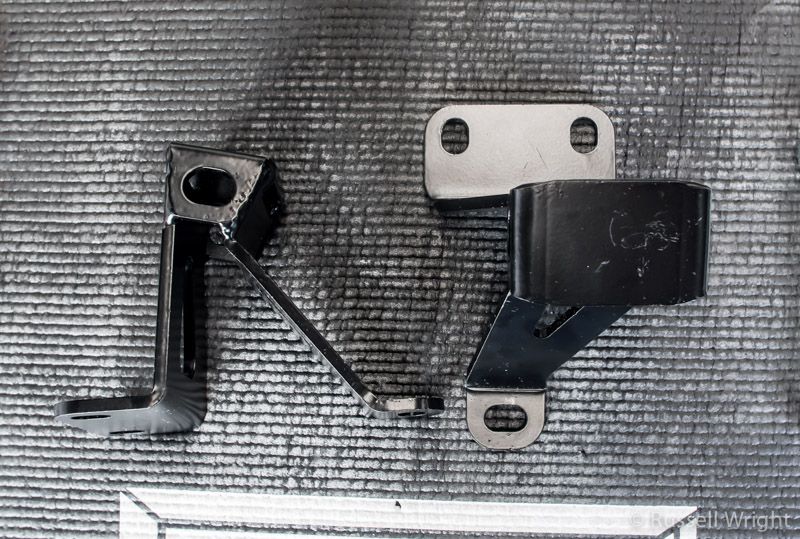
I think I'll use Ken's plates - they look and feel like a much more solid option - but here's a bunch of pics anyway:
Left: CPP frame mounts. (Part # 6570MP-LS)
Middle: Ken's adapter plates.
Right: Hooker adapter plates. (Part # 12611HKR),
CPP
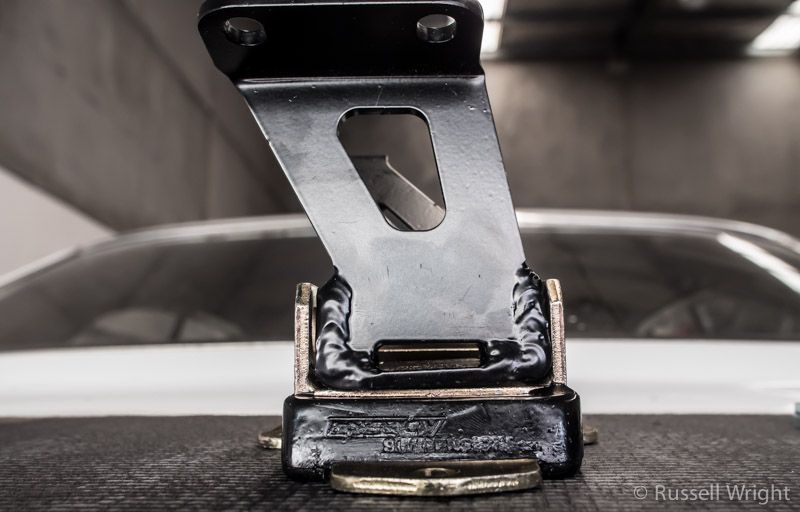
CPP fitt test with Energy Suspension poly mounts.
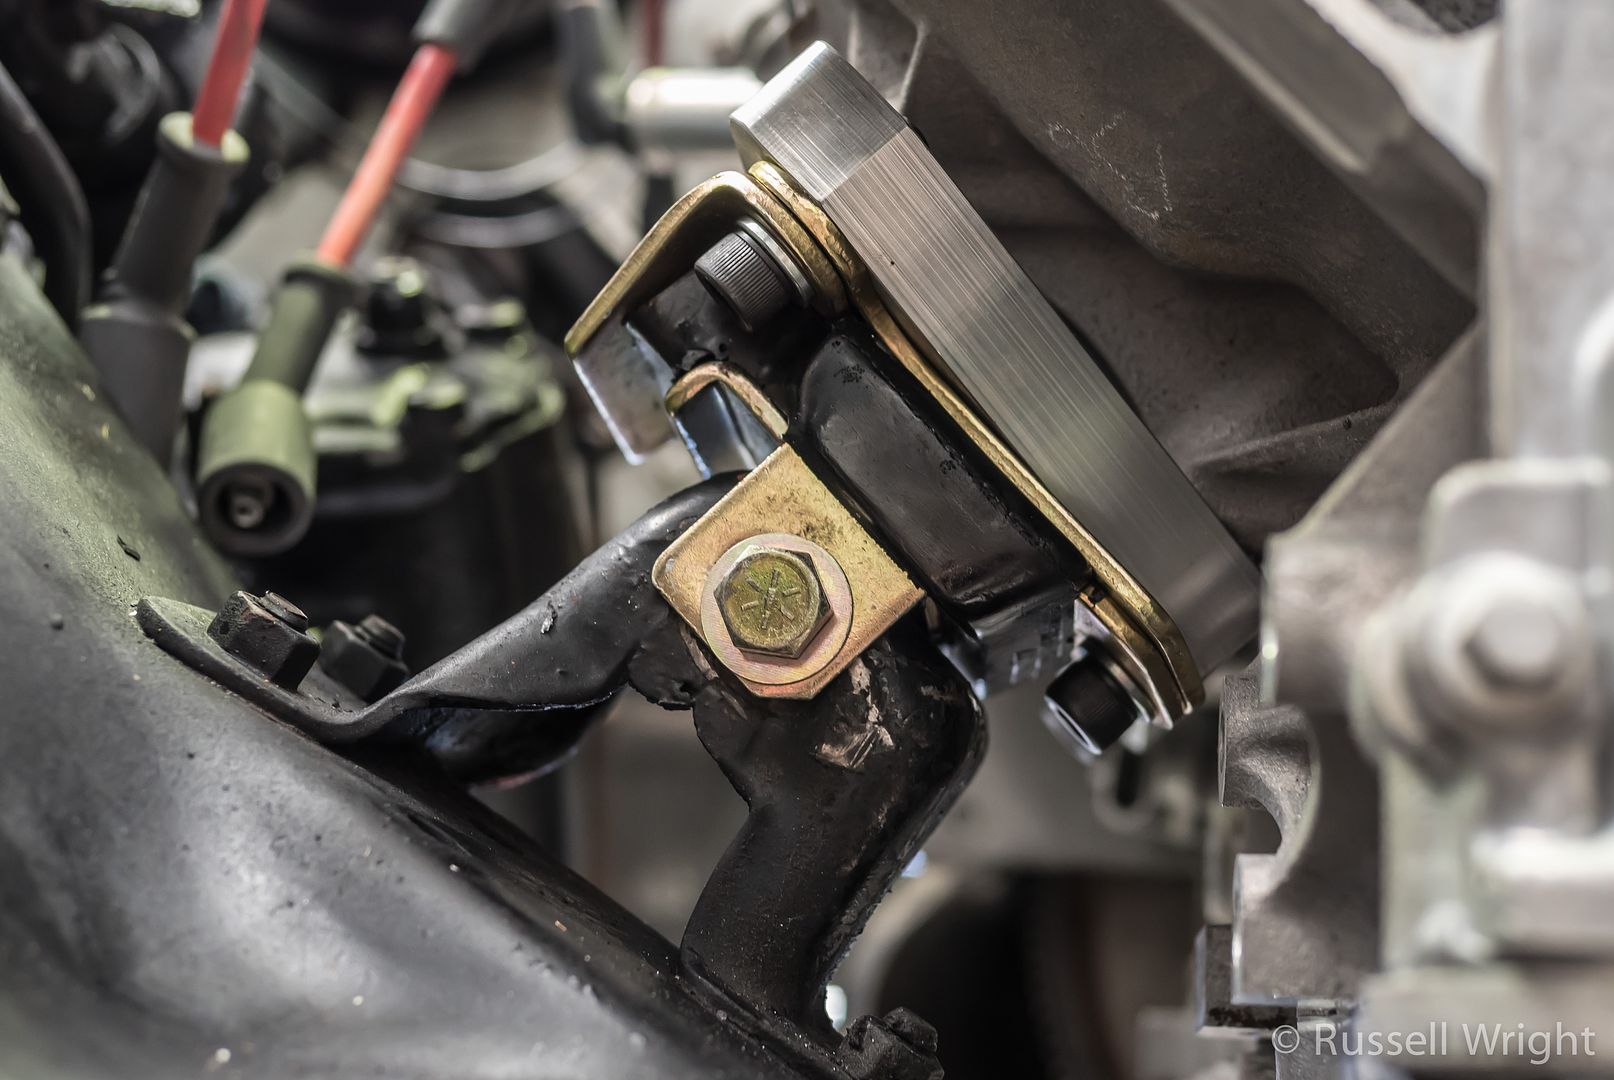
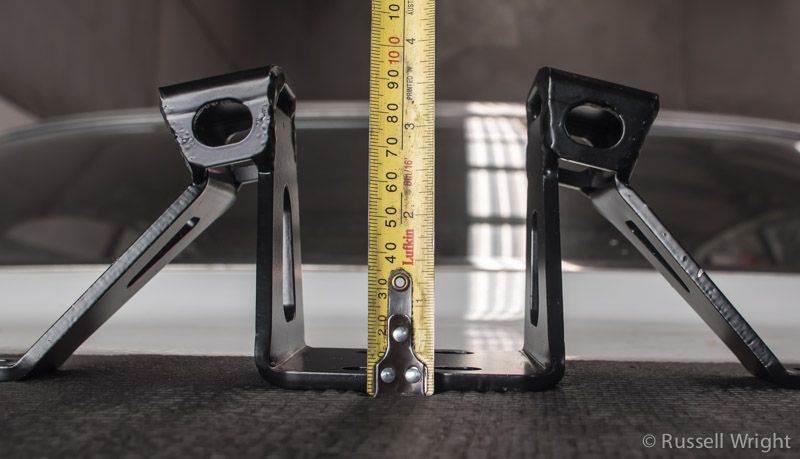
Ken v Hooker
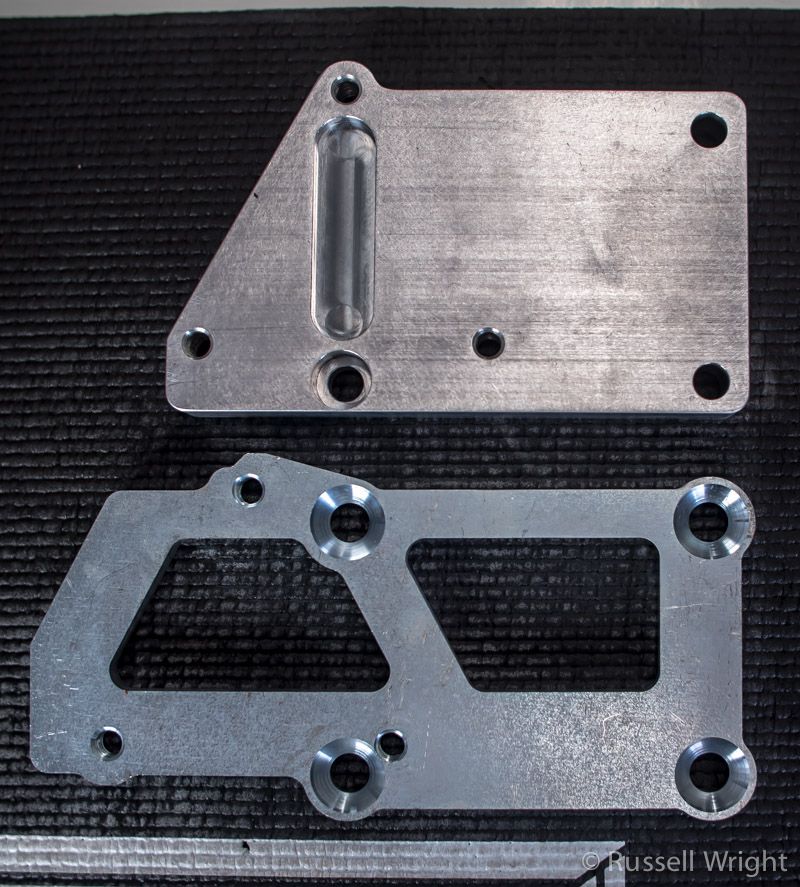
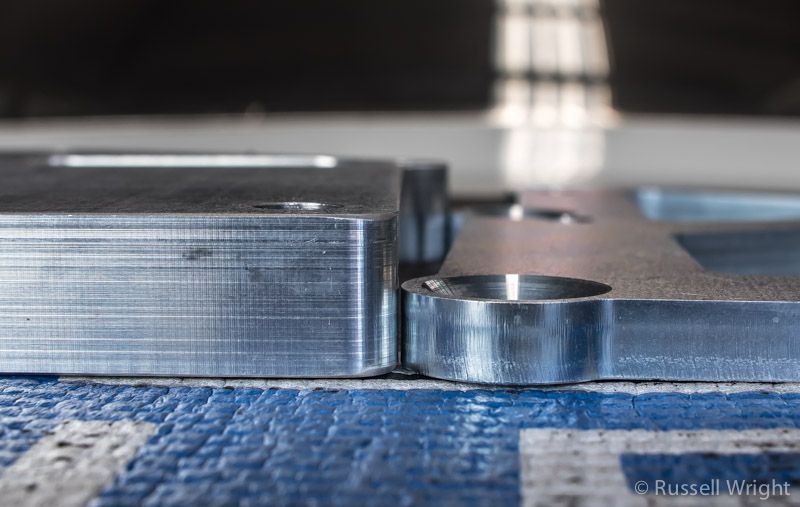
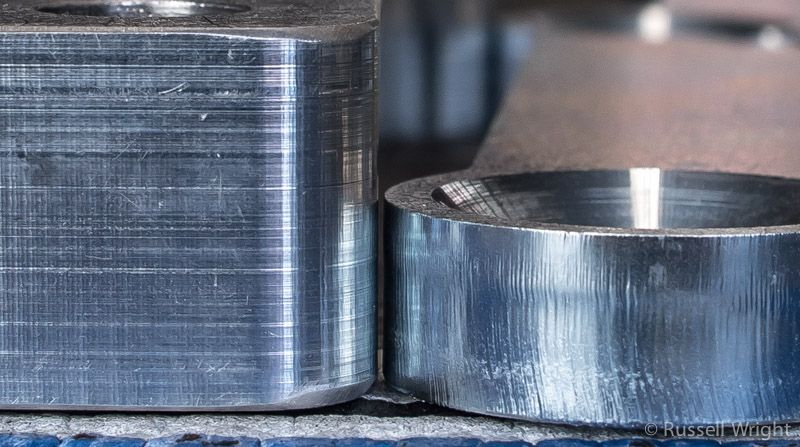
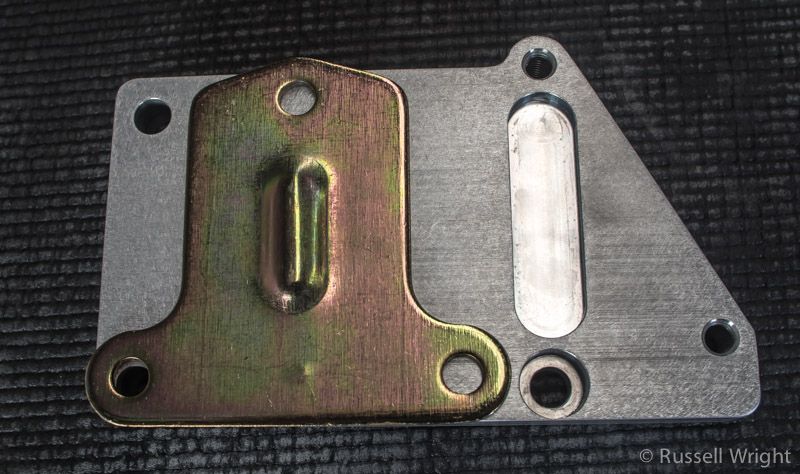
Note the machined cut-out on Ken's plates. I thought it was a design cue - turns out it's to accommodate the protrusion on the engine mount pre-load plate:
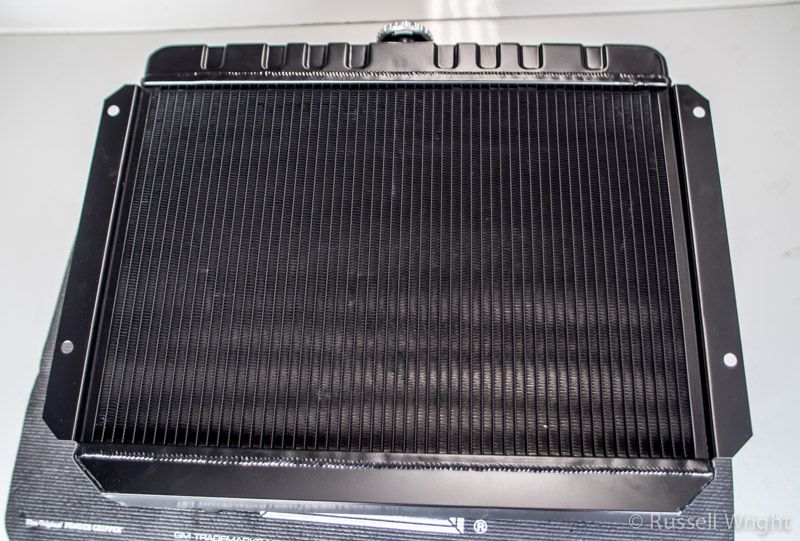
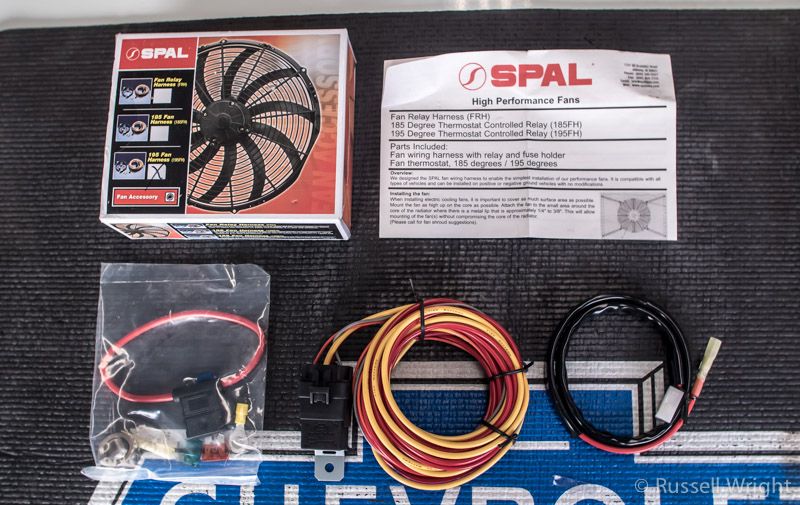
Also arrived - my DeWitts dirrect-fit LS Swap aluminium radiator with dual 11" fans. Double checked the mounting point measurements once out of the box. Perfect fit.
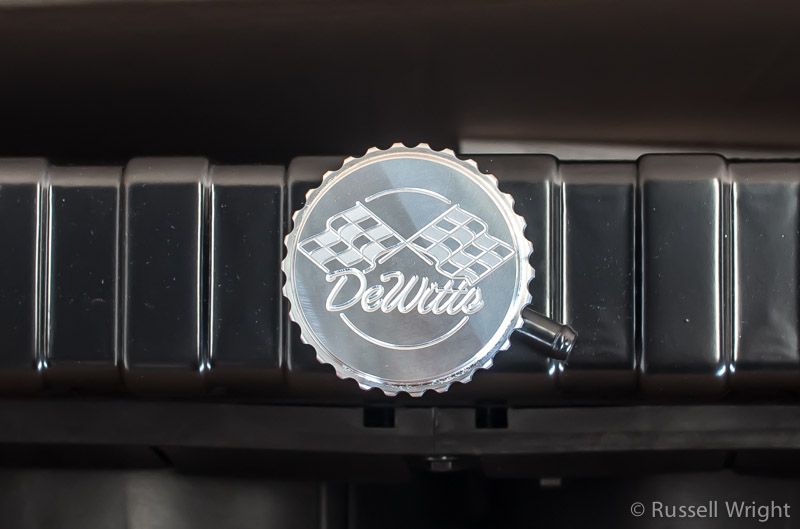
For those wanting to know, DeWitts offer this in three finishes - Polished, Natural, and Black Ice - and for both Auto and Manual transmission applications. Their website doesn't list the 65-70 B-Body radiators (at all), but Jegs have them listed on their web-store.
For any 65-70 B-Body guy interested, part numbers are:
Auto trans
Polished: 6339016A
Natural Aluminium: 6139016A
Black Ice finish: 6239016A
Manual Trans
Polished: 6339016M
Natural Aluminium: 6139016M
Black Ice: 6239016M
Add a -C to the end of those part numbers if you want chrome fans.
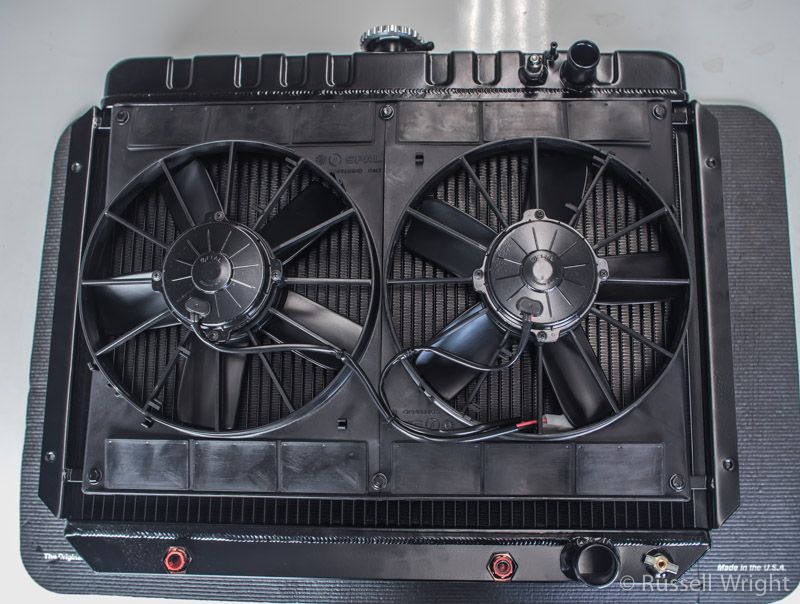
Included with the radiator, for the fans (x2):
Anyways ... that's enough jibbering. Should have another update next week - fingers crossed!
Pretty sure I'll go with the Aeromotive Phantom route.
---
Not much else has happened lately. Just been waiting on parts, however a few days ago most arrived on the same day. Felt like Christmas.
Firstly, all my engine mount options showed up.
Knowing that the engine had to be raised slightly to accommodate the Holley 302-1 pan, I purchased the Hooker stock location adapter plates (12611HKR), but also grabbed the CCP LS Swap pedestals (6570MP-LS), which are taller than the stock frame mounts for this very purpose, on 65-70 Chev B-Body's.
Not long after that purchase, I noticed on this very forum, member Ken (kwhizz), and his custom made adapter plates which negate the necessity for replacing or modifying frame mounts. That sounded like a better idea, so I bought a set from him. When I got them, after a small amount of time fingering them in admiration of how simple and sexy they looked, I noticed they were shorter than the Holley adapter plates, and appeared to move the engine forward an inch or so. I dropped Ken a PM, and he said this took care of trans fitment issues.
I already have a 4L60 in my Impala, so I was expecting the change to the 4L65E being a straight swap, ie: use my current trans cross-member and driveshaft - what I didn't account for, however, is with the need to slightly raise the engine, it may create clearance issues in the trans tunnel.
****. This means I'll have to modify the trans cross-member (again), and change the length of my driveshaft (again). That was one place I was hoping I didn't have to spend money.
I think I'll use Ken's plates - they look and feel like a much more solid option - but here's a bunch of pics anyway:
Left: CPP frame mounts. (Part # 6570MP-LS)
Middle: Ken's adapter plates.
Right: Hooker adapter plates. (Part # 12611HKR),
CPP
CPP fitt test with Energy Suspension poly mounts.
Ken v Hooker
Note the machined cut-out on Ken's plates. I thought it was a design cue - turns out it's to accommodate the protrusion on the engine mount pre-load plate:
Also arrived - my DeWitts dirrect-fit LS Swap aluminium radiator with dual 11" fans. Double checked the mounting point measurements once out of the box. Perfect fit.
For those wanting to know, DeWitts offer this in three finishes - Polished, Natural, and Black Ice - and for both Auto and Manual transmission applications. Their website doesn't list the 65-70 B-Body radiators (at all), but Jegs have them listed on their web-store.
For any 65-70 B-Body guy interested, part numbers are:
Auto trans
Polished: 6339016A
Natural Aluminium: 6139016A
Black Ice finish: 6239016A
Manual Trans
Polished: 6339016M
Natural Aluminium: 6139016M
Black Ice: 6239016M
Add a -C to the end of those part numbers if you want chrome fans.
Included with the radiator, for the fans (x2):
Anyways ... that's enough jibbering. Should have another update next week - fingers crossed!
02-18-2017, 02:11 AM
#32
02-18-2017, 04:01 AM
#33
Teching In
Join Date: Feb 2017
Posts: 2
Likes: 0
Received 0 Likes
on
0 Posts
02-19-2017, 12:47 PM
#34

Its really not fair you Aussies don't have rust issues with your old cars. LOL
02-19-2017, 02:40 PM
#35
TECH Enthusiast

Join Date: Dec 2006
Location: Grafton MA
Posts: 514
Likes: 0
Received 0 Likes
on
0 Posts

Is that brake caliper going to have trouble bleeding the air out with the line on the bottom side?
Great work on this thing! Hadn't checked this post for awhile, very nice progress!
Great work on this thing! Hadn't checked this post for awhile, very nice progress!
08-30-2017, 04:56 AM
#36
Quick update. The swap is all but done. Just waiting on the paperwork from the engineer so I can get it registered.
Will do a more thorough write up of how everything went shortly, but I wanted to update one thing first.
The internal fuel pump. As above, I used the Tanks Inc PA-4 internal module with the Walbro 255lph pump.
Unfortunately, it is loud. Really loud. I can hear it coming up the driveway to the factory, which is about 40 metres away. It's annoying as hell. I was able to compare it to an external Walbro pump used on an LS swapped Land Cruiser, and my internal pump is twice as loud. Pretty disappointed.
Once I've got it on the road, I'm going to swap it out for something else.
Here's a video.
The following users liked this post:
rsz288 (02-18-2023)
The following users liked this post:
rsz288 (02-18-2023)
08-30-2017, 07:30 PM
#39
The one in my Cougar and GTO are also loud. I replaced the one on the Cougar:
http://youtube.com/watch?v=S5okXrlVG90
Andrew
http://youtube.com/watch?v=S5okXrlVG90
Andrew
Of course, I read about the DW pumps after I had installed my Walbro.
Is there any reason you went with DW over something like Aeromotive as a replacement? And was the DW pump exactly the same dimensions as the Walbro? My tank is right at the minimum depth requirement, so if the DW pump outlet is even 1/4" longer, it won't work.
08-30-2017, 09:57 PM
#40
TECH Senior Member
iTrader: (7)
Great video Andrew. Thanks for that. Good to see/hear some actual comparisons.
Of course, I read about the DW pumps after I had installed my Walbro.
Is there any reason you went with DW over something like Aeromotive as a replacement? And was the DW pump exactly the same dimensions as the Walbro? My tank is right at the minimum depth requirement, so if the DW pump outlet is even 1/4" longer, it won't work.
As I recall, and you can maybe see it in the video, but the Walbro 255 and the DW200 are nearly identical externally. I did not change anything with respect to pump depth.
Andrew