
DIY 5th Gen Fuel Pump Assembly in stock 1968 Camaro Tank
 09-29-2016, 09:19 AM
#1
TECH Fanatic
Thread Starter
iTrader: (27)

Before anyone attempts this, please note that neither myself or this site is responsible. Working with flammable fuel is dangerous. Please attempt at your own risk
That said, my dilemma was that I wanted to find an alternative to the LS swap tanks that I have seen that have been all over the map, with some well over the $1k mark. I wanted similar performance, but I didn't want to pay that price or sacrifice the performance of my tank. After reading all of the difficulties that people were having with the Spectra tanks, I decided to do some research. After some searching, I came across the stamped tank from Rick's and that was very similar to what I wanted and utilized the stock 5th gen Camaro fuel pump assembly. The problem is the tank was $400 (much cheaper but still too much for me), and I would have to buy the fuel pump, PWM and sending unit.
I posted a question on this site a while ago with a question about the 5th gen pumps, and Carl from Vaporworx replied back that they had developed the parts to convert the 5th gen fuel pump assemblies over to run a constant 58psi. That was just what I wanted, a stock fuel pump assembly for ease of use and designed for longevity, but didn't need an expensive module to run. I used a 4th gen fuel pump assembly on my 1976 Trans Am when I did the conversion and it worked flawlessly. I wanted that sort of reliability.
https://ls1tech.com/forums/conversio...camaro-tank.html
With that information, I came to the conclusion that I was going to modify my fuel tank to accept the 5th gen fuel pump assembly as it fit the bill with exactly what I was looking for. I needed to have something that was short enough to fit into a recessed panel in the stock tank, supply enough fuel to my motor without starvation, and have the correct fuel pressure to run an LSx motor. According to Carl, after this mod the fuel pump will supply the equivalent of a Walbro 255 pump. WIN
The next decision I had to make was how to attach the fuel pump assembly to my fuel tank recess. I used the Vetteworks adapter when I did my LS1 swap in the 76 that worked incredibly well, but still wanted something more stock appearing. After more research, I found that the Chevy Colorado's use the same size fuel pump assembly opening, so I could attach that to my fuel tank recess, and use the stock clamping ring. Now, my plan is complete and I need to start collecting parts.
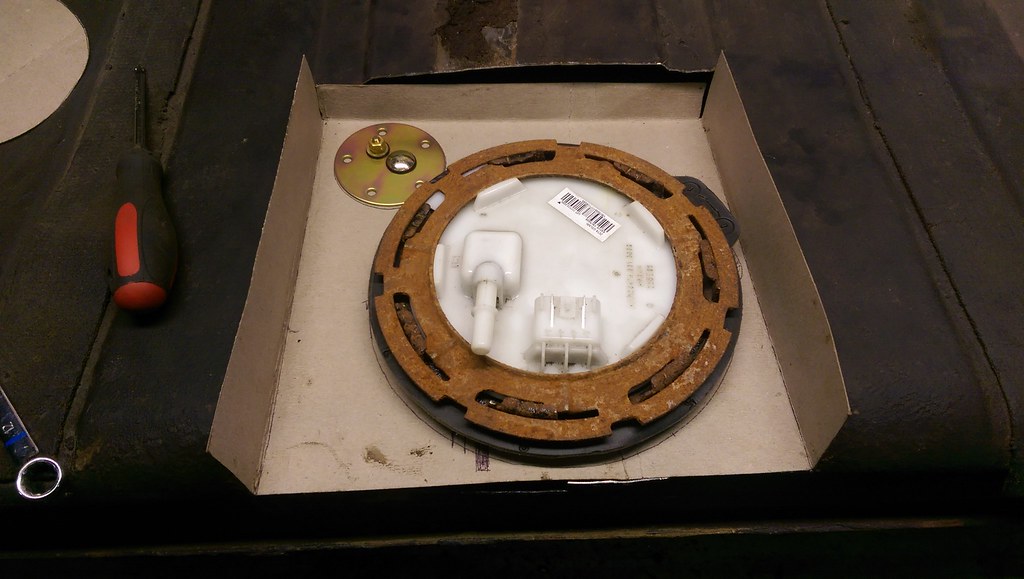
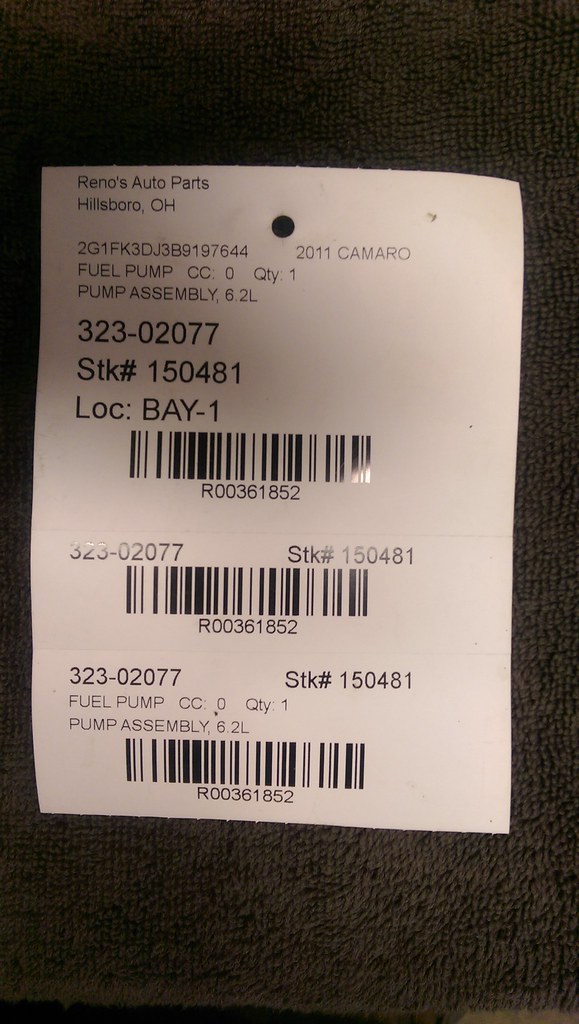
Here is what I am started with. It is a 2011 SS Camaro Fuel pump assembly from a 53k mile car. I scored this on ebay for $59 bucks free shipping from a salvage yard!
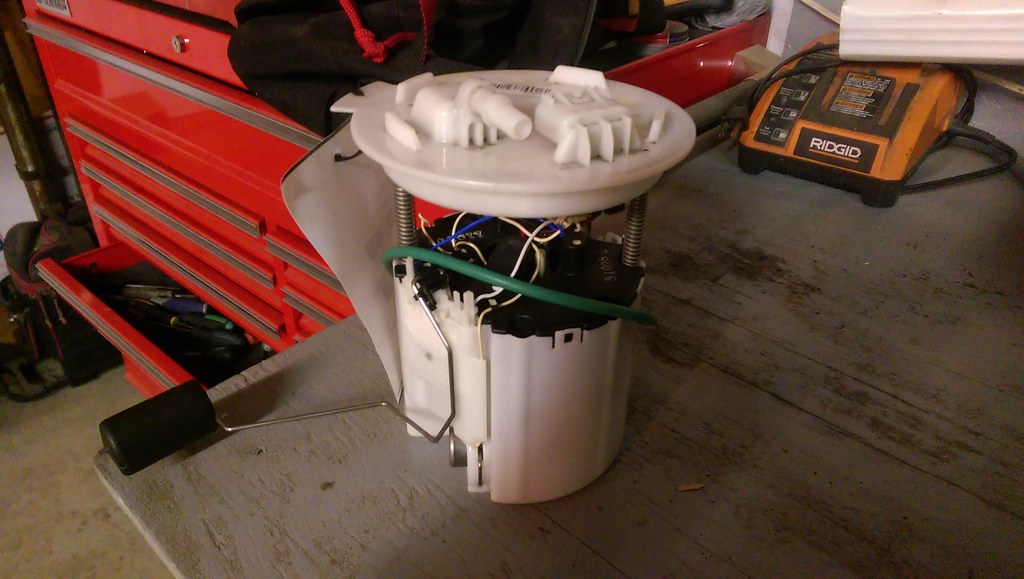
With a little research and looking around, I found a local pick and pull yard that had a '09 Colorado. After a quick trip to the pick-a-part, my sawzall make quick work to get this little guy out!
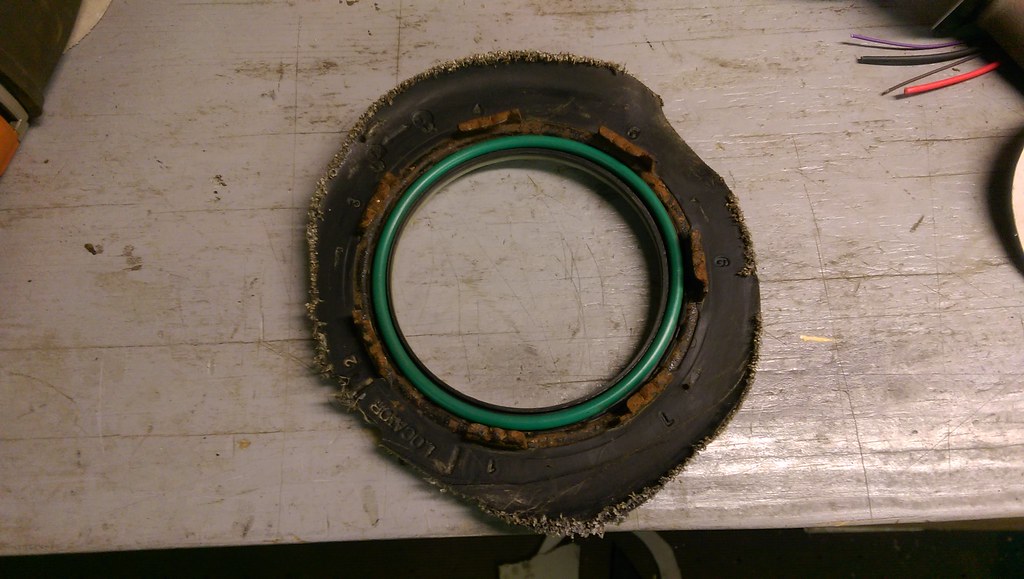
After sketching out some dimensions and seeing what would work with this pump and the mounting ring, I had my game plan.
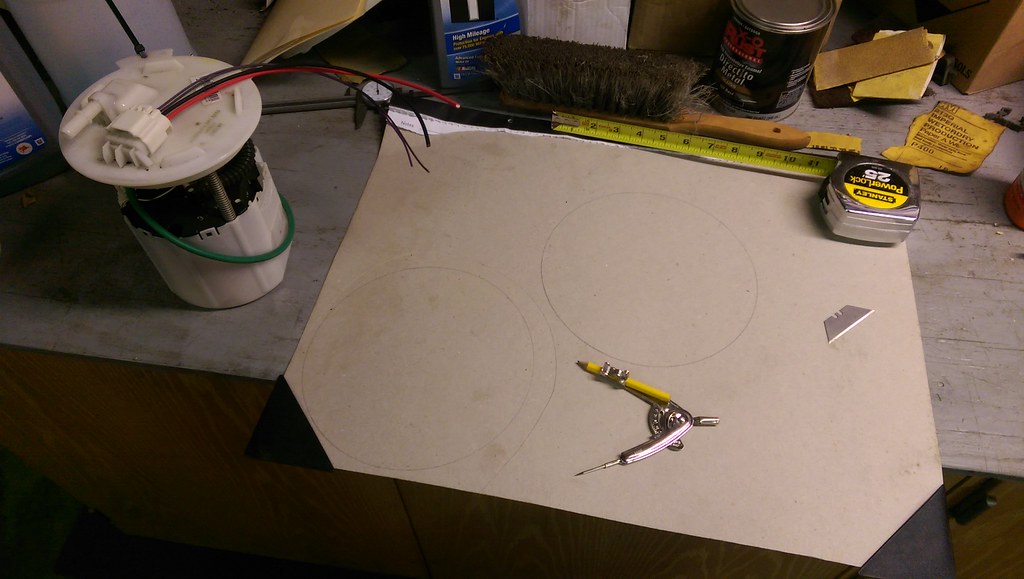
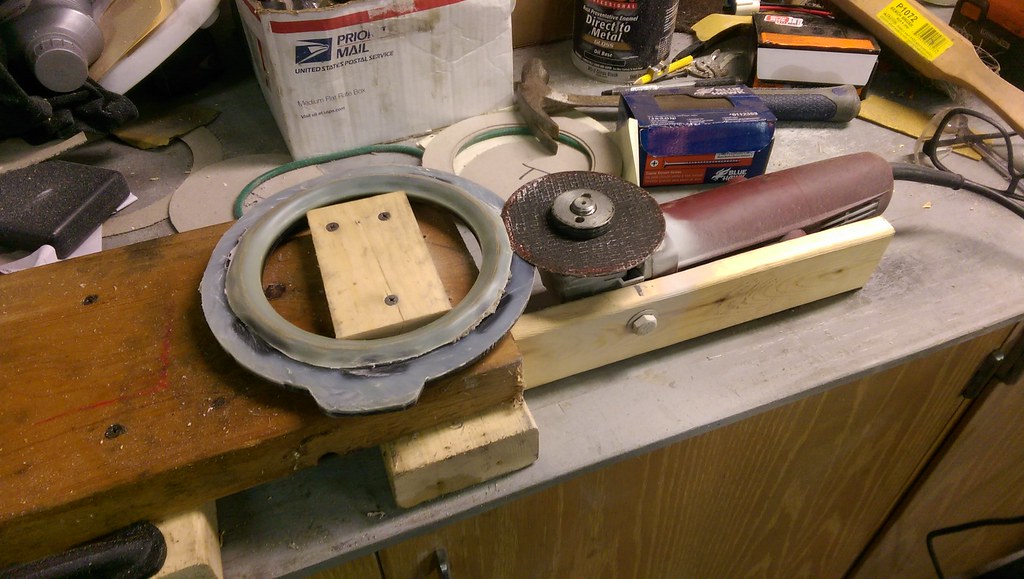
I wanted to get the mounting ring as round as I could, so with some "creative engineering", I was able to come up with this method. I was using the inner circle as my template, and fixed my grinder into position. It worked great!
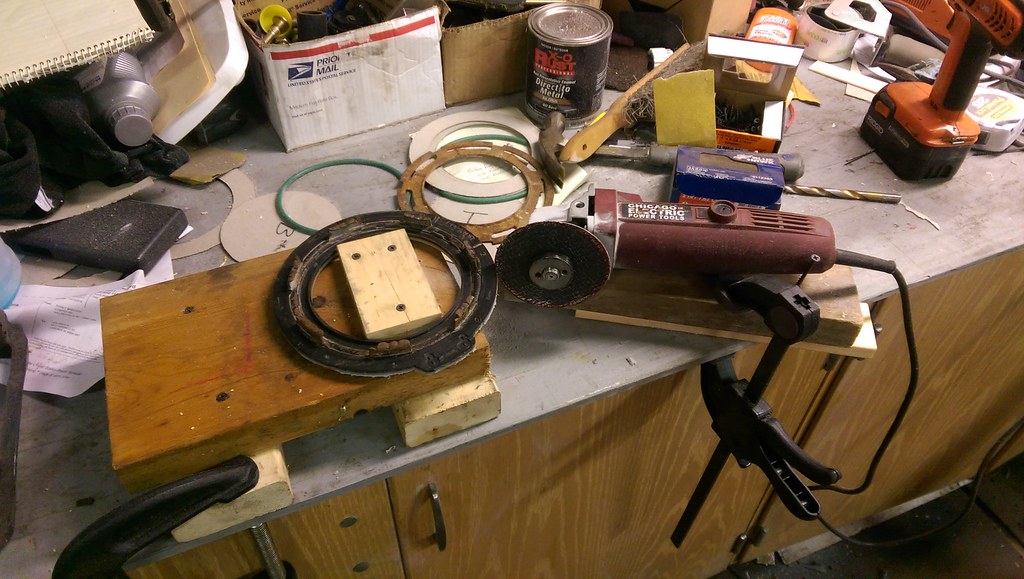

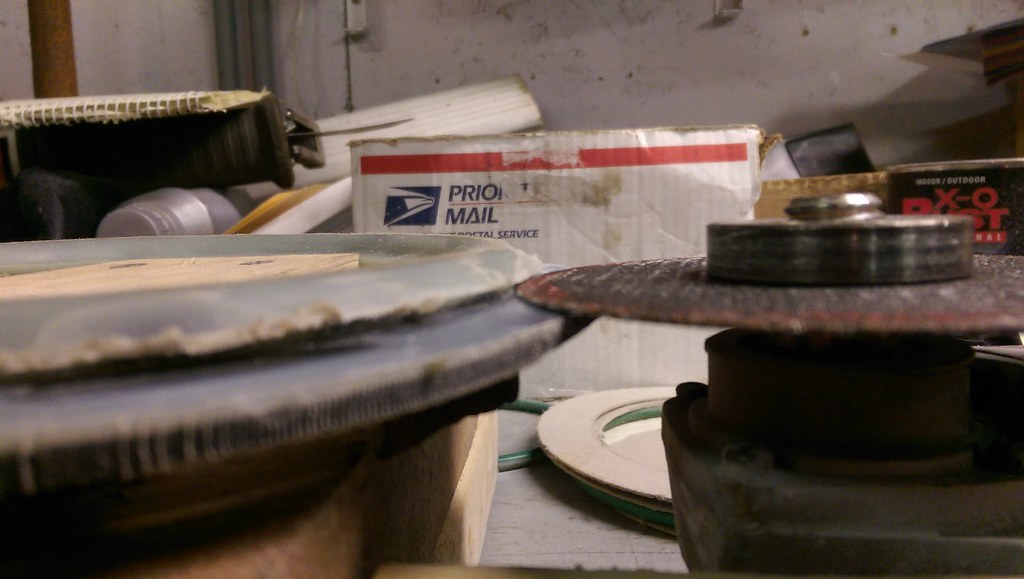
Next up was getting the gasket surface as flat as I could. After giving this some more thought, I decided to use a similar method. I used my phone's level, and got the grinder perfectly level both side to side and front to back. I mounted it in place, and slowly worked the surface. Since I am going to use a Viton(r) gasket, it should take up some of the imperfections that this surface has. Overall, I was very pleased with the results from my makeshift methods... or whatever you want to call it.
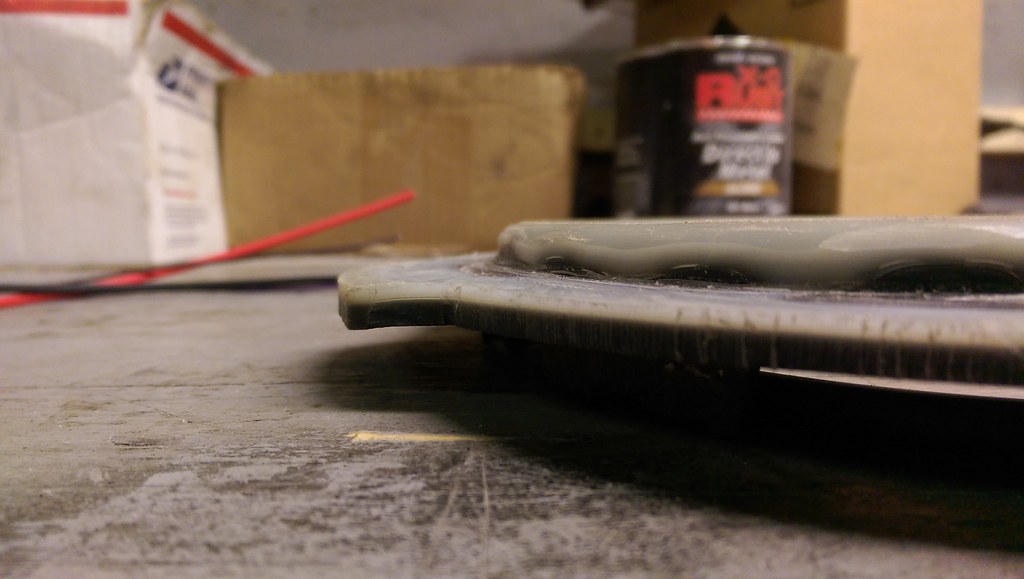
And the final result for my fuel pump adapter ring.
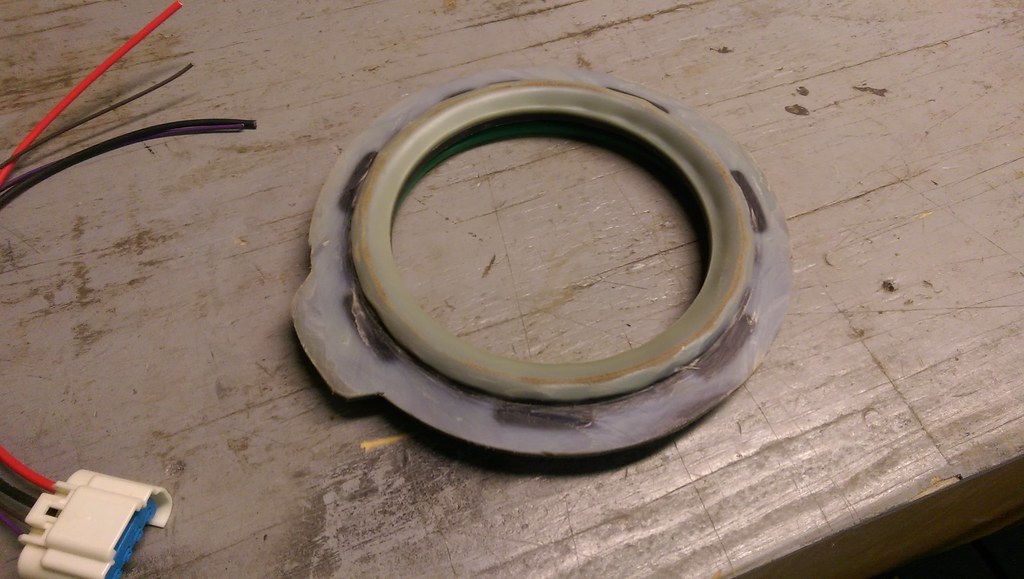
For the final installation, it will have a Viton(R) gasket sealed up between it and the recessed panel I will be putting on my fuel tank. I will make a ring that will fit inside the tank that will bolt everything down.
That said, my dilemma was that I wanted to find an alternative to the LS swap tanks that I have seen that have been all over the map, with some well over the $1k mark. I wanted similar performance, but I didn't want to pay that price or sacrifice the performance of my tank. After reading all of the difficulties that people were having with the Spectra tanks, I decided to do some research. After some searching, I came across the stamped tank from Rick's and that was very similar to what I wanted and utilized the stock 5th gen Camaro fuel pump assembly. The problem is the tank was $400 (much cheaper but still too much for me), and I would have to buy the fuel pump, PWM and sending unit.
I posted a question on this site a while ago with a question about the 5th gen pumps, and Carl from Vaporworx replied back that they had developed the parts to convert the 5th gen fuel pump assemblies over to run a constant 58psi. That was just what I wanted, a stock fuel pump assembly for ease of use and designed for longevity, but didn't need an expensive module to run. I used a 4th gen fuel pump assembly on my 1976 Trans Am when I did the conversion and it worked flawlessly. I wanted that sort of reliability.
https://ls1tech.com/forums/conversio...camaro-tank.html
With that information, I came to the conclusion that I was going to modify my fuel tank to accept the 5th gen fuel pump assembly as it fit the bill with exactly what I was looking for. I needed to have something that was short enough to fit into a recessed panel in the stock tank, supply enough fuel to my motor without starvation, and have the correct fuel pressure to run an LSx motor. According to Carl, after this mod the fuel pump will supply the equivalent of a Walbro 255 pump. WIN
The next decision I had to make was how to attach the fuel pump assembly to my fuel tank recess. I used the Vetteworks adapter when I did my LS1 swap in the 76 that worked incredibly well, but still wanted something more stock appearing. After more research, I found that the Chevy Colorado's use the same size fuel pump assembly opening, so I could attach that to my fuel tank recess, and use the stock clamping ring. Now, my plan is complete and I need to start collecting parts.
Here is what I am started with. It is a 2011 SS Camaro Fuel pump assembly from a 53k mile car. I scored this on ebay for $59 bucks free shipping from a salvage yard!
With a little research and looking around, I found a local pick and pull yard that had a '09 Colorado. After a quick trip to the pick-a-part, my sawzall make quick work to get this little guy out!
After sketching out some dimensions and seeing what would work with this pump and the mounting ring, I had my game plan.
I wanted to get the mounting ring as round as I could, so with some "creative engineering", I was able to come up with this method. I was using the inner circle as my template, and fixed my grinder into position. It worked great!
Next up was getting the gasket surface as flat as I could. After giving this some more thought, I decided to use a similar method. I used my phone's level, and got the grinder perfectly level both side to side and front to back. I mounted it in place, and slowly worked the surface. Since I am going to use a Viton(r) gasket, it should take up some of the imperfections that this surface has. Overall, I was very pleased with the results from my makeshift methods... or whatever you want to call it.
And the final result for my fuel pump adapter ring.
For the final installation, it will have a Viton(R) gasket sealed up between it and the recessed panel I will be putting on my fuel tank. I will make a ring that will fit inside the tank that will bolt everything down.
Last edited by ryeguy2006a; 09-29-2016 at 09:48 AM.
 09-29-2016, 09:19 AM
#2
TECH Fanatic
Thread Starter
iTrader: (27)
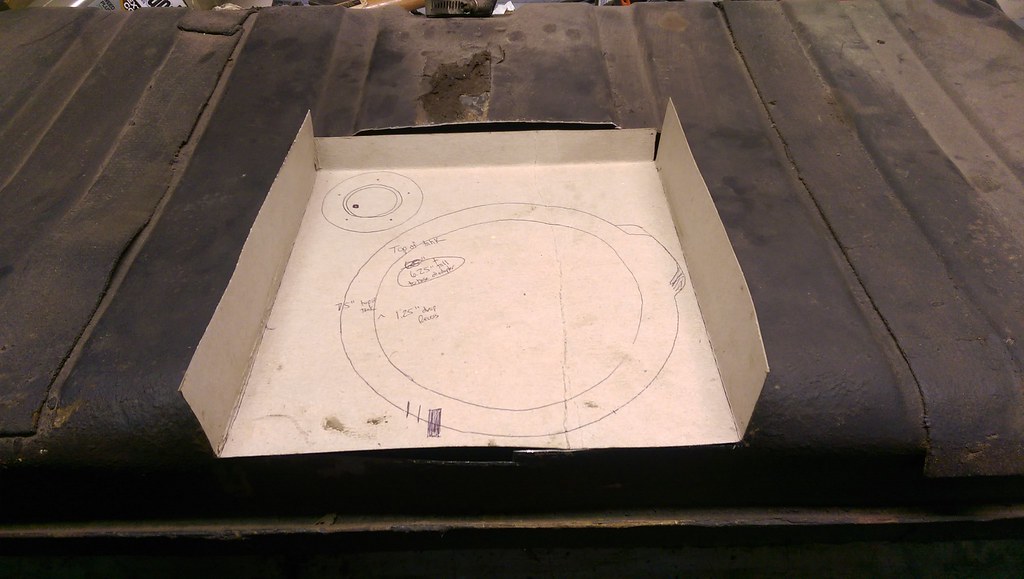
I first started, by taking all of my measurements for the adapter ring that I made from a '09 Colorado fuel tank, and where it would sit in relation to the fuel tank recess I want to make. With the fuel pump assembly attached to the adapter ring, the height I wanted was 6.25" tall. That gave me the measurements I needed to start my template. I cut mine out of some thin cardboard I have been saving for this project.

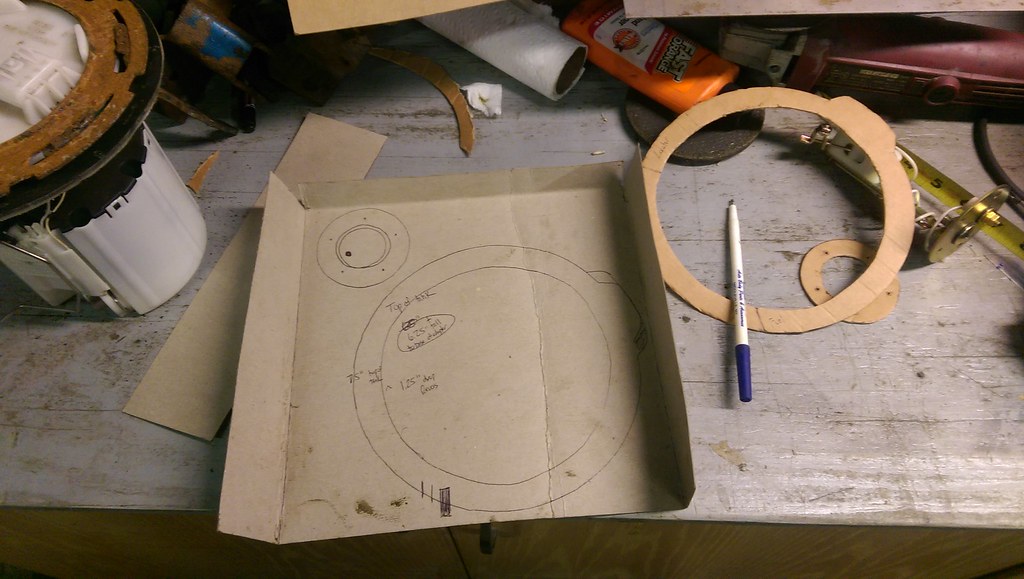
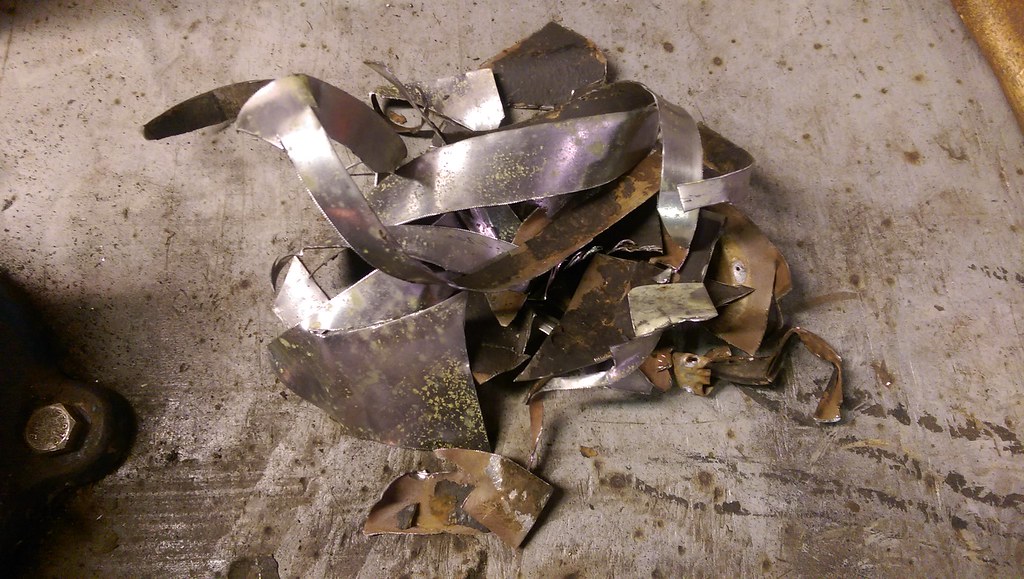
Once I had the template, I measured where it would fall in relation to the fuel tank. I wanted it centered, and where the outlet of the fuel pump assembly would be pointing in the right direction. My template measured 10" x 10", and will recess the pump roughly 1.25". No turning back now! I opted to use metal sheers rather than a cut off wheel for two reasons; one is it will greatly reduce the debris and two that it will not produce sparks like a grinder would.

Luckily it fit right in between the two ribs on the tank.
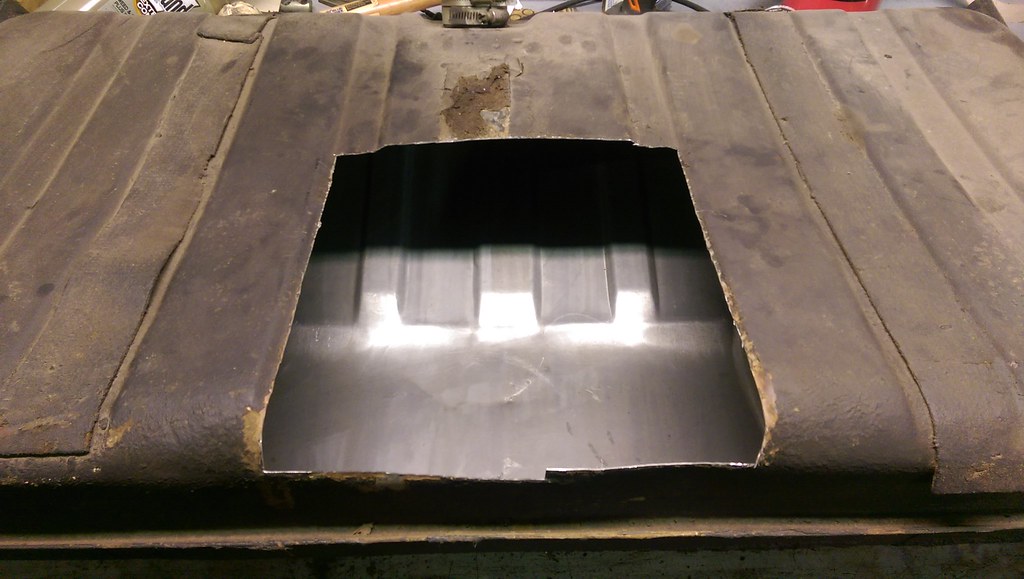
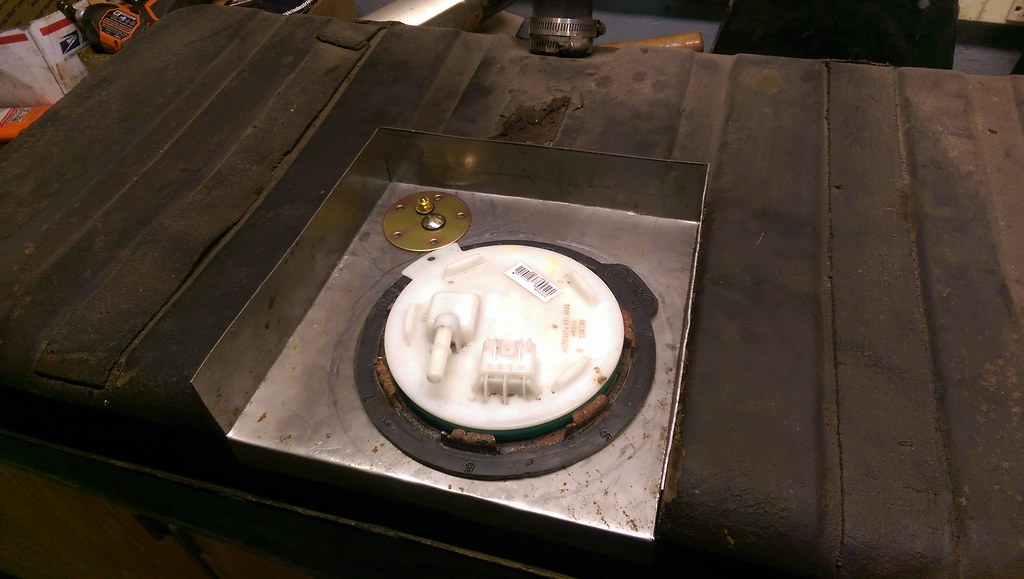
And test fit, it is going to work perfectly. I wanted the compressed height of the assembly to be between 6.25" and 6.5" and it measured in right at 6.5" with my template. Perfect. Now for those wondering, the fully compressed height for the assembly is 5.75" and the fully extended height is 7.125". So somewhere in the middle is right where I want to be.
Now, my original plan was to cut my recess out of stainless steel, but due to the added complications, I just used mild steel. I had a piece of 16 gauge steel, which is a little more rigid and won't give any issues with welding to the tank.

To make the bends much cleaner, I used a tape line and my cut off disk on my 4 1/2 grinder and cut a small line where I wanted the bends. I saw this trick somewhere else online, and it worked incredibly well. The lines are so clean and the bends are spot on.

And here is the first trial fitment.
Once I had the template, I measured where it would fall in relation to the fuel tank. I wanted it centered, and where the outlet of the fuel pump assembly would be pointing in the right direction. My template measured 10" x 10", and will recess the pump roughly 1.25". No turning back now! I opted to use metal sheers rather than a cut off wheel for two reasons; one is it will greatly reduce the debris and two that it will not produce sparks like a grinder would.
Luckily it fit right in between the two ribs on the tank.
And test fit, it is going to work perfectly. I wanted the compressed height of the assembly to be between 6.25" and 6.5" and it measured in right at 6.5" with my template. Perfect. Now for those wondering, the fully compressed height for the assembly is 5.75" and the fully extended height is 7.125". So somewhere in the middle is right where I want to be.
Now, my original plan was to cut my recess out of stainless steel, but due to the added complications, I just used mild steel. I had a piece of 16 gauge steel, which is a little more rigid and won't give any issues with welding to the tank.
To make the bends much cleaner, I used a tape line and my cut off disk on my 4 1/2 grinder and cut a small line where I wanted the bends. I saw this trick somewhere else online, and it worked incredibly well. The lines are so clean and the bends are spot on.
And here is the first trial fitment.
Last edited by ryeguy2006a; 09-29-2016 at 10:12 AM.
09-29-2016, 09:19 AM
#3
TECH Fanatic
Thread Starter
iTrader: (27)
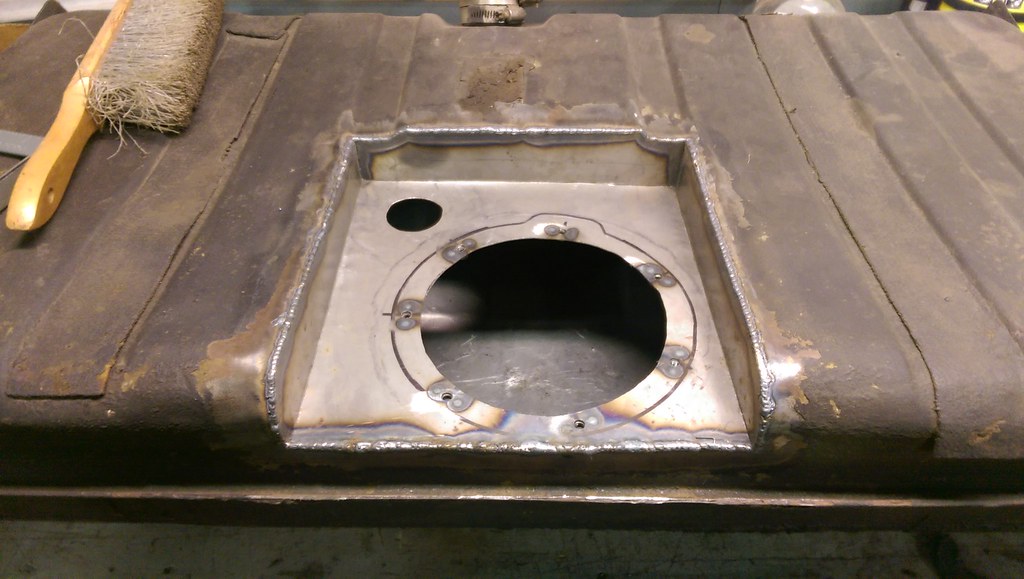
I printed off a seven piece pie chart on the internet to use as a template, and drilled my holes in the adapter ring. I then transferred those holes to my recess panel. I put the recess panel in the tank and did a trial run in the car. After the first fitment, it was clear that the panel needed to go down about an inch to clear everything. I also made sure to clock the fuel pump pick-up to ensure that it will be submerged enough.
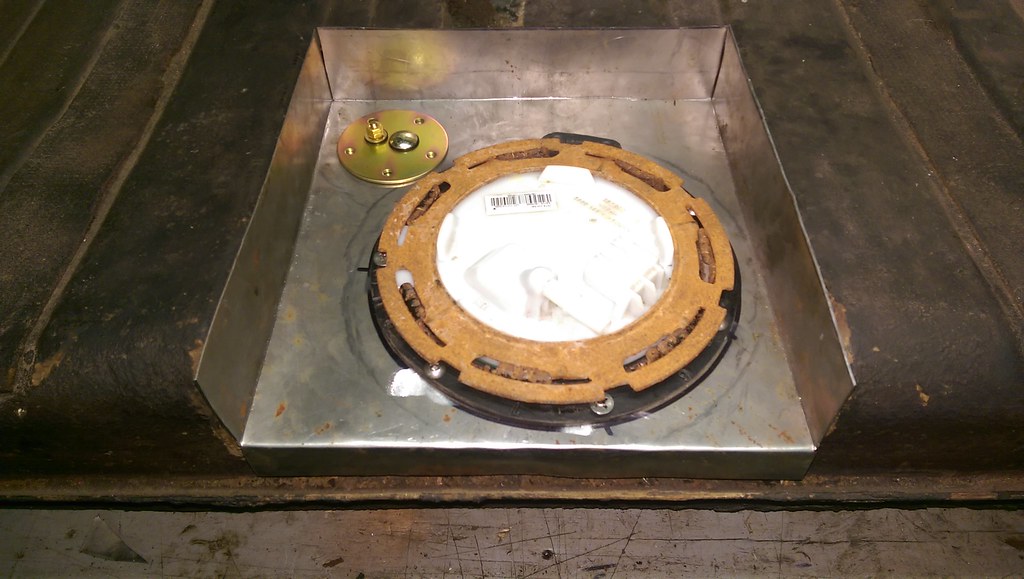
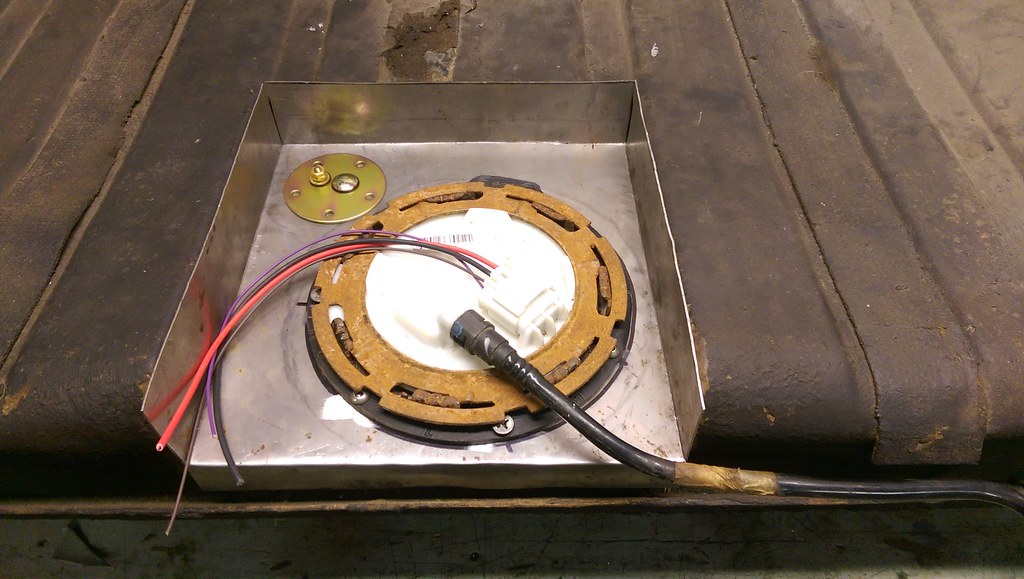
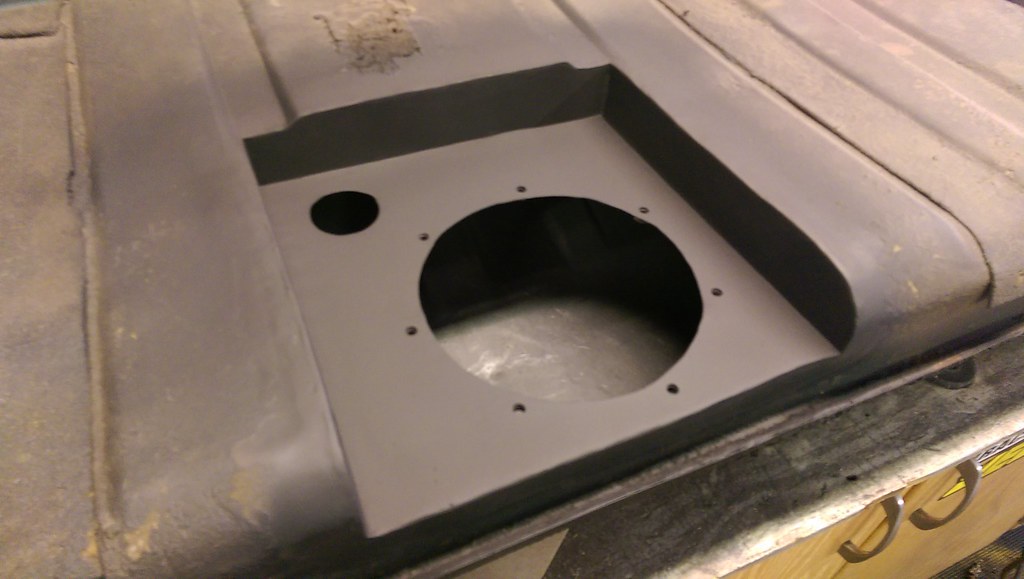
I cut the tank just a little more, and now the pump sits just slightly lower than the top of the tank.
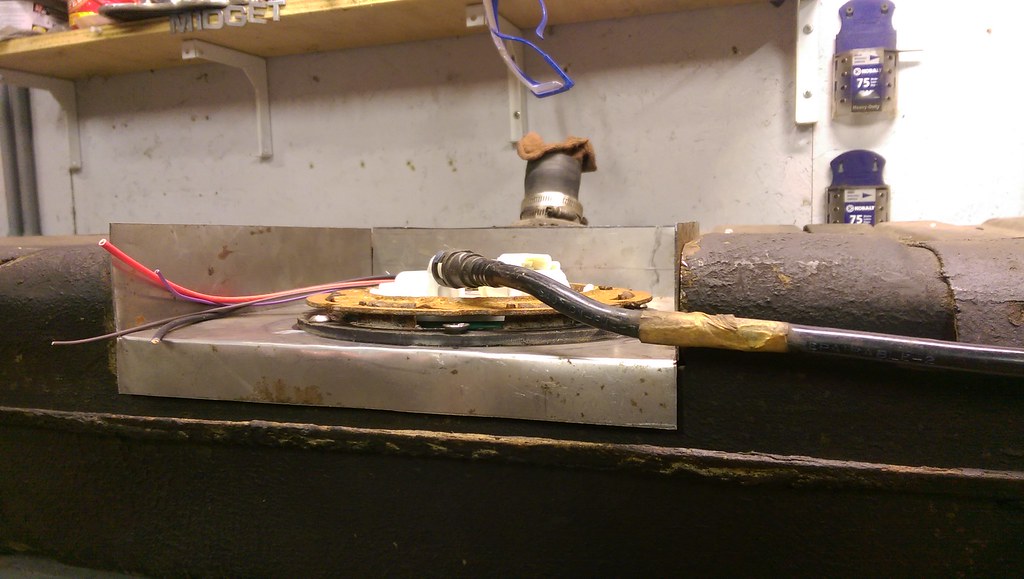
I used my square and made sure that it was perfect on both sides. I got the welder dialed in and this is how it turned out. Very smooth and excellent weld penetration.
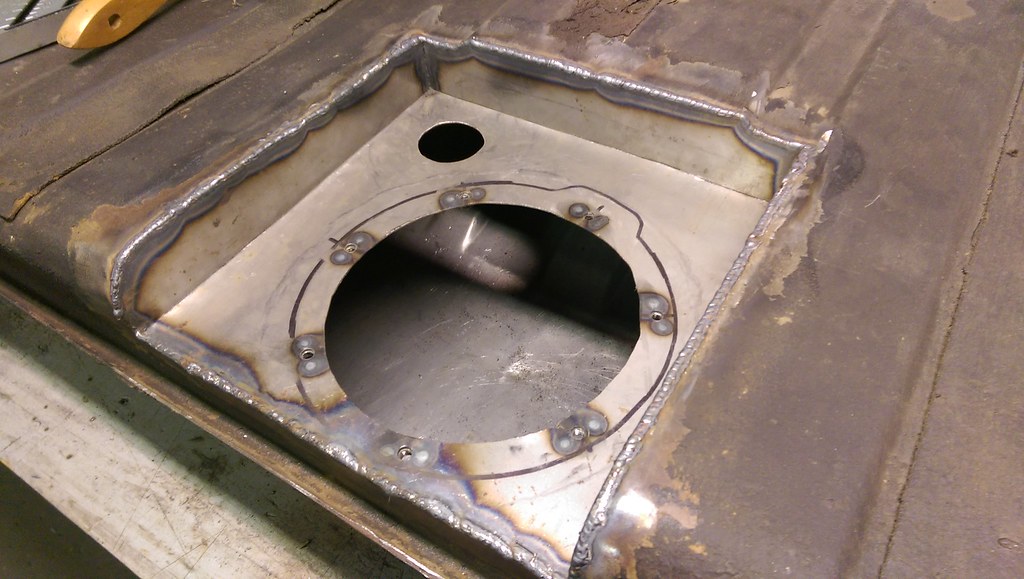
Welded some nuts to the bottom side.

I made sure that everything was level and then tack welded in a few spots. One final test fit before I burned it in for good.
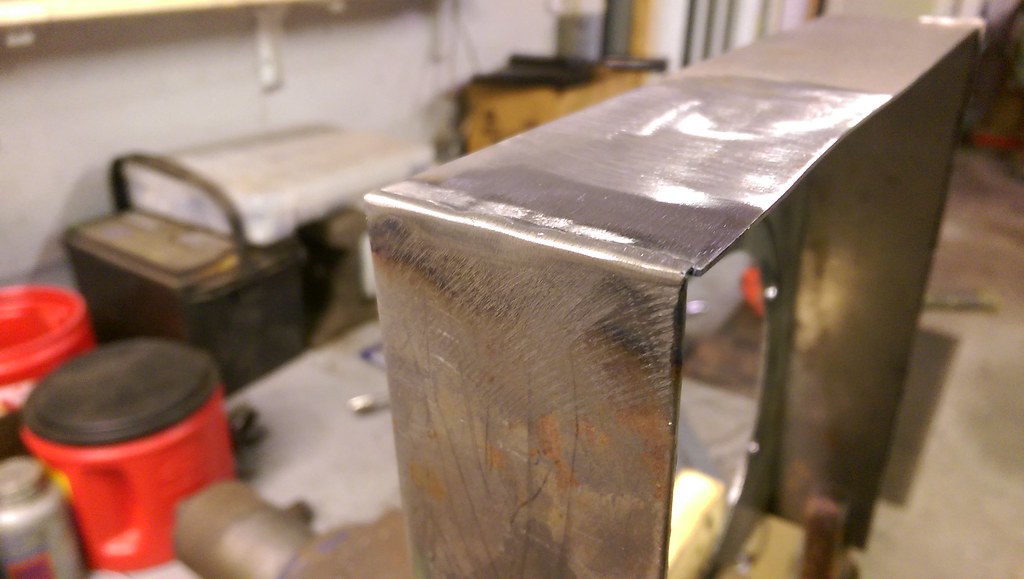
After I started working on everything I decided that I was going to butt weld the panel. After a few inches of weld, it was turning out better than I had expected. Then before I knew it I was done welding.

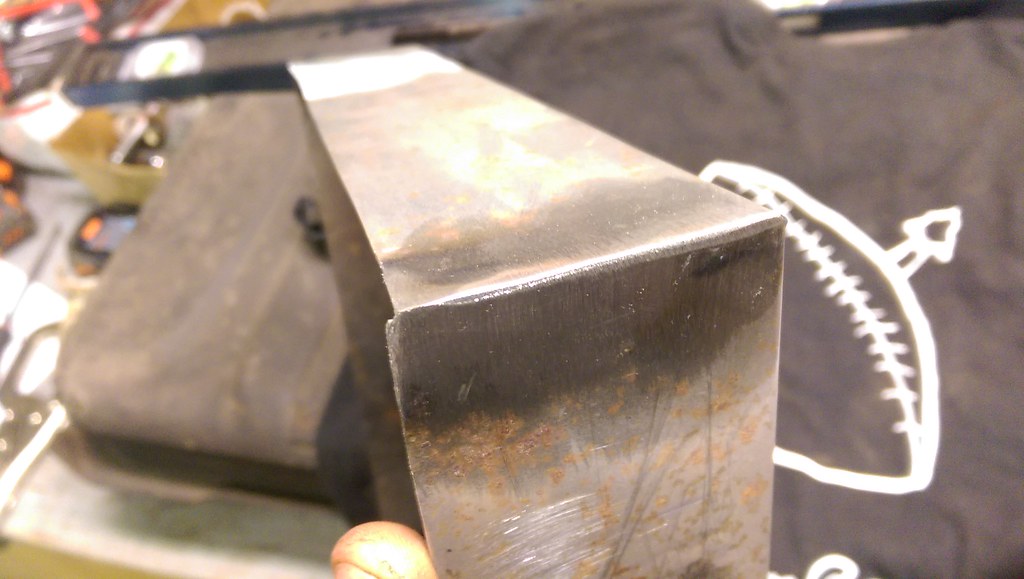
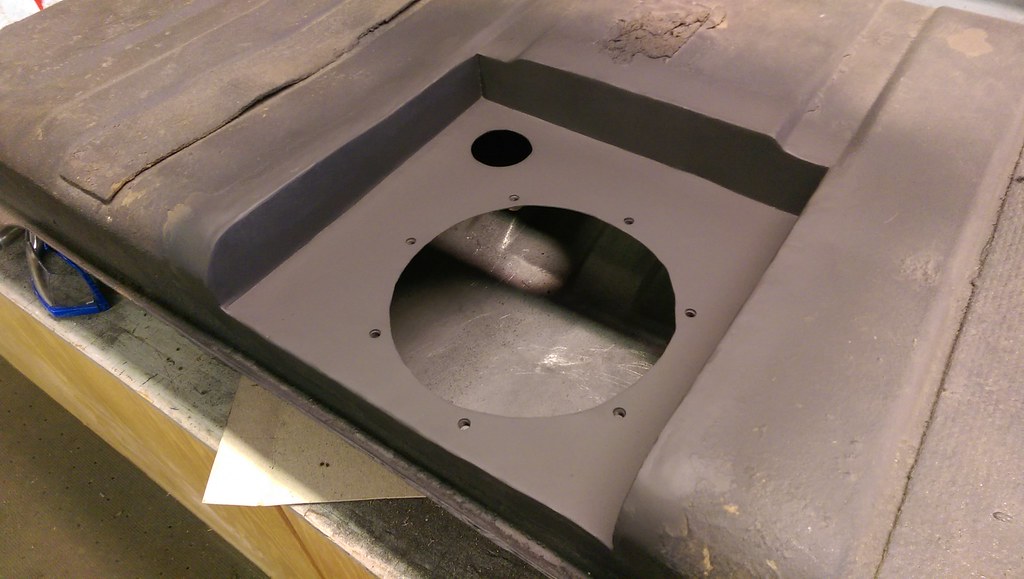
After a little love with the flap disk.

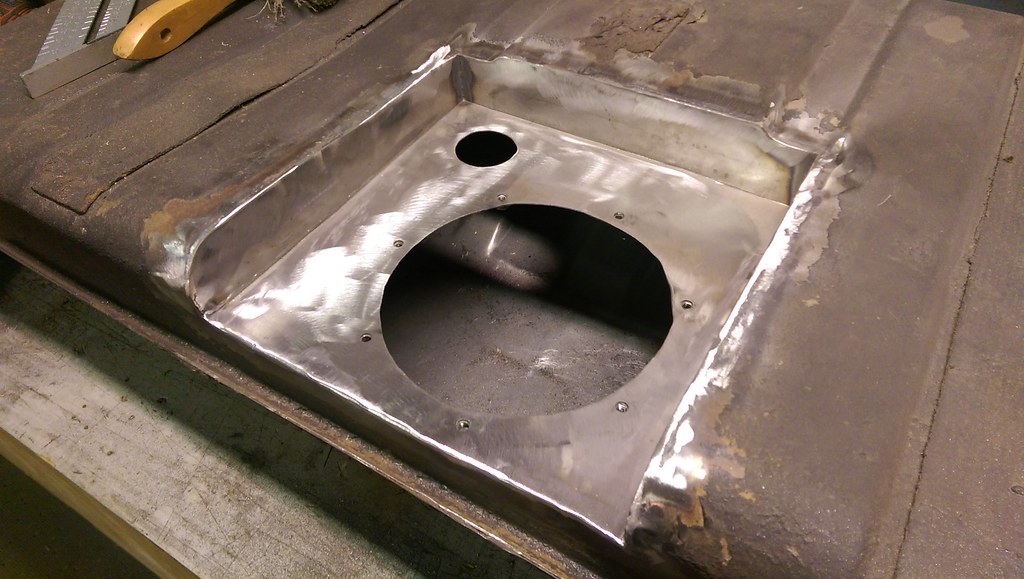
After primer and paint.
I cut the tank just a little more, and now the pump sits just slightly lower than the top of the tank.
I used my square and made sure that it was perfect on both sides. I got the welder dialed in and this is how it turned out. Very smooth and excellent weld penetration.
Welded some nuts to the bottom side.
I made sure that everything was level and then tack welded in a few spots. One final test fit before I burned it in for good.
After I started working on everything I decided that I was going to butt weld the panel. After a few inches of weld, it was turning out better than I had expected. Then before I knew it I was done welding.
After a little love with the flap disk.
After primer and paint.
Last edited by ryeguy2006a; 09-29-2016 at 10:27 AM.
09-29-2016, 09:20 AM
#4
TECH Fanatic
Thread Starter
iTrader: (27)
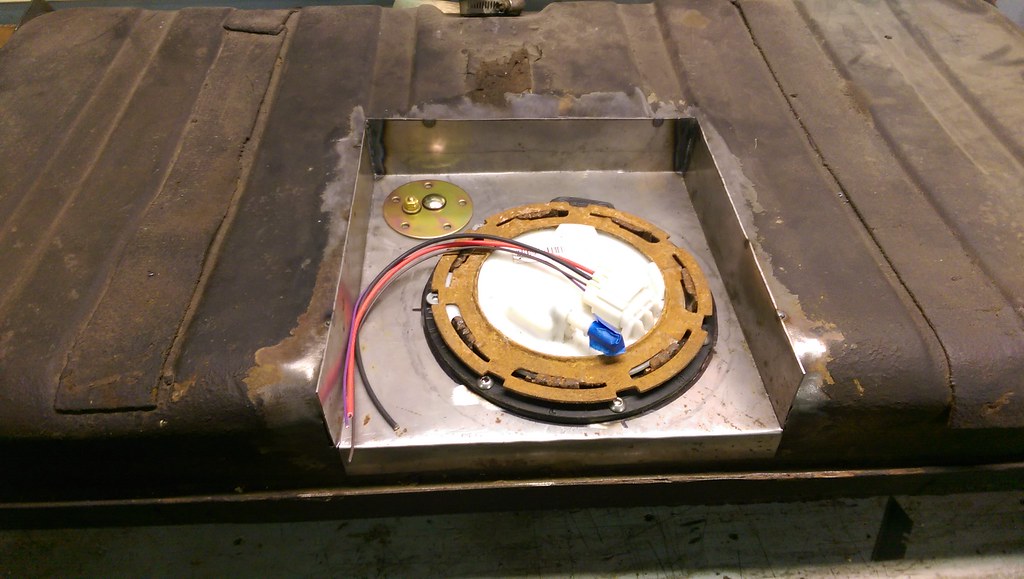
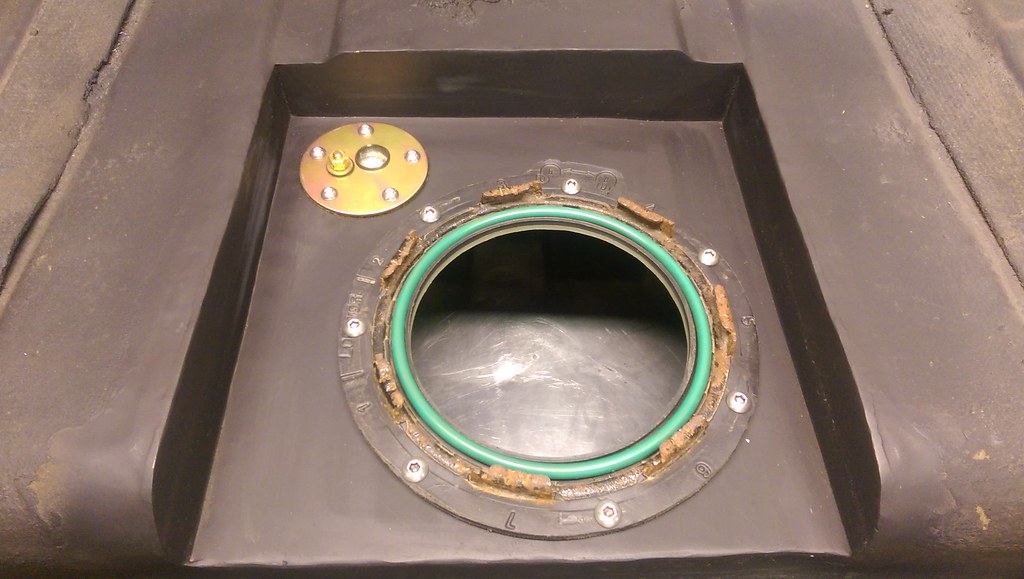
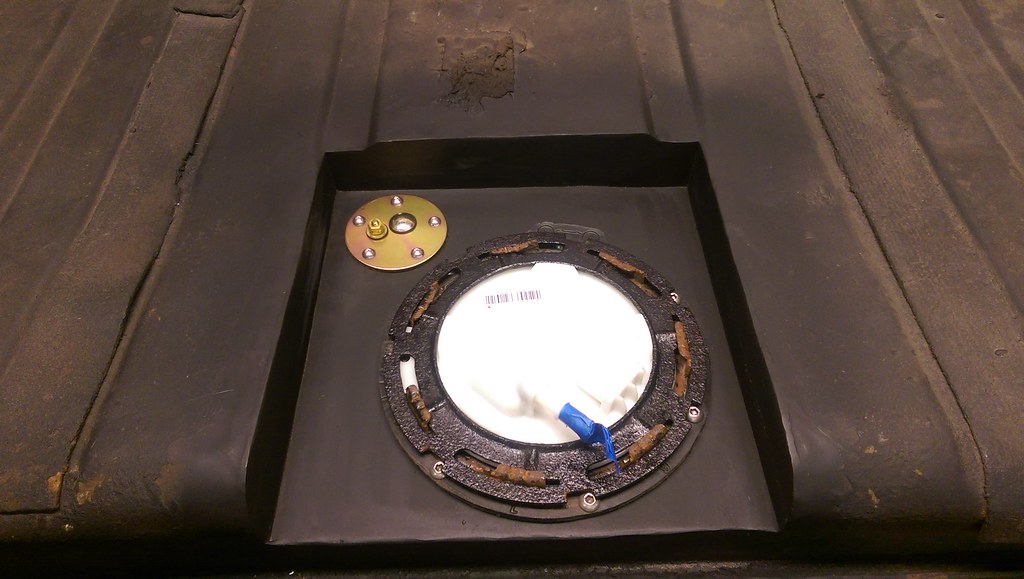
I needed to address drilling the holes for my fuel tank sending unit. I used the gasket for a template and drilled them out. After that, I filed any burrs and got to work with the inside of the tank. I used about 12 brand new shop rags, brake clean, and a magnet, but it cleaned up really nicely. I kept using the new rags to monitor how dirty they were when I was done wiping the tank. Once I saw satisfied, I re-installed my adapter ring for good with my Viton seal. (bought a 9" remnant from ebay and made my own gasket) The fuel sending unit is a universal sending unit that can be had on eBay or Amazon that reads 0-90 Ohm.
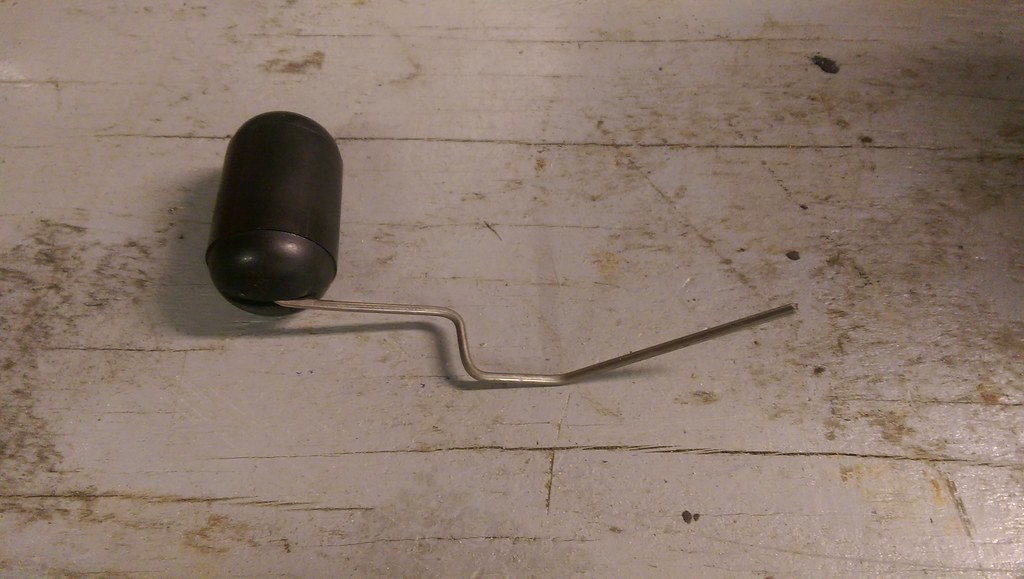
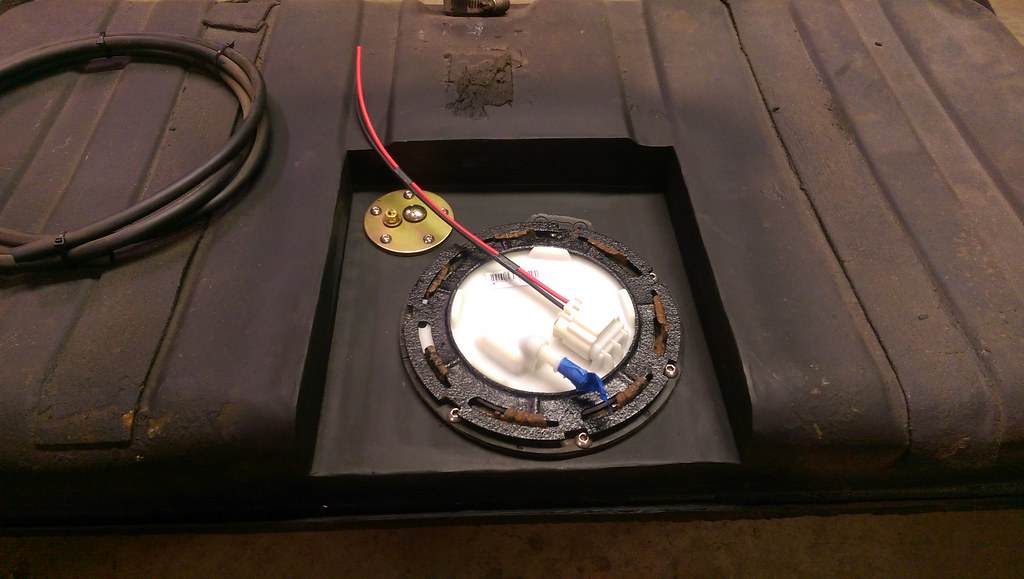
Once the fuel sending unit was in for good, I had to bend the level sender float so that it would read empty and full while still clearing the recess panel. It took me a little bit to figure out the angles, but it turned out pretty good and I am satisfied that it will read correctly. Having a 5" hole in the top of the tank helps with making those small adjustments too.
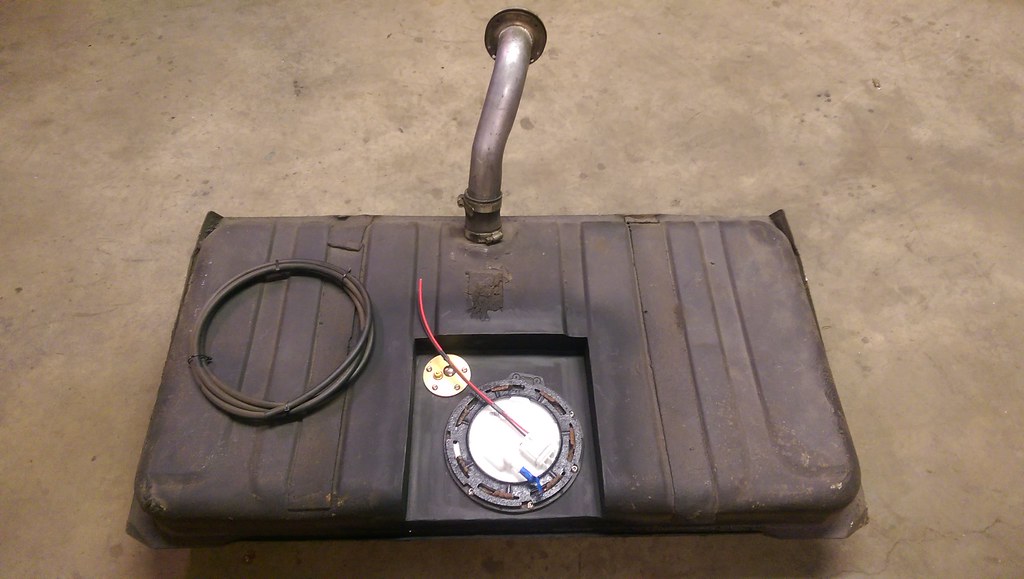
All buttoned up and installed for a final time.
Now was the part that I was excited to start; modifying the stock fuel pump assembly to run at constant 58psi. I kit is from Carl at Vaporworx, and I have been patiently waiting for the tank to be done before I did anything with the pump. I used a little cleaner and a scrub brush to clean up the pump assembly and it looks brand new!

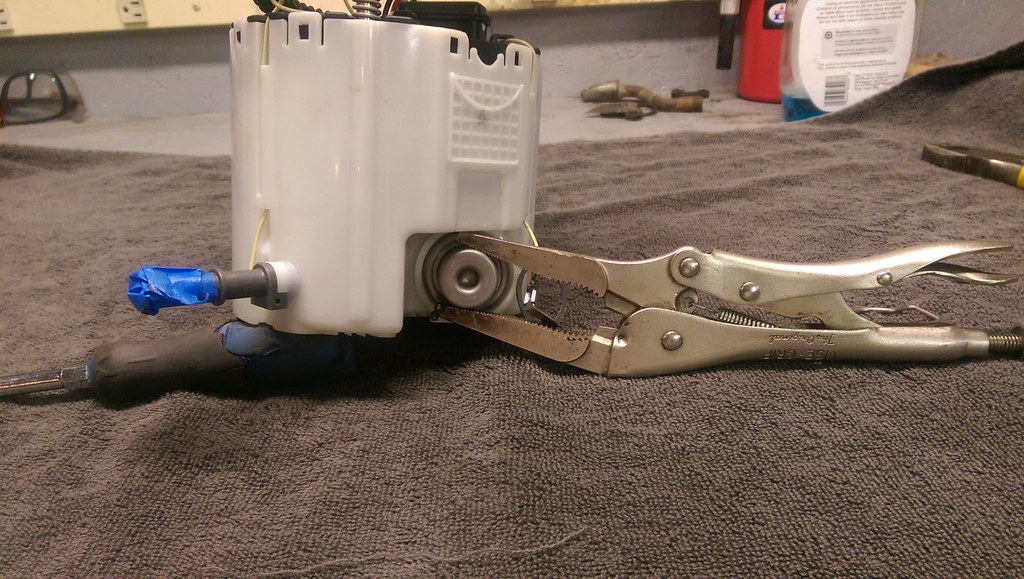
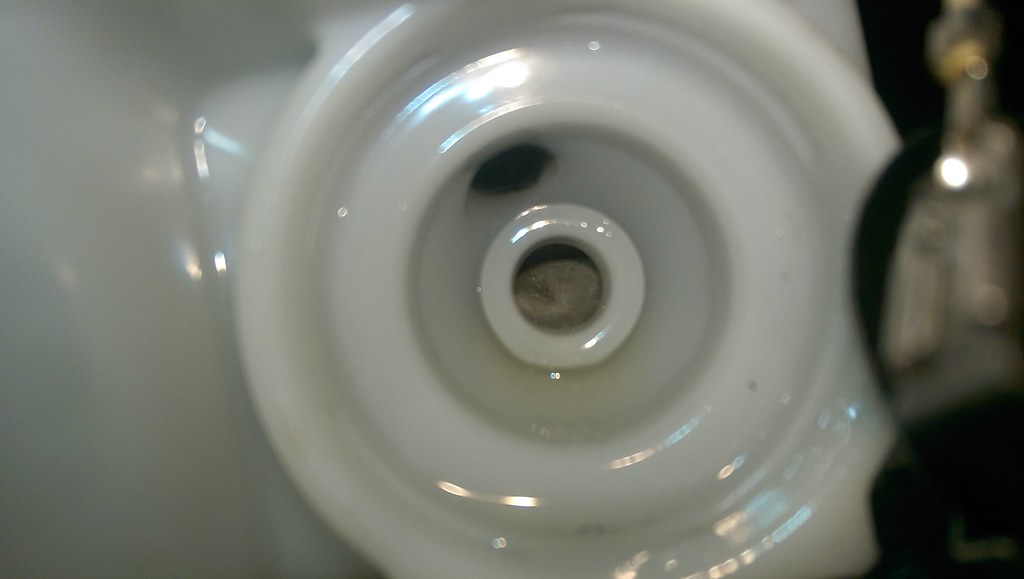
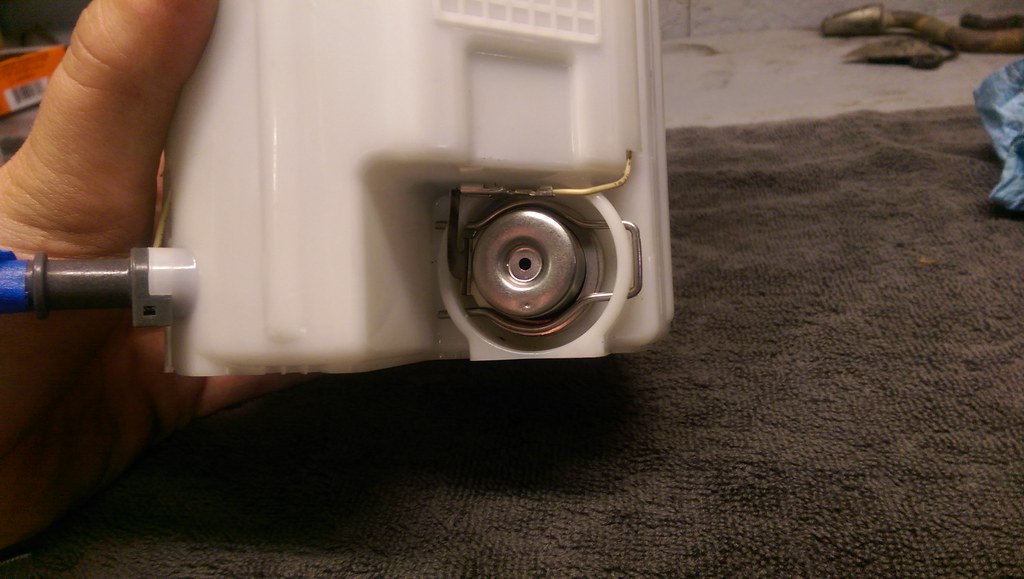
I followed along with the highly detailed instructions that were provided, and it was incredibly easy. First step was to remove the retaining ring and remove the stock fuel pressure reg.
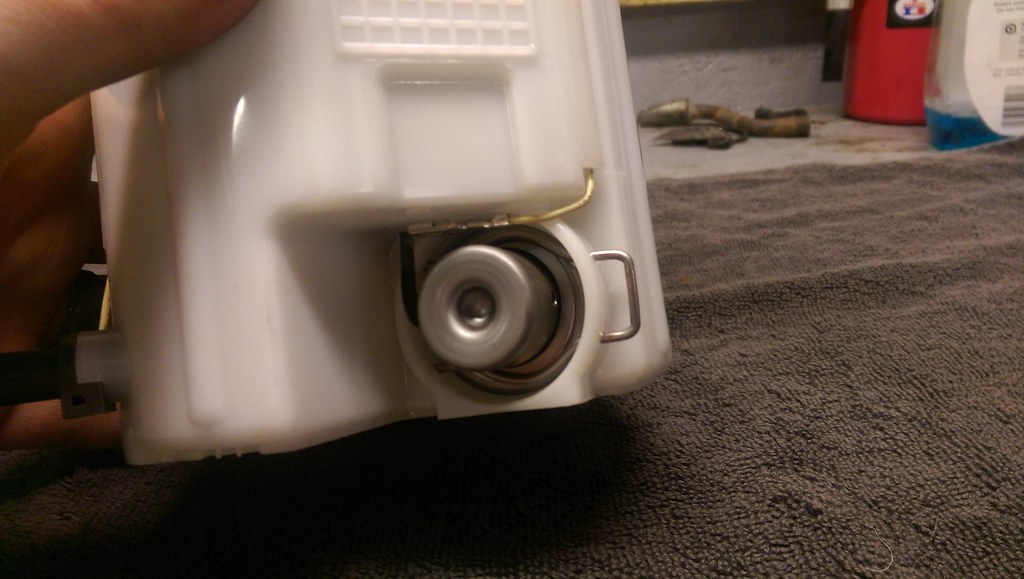
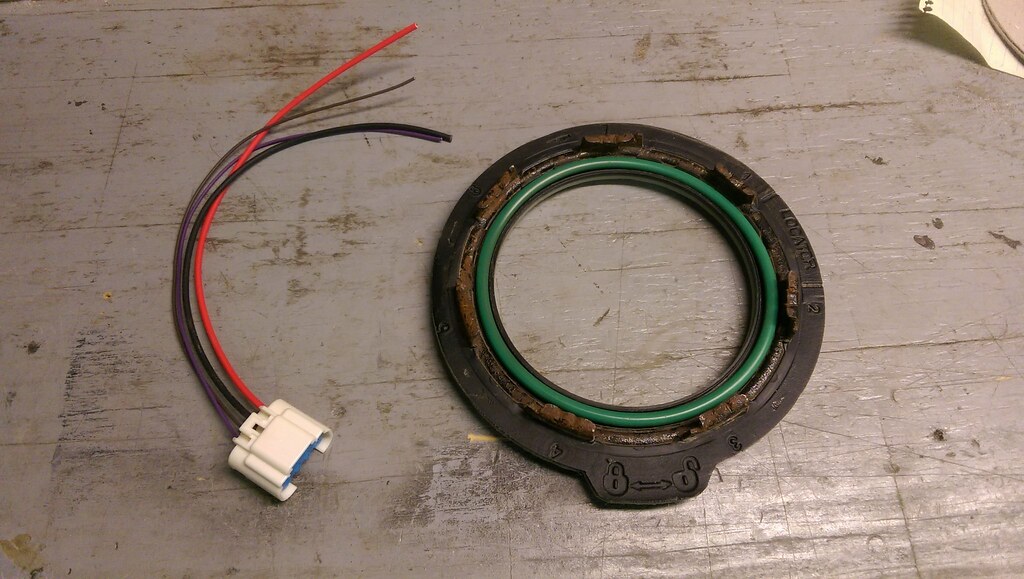
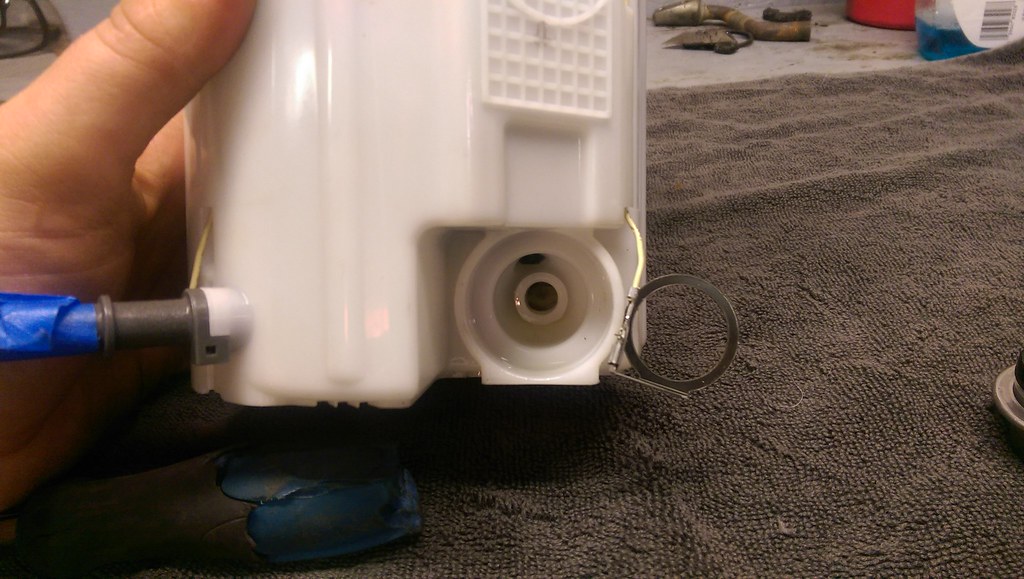
Once it is removed you end up with this. There is also the grounding ring that needs to be temporarily moved to the side.
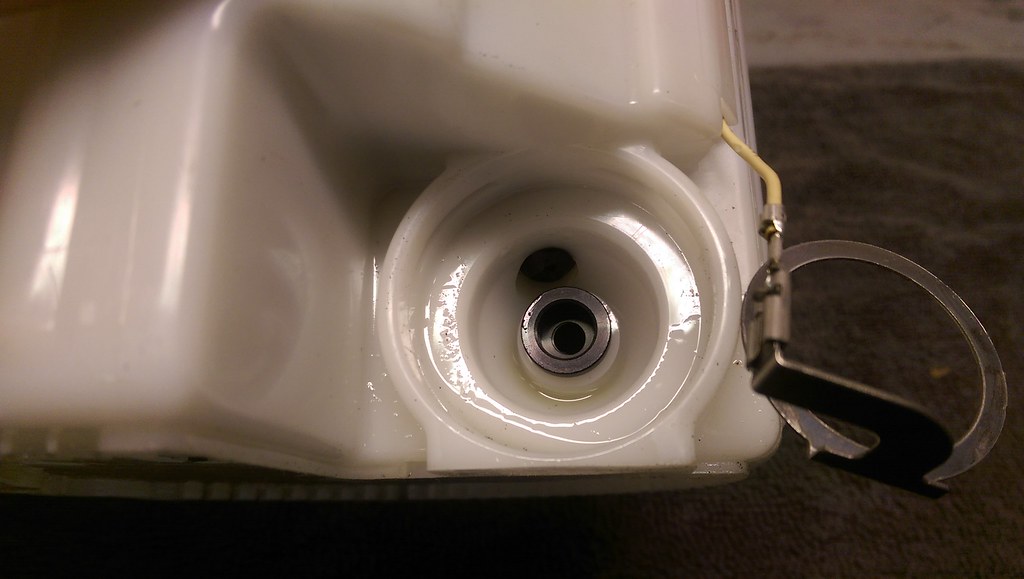
This is the heart of the conversion. This is an adapter that was developed by Vaporworx and is what allows for the new fuel pressure regulator to work properly.

Like it mentioned in the instructions, the filter was in the way for the adapter to seat properly, so I had to gently move it to the side. I ended up installing it at an angle, and it worked like a charm. Hard to get a picture, but there is the filter in the way.
Adapter fully seated
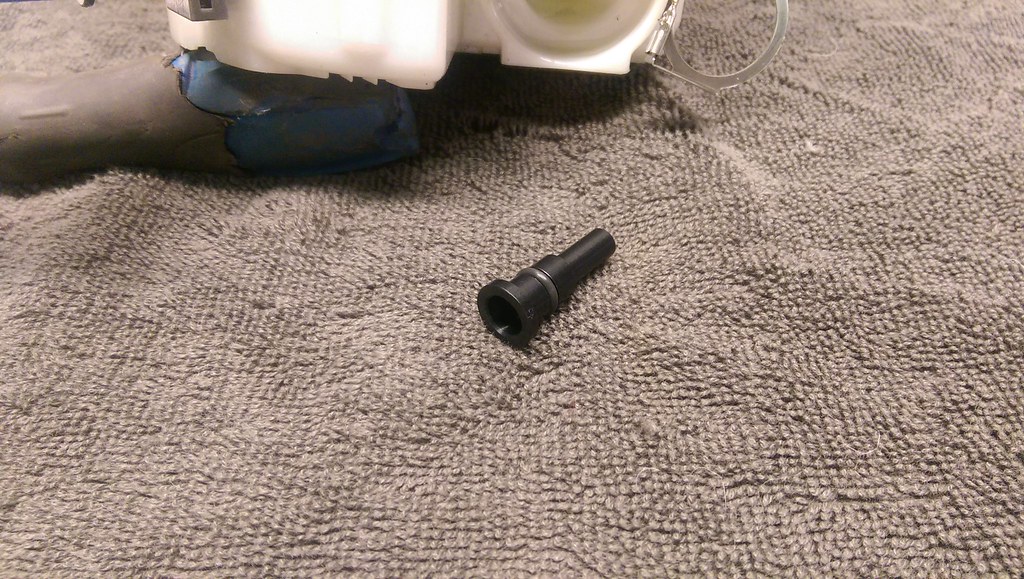
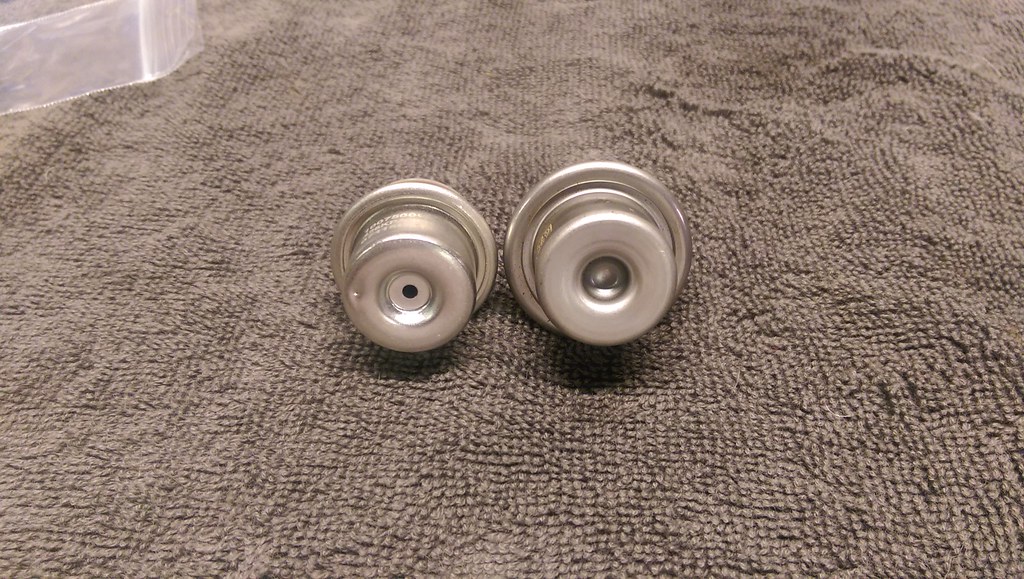
Here is a comparison of the 4th gen fuel reg vs. the stock one that came out. 4th gen on the left and stock on the right.
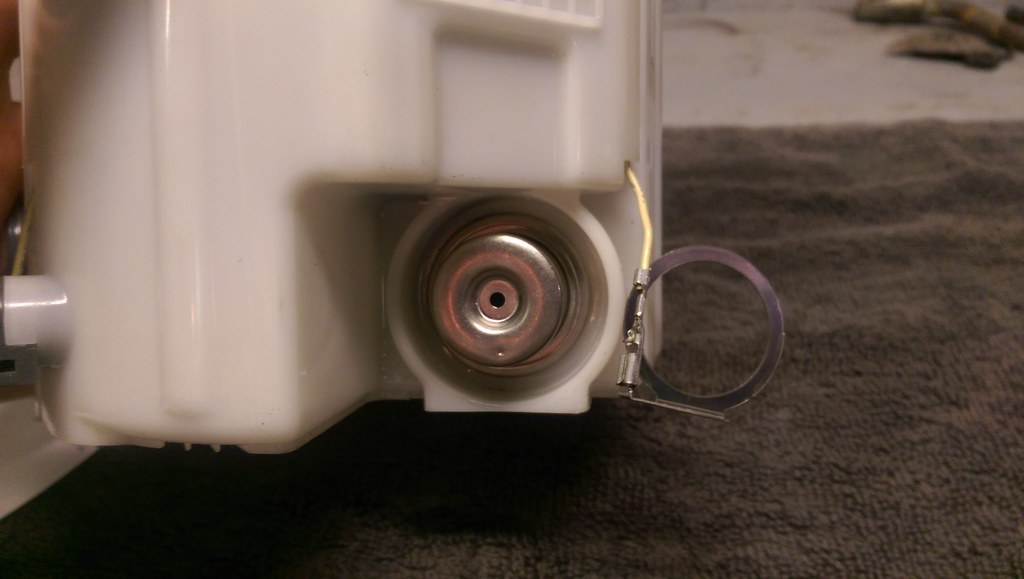
And fully installed. Don't forget to re-install the grounding ring.
 [/url]
Fully completed swap. Here are all of the tools that were required for the job too.

(this tag is for future reference)
And here is the fully installed tank. I threw some paint on the stock retaining ring, but will get a new one before final install in the car. For now it works fine to hold it down to keep debris out.
Ready to go into the car! The only modification I may make is to bend up a hard line from the pump assembly to the driver's side front of the tank for a cleaner install.
For those wondering how I did from a cost perspective, I am listing it below:
LS3 Camaro fuel Pump $59.00
Colorado Mount w/ Ring $2.00
Recessed Tank Panel Metal $30.00 (even though I already had it)
Parts from VaporWorx $101.99
0-90 OHM Sending Unit $5.00
Viton Gasket $8.96
That is a grand total of $206.95
Still need to wait to see how it performs, but I have no doubts that it will live up to my expectations. I feel that is a much more reliable option than the Spectra tank, despite the work to complete.
Thanks,
Ryan
Once the fuel sending unit was in for good, I had to bend the level sender float so that it would read empty and full while still clearing the recess panel. It took me a little bit to figure out the angles, but it turned out pretty good and I am satisfied that it will read correctly. Having a 5" hole in the top of the tank helps with making those small adjustments too.
All buttoned up and installed for a final time.
Now was the part that I was excited to start; modifying the stock fuel pump assembly to run at constant 58psi. I kit is from Carl at Vaporworx, and I have been patiently waiting for the tank to be done before I did anything with the pump. I used a little cleaner and a scrub brush to clean up the pump assembly and it looks brand new!
I followed along with the highly detailed instructions that were provided, and it was incredibly easy. First step was to remove the retaining ring and remove the stock fuel pressure reg.
Once it is removed you end up with this. There is also the grounding ring that needs to be temporarily moved to the side.
This is the heart of the conversion. This is an adapter that was developed by Vaporworx and is what allows for the new fuel pressure regulator to work properly.
Like it mentioned in the instructions, the filter was in the way for the adapter to seat properly, so I had to gently move it to the side. I ended up installing it at an angle, and it worked like a charm. Hard to get a picture, but there is the filter in the way.
Adapter fully seated
Here is a comparison of the 4th gen fuel reg vs. the stock one that came out. 4th gen on the left and stock on the right.
And fully installed. Don't forget to re-install the grounding ring.
[/url]Fully completed swap. Here are all of the tools that were required for the job too.
(this tag is for future reference)
And here is the fully installed tank. I threw some paint on the stock retaining ring, but will get a new one before final install in the car. For now it works fine to hold it down to keep debris out.
Ready to go into the car! The only modification I may make is to bend up a hard line from the pump assembly to the driver's side front of the tank for a cleaner install.
For those wondering how I did from a cost perspective, I am listing it below:
LS3 Camaro fuel Pump $59.00
Colorado Mount w/ Ring $2.00
Recessed Tank Panel Metal $30.00 (even though I already had it)
Parts from VaporWorx $101.99
0-90 OHM Sending Unit $5.00
Viton Gasket $8.96
That is a grand total of $206.95
Still need to wait to see how it performs, but I have no doubts that it will live up to my expectations. I feel that is a much more reliable option than the Spectra tank, despite the work to complete.
Thanks,
Ryan
Last edited by ryeguy2006a; 09-29-2016 at 10:50 AM.
09-29-2016, 09:20 AM
#5
TECH Fanatic
Thread Starter
iTrader: (27)
I will keep this reserved for my impressions once installed in the car. Carl said that people that have installed his kit in the 5th gen pumps have reported no fuel starvation with as little as 1 gallon of fuel in the tank. Time will tell.
Last edited by ryeguy2006a; 09-29-2016 at 10:35 AM.
09-30-2016, 06:22 PM
#6

Great write-up. This should be a STICKY
10-01-2016, 03:57 PM
#7

Just curious - are the Tanks Inc. tanks no good? Looks like they are right around $200 (without a fuel pump). Just trying to get educated.
Nice work.
Tipsy
Nice work.
Tipsy
Trending Topics
10-01-2016, 07:32 PM
#8
nice job and nice writeup 
few questions... mig or tig welding? anything to seal the inside of the tank to protect the welds? did you pressure test to check for pinholes? what seals the bolt threads?
I've tried something similar in the past and it ended up being a big headache but yours turned out much nicer.
few questions... mig or tig welding? anything to seal the inside of the tank to protect the welds? did you pressure test to check for pinholes? what seals the bolt threads?
I've tried something similar in the past and it ended up being a big headache but yours turned out much nicer.
 10-02-2016, 01:25 PM
#10
TECH Senior Member
iTrader: (7)
What's roughly the diameter of the adapter plate bolt circle (hopefully that makes sense).
I have a Tanks Inc tank, but I hate how loud my Walbro 255 is...
Andrew
I have a Tanks Inc tank, but I hate how loud my Walbro 255 is...
Andrew
Last edited by Project GatTagO; 10-02-2016 at 01:34 PM.
10-03-2016, 07:49 AM
#11
TECH Fanatic
Thread Starter
iTrader: (27)
Thanks for all of the compliments. I have been planning and researching on this project for a while now. I am really happy with the way that it turned out.
Tipsy,
I haven't had any experience with the Tanks Inc stuff, but I have heard good things. It was certainly something I was considering, but from what I could see the tank fully loaded was right around $500.
Ryan
Just curious - are the Tanks Inc. tanks no good? Looks like they are right around $200 (without a fuel pump). Just trying to get educated.
Nice work.
Tipsy
Nice work.
Tipsy
I haven't had any experience with the Tanks Inc stuff, but I have heard good things. It was certainly something I was considering, but from what I could see the tank fully loaded was right around $500.
Ryan
10-03-2016, 07:59 AM
#12
TECH Fanatic
Thread Starter
iTrader: (27)
nice job and nice writeup
few questions... mig or tig welding? anything to seal the inside of the tank to protect the welds? did you pressure test to check for pinholes? what seals the bolt threads?
I've tried something similar in the past and it ended up being a big headache but yours turned out much nicer.
few questions... mig or tig welding? anything to seal the inside of the tank to protect the welds? did you pressure test to check for pinholes? what seals the bolt threads?
I've tried something similar in the past and it ended up being a big headache but yours turned out much nicer.
I haven't pressure tested the tank as of yet, but I plan to use some compressed air with a soapy water spray bottle before final installation. Keeping my fingers crossed. I inspected all of my welds carefully before paint and didn't see anything. I am confident that it will seal up. If not, I will use a solder or 2 part epoxy to seal it up.
I know it isn't an LS motor at 58psi, but I got this LT1 motor running using my tank this weekend for my wife's grandpa. The tank performed flawlessly, and was very quiet.
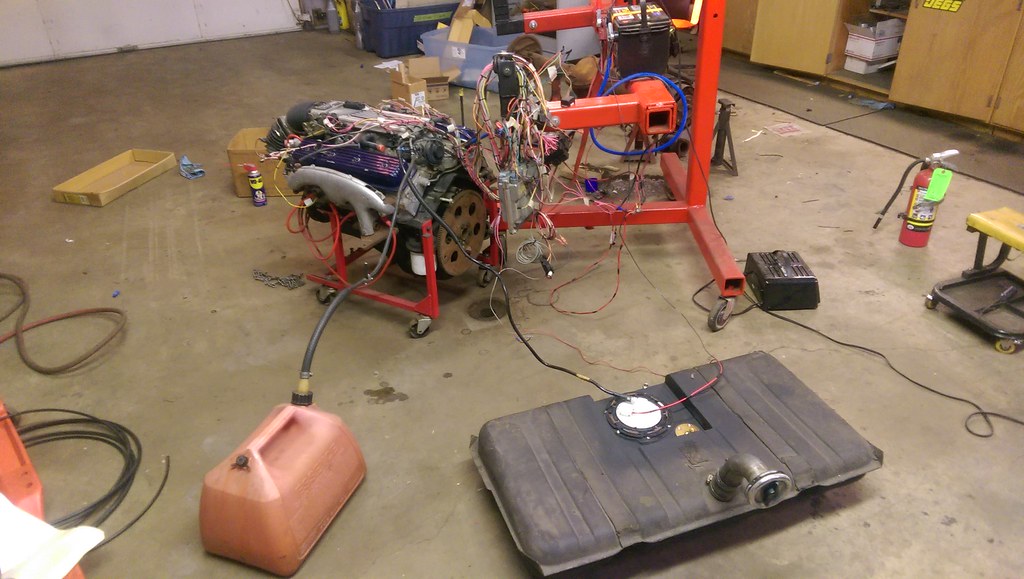
Ryan
10-03-2016, 09:29 AM
#14
Launching!

Join Date: Feb 2003
Location: 08003
Posts: 205
Likes: 0
Received 0 Likes
on
0 Posts

Just curious - are the Tanks Inc. tanks no good? Looks like they are right around $200 (without a fuel pump). Just trying to get educated.
Nice work.
Tipsy
Nice work.
Tipsy
I just dug up my invoice for my tank.
I got the restomod stamped tank. It was 373 with provisions for corner pickups
The ricks 7" fuel gauge sending unit was 115
The corner pickup kit was 120
The -6 fitting to hook to the fuel line was 16
I paid about 650 shipped for it. Corner pickups may be overkill for some and there are cheaper sending units. I picked up a slightly used ctsv pump for mine for under 200. I still consider it pretty cheap for a reliable 800+ hp fuel system.
OP's tank looks good though. For those of us who can't weld, I went with a bolt in job, but I'm sure it will work fine. Looks like about the same as the retroworx system that Carl sells.
10-03-2016, 09:39 AM
#15
TECH Fanatic
Thread Starter
iTrader: (27)
I just dug up my invoice for my tank.
I got the restomod stamped tank. It was 373 with provisions for corner pickups
The ricks 7" fuel gauge sending unit was 115
The corner pickup kit was 120
The -6 fitting to hook to the fuel line was 16
I paid about 650 shipped for it. Corner pickups may be overkill for some and there are cheaper sending units. I picked up a slightly used ctsv pump for mine for under 200. I still consider it pretty cheap for a reliable 800+ hp fuel system.
OP's tank looks good though. For those of us who can't weld, I went with a bolt in job, but I'm sure it will work fine. Looks like about the same as the retroworx system that Carl sells.
10-03-2016, 09:46 AM
#16
Launching!
Join Date: Feb 2003
Location: 08003
Posts: 205
Likes: 0
Received 0 Likes
on
0 Posts
I did. Well will have to, that's I think the last thing parts wise I still need to order.
With the LSA blower I'm running I needed to either do PWM or something boost referenced. When I started pricing out all the extra fuel hose, fittings, clamps, a boost referenced regulator, etc it didn't end up being anywhere near as expensive as I originally thought, and it will be a lot cleaner looking and easier to plumb
With the LSA blower I'm running I needed to either do PWM or something boost referenced. When I started pricing out all the extra fuel hose, fittings, clamps, a boost referenced regulator, etc it didn't end up being anywhere near as expensive as I originally thought, and it will be a lot cleaner looking and easier to plumb
10-03-2016, 09:53 AM
#17
TECH Fanatic
Thread Starter
iTrader: (27)
That is why I really liked the idea of using the LS3 pump converted to run constant. Only one line from the pump to the rail. Essentially the return line is inside the fuel pump assembly, and returns the fuel into the fuel bucket which keeps it full in low fuel situations.
I had a lot of discussion with Carl at Vaporworx (which I greatly appreciate and highly recommend), and he assured me that with his kit I would be fine with the motor I was running. But if I ever decided to move up to a boosted or higher HP application that the CTS-V pump with PWM would be the way to go. Also, that for my application the corner pick-ups were not necessary.
The great thing about his conversion, is that it is completely reversible. If I decide to upgrade to the PWM unit I just swap the stock piece back in and wire up the PWM unit. Maybe he will chime in here at some point.
10-08-2016, 10:04 AM
#19

I've been lurking..... ;-)
Andrew, the GM cam ring is about 7.5" diameter. If one end of the tank recess is open then something in the 8" min diameter will work. Give me a ring sometime and we can discuss what will work for you.
PWM and boost referencing are two different animals. PWM is, in its simplest terms, a very fast acting on-off switch. The on-off action (Pulse Width Modulation) is what controls the speed of the pump. The pump will not produce more fuel with PWM, it will only produce what it would at full/direct connect battery voltage.
Boost referencing is where the fuel pressure changes typically on a 1:1 basis with the manifold pressure. This allows the pressure across the injector outlet to remain constant. On constant pressure applications (90%) the fuel pressure at the injector outlet changes with manifold pressure.
Either can be made to work in most applications with good results and proper ECM tuning.
The anomaly to this is the GM LSA crate engine tune that requires 60psi idle and 65psi WOT. Unlike a traditional manifold referenced 1:1 setup that would have approximately 18psi pressure change, the GM spec is 5psi. VaporWorx has a specific PWM controller tune to accommodate these needs.
The Gen5 ZL1 is good to 650hp supercharged, CTS-V2 = 800hp SC. The new CTS-V3 pump has identical performance to the Gen5 ZL1 (same pumping section) but the price point is quite low. A CTS-V3 pump can be had on Amazon for the low $100's but requires some plugging of unneeded attachment points, and is too tall for many older chassis. We'll have a fix for that soon ;-)
10-08-2016, 11:41 AM
#20
Staging Lane
iTrader: (6)

Join Date: Jul 2004
Location: Melbourne, Florida
Posts: 75
Likes: 0
Received 0 Likes
on
0 Posts

I haven't pressure tested the tank as of yet, but I plan to use some compressed air with a soapy water spray bottle before final installation. Keeping my fingers crossed. I inspected all of my welds carefully before paint and didn't see anything. I am confident that it will seal up. If not, I will use a solder or 2 part epoxy to seal it up.
Ryan
http://www.por15.com/POR-15-Fuel-Tan...-Kit_p_62.html