
1979 Corvette LS3/525 w/ 4L70 Swap


 10-16-2017, 11:36 AM
#23
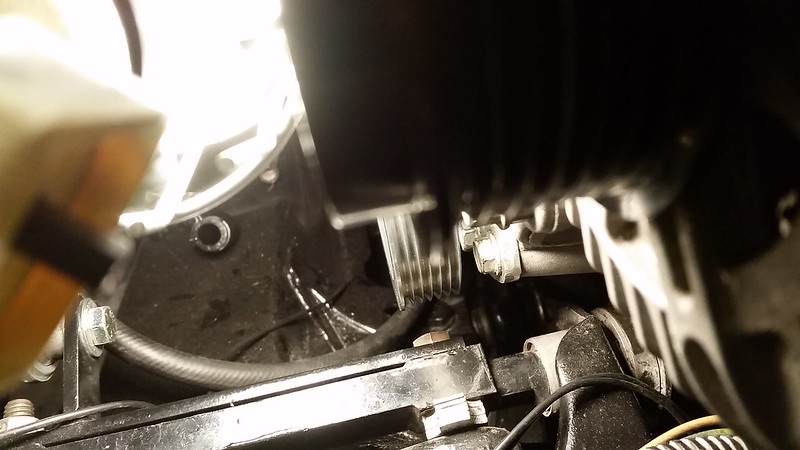
I ended up with ordering a smaller from dirty dingo and put in pressure reducing spacers. For anyone looking at going the little cheaper route I listed the other pulleys I tried out from dorman. #300-301 (.66 hub, 5-5/16" od) and #300-126 (.66 hub, 5-3/4" od, similar to the smaller pulley holley offers). 300-301 had good clearance at the control arm but the hub offset was slightly different than the factory and wouldn't line up well w/out machining the hub or shims on everything else. The 300-126 was still slightly off and I wasn't comfortable with how close it was to the control arm. Also note on the 300-126 my ps pulley puller tool would not work on this one. It wouldn't fit under the notch on the hub so I had to get creative with pulling it. I've read these pulleys have worked for others so I'm not sure why my stuff was slightly off so I just went ahead and returned the dormans and ordered the dirty dingo. Hopefully this will help someone out in the future.
Dorman 300-126
300-301
Dirty Dingo
[url=https://flic.kr/p/C6ocXU]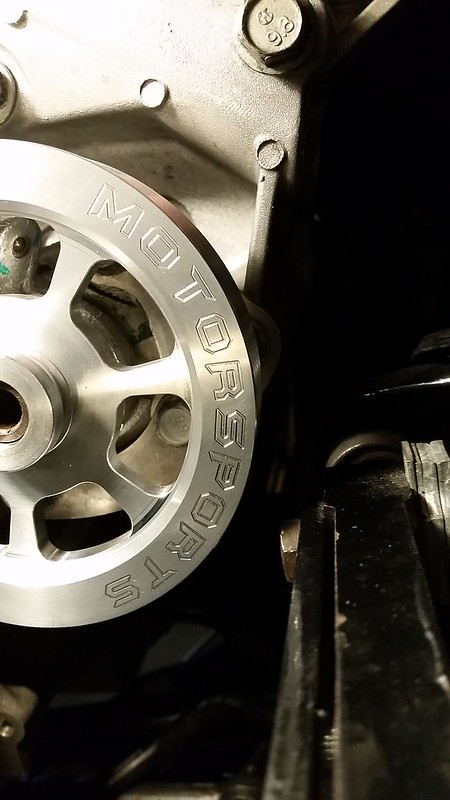
Dorman 300-126
300-301

Dirty Dingo
[url=https://flic.kr/p/C6ocXU]
 10-16-2017, 11:37 AM
#24
Back to it this weekend. I got around to drilling and tapping the water pump.
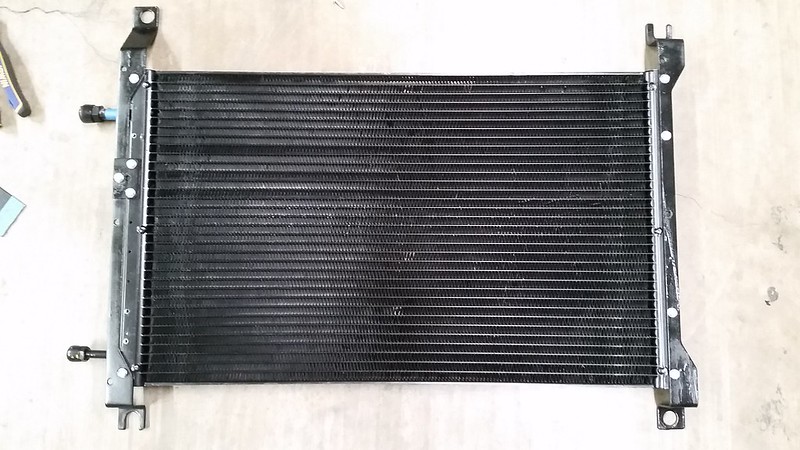
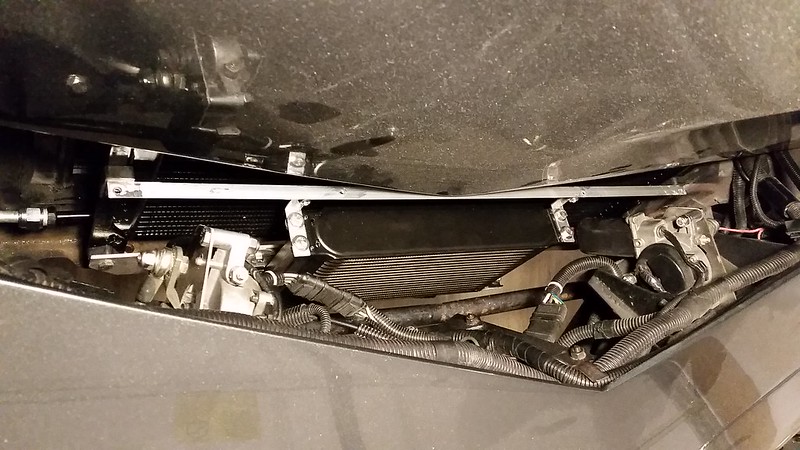
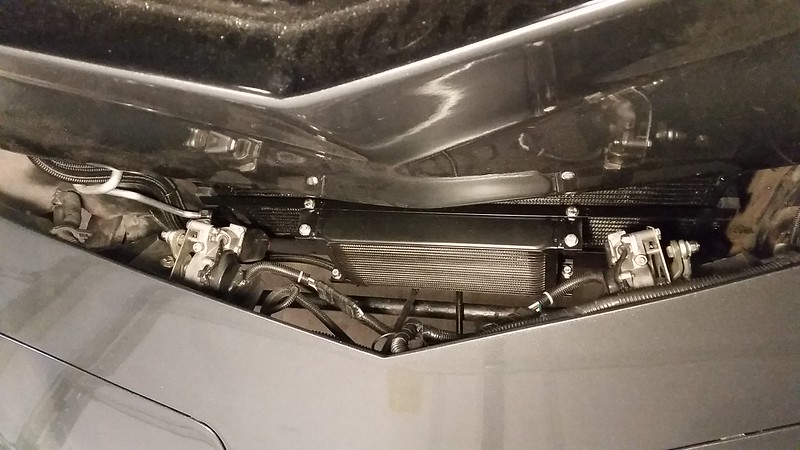
Mounted the classic auto air condenser, trans cooler and started routing new braided lines. Condenser came with some mounting plates but I ended up using the factory condenser brackets (flipped drivers side around to fit). Came out nice and clean and I didn't have to drill and new holes. I didn't really want to pull the hood.
I'm bypassing the radiator cooler (dewitts radiator) and going straight to the new cooler. Comments are welcome on the mounting and if this trans cooler will/should be sufficient for my higher stall speed. Cooler is a Derale 13403 Series 10000 Stacked Plate Transmission Oil Cooler 19 Row (37,000 BTU's Per Hour).
Barely had time to start working with the new fuel setup.
 10-16-2017, 12:52 PM
#25


In regards to the trans cooler that's exactly how I did mine. I don't have AC.
I've done the same in other LS swaps. Since you are going to run a electric fan the fan will pull air thru the trans cooler when you in slow moving traffic.
I've done the same in other LS swaps. Since you are going to run a electric fan the fan will pull air thru the trans cooler when you in slow moving traffic.
11-01-2017, 05:49 PM
#27
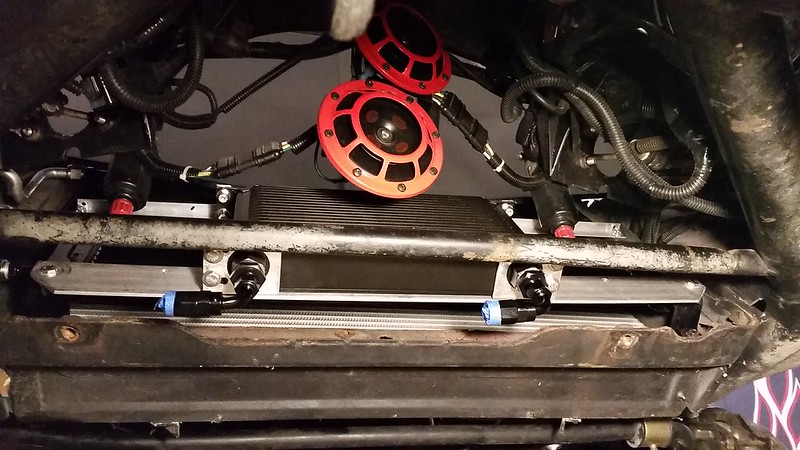
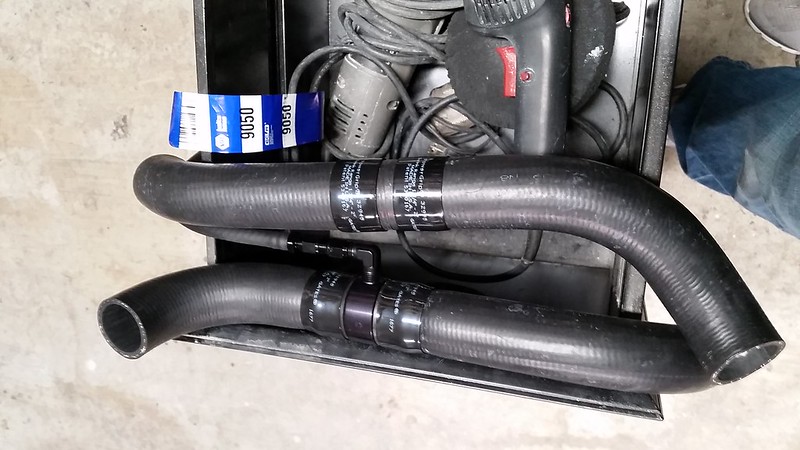
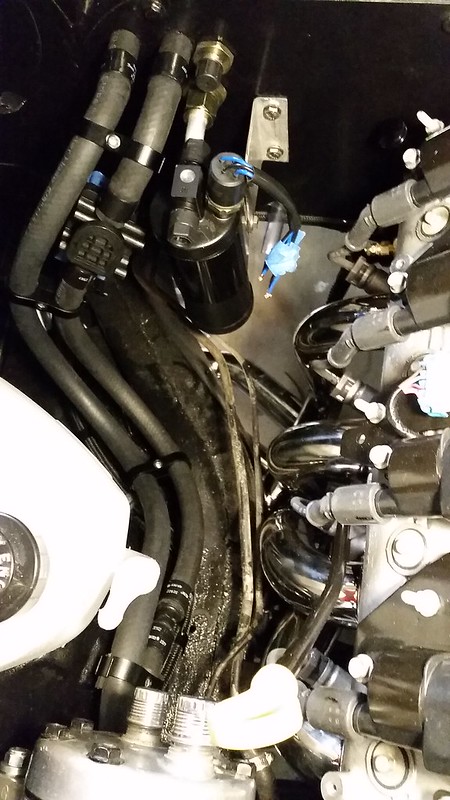
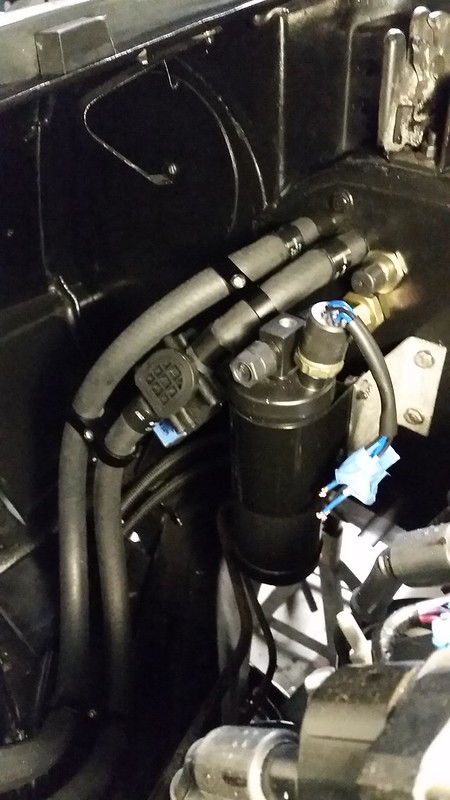
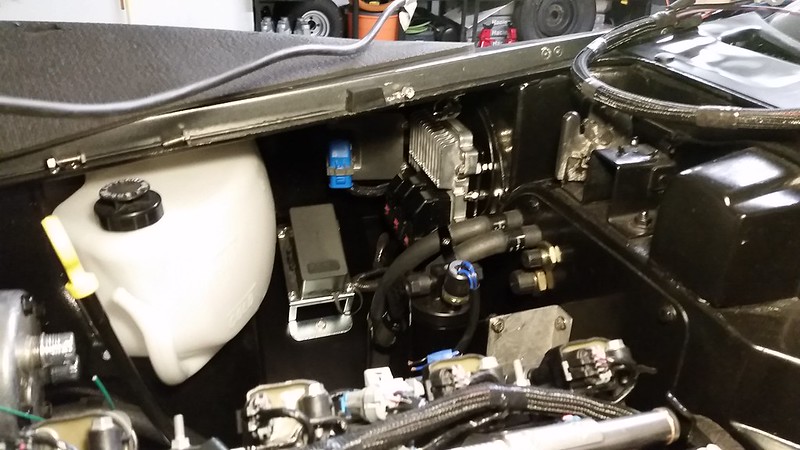
Little by little. I'm using some heat shrink type hose clamps by gates. They look nice and clean, hopefully they work well because they'll be everywhere! I ran the heater hoses as cleanly as possible with the way they stub out of the firewall with the ac lines and drier. I used two napa 9050 hoses and spliced them for the upper and lowers. The upper has my steam lines tied into it and upside down so you can't see it as much. My transmission cooler lines are routed in there with the heater hoses, you kind of have to look for them.
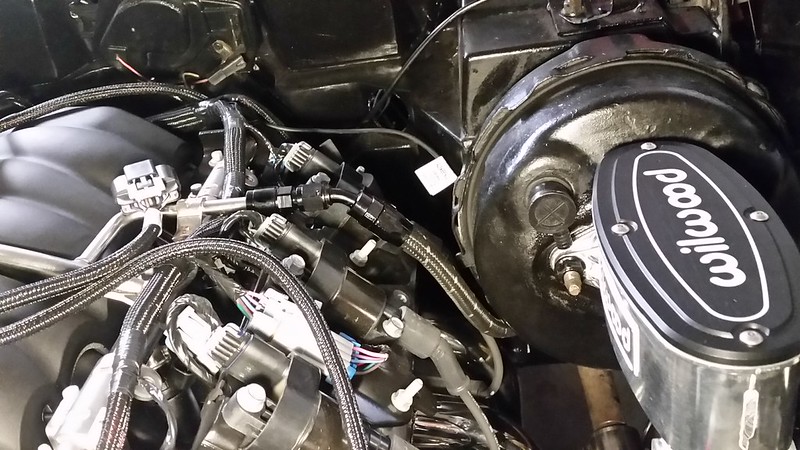
I also replaced the power steering control valve and cylinder (leaking and messy) while everything is torn apart and clean. Hopefully my harness will be here by the weekend and I can get the ecm, tcm, fusebox and everything routed cleanly (I'm planning for up under the pass. fender/firewall area).
Looks like I'll have to build a little drip shield for the drier (headers right below it) and have a straight pipe made from the drier to the firewall.
I also got around to putting in the oil pressure, water temp. and trans temp sensors. Autometer makes an ls kit with fittings needed and a few extra.
Plus a lokar transmission dipstick (i bought a 36" firewall mount and cut it down and cutout an aluminum mount for it). I bought a trans mount lokar dipstick but it was too short (12") and put the dipstick angled close to the header and way too low. I also tried a factory dipstick/tube but angles were off and it didn't fit.
I also replaced the power steering control valve and cylinder (leaking and messy) while everything is torn apart and clean. Hopefully my harness will be here by the weekend and I can get the ecm, tcm, fusebox and everything routed cleanly (I'm planning for up under the pass. fender/firewall area).
Looks like I'll have to build a little drip shield for the drier (headers right below it) and have a straight pipe made from the drier to the firewall.

I also got around to putting in the oil pressure, water temp. and trans temp sensors. Autometer makes an ls kit with fittings needed and a few extra.
Plus a lokar transmission dipstick (i bought a 36" firewall mount and cut it down and cutout an aluminum mount for it). I bought a trans mount lokar dipstick but it was too short (12") and put the dipstick angled close to the header and way too low. I also tried a factory dipstick/tube but angles were off and it didn't fit.
 11-13-2017, 05:47 PM
#29
thanks! looks like a lot of guys are using the hose adapter for the steam vent. Looks nice and should work just fine. It can always be drilled and tapped for something else in the future.
11-13-2017, 05:47 PM
#30
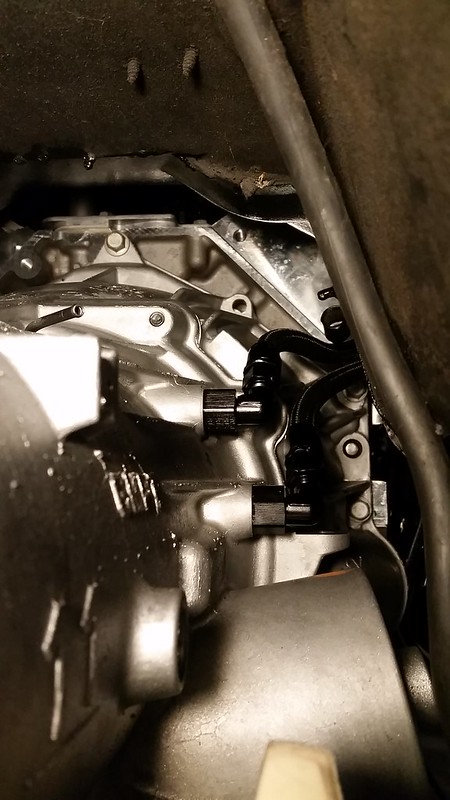
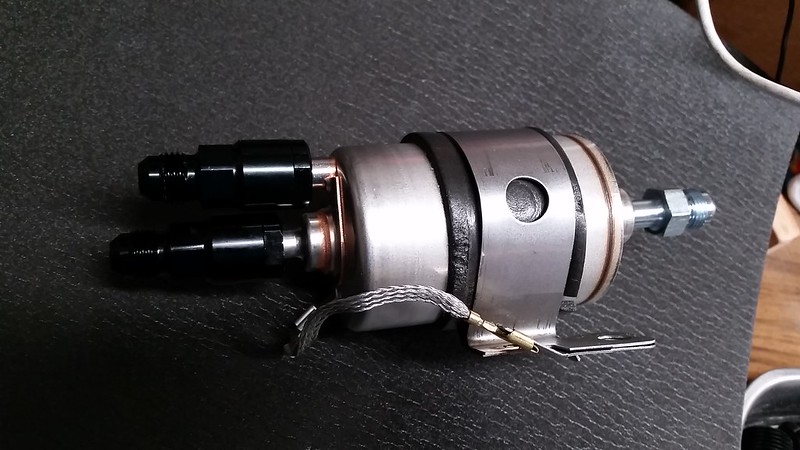
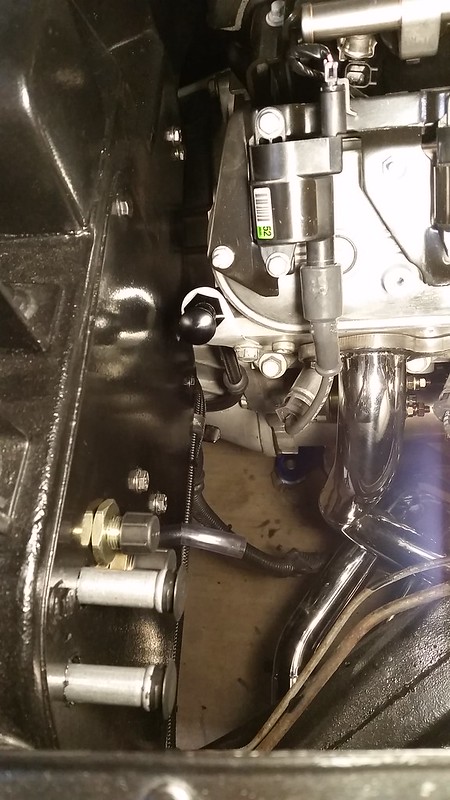
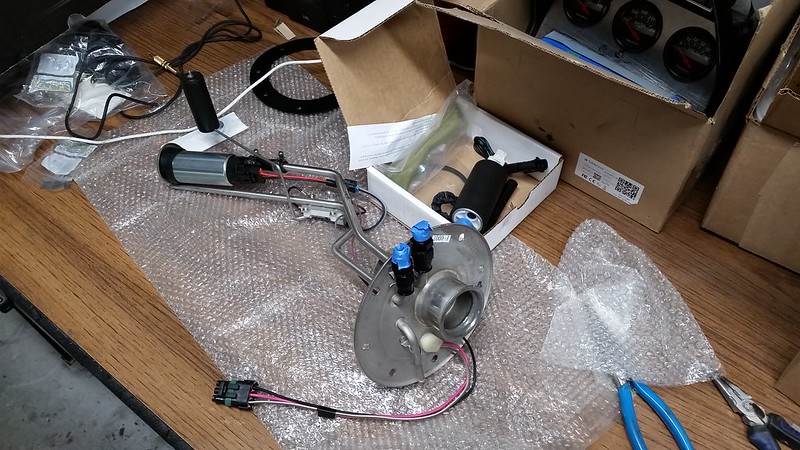
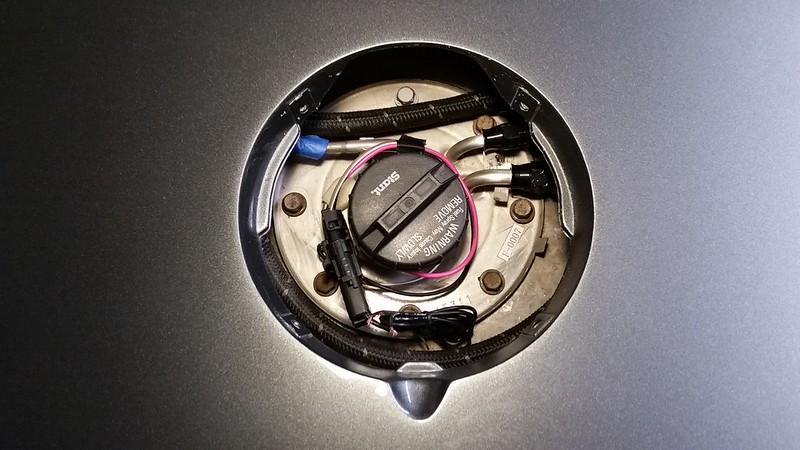
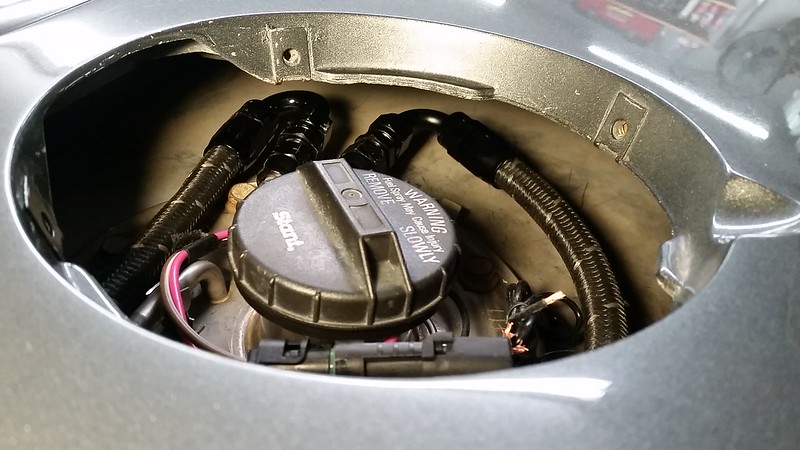
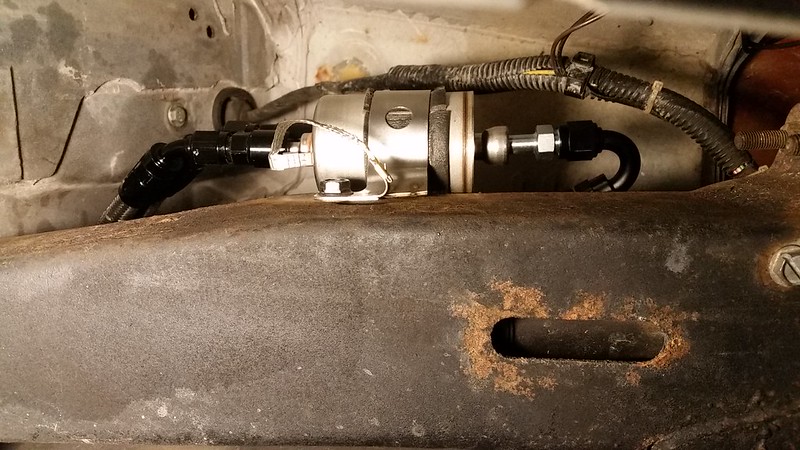
I was able to get moving on the new fuel lines. I demoed out all the old hard lines (supply, return, vent) and started over. Routed -6AN hose & fittings along with new 82 fuel sending unit and upgraded pump attached. I went up the drivers side and routed along side the brake line. The new reworked harness came in from tilden motor sports along with the e67 ecm from gmpp tuned w/ a used tcm so it's looking like wiring will be next on the list along with some intake/filter ideas (hopefully).
 01-09-2018, 11:44 AM
#32
I had some of this information posted in another thread but I'll leave it here too for anyone looking in the future.
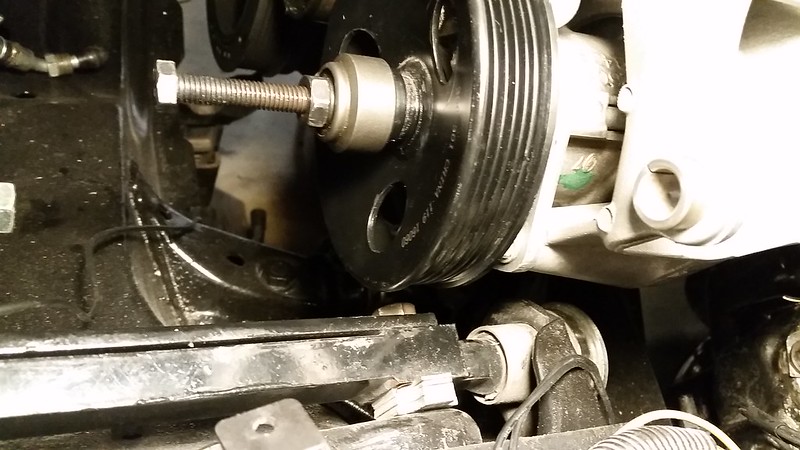
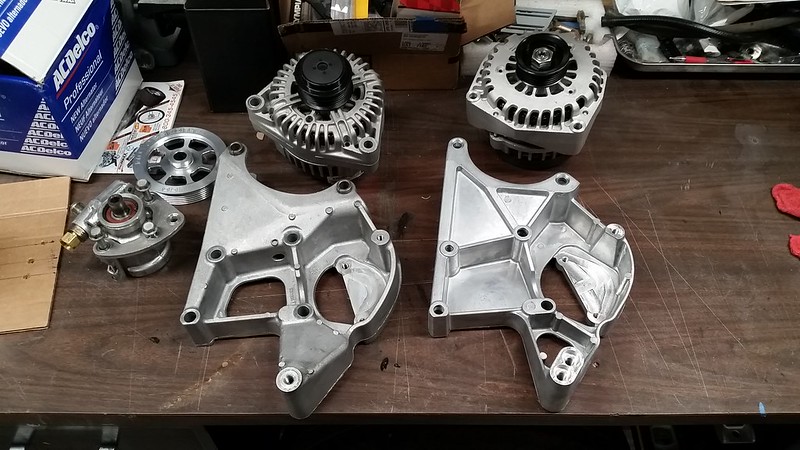
I ran into some more problems. Long story short, I went with a 2 wire ecm controlled alternator. Come to find out the used Holley accessory bracket setup I received wasn't holley. The ac side was holley, the alternator/ps side is a c6 bracket which will only use a c6 type alternator. I had to go buy a new holley bracket along with new idler for it. For that extra cost, stripped out ps pump bolt holes (installed helicoils) and the back and forth I should've went the new route. Oh well. It's redone and back together.
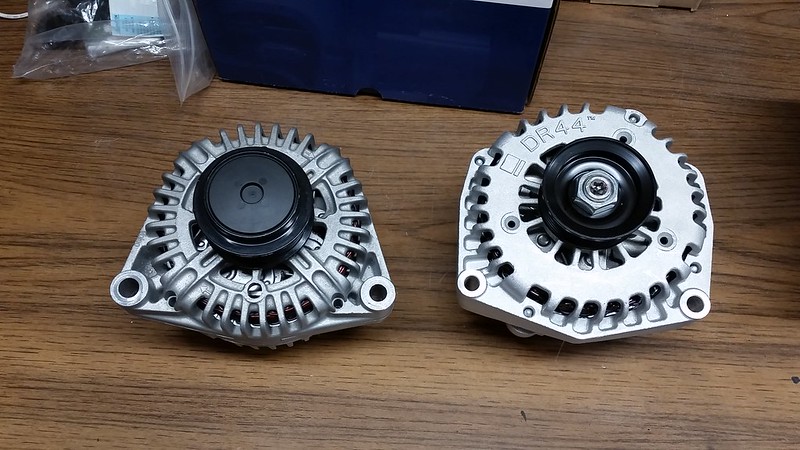
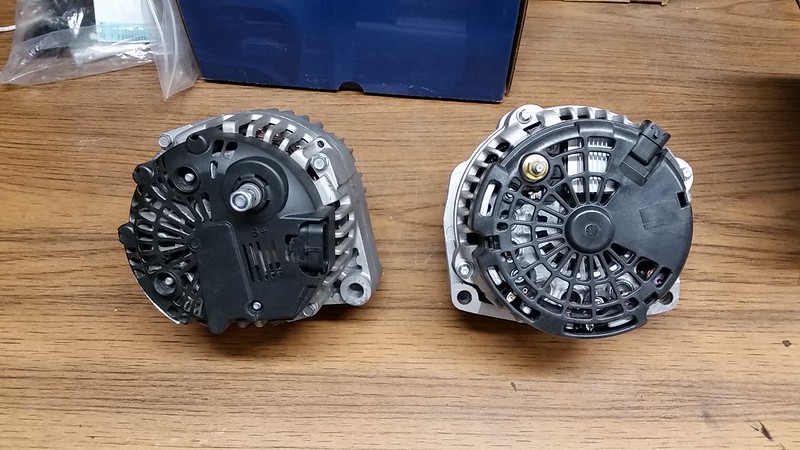
For those that don't know, holley designed their bracket to use a truck type alternator which is cheaper, easier to come by and more options (ecm controlled, etc.). Pictures are just for future reference for anyone researching information. Right side is the 2 wire truck type and left is the c6 type.
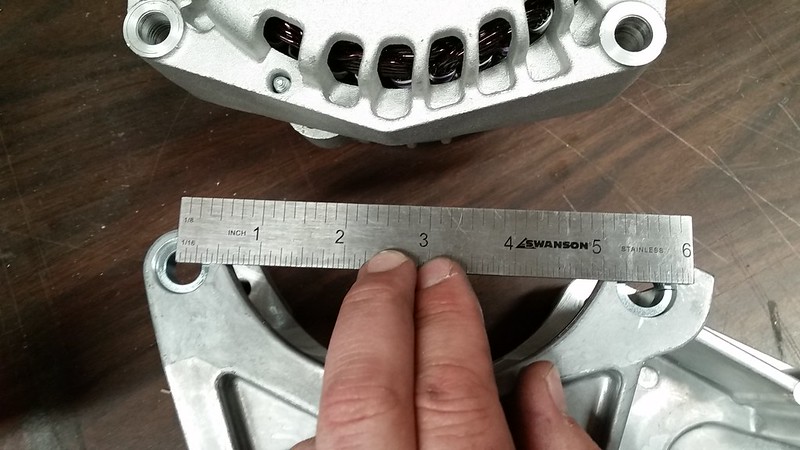
Rough dimensions.....c6 alternator
2wire alternator
[url=https://flic.kr/p/ZrTpbX]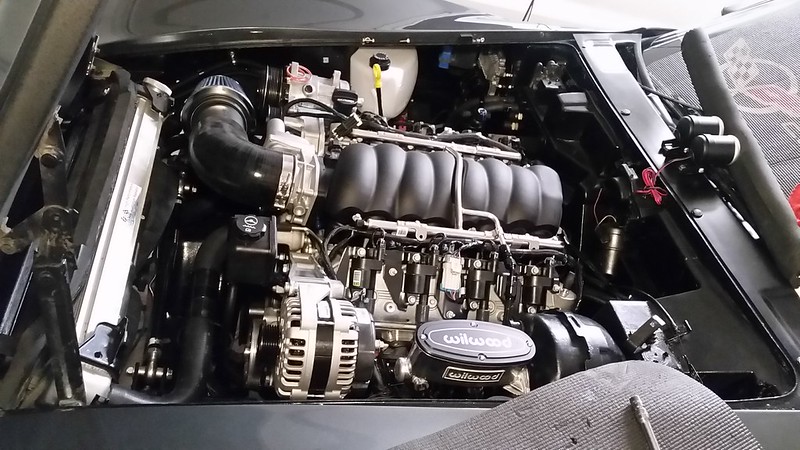
I ran into some more problems. Long story short, I went with a 2 wire ecm controlled alternator. Come to find out the used Holley accessory bracket setup I received wasn't holley. The ac side was holley, the alternator/ps side is a c6 bracket which will only use a c6 type alternator. I had to go buy a new holley bracket along with new idler for it. For that extra cost, stripped out ps pump bolt holes (installed helicoils) and the back and forth I should've went the new route. Oh well. It's redone and back together.
For those that don't know, holley designed their bracket to use a truck type alternator which is cheaper, easier to come by and more options (ecm controlled, etc.). Pictures are just for future reference for anyone researching information. Right side is the 2 wire truck type and left is the c6 type.
Rough dimensions.....c6 alternator

2wire alternator
[url=https://flic.kr/p/ZrTpbX]
01-09-2018, 11:45 AM
#33
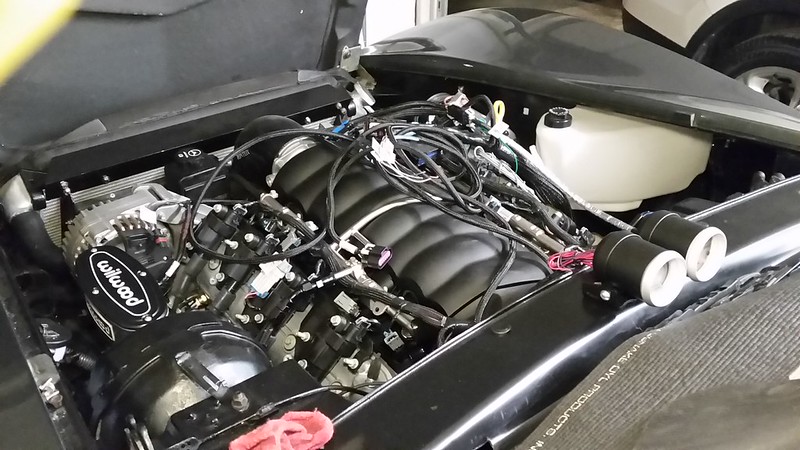
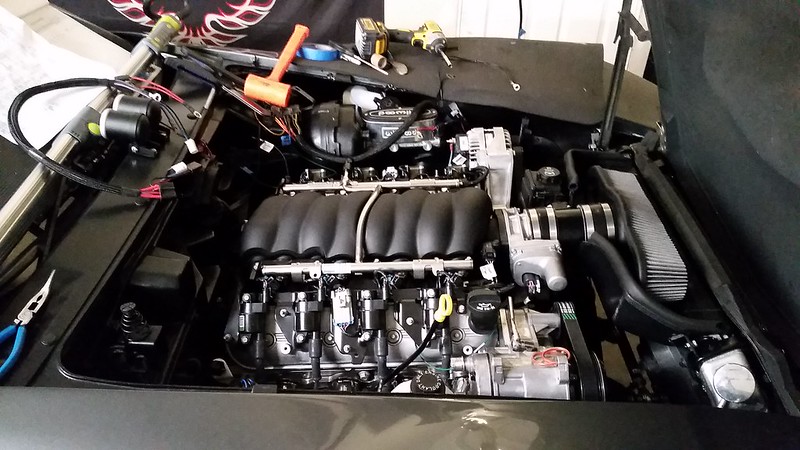
Got the ecm, tcm and harness back from the rework a little while back and started mounting the controllers and fusebox. Gotta do a little leaning over but everything is accessible.
by https://www.flickr.com/photos/149923940@N05/, on Flickr
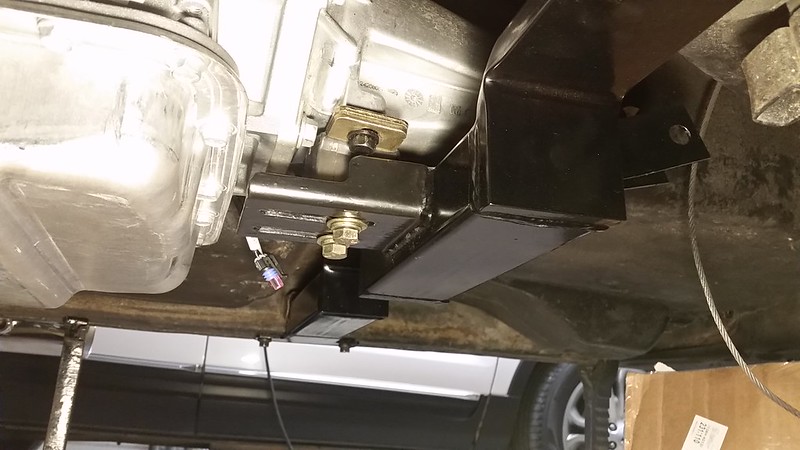
Trans crossmember holes elongated. Nice fit now.
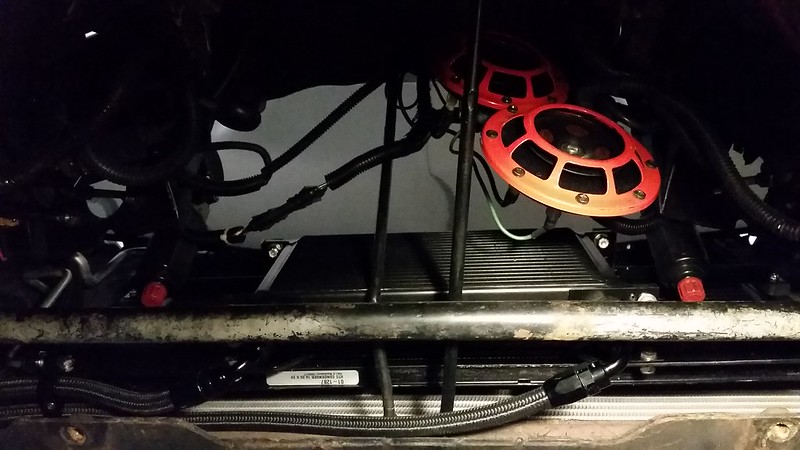
I started putting the front end brackets back together and had to rework my trans cooler location to make the brackets work (still had to modify 1 of them) and get the cooler hoses above the fiberglass scoop.
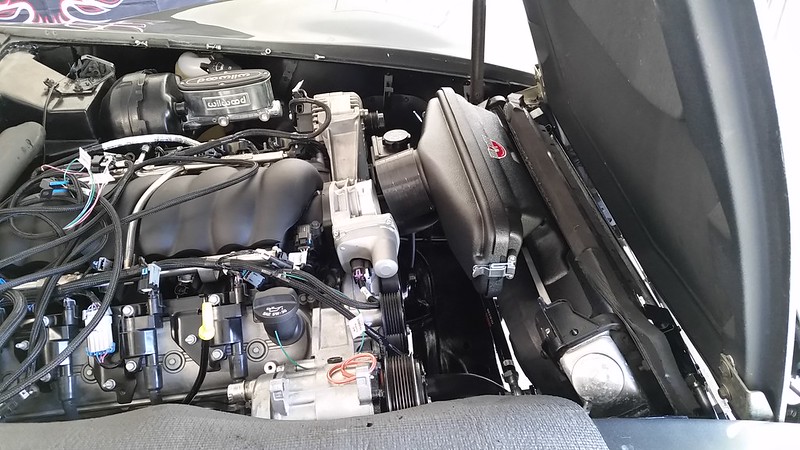
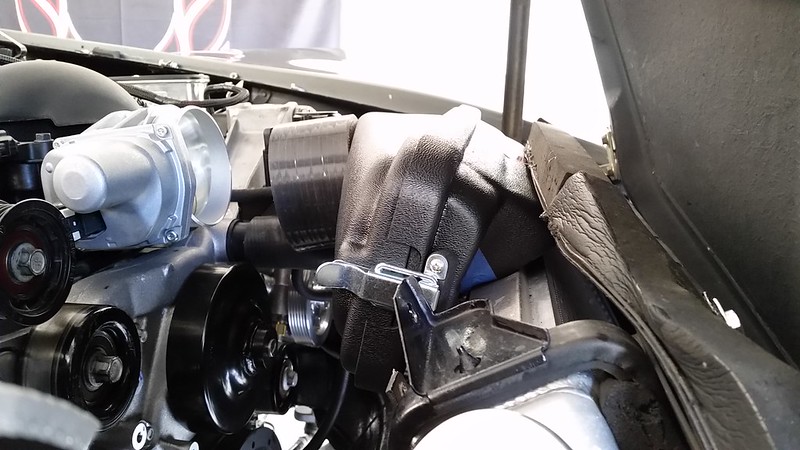
Messing around with a cold air setup. I didn't like the old 90* and filter in the engine bay, I figured I'd try going under but didn't work as well as I would've liked, plus I'd still have to build a box for it and figure where to route some ducting from the front to it. Still an option. Other pics are of a vararam G8 cai I figured I'd try. Not enough room w/out cutting up the radiator core support or modifying the hood. I went ahead and ordered the vararam gto otr cai since it seems to work fit decent thanks to some of the guys here on the forum.
G8 intake....opening to the filter was partially blocked by radiator. Hood would touch the box when closed. Needs to move forward but no go. Worth a try.
Trans crossmember holes elongated. Nice fit now.
I started putting the front end brackets back together and had to rework my trans cooler location to make the brackets work (still had to modify 1 of them) and get the cooler hoses above the fiberglass scoop.
Messing around with a cold air setup. I didn't like the old 90* and filter in the engine bay, I figured I'd try going under but didn't work as well as I would've liked, plus I'd still have to build a box for it and figure where to route some ducting from the front to it. Still an option. Other pics are of a vararam G8 cai I figured I'd try. Not enough room w/out cutting up the radiator core support or modifying the hood. I went ahead and ordered the vararam gto otr cai since it seems to work fit decent thanks to some of the guys here on the forum.
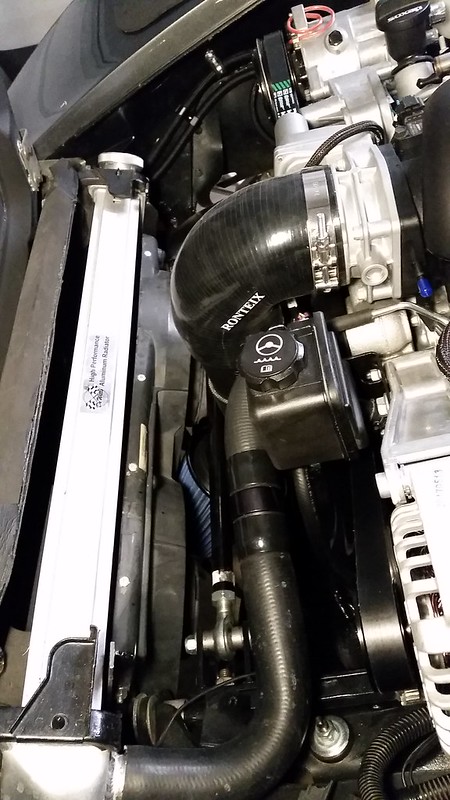
G8 intake....opening to the filter was partially blocked by radiator. Hood would touch the box when closed. Needs to move forward but no go. Worth a try.
 01-09-2018, 11:45 AM
#34
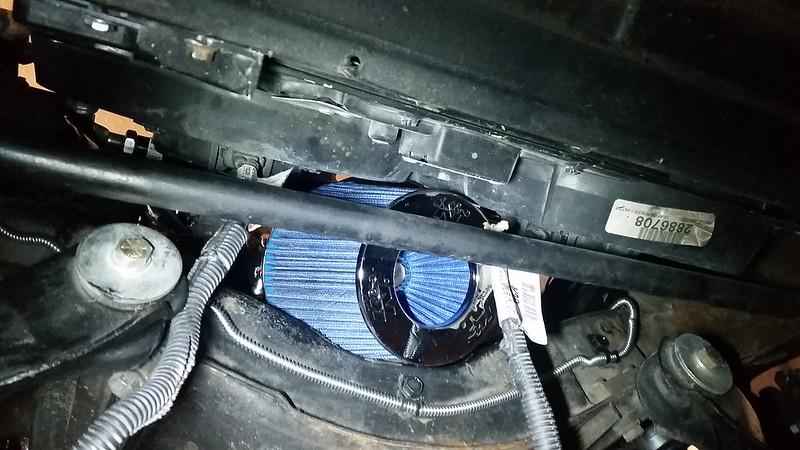
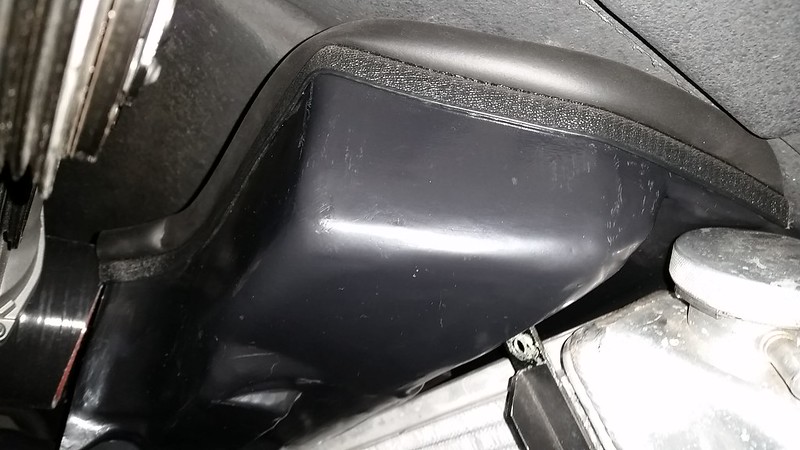
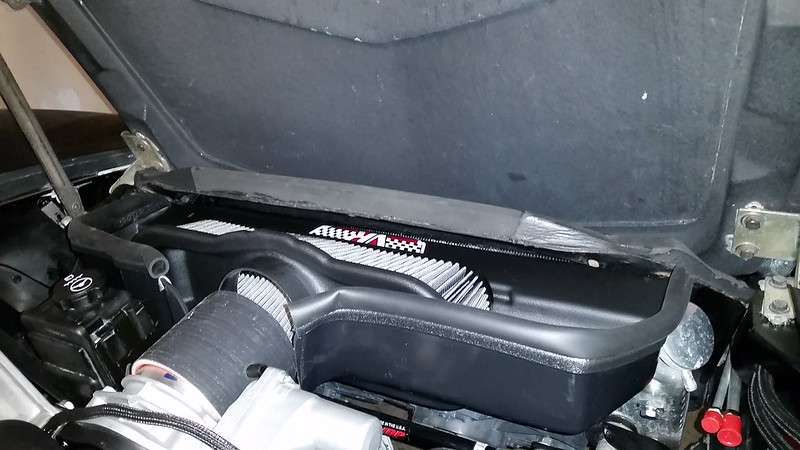
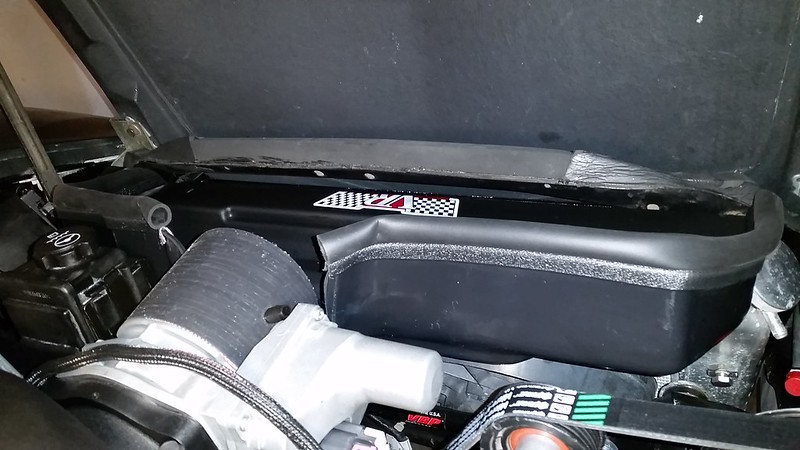
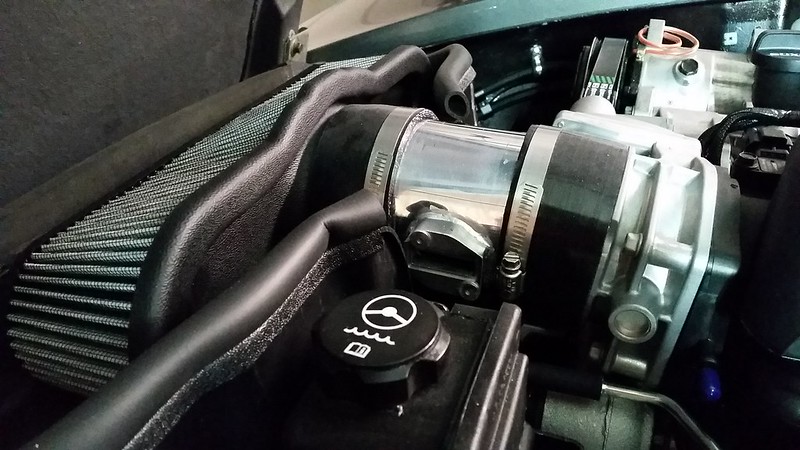
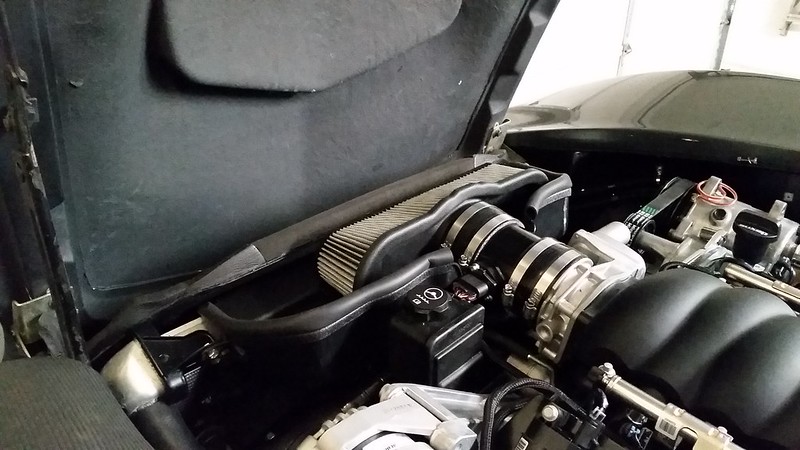
here's the vararam cai for the GTO. I found it on sale for 200 shipped, hard to pass up. I'll still have to rework my upper mounting brackets for the fans and do something with the passenger side radiator bracket. The box sits right on top of the radiator hose and a little tight around the ps reservoir. I still have access to the radiator cap. I'll need to do some trimming and rebending around the front ledge to help air get shoved into it over the radiator. It still has a good size opening between the top of the radiator and the core support for air to get through.
Overall, I think this is the easiest and cleanest looking setup w/out cutting radiator core support and doing a lot of fabrication for a custom cold air intake setup.
Overall, I think this is the easiest and cleanest looking setup w/out cutting radiator core support and doing a lot of fabrication for a custom cold air intake setup.
 01-09-2018, 11:46 AM
#35
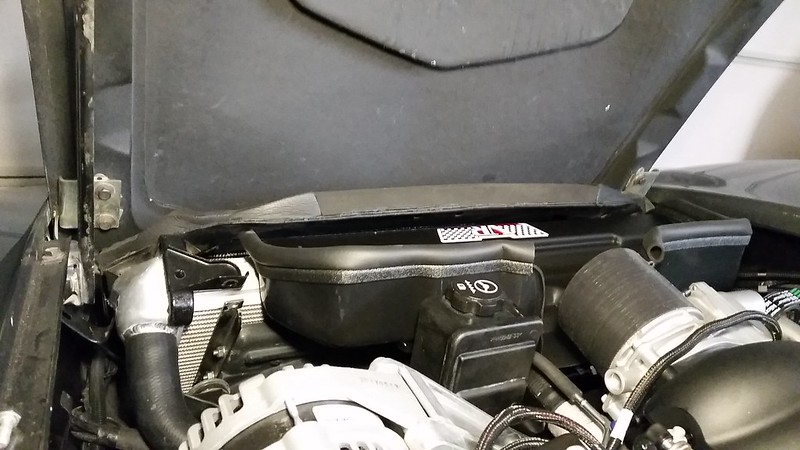
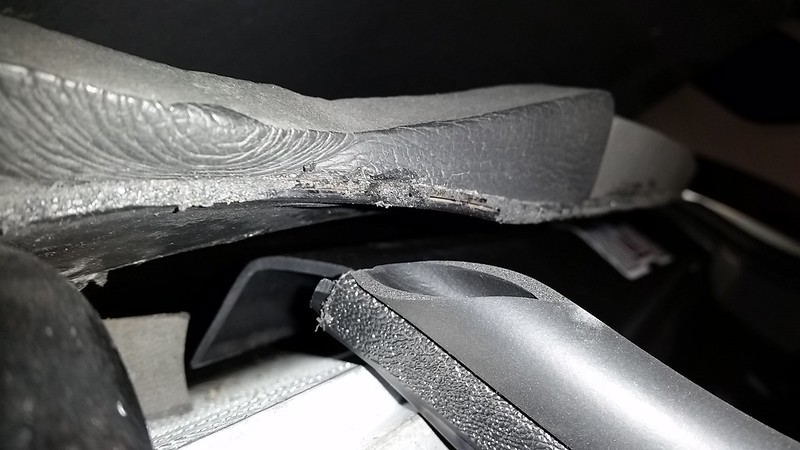
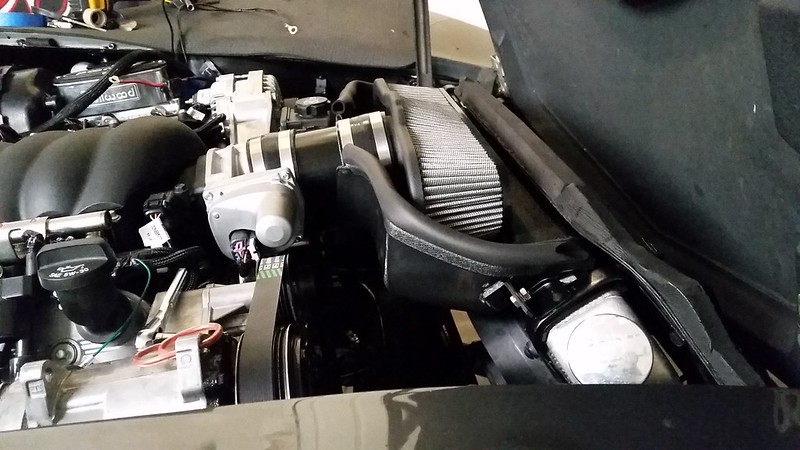
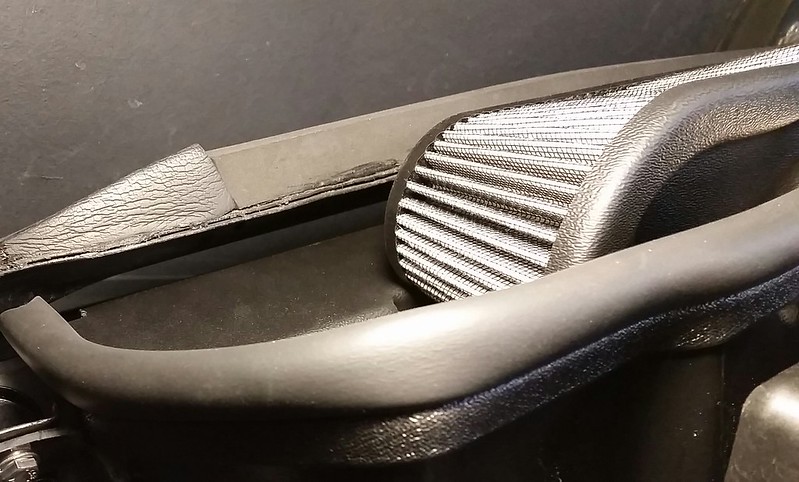
I ended up not liking how it fit around the passenger side radiator bracket/clamp and modifying it some. Played around with plastic welding methods and sectioned the plastic tray to fit with the factory c3 radiator bracket. I also welded some plastic tabs on the sides to mount the tray. The bottom lip where it sits in front of the radiator was awkward so I trimmed it up and bent it back some. The the passenger side bracket got modified some to pull it in away from the vararam tray and addressed my fan mounting too. I'll clean up and paint the tray and work on sealing it more to the hood when I'm done with the swap.
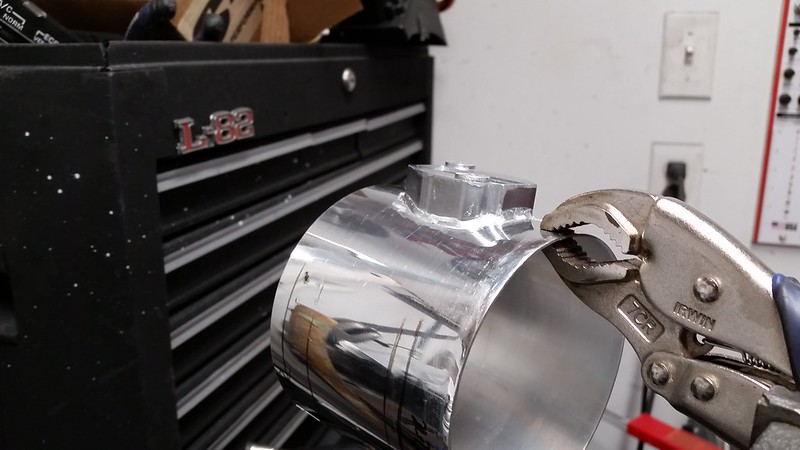
I also soldered up the aluminum maf mount to the 4" tubing and painted which finishes up my cold air intake side of things. Onto wiring!
I also soldered up the aluminum maf mount to the 4" tubing and painted which finishes up my cold air intake side of things. Onto wiring!
 05-17-2018, 12:07 PM
#37
I wish I had more of an update. Life's been busy with work mostly, I did buy a new truck though.
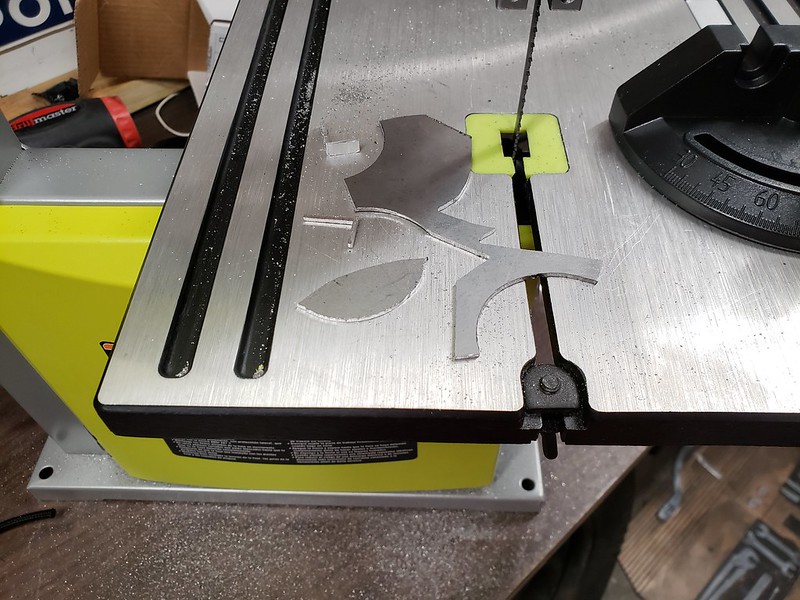
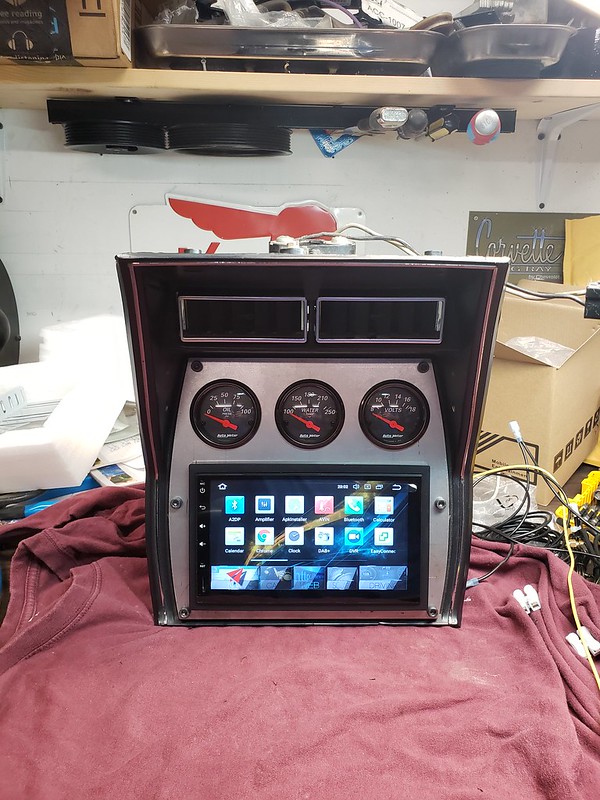
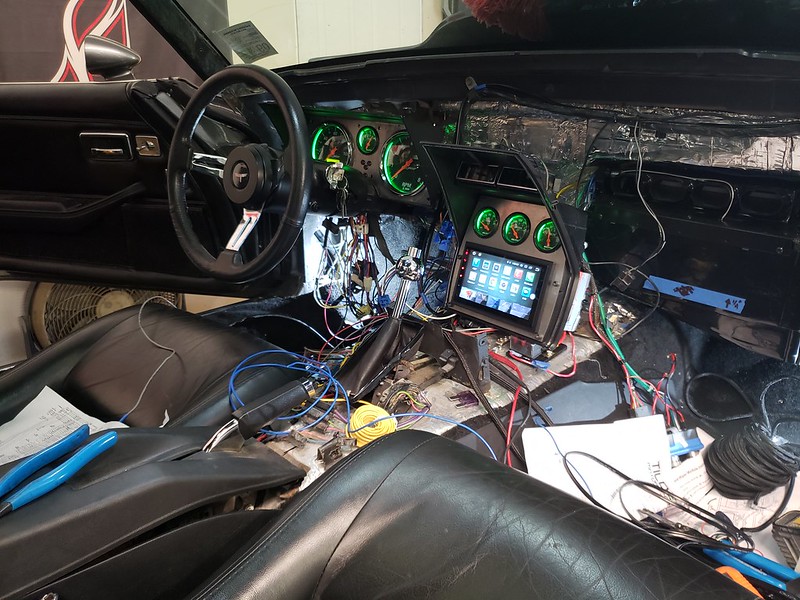
I reworked my center console plate for my screen and gauges with a thicker plate since I bought a bandsaw with a bimetallic blade. I finally got around to my speedo/tach cluster and added in the fuel gauge, check engine light along with some blinkers and bright indications. I'm currently reworking some of my prior wiring (you know, while I'm there sort of thing) and wiring in the new engine harness with the factory stuff. Time consuming to keep it clean and professional looking and to do it right without.
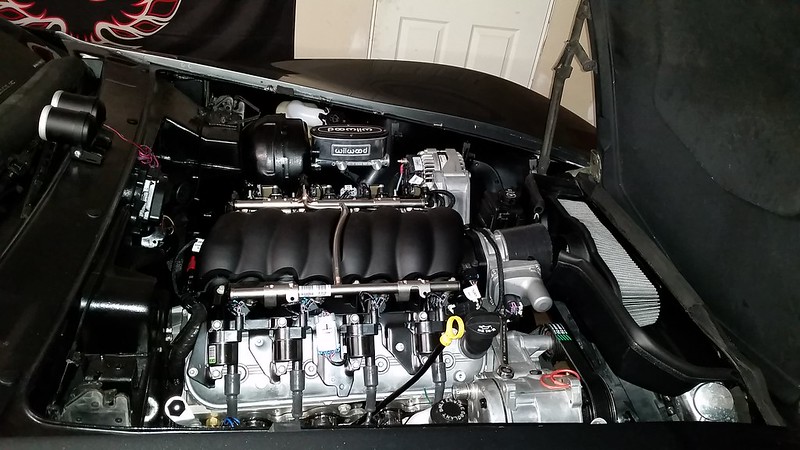
Mechanically everything is set in place so once the wiring is done I have a bunch of small odds and ends and it should be ready to fire-up.
new pick-up:
I reworked my center console plate for my screen and gauges with a thicker plate since I bought a bandsaw with a bimetallic blade. I finally got around to my speedo/tach cluster and added in the fuel gauge, check engine light along with some blinkers and bright indications. I'm currently reworking some of my prior wiring (you know, while I'm there sort of thing) and wiring in the new engine harness with the factory stuff. Time consuming to keep it clean and professional looking and to do it right without.
Mechanically everything is set in place so once the wiring is done I have a bunch of small odds and ends and it should be ready to fire-up.
new pick-up:
 06-03-2018, 09:45 PM
#40
Moving along....won't be long until it gets cranked up. Hopefully next weekend.
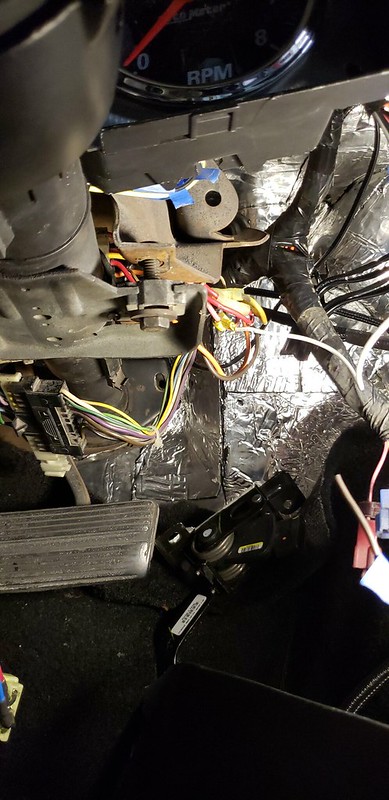
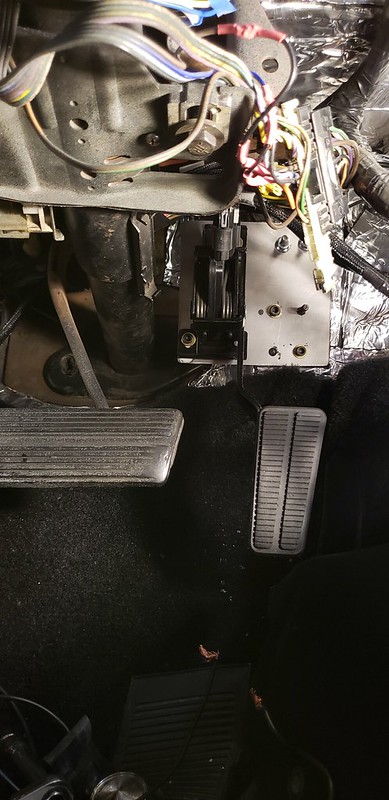
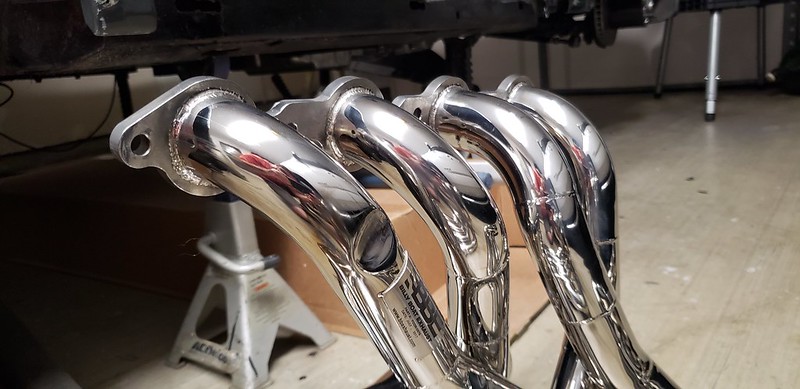
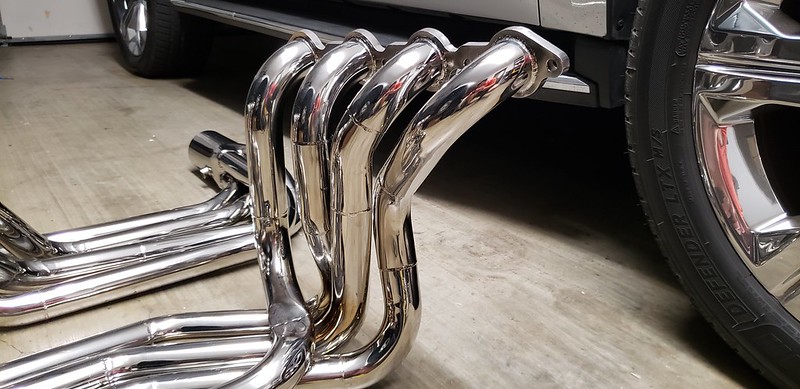
I got around to mounting the gas pedal. Offset of this was opposite of the stock pedal and longer. I ended up just cutting out 2 16ga steel plates (the single plate would flex a bit so i doubled it). Used some of the stock pedal mounting holes and added some at the top. This is the last mock up, it'll get painted and go back in. The gas pedal looks like it sits a little further back then the brake but they are even. I guess it's the pic. I also got around to clearancing (dinging) my headers. They just barely touched to bottom of the frame on the passenger side and top of the steering box on the driver side. Plenty of room now.
I got around to mounting the gas pedal. Offset of this was opposite of the stock pedal and longer. I ended up just cutting out 2 16ga steel plates (the single plate would flex a bit so i doubled it). Used some of the stock pedal mounting holes and added some at the top. This is the last mock up, it'll get painted and go back in. The gas pedal looks like it sits a little further back then the brake but they are even. I guess it's the pic. I also got around to clearancing (dinging) my headers. They just barely touched to bottom of the frame on the passenger side and top of the steering box on the driver side. Plenty of room now.
Last edited by blueday; 06-03-2018 at 09:51 PM.