When you click on links to various merchants on this site and make a purchase, this can result in this site earning a commission. Affiliate programs and affiliations include, but are not limited to, the eBay Partner Network.
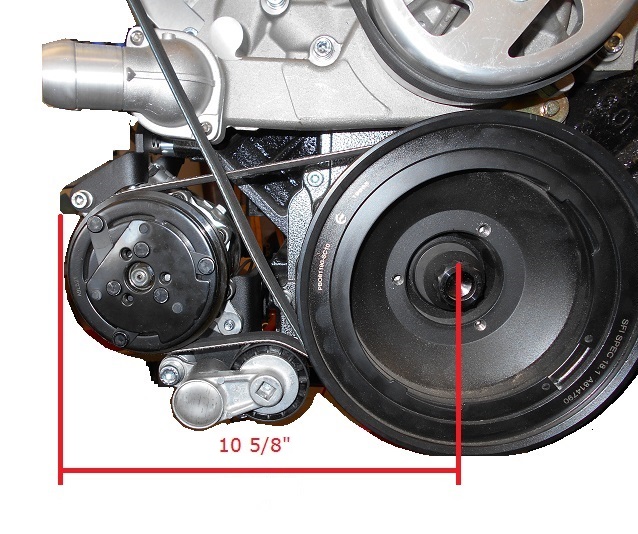
A measurement from the centerline of the crank pulley to the outmost part of the mounted bracket/compressor would probably tell Tipsy what he needs to know.
A measurement from the center line of the crank pulley to the outermost part of the mounted bracket/compressor would probably tell Tipsy what he needs to know.
I think there's pretty much no question this will save space over my current setup. The Dirty Dingo site shows a measurement of 10 5/8" from the center of the crank pulley to the outside of the compressor pulley (and 11.25" for the Holley). My current configuration is closer to 12.5".
The real benefit through is the line routing and compressor installation. The lines attach to the back of the F-Body compressor. My hose shop has the aluminum o-ring block adapter blanks and the capability to create hard lines that will attach, but the lines must come off the back of the compressor and immediately route forward. And due to space constraints behind the compressor, the lines will have to be attached to the compressor before the compressor is bolted in place. You can see how tight the space is to manipulate the compressor between the bracket and the frame rail. And on top of that, with the lines coming forward, it will be difficult to leave enough space to physically insert and tighten the bolts.
So, again, the compressor I have is not unusable. But swapping it out for the SD7 will seemingly make installation, line construction and line routing considerably less cumbersome.
I was doing a little more digging into these two low-mount Sanden SD7B10 7176 kits and noticed one thing I hadn't earlier; The Holley kit includes a "Holley" compressor, which appears to be an actual Sanden brand SD7B10 7176 compressor. The Dirty Dingo kit includes a Sanden "style" SD7B10 7176 compressor. I hadn't previously noticed the word "style."
So, while I'm sure it cost Holley quite a bit to design and tool a cast aluminum bracket, it appears the difference in kit pricing is probably driven more by the fact that the Holley kit comes with a Sanden brand compressor while the DD kit comes with a Sanden "style" compressor. Similar compressors are available on eBay with both the "Four Seasons" name and no name at all.
I have no idea what the difference is in quality and reliability among the various offerings.
EDIT: The $230 Summit compressor is also made in China.
Last edited by TipsyMcStagger; 10-20-2018 at 08:34 AM.
I was doing a little more digging into these two low-mount Sanden SD7B10 7176 kits and noticed one thing I hadn't earlier; The Holley kit includes a "Holley" compressor, which appears to be an actual Sanden brand SD7B10 7176 compressor. The Dirty Dingo kit includes a Sanden "style" SD7B10 7176 compressor. I hadn't previously noticed the word "style."
So, while I'm sure it cost Holley quite a bit to design and tool a cast aluminum bracket, it appears the difference in kit pricing is probably driven more by the fact that the Holley kit comes with a Sanden brand compressor while the DD kit comes with a Sanden "style" compressor. Similar compressors are available on eBay with both the "Four Seasons" name and no name at all.
I have no idea what the difference is in quality and reliability among the various offerings.
BINGO!!!!! Been down that road with the Chinese knock-off. Got a real compressor on the car now. Can�t afford cheap stuff
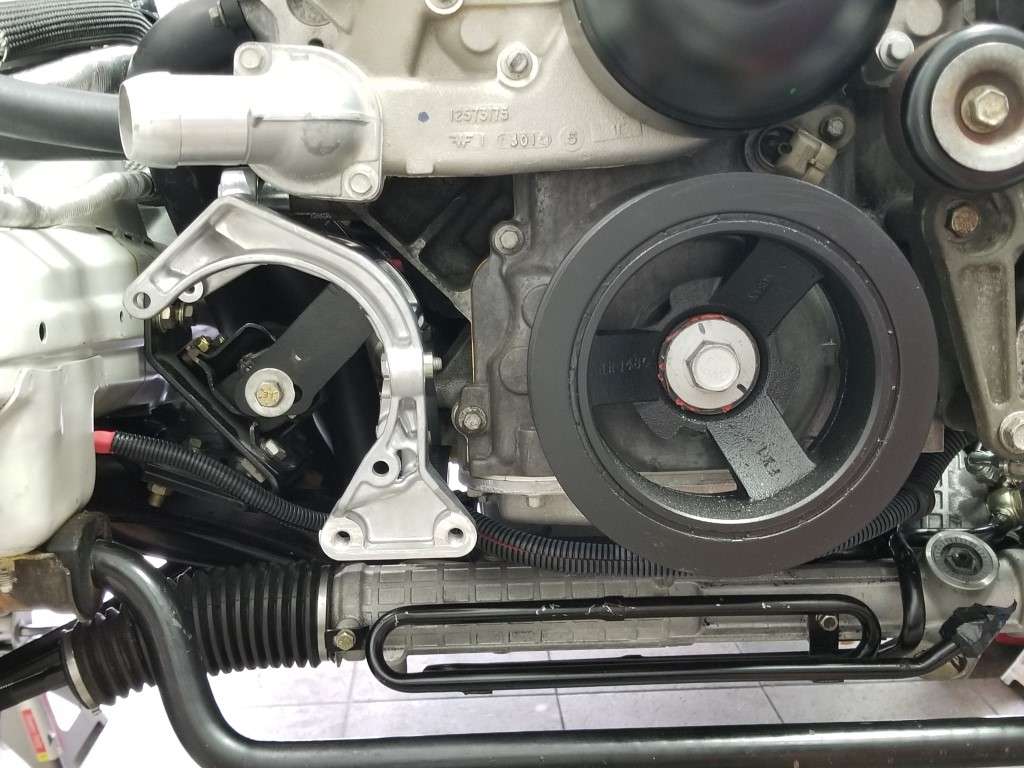
This will give you an idea as to what I'm talking about in reference to images...I took these three images of the Holley low-mount system on the G-body application as I am responsible for the design of the Hooker Blackheart LS swap systems and it's within the scope of my duties to determine which of the various Holley accessory drives, if any, are compatible with the various vehicle specific swap systems I develop. However, since I only give input to the design of the Holley accessory drive systems, and do not have any major involvement with their development, I do not take any generic or marketing-type photographs of those products.
Is this the 20-160, with GTO accessory spacing, in your 80s Monte SS fitment mule?
Thanks
I ordered the Holley kit (20-160). I really don't want to mess with a Chinese knockoff compressor.
It looks like the DD setup is a bit tighter to the engine, so I considered buying the DD bracket without the compressor and buying a USA made Sanden separately. But I've read a couple of random comments which raised concern over possible belt alignment issues with the DD.
While, I would like every extra millimeter of frame rail clearance available, I don't want to risk belt alignment issues. So I traded a bit of clearance for perceived quality.
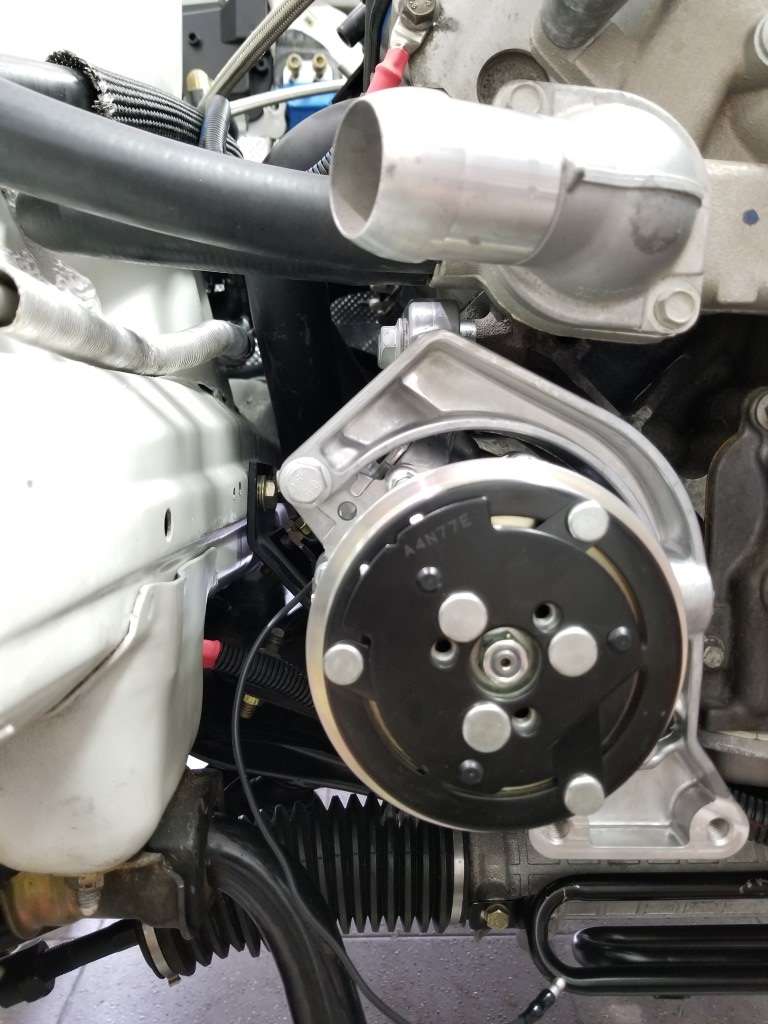
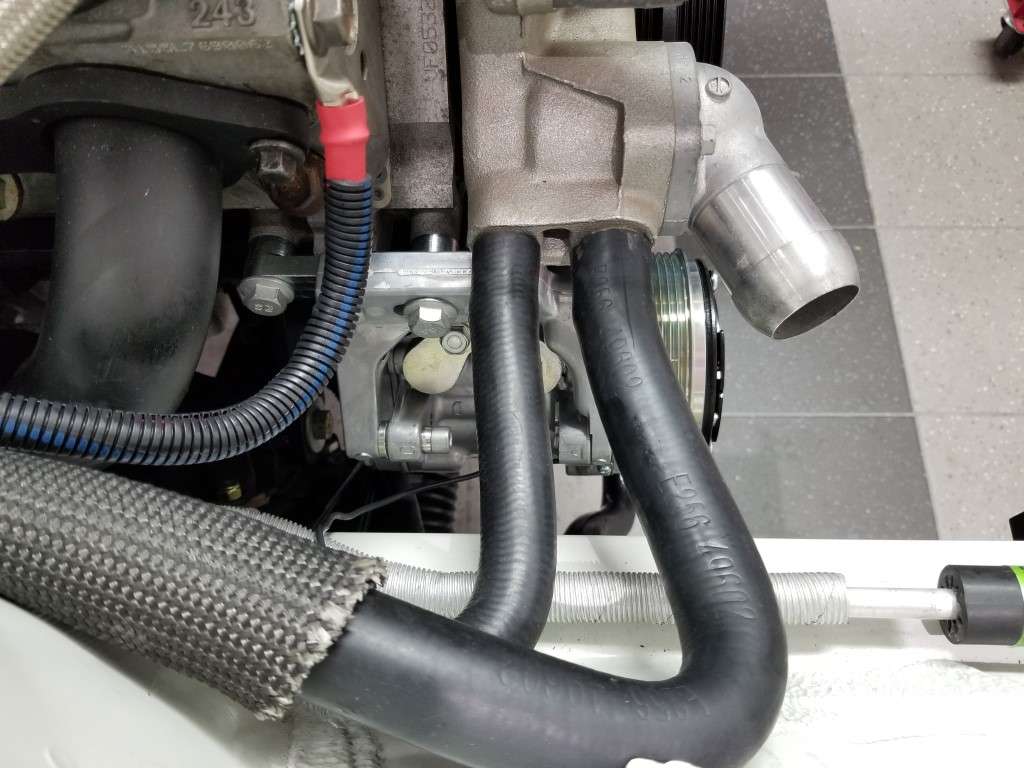
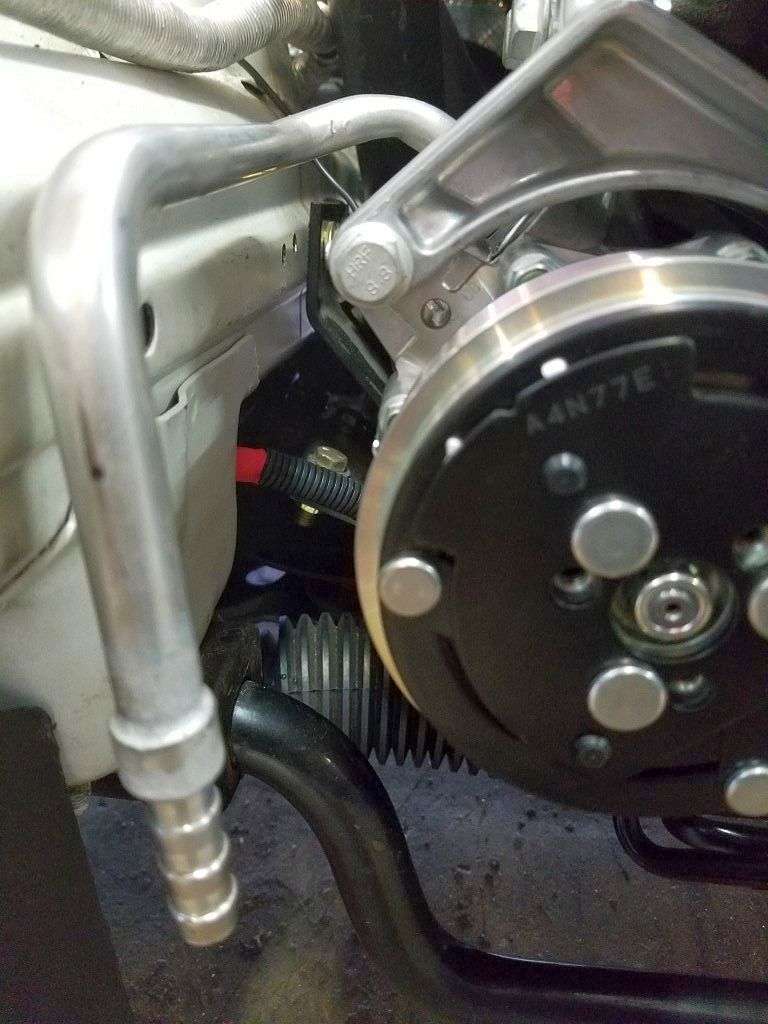
The Sanden SD7B10 is considerably more compact than the factory GM compressor. Routing the lines will definitely be a lot easier with this setup. Unfortunately, the rear compressor port is for the line that has to come forward to the condenser and the front port is for the line that has to route back toward the firewall to the evaporator, but that's a minor inconvenience compared to the previous setup.
Here are some pics of the bracket and the compressor:
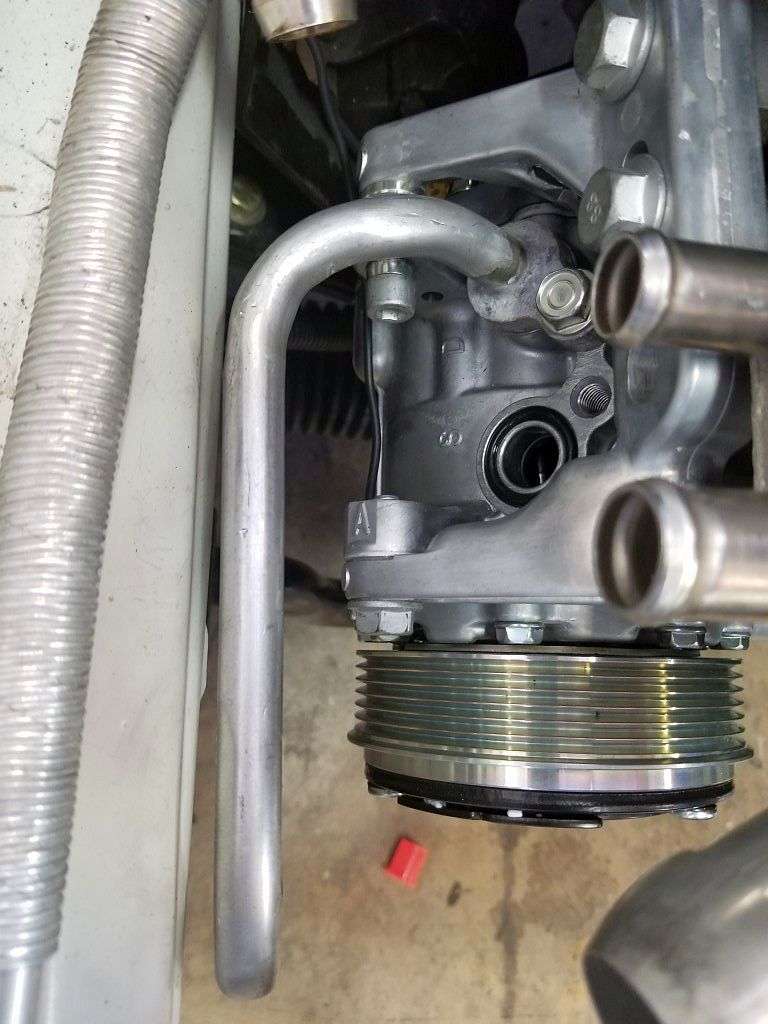
Holley Cast Aluminum Bracket Kit 20-160
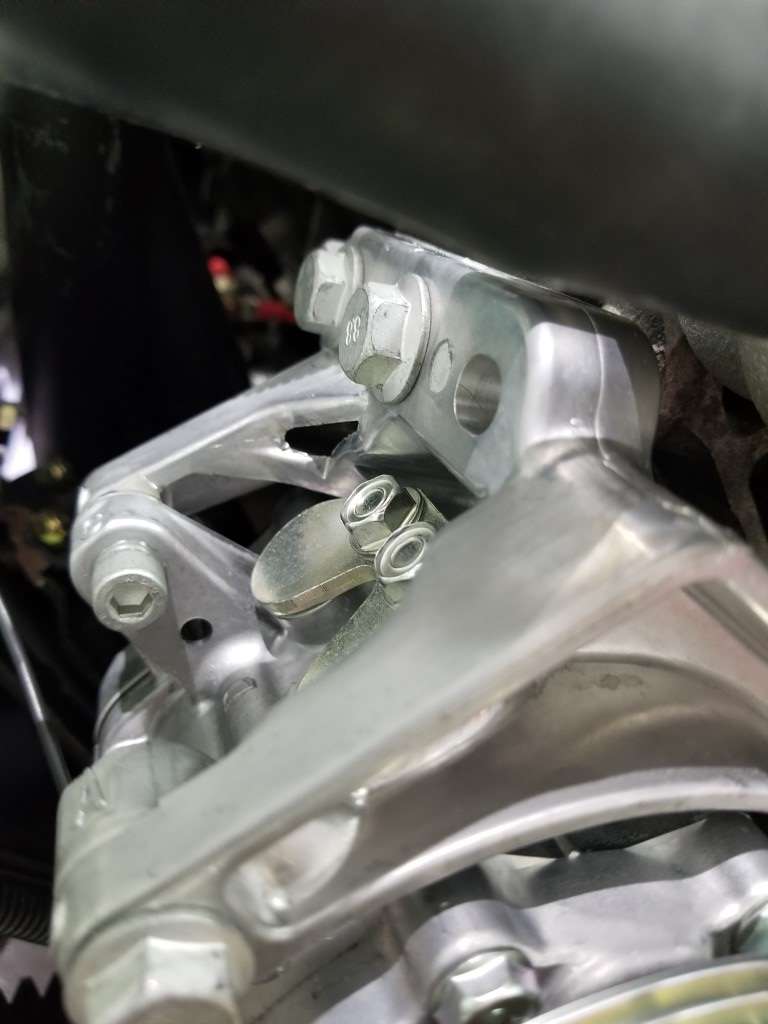
Way more room between the compressor and the frame rail than with the GM compressor
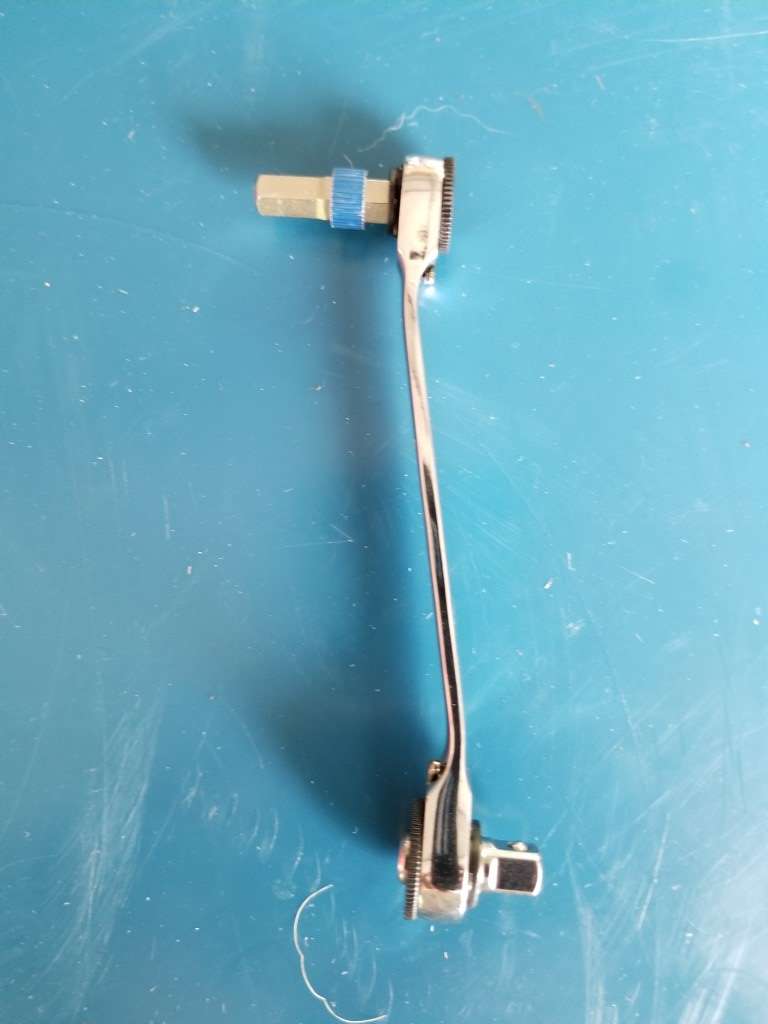
This tool with a 6mm Allen bit makes tightening the rear cap-head bolts on the compressor much easier
I brought the car to the hose shop and had the lines made. The smaller SD7B10 compressor was definitely the way to go. The stock F-body compressor was theoretically usable, but it would have a been much more difficult to deal with the rear mounted lines.
To fit the GM pressure senor, the BMW Schrader valve was removed and an adapter was used to fit the M10 x 1.25 fitting.
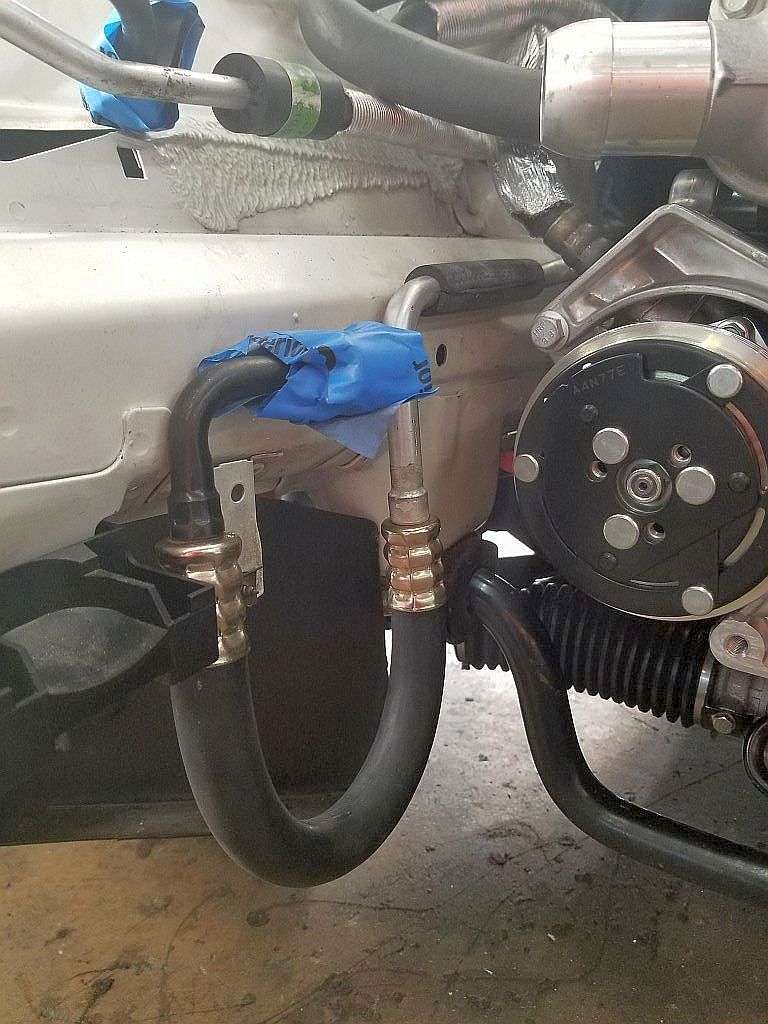
I took the following two pics while he was in the middle of making the line from the compressor to the condenser.
Here's the completed compressor to condenser line. The condenser was temporarily installed while he was working on this.
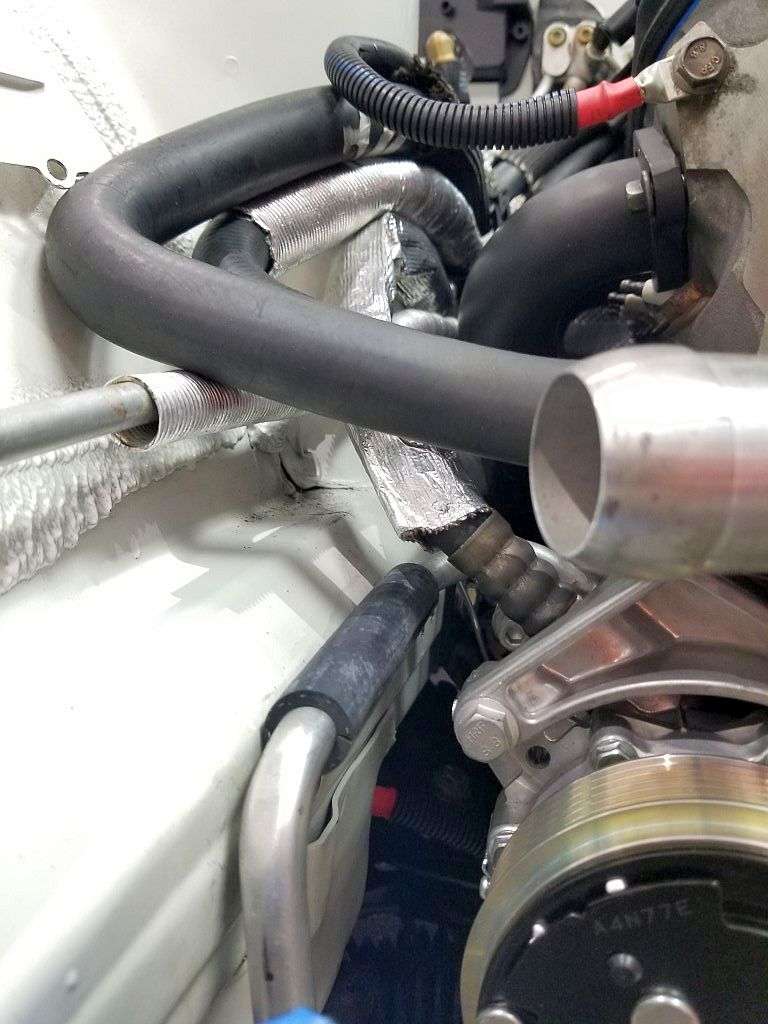
It's hard to get a good pic but here are the high and low pressure lines running aft to the evaporator, with the heater hoses above them.
We have swapped to the reduced diameter hose and fittings. MUCH easier to route, easy to clock, mark, snap the retainer harness on, Crimp the rings, done. Need to change? NP, you don't lose a fittng or hose, as the rings are cut, and the fitting is moved, changed, etc.
Ya, more $, but no running to get hoses crimped.....


 10-10-2018, 02:10 PM