When you click on links to various merchants on this site and make a purchase, this can result in this site earning a commission. Affiliate programs and affiliations include, but are not limited to, the eBay Partner Network.
After test fitting the engine again to get a better idea of what I needed to do, I just removed the complete right front rail/inner fender assembly to have better access to work on the firewall. I figured it would be coming out at some point anyway, and with the jig under the car it's pretty easy to put it back in and line things back up when needed.
With what I'm trying to do, I figured dissecting the firewall down and working the individual parts, then putting it back together in the car was the way to tackle it.
I have been watching you on the mgb site. You do awesome work. Where did you learn this skill, are you a body man. Anyways I'm one of the others on the site with a LS powered 1974 mgb roadster and you can't wipe the smile off my face when I'm behind the wheel. Good luck with your build and i will be watching. I got rid of the computer and efi and went with a carb and coil pack covers
Last edited by billymgb1000; 03-09-2019 at 03:41 PM.
Reason: Forgot something
Well, I grew up around circle track racing and an auto repair/body shop. For the last 25 yrs I've worked as a welder/ fabricator building grain elevators, conveyors, bell towers, handrails, and just about anything else large and small that will fit through the door as long as it was made out of metal. Then I started my own shop on the side repairing and restoring British cars ( which is now almost full time and the welding is part time)
While my sense of adventure isn't quite what it used to be, I've been wanting to do this one too long to not do it, or to take the easy road on it, ( I would just end up regretting not doing the hard bits) so.... I guess, enjoy my punishment of myself 😁 And thank you for the kind words about the workmanship, I'm trying to keep myself from rushing it and keep the quality up.
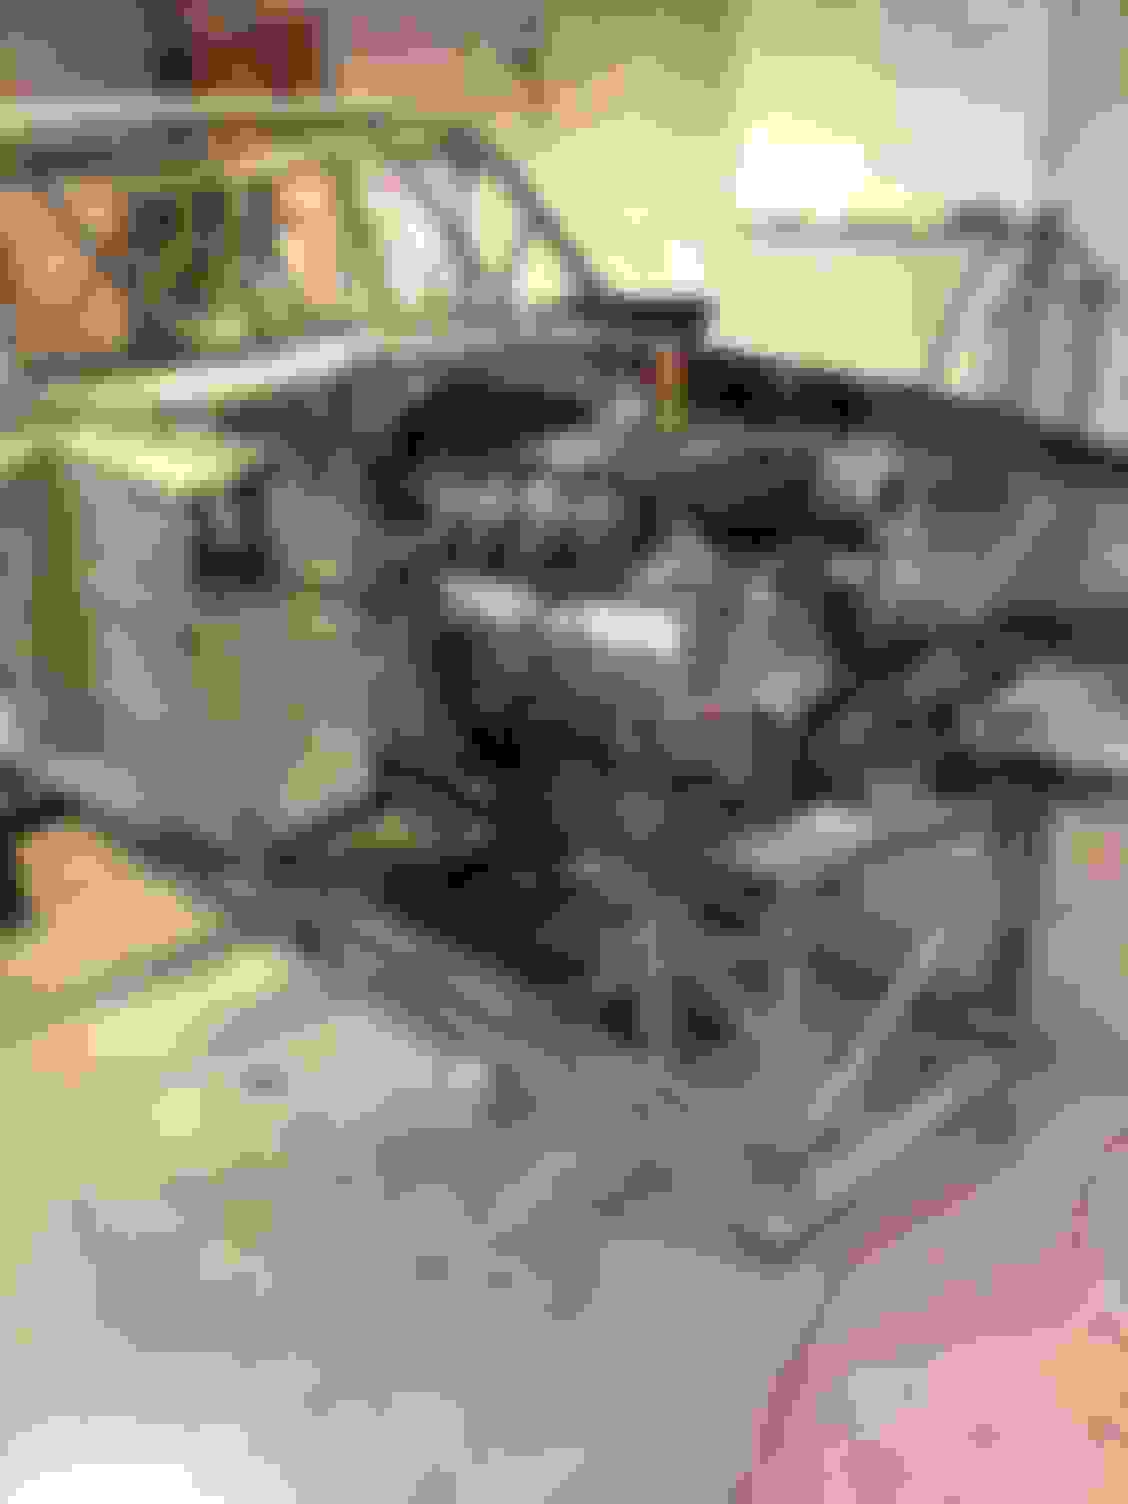
After pondering final engine placement, I figured I wanted to move the engine back as far as I could while retaining the heater and the wipers (keeping those is so much a part of keeping it looking factory plausible I won't compromise and remove them) I dissected the top of the firewall into three sections and starter by moving the center back as far as I could while still being able fit the wiper wheel boxes in... which was a whopping 1/2 inch.
I took the lower center section, split it in half, widened it a little bit, and flared it out some at the front for bell housing clearance. Here's the new one next to the old one ( the extra holes are for in dash fresh air vents that the 72' on cars have, mine being a 71' didn't originally have them).
While my sense of adventure isn't quite what it used to be, I've been wanting to do this one too long to not do it, or to take the easy road on it, ( I would just end up regretting not doing the hard bits) so.... I guess, enjoy my punishment of myself 😁 And thank you for the kind words about the workmanship, I'm trying to keep myself from rushing it and keep the quality up.
Seems to be working so far...
Originally Posted by mgbgts
After pondering final engine placement, I figured I wanted to move the engine back as far as I could while retaining the heater and the wipers (keeping those is so much a part of keeping it looking factory plausible I won't compromise and remove them)
Gotta give you lots of credit for 'doing it right'. Looking forward to seeing the finished product!!
I took the lower center section, split it in half, widened it a little bit, and flared it out some at the front for bell housing clearance. Here's the new one next to the old one ( the extra holes are for in dash fresh air vents that the 72' on cars have, mine being a 71' didn't originally have them).
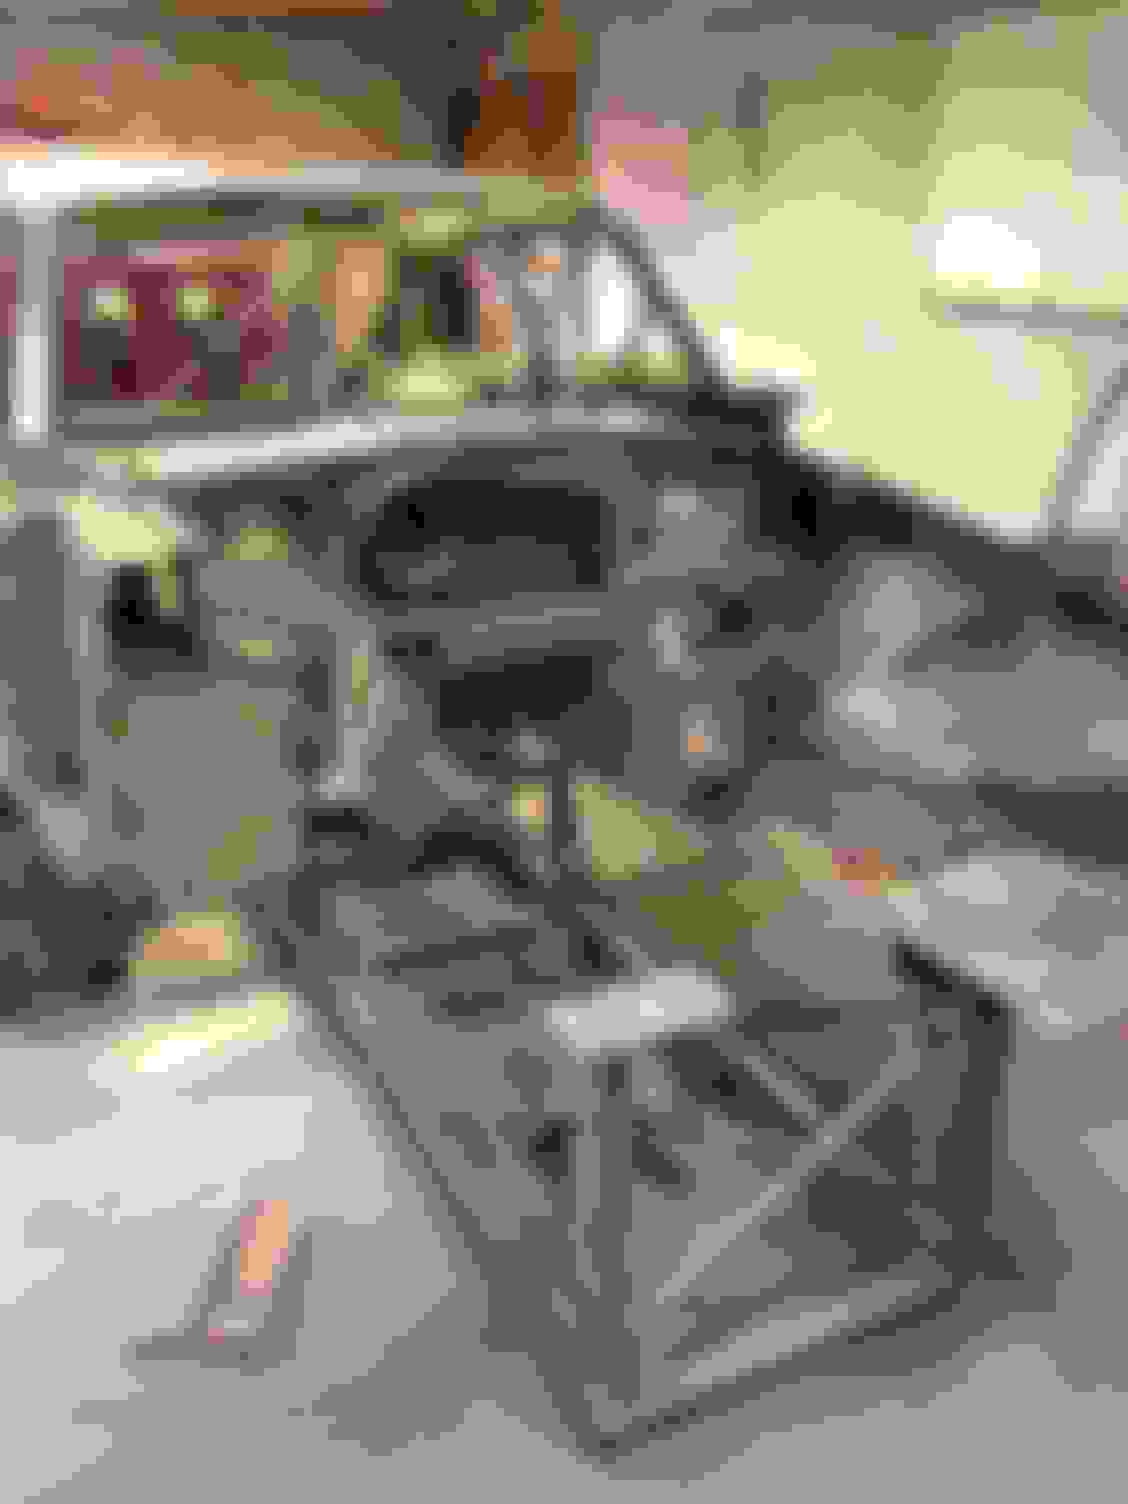
After taking the engine in and out several times and adjusting the shape in several areas I'm much happier with where it's sitting now. I made clearance around the transmission and was able to get the engine a little further back.
I modified the radio console section of the transmission tunnel to fit up to the front section ( from parts car) and will use the extra length behind the console brace to fill in the gap I created when I moved the tunnel back 2" in the car to mate up with the new shifter position.
As others have said, the metal working you're putting on display is pretty amazing. I'm particularly impressed by your ability to dissect these various parts of the car and visualize how to put them back together to get the additional space you want/need while enabling you to make the finished product look "factory". Definitely look forward to watching this develop!
Thanks for the kind words. I do spend a lot of time thinking/planning each step of the way and trying to think a couple steps ahead to get that "factory " look and prevent a lot of reworking of any previous work done( I hate cutting out something I've already made once).
I had to make a new heater shelf from scratch, as the old one obviously isn't going to come even close to fitting up to the previously modified parts or clear the bell housing. The notch in the middle is for clearance around the top bell housing bolt.
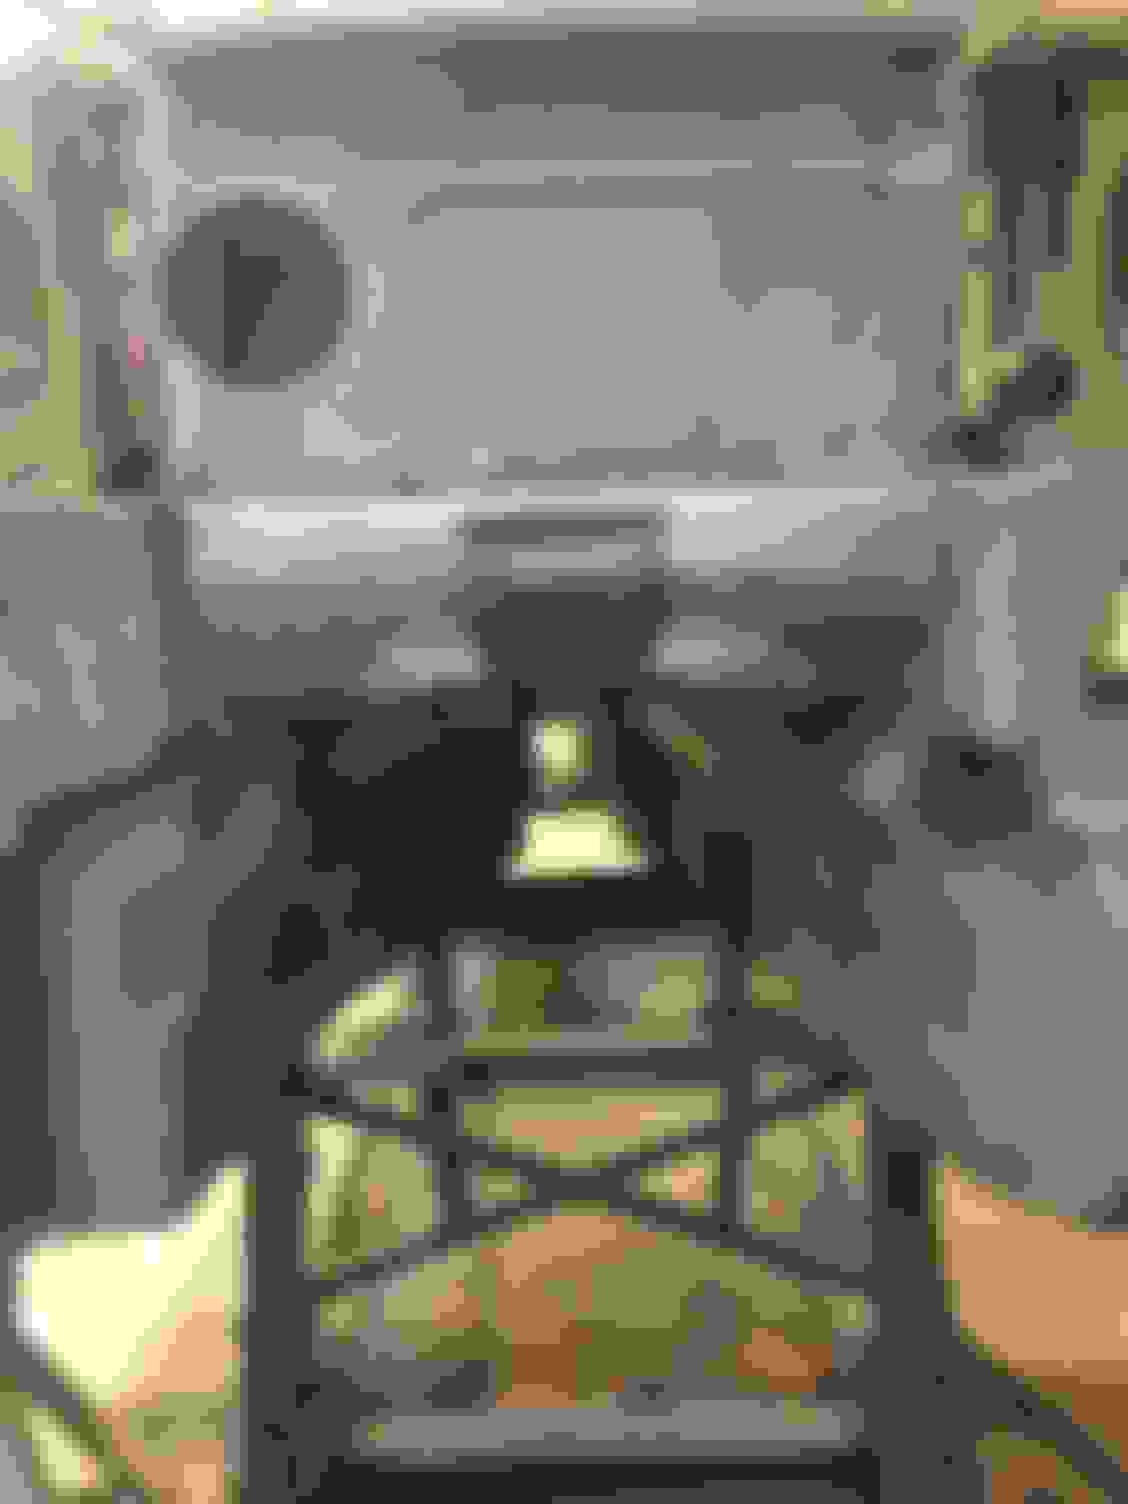
It doesn't look drastically different. And that's the point, I guess. Once it's in the car, all but some MG enthusiasts will probably never have any idea how much work this was. lol


 03-07-2019, 12:35 PM