
Taking the plunge: LS3 into '64 Tempest. Need help with shopping list.
 11-22-2008, 09:03 PM
#21
......needs to be done in preparation for the swap. The Tempest has been mothballed in my garage for over 6 years, sitting without an engine or trans. The old 2-1/2" exhaust system had nothing holding up the front end, so eventually the over-stressed muffler hanger rubber straps gave way and let the front end of the system hang down to the garage floor.
I'm replacing the exhaust system mainly to better handle the added power of the LS3, plus I have also always wanted to try out an X-pipe system. The old 2-1/2" pipe size would probably have been okay but the mufflers on this system can only handle about 380 HP unrestricted. Having 3" pipes to the 3" mufflers is a big plus for adding horsepower. The exhaust gasses will have cooled and contracted by the time they have left the mufflers so the 2-1/2" tailpipes will be more than up to the job.
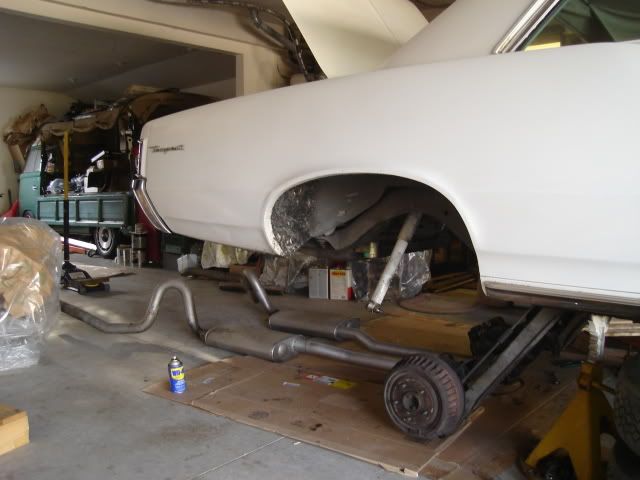
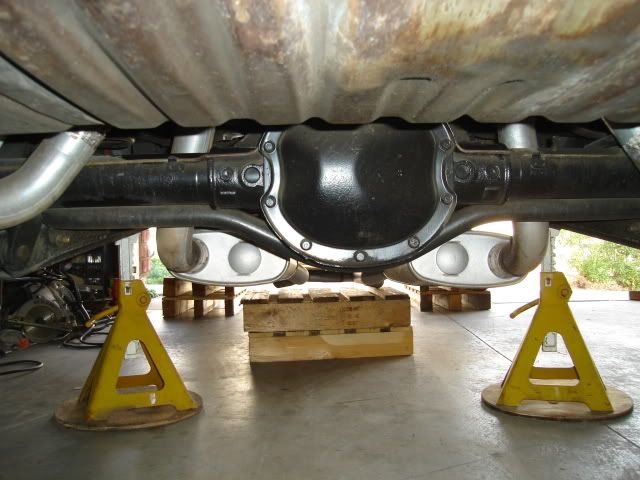
I put the car up on wood pallets up front (tires blocked on the pallets) and jack stands under the frame in the rear so I could drop the rear end down far enough to slip the old exhaust system out the rear. All of the exhaust, chassis and fuel line work will be done in a similar fashion. I really have nothing other than a good floor jack to use to get the car up in the air, there's no 4-post lift in my garage.
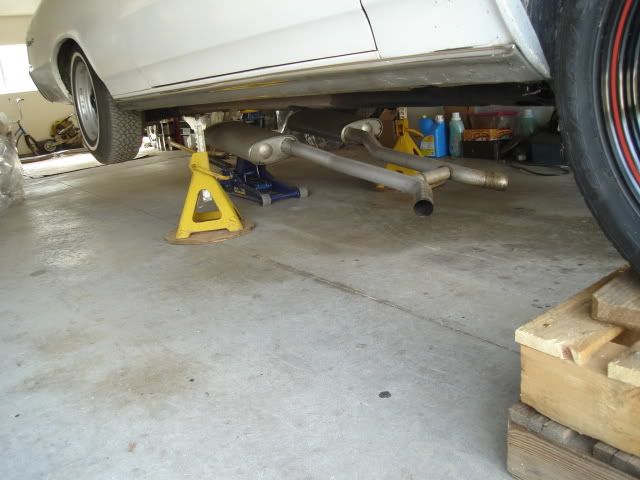
Old exhaust system is now removed, I just barely had enough clearance to manuever it out.
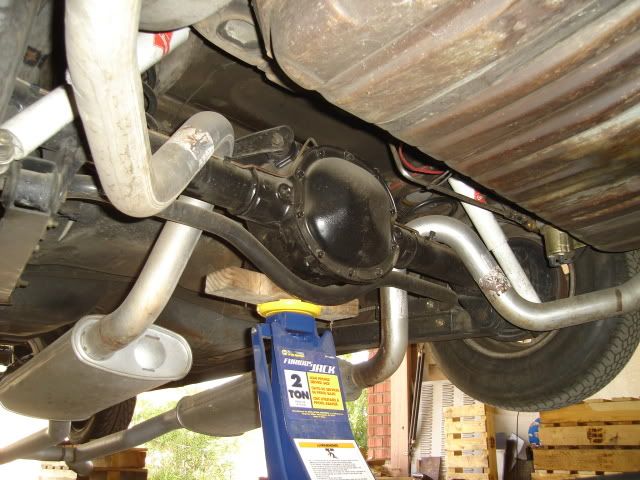
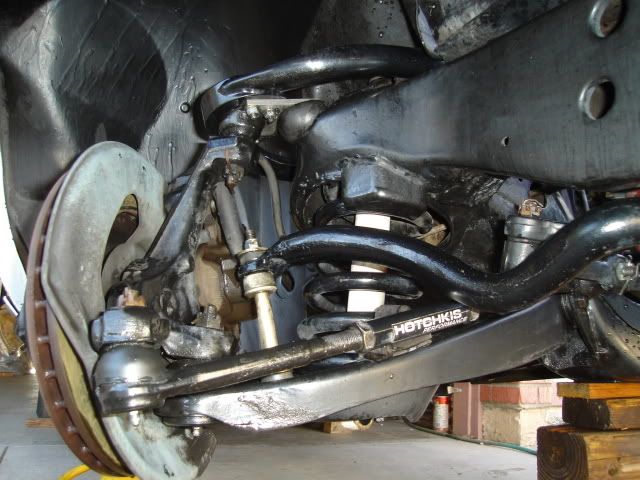
One of suspension features on this 'Poor-Touring' car, a 1-3/8" sway bar that rests on top of the owner-boxed rear lower control arms with poly bushings. I bought this sway bar after being told it was for an A-body, but I ended up finding a way to make the 'mystery bar' work by fabbing up some brackets. Note the stock rear drum brakes, a shining example of 'Poor-Touring' at it's very best.
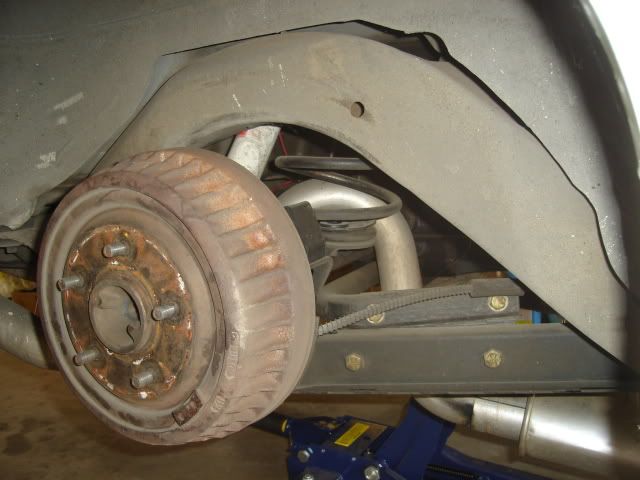
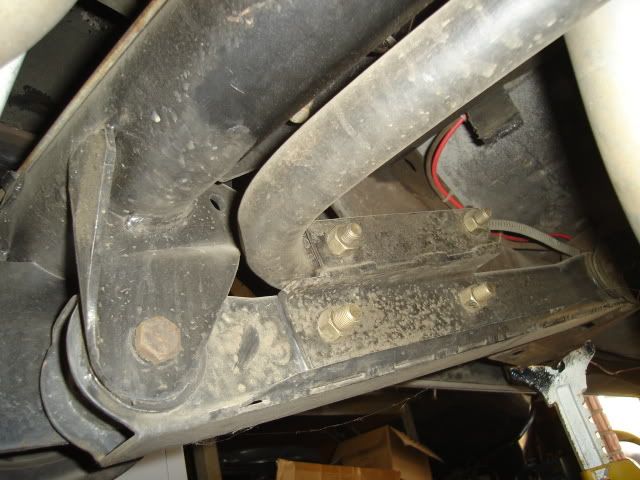
The bar tucks up nicely, fits like a glove.
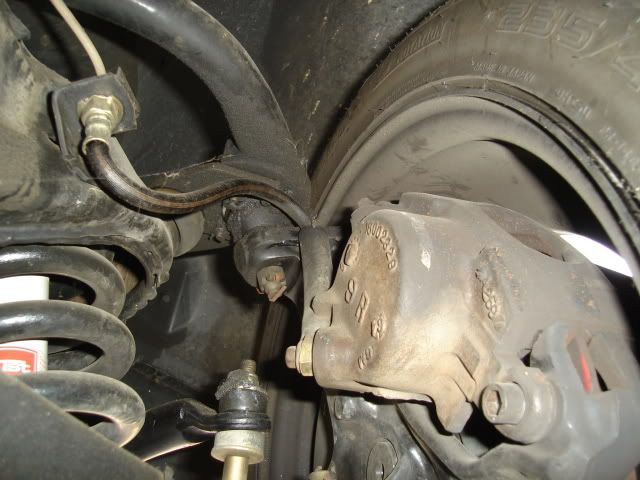
The lower control arms have poly busings that I modified to be greaseable, reinforcing plates have been welded in place next to the bushings. A set of 1978 B-body spindles with 12" discs and Hotchkis tie rod adjusters are used. The KYB gas shocks seem to work okay, hopefully to be replaced soon with a set of KONI shocks.
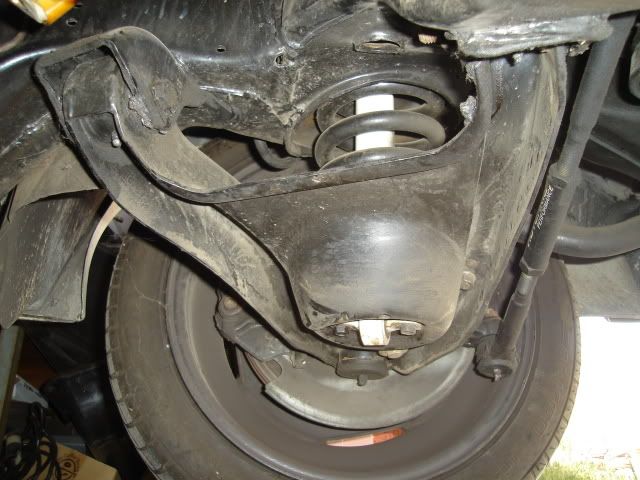
A pair of Hotchkis upper control arms make the B-body spindles work and a set of high-rate H-O Racing front springs help it handle. The suspension and undercarriage along with the engine compartment will have an all-day appointment with some dish soap and an old car wash mitt soon.
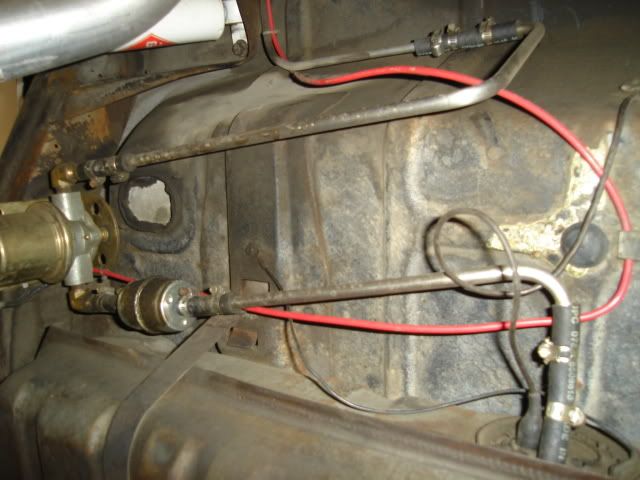
A shot of the old fuel delivery system that somehow managed to feed the mild 455 through the stock 5/16" fuel line. The Carter 4070 4-6 psi electric pump kept up okay, however the tank really needed to be at least half-full all of the time. I'm sure that the 3 Tri-Power float bowls to keep fuel in reserve and the tall 2.56 gears helped it all work. All of this was removed today while I was under there doing my thing.
Moving forward.
I'm replacing the exhaust system mainly to better handle the added power of the LS3, plus I have also always wanted to try out an X-pipe system. The old 2-1/2" pipe size would probably have been okay but the mufflers on this system can only handle about 380 HP unrestricted. Having 3" pipes to the 3" mufflers is a big plus for adding horsepower. The exhaust gasses will have cooled and contracted by the time they have left the mufflers so the 2-1/2" tailpipes will be more than up to the job.
I put the car up on wood pallets up front (tires blocked on the pallets) and jack stands under the frame in the rear so I could drop the rear end down far enough to slip the old exhaust system out the rear. All of the exhaust, chassis and fuel line work will be done in a similar fashion. I really have nothing other than a good floor jack to use to get the car up in the air, there's no 4-post lift in my garage.
Old exhaust system is now removed, I just barely had enough clearance to manuever it out.
One of suspension features on this 'Poor-Touring' car, a 1-3/8" sway bar that rests on top of the owner-boxed rear lower control arms with poly bushings. I bought this sway bar after being told it was for an A-body, but I ended up finding a way to make the 'mystery bar' work by fabbing up some brackets. Note the stock rear drum brakes, a shining example of 'Poor-Touring' at it's very best.
The bar tucks up nicely, fits like a glove.
The lower control arms have poly busings that I modified to be greaseable, reinforcing plates have been welded in place next to the bushings. A set of 1978 B-body spindles with 12" discs and Hotchkis tie rod adjusters are used. The KYB gas shocks seem to work okay, hopefully to be replaced soon with a set of KONI shocks.
A pair of Hotchkis upper control arms make the B-body spindles work and a set of high-rate H-O Racing front springs help it handle. The suspension and undercarriage along with the engine compartment will have an all-day appointment with some dish soap and an old car wash mitt soon.
A shot of the old fuel delivery system that somehow managed to feed the mild 455 through the stock 5/16" fuel line. The Carter 4070 4-6 psi electric pump kept up okay, however the tank really needed to be at least half-full all of the time. I'm sure that the 3 Tri-Power float bowls to keep fuel in reserve and the tall 2.56 gears helped it all work. All of this was removed today while I was under there doing my thing.
Moving forward.
 11-28-2008, 09:03 PM
#22
Budget?
What's that?
I have decided to replace the '66 3.36 posi 8.2" 10-bolt Pontiac A-body narrow rear end with a much stronger '71 -'72 3.42 posi 8.5" Olds/Buick A-body (tapered bearing bolt-in axle) wide rear end. The strength of the GM corporate 8.5" rear rivals that of the Chevy 12-bolt, as an added plus the tapered bearing 28-spline bolt-in axles are best for hard cornering and overall durability.
I had been hesitating to replace the early narrow 8.2" rear end with a later wide 8.5" rear end (1" wider overall, 1/2" per side) mainly because of the way my steel 17X8s were built, they won't fit in the rear with 4-1/2" of backspace and a wide rear end. Now that I have decided to go for a set of 18X9" wheels all around I can buy new wheels that will fit with a wider rear axle.
The 17X8" steelies and dog dish caps will soon find a new home on my '64 Lemans convertible.
After doing some measuring I see that I will have 7.25" from the wheel mounting surface on the rear drum to the frame rail/inner fender and 4.50" to the outer fender inner body panel, for a total of 11.75" of room from side to side for a wheel/tire assembly.
A 9" wide rim is 10" in overall width, once you add the width of the outer wheel lips to the width of the 9" bead width of the rim. With the rim perfectly centered from side to side (looking from the rear) in the wheelwell, ideally I should have .875" of body/frame clearance on both sides of it (11.75" - 10" = 1.750", divided by 2 = .875").
After doing some internet research I have found a 18X9" wheel spec'd for a 2008 BMW Z4, the 5 on 120 mm bolt pattern is plenty close enough to the GM 5 on 4.75 to work (120.65 mm). I'm not first guy to use the 120mm bolt circle BMW wheels on a GM car.
I need a 9" wheel with close to 6.5" of backspace to center the wheel from side to side, the wheels I found have a 40mm offset which is the same as 6.57" of backspace. A tad toward the inside, but still very good.
After I upgrade to rear disc brakes on the car the rear wheel will move outward by about .125", moving the wheel pretty cloe to the exact amount I want to center it even better. I should end up with something like .805" between the inner wheel lip and the frame/inner fender panel, pretty close to perfect.
I can use this same wheel up front with a 1.25" thick billet aluminum wheel adapter, I have room to go inward by about 1" but almost no room to go outward. Using the 1.25" adapter effectively changes the 6.57" wheel backspacing to 5.32", moving the outer face of the front wheel lip outward by about .180" (less than 3/16") from where it is right now with the current 17X8" 4.5" backspace wheels.
I will run the same size tires front and rear, 245/40-18, 25.7" tall. This size tire will have very close to a 10" section width (sidewall to sidewall) mounted on a 9" rim, it is spec'd at 9.8" when mounted on an 8.5" wide rim.
I can rotate the tires from front to back by running the same size front and rear, plus I happen to like that look. There's still plenty of room to go up in size to a 275/40-18 that's 26.6" tall in the rear later on too if I change my mind.
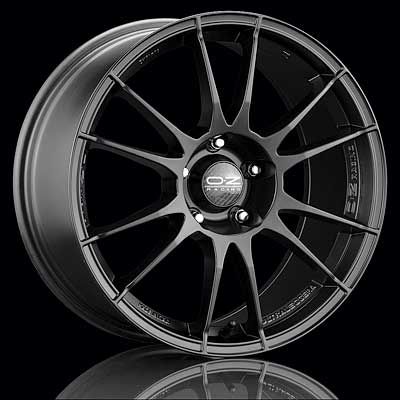
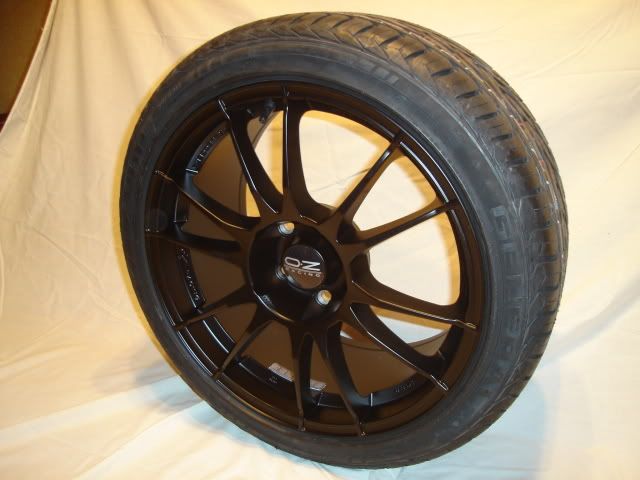
My wheel choice, 18X9" O.Z Racing Ultraleggera, black painted of course.
40 mm offset/6.57" backspace, weighing only 20.8 pounds.

Spent some time today while it is still unseasonably warm out to get wet and dirty cleaning up the front suspension and engine compartment a bit. The front end cleaned up pretty nice.
The frame from the firewall forward, front suspension and inner wheelwells are coated with semi-gloss black POR-15. Note the junkyard 12" B-body rotors that have been redrilled from the 5 on 5" GM big car pattern to the 5 on 4.75" GM intermediate pattern.

Moving forward.
What's that?
I have decided to replace the '66 3.36 posi 8.2" 10-bolt Pontiac A-body narrow rear end with a much stronger '71 -'72 3.42 posi 8.5" Olds/Buick A-body (tapered bearing bolt-in axle) wide rear end. The strength of the GM corporate 8.5" rear rivals that of the Chevy 12-bolt, as an added plus the tapered bearing 28-spline bolt-in axles are best for hard cornering and overall durability.
I had been hesitating to replace the early narrow 8.2" rear end with a later wide 8.5" rear end (1" wider overall, 1/2" per side) mainly because of the way my steel 17X8s were built, they won't fit in the rear with 4-1/2" of backspace and a wide rear end. Now that I have decided to go for a set of 18X9" wheels all around I can buy new wheels that will fit with a wider rear axle.
The 17X8" steelies and dog dish caps will soon find a new home on my '64 Lemans convertible.
After doing some measuring I see that I will have 7.25" from the wheel mounting surface on the rear drum to the frame rail/inner fender and 4.50" to the outer fender inner body panel, for a total of 11.75" of room from side to side for a wheel/tire assembly.
A 9" wide rim is 10" in overall width, once you add the width of the outer wheel lips to the width of the 9" bead width of the rim. With the rim perfectly centered from side to side (looking from the rear) in the wheelwell, ideally I should have .875" of body/frame clearance on both sides of it (11.75" - 10" = 1.750", divided by 2 = .875").
After doing some internet research I have found a 18X9" wheel spec'd for a 2008 BMW Z4, the 5 on 120 mm bolt pattern is plenty close enough to the GM 5 on 4.75 to work (120.65 mm). I'm not first guy to use the 120mm bolt circle BMW wheels on a GM car.
I need a 9" wheel with close to 6.5" of backspace to center the wheel from side to side, the wheels I found have a 40mm offset which is the same as 6.57" of backspace. A tad toward the inside, but still very good.
After I upgrade to rear disc brakes on the car the rear wheel will move outward by about .125", moving the wheel pretty cloe to the exact amount I want to center it even better. I should end up with something like .805" between the inner wheel lip and the frame/inner fender panel, pretty close to perfect.
I can use this same wheel up front with a 1.25" thick billet aluminum wheel adapter, I have room to go inward by about 1" but almost no room to go outward. Using the 1.25" adapter effectively changes the 6.57" wheel backspacing to 5.32", moving the outer face of the front wheel lip outward by about .180" (less than 3/16") from where it is right now with the current 17X8" 4.5" backspace wheels.
I will run the same size tires front and rear, 245/40-18, 25.7" tall. This size tire will have very close to a 10" section width (sidewall to sidewall) mounted on a 9" rim, it is spec'd at 9.8" when mounted on an 8.5" wide rim.
I can rotate the tires from front to back by running the same size front and rear, plus I happen to like that look. There's still plenty of room to go up in size to a 275/40-18 that's 26.6" tall in the rear later on too if I change my mind.
My wheel choice, 18X9" O.Z Racing Ultraleggera, black painted of course.
40 mm offset/6.57" backspace, weighing only 20.8 pounds.
Spent some time today while it is still unseasonably warm out to get wet and dirty cleaning up the front suspension and engine compartment a bit. The front end cleaned up pretty nice.
The frame from the firewall forward, front suspension and inner wheelwells are coated with semi-gloss black POR-15. Note the junkyard 12" B-body rotors that have been redrilled from the 5 on 5" GM big car pattern to the 5 on 4.75" GM intermediate pattern.
Moving forward.
11-29-2008, 03:00 PM
#23
Awesome car man. I love those early A bodies, I have wanted one forever. It looks like your doing a really clean build, I like how you are trying to remain somewhat stock looking. I also love your pickup! I have a '68 and its great to see them out and about working! Good luck!
11-29-2008, 07:49 PM
#24
I decided to buy 245/40-18s and 275/40-18s since this thing could really use some tire to help handle the 450+ HP I'm expecting. Now that my wheels and tires are on order along with my front wheel adapters (27 mm/1.06") it's time again to do some more work to prep the body.
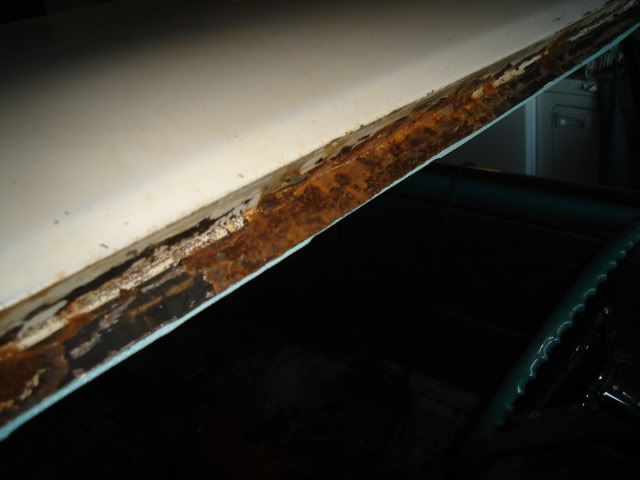
I removed the windshield so I could put a halt to the rust that was forming in the window channel, plus it had a crack that was slowly growing downward from the rear view mirror area.
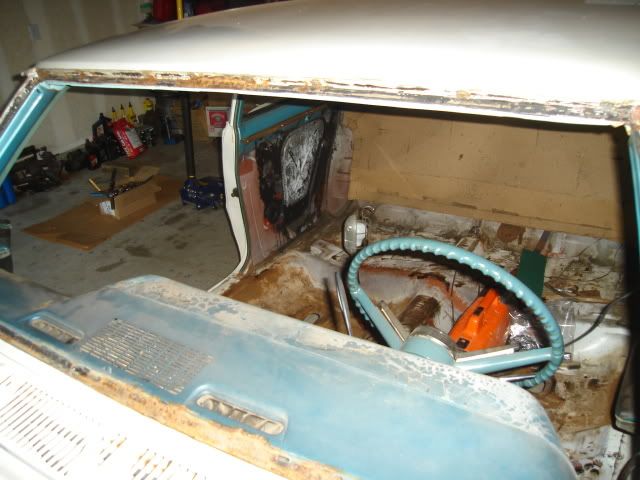
Other than a few lower windshield trim clips that were pretty much consumed by the rust I don't see any really bad spots.
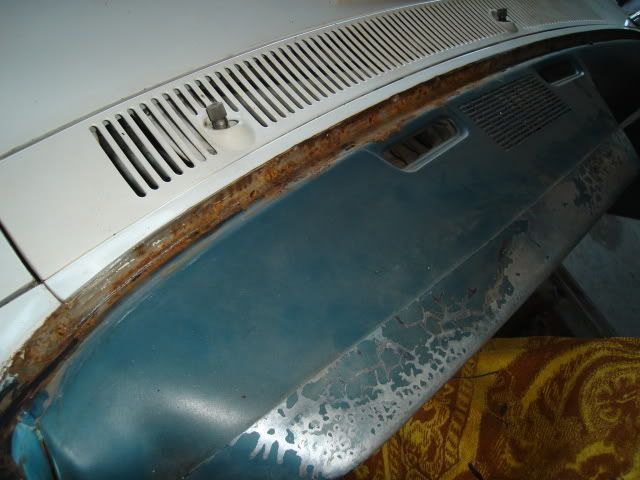
Some heavy pitting is present but no holes that I can see so far, after some more work with a wire brush it will soon be ready for the POR-15 treatment. For those of you who haven't tried POR-15, you'll soon see the near miracles this stuff can perform. At only $45 a quart it's an affordable solution for minor to moderate rust problems.
I removed the windshield so I could put a halt to the rust that was forming in the window channel, plus it had a crack that was slowly growing downward from the rear view mirror area.
Other than a few lower windshield trim clips that were pretty much consumed by the rust I don't see any really bad spots.
Some heavy pitting is present but no holes that I can see so far, after some more work with a wire brush it will soon be ready for the POR-15 treatment. For those of you who haven't tried POR-15, you'll soon see the near miracles this stuff can perform. At only $45 a quart it's an affordable solution for minor to moderate rust problems.
 11-30-2008, 08:14 PM
#26
TECH Enthusiast
iTrader: (1)

Join Date: Jan 2006
Location: Charlotte, NC
Posts: 581
Likes: 0
Received 0 Likes
on
0 Posts

make sure you scuff the surrounding paint.
I had an old project car where the por15 just peeled off the paint that was around the bare metal that I was working with.
I had an old project car where the por15 just peeled off the paint that was around the bare metal that I was working with.
11-30-2008, 09:11 PM
#27
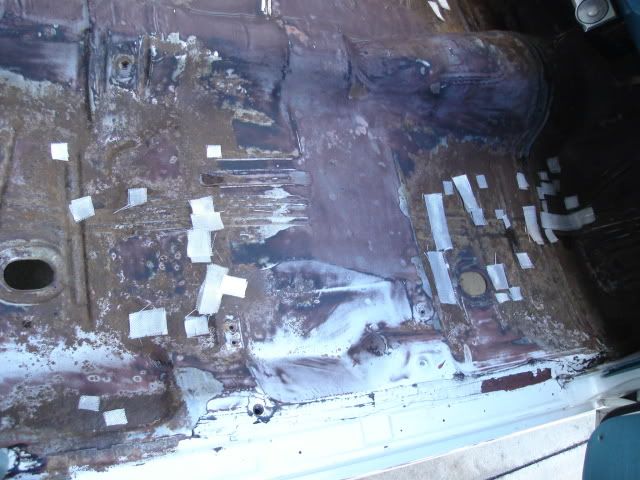
.....that will be fixed next weekend if all goes well. Today I scrubbed down the floorpans with some Simple Green followed up by some mineral spirits (paint thinner) in the areas where the old tar-based sound deadener left some black sticky residue.
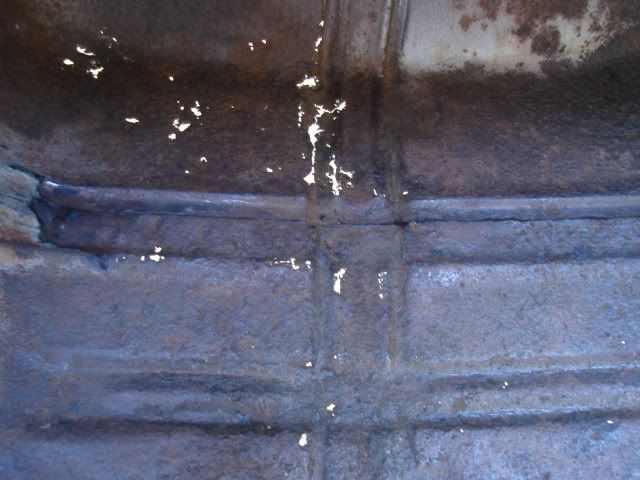
The driver's side footwell has a few holes. The hole next to the where the accelerator pedal goes is the biggest one on the entire floorpan. I will use a couple of layers of fiberglass cloth along with the high-fill silver POR-15 to patch it.
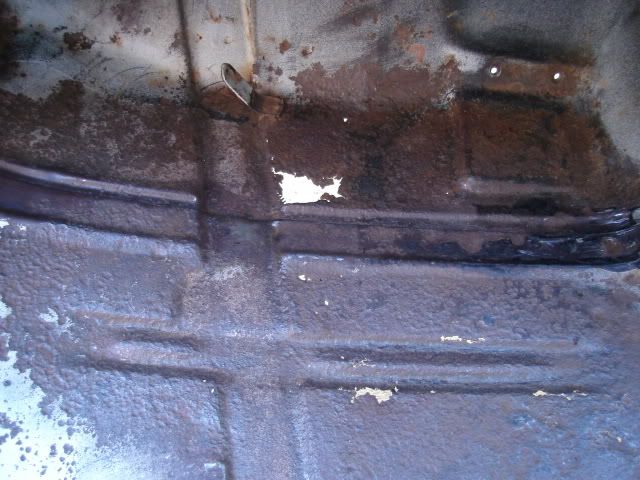
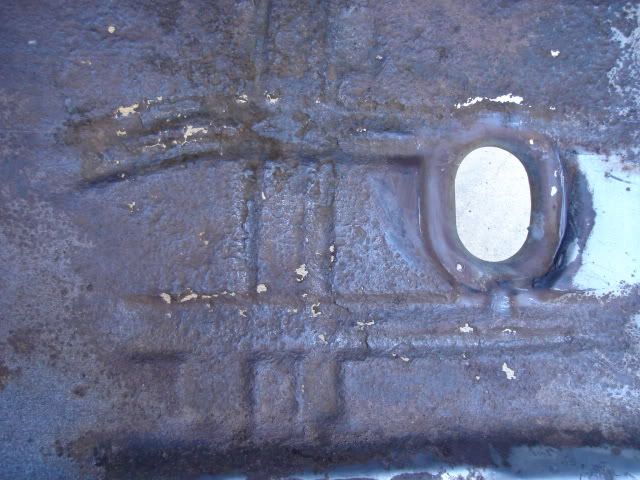
Passenger footwell, numerous holes there to patch with small pieces of fiberglass cloth.
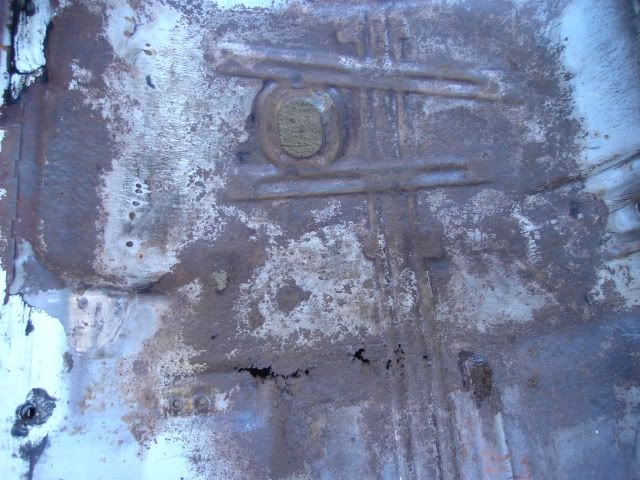
The front passenger floor has a lot of little holes, this side is in far worse shape than the driver's side.
Just behind the passenger seat above the body brace some more small patches are needed.
Overall it looks pretty good, actually in a lot better shape than I'd expected. There's no need to replace the floorpans on this little beauty.
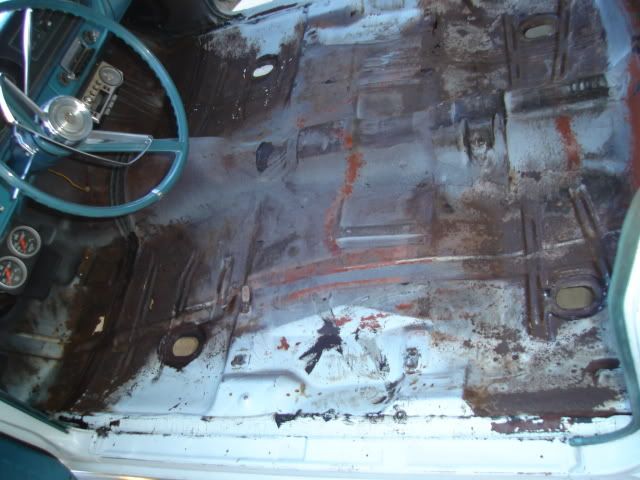
The rear seat area is in primo shape, just a little cleaning was all it needed.

I tried to make the most of the Thanksgiving 4-day weekend. The weather has been absolutely stunning lately with temps in the mid to low 80s, so I needed to take full advantage of it for getting as many wet and dirty jobs taken care of as possible.
Nest weekend I'll finish prepping the floors on Saturday using some Metal-Prep to etch the rusted areas, and get an early start on Sunday applying the POR-15 paint and fiberglass patches.
You really need to plan on having a full day to do the POR-15 application. The instructions point out that you must recoat after waiting 2 to 3 hours, otherwise you have to sand it all to make any more coats stick. The day gets eaten up pretty fast if you plan on doing 2 or 3 coats of the stuff.
Stayin' busy.
The driver's side footwell has a few holes. The hole next to the where the accelerator pedal goes is the biggest one on the entire floorpan. I will use a couple of layers of fiberglass cloth along with the high-fill silver POR-15 to patch it.
Passenger footwell, numerous holes there to patch with small pieces of fiberglass cloth.
The front passenger floor has a lot of little holes, this side is in far worse shape than the driver's side.
Just behind the passenger seat above the body brace some more small patches are needed.
Overall it looks pretty good, actually in a lot better shape than I'd expected. There's no need to replace the floorpans on this little beauty.
The rear seat area is in primo shape, just a little cleaning was all it needed.
I tried to make the most of the Thanksgiving 4-day weekend. The weather has been absolutely stunning lately with temps in the mid to low 80s, so I needed to take full advantage of it for getting as many wet and dirty jobs taken care of as possible.
Nest weekend I'll finish prepping the floors on Saturday using some Metal-Prep to etch the rusted areas, and get an early start on Sunday applying the POR-15 paint and fiberglass patches.
You really need to plan on having a full day to do the POR-15 application. The instructions point out that you must recoat after waiting 2 to 3 hours, otherwise you have to sand it all to make any more coats stick. The day gets eaten up pretty fast if you plan on doing 2 or 3 coats of the stuff.
Stayin' busy.
12-05-2008, 09:12 PM
#28
Today I ordered up a set of Corvette C6 Z51 330 mm (13") rear brakes with the internal drum parking brake, along with a set of Lokar E-brake cables and all of the FlexKORE� braided stainless brake lines I need. The salesman I spoke to (Tobin) at KORE3 was super-helpful and knew every single little detail about what he was selling.
I bought all OEM stuff, the only small upgrade was a set of ceramic brake pads. I figured that the stock Corvette brakes will be more than enough for my needs. The KORE3 website doesn't currently list the availability of a rear brake kit for a 10-bolt rear end with bolt-in axles, but I called them and found out they do have a kit for my '71 -'72 Olds/Buick 10-bolt rear. While I was on the phone I figured I'd order up my kit.
Haven't yet decided what to do up front yet for brakes, I'm still throwing around the idea of a set of ATS spindles and adjustable upper control arms.
12-06-2008, 12:43 AM
#29
.....were waiting for me in my driveway when I came home from work today.
They are finished in a very nice matte black paint, just a slight amount of gloss. Painted wheels are really easy to care for, just a quick going over with the wash mitt and you're done.
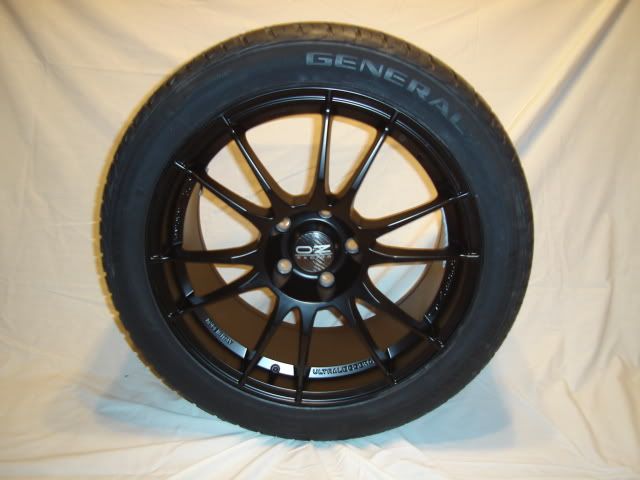
I really like the way the 12 spokes protrude just past the edge of the rim near the wheel center. The casting quality on these wheels is second to none in my opinion.
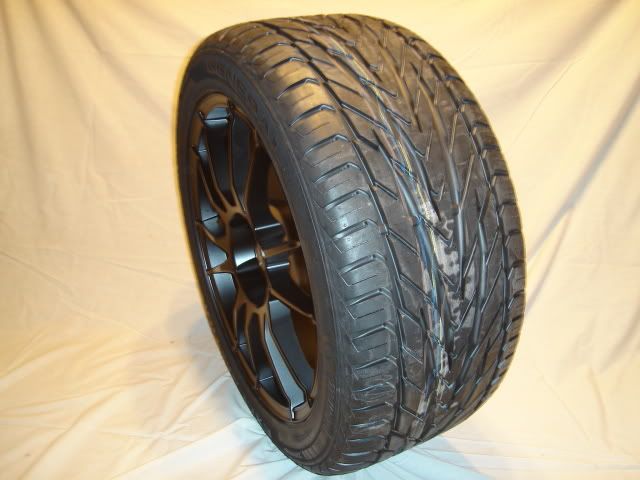
I bought a set of General Exclaim UHP tires, mainly because I could afford them. A very good tire for the price, I have set of them (225/40-18) on one of my daily drivers too and I've been quite happy with them.
245/40-18 for the front, same size as a C6 Corvette front tire.
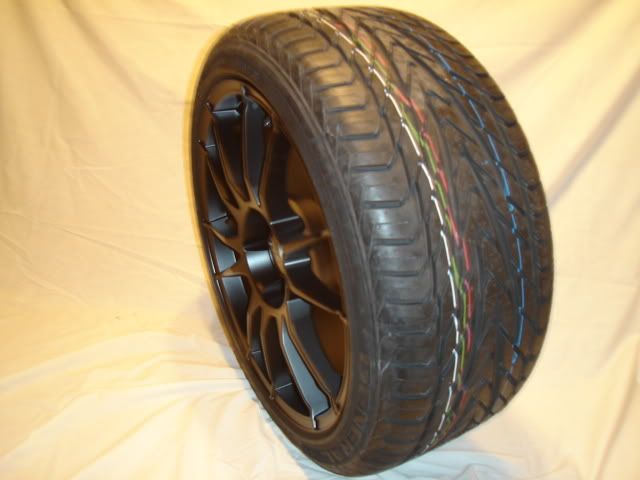
275/40-18 for the rear, plenty of tire for my needs. Not much smaller than the 285/35-19 used on the C6 and almost the same height.
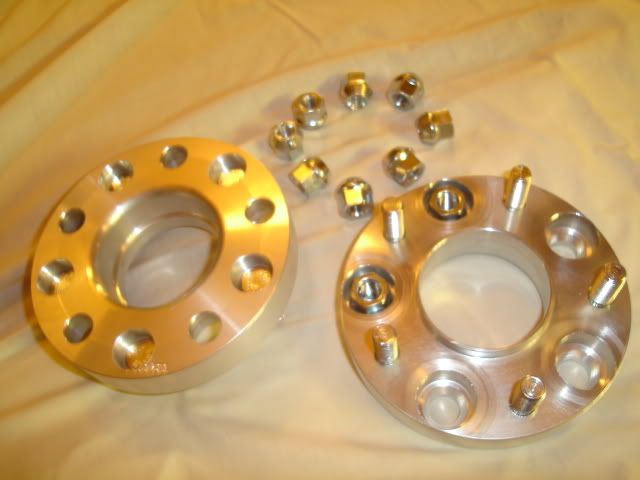
New front wheel adapters, 1.063" thick (27 mm). I had them made both hub-centric and wheel-centric. I'll need to put the front hubs on a lathe and slightly turn down the O.D. of the rough cast part closest to the dust cap, the I.D. of the wheel-centric lip on the adapter interferes by just a hair. A tapered-seat OEM 7/16-20 lugnut will attach them to the 12" B-body front hub/rotor, M12X1.5 is the stud thread size on these adapters.
These are definitely top-quality parts, I'll sleep just fine knowing these are on my car.
They are finished in a very nice matte black paint, just a slight amount of gloss. Painted wheels are really easy to care for, just a quick going over with the wash mitt and you're done.
I really like the way the 12 spokes protrude just past the edge of the rim near the wheel center. The casting quality on these wheels is second to none in my opinion.
I bought a set of General Exclaim UHP tires, mainly because I could afford them. A very good tire for the price, I have set of them (225/40-18) on one of my daily drivers too and I've been quite happy with them.
245/40-18 for the front, same size as a C6 Corvette front tire.
275/40-18 for the rear, plenty of tire for my needs. Not much smaller than the 285/35-19 used on the C6 and almost the same height.
New front wheel adapters, 1.063" thick (27 mm). I had them made both hub-centric and wheel-centric. I'll need to put the front hubs on a lathe and slightly turn down the O.D. of the rough cast part closest to the dust cap, the I.D. of the wheel-centric lip on the adapter interferes by just a hair. A tapered-seat OEM 7/16-20 lugnut will attach them to the 12" B-body front hub/rotor, M12X1.5 is the stud thread size on these adapters.
These are definitely top-quality parts, I'll sleep just fine knowing these are on my car.
12-06-2008, 06:59 AM
#30
12 Second Club
iTrader: (39)
Join Date: Jun 2006
Location: surry, va
Posts: 943
Likes: 0
Received 0 Likes
on
0 Posts
have you been to detroitseed.com yet? i just recently saw that they are developing parts for the abody. they have a nice 1965 malibu they are working on. they nice thing abouit detroit speed is the owners used work on the vette for gm. there stuff is not only researched well, but it actually fits.
im just getting started on my 65 malibu ss. im doing an ls/6spd to it. the car does`nt really need it, but im stipping it and doing it from the ground up. ive been watching your thread. im liking the details your giving. im going to see if core3 has a rear disc kit for the 12bolt. do you know of anyone else that might? your doing a great job, please keep it up, and keep us posted
im just getting started on my 65 malibu ss. im doing an ls/6spd to it. the car does`nt really need it, but im stipping it and doing it from the ground up. ive been watching your thread. im liking the details your giving. im going to see if core3 has a rear disc kit for the 12bolt. do you know of anyone else that might? your doing a great job, please keep it up, and keep us posted
12-06-2008, 03:54 PM
#32
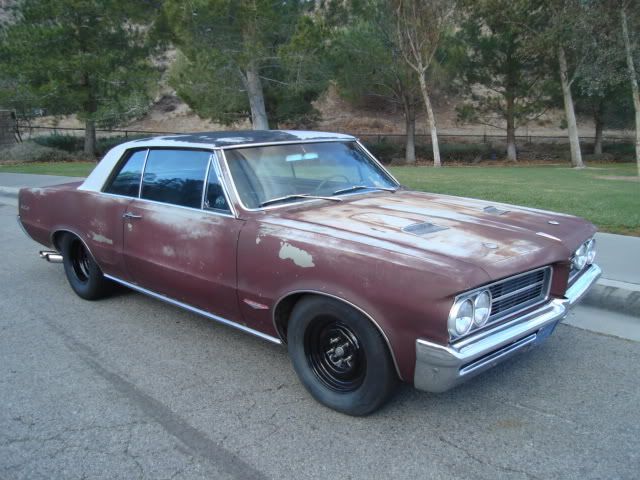
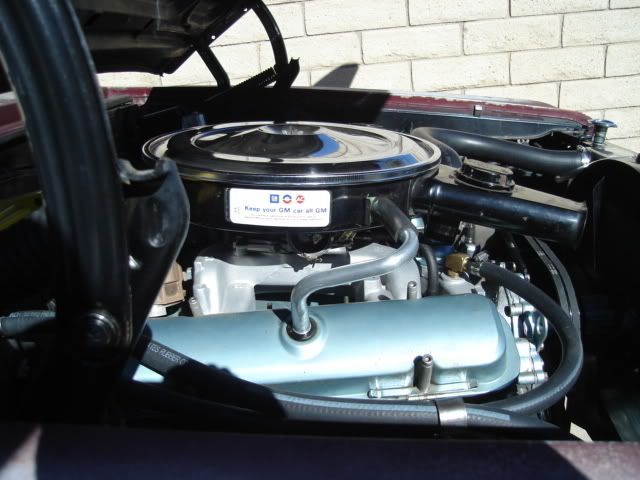
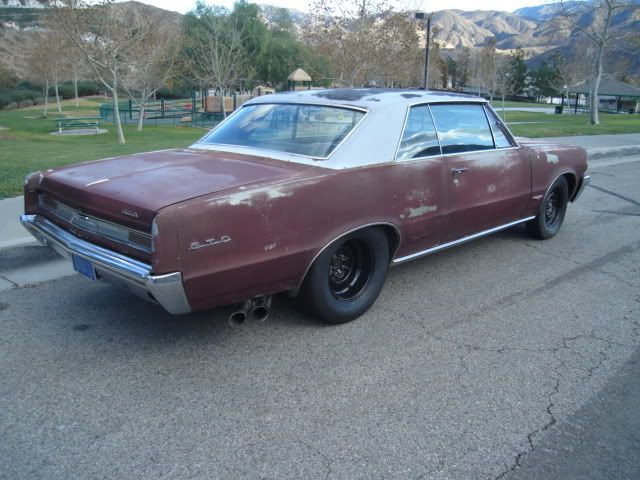
As a matter of fact I'm currently driving MY old '64 GTO ex-bracket car on the street these days, I spent 10 years bracket racing this one before I retired it in 2002. It makes a trip to my work about once a week now, a few of my co-workers who have had the cajones to go for a ride really get a kick out of it.
It's good for mid-12s as it sits and runs a low-compression (8.6:1) '71 455 HO with the stock HO aluminum intake and and an 800 Q-jet, along with a 244/252 hyd cam and Tri-Y headers through a full 3" exhaust. Runs a reverse-pattern TH400 w/transbrake and 3.89-geared 9" w/Detroit Locker, fun car!
have you been to detroitseed.com yet? i just recently saw that they are developing parts for the abody. they have a nice 1965 malibu they are working on. they nice thing abouit detroit speed is the owners used work on the vette for gm. there stuff is not only researched well, but it actually fits.
im just getting started on my 65 malibu ss. im doing an ls/6spd to it. the car does`nt really need it, but im stipping it and doing it from the ground up. ive been watching your thread. im liking the details your giving. im going to see if core3 has a rear disc kit for the 12bolt. do you know of anyone else that might? your doing a great job, please keep it up, and keep us posted
im just getting started on my 65 malibu ss. im doing an ls/6spd to it. the car does`nt really need it, but im stipping it and doing it from the ground up. ive been watching your thread. im liking the details your giving. im going to see if core3 has a rear disc kit for the 12bolt. do you know of anyone else that might? your doing a great job, please keep it up, and keep us posted
I don't have the time nor the ambition to do a complete strip down or a frame-off on this car. It's still plenty solid and really doesn't need to be perfect to make me happy. The paint job on this car, although a bit old and tattered, is still very presentable and looks just fine going down the road.
Just trying to do my best in my home garage on the weekends while working about 55 hour/5-day weeks, no high-dollar build here. If you work hard and save your money you can make things happen, this car is not being built off of a credit card. It always helps if you're willing to get dirty and do as much of the labor as you can yourself.
Thanks for the kind words everyone.
Bart
Last edited by b-man64; 12-06-2008 at 07:29 PM.
12-06-2008, 06:16 PM
#33
I really love those other A bodies. A Chevelle is cool, but you don't see the different A bodies as much. Did you sell the old exhaust system to a guy with an old Chevy truck?
12-06-2008, 07:27 PM
#34
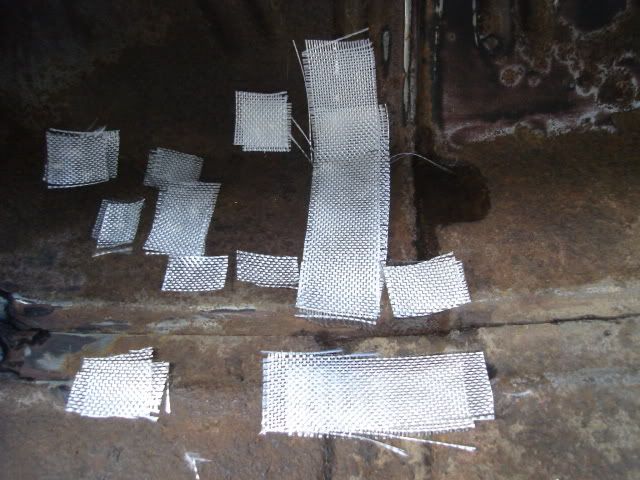
Finally I have the floorpan prep job completed after a good sanding using 180 grit paper to help the POR-15 adhere to any non-rusted painted areas that will get coated. A dose of Metal Prep mixed with 2 parts water was worked in with clean stainless steel wire brush to remove the last bits of loose rust and to give the acid a good chance to etch the rusted areas. After a good final rinse with clean water it's ready for tomorrow's all-day POR-15 application.
I spent some time cutting and placing the fiberglass cloth patches I'll be using to fill the larger holes, 2 layers in most places. I cut some fairly large patch pieces for the groups of smaller holes as well. The fiberglass cloth will help serve to strengthen the thin rusted metal in these areas along with the silver POR-15 that contains ground-up aluminum solids.

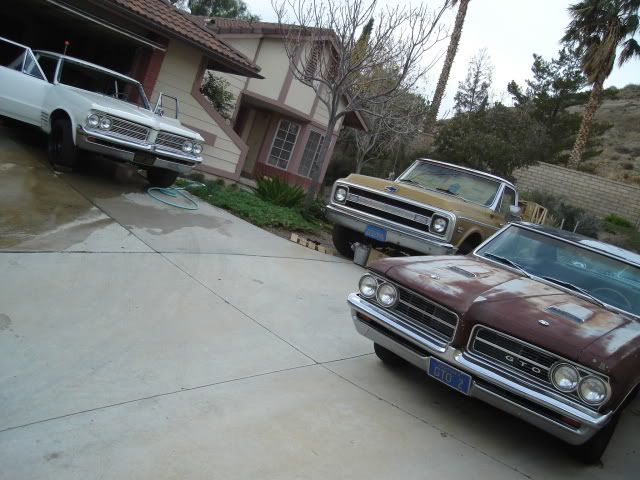
The weather has been great, in the mid-70s making it a lot easier to get my work done. Here's 2 of my '64s hanging out with my '70 Chevy C20. The ol' Chevy exists mainly to serve the needs of my Pontiacs.
 12-07-2008, 04:09 PM
#36
.....on this particular Sunday, there's just too much work that I need to get done before the weather starts getting colder.
Pulled my daily drivers out of the garage at 7:30 AM so I could push the Tempest out and get the long day started. Spent a little time under the car wiping down the underside of the floorpans with some paint thinner in the areas where I need to patch it, to give the duct tape I'm using to contain the POR-15 in those areas a chance to stick.
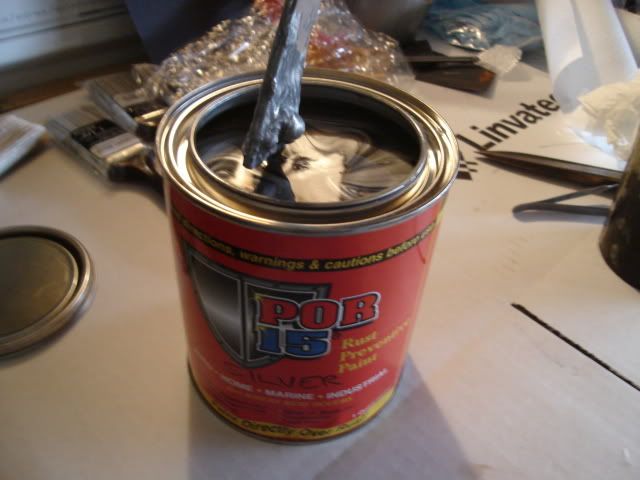
Stirring up the silver POR-15 takes about 5 minutes of constant mixing the first time, there's a ton of solids at the bottom that need to get dispersed in the carrier before you can use it.
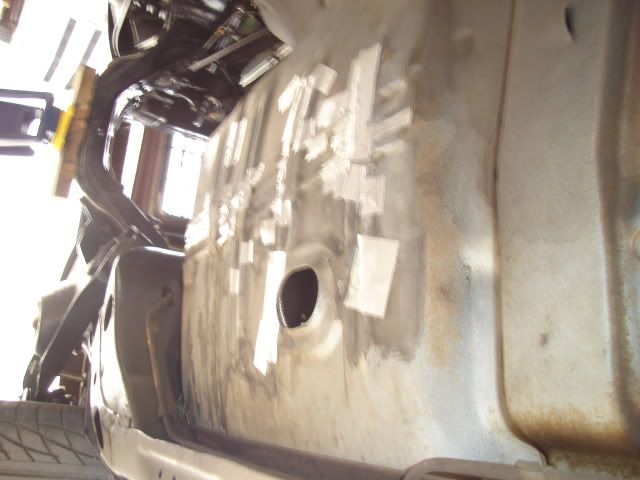
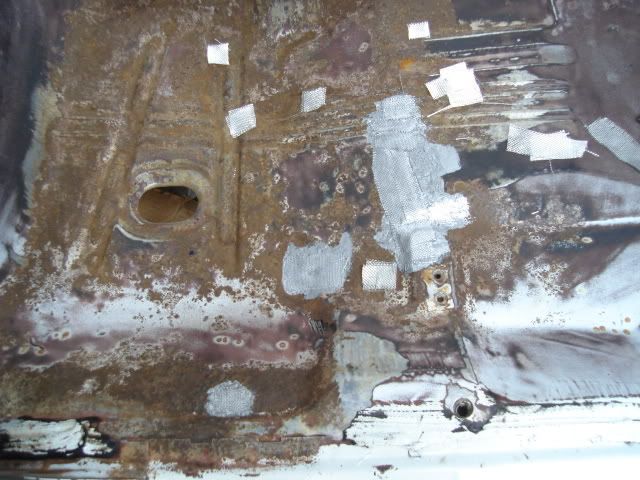
First thing to do is to set all the patches by lifting them up with tweezers and putting a first coat down under each one, starting with the ones furthest away from me. I ended up cutting down a lot of the patches, they don't lay into the valleys and on the ridges very well if they're too big. On the flat areas this isn't a problem, bigger patches are fine in those areas.

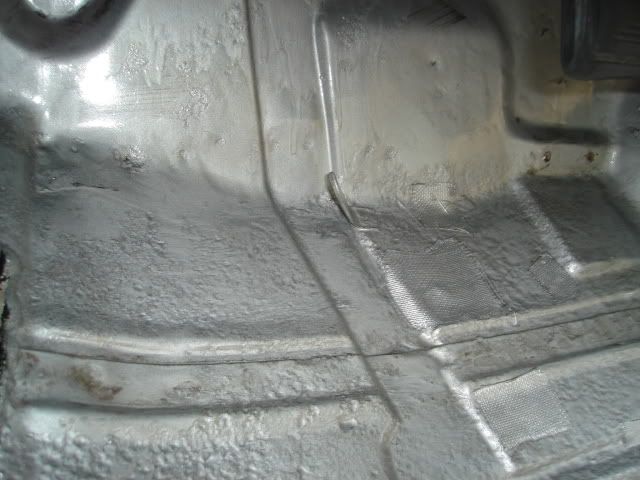
On to the rear passenger floor, in much worse shape than the driver's side passenger floor that won't require any patching.
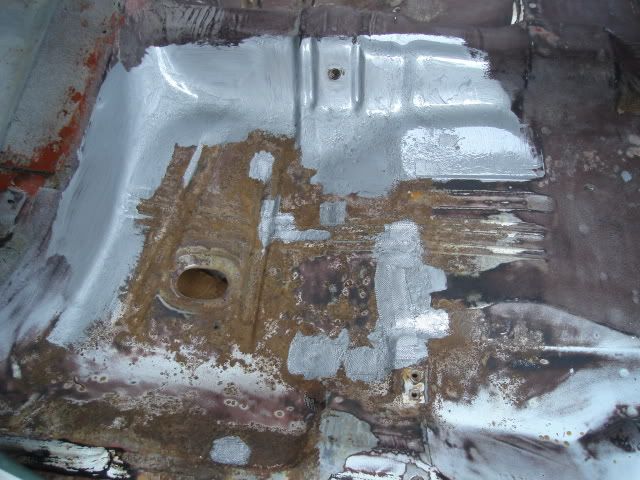
Passenger front floor first coating is now complete. I filled in the areas between the patches by using the tip of the brush in a straight up-and-down dabbing motion so as not to disturb the patches.

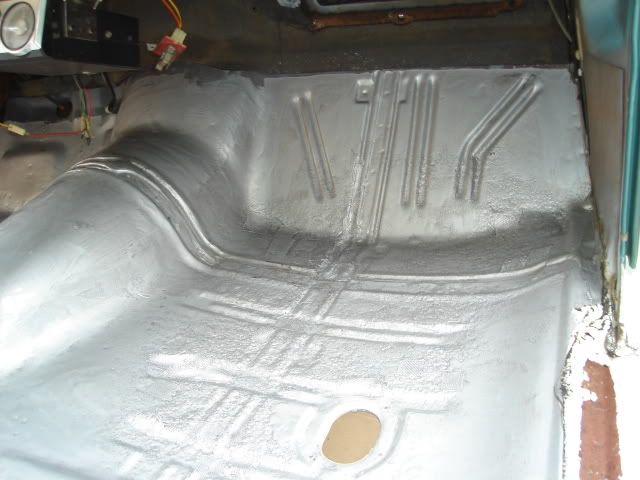
First coat is now complete, about 2 hours of work. Takes a bit of time because I trimmed down quite a few of the patches, plus there were a lot of patches to set on the passenger side. The next two coats that will be done about 2 to 3 hours apart will go a lot quicker, taking about 1/2 hour to coat the entire floorpan.
You have to re-coat within the 2 to 3 hour time frame. Otherwise you're in for a lot of work scuffing this stuff down as it dries super-hard, similar to powdercoating. Again you must dab straight up-and-down with the brush on or near the patches on subsequent coatings, they tend to slide around fairly easlily until this stuff hardens completely.

Pulled my daily drivers out of the garage at 7:30 AM so I could push the Tempest out and get the long day started. Spent a little time under the car wiping down the underside of the floorpans with some paint thinner in the areas where I need to patch it, to give the duct tape I'm using to contain the POR-15 in those areas a chance to stick.
Stirring up the silver POR-15 takes about 5 minutes of constant mixing the first time, there's a ton of solids at the bottom that need to get dispersed in the carrier before you can use it.
First thing to do is to set all the patches by lifting them up with tweezers and putting a first coat down under each one, starting with the ones furthest away from me. I ended up cutting down a lot of the patches, they don't lay into the valleys and on the ridges very well if they're too big. On the flat areas this isn't a problem, bigger patches are fine in those areas.
On to the rear passenger floor, in much worse shape than the driver's side passenger floor that won't require any patching.
Passenger front floor first coating is now complete. I filled in the areas between the patches by using the tip of the brush in a straight up-and-down dabbing motion so as not to disturb the patches.
First coat is now complete, about 2 hours of work. Takes a bit of time because I trimmed down quite a few of the patches, plus there were a lot of patches to set on the passenger side. The next two coats that will be done about 2 to 3 hours apart will go a lot quicker, taking about 1/2 hour to coat the entire floorpan.
You have to re-coat within the 2 to 3 hour time frame. Otherwise you're in for a lot of work scuffing this stuff down as it dries super-hard, similar to powdercoating. Again you must dab straight up-and-down with the brush on or near the patches on subsequent coatings, they tend to slide around fairly easlily until this stuff hardens completely.
 12-07-2008, 06:26 PM
#39
Here in So Cal if it's in the 50s all day long in the winter we think we're freezing our asses off.

Today it actually started to rain a little at about 2 PM, I had to push the Tempest back inside the garage to do my 3rd and final coat of POR-15.
Yep, wear gloves!
Thanks for the kind words all.